Chicken update from Illinois

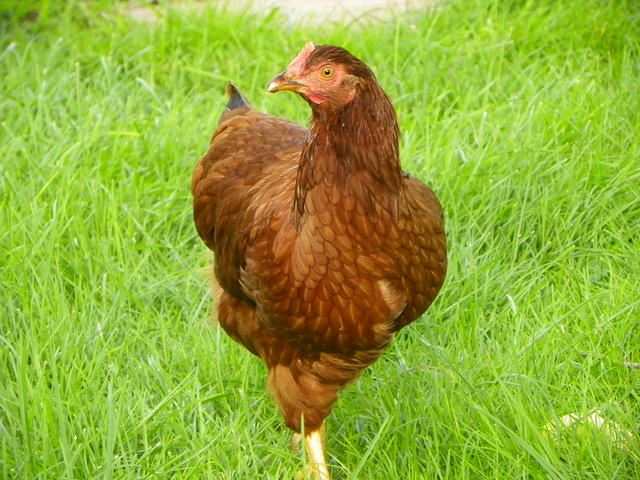
Sarah in Illinois has made it through her second week of raising chickens. She’s back today to report on what she’s learned and how things are going. See her first post introducing her flock.

So far things with the chickens couldn’t be any easier. Each morning I open the coop, make sure they have water and some food. Each night they return to their coop about 7:30, and I close it back up. That’s it. They are not laying eggs yet. They should be old enough in the next couple weeks so I look for eggs every day just in case.

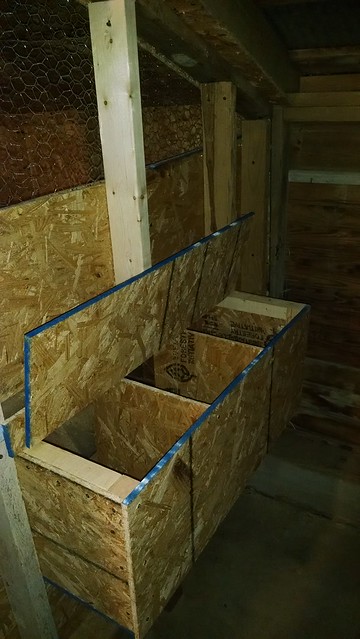
I will give you a quick tour. We made a coop inside one of our barns.

I have access with both a full door and a lid to lift off of the nesting boxes.

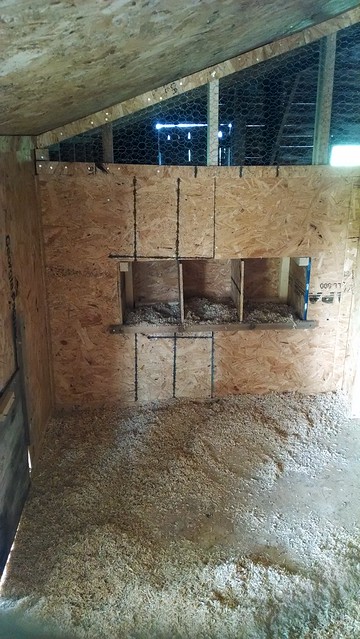
The chickens have a roost with plenty of ventilation. I do plan, however, to add another roost up a little higher.

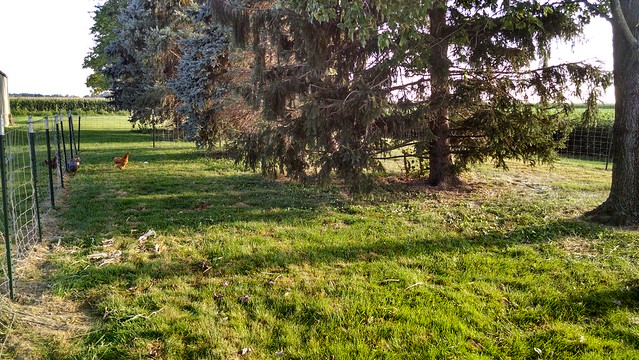
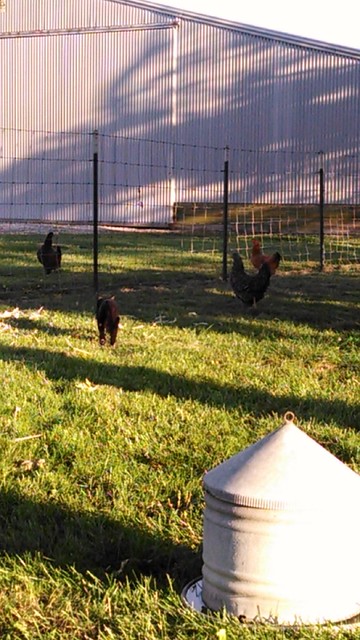
They have access outside to the pen that was for Treu. I knew from the beginning that they would easily be able to fly over the fence, since there is no top to it. I was just hoping that with all the room and shelter under the trees that they would just prefer to stay inside.

Have you ever seen chickens laugh at you? I am pretty sure I have.

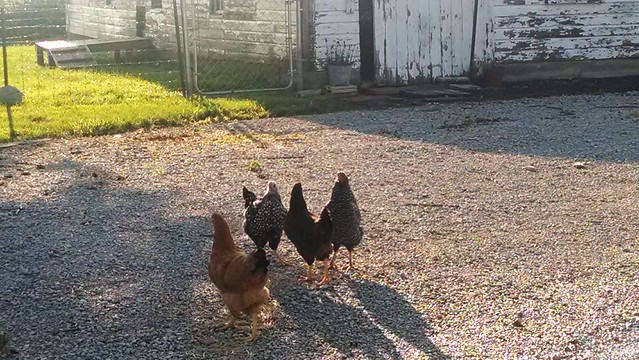
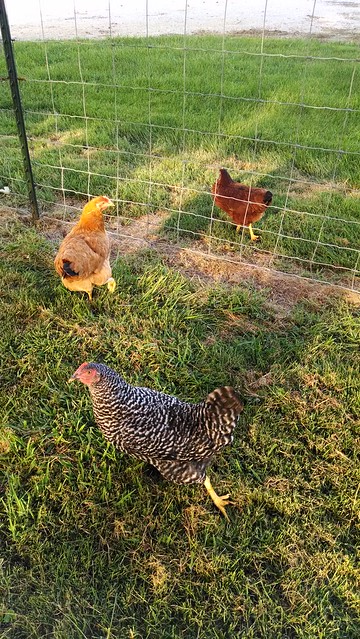
Here they are very clearly not inside the pen!

And the funny thing is, once they get out they don’t always remember how to get back in.

I mentioned in my last post that Toothless may be an issue. And she has been. I don’t think she has any intentions of hurting the chickens. She just thinks of them as her own personal toys. She loves to run right up into them when they are huddled together and just watch them go flapping and squawking away.

Here she is sneaking up on them, you can see one of the chickens has hopped the fence to get away from her.

It was funny the first time, but it is not something I want to encourage and I can tell the chickens are nervous when she comes around.

One night I went to close the coop, and I only counted 3 chickens. I quickly ran outside to see where the fourth one could be. Toothless had her cornered in the bean field.

I knew at that point I had to do something quickly.

I now have a squirt bottle of plain water that I keep out at the pen. Any time I see Toothless lurking around I give her a quick squirt of water and she goes running. Obviously I can’t sit out there all day and keep watch so I am hoping she gets the hint quickly.

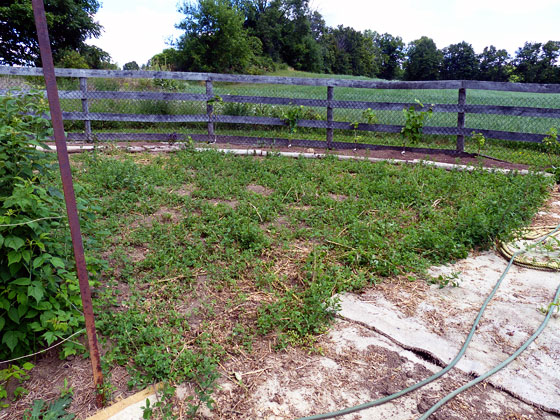
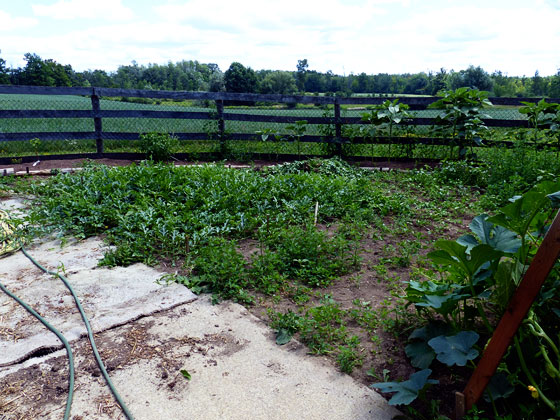
Otherwise, I am just enjoying them. I go out to their pen every day after work and watch them peck the ground. I have given them tomatoes and cucumbers from the garden and I love to watch them chase each other and play keep-away.

So far they haven’t found our garden. They can’t see it from the pen. I am hoping it stays that way. I don’t want them to have their own private buffet. But as I mentioned above, have you ever seen a chicken laugh at you?

Anyone else new to raising chickens? Have any advice on getting Toothless to behave? Any predictions on when I will get my first egg?

It sounds like your girls are doing well, Sarah. With our chickens and ducks when I was growing up, my Dad put a mesh roof on our run. Treu’s run looks pretty big, but a covering of some kind would help keep the chickens in and Toothless out. We also put straw in the nesting boxes, even when we had shavings in the coop itself. I’m not sure if that makes a difference for encouraging them to lay or not.

A look at life on 129 acres

Due to some technical difficulties too ridiculous to explain (and a wee bit of procrastination), I had not set up an Instagram account.

However, I finally changed that last week… and I see what all the fuss is about.

I’m loving seeing what people are up to and sharing a bit of what’s happening in my life.

Here’s a glimpse of a few of my first posts.


Want to see more? Follow me at @juliaon129acres.

I love finding new people to follow. Feel free to suggest your favourite accounts in the comments.


Comparing interior and exterior basement waterproofing

Last month (who else can’t believe we’re already almost halfway through August?) I shared some of the water leaks we’ve had in the basement. Starting today, I’m going to go into a bit more detail about the waterproofing process.

Up first, I’m going to talk about the different waterproofing options we considered and what we ended up choosing.

Option 1: Exterior Waterproofing

Waterproofing a basement foundation from the outside

I don’t have any experience with waterproofing, but exterior waterproofing is what I was at least passingly familiar with.

In this approach, the foundation is dug out from the outside. You dig down the full depth of the wall all the way to the footing. Then weeping tile (that black corrugated flexible pipe) is laid in the trench along the base of the foundation. The idea is that water flows into the the weeping tile and is funneled around the foundation and into a sump pit.

The foundation wall is coated with sealant and/or membrane. And then the dirt is backfilled.

Option 2: Interior Waterproofing

Waterproofing a basement foundation from the inside

Due to my inexperience with waterproofing, the first time a contractor suggested an interior approach my reaction was, “But don’t I want the water to stay outside?”

It turns out, you can’t always keep the water out. But you can manage it once it gets in.

The method for interior waterproofing is somewhat similar to exterior, except for the digging. In interior waterproofing, the concrete floor is cut along the perimeter of the wall. The concrete is removed and then the dirt is excavated down to the footing. Weeping tile is laid along the footing and is funneled around the wall and into a sump pit.

The trench is filled with gravel and the floor is repaired with new concrete.

Option 3: Interior Waterproofing 2.0

As we went through the meetings with various waterproofing contractors, we came across one that had a slightly different approach. They worked from the inside like the other contractor had recommended, but the materials that they used were a bit different. The conduit that they laid along the footing were guaranteed never to become clogged with silt. They had membranes for the walls that funneled any seepage or humidity into the pipe. They had all kinds of informational videos and patents on a lot of their materials.

Their sales pitch was that they had invented a better mousetrap waterproofing technique. And they would guarantee it for forever.

Basement waterproofing cartoon

Our decision

The first time a contractor mentioned interior waterproofing to me, I admit that my reaction was something along the lines of, “Uh. No way, Jose. Do you see this finished basement? Do you know how much work we put into this? I’m not ripping it up to waterproof from the inside.”

After I calmed down, here were some of the other considerations we weighed in making our decision.

  1. Given the damage we’d had to the drywall, studs and baseboard, I was going to have to do some repairs inside. Waterproofing from the interior would allow us to have one disaster zone inside, rather than two, inside and out.
  2. The two contractors that recommended the interior approach also recommended focusing just on where we had problems, not on the whole foundation. Again, my reaction was a bit skeptical, as I wanted to waterproof only once and make sure we never have a problem anywhere ever. However, no one could guarantee that except for company #3.
  3. Over time regular weeping tile, whether inside or out, can get clogged with dirt. It may take a couple of decades, but when that happens water may once again seep into the basement (see no guarantee above).
  4. In exterior waterproofing, after backfilling the dirt will eventually settle. So a year or two after waterproofing we might have to do more work in terms of adding dirt and regrading.
  5. If we worked from the outside, the whole perimeter of our house would be dug up. I didn’t love the idea of sacrificing all of our flowerbeds after I’ve spent so much effort establishing them (although it did give me an excuse to skip weeding this spring). On the flip side, I liked that the disruption would be confined to the exterior, rather than our finished basement.
  6. All of the methods were within roughly the same price range. Money was not going to be the determining factor.
  7. Company #3 offered a lifetime guarantee that we would have no leaks in the areas that they waterproofed. Options #1 and #2 would only give us a 20 year warranty, but I wasn’t sure that was quite enough for me.

We decided to go with Option #3, Omni Basement Systems.

Omni basement systems truck

Coming up, I’ll talk about the waterproofing process and then share the results.

I’d love to hear your input. Have you ever gone through a waterproofing project? What option did you choose? If you haven’t gone through waterproofing, what solution would you select?

Save

Save

Save

Mid-summer garden update

Basket of potatoes and zuccini in front of marigolds in the vegetable garden

It’s been awhile since I shared what’s up in the vegetable garden. Deep in the middle of summer, lots is up. As in lots of beautiful vegetables.

Looking back at my last update from the end of June, I’m amazed at how much things have grown. Here’s the tour ’round the ring.

Quadrant #1, where the first three of the five rows of potatoes are ready to be dug.

Potatoes in the garden

The raspberries along half the centre axis. I think that the black raspberries (the mess on the left) will be coming out to be replaced with either more raspberries or something entirely different. We have enough growing wild around the farm that we don’t need them in the garden too. And they do not seem amenable to being tamed.

Two rows of raspberries

Quadrant #2 which continues to be weed central as there’s nothing planted here beyond asparagus and grapes in the perimeter beds. I actually broke down and mowed this section last weekend. Let’s pretend I’m a really sophisticated gardener and we’re intentionally letting this section lie fallow this year, okay?

Weedy section of garden

Quadrant #3, which also continues to be quite weedy. However, no mowing is happening here, as this is home to our watermelon, which have totally taken off (more on this below).

Watermelon vines growing in the garden

The other half of the centre axis is our squash A-frame. The vines are climbing! I’m very excited that the trellis seems to be working. We have baby butternuts, acorn squash and gourds.

Squash growing up an A-frame trellis

Quadrant #4 is the best looking, especially after Matt spent hours last weekend pulling weeds. It’s home to our very bushy tomatoes, peppers, beans and more zucchini.

Vegetable garden

I tried to pick a few highlights to zoom in on a little more. A few is hard, as I’m super excited about everything.

Most exciting is our watermelon. As in we actually have watermelon! They’re about the size of softballs right now, so they’re not quite watermelons, but they’re on their way.

Baby watermelon

Another vegetable that is exciting just by its presence is our yellow bush beans. Last year all of four plants sprouted. This year we have a whole row and each plant is loaded with beans and blossoms. We’re going to have more than enough beans to freeze for the winter.

Yellow bush beans

Also on their way are our Sicilian Saucer tomatoes. I picked up these seeds on a whim, so I’m not sure what to expect. The blossoms were huge, befitting the “saucer” name. We have some catfacing on the bottom of the fruits, which I’ve learned is common with big tomatoes. The fruits aren’t saucer-size yet, but I feel like they’re on their way to being quite large.

Sicilian Saucer tomatoes

The plants that I’m watching most closely are our grapes. A few of the vines have finally reached the top of the fence, and some tendrils have even started to wind themselves around the wires.

Grape vines

These are the highlights, but there are a few lowlights.

I planted the bunching onions in the raised bed, which are filled with the dirt we bought this spring. The onions did not like the dirt at all. They’ve looked like blades of grass ever since they sprouted back in June. Last weekend we transplanted those wee little sprouts into the main section of the garden. They’re already looking perkier.

Green onion sprouts

A few of the raspberries have been hit by Japanese Beetles. The damage hasn’t been too bad, and we have so many canes that I’m not miffed to sacrifice a few leaves. However, that doesn’t mean I’m not on a campaign against the beetles. It only took me a couple of days to get over my squeamishness at the crunch they make when I crush them.

Japanese beetle damage on raspberry canes

This one may not be a lowlight, but some of the tomatoes that we purchased as sprouts are growing oddly. The plants are all the same type, but the fruit are all different sizes. Everything from the size of a marble to the size of a pingpong ball.

And then we have a few plants where the stems that support the trusses have taken a turn and branched up into “suckers.” You can see the stem looping around and up in the photo below. I’ve never seen this before. Have you?

Sucker on a tomato truss

One final highlight that I have to share. As I was photographing the garden, I came across this guy in the watermelons. A frog in the garden is a good omen, right?

Frog in the garden

What we’re loving most is eating the garden–the vegetables and fruits only, no frogs. We have so much desire to cook in the summer, and our meals are so fresh and full of variety.

How is your garden growing? What fresh produce are you enjoying this summer?

Save

Save

Save

Save

Things I think about while splitting firewood

We’ve been gradually amassing firewood on our side patio.

Unsplit firewood on the side patio

On Saturday, I was away from the farm for a few hours, and when I came home Matt was deep into splitting. In all, he spent 7 hours splitting. I put in 5 hours stacking.

Matt splitting firewood

By the end of the day, we had three rows of wood split–my goal for our annual firewood allotment.

Firewood piles

Of course, by Sunday one of the rows had partially collapsed, but on the bright side I cleaned up most of the wood chips, bark and small branches that had littered the patio.

Collapsed firewood piles

I’ve been thinking about making a little sitting area here.

Cleaning up the side patio

We’re not really good at sitting, especially when we’re outside, but maybe that’s just because we don’t have a spot. That could be, right?

It has nothing to do with spending a whole day splitting wood or the next one picking up bark or weeding the garden or… or… or…, right?

The mosquitoes haven’t been bad this summer, so sitting outside is actually a possibility.

I love this patio makeover from Love Grows Wild. Back in the spring I uncovered some huge slabs of 6x6s that had been bolted together. I wasn’t sure what to do with them, but then I saw Liz’s chunky rustic table and was inspired.

Love Grows Wild patio

I feel like this post has been building to a reveal of a relaxing new patio area… or at least our own rustic table.

Ha-ha. Yeah right. Projects do not happen that quickly around here.

But we still had a productive weekend. Getting that much firewood put up is a huge accomplishment.

What did you get up to this weekend?

Save

Robin at the birdbath

I spy with my little eye a robin having a bath.

Robin in a birdbath

No, I’m not a creepy voyeur. I am geekily excited, though.

If you’ve been around here for any length of time, you know that watching the birds at our feeder is one of my favourite winter past times. The bird feeder has been tucked in the driveshed since spring, so I’ve been missing out on my bird watching.

Robin in a birdbath

Last year for my birthday, Matt had a new top made for our birdbath.

When we put away the birdfeeder, we brought out the birdbath. But no one has seemed interested in taking the plunge. In fact, the one day I saw birds bathing in the puddles on the driveway instead of the birdbath. Snobs.

But last week I finally spotted a fastidious robin having a bath. And over the weekend I captured photographic evidence that at least one bird likes my birdbath.

Robin in a birdbath

(Shout out to my MIL for my new camera that has a decent zoom that lets me get pictures like this without frightening bathing beauty.)

Save

Save

Chickens in Illinois

Exciting news from Sarah in Illinois. The new additions that she’s been working for all season have arrived!

Last weekend was very busy for me, so I am going to let pictures so most of the work for this post.

They’re here:

Chickens eating a tomato

Chickens

I haven’t had much time to spend with them but I have already determined a couple personalities. I keep saying that I am not going to name them, but I am sure it will eventually happen.

This one is the boss. She is the leader and the noisiest. She is the first one to make noise as I walk up.

Bossy chicken

This one is shy. She is the last one to approach me, the last one to come out of the coop, the last one to try the new piece of food I give them.

Shy chicken

This one is the tallest and always has her neck up high and reminds me of a lookout for organized crime.

Young brown chicken

I haven’t determined what personality this last one has.

Chicken from the front

I still have a lot to learn, but as I write this, I have kept them alive about 32 hours! So I consider that a win.

I have two outdoor cats and I have been very concerned how they would react to them. One really couldn’t care less about them. The other:

Cat walking amongst the chickens

Black cat in the grass

I guess time will tell.

This is so exciting, Sarah! Have you had any eggs yet? What kinds of chickens are they? I think I see a Plymouth Rock and a Rhode Island Red? Shy and Lookout look different from the breeds I’m familiar with. Good luck with kitty. Hopefully it’s just a case of curiosity.

Save

I’m not here

A mid-summer holiday Monday. Ahhh. Such a treat. In honour of my day off, I’m taking the day offline too. Paintbrushes and other tools, my two favourite guys, the garden and great outdoors–there’s lots of things I love out there IRL.

Paintbrush

Save

Front porch dreaming

One of the things I most want to add to our house is a front porch. I think a porch is essential on a farmhouse.

Farmhouse front porch

Source: homify

Plus, I dream of watching summer storms roll across the fields, starting my day with breakfast outdoors and ending my day relaxing in a rocking chair.

Until that day comes, I’ll continue dreaming, imagining and planning. I recently wrote about how to create a functional and stylish front porch on homify.

Do you have a porch? Want a porch? What makes the perfect summer porch for you?

Save

Save

How to build a raspberry trellis

Raspberries are a pretty easy crop to grow in my opinion. Last year I transplanted a whole bunch of raspberry canes from my parents’ garden to ours. The canes have grown and spread like crazy.

This year, the object of the game is to contain the canes–a little bit. Raspberry canes don’t bear fruit until their second year, so the first year is all about letting the canes grow… and grow… and grow.

The taller the canes grow, the more likely they are to fall over. A trellis can help to keep them upright and also keep the row a manageable width.

Here’s how Matt and I made the trellis for our berries.

How to build a raspberry trellis

We started with metal T-posts. We happened to have a large quantity courtesy of past owners–free materials, yay! And I liked that the metal won’t rot like wood.

The posts were about 7 feet long. Matt hammered them into the ground leaving about 5 feet sticking up. We used six posts, three on each side, for our rows, which are about 18 feet long. The width of the rows is 2 feet.

Then I strung wire through the holes on the T-posts. There are three rows of wires, each about 16 inches apart.

How to build a raspberry trellis

At the final corner I doubled the wires back and twisted them around themselves.

How to build a raspberry trellis

The raspberries grow between the wires staying nice and straight. About once a week, I walk along the row and make sure all of the growing canes are tucked inside the wires.

Any canes that sprout outside the row can be transplanted to inside the boundaries.

How to build a raspberry trellis

So far, we’ve had just a handful of berries, as we only started our canes last year. Our plants, though, have become thick and lush. With our trellis in place, we’re set to have a great crop of raspberries next year.

Have you picked any raspberries this year? Do you grow raspberries? Have you ever built a raspberry trellis?

Save