The epee umbrella

Rumour has it that one night in my grandparents’ apple orchard, there were some thieves stealing gas from the tank my Grandpa kept for the tractors. My uncle–who was a salesman and not the first person I would choose as a defender (no disrespect intended to Uncle Bob)–went out to run them off. This umbrella is what he took as his weapon.

Vintage pagoda ombre umbrella

En garde!

The gas incident was well before I was born. Eventually, this umbrella made its way to my grandparents’ cottage. Every so often, it would be pulled out on rainy days so that people could make their way back and forth between cottages. When my grandmother sold the cottage, the umbrella became mine.

Vintage pagoda ombre umbrella

The April issue of Country Living magazine featured vintage umbrellas, including one that looked a lot like mine. The shape is called pagoda, and according to CL, “Asian-inspired shapes generally indicate an older piece.” Given its illustrious family history, my umbrella is obviously somewhat old. The umbrella in the magazine was made in Montreal. That Canadian lineage makes me wonder if mine might be related.

Vintage pagoda ombre umbrella

I saw another umbrella very similar to mine at an antique show on the weekend. It was even rose ombre but reversed with the pink on the bottom and white on the top. The tag said it was from Montreal too. It was priced at $80. Country Living valued their umbrella at twice that–$160. I’m not sure that mine is worth that much, but maybe it’s about the price of a tank of gas–even at today’s prices.

Do you have any family hand-me-downs with interesting pasts? Have you ever spotted any of your heirlooms in  a magazine?

Featured

Over the past month or so, I’ve been really excited to have some of my posts picked up by other bloggers and other sites.

Site logo collage

Pattern Review published my tutorial on how to match horizontal seams across an invisible zipper in their Tip Tuesday feature. The post got some really kind comments, and a few people even said they tried my technique.

Homedit included my DIY umbrella stand as one of 10 Budget-Friendly Entryway Makeovers For A Great First Impression.

My DIY wood island countertop made Shelterness’ list of 12 DIY Wooden Kitchen Countertops To Make.

You all saw the Mad Men dress that I posted a few weeks ago. Julia Bobbin included that dress as well as my yellow bridesmaid dress in her round up of outfits inspired by Joan Holloway’s wardrobe.

One Lovely Blog Award iconAnd finally, The Optimistic Househusband, AKA Nick, nominated me for One Lovely Blog Award. I’m not going to do a full post like I did last time, but I did want to share a link to Nick’s blog and thank him for the nomination.

Thanks to everyone who featured my posts. It’s neat to see the interconnectedness of the blogosphere. Thanks as well to all of you for following this little blog.

It’s tough being a puppy

Baxter has a bit of Friday fun for you today as you head into the weekend.

“My head… it’s so heavy. I can’t hold it up any longer… Sigh… I guess I’ll have to use this here rock as a pillow.”

Rock pillow

If a branch falls in the forest, does it make a sound?

“Yes. Yes, it did. I heard that. My worry eyebrows and ears are on full alert.”

Worried puppy

“Excuse me. My pillow is not properly positioned for optimal sunbathing.”

Napping in the sunbeam

“I just want to lay here and sniff, and she keeps trying to take a picture… Oh alright. Here you go.”

My buddy and me

Life sure is tough for a puppy dog.

I hope your weekend is easier than Baxter’s hard, hard life. For my American readers, happy Memorial Day.

Blue eggs and baby birds

You want a sure sign that spring is here?

How about this?

Blue eggs in a robin nest

A robin built a nest right outside of the kitchen window on top of the clothesline post.

Robin's nest

She’s an artistic robin and decorated her nest with long streamers of hosta and hay.

Robin's nest

The only way I could get a picture of her was to shoot through the kitchen window, hence the grid of the screen.

Robin sitting on her nest

Over the weekend, I thought that something might have changed. So on Sunday, when I didn’t see her on the nest, I snuck out for a peak. The eggs were gone. In their place, we had these.

Baby robins in a nest

Amazing.

It was a little chilly over the weekend, so Mama stayed close, keeping everybody warm. Mr. Robin brought her snacks every so often. On Monday, Mama and Daddy were both on duty bringing a near constant buffet of bugs and worms to the babies.

Obviously, we’re keeping a very close eye on our new little family.

Do you have any spring babies at your house? Is there any more perfect colour than robin’s egg blue? How long does it take for baby robins to grow feathers?

Forsythia of ’14

Two weeks later than last year, six weeks later than our first year, our forsythia is finally in bloom… if you can call it that.

Frost-bitten forsythia

I think the harsh winter gave our forsythia frost bite. We have just a handful of yellow blossoms on the very tip of a few branches.

Frost-bitten forsythia

Rather than going golden this year, I think our bushes are going to straight to green. Green is better than the dismal grey days we’ve had so far. I think spring is here.

Has spring arrived at your house? Have any of your plants been frost bit?

Trilliums!

Trilliums

When we moved to the farm, I thought there must be trilliums somewhere on the property. After two springs, though, I still hadn’t seen any. Then, on Monday morning, I found them. In the small grove between the front field and the east field, alongside the creek, there are trilliums. Lots and lots of trilliums.

Trilliums

For those that don’t know, trilliums are Ontario’s official flower. There’s a common perception that you’re not allowed to pick trilliums in Ontario. But, according to Wikipedia, trilliums are only protected in conservation areas or provincial parks (and in some areas in the States). However, picking a trillium can kill the plant.

Trilliums tend to be a bit elusive. They hide away in the woods and aren’t seen very regularly, so I’m super excited that we have some on our property. I even spotted some Jack in the Pulpit, which I’ve never seen before.

Trillium and Jack in the Pulpit

Happy spring!

How to make a fabric-covered bulletin board

While the dresser may be the workhorse of my new office nook, the beauty queen is definitely the fabric-covered bulletin board that hangs above it.

Pretty home command centre

Since I was working with such specific measurements in this tiny space, I decided that my best option was to make my own bulletin board.

Home Depot sells prefab cork panels that are 48 inches by 24 inches, very close to the dimensions I needed, so I started with that. Then I found a piece of decorative molding to build my frame. I considered some of the very fancy crown moldings, but a lot of those are very wide. Given that I only had about 20 inches total to work with, I didn’t want to take up too much space just with the frame. I wanted as much pin-up space as possible.

For the back of the frame, I bought some 5/8 inch by 2 inch strips. After ripping them in half, they were about half an inch narrower than my molding. By attaching them to the back of the molding with some glue and little nails, I was able to make a recessed area for the cork to sit.

How to make a bulletin board

I used my mitre saw to cut each side of the frame to the right length at a perfect forty-five degree angle. Tip: When you’re cutting pieces on an angle, mark your desired length as you usually would at 90 degrees. Add a tick mark to the left or right to remind yourself which way you’ll need to angle your cut your.

Cutting decorative molding on an angle

Each corner got a few dabs of glue, and then I nailed them together with my Dad’s nail gun. Tip: To check that your frame is square, measure diagonally from corner to corner. The dimensions should be the same between each diagonal pair. Twist your frame a bit to the left or right until your measurements match exactly.

Checking for square

Once my frame was perfectly square, I caulked all of the nail holes and corner joints. Tip: Keep a damp sponge on hand as you’re caulking. Wetting your finger before smoothing out the caulk gives a nice even finish. Plus the sponge gives you a spot to wipe any excess caulk off your hands before you get it all over yourself. Not that I’m speaking from past experience, or anything. Oh, and make sure you choose paintable caulk.

Wet your finger before smoothing out caulking

I let everything dry and then it was time for paint. I knew I wanted a bit of glitz, so I decided to go with gold. A few light coats of spray paint did the job.

With the frame done, I moved on to the cork. The prefab piece was close, but just a bit too wide. It cut easily with a knife, and then a quick rub with fine sandpaper smoothed any ragged edges. Tip: Cut the the cork about 1/8 inch to 1/4 inch smaller than the frame. A little bit too loose is better than too tight. Plus any gap will be hidden by the recessed channel behind the frame.

Cutting cork with a knife

Covering the cork in fabric was no more complicated than wrapping a present. I cut the fabric about 6 to 7 inches bigger than the cork panel, so that I had plenty to wrap around the back. I pulled it taunt and stapled it in place. The corners got a bit of extra pleating and a few extra staples.

Staple the corners on the backside of the cork

I slipped the cork into the frame. To hold it in place, I tacked staples part way into the frame at four different points around the back side of the frame. I can easily pull these out if I ever want to change the fabric.

Use staples to hold the bulletin board in the frame

I flipped it over and was dazzled. Pretty! Pink! Flowers! Colour! Gold!

Fabric covered bulletin board

I was so dazzled that I didn’t spend too much time coming up with a technical solution to hang it on the wall. I just wanted it up. My solution was two finishing nails hammered into the drywall on the same level. Their small heads fit easily between the edge of the frame and the cork, and the board is light enough that that’s all the support it needs.

Anchoring securely might be more important if you have small children or other things you don’t want bulletin boards falling on, although we’ve had no issue with the board shifting or falling since I installed it.

Fabric covered bulletin boards are a pretty easy and popular DIY. Have you ever made one? How do you bring beauty to functional pieces like bulletin boards? Are you a floral sparkle fan?

How to make a tall narrow dresser

When I reorganized the tiny nook in my office, I knew that I had to add some kind of storage. A dresser was the ideal solution. Drawers would allow me to tuck things away, and the surface would give me a spot to write notes and set my purse and keys.

So I had some pretty specific requirements: drawers, about counter top height, oh, and it had to fit in the nook, which was 16 inches deep by 24 inches wide. Of course, it also had to be cheap.

Well, I had no luck finding a piece of furniture that met those standards. However, I soon realized that nightstands often have drawers and are usually small enough to fit this little space. While nightstands are much shorter than countertop height, they usually come in pairs. Couldn’t I just stack them one on top of another?

It turns out, yep, I can.

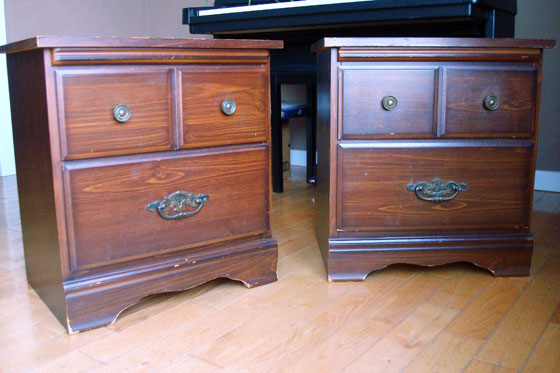
Here’s what I started with. Two little nightstands I found at the Salvation Army thrift store for $12 each.

Two vintage night stands

First step of any furniture makeover: remove the drawers and the hardware. It turned out that one of the drawers contained a plastic hardhat, so I got distracted by that for a little while. Consider this your PSA to always wear safety equipment (hardhat, safety glasses and ear protection) while DIYing.

Geeky safety equipment

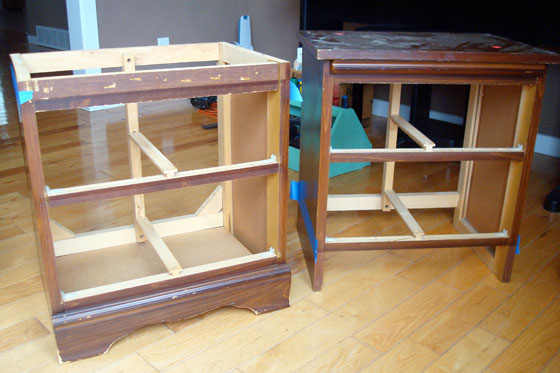
Anyways, back to work. I started taking apart the dressers. I popped the backs off of each of them. Then I took the top off one and the bottom off another. The nightstands came apart really easily. The backs were just stapled in place. The top was attached to corner blocks that were screwed in place. The decorative trim at the bottom was tacked with some little nails. I needed a few different tools, and I was thankful for my stubby screwdrivers that fit in some of the tighter nooks and crannies, but dismantling these pieces of furniture was not a taxing task.

Dismantled night stands

Once they were apart, it was time for something that was a little more taxing: cutting. The nightstand that was going on the bottom had to be trimmed along the top, and the one that was becoming the top half had to be cut down along the bottom. Clear? I measured the spacing between the drawers to figure out exactly where to make my cut and marked the line with painters tape.

Marking a cut line with painters tape

Four quick slices with my circular saw, and the dressers were the right height. I set them on top of each other and was super excited. It was looking like I envisioned.

Making a dresser out of two night stands

Now I just had to figure out how to actually attach the two halves. When I’d taken apart the dressers, I’d removed some side braces. I was able to reuse those pieces on the inside of the dresser. I ran them half on the bottom and half on the top and screwed right through the side into the brace. My dresser was now all one piece and it was solid, but it was ugly. No amount of wood filler was going to fix that joint.

Attaching two night stands to make a dresser

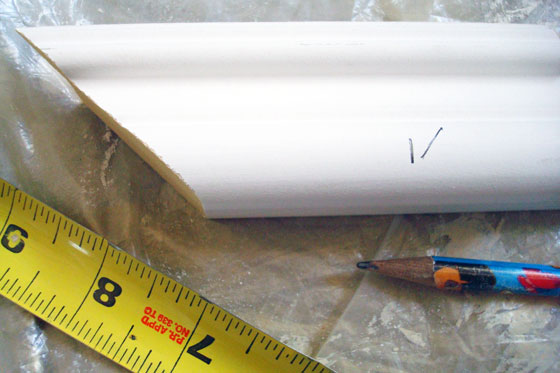
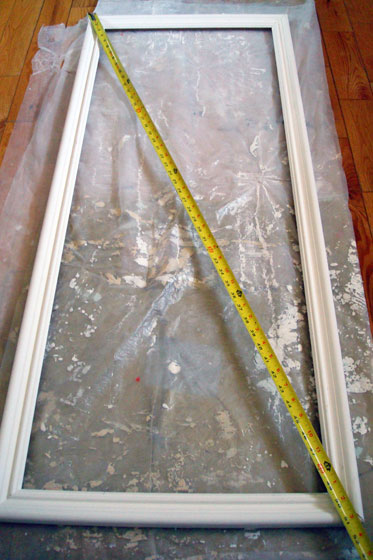
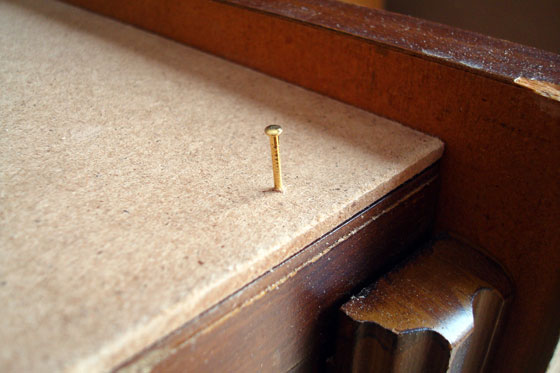
The solution was overlaying a very thin panel along the whole side. I had 1/8 inch MDF, which I cut down to the exact dimensions of the side of the dresser. I tacked it in place with small finishing nails, and it covered up the gap completely.

Tacking a board in place with small brass finishing nail

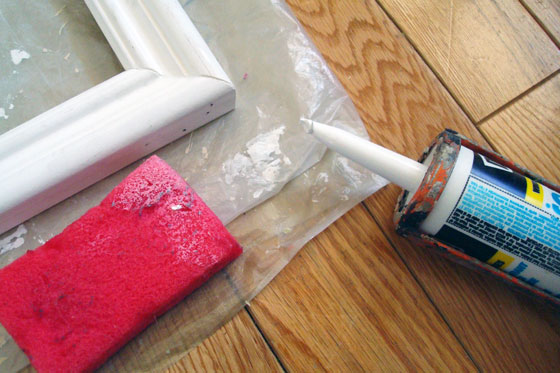
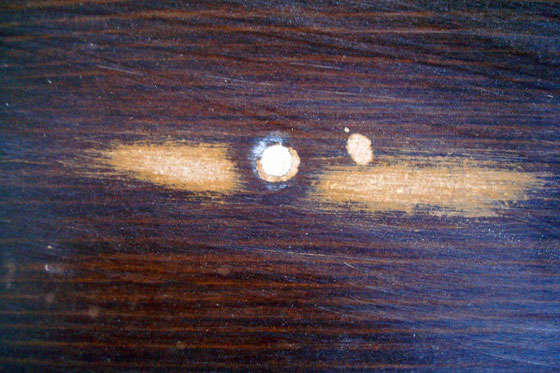
A bit of wood filler camouflaged the joint on the front of the dresser. While I had the wood filler out, I filled the holes on the drawers where the original pulls had been and a few other spots on the dresser where the veneer was chipped.

Filling holes with wood filler

After a light sanding all over, I primed the dresser and drawers, and then they all got a coat of creamy white paint–Cloud White in Benjamin Moore’s Advance formula. This was my first time using Advance, and I really like it. The finish is nice and smooth (I used a foam roller), it has none of the stickiness that you sometimes get with latex after it dries, and it has been very durable. In the past, I’ve used heavy duty oil paints on furniture or cabinets. The clean up is a pain and the stench is noxious. None of that is an issue with Advance, and in my opinion it’s held up just as well as an oil finish.

Painting a dresser with a foam roller

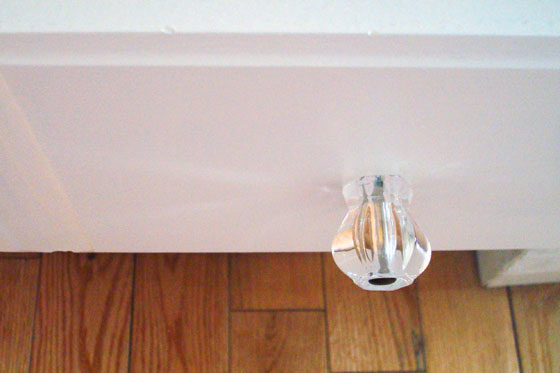
The finishing touch for the dresser was new crystal (plastic) nobs. This is one area where I got a bit neurotic. The nobs that I chose had a metal post that went through the middle. The posts were brushed nickel. I’m not a fan. Plus, I already had oil-rubbed bronze and gold/brass elsewhere in the office. I’m not good with mixing metals, so I spray painted all of the metal pins with oil-rubbed bronze spray paint. It was easy, but probably not entirely necessary.

Crystal drawer nobs

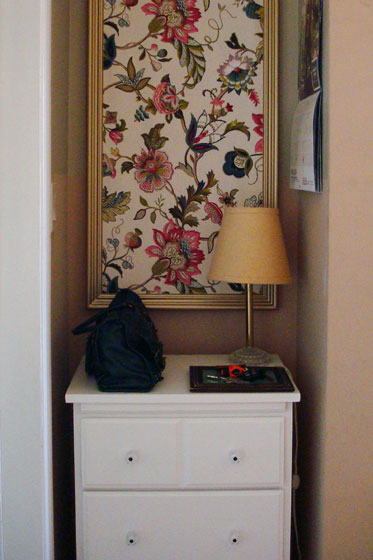
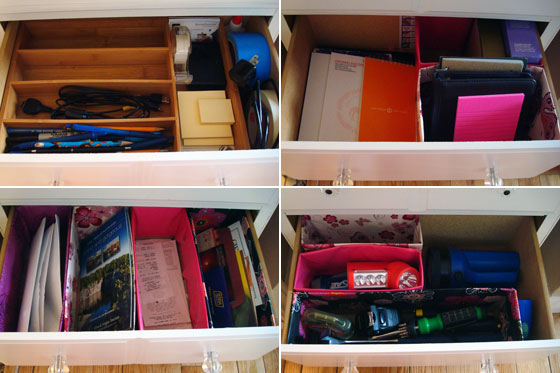
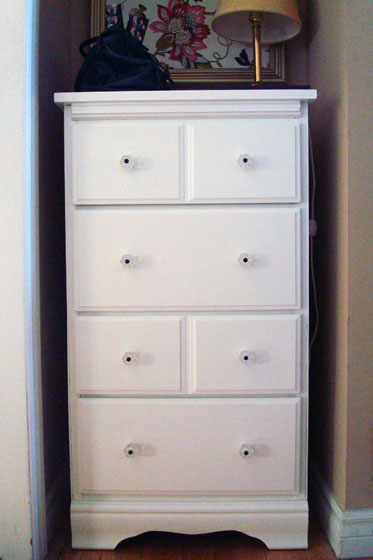
As you saw last week, the dresser fits perfectly in the nook. It ended up being the exact right height, and I’m loving having all of the drawers to keep me organized.

Tall and narrow DIY dresser

What second hand furniture have you made over? Have you ever made two pieces into one? How do you handle hard-to-furnish spots with specific dimensions?

My best girl

Lest you think my transformation into a dog person has made me forget about the kitty-cats, this post is all about our furry feline family members. Of course, the star of this post is my best girl, Ralph.

Ralph the barn cat

For those that have been following along since the beginning, you’ll recall that Ralph came with the farm. She made our first spring more interesting by giving us four kittens to add to our little family. In time, Gypsy, June and Rex all moved on to their own families. Our pick of the litter, Easter, stayed with us for a year and a half before striking out on her own.

The kittens’ birthday is today. While we don’t know Ralph’s birthday or even how old she is, she’s definitely worthy of celebration and today seems like a fitting day.

Ralphie is a superstar barn cat. She made it through the winter before we came to the farm by herself, although she was pretty skinny that first spring. She catches birds, bunnies, as well as more regular feline fare of rodents. She also enjoys her nightly serving of kibble, in case you can’t tell from the photo comparison below of how she looked two years ago and how she looks now.

Skinny cat to fat cat

She has a few battle scars, the most noticeable being her left eye. When we took her to the vet our first spring, he thought she might have had a scratch at some point, and it flares up every so often. Some days are worse than others and recently it’s been particularly bad. Despite appearances, it doesn’t seem to cause her pain or impact her hunting ability, so we’ve made the choice to let her live with it and not subject her to medication or additional vet visits.

Cat with a bad eye

As tough as she is, she also has a soft side when it comes to Matt and me. As soon as we enter the barn, she comes looking for scratches. Belly rubs are favourites–she’s such a fierce barn cat.

Cat belly scratches

You may recall that when we first came to the farm, Ralph had a sidekick, Bert. Bert made himself scarce when the kittens arrived. He was replaced by Tom, a very bold male cat, who came around every so often. Once we had Easter spayed, Tom lost interest.

Cow Cat started coming to visit more than a year ago when Easter was still here. Easter left last fall, but Cow Cat has stayed. He’s been around so long that Matt insisted that he had to have a proper name. He is now known as Harold. Harold is still super duper skittish, so we’re not even sure he’s a he. We’ve made some progress, though. Last spring, his reaction when he saw us was bolt or pancake.

Fraidy cat

He doesn’t let us get too close, and he still runs away if we come into the barn while he’s there. However, he will now stay in the barn and just watch us from the corner.

Harold the barn cat

While he may not like us, he seems to like Ralph. I’m glad she has a buddy. She definitely is our best girl and deserves only good things. Happy Ralph day, girl.

Ralph the barn cat

Are you a cat or a dog person? Or are you both? Any tips to help us warm up Harold? How do you celebrate your pet’s birthdays?

Office nook details

Thanks everyone for your very kind comments on the nook in my office. Today I’m going to go into more detail on the particulars of this little corner.

Starting at the top, there is the bulletin board. I’ve always been a bulletin board kind of girl. Whiteboards just don’t work as well for me. For this tiny nook, I needed something tall and narrow, which meant custom. I’ll share the details of how I made this bulletin board next week. It’s a simple wood frame that I spray painted gold, and the cork is covered in one of my favourite fabrics, Brissac Jewel by P Kaufmann Fabric. I’ve had this piece of fabric for close to five years. I’m really glad that I decided to use it here. Its beautiful colours make me happy.

Fabric covered bulletin board

Our calendar hangs beside the bulletin board. It’s just a freebie wall calendar hanging from a simple cup hook. It’s basic, but it’s so helpful to get things out of my head and organized on paper where both Matt and I can see them. (Ignore the unpatched screw hole and the two-tone paint).

Wall calendar

Continuing our way down, we come to the top of the dresser. This was always meant to be a place to set my purse and keys when I come home from work. My dear friend made me a handy little tray that’s perfect for my keys. She took a picture frame, removed the back, added cork feet to the underside and put a pretty piece of sparkly paper inside. I love the blend of the slightly rustic wood frame with the sparkle of the paper.

Home command centre

I’ve had the little lamp for pretty much as long as I can remember. My grandpa rewired it when I was little, and it’s been with me ever since. Growing up in my childhood bedroom it had a pretty pink shade. This newest shade is a second hand burlap one that I picked up at Value Village. The burlap is a nice contrast with the glass base. I’ve gotten into the habit of turning on the lamp at night before we head down to the basement to watch TV. It casts such a nice glow in the hallway when I come back upstairs to go to bed. Definitely my favourite look for this nook.

Nook at night

The anchor of the nook is obviously the dresser. Since I was working with such specific dimensions in this spot, finding the right piece of furniture was a bit of a challenge. As usual, DIY is the best solution. I’ll be sharing the tutorial of how I made the dresser next week.

Tall and narrow DIY dresser

This piece is small but mighty. Four drawers give me lots of space to tuck away everything: pens, paper, tape, chargers, receipts waiting to be filed, coupons, bits of paper, even extra tools and flashlights. In the top drawer, a cutlery organizer that I picked up at Value Village fits perfectly. In the other three drawers, I used IHeart Organizing’s Cereal Box Drawer Organizers to keep everything neat and tidy. (Yes, even my hammer now lives in a box wrapped in flowered pink paper).

Drawer organizers

The elements of this nook have come together slowly over the past few months. With each new addition, I feel more organized. I’ve spent the time to think about what I need and what makes sense to include in this corner. Even better, it’s not just functional. It’s pretty too.

What makes you feel organized? Are you a fan of bulletin boards or white boards? How do you blend pretty and functional?