Hope springs… and hopes dashed

This week began with a few warm days. Snow is still at least knee deep in most places, but along the edge of the house we have a narrow strip of bare ground.

In the garden I built around the well, peaking up through the sopping mud, are some very small spears of iris.

Iris sprouting in the spring

Could it be possible that spring might come this year?

As if!

The weather forecast for today calls for temperatures to dip below freezing again and for 10cm (nearly 4 inches) of snow to fall.

Winter just totally gave spring the cold shoulder.

What’s the weather like where you are? Have you seen any signs of spring yet? What first flowers are you looking forward to seeing? I feel like I don’t have to ask this, but who else is ready for spring?

The furniture in my wallet

I have a few key pieces of furniture that I’m on the hunt for. I’m fairly particular about what they look like, but what size they are is even more important.

To avoid constantly running to my measuring tape, I sized up all of the spots that need furniture. Then I typed up the measurements, printed them out and slipped them into my wallet.

Keep track of furniture measurements with a slip of paper in your wallet

Whether I’m in a thrift store, at the office or browsing online (all places I’ve found furniture), I can reference this slip of paper and know if those nightstands, that sideboard or that table will fit where I need them to go.

Of course the other key part of this is carrying a tape measure with me at all times.

Carry a tape measure with you to size up furniture no matter where you are

Since writing this list, I’ve actually been pretty successful at finding the furniture that I’m looking for. Since taking this picture, Matt found the cabinet for the laundry room (which we assembled yesterday), so I can cross another item off the list.

Keep track of furniture measurements with a slip of paper in your wallet

I’m sure there’s an app for this, and I know I could just save the measurements on my phone, but I’m old school. Plus, there are lots of times I forget my phone or let the battery die, so paper is actually more useful for me.

In fact, now that most of my first list is crossed off, I’ll be printing myself a new one. Next up on furniture most wanted: a cabinet for the dining room.

How do you keep track of furniture measurements? Who else always has a tape measure in their purse?

The odds of March

This month is going to be about, in the words of my paternal grandmother, the “odds and sods.” Or, in the words of Sherry from Young House Love, “Dude Get On That Already.” (I’m pretty sure my grandma never used the word “dude”).

It took me awhile to land on a goal for March. After our success in February with finally painting the hallway, kitchen and foyer, I really wanted to keep the momentum going and choose another item from the Home Goals 2014 list.

Furniture kept popping into my mind because I have some updates to share in this area. Plus we extended our painting to include one wall of the living room expressly so that I could set up my bookshelves. Clutter overflow in the basement is making me more impatient to find some of the furniture pieces that I’m looking for, but I need a reminder to check out kijiji and my thrift stores regularly.

Setting furniture as a goal would absolutely address all of these wants. However, the main task in furniture month will be painting the bookshelves, and the idea of spending another month with a paint brush in my hand really did not appeal.

So cross furniture off the list.

Not finishing the bookshelves

Sorry books

Then I thought of the kitchen. I have a bunch of small fixes that I want to do in there. Now that it’s freshly painted, it makes sense to finish the rest of the tweaks. But the kitchen doesn’t seem pressing. I can live with it. Why bump it to the top of the list?

Then, the nagging little tasks rolling around in my brain suddenly coalesced and said, “What about us?” I thought about it for a minute. There’s that. And that. Oh yeah, and definitely that. I felt excited. I felt energized. I felt like I’d found my goal for March. So I said, “Yes, please.”

A lot of this month’s tasks stem from last month’s painting. I don’t know about you, but when I finish a project usually tools and materials are spread around everywhere. That chaos causes other messes, and I ended up feeling very disorganized.

So it may not be the most creative or challenging collection of tasks, but March will definitely be full of variety. Most rooms have some issue that needs to be addressed. Spoiler alert: This month you will see my most shameful space, my poor, poor catch-all office.

My challenge is to avoid making March’s plan read too much like my regular to-do list. After all, dusting and vacuuming and mopping do not make the most interesting blog posts (although starting on spring cleaning is definitely on my mind).

Here are some of the major odds and sods on my list:

1. Set up the ping-pong table

Eastpoint Everywhere Table Tennis set

  • Figure out how to configure the legs and what I need to attach them to the tabletop – By March 11
  • Buy lumber, screws and whatever other materials I need – By March 11
  • Build a frame – By March 16
  • Drill the legs – By March 16
  • Attach the legs and frames and tabletop together – By March 16
  • Set up the net – By March 16
  • Practice my ping-pong skills… which currently do not exist

2. Get my home office under control

You don’t really want to see the before, do you?

Ohhhhh. I cannot tell you how much I don’t want to post this picture.

Argh.

Sigh.

I’m so ashamed.

File this under the category of “keeping it real.”

Messy office

Aaaah. Please stop looking at it.

Keep scrolling until it falls off the screen.

Let’s look ahead at how I can fix this disaster.

  • Sort and file the mountain of paperwork that’s built up on top of the filing cabinet – By March 16
  • Add organizers to the new dresser and start filling the drawers – By March 22
  • Make a bulletin board – By March 22
  • Pull together all of the forms that we need for our taxes this year – By March 30
  • Figure out how to make better use (temporarily) of the closet – By March 30
  • Unpack a few boxes, repack some of the boxes, repile the boxes – By March 30

3. Pretty up my work office

  • Make a bulletin board – By March 16
  • Recover the shade from my desk lamp – By March 16

4. Finalize light fixtures

Value Village light fixture

  • Buy a second light for the kitchen island – By March 9
  • Finish foyer light fixture – March 10
  • Install foyer light fixture – March 11
  • Install a new light fixture in the bathroom – By March 16

I may even make time for some sewing. I try not to post too much about fashion or sewing here, but I have had a wonderful green dress cut out since November. Julia Bobbin is running her annual Mad Men Challenge this month, and I think my dress would fit in perfectly. The April 1 deadline and cleaning my office so I actually have some sewing space may be the motivation I need to finally get stitching.

You’ll notice that I have March 16 as a deadline on a lot of things. That’s mainly because as of 4pm this afternoon I am on vacation for a week. Yay! Forget jetting away to a tropical destination or cozy resort, I am excited to have a week of uninterrupted farm time to connect with family, work on my projects, sleep in and “get on that already.”

This month will definitely be a mixed bag (to borrow another term from my grandmother). You will hear about some of our new furniture pieces along with these other to-dos. As usual, I’ll keep you updated and hold myself accountable throughout the month.

What’s on your list for March? Do niggly little tasks build up for you too? Anyone else have any odd sayings that you use regularly?

Blog-iversary 2

At the start of this week, I celebrated our second farm-iversary. Today it’s all about the blog-iversary. (In case you want to compare, last year’s blog-iversary included a stats post and a goals post).

Two was the theme for my second year of blogging, as the number of people visiting the blog more than doubled–a 132% increase, to be precise.

Total, monthly and daily blog views

Last year, I said my goal was to attract more readers, and I was hoping that I might get to 100 views per day. I did it, averaging 107 views per day. For the past few months, I’ve had a gradual increase as you can see below, and now the blog has around 100 visitors per day. Thank you all for visiting.Monthly blog viewsLike last year, visitors came from all over the world. However, there was one change. In year one most of my visitors were my fellow Canadians. This year the majority of you are American.

Blog views by country

Here are the top 10 countries and the number of visitors from each. Interestingly, the same countries are in the top 9 from year one to year two, and they’re in roughly the same order. The only change is at number 10 where South Africa replaced the Philippines.

  1. United States — 19,694
  2. Canada — 14,817
  3. United Kingdom — 1,247
  4. Australia — 599
  5. Germany — 349
  6. Switzerland — 155
  7. France — 155
  8. India — 142
  9. New Zealand — 133
  10. South Africa — 99

In year two, I was able to stick to my three posts per week schedule and published a total of 154 posts.

Last year’s most read post about the bridesmaid dress I sewed for my sister’s wedding reigned at the top for a year. At the end of July, it was overtaken by my post about how to make a wood countertop. The countertop post continues to get the most views every day. The bridesmaid dress has slid back to number four. Rounding out the top three most viewed posts are How to stain and waterproof a wood countertop and Not so fab freebie, the post about our uncomfortable wing chair.

The wing chair post has surprised me. This post is the first time I professed my love for Ikea’s Strandmon wing chair. It’s not the post where we actually buy the chair or where I actually talk about Strandmon in any detail. Apparently, a lot of people are interested in Strandmon. I published this post at the start of September, so it rocketed to the top very quickly.

Here are the top 10 posts of the past year and of all time and the number of views for each:

Posted 2013-14:

  1. How to make a wood countertop — 6,056
  2. How to stain and waterproof a wood countertop — 1,728
  3. Not so fab freebie — 1,723
  4. Birthday wish come true — 530
  5. Celebration — 517
  6. How to match seams across an invisible zipper — 324
  7. Lakeside Living Home Tour — 129
  8. How to build simple closet shelves — 127
  9. What once was lost now is found — 124
  10. DIY fail… sorta — 109

All-time:

  1. How to make a wood countertop — 6,056
  2. How to stain and waterproof a wood countertop — 1,728
  3. Not so fab freebie — 1,723
  4. Change of pace — 1,120
  5. The reveal… aka how to strip wallpaper — 845
  6. How to install a pot light — 619
  7. Birthday wish come true — 530
  8. Celebration — 517
  9. How to use preglued veneer edging — 346
  10. How to match seams across an invisible zipper — 324

Searches for wood countertops and and wing chairs are by far the top search terms and bring a lot of people to the site every day. But there are also lots of you who are regular visitors every week. Your loyalty means so much to me. Thank you for reading.

I have to give a special shout out to Jan Elizabeth, Sarah In Illinois, Margaret, Lindsay of ThatMutt.com and Dave & Sharynne Wilder of Dockwood Furniture for their frequent comments.

Top commenters' gravatarsJan Elizabeth stumbled across my blog in the fall, and she proceeded to read the entire archives and comment on pretty much every post in the span of about a week. Sarah has been reading since nearly the beginning. Margaret and I got to meet at BlogPodium in September. It was really neat to talk with someone whom I had previously known only from online. Lindsay’s dog blog is one of my daily reads. Dave and Sharynne always have great suggestions, and their blog is full of their own really inspiring handmade furniture.

I have to give another shout out to Danica of Country Chic Renovator and Diane of West Lake Musings. Back in August, they both guest posted while I took a week’s vacation. This was my first time having guest posters, and I really appreciated Danica’s and Diane’s willingness to share their stories. In case you missed them, here are the links for Danica’s post and Diane’s.

Blogging is such a network. I am frequently amazed by the connections I’ve made online. I’d like to do a better job at connecting with other bloggers. I read a post recently about content curation versus content creation–meaning featuring content from other sources versus writing my own original content. Original content has always been really, really important to me. However, I think that I could add some more variety to my blog and encourage other writers by collaborating more with other bloggers.

I did broaden my blogging network this year through a few events. A year ago, I speculated that I was considering attending a blogging conference to learn some new skills and make some new connections. Well, I made this speculation a reality. In fact, in keeping with my second year theme of two, I participated in two conferences: Word Camp and BlogPodium.

I am attending Blog Podium

These events were very inspiring and motivating. I don’t think I necessarily took full advantage of the networking aspect of the conferences, but I did make a lot of connections that are still with me today. I definitely learned a lot, and I’m so glad that I decided to go to the conferences.

One of the really simple lessons that I learned was to write headlines as though I am writing tweets. Writing post titles is something that I struggle with and probably my least favourite part of blogging. Thinking of titles as tweets has been pretty helpful, although I still turn to Matt every so often and say, “Any ideas for a title for a post about…?” He’s totally my secret writing weapon.

In last year’s blog-iversary post, I wrote “The biggest thing I’d like to do over the next year is decide where I want to go with this blog over the longer haul.” Today, two years in, I’m less worried about this.

Sure, I like the idea of spending my days at home, hanging out with Baxter, receiving tools and building supplies from sponsors, writing and DIYing as much as I want. However, blogging professionally is not the same as the blogging I’m doing now.

I love that my stats increased this year and that there are lots of you out there who like what I write. However, more than that, I like blogging for myself.

Since realizing that, I’ve been worrying less that I’m not active on every single social media channel out there and  that I’m not aggressively courting more readers so that I can attract sponsors. Jen at Rambling Renovators and Kit at DIY Diva posted about some of their feelings on this topic earlier this year, and a lot of what they said really resonated with me.

So while this year I’m all about goals for getting work done around the house, I’m not going to make any blogging goals as I head into year three of this online adventure.

I hope that you will tag along as the adventure continues. I’ve said it a couple of times already, but I’ll say it again: thank you. Thank you for reading and for being part of our projects, part of our farm, part of our lives.

I do appreciate your feedback, so if you have any suggestions of what you’d like to see more of (or less of) on the blog, please feel free to share.

Farm-iversary 2

Two years ago yesterday, we took possession of the farm.

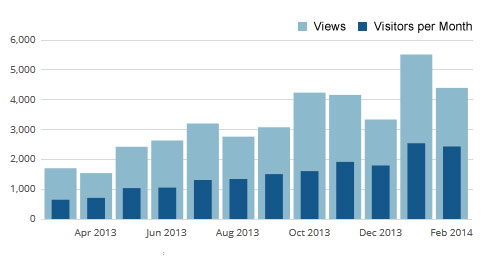
As I did last year, I’m going to take a look back at the milestones and accomplishments from the past year.

This year wasn’t as big on projects as year one. As much as I love DIY and improving my house, it was really, really nice to sit back a little bit and enjoy the comfy spaces we’ve created.

Relaxing in a cool basement

Part of settling into the farm was focusing a little more on decorating, rather than renovating.

I found inspiration on a local home tour and took in the Toronto Home Show with one of my friends. I got crafty, making a monogram, dice and painting a tray. I revealed my obsession with chairs and added two to our collection, receiving Strandmon for my birthday and winning Austin at Blogpodium.

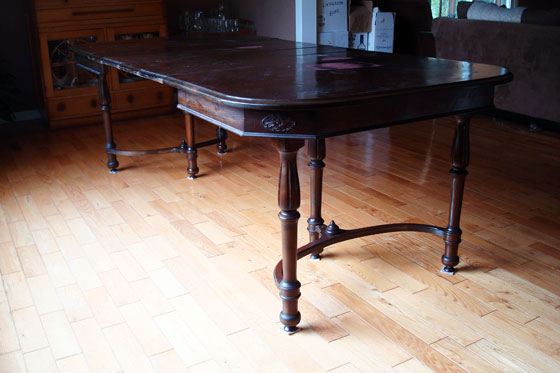
I also went thrifting more than I ever have before, scoring a metal washtub to hold firewood, lamps, flags, pillows, tchotchkes and our beautiful dining table. Thrifting worked the other way too, as I sold the woodstove, our original kitchen stove, a rotisserie and a wing chair on kijiji.

Antique dark wood dining table

However, we did still accomplish a few things that fall more in the reno category.

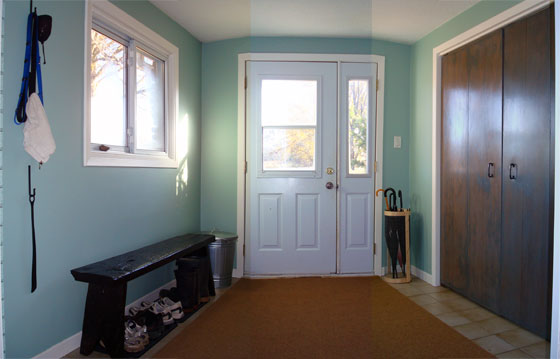
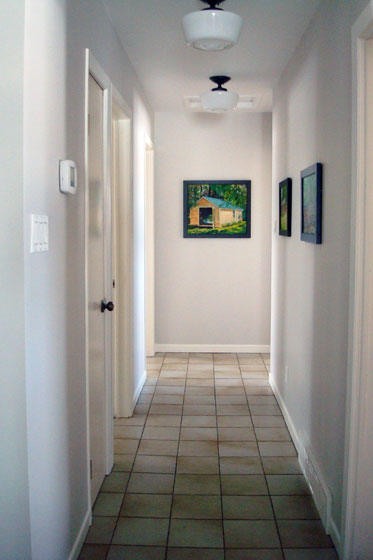
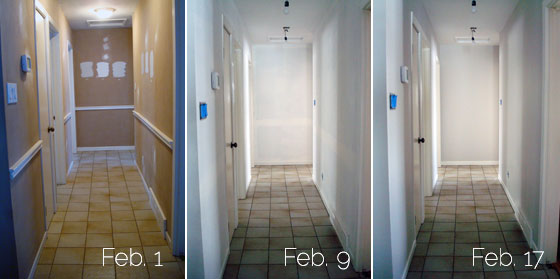
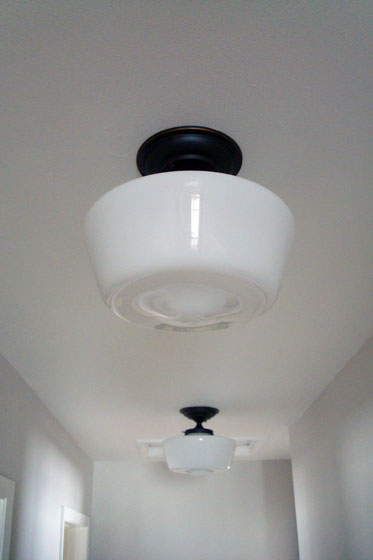
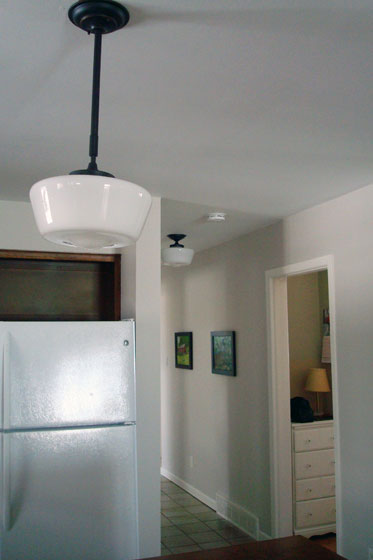
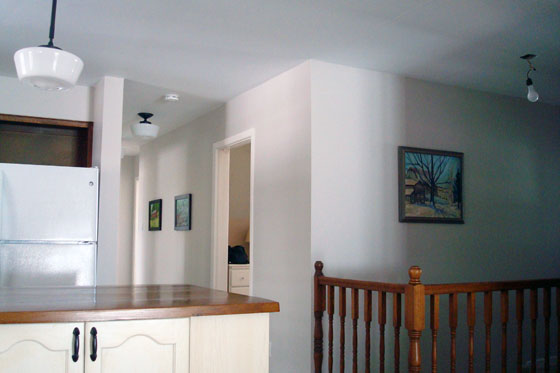
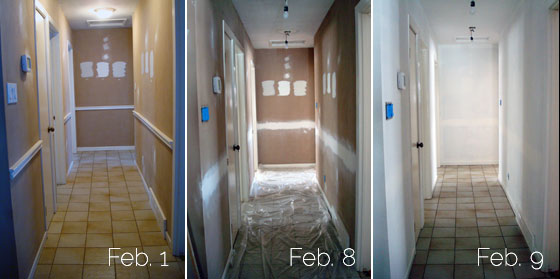
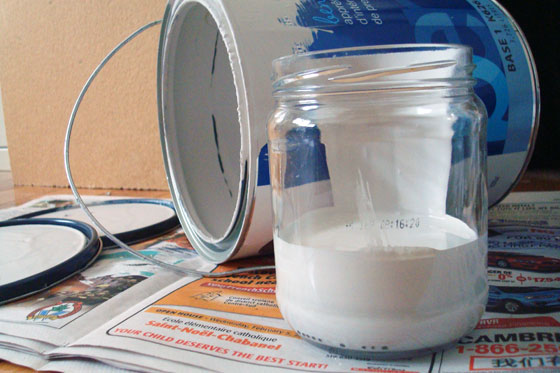
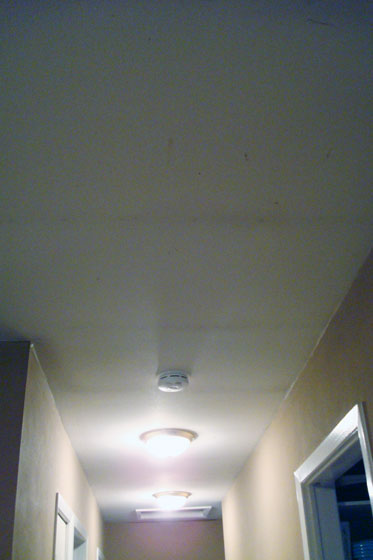
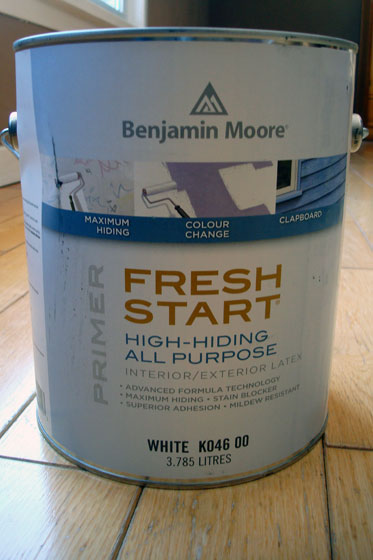
We increased storage and counter space in the kitchen with the addition of a kitchen island, complete with a DIY wood countertop. We added more storage and reorganized the front hall closet. We made over the mudroom to be a bright welcoming space. I finished a cozy reading nook in the basement, including my favourite chair and a simple DIY ottoman. Oh, and then there was our most recent project, painting the kitchen, foyer and hall.

Simple bright country mudroom

Landscaping was supposed to be the big project for year two… and it turned out to be a really big project. Too big for just one year.

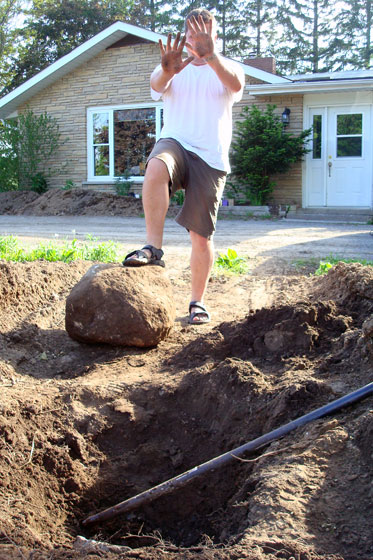
I swear, landscaping at the farm equals rocks. There were the four hours Matt, my Dad and I spent moving a pile of rocks from beside the driveshed to the official rock pile behind the barn. Then there was the new garden around the well that I edged with rocks. I finally had to enlist Matt and his Dad to move the most massive boulders into position.

The path across the turnaround was the one place where I wanted rocks–or at least bricks–but of course Matt and I first had to dig up another big rock that was in the way.

Digging up a large rock from our brick pathway

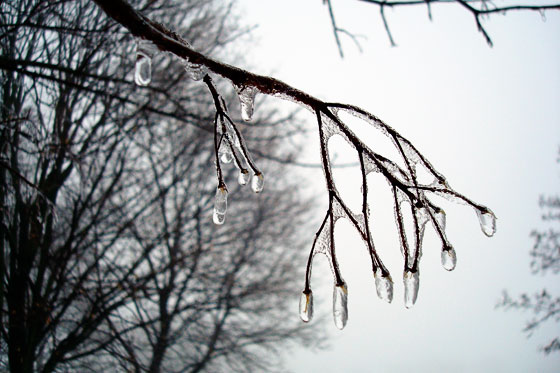
An extreme summer heatwave put an end to my landscaping. The intense heat was just one example of the extreme weather we saw in our second year. Spring came really late. Summer was really hot. And winter has been really snowy… and really, really, really cold. On top of it all, there was the ice storm. Spending three and a half days without power (and water and heat) was a challenging lesson in the realities of country living

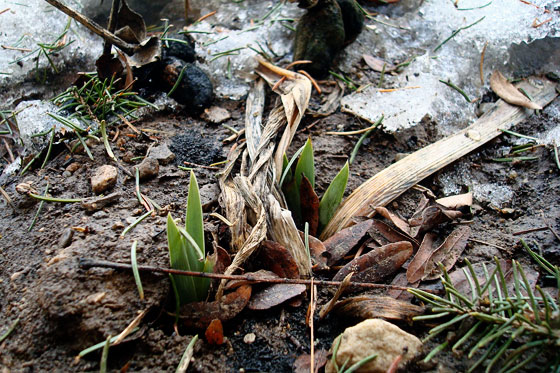
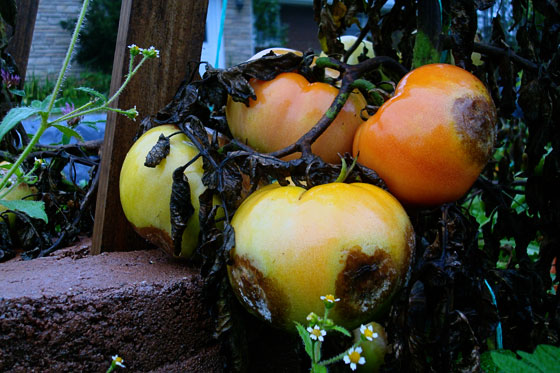
Despite the difficult weather, we managed to grow some of our own food for the first time last year. We only picked a few tomatoes before the rest of the fruit was struck down by a blight, but we are keen to try again. The annual raspberry harvest was much more successful. A vegetable garden is still on our wish list.

Rotting tomatoes

Beyond our small vegetable plot, our fields produced another crop of hay, though our farmer only took one cut. In the fall, the fields were prepped with manure for their transition to soybeans coming up later this year.

Waste was a bit of a theme for year two as I did my own much smaller manure application, we had the septic tank pumped, and I did a major clean up of our 2km of roadside.

Four full bins of recycling

Change was also a theme in year two. In the fall, I left the organization where I had worked for the past 10 years for a new job. I was a bit scared to leave, but I was ready for a new challenge. I’m loving my new job–it’s definitely a challenge–and I’m really glad that I made the leap.

Interestingly, I wouldn’t have had this opportunity without the farm. We’re now located within reasonable driving distance of a bunch of new cities that were too far away before.

The biggest change that came to us in year two is of course Baxter. Matt and I both wanted a dog for a long time. However, we agreed that we would wait to get one until we were living in the country. We thought it might happen in year one, but we ended up waiting until year two. I think that we were just waiting for Baxter.

Family picture with Baxter

He is absolutely the perfect dog for us, and I love experiencing the farm with him. Rain and shine, day and night, hot and cold, I’m spending way more time outside enjoying the property than I did before.

There have been some not so perfect moments: the three run-aways, the pink-eye, the brownies, the chicken bones, the nail clippings and the skunk come to mind. Nonetheless, my love for the sleek sleepy creature dozing in the corner is immense. I have become a massive dog person.

While we gained Baxter, we lost Easter. In the fall, she disappeared for a few days, came back for one night and then disappeared for good. We’ve not found any evidence of foul play, so I am still wondering whether she might return this spring.

I think that’s some of my naive city-girl optimism overshadowing my realistic country-girl side. It’s been hard to think that the little fur ball that was born in our driveshed and that we watched grow up from a helpless baby into a spoiled kitten might not be part of our lives any more. I called her baby all the time for goodness sake, and she loved to be cradled like one.

Matt and Easter eye to eye

Ralph, whom I still call mama, is as constant as ever. She’s packed on the fur–and the pounds–as she presides over the barn. She humours us and now allows us to hold her like a baby. She’s learned that she gets the best belly scratches that way.

Beyond our family animals, we continue to keep a tally of the other animals that come through the farm. Year two gave us a few close encounters that we’ve not had before.

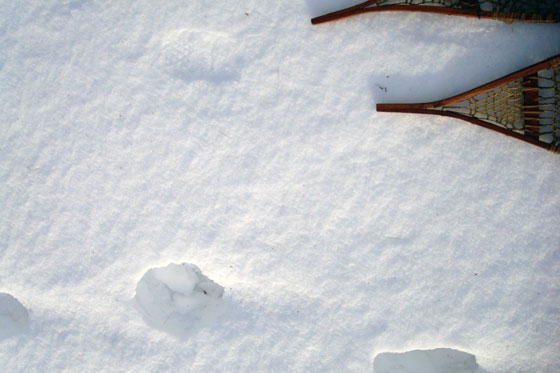
We went beyond seeing turkey footprints to seeing actual turkeys. We saw more deer (and then Matt hit one with his car and his Dad and his shotgun added another to our freezer). We saw a skunk for the first time, and then got sprayed for the first time (but not all at the same time). Down at the pond, we had what we think was a fisher. Watching all of the birds who come to the new feeder we built has been a highlight for me this winter.

Two wild male turkeys

In last year’s anniversary post, I came up with two words to summarize our first year at the farm. Last year’s theme of “big and more” still applies to all of our experiences at the farm, but I wanted something specific for year two. It was harder than I thought to come up with a theme, but I feel like wins and losses sort of summarizes this past year.

We were successful at a decent number of projects but didn’t accomplish as much as I’d hoped. We lost power, and I won a chair. We lost one precious family member and gained another extremely adored one. We settled into the farm a bit more, and the wins have far outweighed the losses. Year two confirmed that it’s definitely a country life for us.

February goals wrap up report (and a reveal)

It’s the last day of February and time for the final report on how we did on our goal for the month of painting the main floor hallway, foyer and kitchen.

Want a sneak peak?

Hallway painted Benjamin Moore Abalone

Yup. We have light fixtures, art and fresh paint. Hallelujah.

Just for a reminder, here’s a look back at how this project unfolded over the month:

Progression of painting our hallway

Heading into last weekend, the final task on our list was installing light fixtures. I chose school-house type fixtures from Home Depot (a complete source list is below). There were lots of options through their web site, and these were about the cheapest. I love how the dark oil-rubbed bronze contrasts with the light coloured walls, our pristine white ceilings and echoes the dark tones of our picture frames.

 World Imports Luray Collection Oil Rubbed Bronze 1-Light Semi Flush mount

The light fixtures came in both a semi-flush mount, which I used in the hall, and in a pendant, which I used over the island. I love these lights and have wanted to use them for awhile. They have so much more personality than the boob lights that were there before, and I think they work very well with our casual country setting.

 World Imports Luray Collection Oil Rubbed Bronze 1-Light Pendant World Imports Luray Collection Oil Rubbed Bronze 1-Light Pendant

The final task on our to-do list was also where we fell off schedule a little bit. If I zoom out a little bit you’ll see that we’re still missing one light fixture in the foyer. I’m DIYing this one and need just a bit more time to pull it together. This angle also gives you a glimpse of the kitchen, hallway and foyer all together.

Hallway painted Benjamin Moore Abalone

This one miss aside, I’m declaring February’s project a success.

For us, a month was a realistic timeline to completely transform these spaces. My schedule worked really well to keep us on track. I kept a rough tally and for just the painting, we spent about 25 hours. We worked steadily but didn’t stress ourselves out trying to get it all done too quickly. I’ll definitely be mapping out monthly goals again.

The main floor feels fresh and new. Having Matt’s grandpa’s paintings on the walls really makes the space feel like ours. I’ve fallen even more in love with my house.

Anyone else go through a transformation this month? What did you accomplish in February?

Source list:
Wall paint: Abalone from Benjamin Moore (75% intensity)
Trim paint: Cloud White from Benjamin Moore
Light fixtures: Luray Collection Oil Rubbed Bronze 1-Light Semi Flush mount (this one doesn’t seem to be available online anymore) and Luray Collection 1-Light 34-5/8 in. Hanging Oil-Rubbed Bronze Pendant both by World Imports through the Home Depot
Paintings: Family heirlooms painted by Matt’s grandfather

Walking on (frozen) water

A week or so ago, I talked about how I was trudging around the farm due to all of the snow. Thanks to a thaw and freeze last week, it’s gotten even worse. The temperature didn’t go up enough to melt the snow very much, so it’s still deeper than my knees. Then the temperature dropped, but just enough to freeze the surface into a very inconvenient crust.

Now I take a step and with a jerk drop down through the snow. The icy crust bruises my shin and grabs hold of my boot trapping me. My boots are full of snow, my shirt is soaked with sweat and my thigh muscles are burning. Walks are brutal.

Before he jetted off to Hawaii (I’m not at all jealous), my father-in-law left me his snowshoes. They may look more suited to being decorative objects hung on a wall, but desperate times call for desperate measures.

Vintage snowshoes

I strapped them on and took my first tentative steps.

Hiking in vintage snowshoes

Antiques or not, these things still work. I can walk (waddle) without dropping down into the snow. In the picture below, you can see my crash-through path from the day before at the bottom and the gentle web prints from my new footwear at the top.

Hiking in vintage snowshoes

I am not coordinated at the best of times, so I can’t claim to be graceful or quick when I add snowshoes into the equation. However, after just one weekend I am already a snowshoe enthusiast. In fact, I’m already planning to upgrade my equipment. I’m thinking something made in this century might be a good choice.

Did you try anything new this weekend? Does anyone else use vintage tools or sport equipment? Have you ever gone snowshoeing?

Progress report 2

Another Friday, and time for another update on how we’re doing with our February project of painting the foyer, hallway and kitchen.

We have colour!

Hallway painted Benjamin Moore Abalone

It’s subtle, but I promise it’s there.

Just to remind you, here’s how the hallway has looked throughout this month.

Progression of painting our hallway

And here’s how the colour stage went down.

Thank goodness for three-day weekends
Two coats of the colour took longer than I expected, but, like everything else that’s been on the to-do list so far, we finished it, and we are on schedule.

Tag, you’re it
Painting at our house is a game of tag, as I cut in and try to stay ahead of Matt who handles the rolling. On the first coat, he caught me quickly. Cutting the ceiling, baseboard, nine doorways and the kitchen meant that I was extremely slow.

I was so glad I made the decision to take off the chair rail. I would not have been happy if I’d had to do more cutting.

On the second coat, Matt didn’t even start rolling until I finished edging the hall and the kitchen. This timing ended up being perfect, as we finished at exactly the same time.

Scraping the bottom of the bucket
We had just enough paint. I bought two gallons, even though Matt thought three might be better. We were probably a bit stingy towards the very end of the second coat, but I still think we have a good finish on the walls… and less than 200mL of paint leftover.

Left over paint

Change it up
We chose Abalone, a popular neutral shade from Benjamin Moore. I find this colour very changeable, which I like. At night with the lights on it looks very grey. In the morning with the sun shining in the windows, it looks more brown.

Lighten up
I had the paint mixed at 75% saturation, as our hallway and kitchen tend to be a bit dim. I was a bit worried that lightening it would change the colour, but it still seems true to the Abalone tone, and the lighter shade works really well in our spaces.

Tongue-tied
How do you pronounce Abalone? Is it “own” like “home alone?” Or is it “onee” like “baloney?”

Coming up
The major work of painting is obviously done. I’m keeping my eye out for touch-ups, but so far haven’t found any spots that inspire me to break out the paintbrush again.

Since I took the picture at the top of this post, I’ve put the cover plates are back on all of the plugs and switches. Which leads to the final item on my original to-do list: install new light fixtures.

Matt, aka “he who hates pigtails,” aka “in-house electrician” will take on this task this weekend.

What’s on your to-do list for this weekend? What’s the division of labour at your house when it comes to painting and electrical? How do you pronounce Abalone?

I’m dreaming of a white ceiling

I know a lot of people are adding colour and patterns to their ceilings these days, but I am still white ceiling person. Even if I wasn’t, the colours and patterns we’ve had on our ceilings for the past two years would not be my choice… ever.

There were the specks and smears. (Sorry for the poor photo quality. I find it really difficult to photograph our dim hallway).

paintingprep5

Then there were the stripes.

paintingprep2

Our home inspector’s explanation for these lines was that the insulation in our attic was insufficient. As a result, the ceiling joists got cold. The temperature difference between our warm drywall inside the house and the cold joists in the attic resulted in condensation. Dust and dirt in the air in the house stuck to that condensation, making stripes.

When we upgraded the insulation in the attic, our contractor had a slightly different opinion. Of course I now can’t remember what he said.

In addition to the obvious dirt, there was the overall grey tinge that you saw on Friday.

I’m a bit embarrassed to say that we’ve been living with these ceilings since we moved in two years ago. However, I am no longer ashamed. We used Benjamin Moore’s Fresh Start primer to make our dreams of a clean white ceiling come true, and I thought it might be helpful to post a bit of a review of this paint.

Out of all of the things I care about in my house, the shade of white on my ceilings is not one of them. My usual method is to use primer to paint the ceilings. For the hallway, foyer and kitchen, I didn’t splurge and go all the way to buying real paint, but I did choose a slightly upgraded primer, rather than the standard formula. The “high hiding” label on the Fresh Start can was what sold me. I had a lot of dirt to hide.

Benjamin Moore Fresh Start Primer

Fresh Start is a slightly thicker consistency than standard primer, which made me feel like I was covering more dirt. It’s not sticky, though, and was easy to apply.

Whether because of the thicker consistency or because our drywall absorbed the paint, we ended up using more than I expected. I had bought a second gallon, not realizing I had one at home already. The extra paint ended up being a good thing because for our 310+ square feet of hallway, kitchen and foyer we used a gallon and a quarter, just for one coat.

I had hoped that we would be able to get away with a single coat on our ceilings, but we ended up having to do two. I’m not sure if it’s that our ceilings were just too dirty, if the Fresh Start didn’t cover as well as I thought it would, or if we applied it a bit thinly in a few spots, but the next day there were sections where I could still see some of the grey.

The second coat went on very quickly (about an hour) and used much less paint (probably just a bit more than half a gallon). The second coat also did the trick. There are no more dirt spots, and none of the grey has bled through.

Since we were working on a ceiling, it would have been helpful for the Fresh Start to have a tint, like some of the specialized ceiling paints out there. These go on light pink and then dry white. In the dim lighting of our hallway, it was sometimes hard to tell where we had yet to paint. At least, it was on the second coat when we were painting over white, rather than grey.

One coat, two coat. One can, two cans. It doesn’t matter now. All that counts is that the Fresh Start did its job, and we now have the white ceilings that I’ve been dreaming of since we moved in.

There’s still one more painting post coming up this week. Check back Friday to see the progress we’ve made on the walls. (Hint: there will be colour!)

Until then, I’m really curious to hear how you handle your ceilings. Are you all about white, like me? Or are you one of those daring folks that embrace the “fifth wall?” What’s your go-to primer? Anyone else tried Fresh Start?

And just in case you’re wondering, Benjamin Moore has no idea who I am, I bought my own paint, and this post is just my opinion.