Six tips on how to stay organized when buying a house

When I was organizing my office the other week, I came across the binder I made when we bought the farm. This thing was my bible. I thought it might be helpful to share how I stayed organized during our relatively complicated house closing.

How I stayed organized when we bought our house

1. Come up with a system capture the paper work and information that comes with selling and buying a house.

You want to have all of your information in one place that’s easily accessible. For me, this system was a binder that I carried everywhere for about three months. For you a file folder might work. You might even be able to set up an electronic file on your computer, tablet or phone. In my experience, buying a house comes with a lot of paperwork, so having a paper-based system worked for me.

2. Once you capture all of the information, keep it organized.

I used dividers to categorize information in my binder.

How I stayed organized when we bought our house

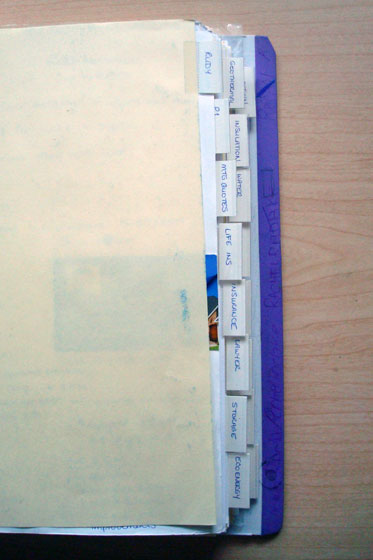
You’ll have your own categories that work for you, but the ones that I used were mortgage broker, mortgage provider, mortgage quote, life insurance, house insurance, lawyer, storage, eco-energy audit, geothermal, insulation, water, internet, home inspection, property taxes, finances, offer, move-in and “fun & plans” (more on this one later). Sections were a mix of information we needed to complete the purchase of the farm and the sale of our first house, along with the fixes we planned to tackle first.

3. Keep track of everything

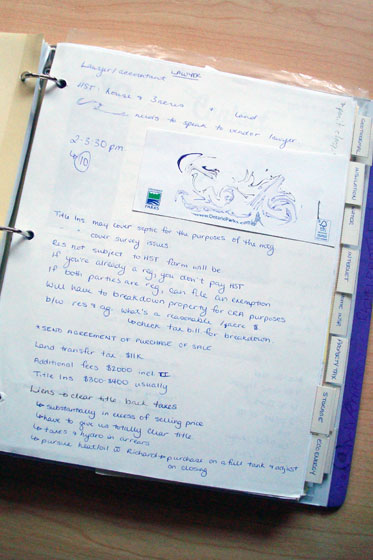
Make note of every conversation, every contact, every transaction, every flyer. You never know what you’ll need some day. I found it was particularly important to have a photocopy of our official offer and all of our financial information that I could quickly refer to.

Here’s the first page in my “lawyer” section. I have everything from appointment times, notes on title insurance and land transfer tax, even the scrap of paper where my dad first wrote down the lawyer’s contact information (which I’ve blurred out) stapled onto the page.

How I stayed organized when we bought our house

Other sections have written quotes from insulation contractors, flyers for rural internet providers and business cards from other contacts. Our water section had the reports from all of our initial well inspections, but then it grew to include research that I gathered on different water treatment and pumping systems, estimates from contractors and other notes as we went through the process of installing our new system.
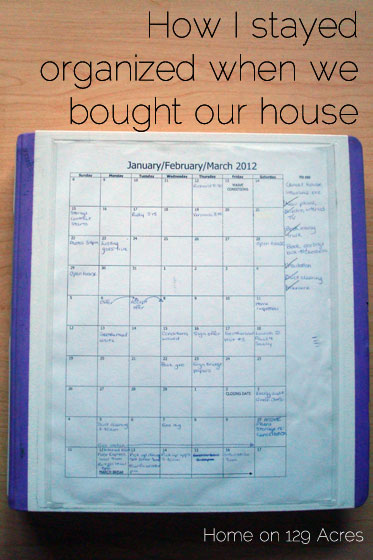
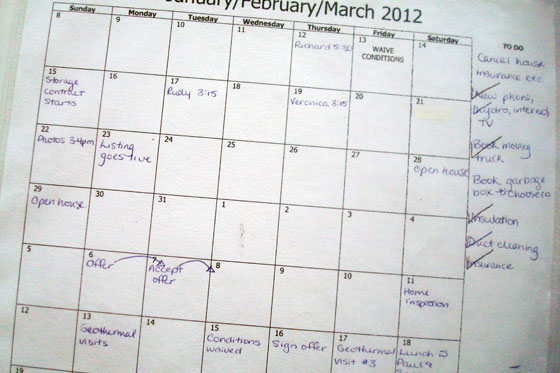
4. Keep a calendar

There are lots of things to remember when buying and selling a house. A calendar or schedule is essential to keep things on track. I made a customized calendar that showed the two months from when we purchased the farm to after we moved in all on one page. The front cover of my binder had a plastic sleeve, so I slipped the calendar in there, where I could always see it at a glance.

How I stayed organized when we bought our house

5. Make sure your system is flexible.

In order to work throughout your whole house purchase, your system will have to grow and adapt and travel with you. Part way through the closing, I bought a second package of dividers and doubled the sections in the binder. As new information came in, I could write it down or print it out, punch holes in it and slot it into the appropriate section. Wherever I was, I could whip out the binder to access information or jot down a note.

6. Make room for some fun.

Buying a house can be stressful. Often, it can seem that you’re spending all of your time with depressing inspection reports that show everything that’s wrong with your house, exorbitant contractor quotes that show you’re never going to be able to fix your house, or complicated legal and financial forms that make you question if you’re ever going to be able to actually buy your house. Occasionally, you’re going to need some help to look on the bright side.

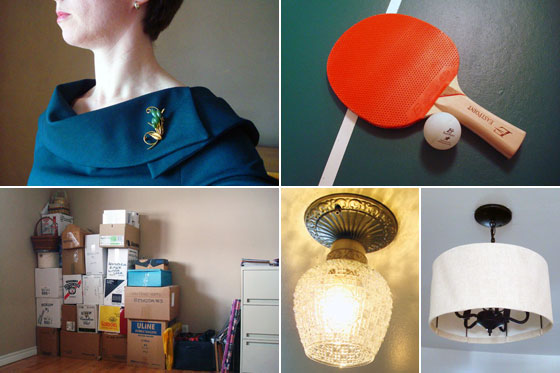
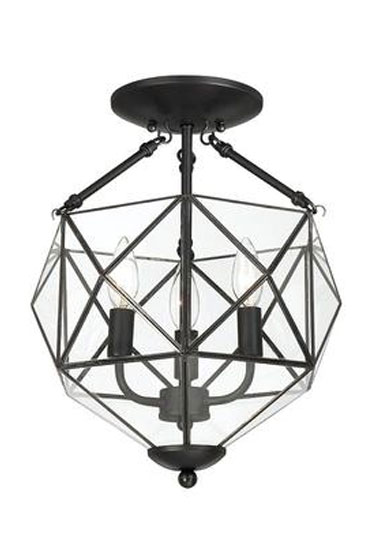
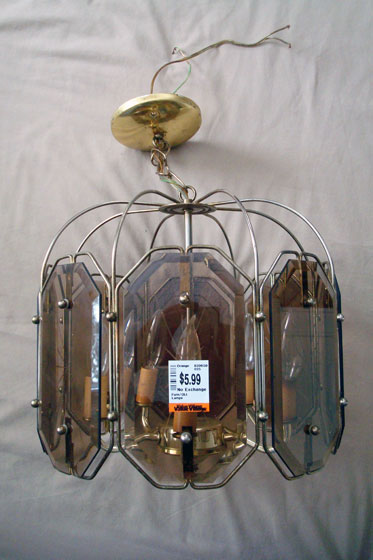
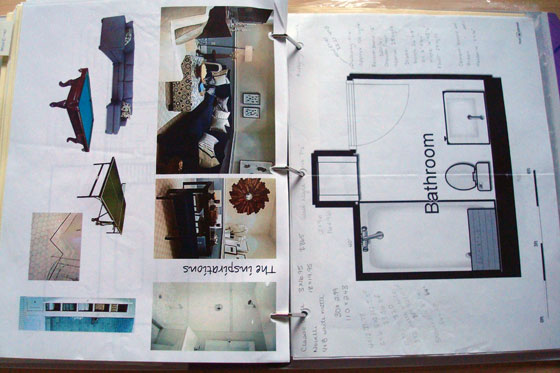
The final section of my binder was called fun & plans.

How I stayed organized when we bought our house

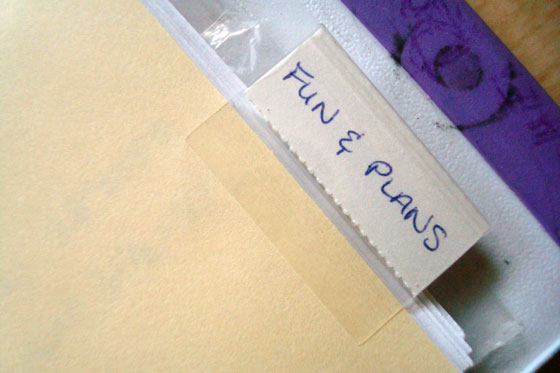
This wasn’t a huge section, and I confess it didn’t get a ton of attention, but it was a spot where I could do things like this.

How I stayed organized when we bought our house

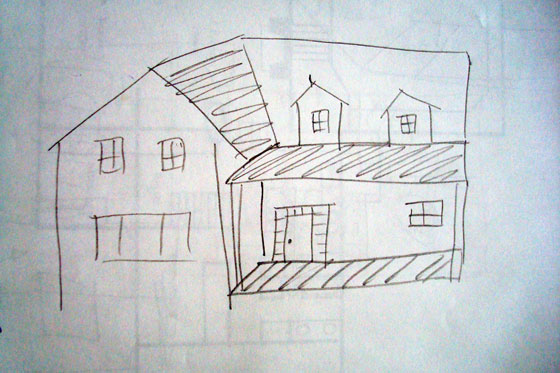
Or this (pre-Pinterest).

How I stayed organized when we bought our house

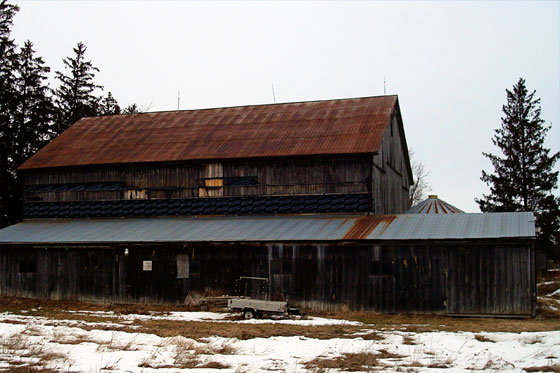
Our two-month closing process was a little complicated because we were dealing with a country property and a fixer-upper, but I think a binder like this would be helpful no matter what kind of house you’re buying. It can be scaled and customized for whatever you need. And its usefulness continues after the sale closes. It’s been two years since we moved to the farm, and I still pull out this binder occasionally to find a contact or double check some information.

Now it’s your turn. Anyone have any tips on how to stay organized when buying a house? Are you a paper or computer person?

Our new pond

I’ve written before how important it was to me to have a pond on our property.

Well, this spring we have a new pond, although it’s not quite what I imagined.

Behold the pond in the driveshed.

Puddle inside the barn

Can’t you just picture it? A peaceful afternoon at the shore, watching the trees reflect in the water’s surface, surrounded by recycling bins, tools and the smell of oil. Ahhh.

There’s always been a low spot inside the door of the driveshed. Occasionally after a big rain, we have a puddle. However, this year’s thaw resulted in more than a puddle. The really hazardous part of our new pond was that for a long time it was still partially frozen. The bottom layer of ice was extremely smooth and extremely slippery. Taking out the recycling took on a new layer of adventure.

Even now that the ice has melted, the adventure remains. Ralph was helping Matt with the garbage this week, and she had to make quite the leap to get in and out of the driveshed.

Addition for the spring to-do list: as soon as the gravel pile thaws, pick up a big scoop (or two) of stones for the driveshed.

How are things thawing at your house? Any water where it’s not supposed to be?

The vulture has landed

The turkey vultures have returned to our neighbourhood. They spent the weekend gliding over the farm intimidating animals and humans alike with their dark shadows, their red heads, their beady eyes and their giant wings. At one point, two touched down on the ridge of the barn, opened their wings and stood there sunning themselves.

They are absolutely massive birds. Unfortunately, Matt got outside first and yelled at them, so they flew away before I could get a picture. (Matt’s a bit concerned about any… let’s call it “interference”… landing on our new solar panels).

Here’s a picture from last year when a trio touched down on the barn roof. (Look how green! And no snow!)

Turkey vultures on the barn roof

I still don’t think this photo conveys the scale of these birds. Just keep in mind the barn’s really, really big, and you can clearly distinguish the vultures sitting on top of it.

Do you have turkey vultures in your neighbourhood?

Better late than never

You may have noticed that a month ended and another began, and there’s been no monthly goals posts. I’m here today with the two posts combined into one.

Setting monthly goals is my attempt to keep on track with my home goals this year. It’s been a good technique to help me stay on track… mostly. I deviated from the plan a little bit in March. Some things I can cross off, but some things I can’t–I’m trying to manage my neuroses about that.

Here’s March’s report card.

Photo collage of March projects

Set up the ping-pong table – Done

We’re loving having the ping-pong table. We play almost every night, and I’ve actually improved a lot. Last night the score in our best two-out-of-three tournament was 2-3 rather than the 3-0 it’s been every other time. Yay, me!

Finalize light fixtures – Done… for now

The DIY foyer light fixture is staying for now. I’m going to keep my eyes open for something better though.

Get my home office under control – Half done

  • Sort and file the mountain of paperwork that’s built up on top of the filing cabinet
  • Add organizers to the new dresser and start filling the drawers
  • Make a bulletin board
  • Pull together all of the forms that we need for our taxes this year
  • Figure out how to make better use (temporarily) of the closet
  • Unpack a few boxes, repack some of the boxes, repile the boxes

Pretty up my work office – Not done. Not started.

  • Make a bulletin board
  • Recover the shade from my desk lamp

My half-organized office gave me the space and the motivation to sew my Mad Men Challenge dress, which was a fun accomplishment and a different way to spend my time last month. However, I am looking forward to getting the final things crossed off my list this month.

So on to the April goals:

First on the list is finish the projects for my home and work offices. That’s an easy one.

The rest of the list I’m a little bit less sure about, so I’m going to go with a theme, rather than specific to-dos. Given that Earth Day is later this month, I’m going with the theme of “green.”

  • Don’t spend any green (on the house) — Good from two perspectives: lessens my consumption, which is always good for the environment. Good for my wallet, which is important as we have to pay off some very expensive solar panels this month.

Solar panels on the barn roof

  • Go with green projects — There are lots of things I can do around the house that will make our home environment a little more pleasant, delay bigger reno projects and that I have supplies for already.
  • Start planning for a green (outdoor) project – It may not save me any green–and it’s definitely more brown than green right now–but I’d like to get a few quotes to see if it’s possible to get some help outdoors. Cleaning up some of the overgrown brush between the house and the pond is, I think, more than we can tackle ourselves.

Over grown pond in spring

Aside: Minutes after taking this picture, Baxter cracked the ice and fell into the pond. Unfortunately, I’d already put the camera away so you don’t get a picture of the “What the… ? Wait. I don’t understand. What just happened? Where did the ground go?” facial expression. Everyone is fine, although puppy is a little sulky because he had a second bath when we got back to the house.

Anyways, back to the plan. I may focus more on project updates, rather than the weekly updates I’ve done so far. If I’m being honest, I didn’t find the weekly reports as much fun, and I’m not sure they were that interesting. They did help to keep me on track somewhat, although I obviously fell off in March. I feel like I’m giving myself a bit of a break in April, but I’m hoping that spring will arrive soon and I can start to look ahead to more outdoor projects.

What did you accomplish in March? Is anyone else going green in April?

Rituals and signs of spring

Waiting for our forsythia to flower has become one of my spring rituals since moving to the farm. For the past two years, my post on April 2 has been an update of how close we are to blossoms.

Our first year, the forsythia was in full bloom at the beginning of April. Last year, we weren’t anywhere close to flowers. It would take another month before the forsythia would be out in bloom. This year, we’re even further away from the bright yellow flowers.

Forsythia bushes annual comparison

So far in 2014, spring has just been a date on a calendar. I’m eagerly awaiting its arrival and the return of my forsythia.

What signifies spring for you?

Let the sun shine

A few people guessed that last week’s Guess What? post had something to do with solar. They are absolutely right. As of Friday night, we had 24 shiny new solar panels installed on the barn roof.

Solar panels on the barn roof

We have 14 more to go before our array is complete. I’ll be posting a full project breakdown once everything is installed and wired, but I’m too excited not to share the news with you now. We’ve been waiting a long time for this day, and I’m so excited that it’s finally here.

The equipment that you saw on Friday is the inverters. The company that’s managing our install calls the inverters “the brains” of the system. Their web site explains, “Inverters… convert the DC (Direct Current) power from your panels to AC (Alternating Current) before feeding it back into the hydro grid.”

What are these?

The panel install started on Thursday. Here’s our empty barn roof on a dim grey morning.

Barn roof before solar panel install

And here’s how it looks currently, mid-way through install on a much nicer day.

Solar panel install on the barn roof

We need that sun to keep on shining. The power generation aspect is obvious, but we have a more immediate need. The panels have to be connected to a hydro pole so that our power can be sent back to the grid. The pole is 300+ feet away from the barn. We need a lot of snow and ice to melt so that the trench can be dug from the barn to the pole and we can be wired up.

Hydro pole for solar panel installation

Say it with me people. Let the sun shine!

Are there any exciting projects happening at your place this spring? Do you have any solar experience to share?

Green sleeves

The benefit of cleaning up my office is that I actually have space to work in there now. I may not be completely finished organizing the office, but I did accomplish something else.

I finally sewed something!

Green wool long sleeved collared dress Vogue 8630

This dress is my entry Julia Bobbin’s third annual Mad Men Dress Challenge.

Julia Bobbin - Mad Men Challenge III

The point of the challenge is to sew a dress inspired by Mad Men. I have to admit, I don’t watch the show, but I love the clothes that I’ve seen. I’ve had this dress cut out since November, so it was nice to finally make it up. Between cleaning up my office and Julia issuing her challenge, it was the perfect motivation.

This dress shares some style points with Joan’s chartreuse dress from season 3, episode 6, most notably the collar and the colour.

Joan's green dress

These photos (and lots of others of this outfit) from here.

Ms. Bobbin herself has sewed this dress, although she did a very true knock-off complete with a column of fabulous buttons down the back.

My dress does not have buttons, but I still feel pretty fabulous in it. My starting point was Vogue 8630. I made a few modifications, which I talk about in more detail in my review on Pattern Review.

The best feature of this dress is its wide collar. I dialed up the Mad Men style factor by adding one of my vintage brooches for these photos. I can see so many different accessories working here–I think a giant black button would be really cool.

Vogue 8630 modified collar

In the Mad Men episode, Joan’s dress ends up covered in blood. However, I will be keeping this dress far away from any farming and renovating activities that may lead to bloodshed. I think my alter ego and her day job will make good use of it and keep it nice and neat.

Check out Julia’s blog next week for all of the other fabulous entries in the Mad Men challenge.

Are there any Mad Men fans out there? How about Mad Men fashion fans?

Foyer lighting options

At the start of the week you saw my attempt at a new light fixture for the foyer.

In the comments, you agreed with my feelings that my DIY fixture wasn’t quite right for the space.

Here are two of the other lights I’m considering as replacements.

The first is this hexagonal fixture. It’s a slightly updated version of the chandelier I bought at the thrift store.

Pros:

  • The design and the shape are a bit unique. I’ve not seen many fixtures like this around.
  • It’s the right size and height for the foyer.
  • It has three bulbs, so it should cast a decent amount of light.

Cons:

  • The metal is black, and the other lights on our main floor are oil rubbed bronze. I’d rather not mix my metal tones in this space, and I don’t think this piece can be painted easily.

Here’s my second option. I’d been considering a lantern-esque fixture, and this one is an attractive option.

Pros:

  • The metal on this light is antique bronze, which is closer to the ORB of our other fixtures.
  • The lantern design feels a little bit country to me, perfect for a farm.

Cons:

  • I’m concerned this fixture might be a bit too small to carry the whole foyer.
  • With only two bulbs, it won’t shed as much light as the first fixture or my DIY option.

I have a hard time spending more than $100 on light fixtures (I know, I know, I’m super cheap), and both of these options come in right around this price point.

Let’s put it to a vote.

Please feel free to suggest another option, if you’ve seen something that you think would work better.

Does anyone else struggle with finding good lighting? How do you feel about mixing metals?

DIY light fixture (fail?)

I have another thrifted light fixture makeover for you today. Remember this beauty from my thrifting post?

1980s light fixture redo

When I was in the checkout line at Value Village, the woman ahead of me said, “What a great find! So classy!”

I said, “Oh, thank you.” In my head I was thinking, “Are you insane? This light is completely 1980s. It will look nothing like this when I’m done.”

My plan for the foyer was to replace the giant ceiling fan with a small chandelier covered by a simple drum shade.

Here was my chandelier.

1980s light fixture

Here was my drum shade.

Vintage lampshade

It was vintage lighting fest over here.

I took apart the light, took apart the shade, merged the two together and spray painted everything oil-rubbed bronze.

1980s light fixture redo

I shortened the shade and added a new fabric cover.

1980s light fixture redo

Then I installed it over the stairwell.

Crooked drum shade

Hmmm… not quite what I envisioned. As Matt said, “Woman, what were you thinking?” I stood there and laughed.

Then I got out my glue gun. A couple of daubs of glue held the shade a bit straighter.

Foyer light fixture DIY drumshade over a chandelier

I’m still not sure if this is quite what I envisioned. The inside looks a bit rough in some spots, and the ribs of the shade show through when the light is turned on.

1980s light fixture redo

Another layer of fabric on the inside might solve both of these issues, but it would also lessen the light. This light is much brighter than the ceiling fan that was there before, which I like as our foyer tends to be a bit dim.

I’m content to live with it for awhile until I make up my mind. Either way, it’s an improvement over the fan that was there when we moved in and the pigtail that we wired up when we were painting.

I’d love to hear your to opinion. Do you think this is a #DIYfail or #victory? Have you ever made over a light fixture?