The search for the perfect footstool for my basement reading nook took a little while. 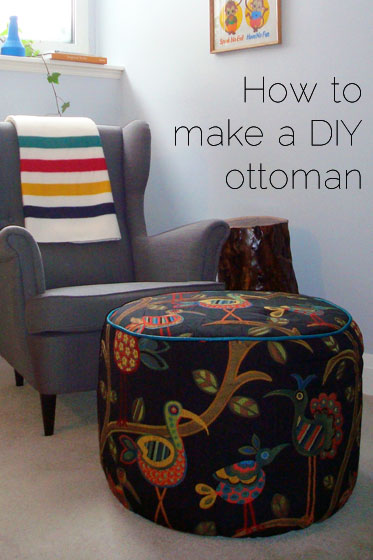 I knew I wanted something round. Between our sectional, the ottoman, the entertainment unit, the TV, and even my Austin chair, we have a lot of squares and rectangles happening in the basement, so I thought it was time for some contrast. And I wanted to make it myself. But how? What would give me the size and the shape that I wanted while being sturdy enough to sit on but light weight enough to move around? Maybe a Sonotube? But I couldn’t find one that was big enough in diameter, and I really didn’t want to buy a six foot tube and use only a short piece of it. Maybe I should just use one of the Moroccan poof patterns available online and upscale it? But that would take a lot of stuffing, and I wasn’t sure how it would work as a seat. Then one night it came to me just as I headed to bed. (Isn’t that always the way?) The next morning when Baxter and I headed out for our walk, we took a brief detour to our junk pile. (Doesn’t every farm have one?)

“Uhhh… I don’t see anything that you’d want to put in the house over here…”
Are you confused like Baxter, or do you see it?
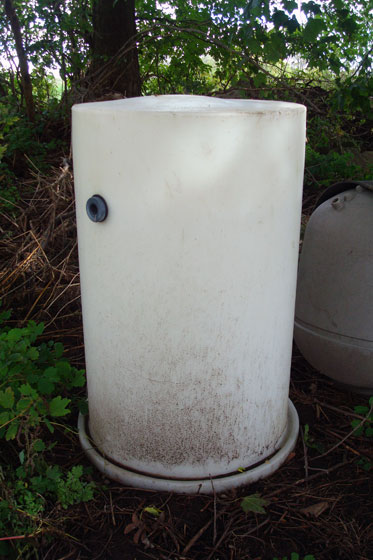
Yes, ladies and gentlemen, I upholstered a giant plastic barrel.
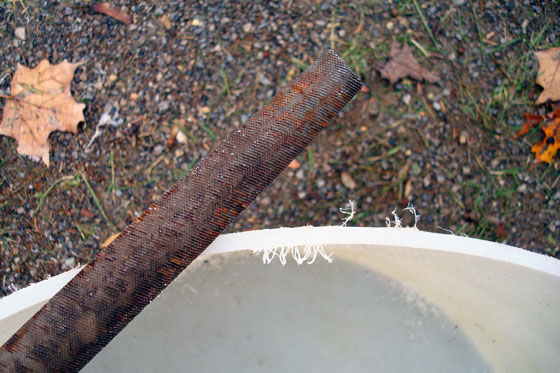
It was big. It was round. It seemed sturdy, but wasn’t too heavy. I had found my base. Now how to make it into an ottoman? I mulled the question of how to upholster it over for a little while. Here’s the technique I came up with. 1) Cut the barrel to my desired height–roughly equal to the height of Strandmon’s seat. I initially planned on using my hack saw, but then I realized that between the thickness of the plastic and the massive circumference of the barrel, cutting it manually would take forever. Plan B was my circular saw, which was much, much faster. Note: an extra person (thank you, Matt) to hold the barrel while you’re cutting is essential.  Go over the cut edge with a file to smooth out any rough spots and remove any plastic strands.
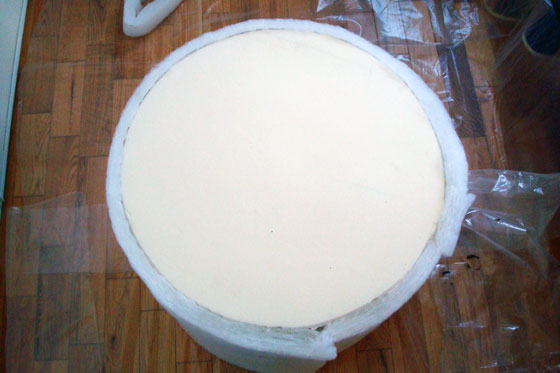
  2) If your barrel still looks like something that’s been sitting outside for who knows how long and really isn’t something you can see yourself bringing into your house, give it a good scrubbing. This is probably a good step regardless because you never know what’s been inside the barrel. Well, some of you might, but I sure didn’t. 3) Pack on the padding. I used a piece of 2 1/2-inch thick foam for the top. Using my barrel as a pattern, I traced a circle onto the foam. The foam cut easily by hand with a serrated bread knife, although I’ve heard that an electric carving knife also works. Using spray adhesive, I attached the foam to the top of the barrel.

Note: Working in a barn avoids spraying sticky glue onto your floors, but you may end up with a few pieces of straw stuck to your stool.
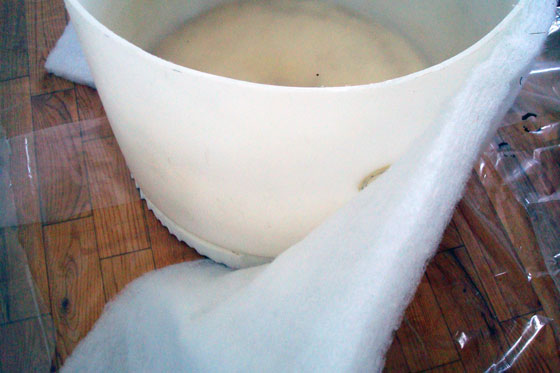
4) To soften up the sides, I took batting left over from my dining room chair upholstery project and glued it to the sides of the barrel. It was at this point that I realized I had less batting left over than I thought. As in not enough to complete the ottoman. So the padded barrel came into the house and sat until I could go to the fabric store. During the waiting period, I found out that the spray adhesive maybe wasn’t going to work quite as well as I’d expected. Basically, the barrel shed its fluffy skin.  6) However, I was undeterred. Once I had more batting, I reattached the first layer using the same spray adhesive. By this point, it was cold outside, so I was working in the house. Note: Be prepared for some overspray. A drop cloth will help, but you will end up with sticky socks.
  7) You’ll notice that my batting was a little patchy. To smooth it out and hold it in place, I added two more layers of batting over top of the whole barrel. I’m going to try to explain how I did this, but if it’s not clear, feel free to ask for more information in the comments. I draped the big sheet of batting over the whole barrel making sure it hung evenly down each side.
 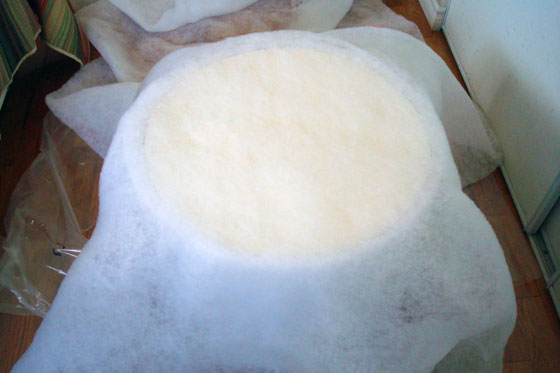 Working in sections of about a quarter at a time, I sprayed the barrel with the adhesive, smoothed the batting down the side and stuck it in place. If you think of the barrel like a clock, I worked at 3, 6, 9 and 12 o’clock. In between each quarter section, I had extra batting. These looked like big triangle wings. I carefully took my scissors and cut off these wings. I wish I had a better picture of this, but my scissors hand was busy being camera hand in this moment. I snipped roughly where the arrow is pointing.
 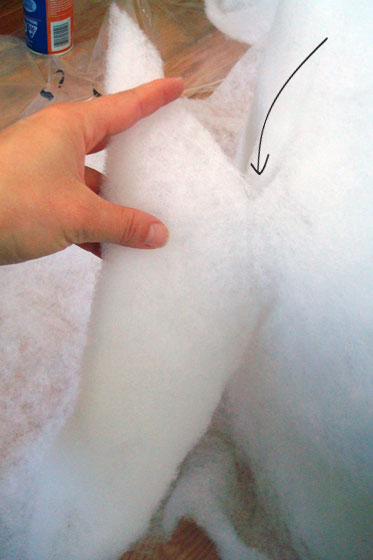 The nice thing about batting is that it doesn’t fray, so I could just snip it off and the smoosh the edges together. The join wasn’t perfect, but close enough ended up working just fine.
 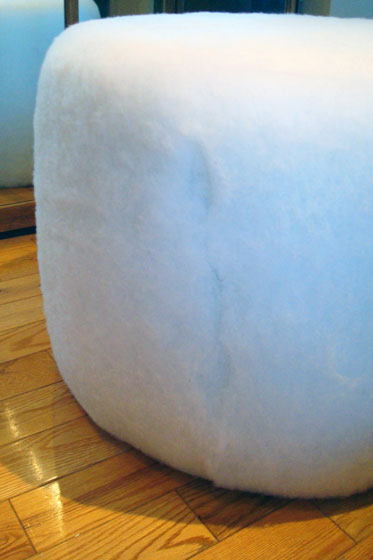 At the bottom of the barrel, I trimmed the batting so that I had about 6 inches overhang. Then I pulled it taunt, smoothed it out, wrapped it around the edge and tucked it up inside the barrel. A spritz of adhesive held it in place.
  Now I had a giant fuzzy marshmallow. Um, yum?
  7) To protect the batting, make sure it stayed attached to the barrel and ensure a smooth surface to overlay my fabric, I decided to make a lining or slipcover before putting on my final upholstery fabric. This was also an opportunity to test my pattern for my outer fabric. To figure out the pieces for the slipcover, I measured first the circumference of my ottoman and then the height. I cut out a rectangle that was as long as my barrel was round (80 inches) and 8 inches wider than my barrel was tall (25 inches). Using the circumference measurement, I was able to figure out the size of circle that I needed to cut for the top of the stool. After a brief consultation with my resident math teacher, I remembered that Pi x diameter = circumference. So for my 80 inch around stool, I needed a circle that was approximately 25 1/2 inches in diameter (80 / Pi = 25.47). I started by cutting a 25 1/2 inch square, folded it into quarters, and then using a very makeshift compass I drew an arc that gave me the curve of my circle. I cut along the arc, and voilà a circle.
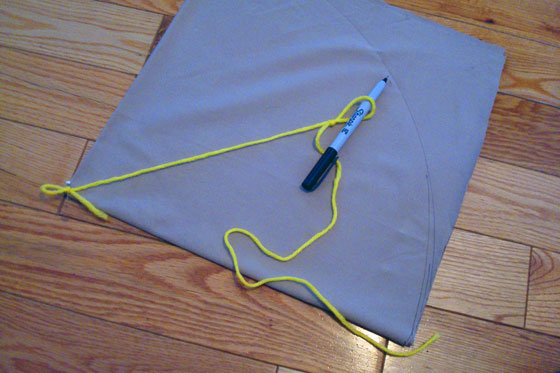
Note that length of the string should be equal to the radius of the circle (half the diameter).
Before unfolding the circle, it’s helpful to mark the outer quarters (basically 3, 6, 9 and 12 o’clocks again). They’ll come in handy later. Now that I had my top, it was back to the sides of my slipcover. I joined the short ends of the rectangle to form a tube, stitching them together on my sewing machine. This is a good point to “try on” the cover. I slipped the tube over the footstool and adjusted the fit as necessary. You’ll notice I haven’t talked about adding seam allowances. I had them at first, but I found that the cover was looser than I wanted. To get a smooth, close-fitting cover, I found going with the actual measurements of the ottoman worked best. Once I had the fit I wanted, I marked the tube in the same way that I’d marked the circle. Using the seam as 12 o’clock, I marked the tube along one edge at 3, 6 and 9 o’clock (rather than measuring, I just folded the tube in half and then half again and pinned at the creases). Then, I pinned my circular piece of fabric to my tube, starting at each of my marked clock points. As I made my way around the circle, I had to smooth things out a little bit since I was joining a straight edge to a curved edge, but with some patience and adjustments everything lined up. 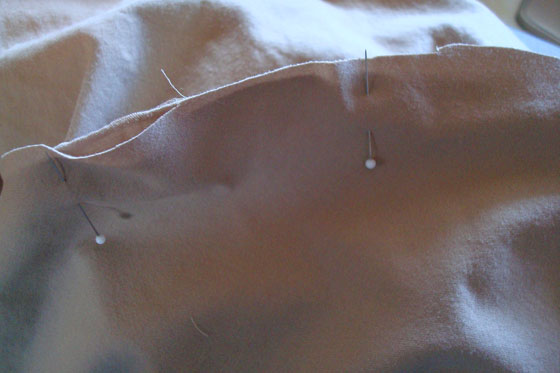 8) Finally, I could sew the cover. I took it fairly slow as my machine stitched around the circle, and then I held my breath as I flipped it right side out and slipped it over the ottoman. Victory! It fit perfectly. 9) Now to finish the bottom edge. Remember, it was about 8 inches longer than than the barrel. I turned the raw edge under by a 1/4 inch all the way around, and then I turned the bottom up an additional 3/4 of an inch.
 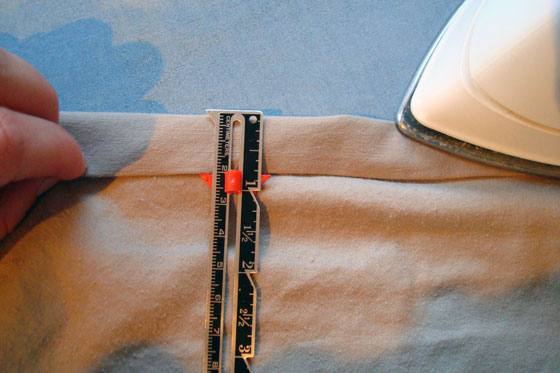 I stitched this hem almost all the way around. I left about a 2 inch gap so that I could insert a drawstring.
 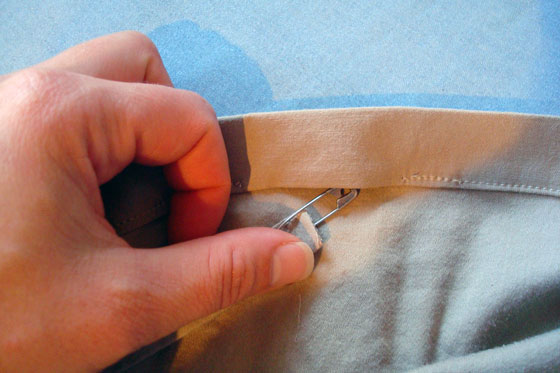 10) It was time to dress the ottoman. I slipped the slipcover over top and using the drawstring cinched the bottom tightly.
  I turned it over and… Victory #2! A pretty smooth, albeit slightly crooked, slipcover.

Note to self: In the future, straighten out the cover before taking the photo.
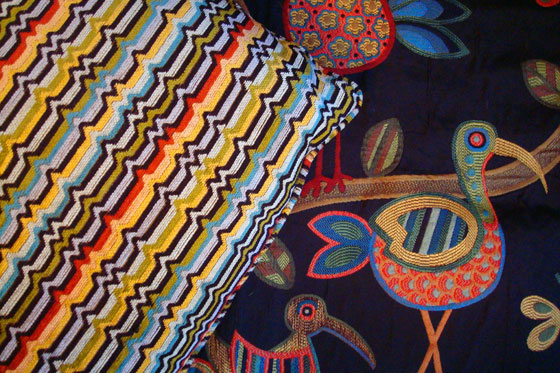
With my pattern perfected, it was time to move on to the official fabric. The search for this fabric had taken my Mom, her friend and me up and down the fabric district, in and out of every store. I was carrying one of the cases from the couch throw pillows, trying to find a fabric that was equally vibrant and equally fun. In one store, I went over to a particular bolt and said, “I love this fabric. I actually bought a few yards a year ago, just because I couldn’t bear not to have it.” My Mom’s friend said, “Hold your pillowcase up.” I did, and she said, “Julia, I think that’s your fabric.” It took me a minute, but then I saw that it was absolutely perfect.  I bought some more because I couldn’t remember how much I had already, added some bright turquoise piping and carted it all home. For all of you who’ve admired the fabric, it’s Crazy Ol Bird Midnight by Swavelle/Mill Creek. To make the outer cover, I followed the same technique that I had used with the inner slipcover. I even did the drawstring at the bottom. The only change was that when I sewed the top to the sides, I sandwiched some piping in between the layers. The piping is a great pop against the black fabric, and I think it makes the ottoman look a bit more professional.
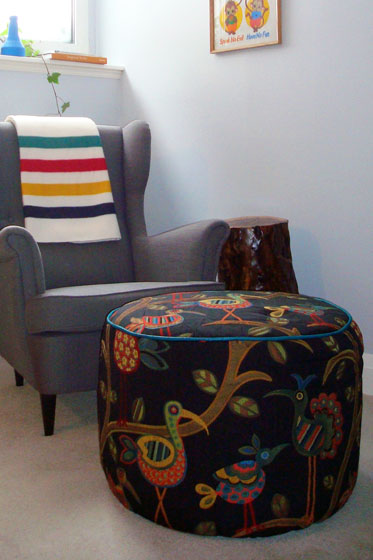
 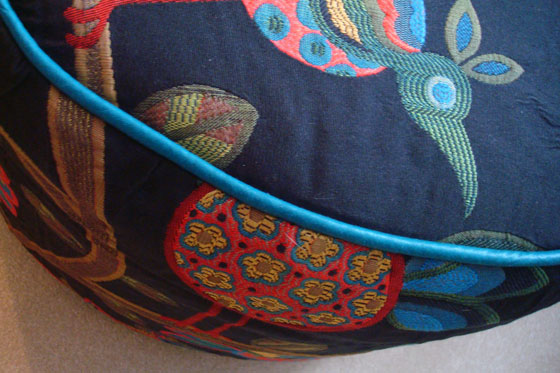 And here’s my finished ottoman sitting with Strandmon and the stump table in the reading nook.
  I love it. This ottoman is such a fun addition. It makes the reading nook a really comfortable spot to hang out. If you have any questions about the construction please let me know. Have you ever used something unconventional (like a plastic barrel) for furniture? What upholstery projects have you tackled?
Update: While I know everyone doesn’t have a plastic barrel lying around outside, it just occurred to me that a plastic garbage can would probably work in much the same way and be close to the same size.
Linking up to: Happy Housie DIY Challenge Party: Fabric Projects, Happy Housie DIY Challenge Party: Patterned and Textured Projects













 Home on 129 Acres