Last post I shared plans for Ellie’s playroom makeover. Today, I’m back with an update. Thanks to March Break, we’ve made really good progress.
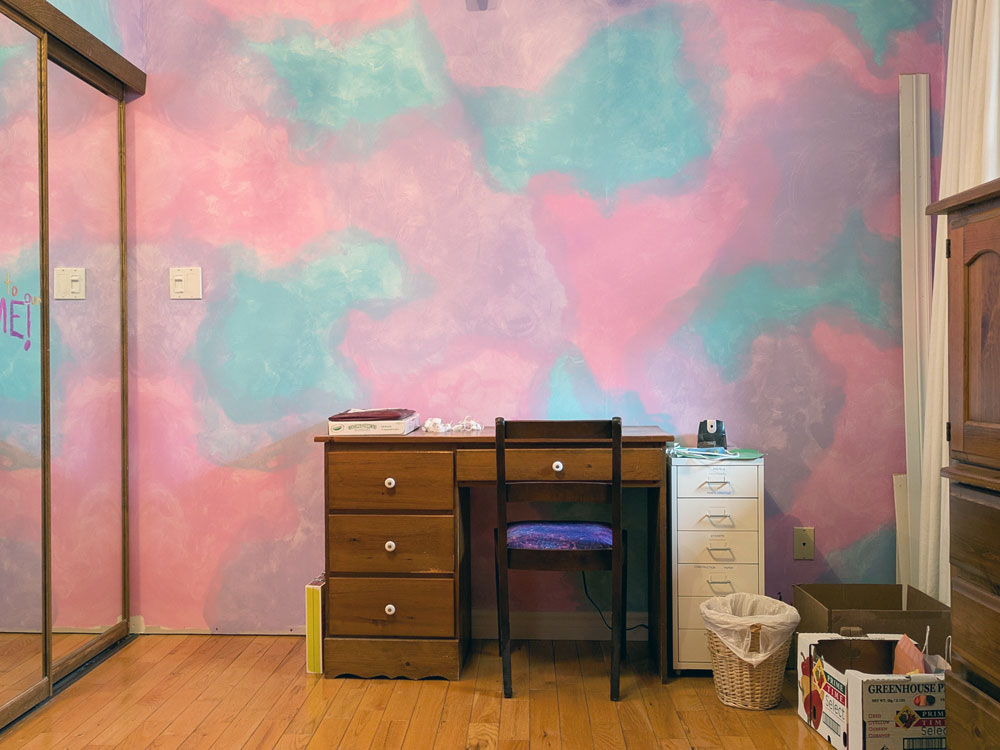
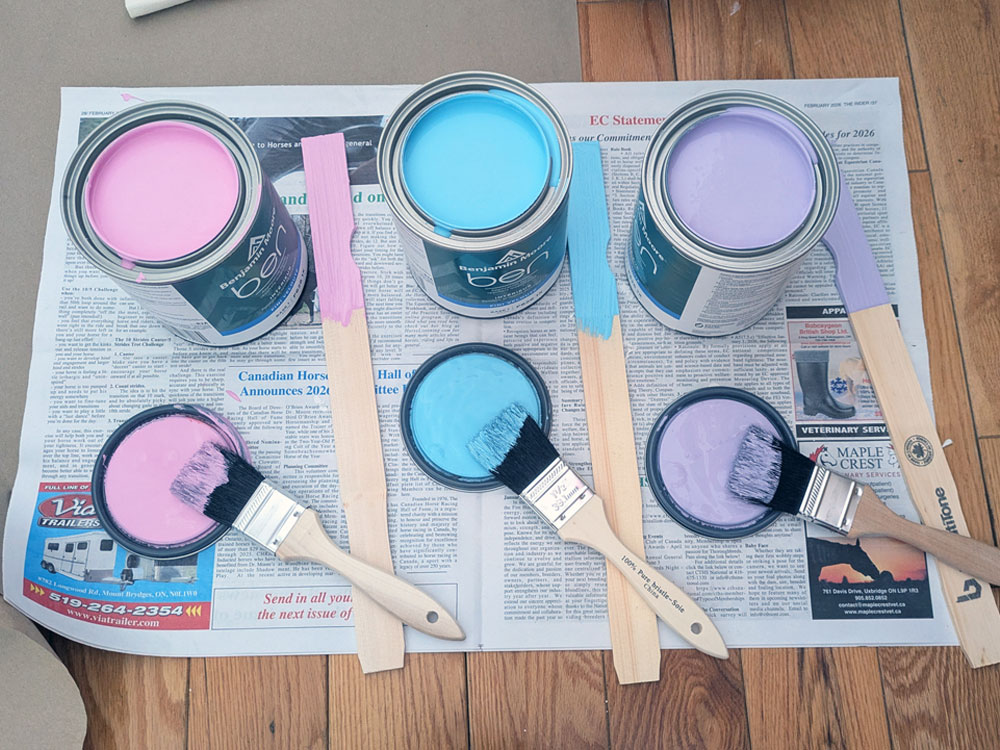
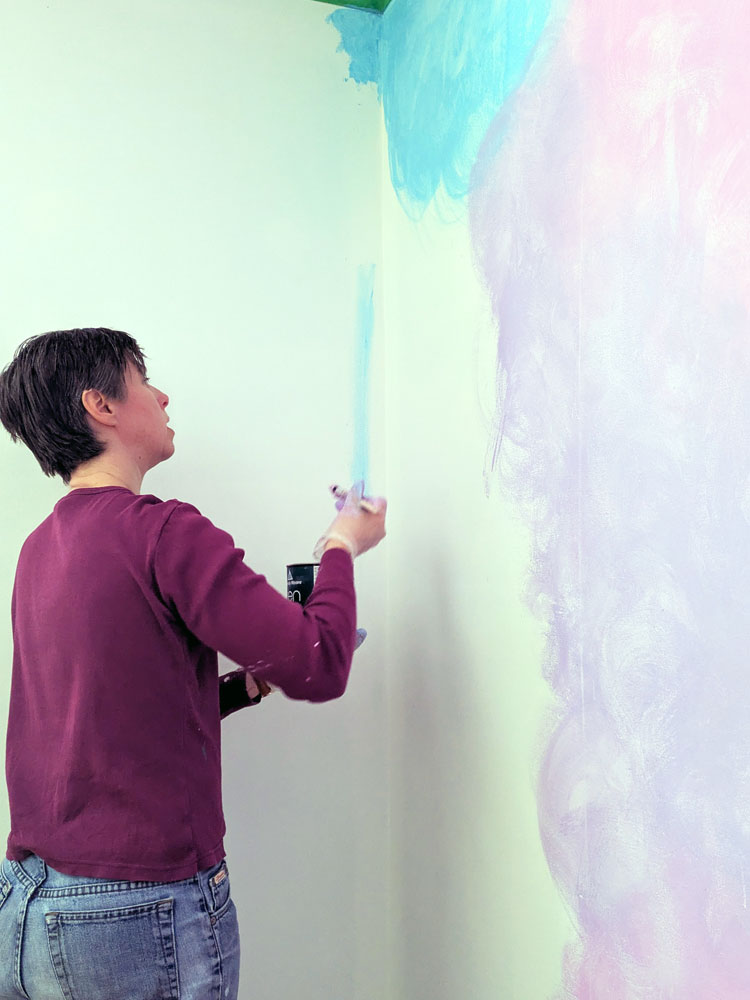
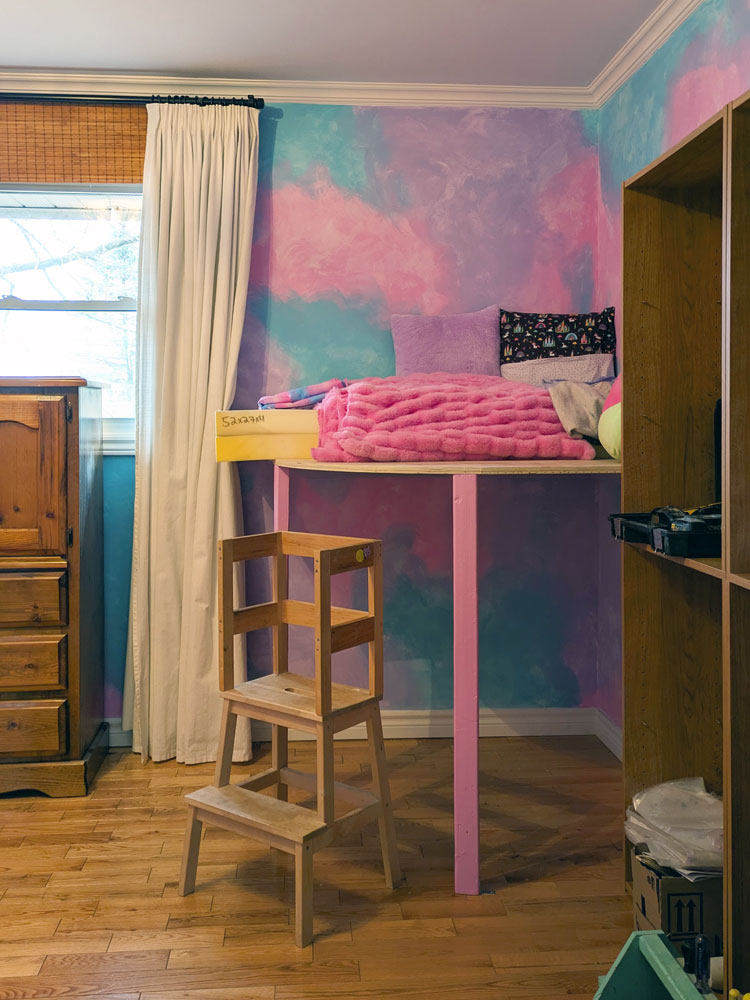
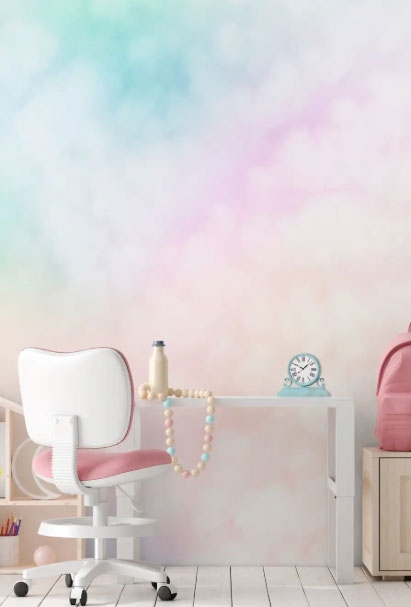
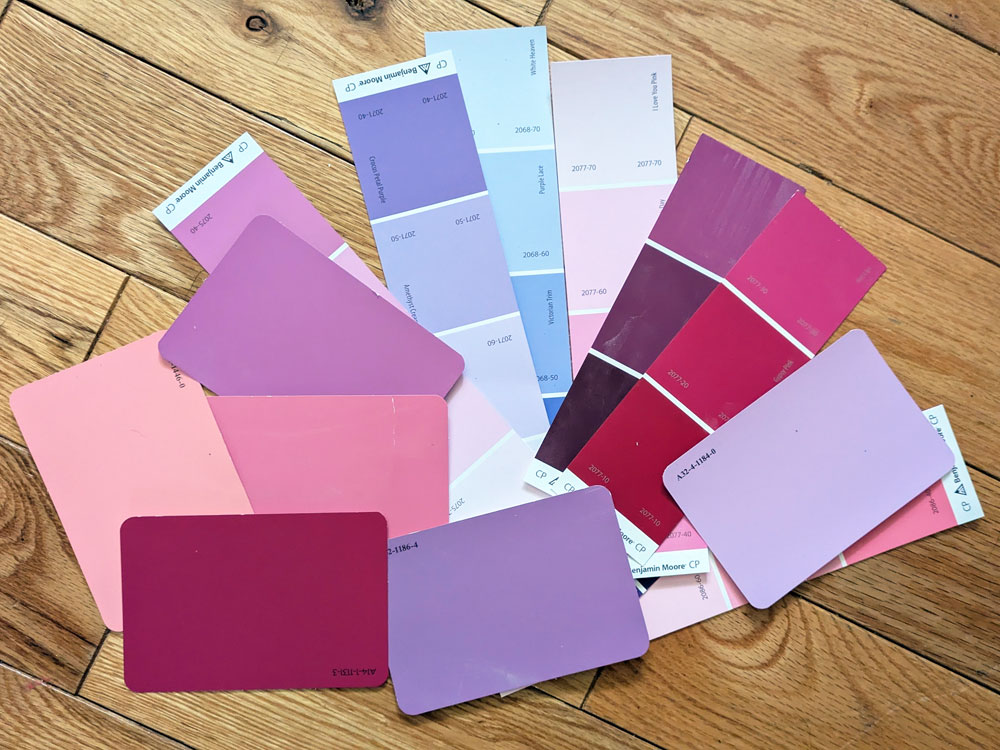
The biggest milestone is paint. Look at these walls. Ellie couldn’t decide what colour she wanted. Then she spotted a pink, purple and blue cloud-like shoebox and said, “If I could paint the walls like that, that’s what I want.” We took a look for wallpaper, sought advice from staff at a couple of paint stores, searched for tutorials online, collected lots of paint chips, tested some samples and then went for it. She loves the result.
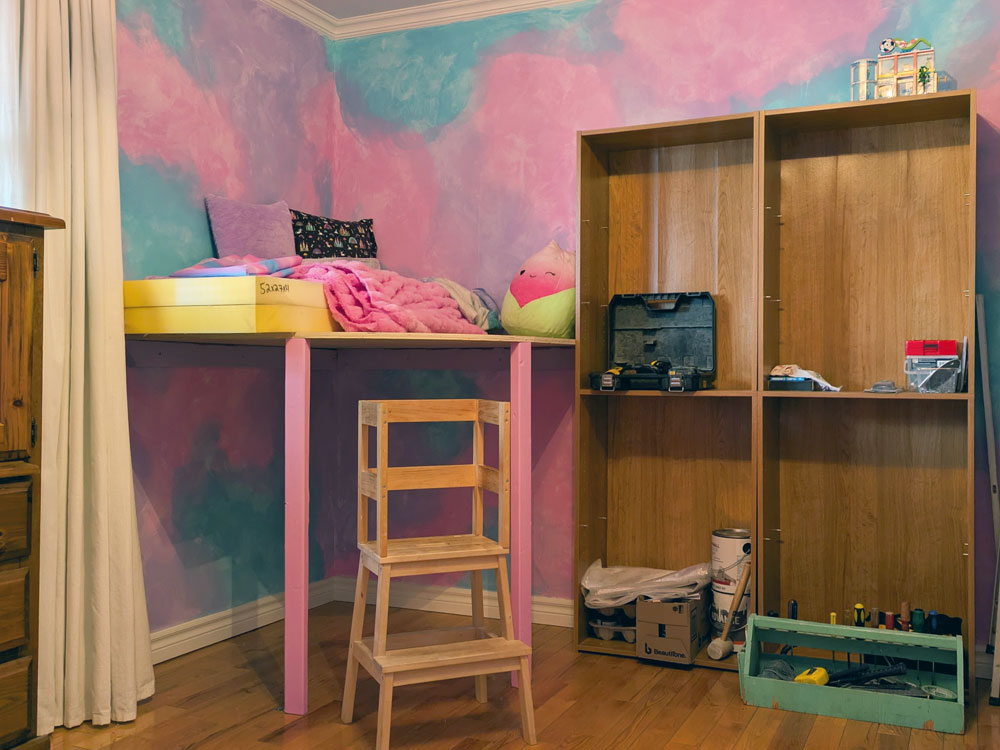
We also started building a cozy corner. High on the priority list for this room is a reading nook. Ellie loves an oversized chair, so we considered a few options and then decided to build a loft nook. This way, she still has a lot of floor space for other activities. The platform is in place and next up is cushions (and a taller ladder).
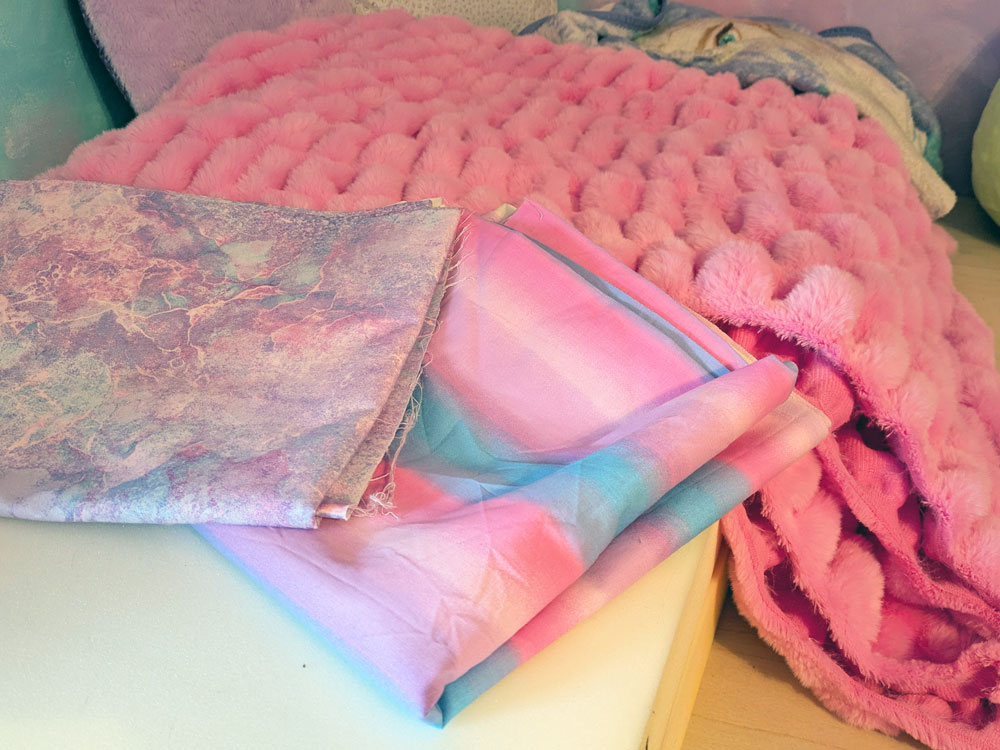
On the topic of cushions, while she was off for March Break we also went fabric shopping. Ellie picked out a bunch of beautiful fabrics that all coordinated really well with the walls and with each other. We’ve recovered the desk chair already. Other fabrics are going to make curtains and a cushion for the cozy corner and cover a large bulletin board that we’ll hang over her desk.
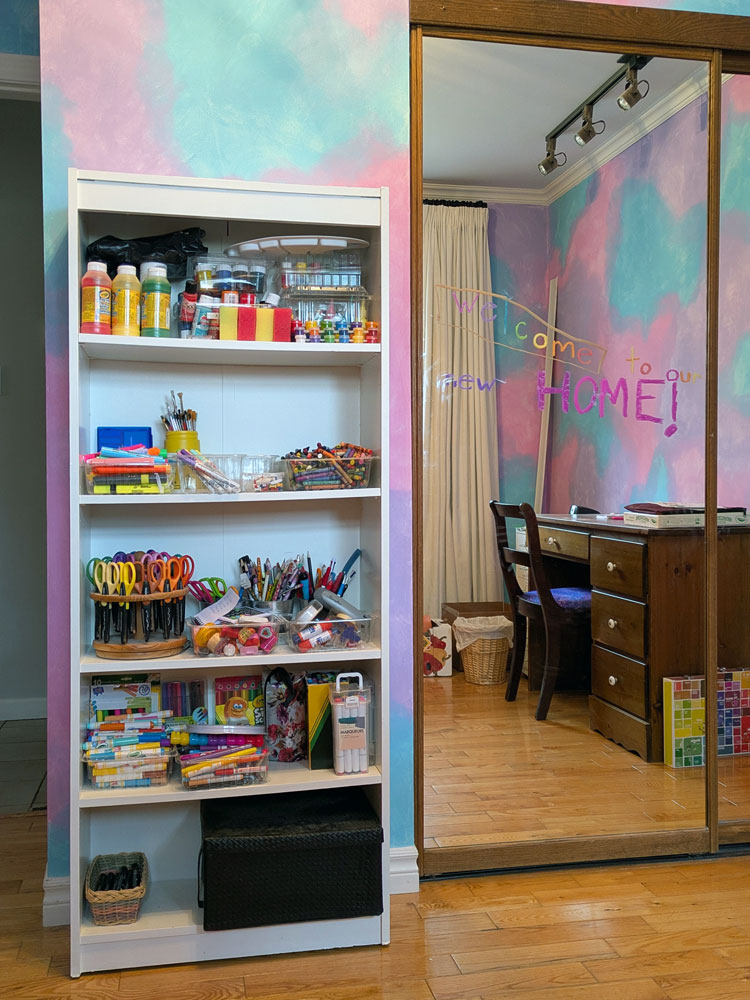
We’ve already started putting the room back together a little bit. Shelves and bins are set up in her closet, and we’ve loaded them up with crafts and dolls (note the welcome message on the mirror). The desk is in place, curtains are hung, and we reorganized her main craft shelf. The dress-up zone is back with hooks and a big basket of outfits. Matt’s nephew helped me carry in some bookshelves that we had stashed in the barn, so I’ll be redoing those to give Ellie more storage. Some pillows and blankets have been added to the cozy corner and we’ve already snuggled in with a few chapters of her current book.
This is turning out to be a really fun project. Everything is designed for Ellie and what she likes and what she does. We’re really enjoying working on it together and seeing it come to life.
Imagine you are a creative young child. Your mind is brimming with ideas for drawings, stories and crafts. You’re inspired by everything you encounter and want to try so many things.
Now imagine the perfect space to fulfill all of that imagination and creation.
That is my goal in making an amazing play space for Ellie.
This project has been on my wishlist for awhile, and we’re finally making it happen.
The space we’re using is Ellie’s old nursery. This room has gone through a few different phases.
When we first moved in, it held boxes that we hadn’t unpacked… for about five years. Then it became my office. Then Ellie’s nursery. Then a shared office-sewing-creating-playing space for both her and me… but with no real functional or decorative changes.
Now it’s time to make it Ellie’s own room again.
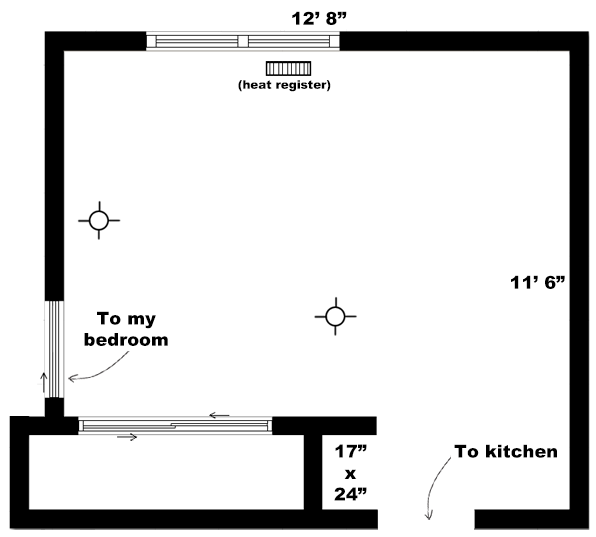
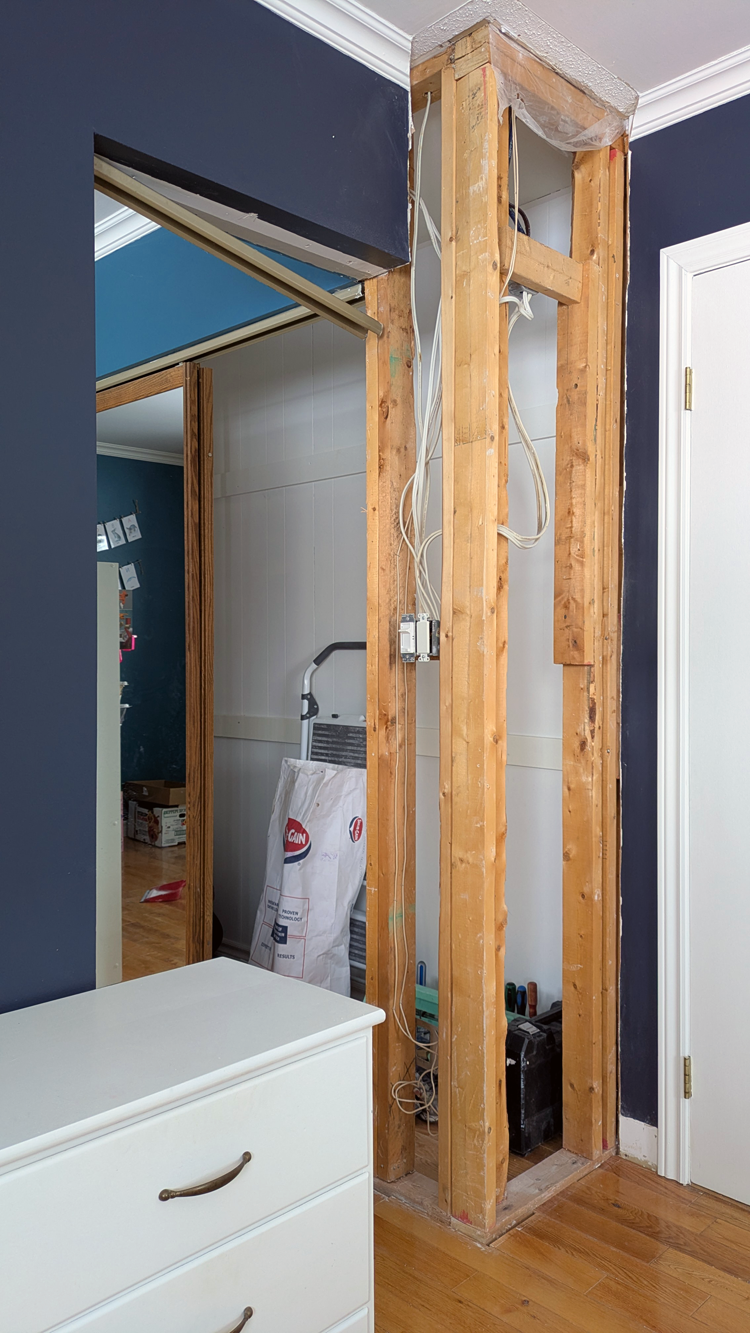
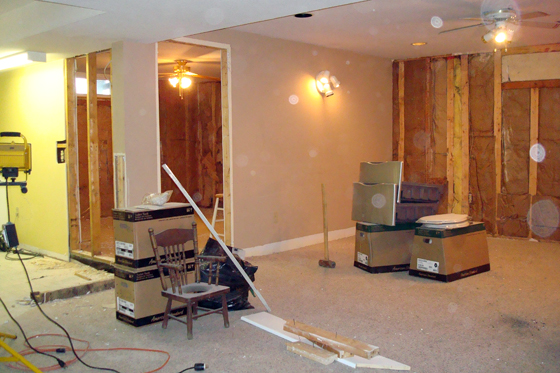
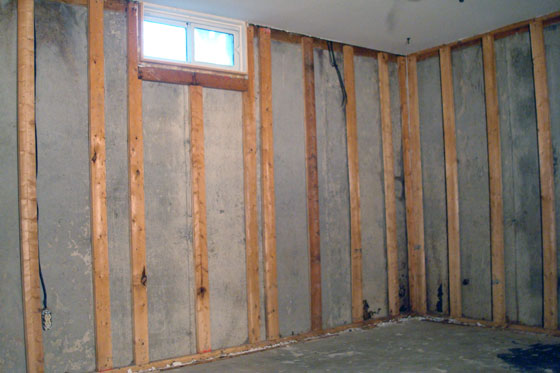
The first step was a bit of construction. Some readers may recall that there was a pocket door between this room and my bedroom. It was helpful when this room was Ellie’s nursery, but not necessary any longer. So I wanted to fill in the doorway. Normally this would be straight forward, but I decided to make it more complicated. Beside the pocket door and behind the door to my bedroom, the wall bumped out by about one foot. If I was going to wall-in the doorway, I might as well straighten the rest of the wall at the same time. (The floorplan below might help to clarify my description.)
I removed the little bump out. This involved stripping the drywall, taking out the old studs, relocating some electrical, framing the new wall and hanging new drywall.
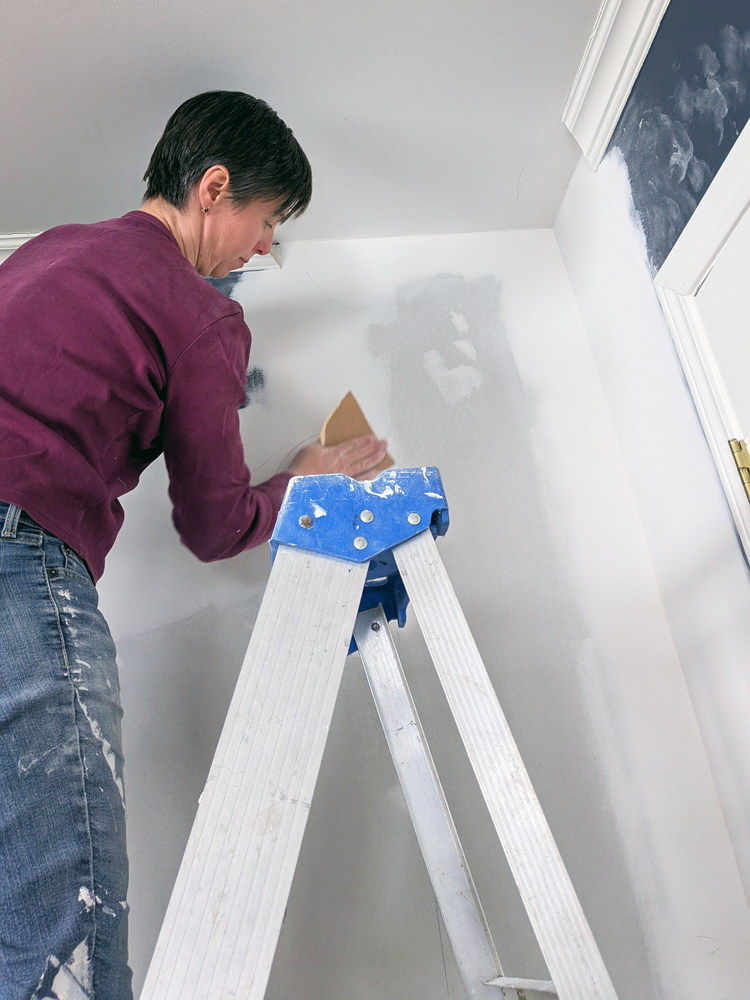
I finally finished the drywall on the weekend, so we are now ready to officially begin the playroom makeover.
First up is paint, and Ellie has picked such a fun design–pink, purple and blue water colour tie dye. We have plans for a little loft in one corner, which will serve as a cozy reading nook on top and a secret fort below. My DIY knock-off Eames hang-it-alls will return for a dress-up zone. Matt’s desk will remain to give her a good crafting and creating spot. And we’ll be adding lots of storage for all of her toys and supplies.
We’re both really excited by this project and are enjoying working on it together. I’m sure we’ll be even more excited with the result.
Last year was a big year for home projects. This year is a little smaller in some ways. The list is shorter, but what I’m hoping to accomplish still feels big. Read on for all the details of what’s on my list for home goals 2026.
My first goal is Ellie’s playroom, a carry over from last year. Our girl is so creative and I really want to give her a special space for whatever she wants to do. This will be the first project of the year. (In fact, it might already be underway.)
Garden(s)
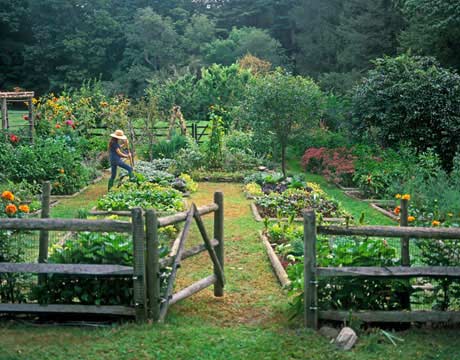
Source: This photos is several years old, but it’s still a beautiful inspiration shot for me. It was originally from Country Living, but the link is not active. It is of Pamela Page’s garden.
Forget the year of the horse. 2026 is the year of the garden(s). The vegetable and flower gardens have received very little attention for the past several years. I’m hoping to change that this year. My main priority will be the vegetable garden, but if I have enough time and energy, I’d like to give the flower gardens some attention too.
Prepare for the worst
Preparing for the worst was on my list in 2022. I’ve taken some steps, but I’d like to do more. Some of the things on my mind are involved like working on a back-up power solution. Others are simple like running a fire drill. Some are tedious like making sure I have copies of important documents. This is an ongoing undertaking, and putting it on my list will hopefully motivate me to give it more attention.
That’s it. That’s the 2026 list. Three things.
Of course, other things will come up through the year. Ellie’s playroom will likely make some dominoes for the living room and my bedroom. We should have time to handle them.
Last year was productive and busy and fun. Taking things a little slower this year can also be productive and fun, but maybe a bit less busy.
What projects are on your list for 2026? Are you focusing inside or outside this year?
I tackled the biggest projects we’ve done in a while here at the farm–maybe ever when I think of the birds who are now a fixture of the farm.
When I laid out my home goals a year ago, I was very excited by what was ahead. As I look back, I’m very excited and proud of what I accomplished.
Here’s my look back at Home Goals 2025.
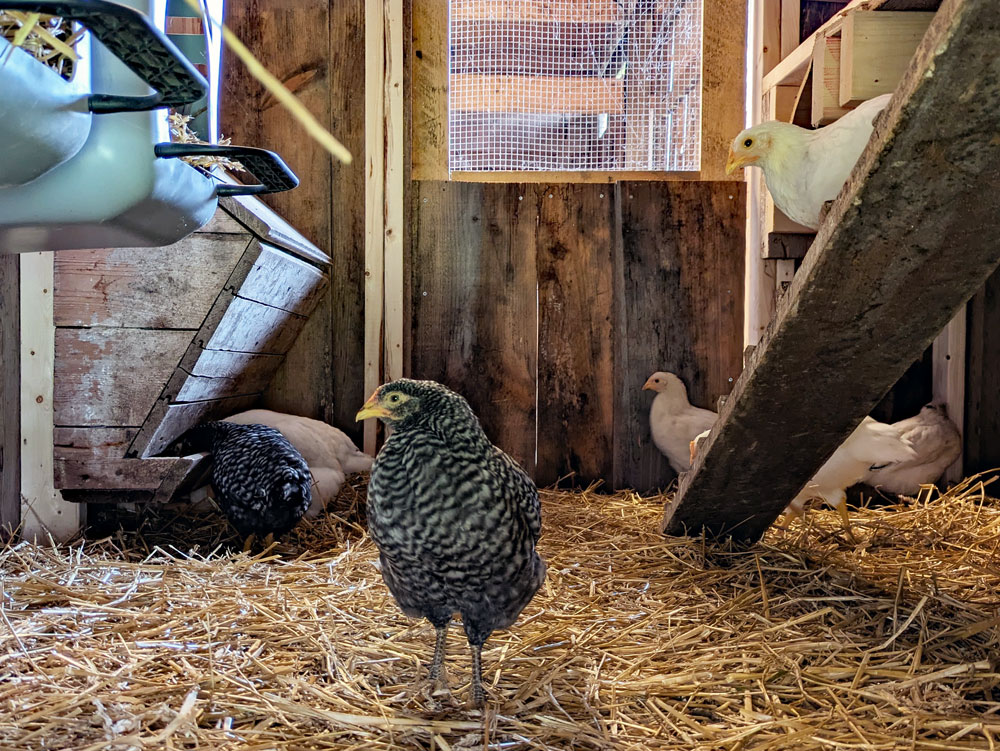
Coop
The coop was a big construction project and it turned out so well. The barn, pens, storage, and runs all work very well and have kept our birds comfortable and safe. Adding birds to our family has been a very special, fun experience–even the turkeys.
While it’s not directly for the coop, there was another big barn task I completed last year: eavestrough. I’ll be sharing more details about this project in an upcoming post.
My office
My office was the first project of the year. It is a comfortable, personal room. Having this space for working, writing, crafting, sewing, whatevering has been so nice.
It’s also helped me to be more focused with my worktime. I still bring my computer to the couch occasionally, but having the desk, a place for my laptop and a dedicated spot for work has helped me leave work on my desk a bit more.
Ellie’s playroom
Ellie’s playroom makeover did not happen. As fall arrived, I really wanted to tackle it, but the reality of everything I was already doing and the number of hours in a day meant that another project would have been too much. I’m glad I decided to postpone the makeover, and I’m eager to start this room this year.
Main bathroom
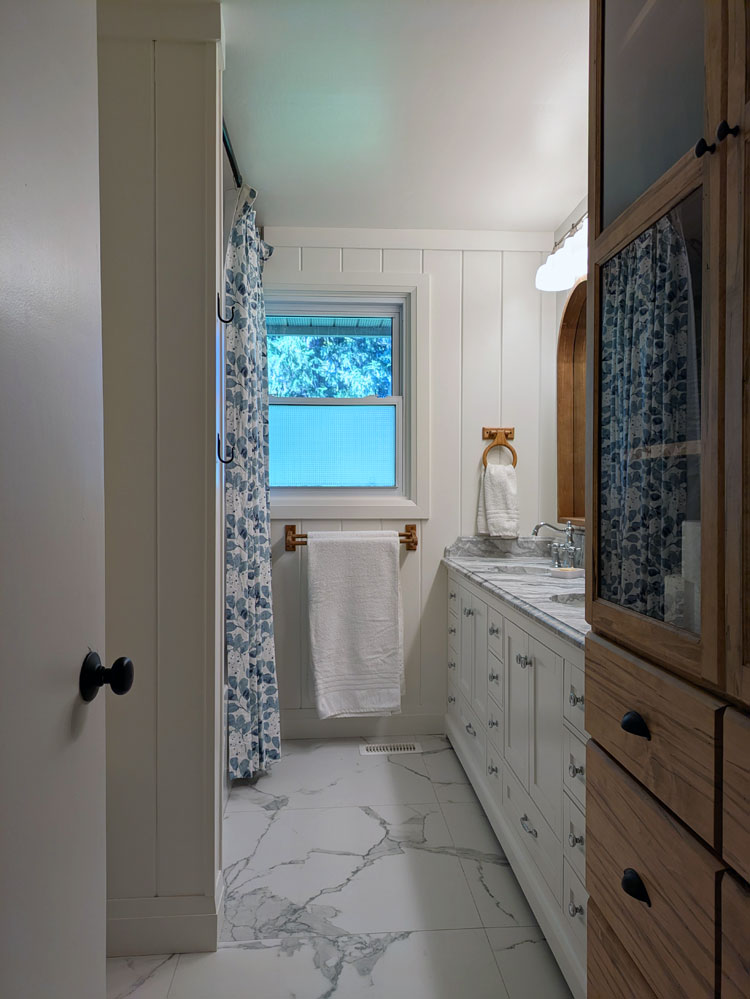
The novelty of our renovated bathroom has not worn off. Every day I am grateful for how beautiful it is, how well it works, that I did so much of the work myself and that after living here for 13 years it is finally done.
Checking off three out of four home goals feels pretty good, especially since these were big projects for us. And, I need to say it one more time, they all turned out so well. I love the changes we’ve made to the house and the farm, and I’m really proud of what we accomplished.
Did you have any big home accomplishments in 2025?
More than a year ago I mentioned I was thinking about buying a ceiling fan for our front hall. I was hoping a fan might help regulate the temperature between upstairs and down, particularly in the summer, particularly when we’re using the air conditioner.
The feedback I collected and the brief amount of research I did suggested that the ceiling fan might be more helpful in the winter. The fan would push the warmer air downstairs, more than it would pull the cooler air up.
Shortly after those musings, I was in a local store that was going out of business and I spied a basic ceiling fan on sale. I decided I was done thinking. I bought the fan.
But that’s as far as I got. The prospect of installing the fan over our stairwell was not something I was enthused about. So the fan sat in its box on the mudroom landing. For more than a year.
Then summer returned. Temperatures rose higher than ever. The basement was frigid. I really wanted to give the fan a try.
Finally, I had a brainwave. Our electricians were here for the bathroom. I could ask them to install the fan. Problem solved.
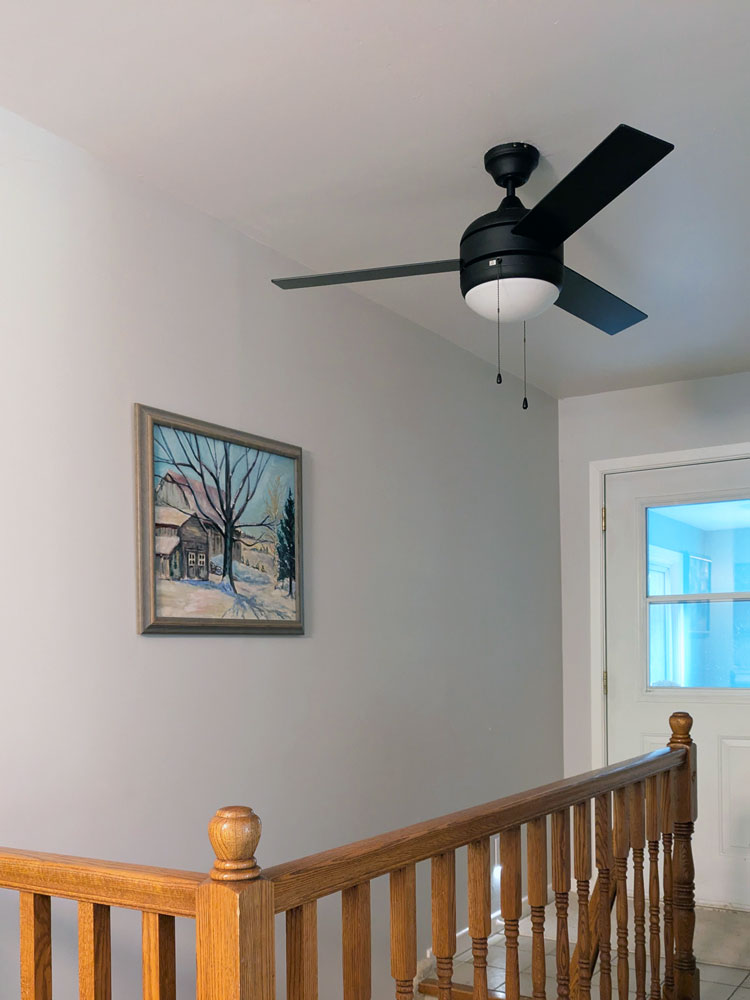
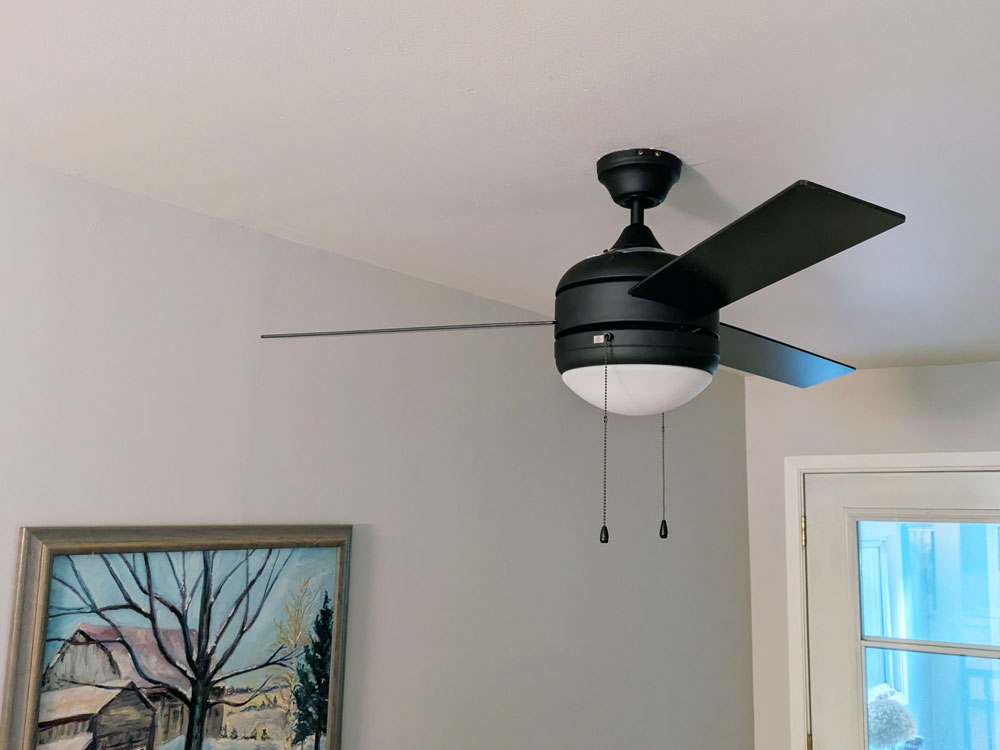
The electricians were happy to take care of the fan for me. And I’m very glad I asked them to do it, as install included switching the electrical box with a fan-rated box, something I wouldn’t have known was needed. (Also, there was the whole hovering over the stairwell while holding a large heavy fan over your head thing.)
So we now have a fan in the front hall. I’ve been running it most days. It does move the air around, though I’m not sure I’ve noticed a huge change in the upstairs and downstairs temperatures. The air currents extend into the kitchen, so I feel a nice breeze sometimes when I’m in there.
I’m curious to see if I notice any difference in the winter.
For now, I’m happy the fan is no longer on the mudroom floor and instead on the foyer ceiling as intended.
Are you a ceiling fan fan? Any tips for this fan newbie? Who else has bought something and then gotten stuck on the install?
I introduced this year’s home goals by saying, “I am really, really excited by the projects I have planned.” Mid-way through the year, I am still excited about these projects. I’m also really, really excited by how much progress I’ve made.
What a year it’s been so far!
Coop
The coop is finished. The birds are in residence. It is awesome. I love having birds again. Seeing them walking around makes me happy. I am so proud of the coop and how well everything has worked out. I will likely continue to make tweaks depending on what the birds need (like repairing the turkeys’ door after they take it apart–again), but I am comfortable saying that for now, this project is done.
My office
Another project that’s done? My office. Transforming, decorating and organizing this space was fun, and I love having my own working, writing, crafting, sewing, creating, whatevering space.
Ellie’s playroom
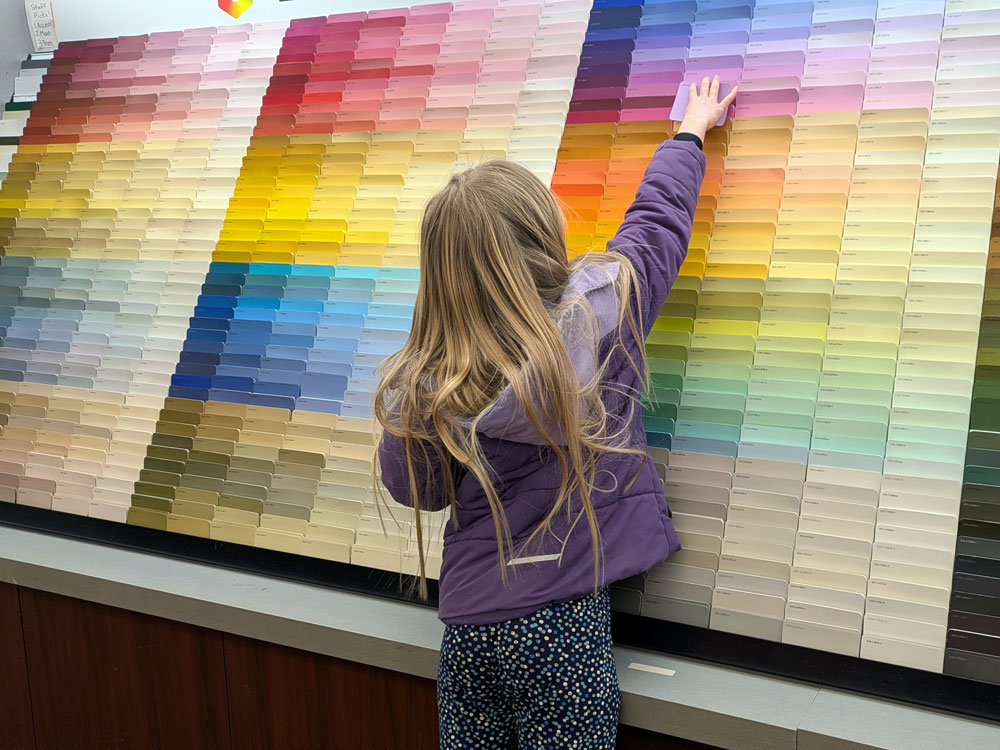
A dedicated play, crafting, creating space for Ellie is still on the list for this year. She’s been collecting paint chips in anticipation. Can you guess what her current favourite colours are? This room will likely be our fall project.
Main bathroom
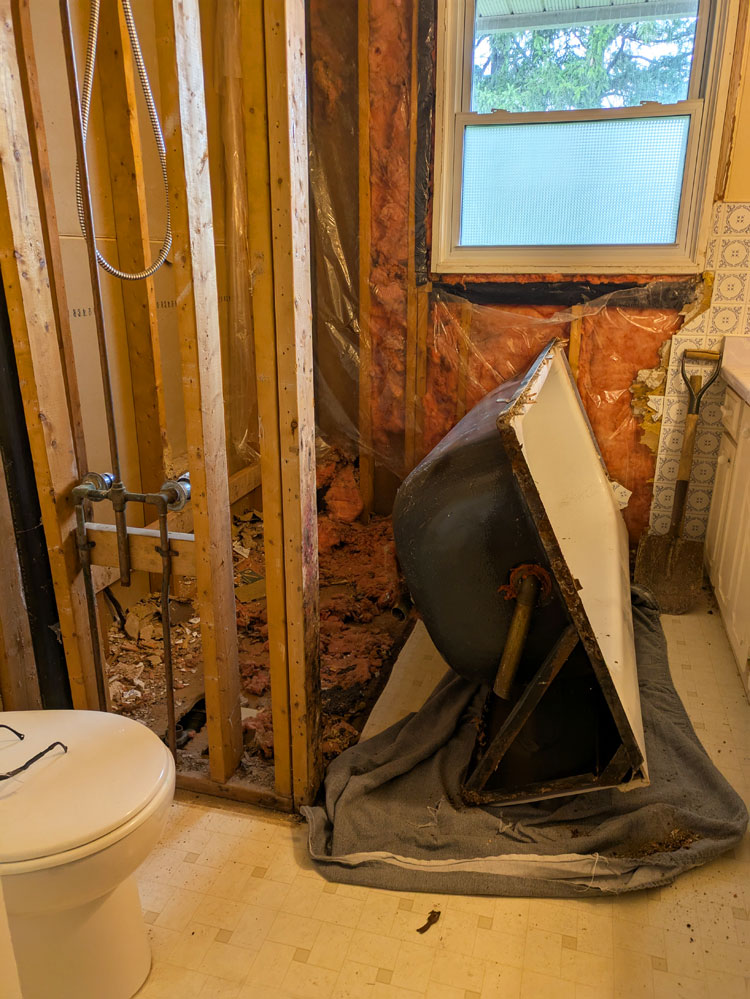
The bathroom renovation is well underway, and what a transformation. I’ve been able to do a lot of the work myself, which feels really good. My vision for the design and function of this space is turning out beautifully. I am really happy. More updates to come.
2025 is a big year. I don’t think I’ve had this many projects on the go since early days (perhaps years) or moving to the farm. It’s been tiring, fulfilling, challenging. But mostly it’s been fun. I love working on the house and the property, making it ours and making it beautiful.
I hope I can keep up the momentum for the rest of the year.
Have you tackled any project around your house so far this year? What’s on your list for the rest of 2025?Anyone else having a big house year? What’s exciting you about your house right now?
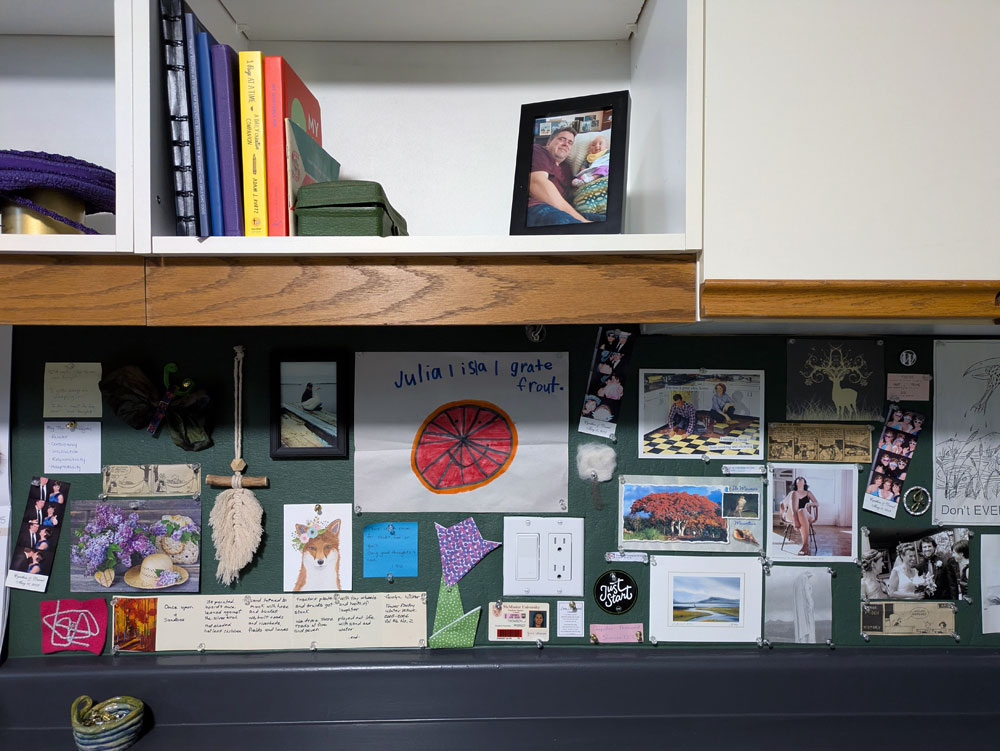
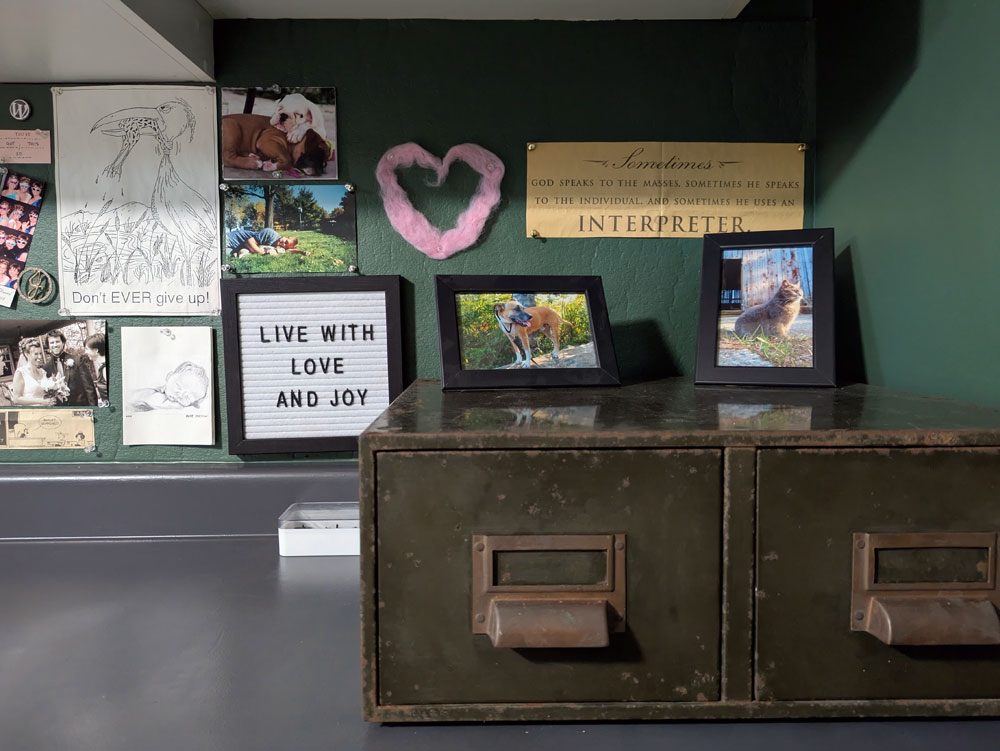
I love a bulletin board. I collect pictures, sayings, mementos–things that inspire me. There are also reminders that I jot down and Ellie’s many art creations. They all need a place to live, and my preferred home is a bulletin board.
In my new office, I debated where that bulletin board should go. Matt had one on the wall above his computer. I could do the same and even reuse the same board. But I really liked the idea of hanging some nice art above my computer instead.
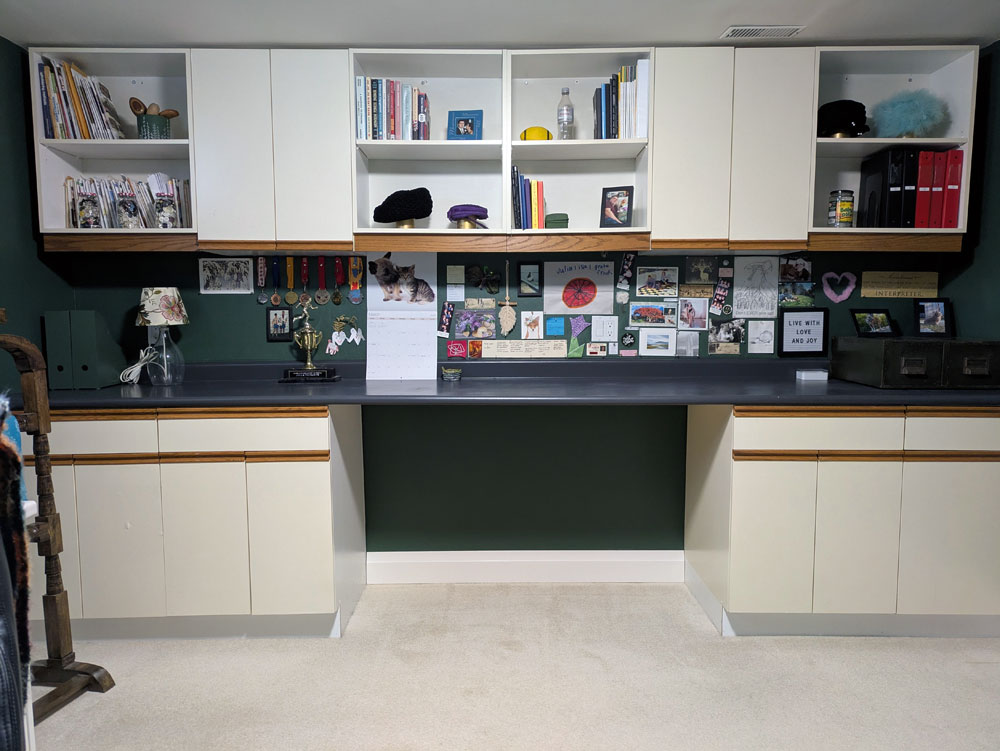
Then I thought of the cabinets on the other side of the room. What if I made the “backsplash” a giant, long bulletin board?
I had used cork shelf liner at our first house to make a bulletin board over my desk and it worked pretty well (a couple of layers were needed as this cork is very, very thin).
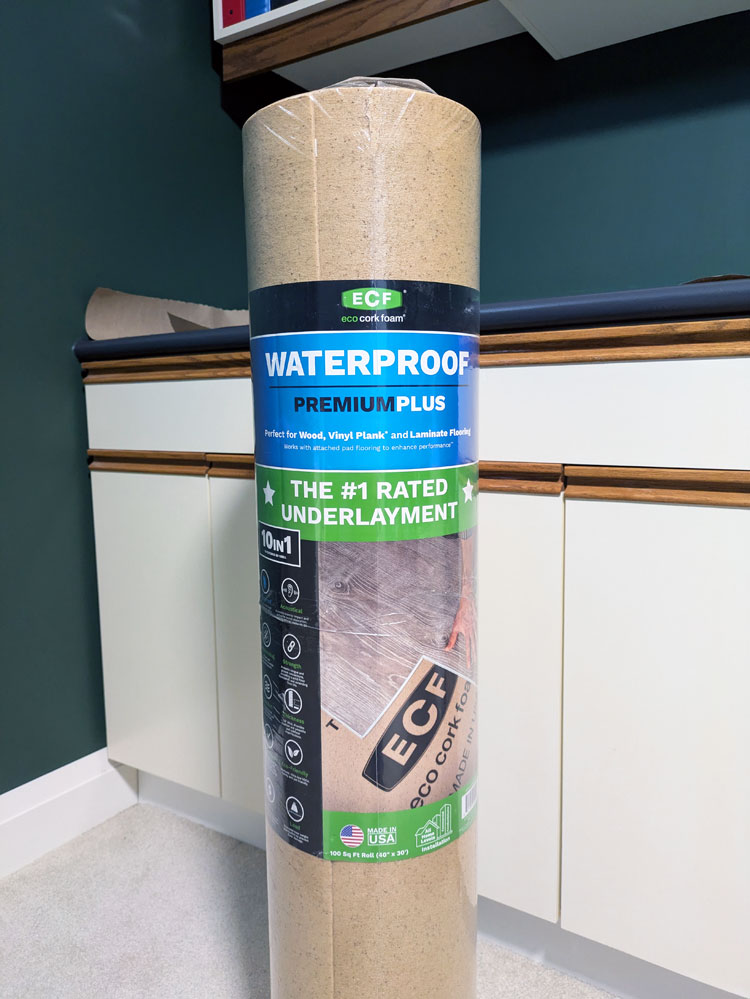
A quick tour of Home Depot showed me that I would need many, many packages of cork and it wasn’t the dimensions I needed. Then I thought about cork flooring underlayment. I had put a strip on the cold cellar door where we have our dart board. Maybe it would work for the office?
I decided to give it a try.
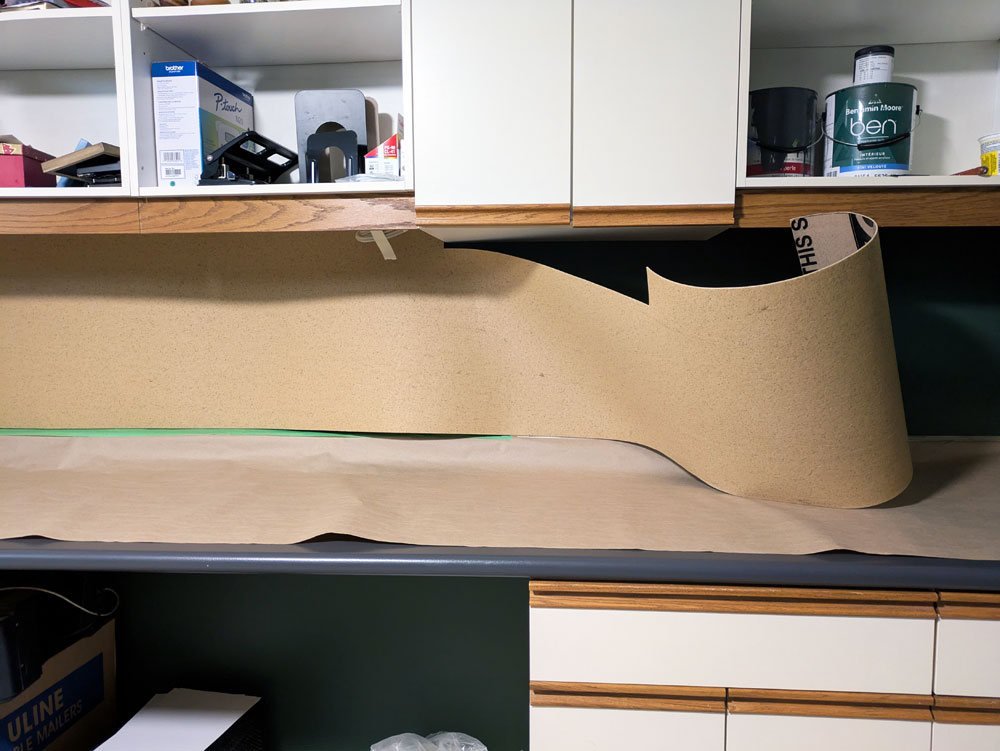
The underlayment comes in a roll 40 inches wide by 30 feet long. Plenty for what I needed.
I did a quick test. I put a couple of layers together and stuck a pin in it. It was nice and squishy and seemed to hold well.
I decided to go for it.
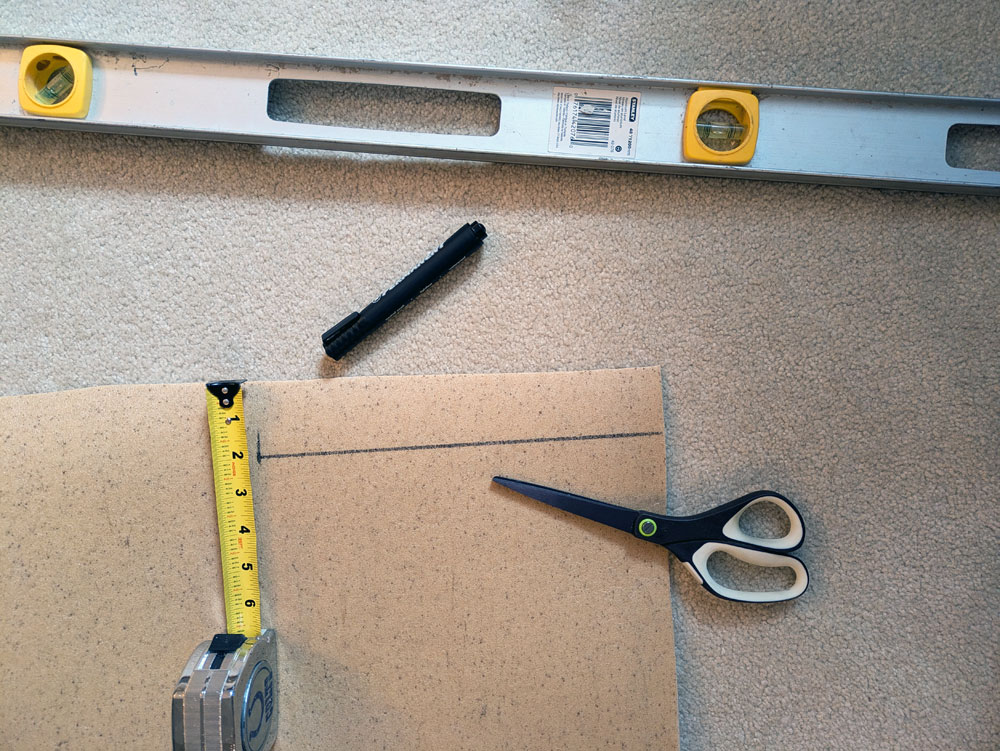
I rolled out the cork. My first step was to cut off the plastic “fringe” that’s along the one edge. Then I measured the space between my cabinets. There were a few ups and downs as a couple of the cupboards are fitted for under cabinet lights. I very carefully plotted everything out with a marker and cut along the lines with my scissors. The cork cut super cleanly and easily.
Then I took my first layer for a test fit. I had a few gaps that were bigger than I wanted, but overall it was a pretty good fit. I was ready to put it on the wall.
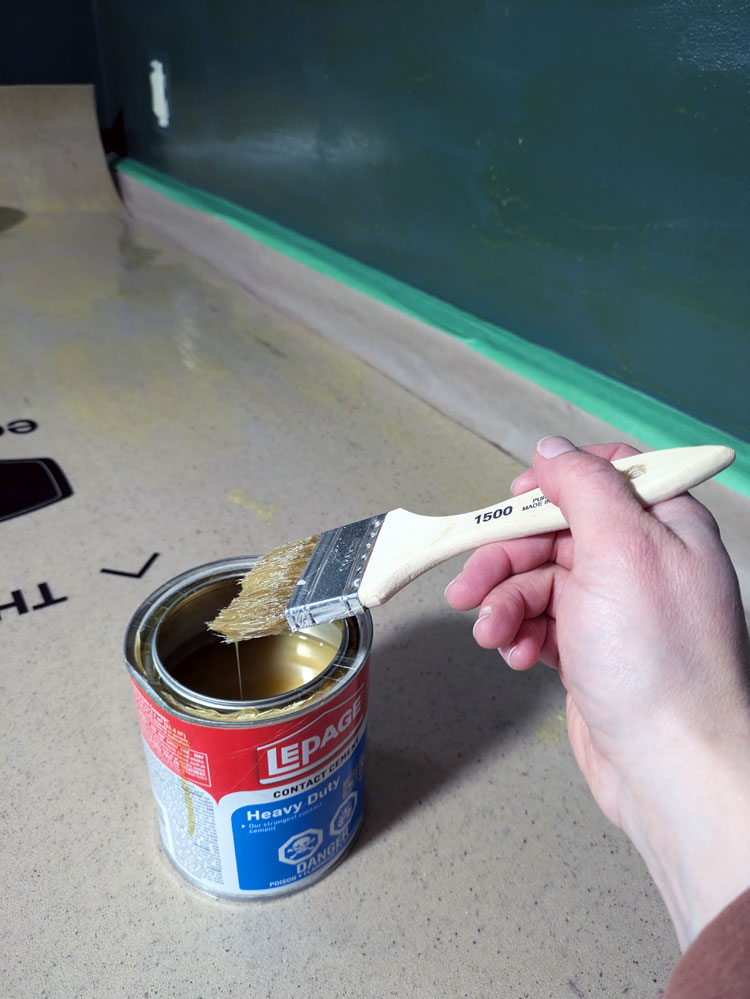
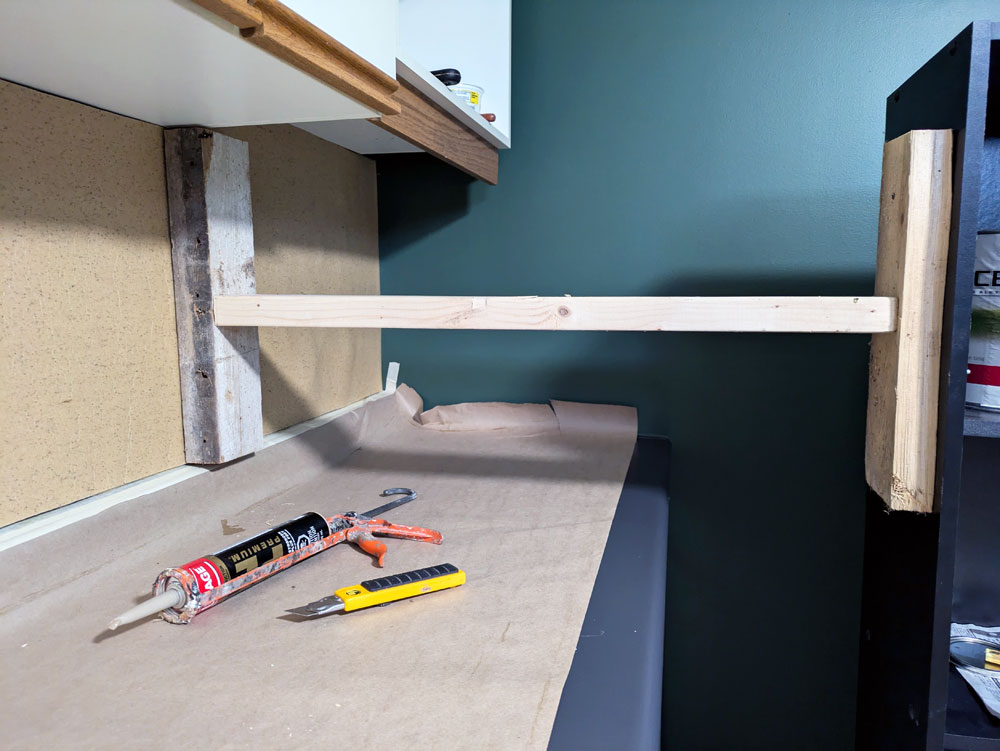
I removed cover plates from the outlets and covered the plugs with tape. I taped off the edge of my counter and covered the whole surface with paper to protect it from the adhesive. Then I laid the cork facedown on the counter and coated the back of it with Contact Cement. I also put a layer of CC on the wall. (Cheap chip brushes are good for this, as you will be throwing them out after gluing.)
Warning about Contact Cement. The fumes are super strong. I had the window wide open (in January) and the door closed.
I recommend following the application directions for CC exactly. Put on a generous, even layer. Let it dry for 30 minutes. Have an extra can of CC to make sure you can fully cover your wall and cork.
The issue I ran into in this project (more on that in a moment) was all because of the Contact Cement. I went through CC much faster than I expected, so some areas didn’t get that “generous” coating. (A 946mL can covers 25-33 square feet. My backsplash was about 20 square feet, so ideally I would have had two cans for each layer of cork.) I also was impatient (and it felt wrong to let glue dry), so I only let it set for about 20 minutes before putting the cork on the wall (still within the guidelines, but on the low side).
So after that foreshadowing, let’s proceed with the install.
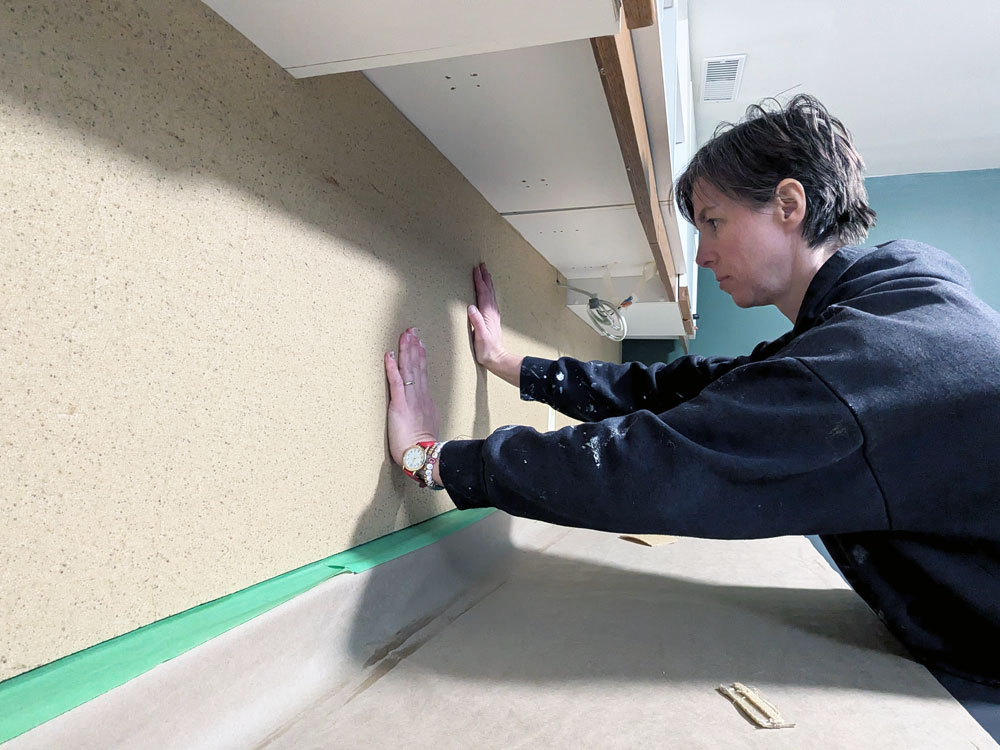
Once the Contact Cement had dried (kind of), it was time to put up the underlayment. I started at one end, got everything lined up as best I could and worked my way down to the other end. Depending on the size of your bulletin board, having an extra person would be helpful for this step. The Contact Cement on the cork sticks as soon as it touches the CC on the wall. You don’t have any wiggle room. With a long, floppy piece of cork, getting it smooth and aligned on my own was a bit awkward.
Once the underlayment was in place, I went over the whole length of cork and pushed it firmly into the wall. I went back and forth, up and down several times.
Then, I did it all again for a second layer. I was able to make some adjustments to my measurements to compensate for the little gaps I had in the first layer. I also cut out the plugs between each layer, just a rough cut around the outlets for now.
Two layers likely would have been enough, but I could still feel the wall when I pushed in a pin, so I decided to add a third layer of cork. However, I was out of Contact Cement, so the third layer had to wait until a trip to the hardware store.
When I came back the next day, I was dismayed to discover a huge bubble at the end of the bulletin board where I’d done a thinner coat of CC. This was also the spot that had cured for the shortest amount of time. The other end was smooth, flat and securely adhered.
I decided to slit the cork with my utility knife, peel it back and repaste it on the wall with my fresh Contact Cement. Then I proceeded with my third layer of cork, which I knew would cover the repair.
The next day, though, was deja vu. There was another bubble at the same end, and this one seemed even larger. My initial reaction was, “Well, I guess I know where I’m hanging the calendar.” But as I looked at the bubble, it seemed too large to leave. It was a significant bulge and would have been noticeable even behind a calendar.
So I came up with a plan. I would cut a small slit in the cork. Then I would fill the bubble with construction adhesive. I would brace a 2×4 against the cork to push it into the wall while the adhesive set.
So I went to work. My small slit became quite large, as I cut open the whole bubble. But I was able to squirt construction adhesive into the whole area. Then I put my brace in place and not so patiently waited the prescribed 24 hours.
When I took the brace out, the bubble was gone. The cork was perfectly flat and securely stuck to the wall. The cut wasn’t super noticeable, and I hoped it would disappear even more with a coat of paint. Worst case, it was still a spot to hang my calendar. (Spoiler alert: the calendar ended up elsewhere.)
I decided to paint the bulletin board because I didn’t love the colour of the underlayment. It’s a bit yellow and not a true brown cork. Plus I liked the idea of the bulletin board blending in with the rest of the walls a bit more.
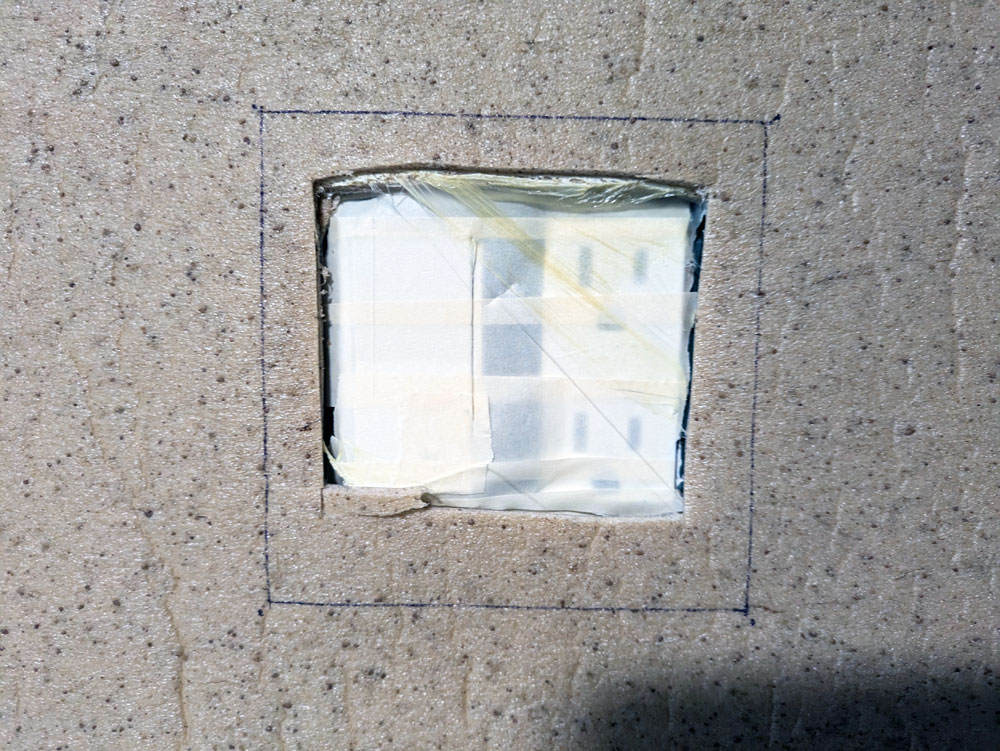
Before painting, I did my final cut around the two outlets. I traced the coverplates and very carefully cut the cork back. The outlets are recessed now into bulletin board.
I primed the cork with my go-to Stix primer and then did two coats of green paint. The cork took the paint really well, and I really like how it matches the walls.
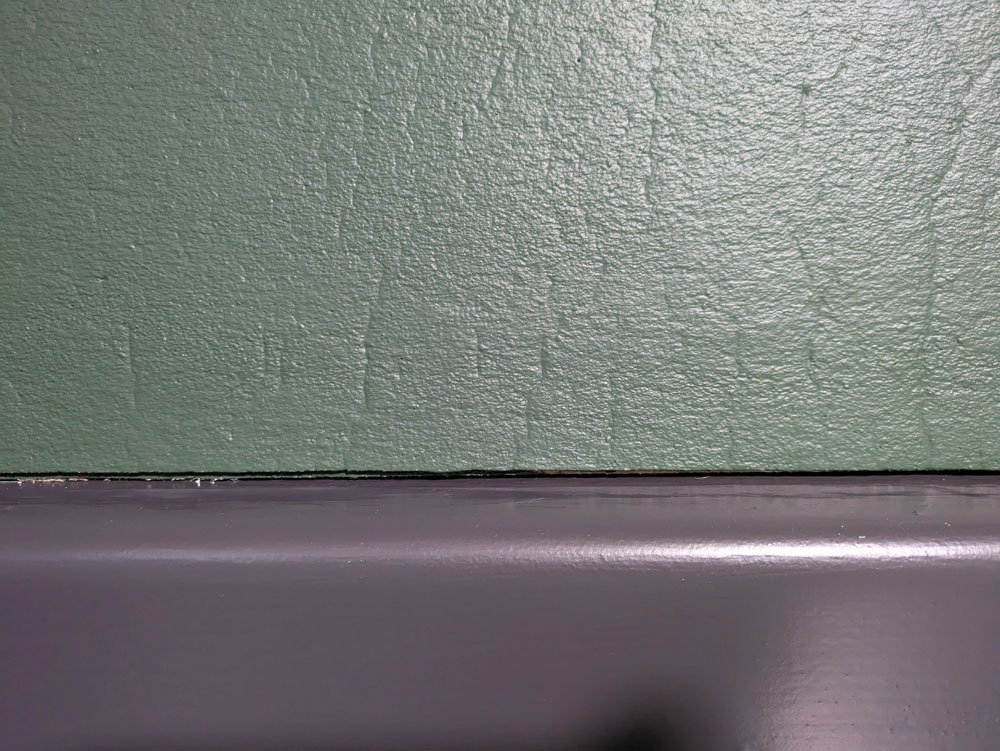
After painting, I took all the masking off the outlets and countertop. That’s when I found the gap between the bulletin board and the counter was more noticeable than I liked. I decided to caulk the edge of the cork where it meets the counter. Then I went over the caulk with another coat of paint. This made a really clean edge.
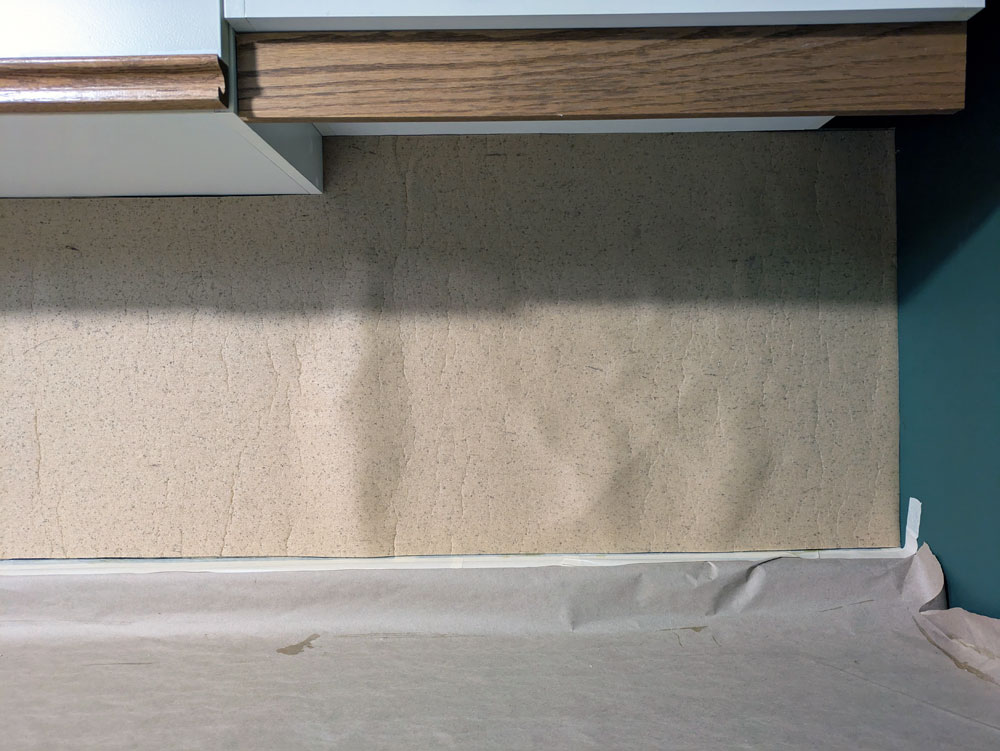
My third layer of cork was a bit more “wrinkly” than the earlier layers. This layer was closer to the centre of the roll of underlayment, so it was wrapped more tightly and had some creases in it. The creases were a bit visible on the wall, but they mostly smoothed out as the cork relaxed.
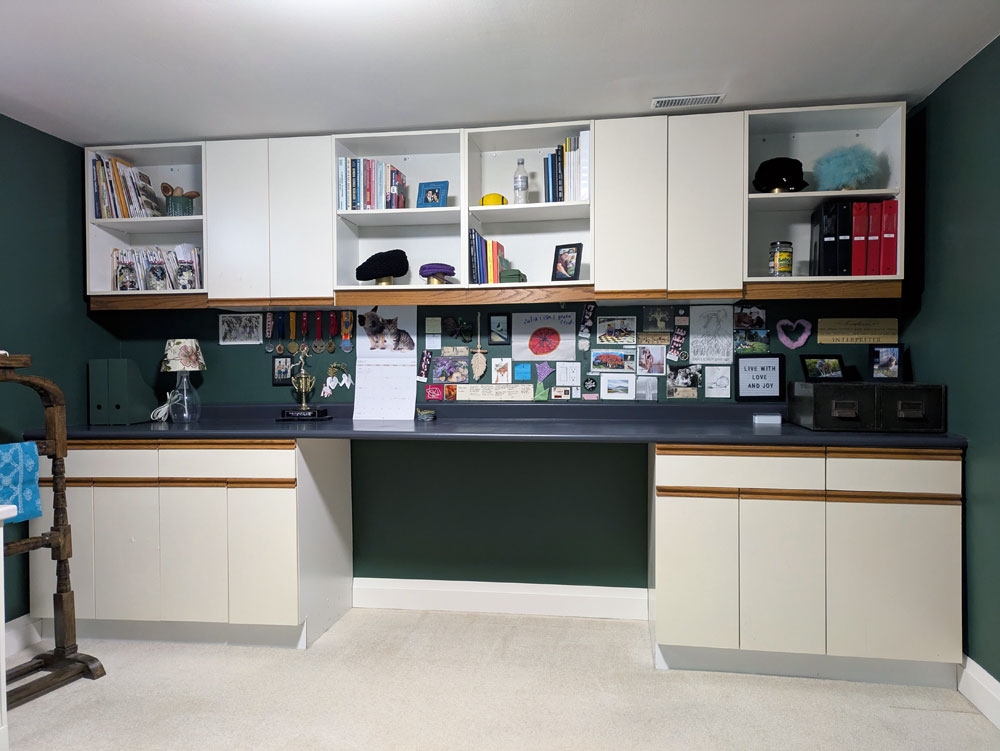
Once I started to load up the bulletin board, all of the flaws disappeared. I love how this project turned out. The wall is full of things that make me feel inspired, happy and loved. And I have plenty of room to grow.
I also love the trial and error–and ultimate success–with this project. I felt like I was returning to some of my old DIY days. I’m still that scrappy, creative, hard-working, cheap, make-it-happen person, and I like tapping into that.
Who else likes a bulletin board? Do you have a place to display creations and inspiration? Has anyone else had to adjust mid-project when things aren’t working out as you planned?
I was unsure what colour I wanted to paint the office for a long time. Back when we first set up the room, Matt picked a forest green (Benjamin Moore Manor Green). It was not my favourite colour, but it was his room, so I didn’t say anything.
Once I decided the office was going to be mine, I was more than ready to repaint.
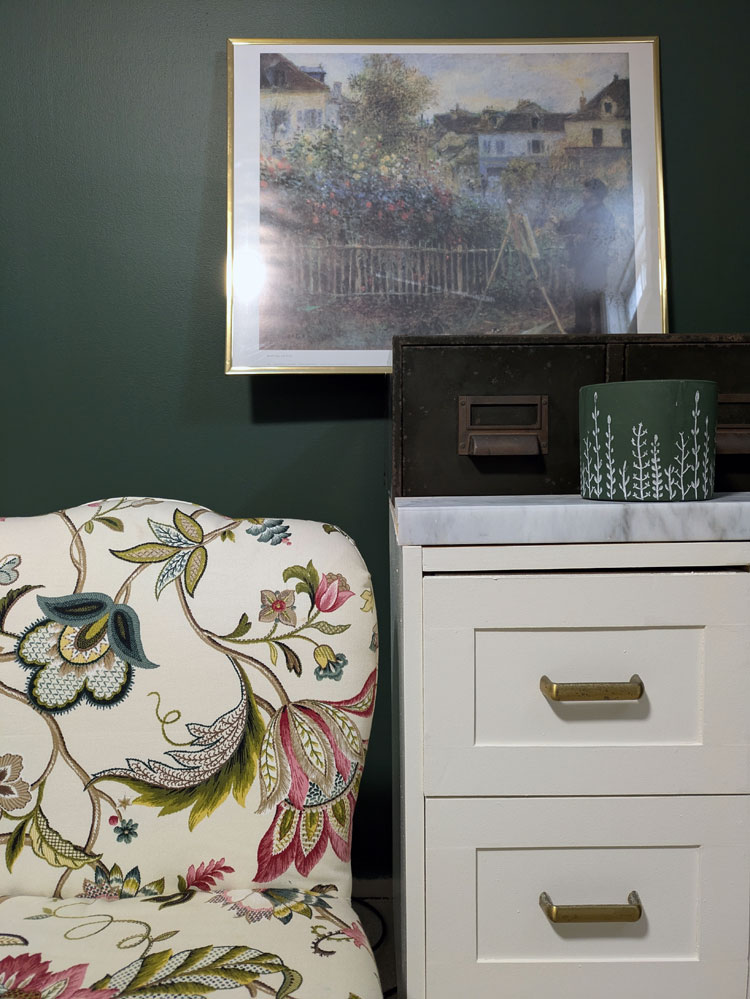
I liked the idea of sticking with some shade of green. I like green and it would be another memory of Matt. I knew I wanted dark olive green a few places in the room (namely the vintage metal drawers I found years ago at an auction). Did I want it on the walls too?
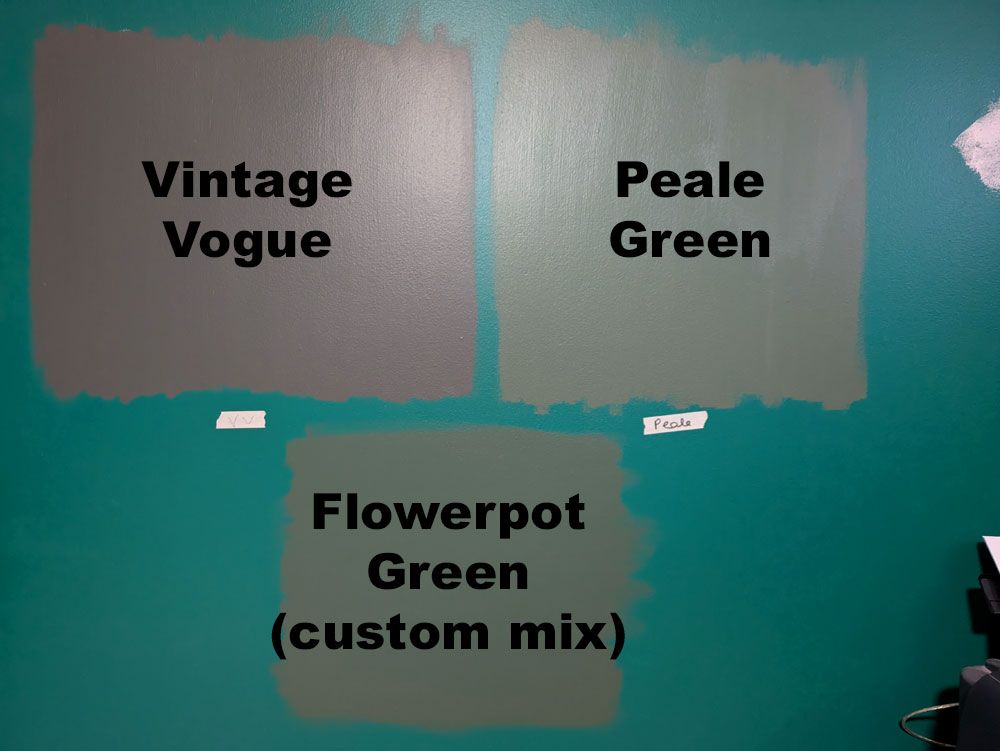
I finally decided to go for it. But then I had to figure out what green. I sampled several: High Park, Rosepine, Cushing Green, Peale Green. They were too light, too grey or too brown.
Ellie’s comment was, “So you’re painting the office garbage can green.”
Thanks, girl.
I returned to the paint store in search of my goldilocks–not garbage can–green.
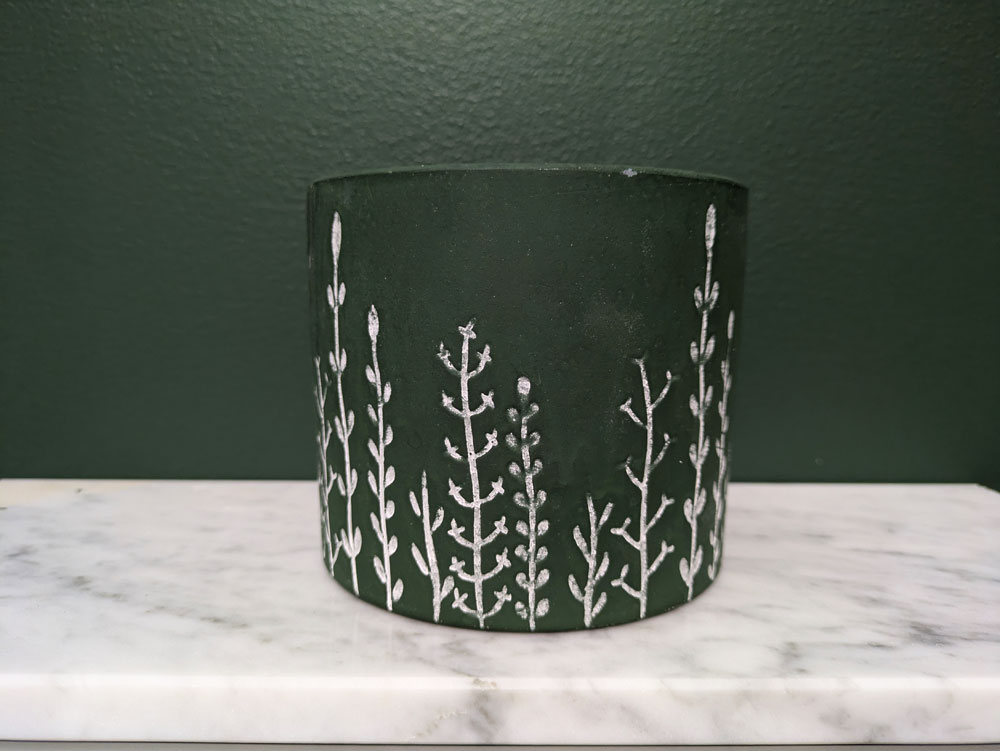
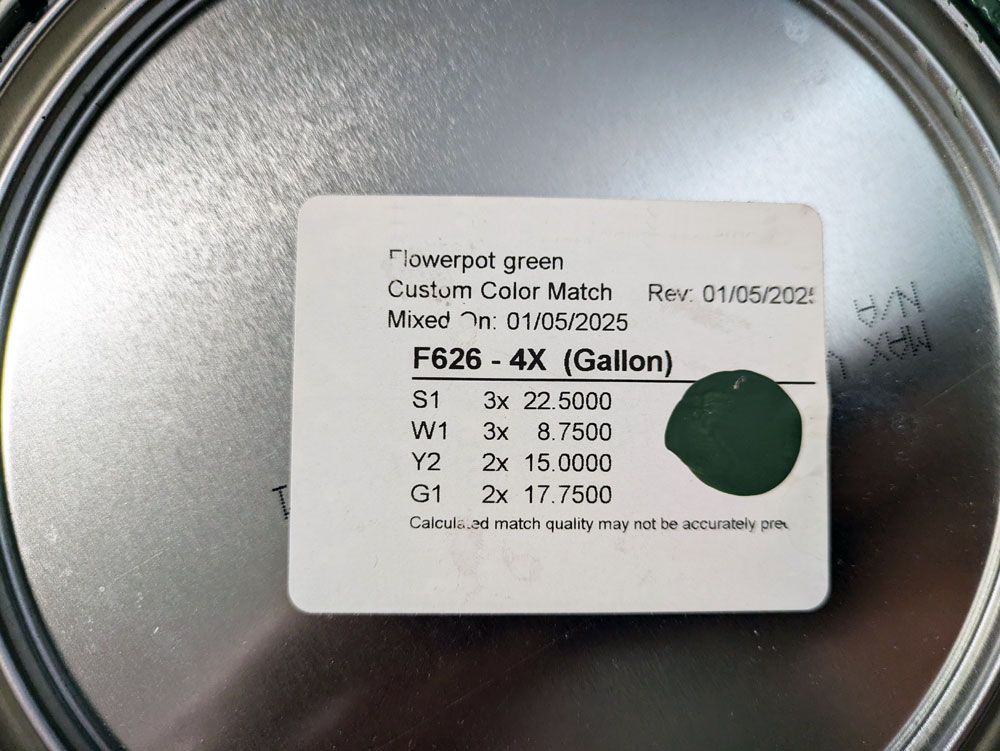
I bought two more samples: the oh so popular Vintage Vogue and a custom shade matched to a flowerpot my sister gave me for Mother’s Day.
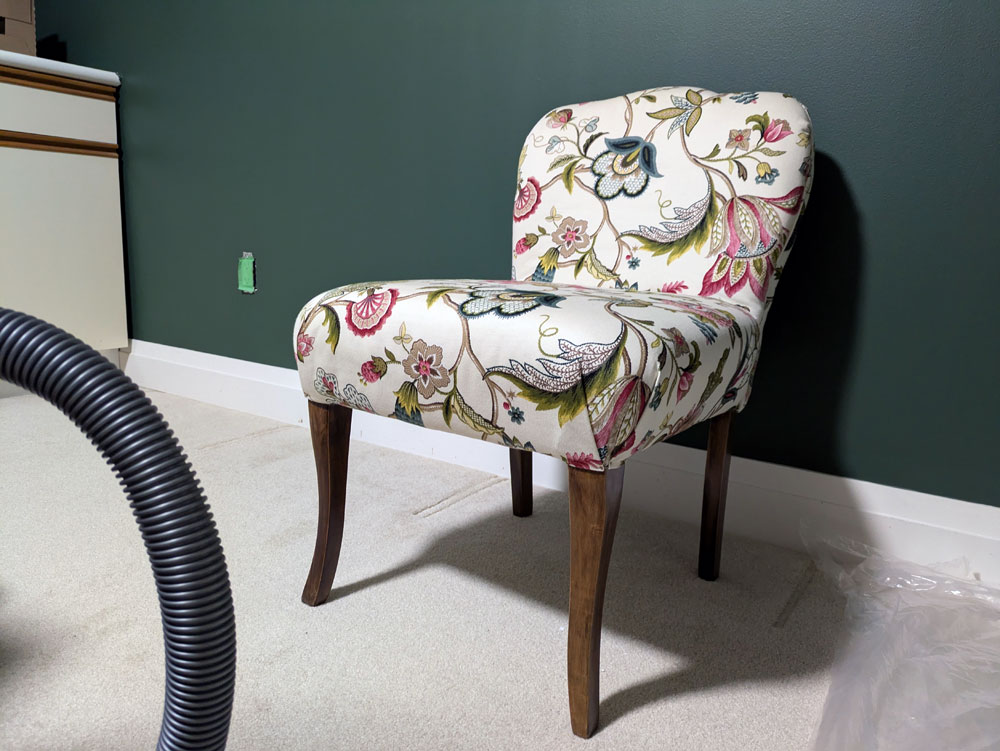
Back at home, I put them on the walls… and Flowerpot Green was the winner. It’s dark, but not black, not brown, not grey. It is definitely green, and it picks up the tones of so many of the things I used in this room.
I had a few moments of hesitation as I was painting the first coat, but then I decided I liked it. When I moved my vintage slipper chair in just to see, I loved it.
My Mom’s reaction gave me another reason to love it. Her comment the first time she saw the room was, “Oh, this is the colour we had in the living room and dining room at home!” She was remembering a time that my grandmother (a frequent redecorator) got new furniture, painted the living room dark green, and then sewed curtains to match.
So from my grandmother to Matt to my sister taking care of me on Mother’s Day, my new office paint is full of history and meaning and family. That feels like a good choice to me.
Do you have a favourite colour? Have you ever had a custom paint colour mixed for you (this was my first time)? Are you a fan of neutrals? Or do you go for colour? Who prefers light shades over dark?
My Mom taught me to sew when I was young, as her Mom had taught her. As my great-grandmother taught my grandmother. Now I have a new space for sewing, crafting, writing, working, creating. A space filled with heritage and history from these women and so many other special people in my life.
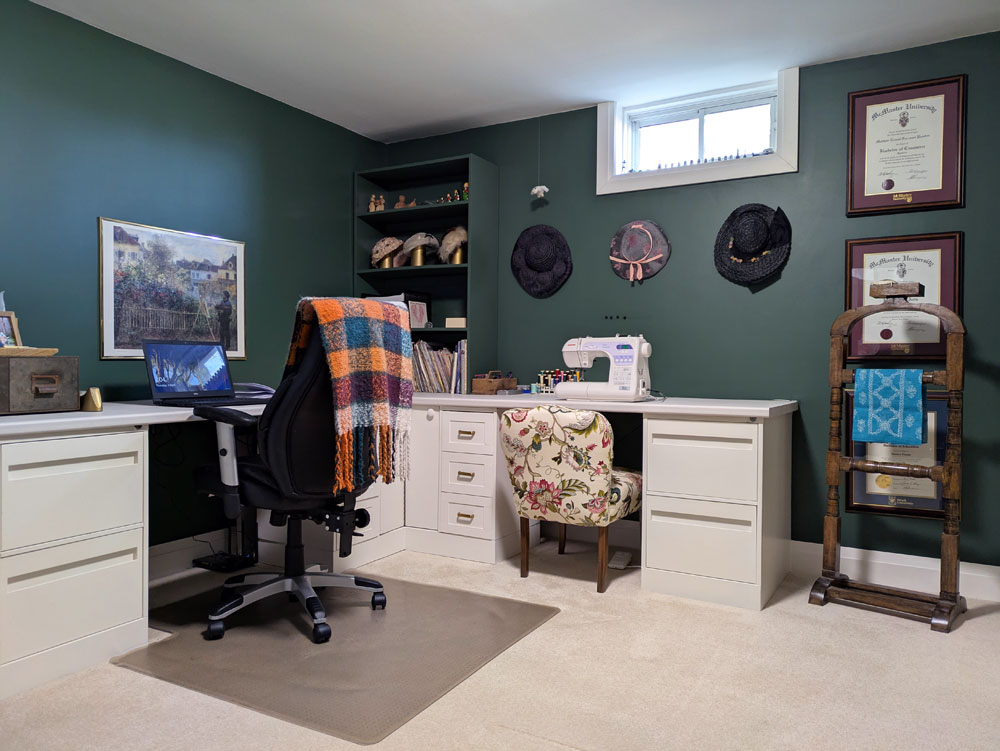
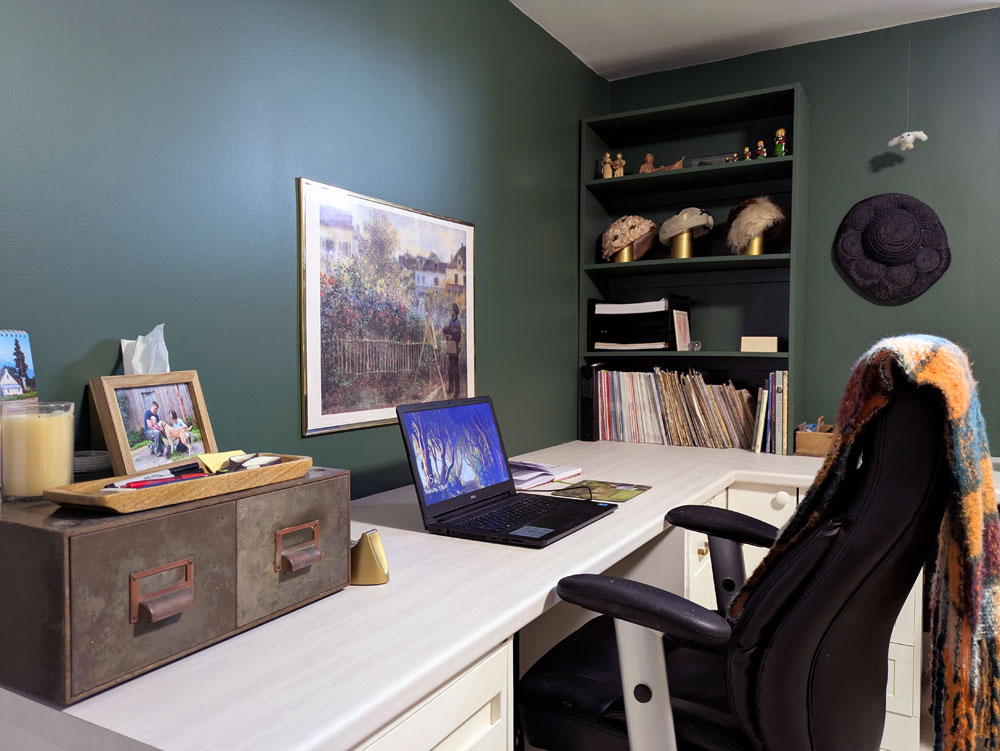
Welcome to my new office.
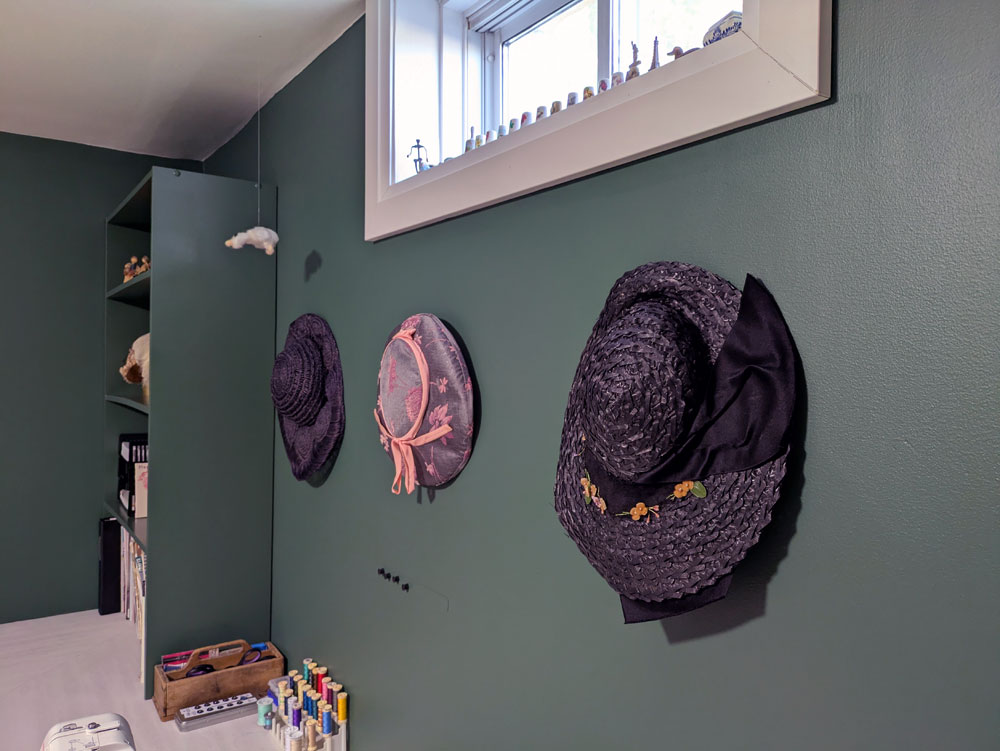
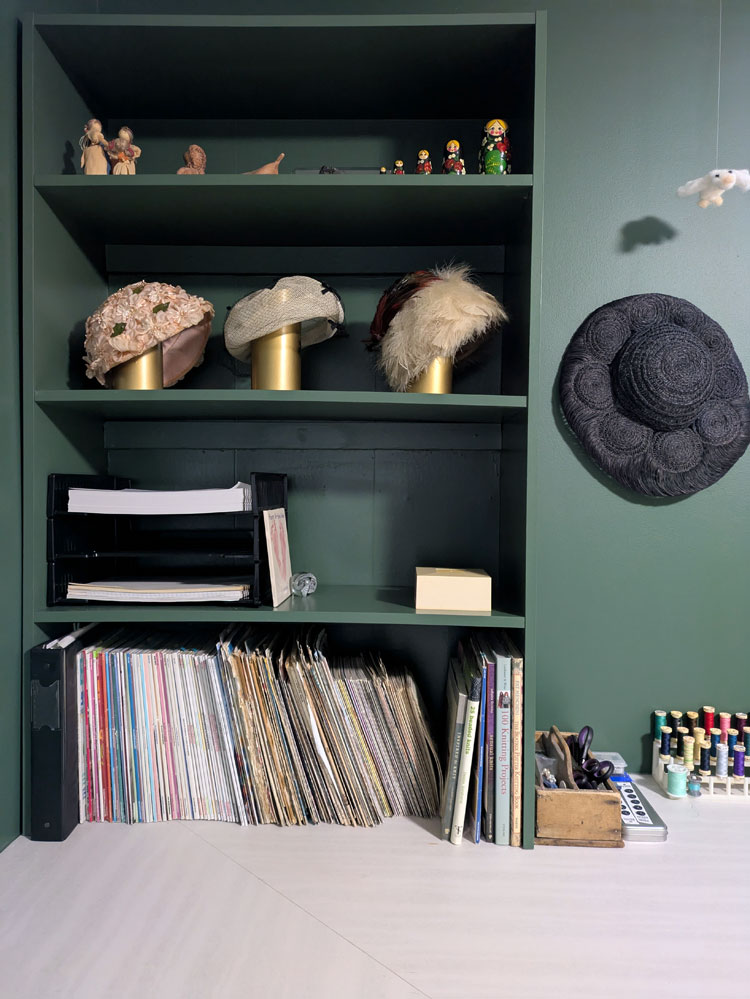
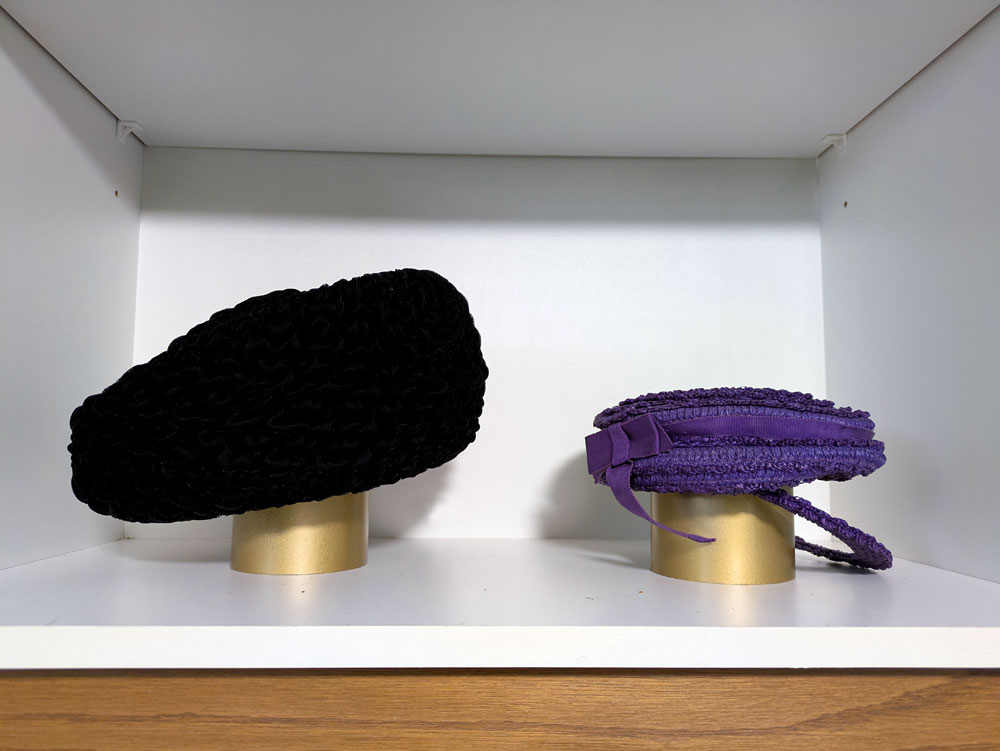
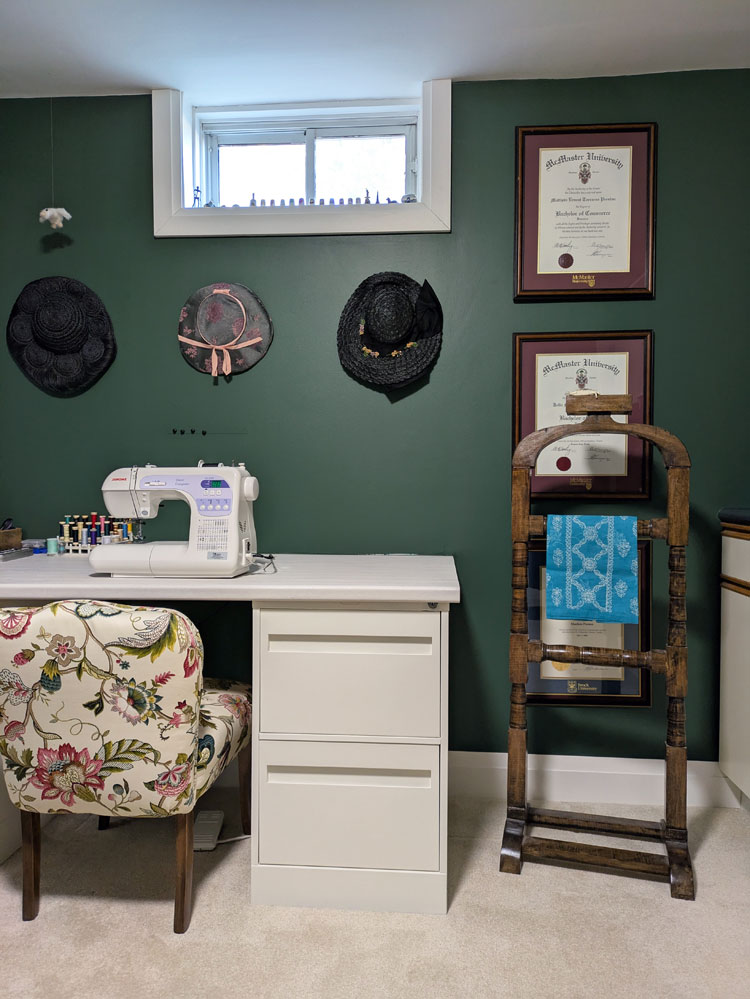
Spread around the room, you will see my collection of vintage hats. Most of these are my grandmother’s. One was made by my great-grandmother. I remember finding a scrap of material in my Grandma’s stash and recognizing it from the hat. I was blown away that someone could simply make a hat. This legacy of creativity and ability is something that I’m very proud of and try to live up to.
As I was decorating the room and styling the shelves, I realized that the hats needed some support. They didn’t look right just sitting on the shelves and I couldn’t see their details clearly. Of course, my initial thought was, “I need some heads.” But I quickly came up with another solution. I chopped up a broken pipe we had left over from redoing our sump pump outflow. I sprayed the pipes gold and voila. Cheap, simple, fancy hat stands. Creativity and ability, check.
The rest of the shelves are filled with books, photos, sewing patterns, mementos. There’s a pickle bottle Matt’s Dad found that is made by Matt and Steve–their names. There’s a football my Dad bought me when I was a baby. There’s a collection of buttons in a powder box that smells just like my Grandma when I open it. So many precious, special things that I can see and enjoy now that they have a home.
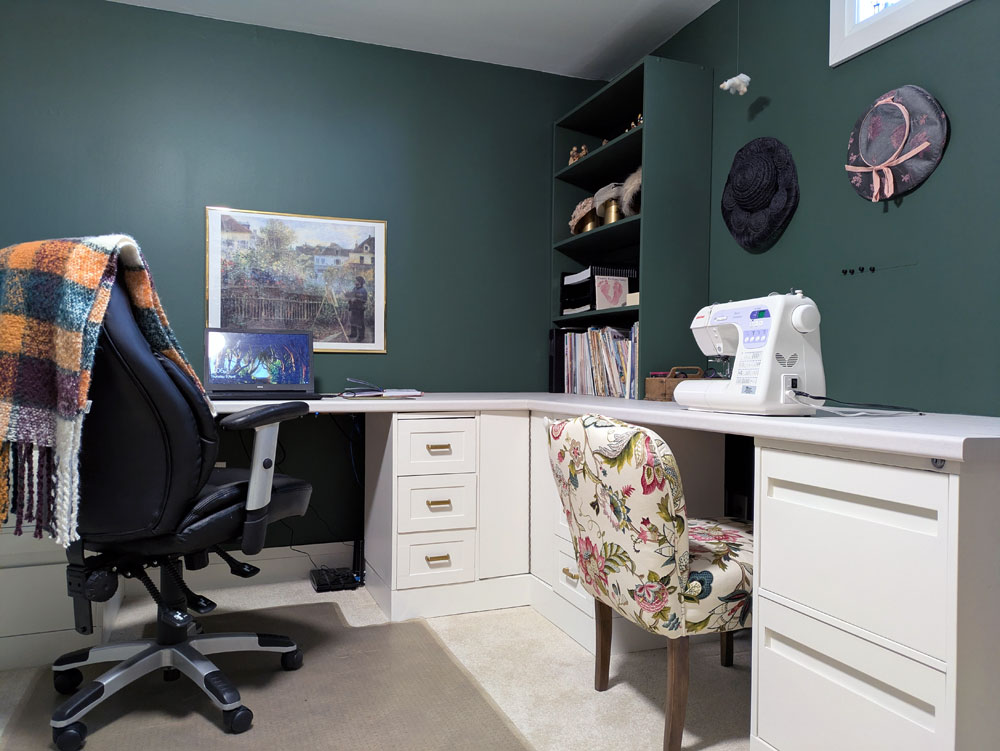
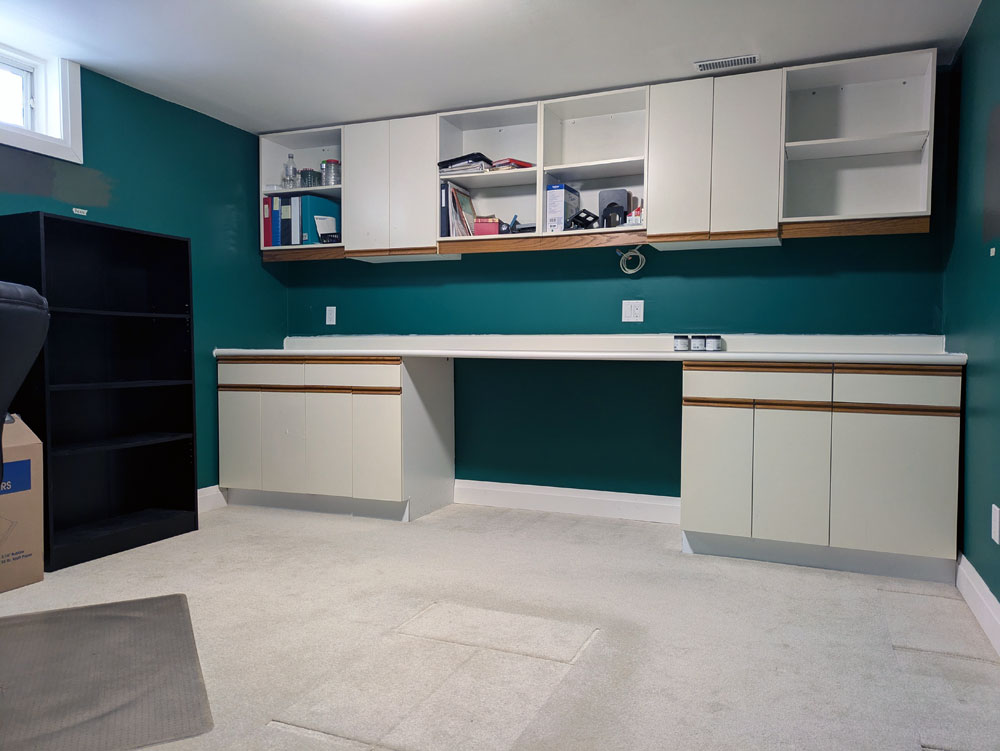
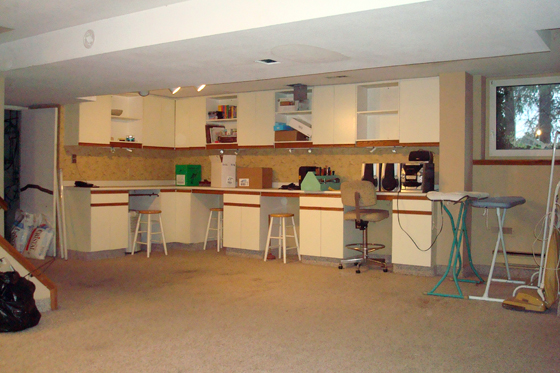
Matt and I installed the cabinets when we set up this room as his office. They provide such great storage for all of my sewing, knitting, wrapping and other supplies. I would like to update the doors and give everything a coat of paint some day, but for now I am enjoying their storage and ignoring their style. This is the first time I have ever had all of my sewing and knitting materials in one spot, and it’s so helpful for projects.
The backsplash is a very long bulletin board. This corkboard is full of things that I find inspiring, beautiful, fun. Cards from friends, crafts from Ellie, even a few notes from Matt. I will be sharing more details about this project in a future post.
The biggest function is the huge corner desk. I have two workstations here, one for my computer and one for my sewing machine. Each zone comes with its own drawers for office supplies or sewing materials. There are also four large file drawers that hold all of our paperwork and even some extra crafting supplies. Above the desk, I have some open shelves for more storage and display. I’ll be going into more details of how I built this desk in an upcoming post because I am very proud of how it turned out (more creativity and ability).
As part of the sewing zone, I have a valet stand that my Dad built for me. When he took up woodturning, he had some signature things he liked to make. One was valets like this. It is perfect for holding in progress sewing projects. Behind the valet I hung Matt’s and my diplomas. They fit perfectly in this space, and I like that Matt and my Dad are both part of this room. So many legacies in this one corner.
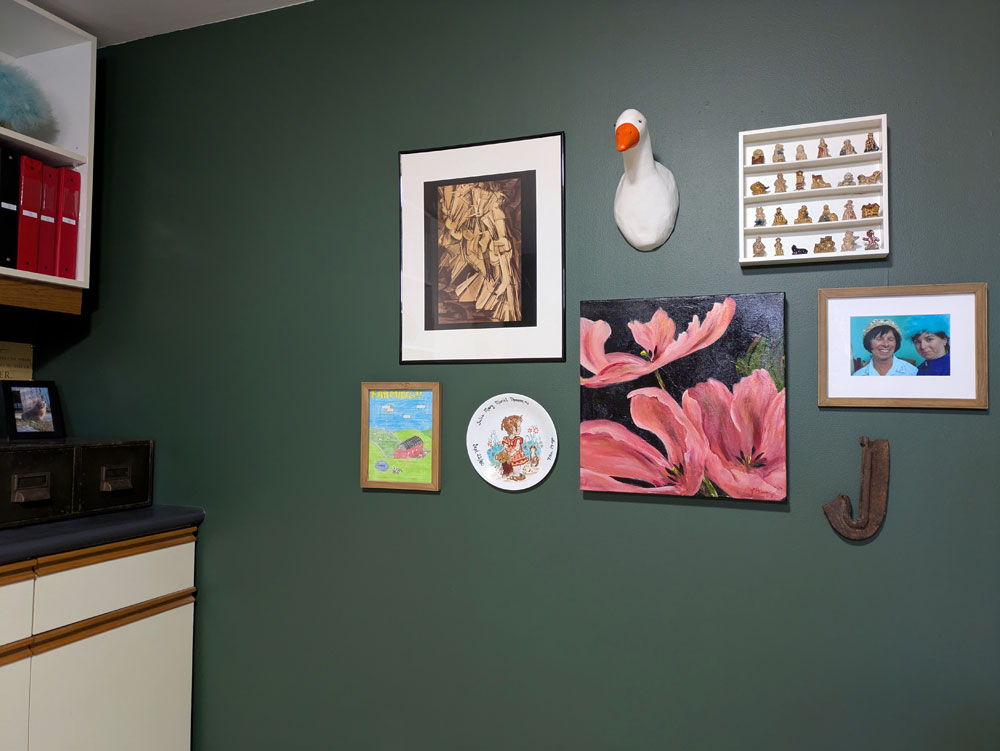
A gallery wall on the other side of the room holds more pictures and things that are special to me. The window sill holds a collection of thimbles from Matt’s Mom and other small trinkets. Ellie needle felted a goose to look like my long ago pet Bill and I hung it from the ceiling so it flies over my sewing machine.
The two sets of green metal drawers came from an auction we went to years ago. They’ve been in the driveshed ever since waiting for the right spot. Now, one sits on the counter and the other on my desk. They give great extra storage, and I love their rustic green patina.
There are so many details in this room, I feel like I could keep going forever. There are a few things I’m still hoping to add (Matt chose the cheapest light fixture possible, and it’s terrible), but I love how this room turned out right now. It is functional. It is pretty. And, like all my spaces, it is personal.
The office makeover is a project I’ve been dreaming about for more than a year. I’ve been working for myself from home since before Ellie was born, yet I don’t have a dedicated workspace.
If I feel like sunshine and a view, I sit at the dining room table. If I’m feeling cozy and the fire is on, I sit on the living room couch. Most nights, I’m on the downstairs couch. I like the flexibility, but having an actual office would also be nice.
It took me a while to realize that I could turn Matt’s office into my office. As soon as I did, I got very excited thinking about everything this room could be.
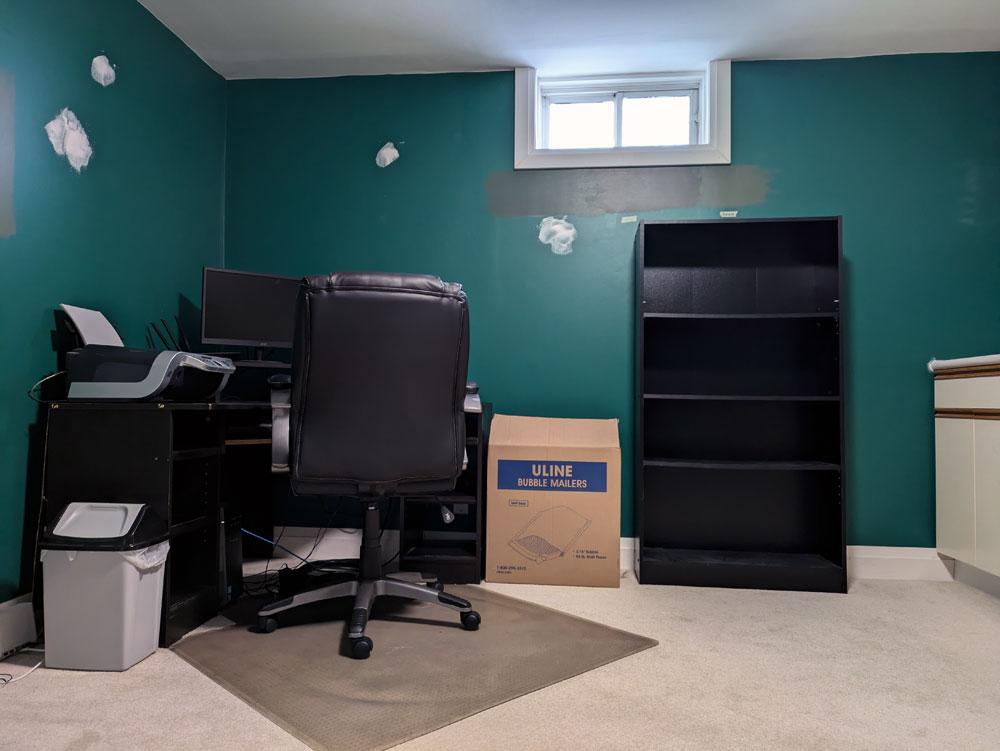
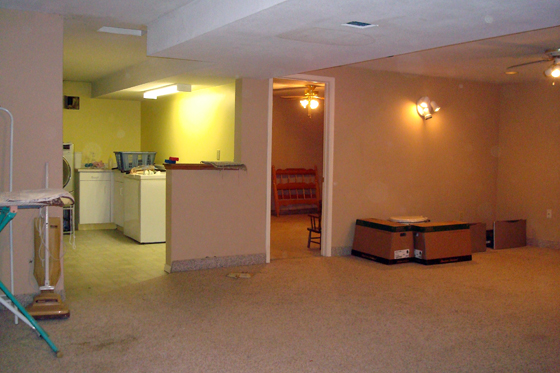
Matt’s office is a room that only appeared on the blog waaaaaay back when we first moved in and were renovating the basement. After Matt set up his space, he wasn’t keen on sharing it and it wasn’t very photogenic, so I never featured it here.
That is all about to change.
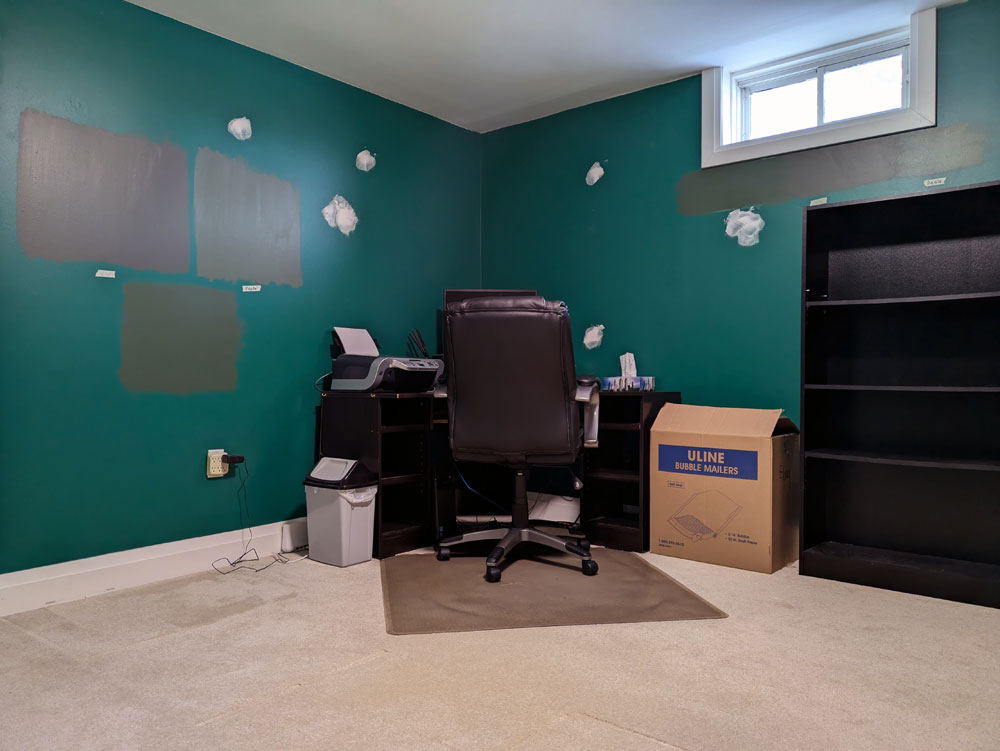
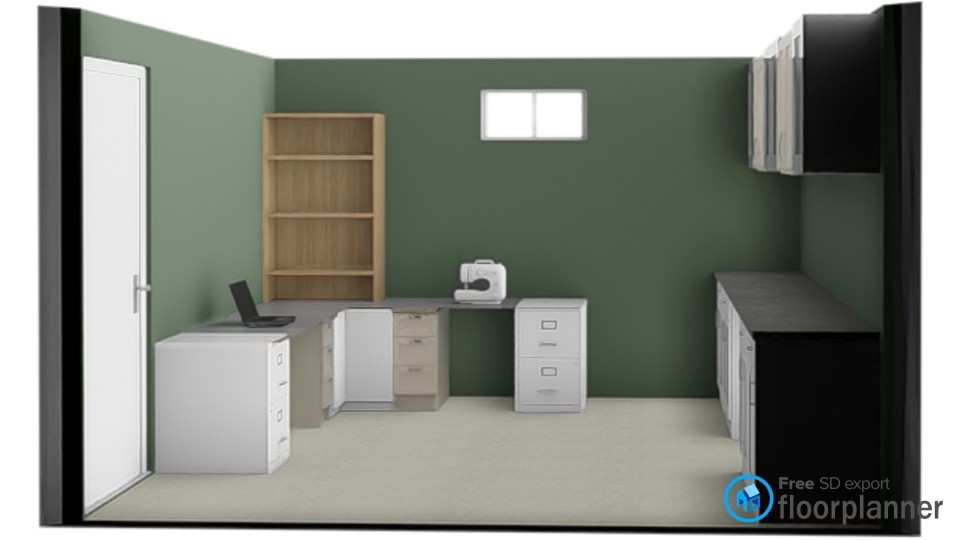
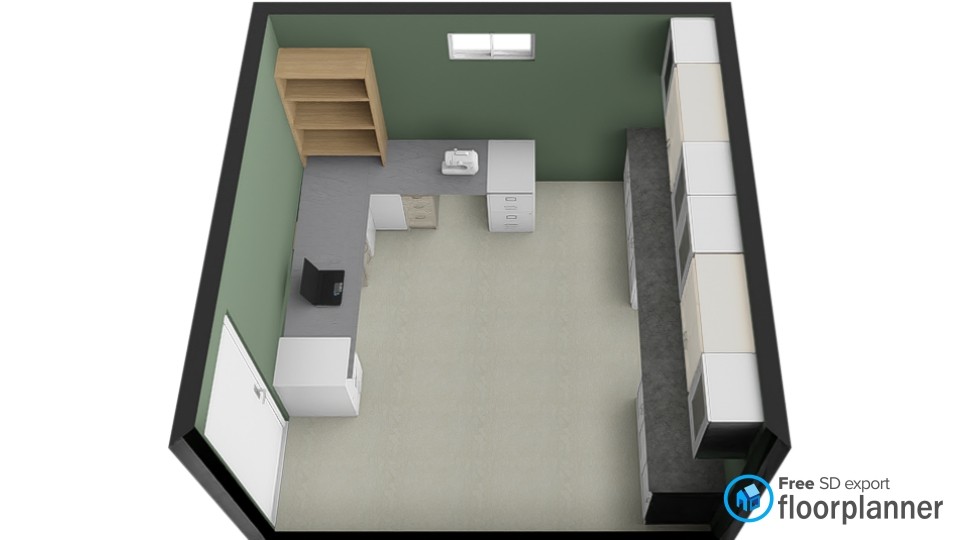
This is the before, a mostly clean slate. (In my excitement to start this project, I couldn’t resist patching nail holes and putting some paint samples on the wall.)
When we did the basement renovation, we reinsulated all of the exterior walls, moved the office door around the corner, put up new drywall, had new carpet laid, and installed the cabinets (which used to live in the main room of the basement).
The foundation of the room was good. But I wanted to make it work for me.
Here’s a collage of some of the things that are in my plans.
First up is the colour. I’m going to be sticking with green for the walls, but a slightly different tone.
My plan is to have a large desk with two work stations that wraps around the corner. On one side, I’ll have my computer. On the other, I’ll have the sewing machine.
The base of the desk will be two filing cabinets and two banks of drawers, all painted white. Above the desk in the corner I’ll have some open shelving (likely painted green) for storage and display.
The cabinets are staying where they are, as they are (for now). I’d love to transform these into shaker doors like I did in the laundry room and give them a coat of paint, but that’s a later plan. For now, I’m grateful to have the cabinets as they provide a lot of really useful storage for fabric, yarn, office supplies, wrapping paper and more. I am planning to add a corkboard “backsplash,” as I love a bulletin board.
Then the rest of the room is decorating. I have art and objects that are special to me, and I want to finally have a nice spot to display them.
I am very excited for this project, and work is already underway. Stay tuned for more updates.
Do you have an office at your home? What’s your must-have (or wishlist) for an office?