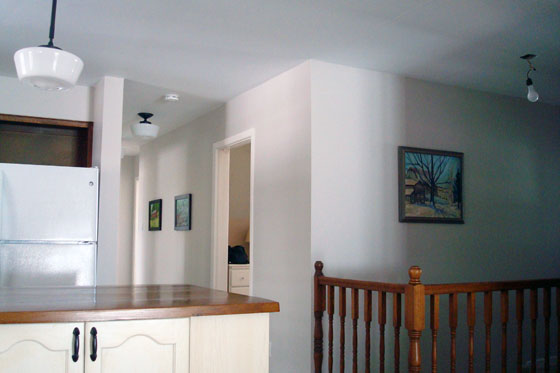
Better late than never

You may have noticed that a month ended and another began, and there’s been no monthly goals posts. I’m here today with the two posts combined into one.

Setting monthly goals is my attempt to keep on track with my home goals this year. It’s been a good technique to help me stay on track… mostly. I deviated from the plan a little bit in March. Some things I can cross off, but some things I can’t–I’m trying to manage my neuroses about that.

Here’s March’s report card.
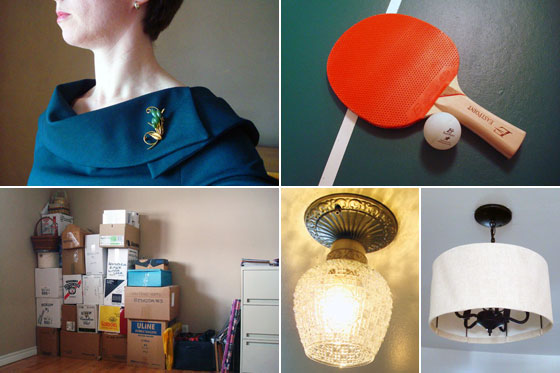
Photo collage of March projects

Set up the ping-pong table – Done

We’re loving having the ping-pong table. We play almost every night, and I’ve actually improved a lot. Last night the score in our best two-out-of-three tournament was 2-3 rather than the 3-0 it’s been every other time. Yay, me!

Finalize light fixtures – Done… for now

The DIY foyer light fixture is staying for now. I’m going to keep my eyes open for something better though.

Get my home office under control – Half done

  • Sort and file the mountain of paperwork that’s built up on top of the filing cabinet
  • Add organizers to the new dresser and start filling the drawers
  • Make a bulletin board
  • Pull together all of the forms that we need for our taxes this year
  • Figure out how to make better use (temporarily) of the closet
  • Unpack a few boxes, repack some of the boxes, repile the boxes

Pretty up my work office – Not done. Not started.

  • Make a bulletin board
  • Recover the shade from my desk lamp

My half-organized office gave me the space and the motivation to sew my Mad Men Challenge dress, which was a fun accomplishment and a different way to spend my time last month. However, I am looking forward to getting the final things crossed off my list this month.

So on to the April goals:

First on the list is finish the projects for my home and work offices. That’s an easy one.

The rest of the list I’m a little bit less sure about, so I’m going to go with a theme, rather than specific to-dos. Given that Earth Day is later this month, I’m going with the theme of “green.”

  • Don’t spend any green (on the house) — Good from two perspectives: lessens my consumption, which is always good for the environment. Good for my wallet, which is important as we have to pay off some very expensive solar panels this month.

Solar panels on the barn roof

  • Go with green projects — There are lots of things I can do around the house that will make our home environment a little more pleasant, delay bigger reno projects and that I have supplies for already.
  • Start planning for a green (outdoor) project – It may not save me any green–and it’s definitely more brown than green right now–but I’d like to get a few quotes to see if it’s possible to get some help outdoors. Cleaning up some of the overgrown brush between the house and the pond is, I think, more than we can tackle ourselves.

Over grown pond in spring

Aside: Minutes after taking this picture, Baxter cracked the ice and fell into the pond. Unfortunately, I’d already put the camera away so you don’t get a picture of the “What the… ? Wait. I don’t understand. What just happened? Where did the ground go?” facial expression. Everyone is fine, although puppy is a little sulky because he had a second bath when we got back to the house.

Anyways, back to the plan. I may focus more on project updates, rather than the weekly updates I’ve done so far. If I’m being honest, I didn’t find the weekly reports as much fun, and I’m not sure they were that interesting. They did help to keep me on track somewhat, although I obviously fell off in March. I feel like I’m giving myself a bit of a break in April, but I’m hoping that spring will arrive soon and I can start to look ahead to more outdoor projects.

What did you accomplish in March? Is anyone else going green in April?
Foyer lighting options

At the start of the week you saw my attempt at a new light fixture for the foyer.

In the comments, you agreed with my feelings that my DIY fixture wasn’t quite right for the space.

Here are two of the other lights I’m considering as replacements.

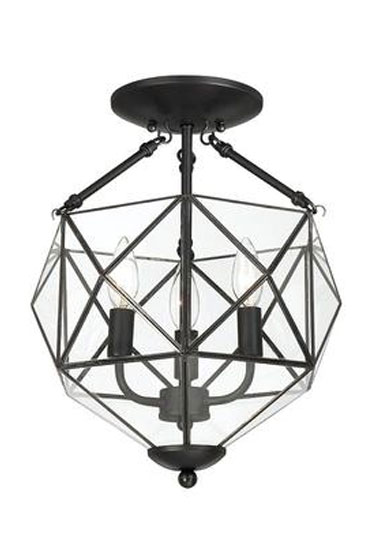
The first is this hexagonal fixture. It’s a slightly updated version of the chandelier I bought at the thrift store.

Pros:

  • The design and the shape are a bit unique. I’ve not seen many fixtures like this around.
  • It’s the right size and height for the foyer.
  • It has three bulbs, so it should cast a decent amount of light.

Cons:

  • The metal is black, and the other lights on our main floor are oil rubbed bronze. I’d rather not mix my metal tones in this space, and I don’t think this piece can be painted easily.

Here’s my second option. I’d been considering a lantern-esque fixture, and this one is an attractive option.

Pros:

  • The metal on this light is antique bronze, which is closer to the ORB of our other fixtures.
  • The lantern design feels a little bit country to me, perfect for a farm.

Cons:

  • I’m concerned this fixture might be a bit too small to carry the whole foyer.
  • With only two bulbs, it won’t shed as much light as the first fixture or my DIY option.

I have a hard time spending more than $100 on light fixtures (I know, I know, I’m super cheap), and both of these options come in right around this price point.

Let’s put it to a vote.

Please feel free to suggest another option, if you’ve seen something that you think would work better.

Does anyone else struggle with finding good lighting? How do you feel about mixing metals?

DIY light fixture (fail?)

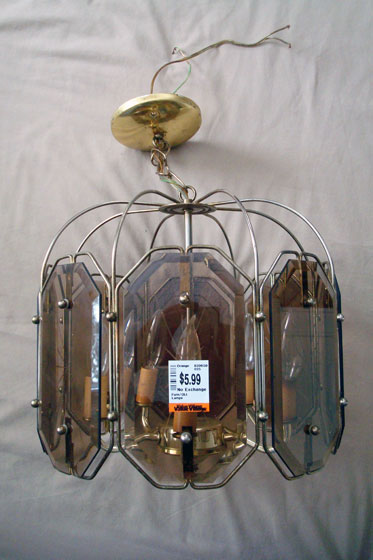
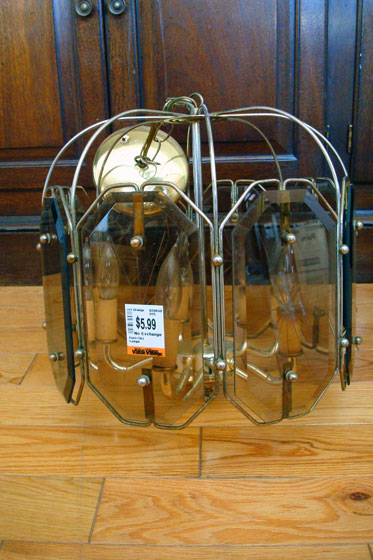
I have another thrifted light fixture makeover for you today. Remember this beauty from my thrifting post?

1980s light fixture redo

When I was in the checkout line at Value Village, the woman ahead of me said, “What a great find! So classy!”

I said, “Oh, thank you.” In my head I was thinking, “Are you insane? This light is completely 1980s. It will look nothing like this when I’m done.”

My plan for the foyer was to replace the giant ceiling fan with a small chandelier covered by a simple drum shade.

Here was my chandelier.

1980s light fixture

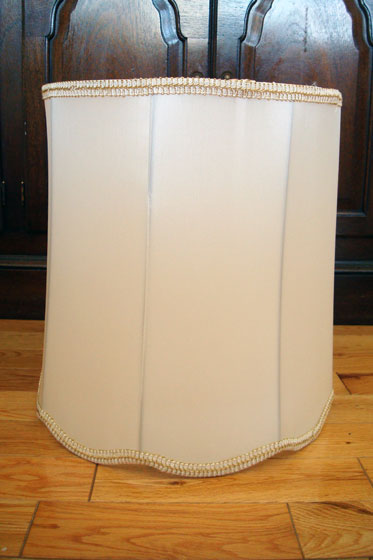
Here was my drum shade.

Vintage lampshade

It was vintage lighting fest over here.

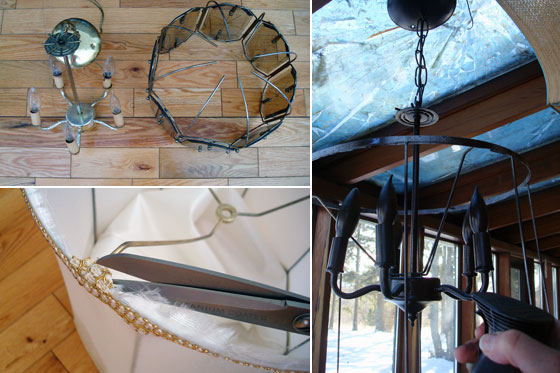
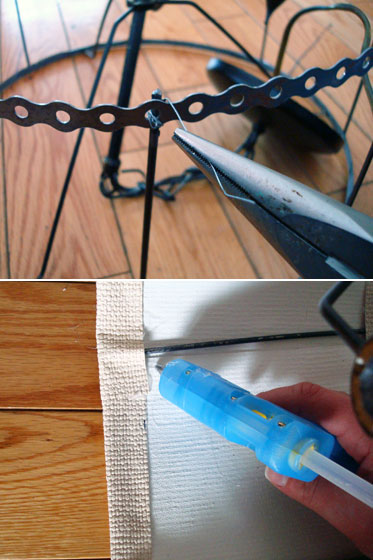
I took apart the light, took apart the shade, merged the two together and spray painted everything oil-rubbed bronze.

1980s light fixture redo

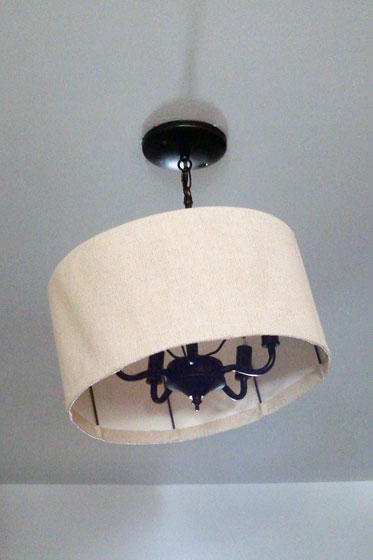
I shortened the shade and added a new fabric cover.

1980s light fixture redo

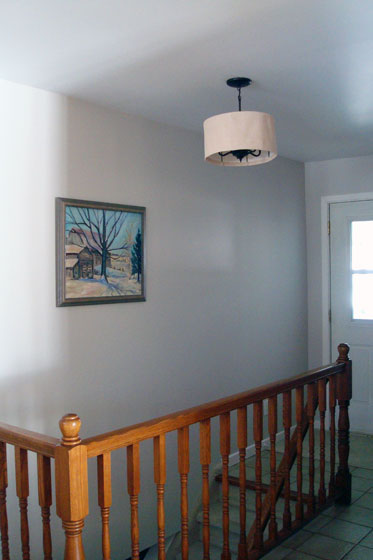
Then I installed it over the stairwell.

Crooked drum shade

Hmmm… not quite what I envisioned. As Matt said, “Woman, what were you thinking?” I stood there and laughed.

Then I got out my glue gun. A couple of daubs of glue held the shade a bit straighter.

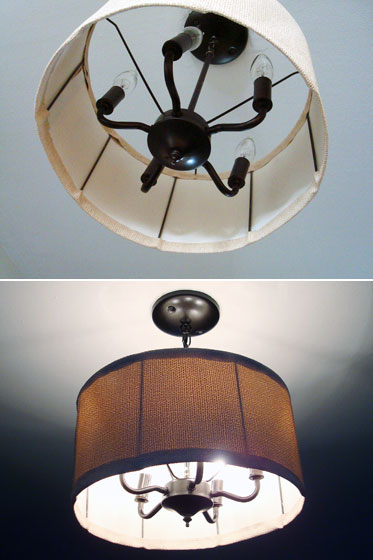
Foyer light fixture DIY drumshade over a chandelier

I’m still not sure if this is quite what I envisioned. The inside looks a bit rough in some spots, and the ribs of the shade show through when the light is turned on.

1980s light fixture redo

Another layer of fabric on the inside might solve both of these issues, but it would also lessen the light. This light is much brighter than the ceiling fan that was there before, which I like as our foyer tends to be a bit dim.

I’m content to live with it for awhile until I make up my mind. Either way, it’s an improvement over the fan that was there when we moved in and the pigtail that we wired up when we were painting.

I’d love to hear your to opinion. Do you think this is a #DIYfail or #victory? Have you ever made over a light fixture?

Office organization progress report

Last week when I shared the progress I’ve made on my March projects, I was all about timelines and staying on schedule. This week, things ran off schedule a little bit… or the schedule got rescheduled.

I had two tasks left for the second half of the month: get my home office under control and pretty up my work office.

I made zero progress on my work office.

My excuse is that I made outstanding progress on my home office.

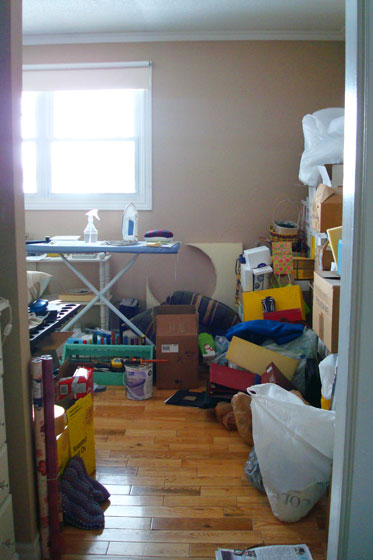
Remember this really embarrassing picture that I so reluctantly shared with you at the start of the month?

Messy office

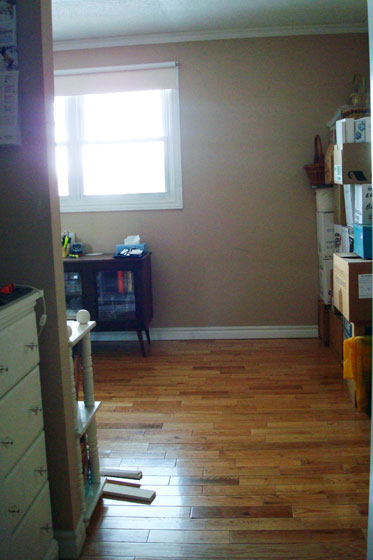
Well, I don’t mind sharing it with you this time because now the view from the doorway looks like this. (And the poor quality of this photo in no way reflects the warm feelings I now have for this room. I was losing light. What can I say?)

VIew from my office doorway

Here’s the order of how I originally planned to tackle the to-dos in my office:

  • Sort and file the mountain of paperwork that’s built up on top of the filing cabinet – By March 16
  • Add organizers to the new dresser and start filling the drawers – By March 22
  • Make a bulletin board – By March 22
  • Pull together all of the forms that we need for our taxes this year – By March 30
  • Figure out how to make better use (temporarily) of the closet – By March 30
  • Unpack a few boxes, repack some of the boxes, repile the boxes – By March 30

Last weekend, I found myself more enthused about the last two items on this list than I was with some of the items higher up, so I decided to be flexible and follow my motivation.

When we moved into the house, my office became the dumping ground for things that we didn’t have a place for.  Since I didn’t have any furniture aside from a desk that was left by the past owners and a small bookshelf that Matt had from his childhood bedroom, everything was left in its packing boxes and piled against the wall. Even though it’s been two years since we moved in, everything was still piled.

After my organizing binge, I still have a pile of boxes, but it’s about half a dozen boxes less than it was before. That’s major progress for me.

Moving boxes stacked in my office

There were two things that allowed me to unpack some of my boxes:

1. Matt gave me a small cabinet that used to be in his office. Filling that cabinet with craft supplies, sewing patterns and some sewing tools meant that I could use Matt’s childhood bookshelf as an actual bookshelf. Even though this shelf is small, it holds all of my knitting and sewing books, magazines and patterns. I even have room for a bunch of decorating magazines. It’s so nice to have these accessible again.

Small bookshelf

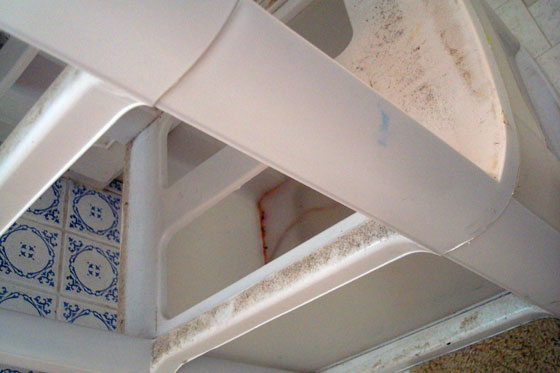
2. In the category of making better use of the closet, I finally filled some storage caddies that had been left behind by the past owners. This seems like a really obvious solution, and you’re probably asking why I didn’t do this long ago. The simple answer is that the caddies were disgusting. Really, really dirty.

Dirty plastic storage caddy

It was easier to just tuck them away–empty–in the closet, rather than scrubbing them out. However, there comes a point when clutter is more annoying than cleaning, so I threw the caddies in the bathtub and scoured them inside and out. The result was 11 drawers for everything from yarn to fabric to wrapping supplies. Some of the drawers are still empty. Yay for room to grow!

Plastic storage caddies

I realize my office still isn’t pretty or even super functional. I have big plans to repaint, add more furniture, and style it into a really, really useful and really, really attractive space. However, there’s no timeline on when this is going to happen. In the meantime, I’m working with what I have and trying to make the space as organized and useable as I can.

The trick now is to avoid it turning back into a dumping ground.

Anyone have any tips to share on organizing a temporary space (one that you know you’re going to redo down the road)? What’s your “room of shame” (please tell me you have one)? How do you store craft supplies? Any recommendations for furniture I should look for when I redo my office?

Vintage cut glass lights

We’re all familiar with the way too common boob light. Now meet the nipple light.

(A really bad picture of a really bad fixture).

Ugly 80s light fixture

This light graced the main bathroom.

Honestly, the light fixture is the least of the problems with this bathroom, but it really bothered me. It was painted, rusted and had absolutely no personality.

Browsing Value Village one day, I found a perfect replacement.

Value Village light fixture

At first glance, you may not agree that this is the perfect light, but let me show you the other lighting in the bathroom.

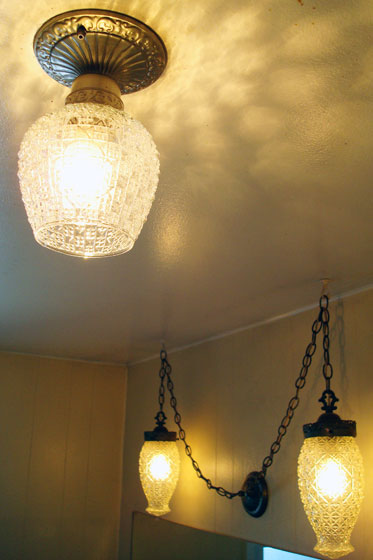
Vintage cut glass pendant lights

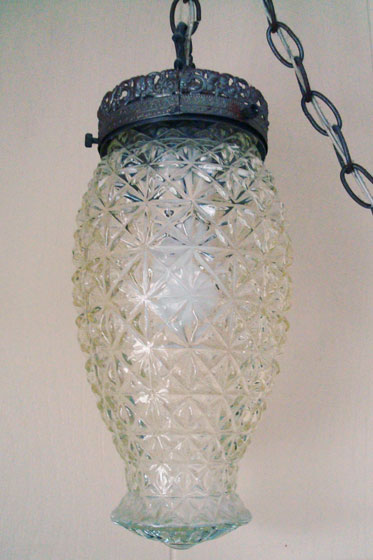
I’m sure your first reaction is not unconditional love for these lights (mine wasn’t), but they’ve totally grown on me since we’ve been living here. Sure they’re vintage. They’re a little bit rusted in a few spots. But they have personality. The shape of the shades is pretty unique and the glass, in my opinion, is just plain pretty.

Cut glass hanging light fixture

The cut glass on my thrifted fixture was a much better match than the nipple light. What wasn’t a match was the pseudo brass base. It took me three attempts to find the right colour of spray paint. ORB was way too dark. Pewter was too bright. Rosemary (what kind of a name is that for a metallic spray paint?) turned out to be the closest. It’s a silver with some gold undertones. It’s still a bit light, but it’s close enough.

Cut glass light fixture

Here’s how the lights look all together and lit up.

Vintage cut glass light fixtures

I love the patterns the cut glass makes on the ceiling. It’s a bit of prettiness that distracts me from the rest of the ugliness in the bathroom.

Alright, let me have it. What do you think of my lights? Are you a cut glass fan or are they too vintage for you?

How to refurbish a ping pong table

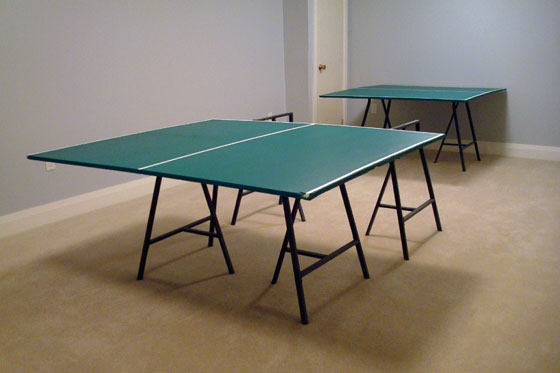
It’s St. Patrick’s Day, so today’s post is all about something green. Our new(ish) ping pong table.

Refurbished pingpong table

This ping pong table was a bit of an experiment. We found the top (in two pieces) in the barn when we first moved in. It was pretty dirty and had even been pooped on by the swallows that live in the barn.

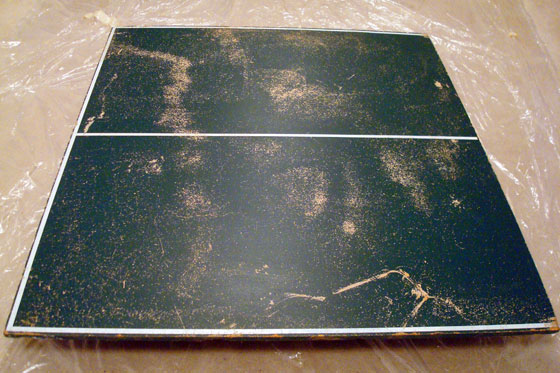
I am always optimistic, so one day last summer, I dragged the two halves outside. I have no idea how I managed to move them by myself because each piece is extremely heavy. I haven’t been able to carry them on my own since. I scrubbed with a brush and sprayed with the hose until all of the poop and dirt (and a fair portion of the original green paint) washed away.

Damaged pingpong tabletop

Matt did not share my optimism that the table could be rehabilitated. That night he tucked the pieces deep into a corner of the driveshed. I have no idea how, though, because the tabletop is heavy even for him to move on his own.

Despite his lack of enthusiasm for the project, Matt did help me carry the top into the house. Then, one weekend while he was out of town, I went to work.

This project was a total experiment, and I’m sure ping pong purists out there will be horrified. But (spoiler alert) everything worked out, so I’m sharing my technique with you.

There were two big issues with the table: 1) We had no legs to go with the top. 2) The top itself was not in great shape.

The leg issue was easy to solve with six trestle style legs from Ikea (Lerberg).

Ikea Lerberg legs for a pingpong table

The top took a little more effort.

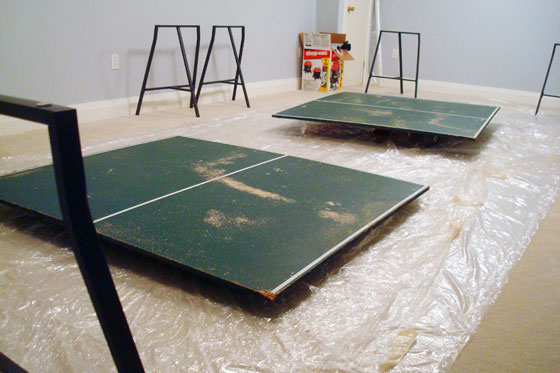
I started with a coat of fresh white paint over the lines. After sleeping on it for the night, I realized I really should have sanded the top first, so the next morning I basically started all over again. I sanded down the top, which was not an indoor task. Sanding resulted in a fine green powder over the whole room–not the best scenario with our nice light carpet. There was a defined line between where the drop cloth had protected the carpet and where the green dust had floated beyond the drop cloth’s reach. I was very glad Matt was not home to see the mess I had made.

Refurbishing an old pingpong table

The Shop Vac erased the green mist, and I was able to get back to the painting.

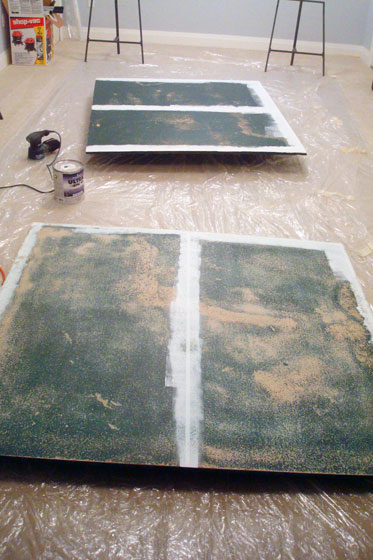
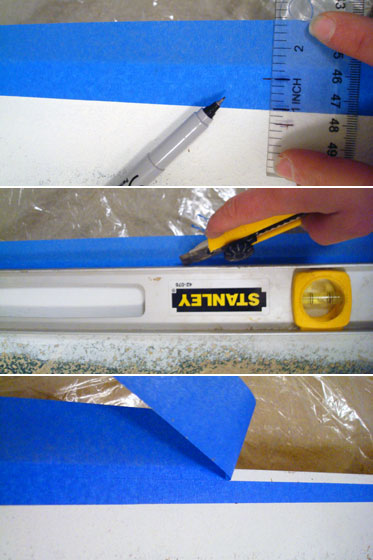
White paint went on again, and, then once it was dry, I taped off the lines. Since painter’s tape doesn’t come in ping pong line widths, I had to very carefully trim it.

Cutting painters tape to narrower width

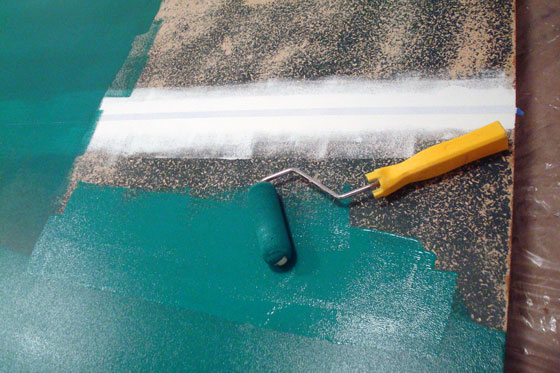
Then the tape got a quick coat of white paint to seal it, and after some drying time I moved onto the green. Since I wasn’t sure if this was actually going to work, I used some regular latex paint that we had left over from Matt’s office. It’s Manor Green from Benjamin Moore in case anyone’s interested.

Refurbishing an old pingpong table

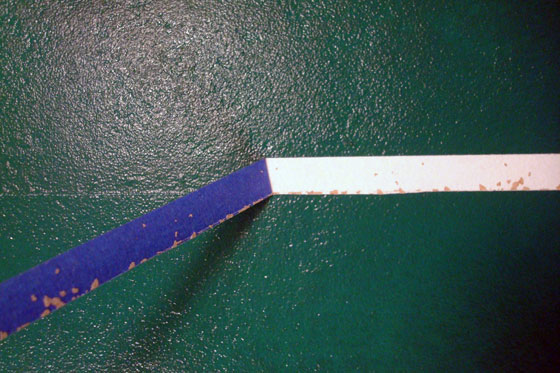
The green took about three coats, I think. On the final coat, I carefully peeled off the tape to reveal the white lines. Some of the white flaked off (I think giving the white more time to dry, or even doing two coats would have been helpful).

Refurbishing an old pingpong table

Chips aside, the finish was a massive improvement over the table’s previous state. In fact, Matt was so impressed when he arrived home that he started to think that maybe I wasn’t entirely crazy in wanting to save the table.

So now I had a tabletop and I had table legs. How to put them together?

Refurbishing an old pingpong table

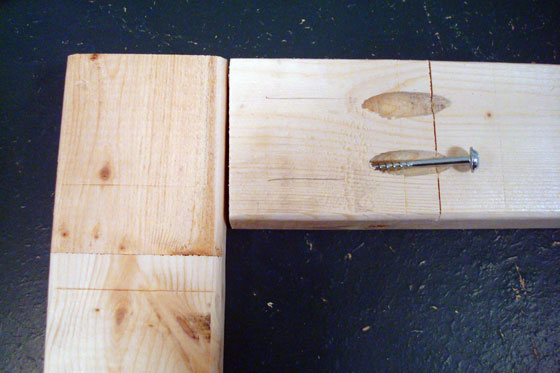
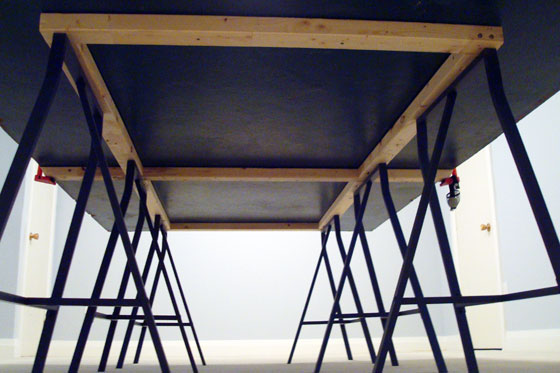
It turned out that the Lerberg legs are a bit shorter than regulation ping pong height of 30 inches–hey, I have some standards. Using a few 2x3s and my Kreg Jig I built a frame to attach to the underside of the tabletop.

Using a Kreg Jig to screw 2x3s together

I screwed the frame to the tabletop… or at least to one half. The top ended up being too unwieldy and heavy as one big piece, so I didn’t screw everything together. We set the top on the frame and the frame on the legs, and we think each piece is heavy enough to stay in place on its own.

Frame for the underside of a pingpong table

The six Lerberg trestles mean the table is very leggy. However, we really needed the support in the middle of the table as well as at each end.

We got a very simple cheap net at Walmart. It’s called an “everywhere table tennis” from EastPoint, and we just clipped it onto the table. Again, I wasn’t sure that this refurbishment was actually going to work, so I didn’t feel the need to invest in a professional net.

Anywhere table tennis net by East Point

With the table set up, Matt broke out the paddles, tapped one of the balls across the net, and it bounced. It worked! We had a functional ping pong table.

I had no ping pong skills, but after a week of daily practice, I’ve improved a lot. I finally won a game against Matt yesterday (he also may have let me win one). My ping pong prowess aside, refurbishing the table was a definite win.

Have you ever rehabbed a piece of furniture that seemed beyond hope? Anyone have any ping pong pointers? How are you celebrating St. Patrick’s Day?

Post-vacation progress report

Ahhhh… a week’s vacation… so nice, so productive, so relaxing… so sad that it’s coming to an end. 😦

Curious exactly how productive I’ve been with my week off?

Well, I slept in everyday. I went snowshoeing twice a day until the snow melted enough that Baxter and I could safely go for a run on the road. Wow are we out of shape… although only one of us ended up with his tongue hanging out of his mouth… not mentioning any names.

Hmmm… what else? I cooked. I baked a pie for goodness sake. It’s only the second one I’ve ever made. (Pastry and I do not get along). I snacked. I read some magazines and a book. I watched movies. We visited with family and friends.

Oh, and I made some really good progress on my March projects.

The fourth item on my list, light fixtures, is completely done. (Although I’m not sure the foyer light is going to stay).

Foyer light fixture DIY drumshade over a chandelier

  • Buy a second light for the kitchen island – By March 9 Done March 9
  • Finish foyer light fixture – March 10 Done March 9
  • Install foyer light fixture – March 11 Done March 10
  • Install a new light fixture in the bathroom – By March 16 Done March 10

The first item on my list, the ping-pong table, is also completely done.

Pingpong paddle and ball on a table

  • Figure out how to configure the legs and what I need to attach them to the tabletop – By March 11 Done March 10
  • Buy lumber, screws and whatever other materials I need – By March 11 Done March 11
  • Build a frame – By March 16 Done March 11
  • Drill the legs – By March 16 Decided this wasn’t necessary
  • Attach the legs and frames and tabletop together – By March 16 The frame is attached to half the tabletop and then the whole thing is just set on the legs. Done March 11
  • Set up the net – By March 16 Done March 11
  • Practice my ping-pong skills… which currently do not exist Done everyday since March 11. And I’ve actually found a few skills… not very many, but some.

Item #2, my home office, is in progress and on schedule.

  • Sort and file the mountain of paperwork that’s built up on top of the filing cabinet – By March 16 Done March 12
  • Add organizers to the new dresser and start filling the drawers – By March 22
  • Make a bulletin board – By March 22
  • Pull together all of the forms that we need for our taxes this year – By March 30
  • Figure out how to make better use (temporarily) of the closet – By March 30
  • Unpack a few boxes, repack some of the boxes, repile the boxes – By March 30

Item #3, my work office, is not started. Wop-wop. However, I have three days until my deadline, so I should be able to return to work next week with a few pretty pieces in tow.

  • Make a bulletin board – By March 16
  • Recover the shade from my desk lamp – By March 16

Once again, setting deadlines has saved me. Heading into my holiday, I had a moment of “I don’t know where to start! How am I going to get everything done?” Then I reminded myself to check the blog and see the timelines I’d laid out.

I realize that I may seem really rigid, but I promise I did relax and have fun this vacation as well. I’m sure my approach wouldn’t work for everyone, but honestly having some kind of structure is really helpful for me.

Can you believe we’re already halfway through March? How’s the month going for you? What do you like to do when you’re on vacation?

The furniture in my wallet

I have a few key pieces of furniture that I’m on the hunt for. I’m fairly particular about what they look like, but what size they are is even more important.

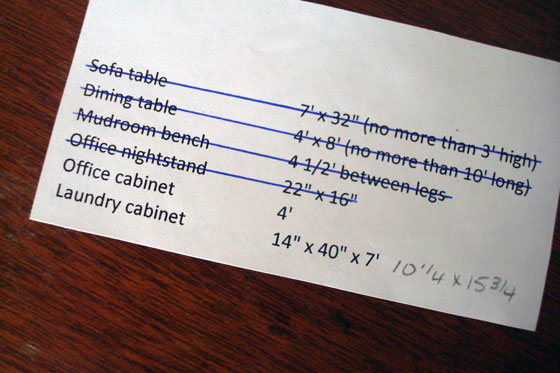
To avoid constantly running to my measuring tape, I sized up all of the spots that need furniture. Then I typed up the measurements, printed them out and slipped them into my wallet.

Keep track of furniture measurements with a slip of paper in your wallet

Whether I’m in a thrift store, at the office or browsing online (all places I’ve found furniture), I can reference this slip of paper and know if those nightstands, that sideboard or that table will fit where I need them to go.

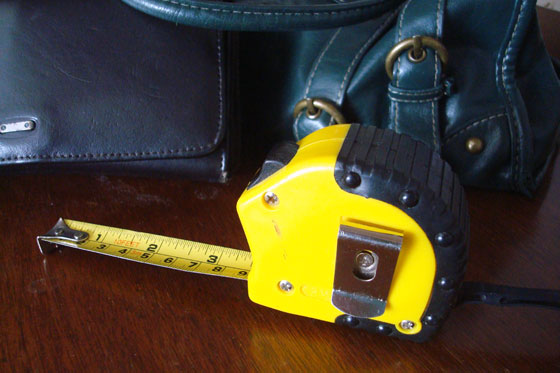
Of course the other key part of this is carrying a tape measure with me at all times.

Carry a tape measure with you to size up furniture no matter where you are

Since writing this list, I’ve actually been pretty successful at finding the furniture that I’m looking for. Since taking this picture, Matt found the cabinet for the laundry room (which we assembled yesterday), so I can cross another item off the list.

Keep track of furniture measurements with a slip of paper in your wallet

I’m sure there’s an app for this, and I know I could just save the measurements on my phone, but I’m old school. Plus, there are lots of times I forget my phone or let the battery die, so paper is actually more useful for me.

In fact, now that most of my first list is crossed off, I’ll be printing myself a new one. Next up on furniture most wanted: a cabinet for the dining room.

How do you keep track of furniture measurements? Who else always has a tape measure in their purse?

The odds of March

This month is going to be about, in the words of my paternal grandmother, the “odds and sods.” Or, in the words of Sherry from Young House Love, “Dude Get On That Already.” (I’m pretty sure my grandma never used the word “dude”).

It took me awhile to land on a goal for March. After our success in February with finally painting the hallway, kitchen and foyer, I really wanted to keep the momentum going and choose another item from the Home Goals 2014 list.

Furniture kept popping into my mind because I have some updates to share in this area. Plus we extended our painting to include one wall of the living room expressly so that I could set up my bookshelves. Clutter overflow in the basement is making me more impatient to find some of the furniture pieces that I’m looking for, but I need a reminder to check out kijiji and my thrift stores regularly.

Setting furniture as a goal would absolutely address all of these wants. However, the main task in furniture month will be painting the bookshelves, and the idea of spending another month with a paint brush in my hand really did not appeal.

So cross furniture off the list.

Not finishing the bookshelves

Sorry books

Then I thought of the kitchen. I have a bunch of small fixes that I want to do in there. Now that it’s freshly painted, it makes sense to finish the rest of the tweaks. But the kitchen doesn’t seem pressing. I can live with it. Why bump it to the top of the list?

Then, the nagging little tasks rolling around in my brain suddenly coalesced and said, “What about us?” I thought about it for a minute. There’s that. And that. Oh yeah, and definitely that. I felt excited. I felt energized. I felt like I’d found my goal for March. So I said, “Yes, please.”

A lot of this month’s tasks stem from last month’s painting. I don’t know about you, but when I finish a project usually tools and materials are spread around everywhere. That chaos causes other messes, and I ended up feeling very disorganized.

So it may not be the most creative or challenging collection of tasks, but March will definitely be full of variety. Most rooms have some issue that needs to be addressed. Spoiler alert: This month you will see my most shameful space, my poor, poor catch-all office.

My challenge is to avoid making March’s plan read too much like my regular to-do list. After all, dusting and vacuuming and mopping do not make the most interesting blog posts (although starting on spring cleaning is definitely on my mind).

Here are some of the major odds and sods on my list:

1. Set up the ping-pong table

Eastpoint Everywhere Table Tennis set

  • Figure out how to configure the legs and what I need to attach them to the tabletop – By March 11
  • Buy lumber, screws and whatever other materials I need – By March 11
  • Build a frame – By March 16
  • Drill the legs – By March 16
  • Attach the legs and frames and tabletop together – By March 16
  • Set up the net – By March 16
  • Practice my ping-pong skills… which currently do not exist

2. Get my home office under control

You don’t really want to see the before, do you?

Ohhhhh. I cannot tell you how much I don’t want to post this picture.

Argh.

Sigh.

I’m so ashamed.

File this under the category of “keeping it real.”

Messy office

Aaaah. Please stop looking at it.

Keep scrolling until it falls off the screen.

Let’s look ahead at how I can fix this disaster.

  • Sort and file the mountain of paperwork that’s built up on top of the filing cabinet – By March 16
  • Add organizers to the new dresser and start filling the drawers – By March 22
  • Make a bulletin board – By March 22
  • Pull together all of the forms that we need for our taxes this year – By March 30
  • Figure out how to make better use (temporarily) of the closet – By March 30
  • Unpack a few boxes, repack some of the boxes, repile the boxes – By March 30

3. Pretty up my work office

  • Make a bulletin board – By March 16
  • Recover the shade from my desk lamp – By March 16

4. Finalize light fixtures

Value Village light fixture

  • Buy a second light for the kitchen island – By March 9
  • Finish foyer light fixture – March 10
  • Install foyer light fixture – March 11
  • Install a new light fixture in the bathroom – By March 16

I may even make time for some sewing. I try not to post too much about fashion or sewing here, but I have had a wonderful green dress cut out since November. Julia Bobbin is running her annual Mad Men Challenge this month, and I think my dress would fit in perfectly. The April 1 deadline and cleaning my office so I actually have some sewing space may be the motivation I need to finally get stitching.

You’ll notice that I have March 16 as a deadline on a lot of things. That’s mainly because as of 4pm this afternoon I am on vacation for a week. Yay! Forget jetting away to a tropical destination or cozy resort, I am excited to have a week of uninterrupted farm time to connect with family, work on my projects, sleep in and “get on that already.”

This month will definitely be a mixed bag (to borrow another term from my grandmother). You will hear about some of our new furniture pieces along with these other to-dos. As usual, I’ll keep you updated and hold myself accountable throughout the month.

What’s on your list for March? Do niggly little tasks build up for you too? Anyone else have any odd sayings that you use regularly?

February goals wrap up report (and a reveal)

It’s the last day of February and time for the final report on how we did on our goal for the month of painting the main floor hallway, foyer and kitchen.

Want a sneak peak?

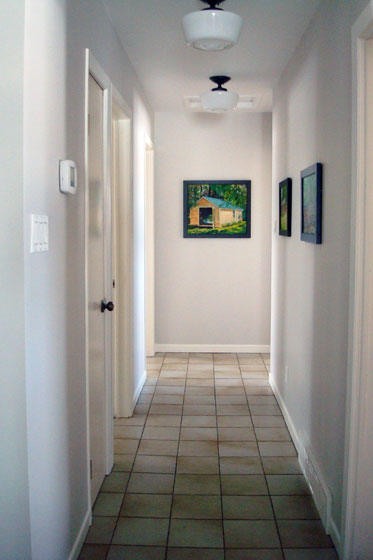
Hallway painted Benjamin Moore Abalone

Yup. We have light fixtures, art and fresh paint. Hallelujah.

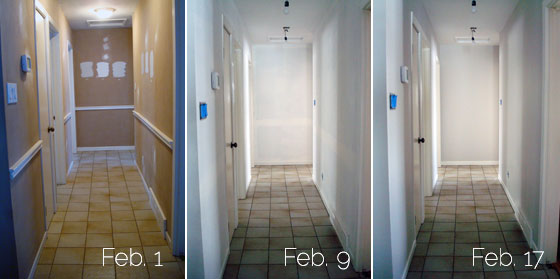
Just for a reminder, here’s a look back at how this project unfolded over the month:

Progression of painting our hallway

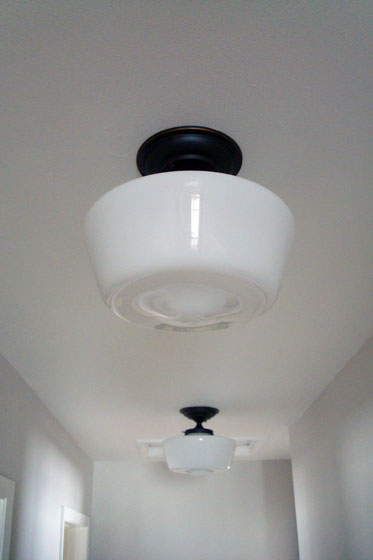
Heading into last weekend, the final task on our list was installing light fixtures. I chose school-house type fixtures from Home Depot (a complete source list is below). There were lots of options through their web site, and these were about the cheapest. I love how the dark oil-rubbed bronze contrasts with the light coloured walls, our pristine white ceilings and echoes the dark tones of our picture frames.

 World Imports Luray Collection Oil Rubbed Bronze 1-Light Semi Flush mount

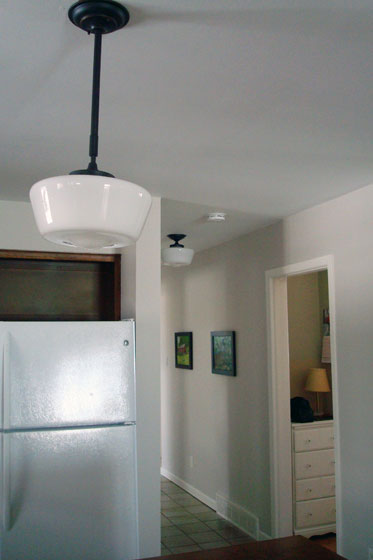
The light fixtures came in both a semi-flush mount, which I used in the hall, and in a pendant, which I used over the island. I love these lights and have wanted to use them for awhile. They have so much more personality than the boob lights that were there before, and I think they work very well with our casual country setting.

 World Imports Luray Collection Oil Rubbed Bronze 1-Light Pendant World Imports Luray Collection Oil Rubbed Bronze 1-Light Pendant

The final task on our to-do list was also where we fell off schedule a little bit. If I zoom out a little bit you’ll see that we’re still missing one light fixture in the foyer. I’m DIYing this one and need just a bit more time to pull it together. This angle also gives you a glimpse of the kitchen, hallway and foyer all together.

Hallway painted Benjamin Moore Abalone

This one miss aside, I’m declaring February’s project a success.

For us, a month was a realistic timeline to completely transform these spaces. My schedule worked really well to keep us on track. I kept a rough tally and for just the painting, we spent about 25 hours. We worked steadily but didn’t stress ourselves out trying to get it all done too quickly. I’ll definitely be mapping out monthly goals again.

The main floor feels fresh and new. Having Matt’s grandpa’s paintings on the walls really makes the space feel like ours. I’ve fallen even more in love with my house.

Anyone else go through a transformation this month? What did you accomplish in February?

Source list:
Wall paint: Abalone from Benjamin Moore (75% intensity)
Trim paint: Cloud White from Benjamin Moore
Light fixtures: Luray Collection Oil Rubbed Bronze 1-Light Semi Flush mount (this one doesn’t seem to be available online anymore) and Luray Collection 1-Light 34-5/8 in. Hanging Oil-Rubbed Bronze Pendant both by World Imports through the Home Depot
Paintings: Family heirlooms painted by Matt’s grandfather