Six-month performance review

Not to alarm anyone, but we’re halfway through the year. (Sorry. Tempus fugit.)

It’s been nearly six months since I posted my home goals for 2014. Time for a mid-year performance review.

I had six projects on my list. Here’s how I’ve done so far.

1. Paint the main floor hallway and kitchen.

Big fat done on task number one. Matt and I knocked this one out in February.
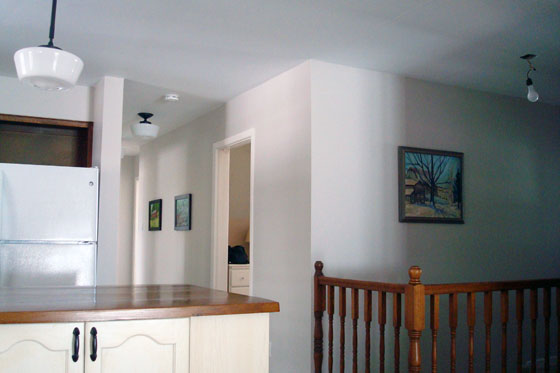
Hallway painted Benjamin Moore Abalone

2. Laundry room.

I haven’t started this one yet. I figure it will be a good fall project when I don’t want to/can’t work outside anymore. Besides, I can’t start anything until Matt digs out the foundation wall and fixes the basement leak. Hello summer honey-do list.

3. Master bedroom.

For the most part, this is another fall project. However, prep starts this month with removing the popcorn ceiling.

4. Furniture.

I’ve done fairly well in this department.

  • Sofa table for the living room. Found this one in an empty office at work (I asked permission before I took it).
  • Narrow dresser for my office. DIYed this one out of two nightstands.

Tall and narrow DIY dresser

  • Cabinet for the laundry room. Bought this one from Canadian Tire. (There was some DIY, since we had to assemble it ourselves).
  • Ottoman for the basement reading nook. Made this one out of a plastic barrel.
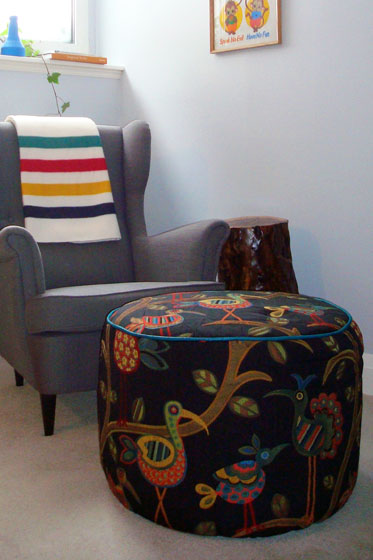
How to make a round footstool

I have a few more pieces that I’m still on the lookout to buy or make. Top on the list is refreshing my bookshelves and the living room TV stand. My books have been packed away for more than two years. I want them back.

5. Living room fireplace.

Hope still springs eternal. The fireplace will be redone some day. Whether that day is this year depends solely on how much we’re able to rebuild our post-solar bank accounts.

6. Landscaping.

  • Reestablish the flowerbeds around the house. I’m slowly, ever so slowly, working my way around the house.
  • Continue to plant the turnaround. The turnaround is looking awesome, albeit a bit weedy.
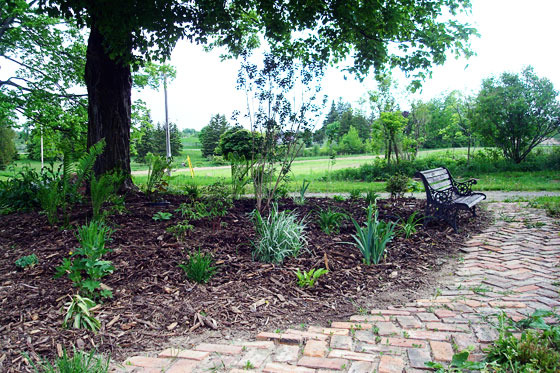
Garden with a brick path and park bench under a big tree

The pond shore is even more overgrown than last year and is pretty much inaccessible. Since this is my favourite part of the property, that is a bit of a downer. I’m willing to cut my losses on the pond this year, but I’m still hoping I’ll be able to clear and fence the vegetable garden before the end of the year.

And that brings us to the bottom of this year’s original goals.

However, there are a few things we’ve done beyond this list.

Obviously, the solar panels are a pretty massive project.

Solar panel array

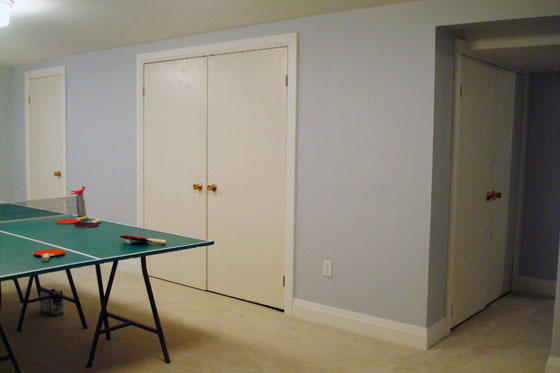
We’re also revisiting the basement, finishing off the reading nook, adding the ping pong table and making over the doors (in progress).

I’ve had a bit more success this year staying on task thanks to the monthly projects. Thanks as well to all of you for your encouragement along the way. It’s nice to look back and see that I’ve actually made some progress. We have half a year to go, and I have a bit more work to do yet, but I think I’m on the right track.

Have you ever given yourself a mid-year performance review? Who else feels like time is flying by? Is there anything you’d like to accomplish over the rest of the year?

Operation popcorn

You know those things that you have to do, want to do, but don’t really want to do? That’s this month’s project.

The plan is to start our master bedroom makeover. Step one is remove the popcorn ceiling (the fan’s on the list too).

Popcorn ceiling

I’ve been saving this project until I could open the windows, as there is likely to be a bit of dust and mess.

What are you up to this July? Do you have any tips for removing stippled ceilings? In the basement, I scraped some and sanded others. Sanding’s way messier, but I got a nice smooth finish and had to do less patching.

Barn door makeover – Progress report

It’s not quite the end of the month, but I’m calling it close enough. Time for an update on how I did on June’s project. You may recall that the plan was to update the boring slab doors in our basement with some trim.

Here’s where we’re at:

A plastic bag full of old hardware.

Bag of door knobs and hinges

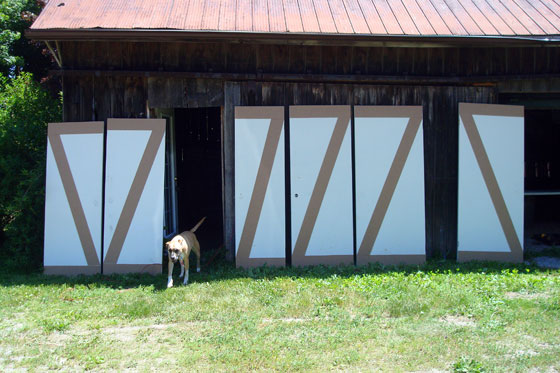
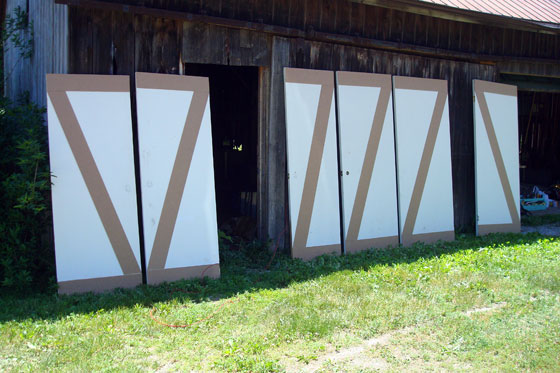
And seven doors trimmed out. (I know there’s only six pictured here, but trust that the seventh one is laying in the driveshed with the trim in place. To make it up to you, I’ll give you a cute puppy instead.)

Making slab doors into barn doors

My timelines shifted a little bit (i.e. my bias to procrastinate came out), but I’m not too far off schedule. Here are the details of how the update went down.

1. Figure out design for the doors. By June 6. Done June 10

As you can see, I decide to go with a basic Z (that’s a Canadian ‘zed’). It’s a classic barn door motif for a reason. Plus, I was able to keep it simple and lay out my strips so they don’t interfere with the door knobs or hinges.

2. Buy material (and hopefully the store staff will cut it into strips for me). By June 13. Done June 13.

A very accommodating (if slightly math challenged) associate at Home Depot along with his beautiful panel saw ripped two sheets of hardboard into 6-inch strips for me. Thank goodness it was a quiet Friday night at the store.

3. Cut strips (if I have to). By June 14. Non-issue.

4. Remove doors. June 14/15. Done June 21.

My Dad came over and helped me get back on track last weekend. He popped all of hinge pins, and I schlepped the doors upstairs.

5. Remove hardware. June 14/15. Done June 22.

A lot of the handles were dummies, and it took me a few minutes to figure out how to detach them. This video was helpful, even though my handles didn’t slide off nearly as easily. I got them eventually.

Bag of door knobs and hinges

6. Trim the bottom of the door to the electrical panel closet (since it rubs on the carpet). June 21/22. Done June 21.

No matter how much I practice, I still can’t cut as straight a line with my circular saw as my Dad does.

7. Install strips on the doors. June 21/22. Done June 21.

It took my Dad and me just two hours to add the panels to all seven doors. Easy-peasy (except for the door where we put the strips on the inside (closet side) of the door, hence only six doors in the picture below. Oops.)

Making slab doors into barn doors

To attach the panels to the doors, we put a smear of carpenter’s glue on the back of each strip and then tacked it with the nail gun. We let the doors sit for about 24 hours, and then I filled all of the nail holes and joints with wood filler and sanded it smooth.

I was on my own to fix the mess-up on the closet door. Since the nail gun went home with my Dad, I used construction adhesive on the panels and weighted them down with everything I could find in the driveshed.

Weighting down the panels until construction adhesive sets

I’ll be interested to see if one method holds up better than another. I sincerely hope that no matter what the panels stay securely in place.

8. Buy new ORB hinges. By June 27. Done June 25.

Upgrading the hinges is the biggest expense on this project. I figure I’ve saved everywhere else, so I can spend a little bit to get exactly what I want. The cost for 20 new hinges is still less than $100, so it wasn’t a huge splurge.

There are a few things left to do before this door makeover is complete, so here’s the plan for the final tasks and June’s final four days:

9. Paint the door jambs – By June 27

I haven’t started painting, so this task will not be done today. It should be an easy weekend project though.

10. Spray paint old knobs ORB – By June 29

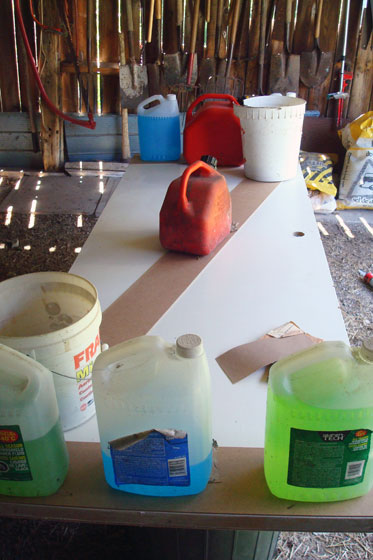
Good weather is forecast for this weekend, so I’m planning to set up a spray paint station outside.

11. Paint the doors – Not my problem.

You might recall my plan is to have Matt paint the doors. Well, he starts summer holidays this afternoon. Happy holidays, honey.

Do you have any last minute projects you’re hoping to knock out this weekend?

June project plan

June’s project might seem a bit unexpected. Weather has finally turned nice. Summer is almost here. Now is the time to be working outside.

However, this month, I’m going to turn my attention back inside to an area you haven’t seen too much of in a little while… the basement. The basement renovation was the big (all-consuming) project for Year One. That was not last summer, but the summer before. As with any renovation, there are still some finishing touches yet to be completed, even two years later.

This month’s project is the basement doors. There are 10 doors in the basement. Two of them are standard colonial style. The other eight (five of which you see below) are basic slab doors. Boooooooring.

Slab doors

All of the doors need to be painted. Smudges, scratches and yellowed paint make them look pretty shabby, especially next to our nice white trim.

Smudges on white doors

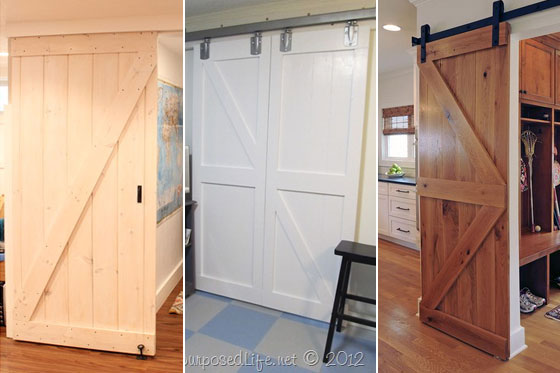
Even more than paint, the slab doors need an injection of personality. I think their personality should be a little bit country, so I’m taking inspiration from barn doors.

Barn door options

Sources: 1, 2, 3

A simple raised Z or X detail would be easy to apply, wouldn’t interfere with the hinges or knobs and would fulfill my interior design philosophy that every room needs at least one rustic element.

So the plan for this month is as follows:

  1. Figure out design for the doors – By June 6
  2. Buy material (and hopefully the store staff will cut it into strips for me) – By June 13
  3. Cut strips (if I have to) – By June 14
  4. Remove doors – June 14/15
  5. Remove hardware – June 14/15
  6. Trim the bottom of the door to the electrical panel closet (since it rubs on the carpet) – June 21/22
  7. Install strips on the doors – June 21/22
  8. Buy new ORB hinges – By June 27
  9. Paint the door jambs – By June 27
  10. Spray paint old knobs ORB – By June 29

You’ll notice that actually painting the doors and rehanging them are absent from this list. This is because my secret plan is to get the doors ready to paint, but then pass them on to Matt. He painted all of the doors in our last house, and I think it would be good to continue the tradition. Don’t you?

This probably is more of a one week project, rather than a one month. However, stretching it out will give me a chance to do some work outside still. It would be hard for me to spend the whole month of June indoors.

Have you ever dressed up basic doors? Are you on board with the barn door trend? What’s on your to-do list for June?

How to make a fabric-covered bulletin board

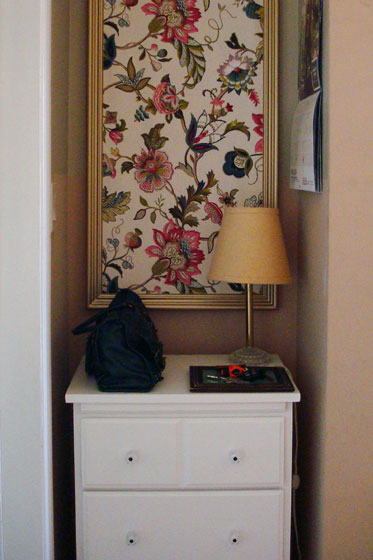
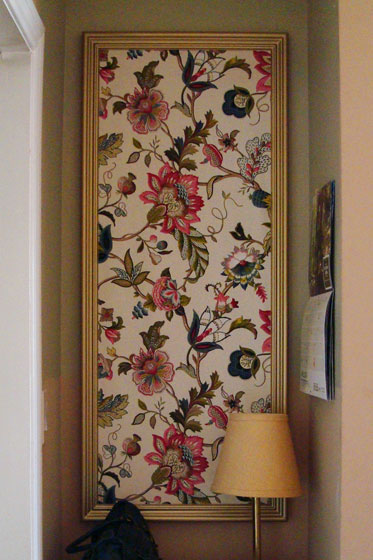
While the dresser may be the workhorse of my new office nook, the beauty queen is definitely the fabric-covered bulletin board that hangs above it.

Pretty home command centre

Since I was working with such specific measurements in this tiny space, I decided that my best option was to make my own bulletin board.

Home Depot sells prefab cork panels that are 48 inches by 24 inches, very close to the dimensions I needed, so I started with that. Then I found a piece of decorative molding to build my frame. I considered some of the very fancy crown moldings, but a lot of those are very wide. Given that I only had about 20 inches total to work with, I didn’t want to take up too much space just with the frame. I wanted as much pin-up space as possible.

For the back of the frame, I bought some 5/8 inch by 2 inch strips. After ripping them in half, they were about half an inch narrower than my molding. By attaching them to the back of the molding with some glue and little nails, I was able to make a recessed area for the cork to sit.

How to make a bulletin board

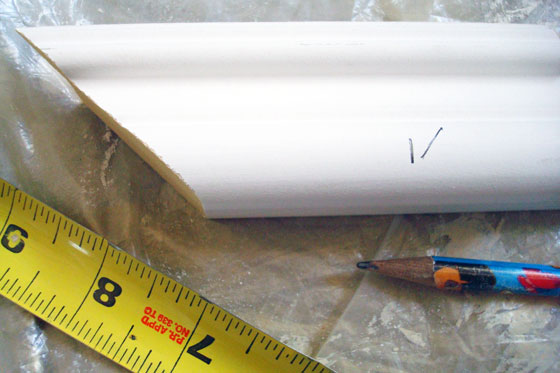
I used my mitre saw to cut each side of the frame to the right length at a perfect forty-five degree angle. Tip: When you’re cutting pieces on an angle, mark your desired length as you usually would at 90 degrees. Add a tick mark to the left or right to remind yourself which way you’ll need to angle your cut your.

Cutting decorative molding on an angle

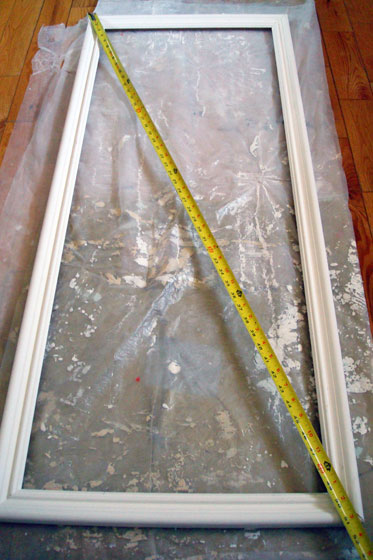
Each corner got a few dabs of glue, and then I nailed them together with my Dad’s nail gun. Tip: To check that your frame is square, measure diagonally from corner to corner. The dimensions should be the same between each diagonal pair. Twist your frame a bit to the left or right until your measurements match exactly.

Checking for square

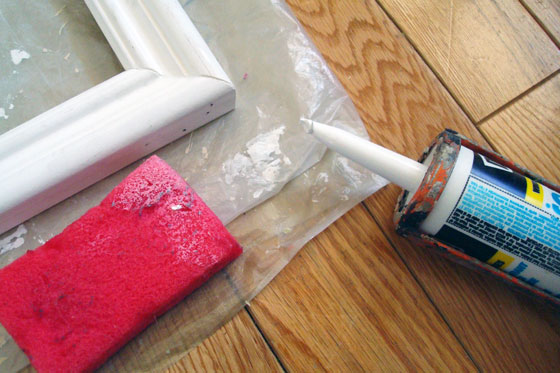
Once my frame was perfectly square, I caulked all of the nail holes and corner joints. Tip: Keep a damp sponge on hand as you’re caulking. Wetting your finger before smoothing out the caulk gives a nice even finish. Plus the sponge gives you a spot to wipe any excess caulk off your hands before you get it all over yourself. Not that I’m speaking from past experience, or anything. Oh, and make sure you choose paintable caulk.

Wet your finger before smoothing out caulking

I let everything dry and then it was time for paint. I knew I wanted a bit of glitz, so I decided to go with gold. A few light coats of spray paint did the job.

With the frame done, I moved on to the cork. The prefab piece was close, but just a bit too wide. It cut easily with a knife, and then a quick rub with fine sandpaper smoothed any ragged edges. Tip: Cut the the cork about 1/8 inch to 1/4 inch smaller than the frame. A little bit too loose is better than too tight. Plus any gap will be hidden by the recessed channel behind the frame.

Cutting cork with a knife

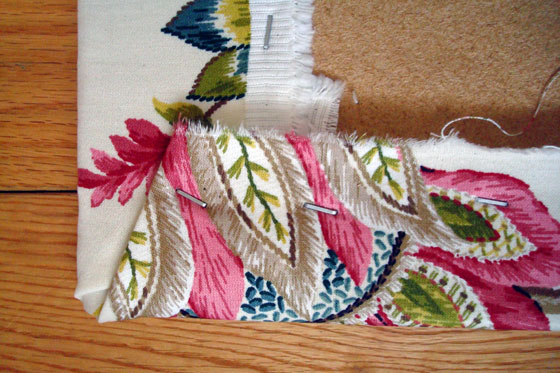
Covering the cork in fabric was no more complicated than wrapping a present. I cut the fabric about 6 to 7 inches bigger than the cork panel, so that I had plenty to wrap around the back. I pulled it taunt and stapled it in place. The corners got a bit of extra pleating and a few extra staples.

Staple the corners on the backside of the cork

I slipped the cork into the frame. To hold it in place, I tacked staples part way into the frame at four different points around the back side of the frame. I can easily pull these out if I ever want to change the fabric.

Use staples to hold the bulletin board in the frame

I flipped it over and was dazzled. Pretty! Pink! Flowers! Colour! Gold!

Fabric covered bulletin board

I was so dazzled that I didn’t spend too much time coming up with a technical solution to hang it on the wall. I just wanted it up. My solution was two finishing nails hammered into the drywall on the same level. Their small heads fit easily between the edge of the frame and the cork, and the board is light enough that that’s all the support it needs.

Anchoring securely might be more important if you have small children or other things you don’t want bulletin boards falling on, although we’ve had no issue with the board shifting or falling since I installed it.

Fabric covered bulletin boards are a pretty easy and popular DIY. Have you ever made one? How do you bring beauty to functional pieces like bulletin boards? Are you a floral sparkle fan?

How to make a tall narrow dresser

When I reorganized the tiny nook in my office, I knew that I had to add some kind of storage. A dresser was the ideal solution. Drawers would allow me to tuck things away, and the surface would give me a spot to write notes and set my purse and keys.

So I had some pretty specific requirements: drawers, about counter top height, oh, and it had to fit in the nook, which was 16 inches deep by 24 inches wide. Of course, it also had to be cheap.

Well, I had no luck finding a piece of furniture that met those standards. However, I soon realized that nightstands often have drawers and are usually small enough to fit this little space. While nightstands are much shorter than countertop height, they usually come in pairs. Couldn’t I just stack them one on top of another?

It turns out, yep, I can.

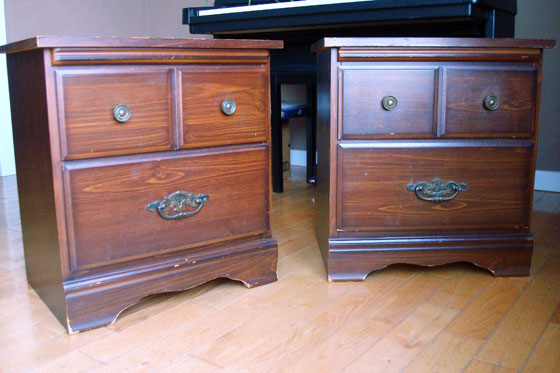
Here’s what I started with. Two little nightstands I found at the Salvation Army thrift store for $12 each.

Two vintage night stands

First step of any furniture makeover: remove the drawers and the hardware. It turned out that one of the drawers contained a plastic hardhat, so I got distracted by that for a little while. Consider this your PSA to always wear safety equipment (hardhat, safety glasses and ear protection) while DIYing.

Geeky safety equipment

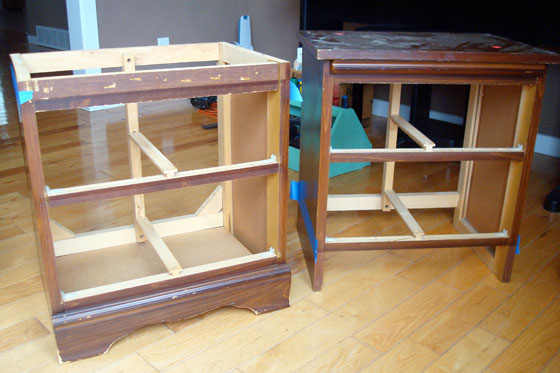
Anyways, back to work. I started taking apart the dressers. I popped the backs off of each of them. Then I took the top off one and the bottom off another. The nightstands came apart really easily. The backs were just stapled in place. The top was attached to corner blocks that were screwed in place. The decorative trim at the bottom was tacked with some little nails. I needed a few different tools, and I was thankful for my stubby screwdrivers that fit in some of the tighter nooks and crannies, but dismantling these pieces of furniture was not a taxing task.

Dismantled night stands

Once they were apart, it was time for something that was a little more taxing: cutting. The nightstand that was going on the bottom had to be trimmed along the top, and the one that was becoming the top half had to be cut down along the bottom. Clear? I measured the spacing between the drawers to figure out exactly where to make my cut and marked the line with painters tape.
Marking a cut line with painters tape

Four quick slices with my circular saw, and the dressers were the right height. I set them on top of each other and was super excited. It was looking like I envisioned.

Making a dresser out of two night stands

Now I just had to figure out how to actually attach the two halves. When I’d taken apart the dressers, I’d removed some side braces. I was able to reuse those pieces on the inside of the dresser. I ran them half on the bottom and half on the top and screwed right through the side into the brace. My dresser was now all one piece and it was solid, but it was ugly. No amount of wood filler was going to fix that joint.

Attaching two night stands to make a dresser

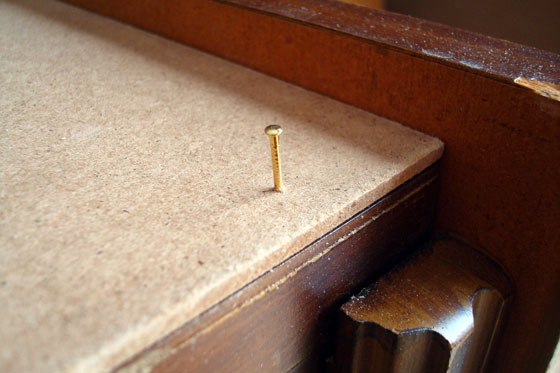
The solution was overlaying a very thin panel along the whole side. I had 1/8 inch MDF, which I cut down to the exact dimensions of the side of the dresser. I tacked it in place with small finishing nails, and it covered up the gap completely.

Tacking a board in place with small brass finishing nail

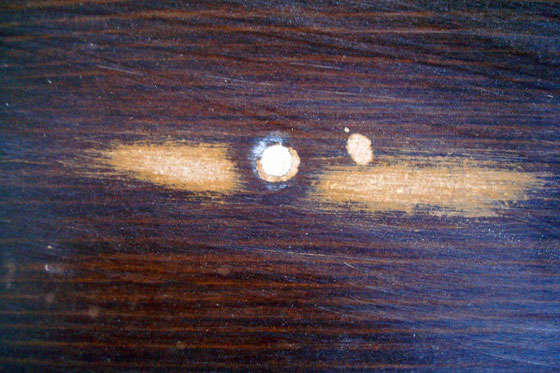
A bit of wood filler camouflaged the joint on the front of the dresser. While I had the wood filler out, I filled the holes on the drawers where the original pulls had been and a few other spots on the dresser where the veneer was chipped.

Filling holes with wood filler

After a light sanding all over, I primed the dresser and drawers, and then they all got a coat of creamy white paint–Cloud White in Benjamin Moore’s Advance formula. This was my first time using Advance, and I really like it. The finish is nice and smooth (I used a foam roller), it has none of the stickiness that you sometimes get with latex after it dries, and it has been very durable. In the past, I’ve used heavy duty oil paints on furniture or cabinets. The clean up is a pain and the stench is noxious. None of that is an issue with Advance, and in my opinion it’s held up just as well as an oil finish.

Painting a dresser with a foam roller

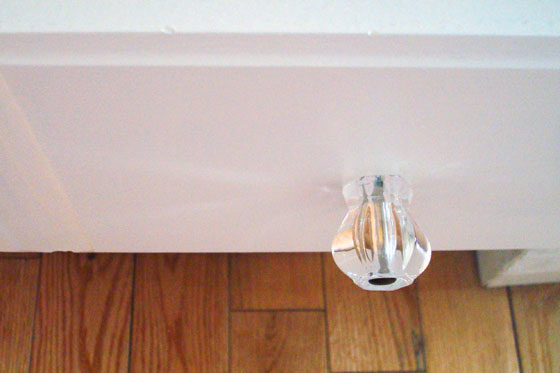
The finishing touch for the dresser was new crystal (plastic) nobs. This is one area where I got a bit neurotic. The nobs that I chose had a metal post that went through the middle. The posts were brushed nickel. I’m not a fan. Plus, I already had oil-rubbed bronze and gold/brass elsewhere in the office. I’m not good with mixing metals, so I spray painted all of the metal pins with oil-rubbed bronze spray paint. It was easy, but probably not entirely necessary.

Crystal drawer nobs

As you saw last week, the dresser fits perfectly in the nook. It ended up being the exact right height, and I’m loving having all of the drawers to keep me organized.

Tall and narrow DIY dresser

What second hand furniture have you made over? Have you ever made two pieces into one? How do you handle hard-to-furnish spots with specific dimensions?
Office nook details

Thanks everyone for your very kind comments on the nook in my office. Today I’m going to go into more detail on the particulars of this little corner.

Starting at the top, there is the bulletin board. I’ve always been a bulletin board kind of girl. Whiteboards just don’t work as well for me. For this tiny nook, I needed something tall and narrow, which meant custom. I’ll share the details of how I made this bulletin board next week. It’s a simple wood frame that I spray painted gold, and the cork is covered in one of my favourite fabrics, Brissac Jewel by P Kaufmann Fabric. I’ve had this piece of fabric for close to five years. I’m really glad that I decided to use it here. Its beautiful colours make me happy.

Fabric covered bulletin board

Our calendar hangs beside the bulletin board. It’s just a freebie wall calendar hanging from a simple cup hook. It’s basic, but it’s so helpful to get things out of my head and organized on paper where both Matt and I can see them. (Ignore the unpatched screw hole and the two-tone paint).

Wall calendar

Continuing our way down, we come to the top of the dresser. This was always meant to be a place to set my purse and keys when I come home from work. My dear friend made me a handy little tray that’s perfect for my keys. She took a picture frame, removed the back, added cork feet to the underside and put a pretty piece of sparkly paper inside. I love the blend of the slightly rustic wood frame with the sparkle of the paper.

Home command centre

I’ve had the little lamp for pretty much as long as I can remember. My grandpa rewired it when I was little, and it’s been with me ever since. Growing up in my childhood bedroom it had a pretty pink shade. This newest shade is a second hand burlap one that I picked up at Value Village. The burlap is a nice contrast with the glass base. I’ve gotten into the habit of turning on the lamp at night before we head down to the basement to watch TV. It casts such a nice glow in the hallway when I come back upstairs to go to bed. Definitely my favourite look for this nook.

Nook at night

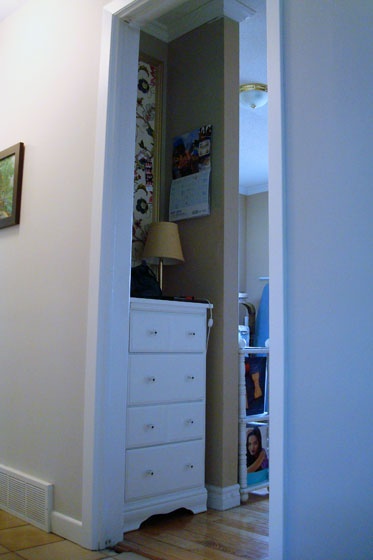
The anchor of the nook is obviously the dresser. Since I was working with such specific dimensions in this spot, finding the right piece of furniture was a bit of a challenge. As usual, DIY is the best solution. I’ll be sharing the tutorial of how I made the dresser next week.

Tall and narrow DIY dresser

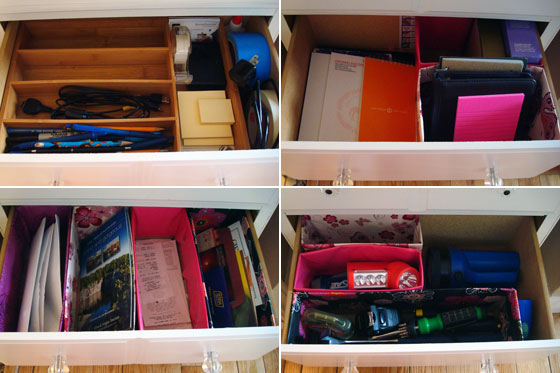
This piece is small but mighty. Four drawers give me lots of space to tuck away everything: pens, paper, tape, chargers, receipts waiting to be filed, coupons, bits of paper, even extra tools and flashlights. In the top drawer, a cutlery organizer that I picked up at Value Village fits perfectly. In the other three drawers, I used IHeart Organizing’s Cereal Box Drawer Organizers to keep everything neat and tidy. (Yes, even my hammer now lives in a box wrapped in flowered pink paper).

Drawer organizers

The elements of this nook have come together slowly over the past few months. With each new addition, I feel more organized. I’ve spent the time to think about what I need and what makes sense to include in this corner. Even better, it’s not just functional. It’s pretty too.

What makes you feel organized? Are you a fan of bulletin boards or white boards? How do you blend pretty and functional?


Office nook before and after

My office is a room of many issues, but there’s one corner that gets the award for most-improved.

Office nook

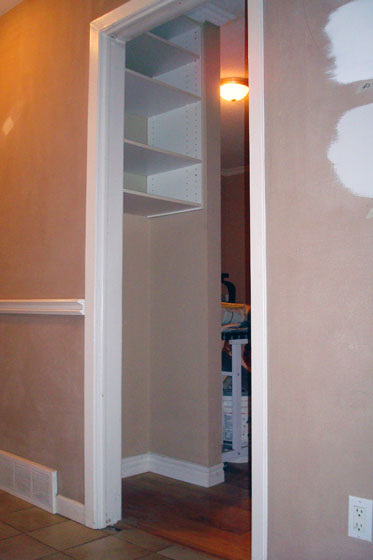
It’s a wee tiny alcove just inside the door. The space measures 16 inches deep by 24 inches wide. When we moved in, and for the first year and a half of living here, this space was fitted with some ridiculous built in shelving. The fact that it started at about five feet in the air and went up to the ceiling made it basically unusable.

Nook before

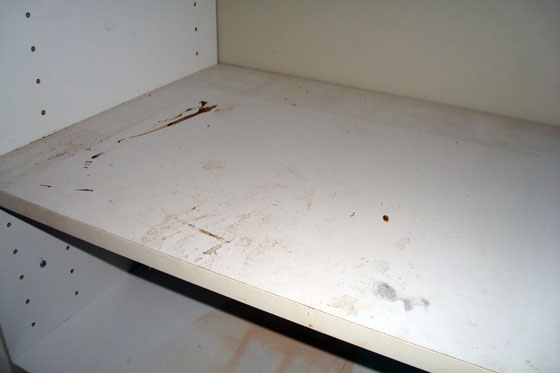
Not that you’d want to use it anyway. It was filthy.

Can I just ask why things in this house have to be both weird and gross? I mean, shelving that’s over your head out of reach isn’t enough? It also has to be disgusting?

Dirty white melamine shelving

One night, I snapped and decided that the shelving had to come down. Of course, it turned out it wasn’t that simple. The shelving had been installed all in one piece before the door casing was put on, and even once I unscrewed it from the wall, it wasn’t going anywhere. Smushing the shelving into a parallelogram allowed me to slide it past the casing and get it out of the nook. Then a set of Allen keys allowed me to take it apart into its composite melamine pieces. There were a few dings in the wall, but otherwise it was a victory. The nook was empty.

Painting the office will happen all at once sometime in the future. So for now I wasn’t worried about patching the drywall or dealing with the two tone paint that removing the shelf had uncovered. I did want to make the space more functional, though, and I didn’t want to wait.

The office is right off the kitchen, so I decided that this was a perfect spot to build a bit of a command centre. A place for the grocery list, a calendar, important numbers, even a spot to put my purse and keys when I come home at the end of the day.

I needed some storage, some display and lots of organization. Here’s what I came up with.

Pretty home command centre

It may be a weird tiny space, but I’ve packed a lot of function into this little corner. In the next post, I’ll share the details of exactly what went into my organized nook.

Has anyone else transformed a very small area? Do you have a command centre at your house? What are your tips for dealing with a small space?

April report

It’s the last post of April, so time to report on my accomplishments for the month.

My plans for April consisted of a few leftovers from March and a theme of “green.” So how’d I do?

Finish the projects for my home and work offices

I just can’t seem to motivate myself to complete the last few details for prettying up my work office. But my home office is getting much more organized and looking much prettier.

  • Add organizers to the new dresser and start filling the drawers – Done April 27
  • Make bulletin boards for my home and work offices – One done April 20
  • Recover the shade from my work office desk lamp

Fabric covered bulletin board

Don’t spend any green (on the house)

  • I didn’t spend any money on the house (I had purchased all of the supplies for my office projects long ago). In fact, I didn’t spend much money at all… aside from a completely unnecessary parking ticket. Country girl goes to the city and forgets the side of the street you can park on depends on whether you’re in the first or second half of the month… argh.
  • We spent a whole lot of green on the solar panels. As much as it hurt to write the massive cheque, we were very happy that we were able to pay for them in full without borrowing any money.

Solar panel array

Go with green projects

  • The solar panels are obviously about as green as we can get. Our hook-up was delayed by one day, but on Friday the inspector cleared us, and we were connected to the grid.
  • For my office projects, I was able to reuse some supplies I already had like spray paint, fabric and the boxes I made into dividers.

Start planning for a green (outdoor) project

  • At the start of the month, I said that I’d like to get a few quotes to see if it’s possible to get some help to clear the brush from the east shore of the pond. I’m not going to be hiring any help until our bank account recovers from the solar payment, so I’m back to DIYing it. Anyone have a bush hog I can borrow?
  • On the DIY front, two gardens have been weeded. Two more gardens have been de-edged of stones. Some of the grass has been raked. Brush has been cleared off of about half the vegetable garden area. And our free trees have been planted.

When I set my goals for April, I said that I was giving myself a bit of a break. Last Saturday afternoon, I actually crawled into bed and took a nap–unheard of for me. Even though I gave myself permission to take it a bit easier this month, I still feel I did a lot in April.

What did you do in April? Who else is getting organized? Going green? Saving money?

The artist in the family

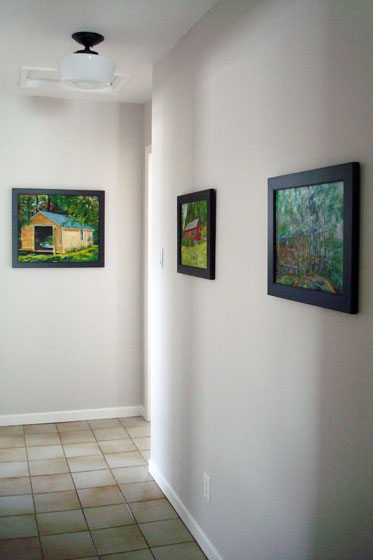
Back in January when I posted about the special painting by Matt’s grandpa that we received for Christmas, a couple of people expressed interest in seeing more of his artwork. You caught a little glimpse of the paintings when I shared the hallway reveal. Today I’m going to give you a closer look.

Paintings hung in the hallway

Matt’s grandpa was a draughtsman. He worked on the Avro Arrow, which in the 1950s was Canada’s most-advanced (and most expensive) jet aircraft.

Painting was his greatest hobby. He painted portraits, still lifes and landscapes.

Matt's grandpa painting

The four pieces that we’ve hung on the main floor are landscapes featuring rustic buildings.

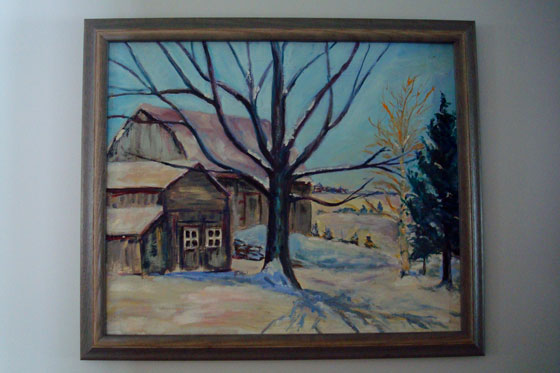
There’s the two barns that Matt’s parents had framed for us for Christmas. We hung this painting in the foyer. When we were searching for our farm, a lot of the properties we toured had pictures, paintings or aerial shots of the farms hanging inside the entryways. Since this painting looks like it might as well have been painted at our farm, it was the perfect choice for a welcoming image right inside the front door.

Painting of two barns in winter

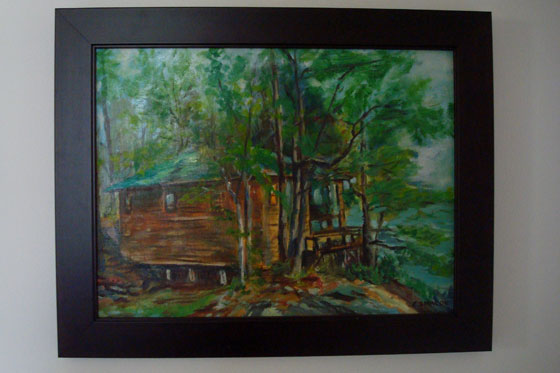
Along the hall, the two smaller images are of Matt’s aunts’ former cottages. Matt remembers spending time at the green cottage as a child. His aunt has since sold it, and I never had a chance to visit.

Painting of a green cottage among trees

The red cottage has been knocked down and a new cottage built in its place. Matt’s aunt and uncle still have the property. In fact, this is the cottage that we visit every fall. It’s special to have this very personal record of two memorable family places.

Painting of a red cottage

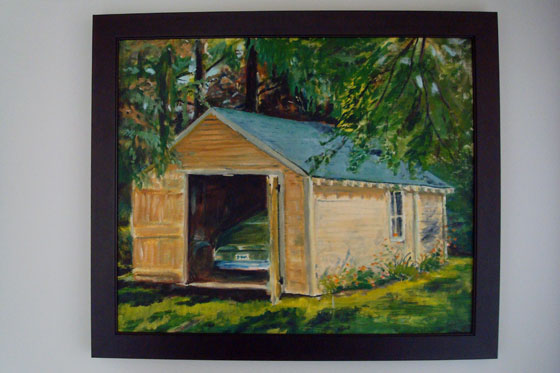
The large painting at the end of the hall shows the garage at Matt’s grandpa’s house. Surprisingly, this painting was stored away and unframed for decades. The sunlight in this picture is beautiful. It’s my favourite painting out of all of Matt’s grandpa’s pieces.

Painting of a sun-dappled garage

I’ve always said that I’d like to own some original art. I realized as I was writing this post that I do. Most artists make art because they love it, not as a “job.” As far as I know, Matt’s grandpa never tried to sell his paintings. He was prolific, and he painted because he loved it. He was most definitely an artist, and I’m very proud to display his paintings in our house.