One room challenge – Laundry room makeover

I am so excited for October’s project. Remember back in September when I didn’t have a project on my to-do list and I took apart the laundry room? Well now it’s time to put it back together.

I’m even more excited for this makeover because I’m going to make the laundry room my part of the One Room Challenge.

One Room Challenge

Linda at Calling it Home created the ORC three years ago as a way to help people stay on track and finish a room. Over the next six weeks, a group of bloggers and a whole bunch of joiners like me will be making over one room. We’ll be posting weekly updates on our blogs. So it’s not all that different from how I’ve handled my other projects so far this year.

Now, I will admit that I’ve gotten a little bit of a head start on this challenge. I trimmed out the cabinet doors and painted them last month.

I wanted to complete the makeover in October, but I knew two weekends this month were booked for non-DIY activities. As a DIYer with a day job, I absolutely need my weekends if I’m going to finish this in one month.

Well, it turns out that the ORC gives me six weeks. So I’ll have a bit of a cushion.

The purpose of today’s post is to introduce my room and tell you my plan.

Everyone, meet the laundry room. Laundry room, meet everyone.

Laundry room before

Here’s the part where the laundry room tells you a little bit about himself. We are very fortunate that we have a great space to start from (and yes, I took these photos after the makeover had already started–bad blogger). There is lots of counter space and built-in cabinets. We have a utility sink and our new (okay two-year-old) front loading washer and dryer. Even though we’re in the basement, we have a nice large window.

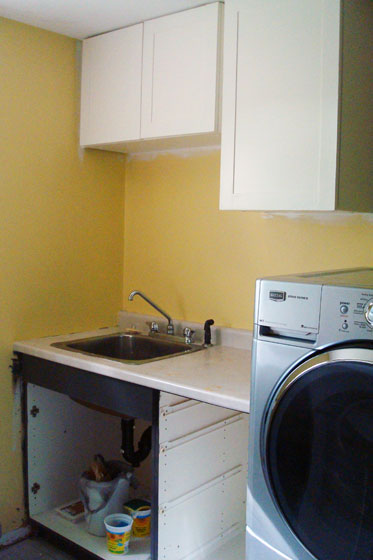
Laundry room before

before19

Now we redid the basement when we first moved to the farm. However, the makeover pretty much stopped at the edge of the laundry room. I scraped the stipple ceiling, took down the fluorescent light fixture, removed some posters that had been tacked to the front of the cabinets (why?) and that was it. Oh, except for our new washer and dryer (love you babies).

Since the room is open to the rest of the basement, I’d really like it to be as pretty as the rest of the basement. And right now, it’s not.
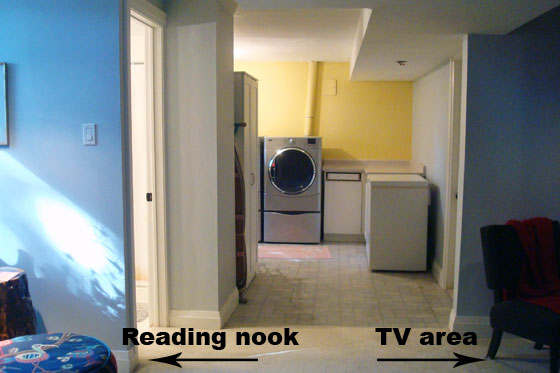
Laundry room before

So this makeover is purely aesthetic, and I’m working with what is there in the laundry room already.

Here’s the vision:
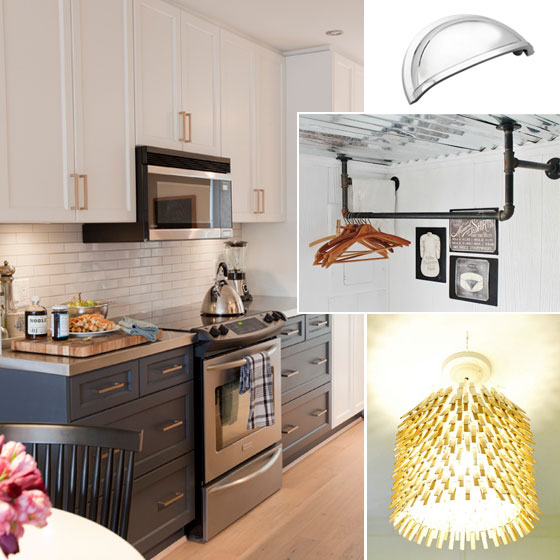
And here’s the plan:

  1. Add shaker style trim to the cabinets
  2. Paint the cabinets
  3. Install doors and drawers
  4. Remove ceiling rack – By Oct. 3
  5. Patch ceiling and walls – By Oct. 3
  6. Prime walls and paint ceiling – By Oct. 10
  7. Paint and install baseboard and paint window trim – By Oct. 10
  8. Deep clean (sink, counter, floor, machines) – Oct. 13 (Happy Thanksgiving Monday!)
  9. Paint walls – By Oct. 17
  10. Build and install ceiling rack – By Oct. 24
  11. Build and install towel bar – By Oct. 24
  12. Install cabinet hardware – By Oct. 24
  13. Build and install light fixture – By Oct. 26
  14. Decorate – By Oct. 31

Fourteen easy steps to laundry room bliss. Simple right?

Is anyone else doing the One Room Challenge? Do you find pretty laundry rooms as exciting as I do?

Bringing back the books

I didn’t really have project this month, but I did say that I wanted my books back. That meant finishing the bookshelf makeover that I started in August.

You might recall that in my original photo you could barely see the bookshelves because they were painted such a dark brown (oh, and hidden behind boxes that have been packed for two and a half years).

Bookshelves and boxes of books

Well, not anymore. Behold the view from the same angle.

Living room bookshelves

Bright and white and, best of all, filled with books. Hello beloveds.

The bookshelves wrap the one corner of the living room and tuck behind the comfy lounging chair that I inherited from my grandmother.

Corner bookshelves

I’m pretty happy with how things have come together. I know a lot of people struggle with styling bookshelves, and I’m no different. I’m decently satisfied with the middle section right now.

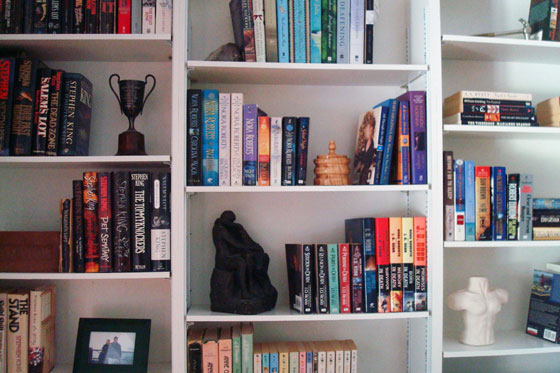
As always, the contents of the shelves have a lot of meaning for us. Besides the books we have some very special treasures.

The trophy is Matt’s grandma’s won for a school running race in 1935 when she was in high school, my dad made the small lidded wood pot on his lathe, and the hammer on the top right was a gift from my grandmother to Matt and unscrews to reveal decreasing sizes of screwdrivers. Towards the bottom, we have a brick I found in the backyard of our first house that has our city’s name stamped on it. Below that there’s a picture of Matt and me at Niagara Falls back when we first started dating, and beside that a miniature replica of Rodin’s The Kiss. (Rodin is our favourite sculptor. A miniature of The Thinker is on an adjacent shelf). The half naked man (or more accurately naked half man) was a high school art class project.

Bookshelves

I want to tuck a few more knick knacks in some of the empty spaces, and I definitely need to get some bookends. I’ll continue to futz with the arrangement, but regardless of what things look like, I’m thrilled to have my books back.

Perhaps it’s because I had bookshelves on the brain, but as I was pulling my shelves together they seemed to be popping up on other blogs as well:

I cannot explain how thrilling it is to have my books back. I came across a few I’d forgotten I had and of course lots of old favourites. In fact the borrowed book that I was half-way through may have been set aside in favour of an old favourite. (I never do that. I’m always a one-book-at-a-time woman).

Plus, setting up the bookshelves gave us an excuse to paint some more of the living room and unpack about 16 boxes that had been piled in the corner. The room feels so much more finished! … Well, we’re still a long way from finished. At least it’s a little bit closer to the vision in my head.

How do you handle book storage at your house? Besides books, what’s on your bookshelves? Any tips on styling bookshelves? Who else is a one-book-at-a-time reader?

Highlights from the Canadian Blogger Home Tour

Well that last post was a bit of a downer. I didn’t want to make it seem like I was bashing the Canadian Blogger Home Tour.

I truly do think it was a great series. I know the work that goes into photographing, editing and writing posts like those, and it’s considerable. I admire all of the people who participated in the home tour and the beautiful spaces they created.

There were some really inspirational homes on the tour and today I wanted to highlight a few of my favourites.

Rambling Renovators – Jen’s home tour was the first I read, and it linked me to many of the others. I’ve been a long-time reader of Jen’s blog, so I’d seen most of the rooms on her home tour already, but this was a great showcase of her house all in one post. The trim work and built-ins–all done by her husband–are beautiful. I love the traditional feel of her house and the attention she and Handyman pay to every detail.

Trim work at Rambling Renovators

The Creek Line House – This is a new blog for me that I discovered through the home tour. A tour of a 114 year old farmhouse? I was hooked from the very first photo. And then I scrolled a bit and saw a barn. And there were fields too. This is my kind of place.

The Creek Line House

Adventures of the Uncommon Common Law – Obviously, Becki’s and Chris’ aesthetic is not something you’ve seen from me before. However, if I ever go modern, this is how I’d do it. Sleek and clean. Dark and dramatic. But still super warm and personal. Their lighting is really cool and creative.

The Uncommon Common Law

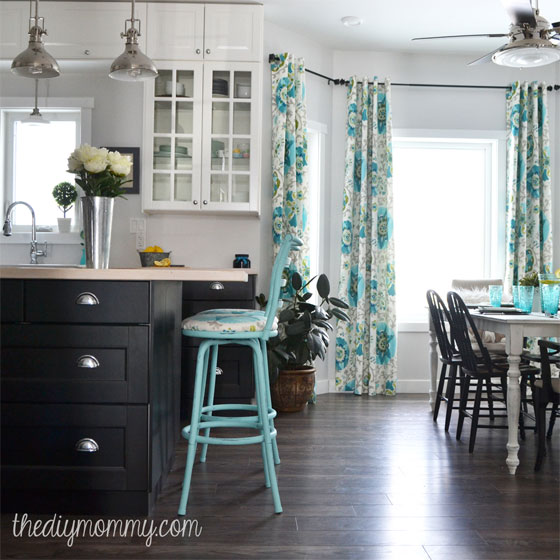
The DIY Mommy – Some of the Home Tour posts included a collage of images from the various bloggers who participated. One of the little pictures was of a bright kitchen with cheerful blue curtains. This picture is what drew me into the other blogs. I just had to find the house with those great curtains. Well, I did. And the house behind it is great too. The fact that Christina and her husband built it themselves is even more amazing.

DIY Mommy

If you haven’t had a chance to check out the whole roster of blogs in the Canadian Blogger Home Tour, I encourage you to. I’m sure you’ll find lots of inspiration too. Thanks to all of the bloggers for opening their homes to us.

Monday
AKA Design
The DIY Mommy
Northern Style Exposure
Echoes of Laughter

Tuesday
A Pop of Pretty
Rambling Renovators
Craftberry Bush
Elliven Studio

Wednesday
First Time Fancy
So Much Better With Age
The Creek Line House
The Sweetest Digs

Thursday
Clean and Scentsible
The Happy Housie
Just Beachy
Dans le Townhouse

Friday
The Uncommon Law
This Little Estate

Comparison, blogging and progress

The Canadian Bloggers Home Tour was a couple of weeks ago. It was great to see Canadian bloggers come together and share their personal styles and beautiful spaces. I’ve been inspired by their designs, photography and styling (tune in Friday for a post showing some of my favourites). I’ve even found some new blogs to add to my feedly.

However, often when I see posts like these home tours, I’m a bit conflicted.

I know all of the houses have been cleaned and staged before any of the photos were taken, but I still can’t help feeling slightly inferior when I see house tours like these.

Holy bad paint job, Batman. There are maybe three rooms in my house that are even close to being photogenic enough to be part of a home tour. And they’d all need a good tidy before I took their picture.

Dining room

Much has been written about the unreality of the blogosphere. I think we all know that the images we see on Pinterest and many blogs are not always accurate representations of how people actually live. Lauren at A Lo and Behold Life did a behind the scenes post last week showing some of the real life at her house, which was nice to see.

The bloggers who participated in the home tour are to a certain extent the cream of the crop of Canadian shelter blogs. One of the organizers, Shannon of AKA Design, said “we selected Canadian bloggers who have gorgeous homes (big or small), great photography and mad decorating skills.” Fair enough. Home tours don’t have quite the same inspirational impact when you see the clutter clustered in the corners or the toss cushions tossed on the floor rather than arranged artfully on the couch.

I have to remind myself every so often that reading certain blogs is basically the same as reading a decorating magazine. It’s about appreciating design and finding inspiration for my own spaces. It’s not about other people’s homes or blogs being “better” than mine.

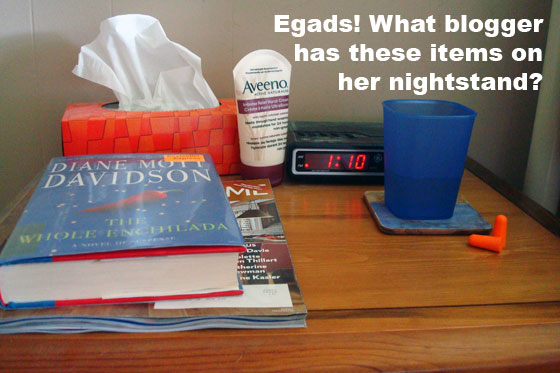
Nightstand

I like the saying that comparison is the thief of joy. In a lot of ways I don’t care what other people do or what they think of me.

Even though I obviously share a lot of my house and my life in public on the internet, I blog for myself (and those like-minded souls that loyally hang in there through slow-moving makeovers and interminable renos).

My house is for myself (and Matt).

I’ll be honest, though, I can’t help wondering what’s wrong with me that my house doesn’t look like these beautiful spaces I saw in the posts last week. We’ve been living here for two and a half years. Why is our house not “done” yet?

I have every confidence that our house will get to a stage where our rooms are beautiful and tidy and perfect reflections of our personal style. Someday, we will be home tour ready. I’m just feeling a little impatient to get there.

(And in case you missed it at the top, I don’t want this post to be interpreted as a rant against the Canadian Bloggers Home Tour. There’s too much negativity and criticism out there. I think the tour was a great way to showcase creative designs and some talented Canadian bloggers. I was inspired by many of the designs I saw. This post is simply my personal reflection and an expression of where I’m at today in my own renovation/decoration saga. I have another post coming up later this week with some of my favourite designs from the home tour. Stay tuned.)

Un-Labour Day

First post of the month means it’s time for another project. But I have something different for you this time around. You see, September’s my birthday month, so I’ve decided to give myself a break.

Of course, there’s still lots to do around here, and since I actually like to spend my time doing things, I will keep myself busy.

Finishing my bookshelves is at the top of the wishlist. My birthday was always my rough deadline to have the shelves completely set up and all of my books unpacked. Having my books back will be like reconnecting with old friends. I think that’s a pretty good gift to give to myself.

Bow on box of books

We made some really good progress this weekend. Matt and I painted the living room. The outer frames of the bookshelves are all primed, and I should be able to get two coats of paint on them today. The shelves themselves will come this week.

Painting the bookshelves

So despite this being an unlabour month, I was pretty productive this Labour Day weekend.

What were you up to this weekend? What are your plans for September?

Summer project report

Take a journey with me back to February, would you?

Don’t worry. You don’t have to actually go back to the time of snow and cold and dark.

Just remember back in February when we painted the foyer, kitchen and hallway.

Hallway painted Benjamin Moore Abalone

Now let’s go back a little bit further to January when I posted my 2014 Home Goals, and I said I wasn’t going to paint the living room this year.

Well, I lied… kind of.

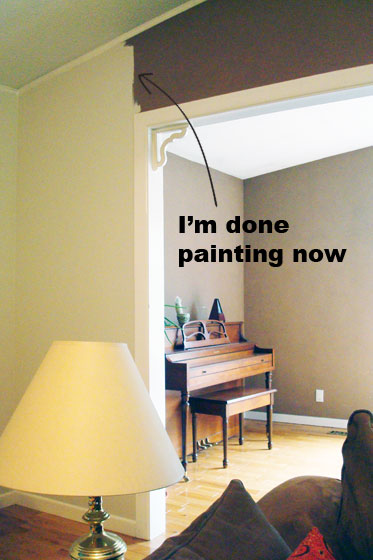
The kitchen, hall, foyer and living room all run together, so I planned to paint them all the same colour. Knowing that I wanted to set up my bookshelves this year, back in February Matt and I painted one wall of the living room–the wall I planned to put the bookshelves on. I figured once my shelves were set up and full of books, I wouldn’t want to take everything down again to paint behind them.

So the living room has looked a little bit like this for the past six months. Stylish, I know.

Half-painted living room

Well, the thing is, when I started the bookshelf makeover this month, I realized that if I put the shelves where I originally planned, we wouldn’t have room to walk around the couch and into the dining room. I decided to put them on the opposite wall. A wall which was unpainted. Whoopsie-doodle.

So my August project report goes something like this.

  • Put the bookshelves that had gotten damaged in the move back together.
  • Took the big fat bookshelf apart, cut it in half and rebuilt two new sets of shelves.
  • Added iron-on edging to the new shelves where I needed to.
  • Stripped the paint off the TV stand.
  • Raised the TV stand by half an inch and added trim around the bottom.
  • Painted the TV stand.
  • Realized I was going to have to paint the living room.

Here’s some evidence that I did actually do some work on the bookshelves.

Steps in my bookshelf makeover

Despite my progress, the bookshelves are kind of on hold right now. They’re all set up in the guest room ready to be painted. However, I’ve shifted my attention to the living room.

The prep process is exactly the same as what we had to go through for the hallway:

  • Pull out nails where pictures were hung.
  • Take off cover plates.
  • Sand the incredibly rough walls.
  • Patch holes and divots.
  • Wipe down the trim.
  • Paint the trim.
  • Prime the walls.
  • Paint (two coats).

The living room is both simple and complicated to paint. Complicated because it’s a vaulted ceiling that requires a big ladder to reach the top of the wall. Simple because on the two walls I’m painting, there is an archway on one and a patio door on the other. The actual wall space is minimal.

And yes, you read that correctly. I am painting only two walls. Of the four walls in the living room one is already painted (as you saw) and the other contains the fireplace. I am not painting around the fireplace until we’re done whatever we do with the fireplace.

So my August project is another bit of a fail. I did manage to get the TV stand completely finished though. I’ve put it in place, even though we’ll likely have to move it when we paint. I had to finish something this month.

TV stand before and after

What did you accomplish this month? Have you ever gotten mid-way through a project and only to find your to-do list has grown?

Baa-baa black sheep

Last week I happened to be over at my parents,’ and my Mom said she had received a notice to go to the post office to pick up a package for me. We were both pretty curious. It’s been awhile since I received mail at my parents’ address.

As soon as we saw the return address on the package, we knew what it was. My Mom’s friend had made me a quilt.

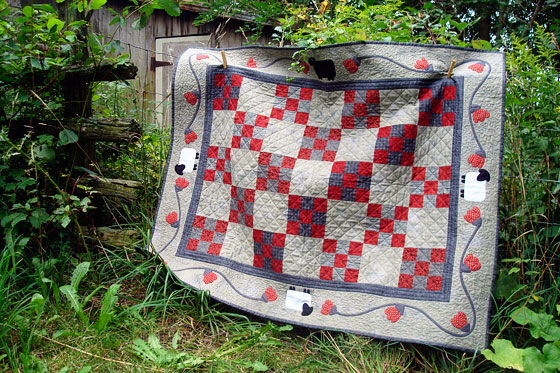
Quilt based on Kay Harmon design for Springtime Frolic

In her wonderful cover note, she called this a nephew quilt. I am a very proud aunt to four fun boys. Two of them are brand new, born just this year.

Here’s some of what she wrote:
“Aunts dream up projects to make with their nephews and have great patience when sharing their tools, skills and time… This quilt is for you to snuggle under with those nephews and love them to bits.”

The design is based on a tabletop quilt by Kay Harmon called Springtime Frolic. My Mom’s friend saw it in the Primitive Quilts magazine this spring and then adjusted the pattern to make it a bit larger.

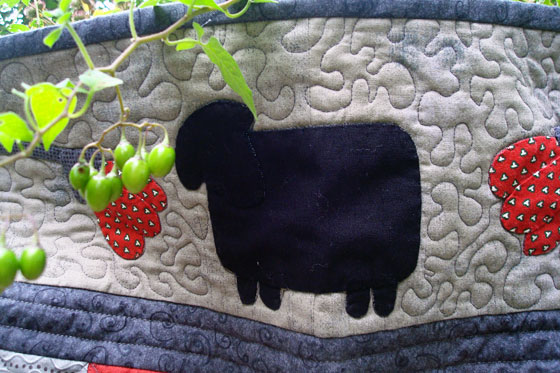
The workmanship, the piecing and the quilting are absolutely beautiful. The parts I like best are the squiggle quilting (I don’t know the proper term for it) around the outside edge and, of course, the one black sheep.

Detail on a quilt based on Kay Harmon design for Springtime Frolic

I’m choosing to associate myself with this guy since I like to be a little bit different and stand out every so often. Besides, I cannot cast one of my nephews as the black sheep.

I feel so honoured that someone took the time to make something by hand specifically for me. Plus, it just seems right that we have a handmade patchwork quilt at the farm… especially one with livestock on it. This is a very special gift. Thank you, Mary.

Anyone else have a homemade quilt at their house? Or are there any quilters out there? I’m a sewer, but I’ve never tackled a quilt, and I admire those who do.

Taking paint off melamine

The question of the day was can I strip paint off of melamine? The answer was kind of.

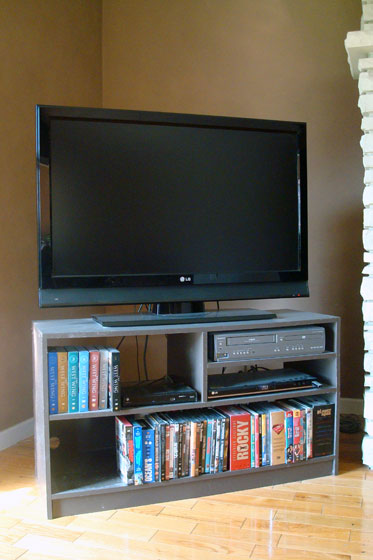
This is not my favourite piece of furniture. (Not the TV. I love my TV. My problem’s with the TV stand.)

TV stand

I attempted to build it when we lived at our old house. We had gotten a new TV. We needed a TV stand. I had some white melamine left over. So I sliced it up and went to work.

Cutting went fine.

Assembling not so much.

I didn’t have the right tools or fasteners and as my rocky, shaky shelf collapsed for about the fifth time, I called my Dad.

My Dad and I knocked it together in no time, but when I painted it I ran into trouble again.

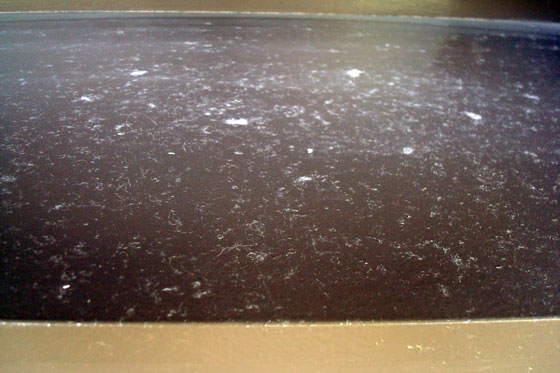
My roller was disintegrating as I painted, and I ended up with all kinds of bits stuck to my shelf. It didn’t improve with time. The dark brown paint showed dust really easily, and when I tried to wipe it down, the dust just got caught in the flecks and it looked even worse. Believe it or not, this is the bottom shelf after I’d wiped it down.

Dust stuck in bumpy paint

I decided to include the TV stand as part of my bookshelf makeover this month. I’m not planning to strip the paint off of all the bookshelves, but the finish on the TV stand was just too awful. I needed a fresh start.

I went with my usual chemical stripper, and it worked pretty well. The stripper made quick work of the paint, even though it’s a heavy-duty oil-based enamel. The stripper also took off the white coating on the melamine. I’m not too worried because I’m going to be repainting, but the finish was a little bit rough. I went over it with my sander to smooth everything out. It may not look great, but I think it’s going to be okay.

Stripping paint off melamine

This week my Dad and I are tackling the rest of the shelves. We’ll be cutting down, putting back together and adding trim. Painting will come soon after. The TV stand should be looking much better the next time you see it. Maybe I’ll even like it by that point.

Have you ever tried to take paint off of melamine? Have you ever painted melamine in the first place? It’s not that hard to do… as long as your equipment is half decent. Has anyone else run into problems with disintegrating rollers? Do you have a piece of furniture that you don’t love?

Summer projects

I have two projects I wanted to complete this summer. First is getting rid of the stippled ceiling in the bedroom. Second is redoing my bookshelves.

Given my lack of success last month with the ceiling, I think both of these tasks are going on the August list.

You’ve already heard about the ceiling, so how about a little bit about the bookshelves?

Bookshelves and boxes of books

(Yes, this corner has looked like this since we moved in more than two years ago).

My Dad and I made these bookshelves for our first house. They’re shallow, so they don’t take up much space. They have adjustable shelves, which is handy. They’re going to work well for us here with just a few tweaks.

First on the list is cutting down one of the shelves. It’s twice as deep as the others because it held our TV back when it was a giant square box. I figure I can get two bookshelves out of this one.

Second on the list is putting another bookshelf back together. It was damaged in our move and is pretty wobbly.

Then, I plan to add some trim and paint everything white.

I’ll replace the adjustable shelving tracks with white ones and set the shelves in place.

Then it’s on to the best part: loading the shelves.

Boxes of books

My books have been packed away for more than two and a half years. I want them back.

Popcorn ceiling and barn doors

So July’s project was my biggest failure yet. Remember that dirty bumpy stippled ceiling in the guest room/soon-to-be master bedroom?

Popcorn ceiling

Yeah. It’s still there.

The week that I was planning to start operation popcorn, Kate posted about removing the stipple ceiling in the flip she and her husband are working on. She mentioned doing an asbestos test before she started. Our house is built the era where asbestos might have been used, so I thought a test sounded like a good idea.

However, finding a test kit was harder than expected. It seems home tests are an American thing. I ended up finding one online. So the extent of my progress this month is a credit card charge and my Dad’s drywall sander sitting in a corner of the guest room. 😦 (Please note as well the light switches behind the door. Really convenient.)

Drywall pole sander

Wanna see some actual progress? Let’s look at some other doors instead.

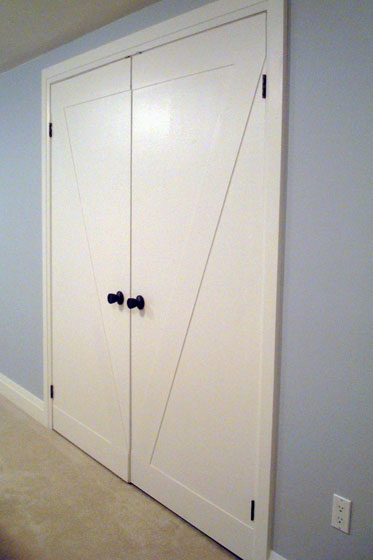
Hello basement barn doors.

Basement door makeover

Here’s the before picture just for reference.

Slab doors

Yes, redoing the doors was June’s project, but the painting was left until July. It must have been something about this month because, like with the stippled ceiling, the final stages of painting and hanging the doors didn’t go smoothly.

For painting, I planned to use my Dad’s sprayer… or rather I planned to have Matt use my Dad’s sprayer. Well, the air compressor conked out, so spraying was a no go. So much for all of the time we spent tarping the driveshed.

Our mechanical difficulties are totally on me. I was the one who set up the air compressor. Earlier the same day I’d killed the push mower, so I obviously had a hex working when it came to mechanical objects.

Painting became a team effort as Matt rolled and I brushed. Soooooo sloooooow.

Painting the basement doors

Installing the doors turned out to be another headache. Only five out of the nine doors that we made over fit smoothly back in place. Somehow, two doors grew so that they were too fat for their openings. The closet door that we’d accidentally put the trim on the wrong side wouldn’t close because the trim hit the doorstop (I don’t know why I didn’t realize this would be a problem). The best one was discovering another door where I’d put the Z on the backside. No idea how I missed this.  My mistake left the completely flat slab door facing out into the room–exactly the situation I was trying to correct.

Ugh. I was very frustrated.

It took a few hours of work spread over a few days to fix my mess ups, including repainting. Double ugh.

Matt was very patient, installing and removing the doors multiple times as I tested the fit.

Finally, all of the doors fit, swung smoothly and closed properly.

I installed the old hardware that I’d ORBed, and I called this one done.

ORBed doorknobs

The Z detail is subtle–the strips are only about an eighth of an inch thick–but I think it’s a really nice touch. Our barn doors are absolutely a lot more interesting than the flat slab doors. Plus they fit really well in our farm setting.

Slab doors become barn doors

Slab doors become barn doors

Issues aside, this is a pretty easy update–and much, much more affordable than buying nine new doors. It would have been even cheaper if I hadn’t bought all new hinges. All in, this makeover cost less than $200 (although I did use glue and nails that I already had):

Panels (two sheets of hardboard cut into 6-inch strips): $18.53
Hinges (Stanley Home Designs in Egyptian bronze-I couldn’t find the exact version online, but this one is close although a little more expense): $96.39
Paint (Benjamin Moore Cloud White in the pearl finish): $59.67
Spray paint (Rustoleum Oil Rubbed Bronze): $11.28
Total: $185.87 (just over $20 per door)

Our master bedroom makeover may not have started, but our basement makeover came a lot closer to finally being finished.

Let’s just not discuss that the basement was summer 2012’s project.