Trilliums!

Trilliums

When we moved to the farm, I thought there must be trilliums somewhere on the property. After two springs, though, I still hadn’t seen any. Then, on Monday morning, I found them. In the small grove between the front field and the east field, alongside the creek, there are trilliums. Lots and lots of trilliums.

Trilliums

For those that don’t know, trilliums are Ontario’s official flower. There’s a common perception that you’re not allowed to pick trilliums in Ontario. But, according to Wikipedia, trilliums are only protected in conservation areas or provincial parks (and in some areas in the States). However, picking a trillium can kill the plant.

Trilliums tend to be a bit elusive. They hide away in the woods and aren’t seen very regularly, so I’m super excited that we have some on our property. I even spotted some Jack in the Pulpit, which I’ve never seen before.

Trillium and Jack in the Pulpit

Happy spring!

Rituals and signs of spring

Waiting for our forsythia to flower has become one of my spring rituals since moving to the farm. For the past two years, my post on April 2 has been an update of how close we are to blossoms.

Our first year, the forsythia was in full bloom at the beginning of April. Last year, we weren’t anywhere close to flowers. It would take another month before the forsythia would be out in bloom. This year, we’re even further away from the bright yellow flowers.

Forsythia bushes annual comparison

So far in 2014, spring has just been a date on a calendar. I’m eagerly awaiting its arrival and the return of my forsythia.

What signifies spring for you?

Hope springs… and hopes dashed

This week began with a few warm days. Snow is still at least knee deep in most places, but along the edge of the house we have a narrow strip of bare ground.

In the garden I built around the well, peaking up through the sopping mud, are some very small spears of iris.

Iris sprouting in the spring

Could it be possible that spring might come this year?

As if!

The weather forecast for today calls for temperatures to dip below freezing again and for 10cm (nearly 4 inches) of snow to fall.

Winter just totally gave spring the cold shoulder.

What’s the weather like where you are? Have you seen any signs of spring yet? What first flowers are you looking forward to seeing? I feel like I don’t have to ask this, but who else is ready for spring?

Fuzzy buzzy

Our huge Rose of Sharon bush outside the dining room window is in bloom. Honestly, as beautiful as it is, I wasn’t going to do a post about it because, really, it’s just another picture of a pretty flower.

Rose of Sharon blossom

But then I saw a fuzzy bumble bee pollinating the blossoms. He was completely dusted in pollen, so I of course had to take his picture.

Bee pollinating Rose of Sharon flower

It may seem sappy, but seeing this industrious fellow–and the hummingbrids which also love the Rose of Sharon–reminds me that mother nature is pretty cool.

My pot problem

Hello. My name is Julia. And I have a pot problem.

It’s not what you think. In fact, it’s more like a problem with a pot.

You see, there’s this great window in the basement. It’s large, lets in lots of sunlight and has a great wide windowsill. I wanted to do a little display there. A vignette if you will. One of the features I wanted to include was a potted plant.

All of this was a rather vague idea until at a meeting at work everyone was given a plant. I selected a bright green ivy thinking to myself, “This would be perfect in a bright yellow pot on the windowsill in the basement.”

Never mind that I’m not good with plants, particularly houseplants, and my ability to keep this ivy alive was very much in doubt. I had a vision in my mind. I had to see it come to reality.

Unfortunately, my perfect pot was hard to find. Well, not really. I found it last fall. It was in the garden clearance section at Rona. And it was $12.99. Now I don’t know about you, but that seemed like a high price to pay for a ceramic pot, especially in the clearance section at the end of the season.

I walked away.

I came back every so often to check on it and see if the price had been reduced. I looked at other stores. I examined numerous yellow pots. I considered spray paint. Nothing matched up to the picture in my head.

Finally, this spring, I snapped. I pulled into Rona on my way home from work one evening, strode into the store, picked up my pot and bought it. With tax, it was close to $15. For a ceramic pot. Granted, it was a ceramic pot in the perfect style, of the perfect size, of the perfect shade of yellow.

I stuck my ivy in it and plopped the whole thing onto the windowsill. And it’s perfect. It matches my mental image.

Yellow pot with ivy in it on a windowsill

I still begrudge paying $15 for a pot, but I do admit that seeing the ivy–which somehow is still surviving–makes me happy.

I’ve never consciously “decorated” a house before, so I’m finding it tough to spend money on decorative elements, which seem somewhat frivolous to me. I have no hesitation about pulling out my wallet when it comes to big ticket items like construction supplies or, ahem, pets.

Is it weird that I spent nearly 6 months thinking about a ceramic pot? Do I have a problem? What’s your usual spending threshold for decorative items? How do you justify buying pretty things for your house?

Landscaping: Phase 2

I said at the beginning of the week that I’m declaring the start of July as the end of phase 1 of landscaping. We all know that the end of one thing is the start of something else, so it is also the beginning of… you guessed it… phase 2.

Yes, I still have things to finish up from phase 1, but let’s not get technical here.

For phase 2, I’m going to use the same technique that I did in phase 1. Walk out the front door and start with the first thing I see. Except this time instead of turning right, I’m going to turn left. Earth-shattering strategy, I know.

So what will I find when I turn left? Something that looks a little like this. (Our roof is not as green IRL as it appears in this photo).

Garden of spirea and ferns

From a distance it may not look that bad, but in reality it’s an overgrown jungle of spirea and ferns. I’m a variety is the spice of life kind of woman, so I need a little more diversity in my garden. I’ll be digging out a decent number of the plants. They will not go to waste though. (Remember the massive turnaround garden that needs plants?)

However, gardening here is never as simple as just weeding, pruning and transplanting. Take these rocks for example (and yet another plastic plant pot that escaped the earlier purge).

Rocks edging a weedy garden

Every single existing flower garden on the property is edged in rocks like this. I’m sure it looked lovely at one point. However, over the years, the rocks have sunk just far enough into the ground to become a complete hazard for the lawnmower. Plus, they’re not doing anything to keep the weeds or grass out of the garden. I would rather edge the garden every year with a spade and be able to get the lawnmower right up to the edge of the plants than deal with these rocks.

Rocks–specifically moving rocks–has been the major theme of landscaping this year. Wiley and I will spend some more quality time, moving loads and loads of rocks back to the pile behind the barn.

Let’s see. What else is there about this garden? Follow me down this garden path and let’s find out.

Broken patio slab path in a weedy garden

Note to self: Add weeding and remove broken patio slabs to the to-do list. Oh, and fill in the pit at the end of the path.

Square pit with wood retaining walls

Oh look. Another plastic plant pot.

This pit is the spot where the wood stove chimney came out of the basement. We’ve removed the wood stove, patched the hole in the wall and tarred the foundation. Now I need to deal with the pit. It’s about 3 feet deep and is usually home to frogs or, when I was taking the picture above, a camera shy garter snake. Perhaps this is a place to dispose of some of the rocks. Provided of course I rescue any creatures first.

If I follow this garden around the corner of the house to the north side, I’ll find more rocks (what else?) and more patio slabs from where the old oil tank used to be. If I follow it around to the back side, things get really wild.

The back gardens will likely be phase 3. No ETA for that yet, though.

Do you have any advice for plants that will add some diversity to my spirea and ferns? Or tips for transplanting? I tend to stick them in the ground and water the heck out of them. What’s edging your gardens? Anyone else have any “special” features in your gardens, like a pit?

Landscaping: Phase 1

Friday morning at work, a colleague who reads my blog regularly marveled at how much Matt and I have accomplished at the farm so far. I didn’t totally agree. Sometimes I see the difference that we’re making. Sometimes I just see the things left undone and the rest of the to-do list.

July does feel like a bit of a milestone to me, though. A turning point. Or a halfway mark. So I have decided to declare it the end of phase 1 of this year’s major project–landscaping–and I have decided to take a look at what we’ve done so far. If you’re interested in a refresher, here’s my previous progress report or the to-do list.

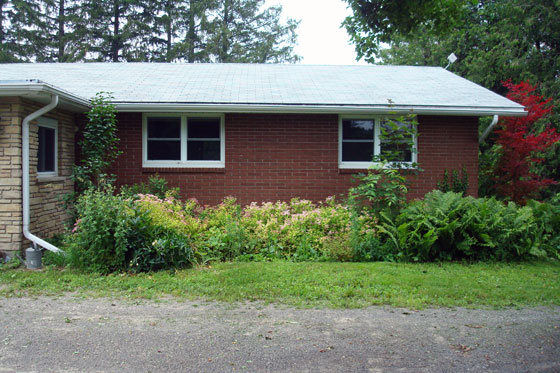
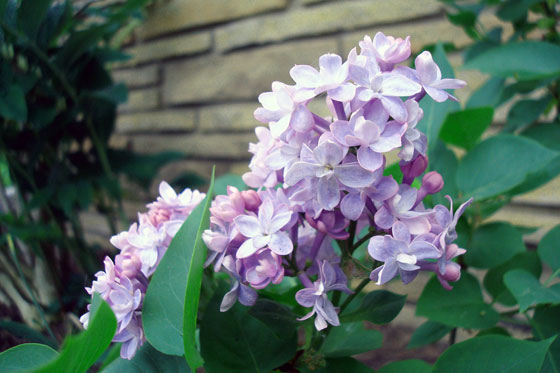
My focus has been the immediate area around the house. I used the very thoughtful technique of walk out the front door, turn right and start there. I slowly worked my way around to the side of the house. So the smaller of our two front gardens has been weeded and a new border of grass has been established.

Evolution of the front garden

Still to do: Put those poor plants that have been living in plastic pots for at least a year and a half in the ground. Transplant some other plants to fill in some of the gaps in this garden, and maybe give the yew and the Rose of Sharon a hair cut.

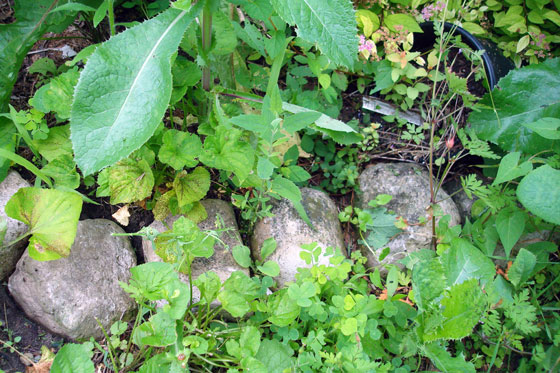
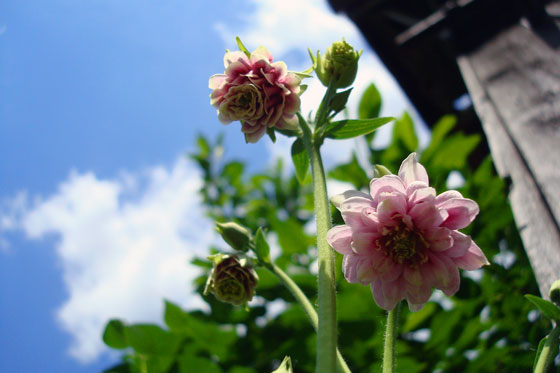
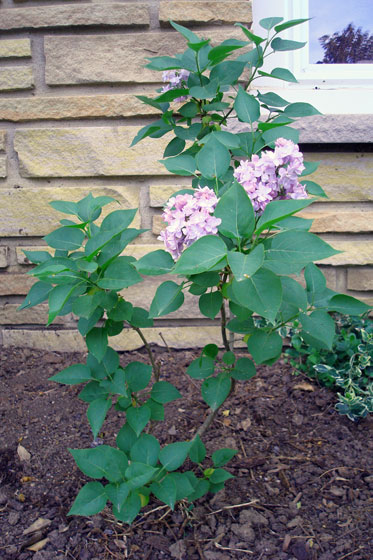
Around the corner from the front garden, we come to a creation I’m particularly proud of, the well garden. At the beginning of the spring, this area was a heap of hard-packed dirt strewn with rocks and overgrown with weeds. After digging everything out (including two window wells last year which were unnecessary after we bricked over the broken basement windows), leveling off the dirt, edging it with rocks (some really, really big rocks that required the help of Matt and his Dad to position), transplanting some plants, repositioning the downspout, installing a hose hanger and seeding the grass, it is starting to look like an actual garden.

Flower garden edged with rocks around a well head

Still to do: Convince the plants to grow. It’s a little hard to see, but I’ve actually planted quite a lot in this garden. I may do a bit more, but I’m trying to restrain myself, because I’m pretty sure once these plants take off, this garden is going to be pretty lush–just what I want.

Let’s go away from the house for a moment across the driveway to the fire pit. This really wasn’t a fire pit. It was more of an area where previous owners burned things. Matt and I have used it a lot as we’ve been cleaning up brush and lumber from the property. However, heaps of ash and brush wasn’t the nicest visual to see when I opened the front door or drove up the driveway. The brush I was able to relocate to a new burn area I’ve established behind the drive shed. The ash got spread around and leveled–and then I went back and forth over it with a big magnet to pick up all of the nails and screws (and hinges, door knobs and other metal) that were mixed in. The rock pile that I discovered buried in ash was picked up and dumped in the main rock pile behind the barn–talk about a dirty job.

Cleaning up an old firepit

Still to do: Make sure all of the metal has been picked out of the ash. Mix some manure and soil in with the ash so that grass might actually grow and seed it. Relocate the lawn chair and bench that were plopped beside the fire pit. Relocate the remaining large logs and lumber that were stacked waiting to be burned. Get rid of the dirt pile.

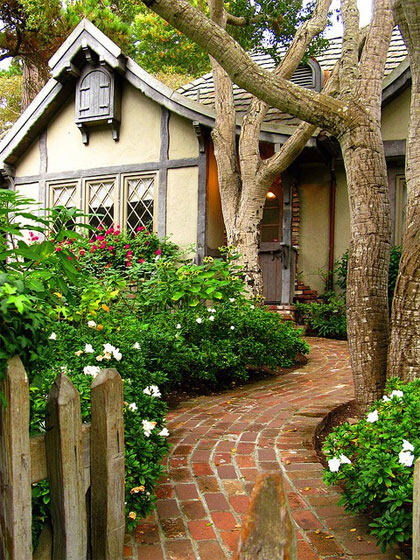
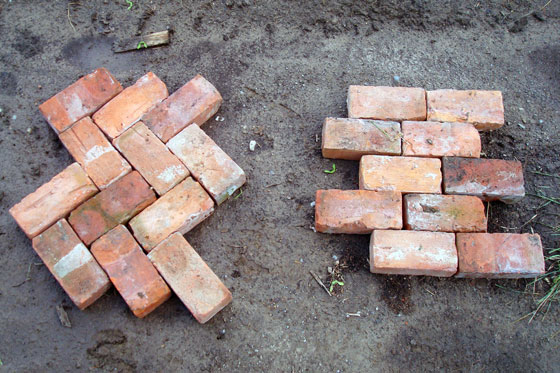
Between the fire pit and the house is the biggest undertaking of the year, the turnaround. This former mountain goat territory has been leveled, fertilized with loads and loads of manure and rototilled. I built a brick pathway across the middle of the garden and planted some bushes, hostas, trees, tomatoes and lettuce.

Evolution of the garden on the turnaround

Still to do: Finish the pathway–I need 60-80 more bricks and sand to fill the joints in between. Put a bench beside the path. Pull the weeds that have sprung up. Plant a whole lot of plants. Seriously. This thing is going to eat plants.

So it’s probably obvious from this post that I can’t just focus on what we’ve done so far. Although looking at the photos above, I am able to see the transformation happening. Slowly, ever so slowly, it’s starting to look a little more like the picture in my head (or on my Pinterest board).

How are you doing on your summer to-do list? Are you looking ahead at what’s yet to do? Anyone have any tips for living in the moment and appreciating what I’ve done so far?

Time to zigzag or stay on the straight and narrow?

Remember this picture from my 2013 home goals?

A lush garden with a brick path winding through it

This is my inspiration for the garden I’m building on the turnaround at the front of the house. Lush. A little bit wild. A beautiful brick walkway winding through.

Honestly, the path is an excuse to use up some of the piles of bricks that we have lying around the farm. But, it does have two additional benefits: the path will save us from having to walk all the way around the turnaround when we want to get to the other side (it’s farther than you might think) and it will be an attractive feature at the front of the house (I hope).

The path is next up on the landscaping list. I’ve dug out the route across the turnaround and gathered my bricks. Now I’m just trying to decide how to lay them: trendy herring bone or traditional brick pattern.

Herring bone brick walkway

If I go with the straight brick pattern, I’ll probably do six courses, not the five that are pictured here. If I go with the herring bone, this is pretty much what it’s going to look like. I’m not going to cut the bricks, so the edge will be a bit ragged. It will probably be hidden eventually by all of the lush plants, but that might take a little while.

I think I know what you’re all going to say, but I’m going to put it to a vote nonetheless. What do you think?

For those who might be concerned by the photo above, I am not going to lay the bricks directly on the dirt. I’m planning a base of sand, which we also just happen to have a huge pile of lying around. I’d use gravel, but the gravel in our pile (yes, we have one of those too) is a bit too large to provide a really stable base.

No matter what pattern I end up using, I’m planning on leaving about a half inch gap between the bricks. Does anyone have any experience with polymeric sand? I’ve heard that it’s good for filling the spaces between the bricks.

Feel free to expand on your opinions on polymeric sand, the beauty of herring bone, dos and don’ts of brick laying, fast growing plants and any other topic that strikes you in the comments. I appreciate any advice.

Memories of Muriel

I’ve said that I didn’t do any gardening last year, and that’s not entirely true. I planted one thing: this lilac.

Double French light purple lilac

This lilac came from our first house. It had lived for six years in the flower garden Matt and I made in the front yard. It never bloomed. It didn’t really grow very much. But I nursed it along because this plant is another one of my special treasures.

This lilac was a shoot that I transplanted from a beautiful bush my grandmother had growing in her backyard. She was always very proud of her lilac and its prolific double blossoms. A few of the grandchildren took shoots to plant in their own gardens.

Last spring as we sold our first house and moved to the farm, I carefully dug up the lilac, cleared a space in the overgrown garden at the front of the house and transplanted it.

Double French light purple lilac

Over the past year, it has finally started to thrive. It’s grown taller and bushier. And for the first time ever, it’s blooming.

This is a banner year for lilacs at the farm and it turns out we have lots: a large bush outside our bedroom window, others scattered around the gardens, a hedge stretching nearly from the house to the pond. However, this, our smallest plant, is my favourite.