One Room Challenge Week 5 – Professional help

We’re heading into the homestretch on the One Room Challenge.

One Room Challenge

Next week is the big reveal of my master bedroom makeover. Here’s where we’ve come so far:

The One Room Challenge is largely about DIY. It’s not a requirement, but most of the other bloggers participating are painting, sewing, carpentering all on their own like I am.

However, last week it was time for some professional help.

One of the quirky elements of this room is that the light switch was behind the door. When we used this room as a guest room, people would always walk in and reach for the light switch. I’d have to explain that no, it’s not where you’d expect it to be. You have to reach around behind the door.

Light switches behind the door

Apparently, I didn’t mind making things inconvenient for our guests, but now that we’re the ones living in the room, I wanted the light switch where it should be.

Matt and I discussed doing this ourselves, but the electrical in this house is a bit wonky. Plus, relocating the switch would involve lots of time in the attic–and lots of time with the insulation in the attic. Not fun. We also had some other minor electrical work on our to-do list, so we decided to bundle it all together and call in a professional.

When he first saw the bedroom, our professional questioned whether there was space for a switch. There’s a very narrow wall between the door and the edge of the closet. We had no way of knowing how the studs were configured. He got out his stud finder, picked a spot, and I held my breath as he punched through the drywall.

There was a narrow cavity. It was nearly the width we needed for the box, but just a bit too narrow.

Cutting drywall for a new light switch

Fortunately, it was close enough that a quick trim with the sawzall allowed the box to fit and didn’t compromise the stud.

Tracing the wire from the junction box in the ceiling to the switch turned out to be another bit of fun. There’s a join in the wiring somewhere, but the electrician wasn’t sure where. It looks like there’s a junction box in the closet of the bedroom next door, so that’s my guess. When we do our big whole house reno, we will definitely devote a portion of the budget to fixing all of the wiring.

Our electrician couldn’t get rid of the original switch behind the door. It’s a crowded box that appears to be feeding some other areas of the house. But a blank cover on the missing switch is something I can live with.

Blank plate covering a light switch

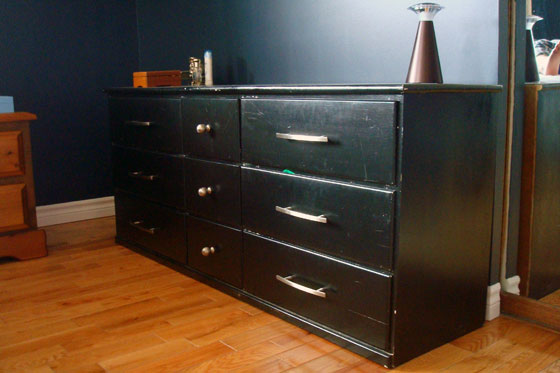
I’m just happy that I no longer have to live with the switch behind the door… although I still reach for it when I go into the room. This new switch, on the right side of the door, with a dimmer (can I have a hooray for dimmer switches?) is so wonderful.

Bedroom light switch with a dimmer

The bedroom is coming together. All of the cosmetic updates are looking really good. However, this little functional improvement is equally awesome.

Thanks to our awesome electrician. And thanks to all of you for following along so far. Only one week to go!

To check out the other ORC participants, be sure to visit Calling it Home.

Summer family

Recently, I’ve started following a few more farm blogs. Even though we live on a farm, I am definitely not a farmer and there’s a lot that I don’t know.

One of the blogs I’ve been reading is Dinner Starts Here.

Dinner Starts Here logo

Contributors to this site are young farmers from Ontario. They write about their lives on the farm and “how they’re producing everything from berries to beef, milk and eggs to wheat, soybeans, potatoes and maple syrup.” The idea is to help people understand what goes into producing the food we eat and get to know the people who make our food.

Last week I came across a post about one of the farmer’s summer family. She wrote about the migrant workers they hire every year to work on their farm. She said, “Our guys are one of the major backbones of the business. They are vital to our operations successes – we quite literally could not exist without them.”

Migrant workers

Photo courtesy of Dinner Starts Here

I realized that after reading her post, I had some misconceptions about migrant workers, so I reached out to the Dinner Starts Here team and asked if I could share her post.

Erin gives a good explanation of the important role migrant workers play on Ontario farms, and it’s a great introduction to the people who produce the food we eat.

Contrary to why a lot of people believe farms hire migrant workers – it’s not cheaper or easier… it’s actually is a lot more expensive and a lot more work for us to hire them than it would be to hire local staff. First – we’re required (as we are required to pay all of our staff) to pay them minimum wage. Some of our guys who have been returning year after year have earned increased wages like all of our staff does when they return year after year. Then – we have to pay for housing, a portion of their utilities, and a portion of their airfare to and from Mexico. We also spend countless hours taking them shopping for anything they need – from groceries to new clothes to take home for their kid… which is a tremendous amount of work, time and effort. But in the end… for us… it’s worth it.

I encourage you to pop over to Dinner Starts Here and read the rest of the post.

Woman vs. tarp

Baxter here with a garden update for y’all.

At least that’s what Julia says we’re making. It doesn’t look like any garden I’ve seen before.

Garden after the weeds have been burned

Two weekends ago, Julia lit the “garden” on fire. I used to love that spot of the field. The long grass was super, super sniffy. But now it’s gone. And I got to say, I didn’t love the fire. First, it was very, very big. I thought it was going to reach out and singe my furs. I’m a short-haired fellow. I don’t have many furs to spare. Second, I got all tangled up in the hose which was not very comfortable. And third, smoke makes me sneeze.

I went into the garden to check it out last Saturday. It’s not as sniffy as it used to be. But it didn’t make me sneeze either. I rolled around a bit ’cause that’s what I used to like to do in the long grass. It felt different, but it was okay.

Julia was not very happy after I rolled, and she decided to cover up all the ash.

She and Matt got out the World’s Biggest Tarp. Matt probably should have stayed with her in the garden ’cause it took her a long time to get that tarp unfolded. I dunno what’s so difficult. She’s got thumbs!

Even though she used the World’s Biggest Tarp, it still wasn’t big enough for the garden. Then she decided to use the big roll of carpet she found beside the garden. It wasn’t frozen anymore–I walked all over it and sniffed to make sure–but she still had a really hard time moving it.

Julia vs. the carpet was more interesting than Julia vs. the tarp, but she didn’t make a video of that one. I was sunbathing, but I opened my eyes every so often to watch.

I got up when she went to get Wiley. I keep an eye on that tractor. It took them a couple of tries, but they finally got the carpet into the front end loader. Then Wiley carried the carpet around the fence and dumped it in the garden. He’s pretty helpful even though he doesn’t have thumbs either.

It still took Julia a long time to lay the carpet all out, but eventually it was spread out in the garden. Even though the carpet was wet and dirty and buggy and had plants growing in it, it was nicer to lay on than the pokey dry weeds.

Julia wasn’t any happier when I laid on the carpet than she was when I rolled in the ash. After my afternoon walk with Matt, he took me from the front door right into the bathtub. That was not my favourite part of the weekend. Honestly, what’s the matter with a few smudges on my furs!

The carpet and the World’s Biggest Tarp and two other little tarps still aren’t enough to cover the whole garden. Plus, some of them blew around in the wind, and we had to spread them out again the other day.

Tarps on the garden

I think we’re going to be working in the “garden” for awhile yet. Hopefully it starts to look like a garden soon.

One Room Challenge Week 4 – Update sliding closet doors with beadboard wallpaper

Progress picked up over the last week in the master bedroom makeover for the One Room Challenge. Mostly because for at least some of the time my workforce tripled.

Saturday morning, my parents showed up, wallpaper tools in hand. They were there to help me cover our severely beat up closet doors.

Here’s a summary of the projects so far in the master bedroom:

The One Room Challenge has been hugely helpful in getting this makeover moving after my motivation waned. The room is coming together. Which brings us to this week’s task: the closet doors.

The doors appear to have had a number of things taped to them in the past. When the tape was pulled off, so was the finish on the doors.

Master bedroom closet

My decorating philosophy at the farm is every room needs touch of something rustic. This bedroom is not at all rustic, but a touch of country would be appropriate.

Beadboard wallpaper would work.

I have never installed wallpaper. I’ve removed a lot of it, but never gone the opposite direction. I figured I’d need an extra pair of hands, so I decided to make sure the hands were experienced and called in my parents.

My parents measuring and cutting beadboard wallpaper

As she was brushing the paste onto the closet doors, my Mom recalled hanging grasscloth wallpaper in their first house in the late 1970s–on trend 35 years ago and on trend today.

Brushing wallpaper paste onto the closet doors

She also recalled cherry wood beadboard lining the stairwell at the farm where she spent summers when she was growing up. Doesn’t that sound beautiful? This wallpaper is not quite the same, but it’s a good shortcut in my opinion.

The wallpaper went up really quickly, especially with three of us working on it. (As you can see, Baxter was his usual helpful self). In less than two hours, the doors were all covered.

Beadboard wallpaper on sliding closet doors

Even though they were white-ish before, the wallpaper makes such a huge difference. The room looks so much fresher. And the vertical stripes make the doors look wider too in my opinion.

Beadboard wallpaper on a sliding closet door

It’s been awhile since my parents and I have worked together. It was really nice to have their help. Thanks, Mom and Dad!

I’ve been working on my own for the rest of this week, but I’ve still been productive. The headboard is almost finished–good thing because I need to get it out of the guest room so my brother-in-law can sleep there this weekend–and the electrician is here today to work on the lighting. We’re getting there!

  • Buy a new bed – Done
  • Remove popcorn ceiling – Done
  • Patch ceiling and walls – Done
  • Paint ceiling, trim, doors and walls – Done
  • Make/find window treatments – Done
  • Build hookboards for behind the door – Done
  • Paint dresser and replace hardware – Done April 6
  • DIY a headboard – By April 12 19 24
  • Refresh dinged up closet doors – By April 19 Done April 18
  • Relocate light switch – Cross your fingers that the electrician doesn’t run into any problems today
  • Replace light fixture – I’ll get the electrician to do this while he’s here
  • Come up with a jewelry storage solution – By April 26
  • Sew a bedskirt – By May 3
  • Decorate and personalize – Ordered prints April 6. I’m still waiting for them to arrive. Come on postal service!

Only two weeks to go. Visit Calling it Home and cheer on the other participants as they head into the homestretch on the One Room Challenge.

Linking up to: Happy Housie DIY Challenge Party: Patterned and Textured Projects

Spring flowers, bulbs and sprouts

A colleague at work gave me flowers last week.

Wilted pot of spring bulbs

A little more wilted than you thought?

They’re actually hand-me-down flowers. Her husband gave her a beautiful pot of spring blooms: hyacinths, mini-daffodils and pussy willows.

She had no desire to plant the bulbs now that the flowers are finished blooming, so she passed the pot on to me. I think the flowers will make a beautiful addition to our gardens, but I’m most excited about the pussy willow.

One of the stalks has sprouted.

Pussy willow sprouts

Pussy willow is my favourite shrub. I’ve always wanted one. I know they root fairly easily. I hope I can keep this stalk alive, so that it will grow into a bush.

Anyone have any tips for growing pussy willow? What’s your favourite spring flower? Do you have bulbs at your house?

Not too much off the (tree) top

Once upon a time, more than a year ago, the hydro company came through and marked a bunch of trees for trimming.

Trees marked by hydro for trimming

It had been a few months since the ice storm, and we had seen how hazardous the trees could be to our wires. Despite my desire to preserve our power, I admit preserving our trees was more important to me. The hydro company was willing to send someone to meet with me, so of course I took them up on that. We did a walkabout talking about what trees to keep and how much to cut.

My biggest concern was the pines along the road at the front of the property.

Pine trees along the side of the road

The suggestion was to “top” them–cutting off their tops. I was not in favour. I was equally opposed to option 2: cutting the branches off one side. I am willing to take the risk, cross my fingers and bank on the trees being far enough from the wires.

Hydro guy seemed willing to listen to me and adjust his plans. But I couldn’t be sure. The proof would be in the actual trimming.

Except the trimming didn’t happen. The orange Hs stayed on the trees, and the trees kept growing all through last year.

Hydro finally came through to do the cutting a few weeks ago.

Trees trimmed by the hydro company

The good news is the pines–and most of our other trees–stayed. Some lost a fair number of branches, but they still resemble trees.

Pine trees along the side of the road

The bad news is there’s a lot of brush lying around.

Brush left behind after hydro tree trimming

When I met with hydro guy, he said brush would be chipped on-site. Some was chipped, but a lot is still there.

Wood chips

The bigger logs we’ll pick up and use for firewood. But we’re going to have to do a bit of unexpected clean-up. Not ideal.

Brush left behind after hydro tree trimming

At the back of the property we have a hydro line that runs through the marsh about 20 feet back from the road. Hydro did a lot of cutting back there. We’re not going to bother cleaning up the wood and brush, but I would like to repair the wire fence, which hydro crushed.

So on the not so good side, we have some clean-up to do.

On the good side, we kept most of our trees. We have a bunch of new firewood. And we have less chance of losing power in the future.

One Room Challenge Week 3 – Master bedroom headboard

Today marks the halfway point of the One Room Challenge. How are we here already?

One Room Challenge

This challenge seems to be flying past. Here’s where the master bedroom has come so far:

This past Sunday was my deadline to finish the headboard. It’s not quite done–yes, I’ve already missed a deadline–but I finally made a decision, so I can show you the direction I’m going.

Headboard templates

The headboard was the spot where I didn’t have a clear vision. Should it be painted white like the dresser? Wood like the nightstands? Upholstered?

Brown paper wasn’t even close to the list… and it will not be the final product.

The paper is my mock-up and my template.

I decided to go with… drumroll… wood.

When I took a look at my master bedroom Pinterest board, I saw some common themes in headboards: one was a camel back shape and one was a more fanciful carved shape.

I decided to give the carved shape a try. I kept it simple, using a piece of plywood that I had left over from the growth charts I made for our littlest nephews. I think the unique shape of the edge will make up for the completely flat face.

Cutting out the headboard

After I traced my template, it was easy to cut out the headboard with my jigsaw. I still need to add some legs so that I can attach the headboard to the bedframe, and then I’ll use iron-on edging to hide the layers of the plywood. Finally, I’ll stain the headboard to match the pine nightstands.

So there’s a little bit of progress, but a little more work to do yet.

Here’s where we’re at on the overall makeover:

  • Buy a new bed – Done
  • Remove popcorn ceiling – Done
  • Patch ceiling and walls – Done
  • Paint ceiling, trim, doors and walls – Done
  • Make/find window treatments – Done
  • Build hookboards for behind the door – Done
  • Paint dresser and replace hardware – Done April 6
  • DIY a headboard – By April 12 19
  • Refresh dinged up closet doors – By April 19
  • Relocate light switch – The electrician is booked to come April 22
  • Replace light fixture – I’ll get the electrician to do this while he’s here
  • Come up with a jewelry storage solution – By April 26
  • Sew a bedskirt – By May 3
  • Decorate and personalize – Ordered prints April 6. Fingers crossed they get here in time.

Thanks as always for following along. Visit Calling it Home to check out the progress of all of the other One Room Challenge participants.

Scorched earth

Hello everyone. Happy Monday. I hope you all had a great weekend. I feel like I need another weekend to recover from my weekend. It was super productive, so I am wiped.

You’ll see Saturday’s project in my One Room Challenge post later this week. Today, I have to talk about Sunday’s project. Sunday turned out to be a good garden day.

In my last garden update, I mentioned my plan to use the longe ring. I also mentioned my dilemma of how to clear it of weeds.

Longe ring

Weeds

By Sunday, I had a bit of a plan of how to start. I also had a sidekick: my oldest nephew.

He loves being at the farm, and he and I work really well together. We also share another unique trait, which I’ll talk about in a minute.

Step one was to cut a new opening in the fence. There’s a gate, but it’s on the wrong side of the ring. Nick selected what he thought would be the best location for the new gate. I ran the saw, he used the drill and then the hammer to knock off the boards (yes, they were both nailed and screwed to the posts).

Voilà, access.

Opening for new garden gate

Then came the slightly dicey part of my plan–and the opportunity to exercise Nick’s and my shared trait: pyromania.

We piled some of the cardboard that’s been amassing in the driveshed in the middle of the ring. And then we lit it on fire.

Burning weeds

After a bit of a slow start, things started to take off. And then they really took off. It wasn’t that bad though. I only hurled myself over the fence once to get away from the flames. And poor Baxter nearly strangled only once when he got tangled in the hose.

We quickly got everything under control. Nick ran the hose while I directed the fire with a rake.

Burning weeds

When the smoke cleared, I still had a nephew, I still had a dog and I still had a fence around the ring.

But I didn’t have any weeds left. Yay!

Burning weeds in the future garden

Nick and I had been really careful to keep the fire inside the ring, so I spent another few hours hacking at the weeds outside the ring with my trusty rake. My plan is to have Matt mow a single loop around the outside of the ring to try and keep the weeds on the field side of the fence, so I needed to clear a path for him.

Three quarters of the way around the ring I found something that’s going to be harder to get rid of than the weeds.

Anyone need some carpet?

Roll of carpet dumped in the field

Who says, “I’ve got a huge roll of carpet. Let’s carry it out to the field and leave it there?” How is this a reasonable disposal option?

The carpet is either frozen or rooted to the ground, and by the time I found it I had pretty much lost the ability to raise my arms above my shoulders. So removing it will be a project for a future weekend.

But for now, let’s look at the garden!

Garden after the weeds have been burned

You can actually see all of it for the first time. You can see the fence on the far side. You can tell it’s a ring.

Sure there’s still a long way to go, but some major progress has been made.

I’m pretty sure the roots of the weeds are still living, so tilling the soil is still going to be a challenge.

On my last post, Meghan suggested covering the ground with tarps for a few weeks to kill the weeds. I’ve read about this technique before, so now that the weeds are knocked down I think I might give it a try.

Once I regain the use of my arms, that is.

What did you do with your weekend? Have you ever done a controlled (or not-so-controlled) burn before? How about using a tarp to kill weeds? Any tips?

Watch out rabbits

Ralph is a top-notch barn cat, but she’s become a bit… soft.

This winter, as soon as HRH deemed the temperature too cold and the snow too deep, she retreated to the barn and refused to venture outside.

As a result of her hibernation, we had our first rabbits this spring. Two of them living behind the barn.

The snow is now mostly gone, so Ralph is outside again and the rabbits are also gone. She hasn’t gotten that soft.

But then last weekend the snow returned. It fell all night from Saturday into Easter Sunday.

HRH poked her head out of the barn.

Ralph peeking out of the barn

She looked to the left and the right.

Ralph peeking out of the barn

She paused for a moment to consider.

Ralph peeking out of the barn

And she retreated back into the barn.

Ralph peeking out of the barn

Oh, Ralphie. You’re such a tough barn cat.

At least the Easter bunny was safe.

One Room Challenge Week 2 – Master bedroom progress report

It’s the beginning of week 2 in the One Room Challenge. Time for your first progress report on the master bedroom.

One Room Challenge

This makeover has been going on for a long time–longer than just the ORC. If you want to get caught up, here are the previous posts:

I’ve learned that I need schedules and deadlines if I want to complete a project in any reasonable amount of time. That’s part of why I love the ORC.

I posted my to-do list last week, but not my schedule. So to hold myself accountable, I’m going to put timelines on everything.

It may look like I’ve accomplished a lot already. Just remember this makeover has been running since Christmas.

Here’s where we’re at:

  • Buy a new bed – Done
  • Remove popcorn ceiling – Done
  • Patch ceiling and walls – Done
  • Paint ceiling, trim, doors and walls – Done
  • Make/find window treatments – Done
  • Build hookboards for behind the door – Done
  • Paint dresser and replace hardware – Done April 6
  • DIY a headboard – By April 12
  • Refresh dinged up closet doors –By April 19
  • Relocate light switch – The electrician is booked to come April 22
  • Replace light fixture – I’ll get the electrician to do this while he’s here
  • Come up with a jewelry storage solution – By April 26
  • Sew a bedskirt – By May 3
  • Decorate and personalize – Ordered prints April 6. Fingers crossed they get here in time.

The main accomplishment in the past week is painting the dresser. I didn’t realize how badly scuffed and chipped the black paint was until I started to prep for painting. It’s amazing what your eyes miss when you look at something every day.

Black dresser before

I’m really liking how the white paint pops against the dark blue walls. The brass knobs and handles tie in with the hardware on our pine nightstands–and even better the new handles are the same dimensions as the old ones so I didn’t have to patch or drill any holes. That’s never happened for me before, and it felt like a major victory. (And yes, I know I’m missing two handles. They’re back ordered and are supposed to come in a week or two. Missing hardware seems to be a recurring theme of my ORC participation).

White dresser with brass hardware after

I think I’ve made some decisions about the headboard, so I’m crossing my fingers I can get that one done next weekend.

Thanks for following along.

And be sure to check out Calling it Home for all of the other ORC projects.