Happy Thanksgiving

Hey y’all. Baxter here.

Julia and Matt decided to take Thanksgiving off. So, with them turkey-digesting and one-room-challenging, it’s been left to me–the dude without any thumbs–to handle today’s post.

Even though I’m a Canadog now, it seems weird to be celebrating Thanksgiving in October. But there’s some perks to the weekend.

Road tripping (I’m a very good backseat driver).

Back seat driver

Dog parking (I’ve been to a dog beach, but never a dog park with a dog beach).

Baxter wading in the water

Y’all want to know what else was special about this dog park? It wasn’t just for dogs. Although this guy wasn’t really into playing. I walked around his tree five times and did a special dance. I finally got so frustrated I just gave up and barked at him. That’s when Julia told me I had to leave him alone.

Baxter investigating a racoon in a hollow tree

There were three special dinnering (two were turkeys and one was the bird of my homeland).

Baxter posing with the KFC bucket

So that’s how I spent the Canadian Thanksgiving. If you’ll excuse me, I have some turkey and chicken and squash to sleep off now.

Hope y’all had a good weekend. Did you do anything special? Or make any new friends? Or eat any good foods? For those other Canadians and Canadogs out there Happy Thanksgiving.

Don’t ever give up

This was a different post when I wrote it in my head the first time on my drive home from work on Tuesday evening. By the time I turned into my driveway it was this post you see before you.

Work kicked my butt on Tuesday. I made a couple of really big mistakes on an important project I’m responsible for. I said some really bad swear words and came close to shedding a few tears. It was a low point.

Then on the way home, I stopped at Home Depot. I was getting a refund on a special order they hadn’t been able to find for me. The associate said, “I’ll give you the refund, but let’s try and place the order again. I won’t charge you even if it goes through.”

Back on the road, there was a back up of cars and lots of flashing lights at the roundabout I drive through every day. As I came around the curve, I saw a bad accident with a dump truck.

And this is why my attitude had changed by the time I made it home. I had a bad day at work. That’s all it was. There were other good things that happened to me, and things could have been a lot worse.

I will still recite my mantra of “Be the duck. Be the duck.” (You know, feet paddling madly under the water but feathers smooth and unruffled above).

However, what started to play a little more loudly in my head was, “Don’t ever give up.” In fact, this mantra inspired me to dig into the boxes in my office and pull out this poster.

Don't ever give up

This hung in the office at my middle school. When I was in grade 8 I finally worked up the courage to ask one of the teachers to photocopy it for me. It’s hung on a bulletin over my various desks ever since then.

Obviously, it’s been packed away too long. It’s now back up on the bulletin board in my office here.

How was your week? Hopefully it was better than mine. Let’s all have a good weekend, okay?

How to build your own shaker cabinets

It’s time for the first progress report in my One Room Challenge laundry room makeover.

One Room Challenge

Today’s update focuses on the most striking transformation in the laundry room: the cabinets.

You saw in the first post that the laundry room cabinets are basic flat doors. You also saw that my inspiration was a shaker style.

Laundry room before and inspiration

Fortunately, transforming flat doors into shaker doors is a pretty easy process. However, there was one door and one drawer that weren’t basic flat panels. I don’t know what this style is called officially, but I believe it was popular in the nineties. The distinctive feature of these cabinets was a built in wood stained “handle” along the edge of the white melamine flat door or drawer. Look familiar?

90s style cabinet

Before I could shaker-fy these cabinets, I needed to get rid of the ridge part of the handle. I enlisted my new-to-me, but extremely old table saw. I set the fence and the blade at the precise width and height I needed to slice off the handle, and then I very carefully ran the door and the drawer through the saw.

Trimming the edge off a cabinet door

Once the handle was removed, I could work with these cabinets exactly like the rest of the ones in the laundry room.

Using my table saw again, my Dad and I cut 2 inch wide strips out of a sheet of hardboard that I had left over from my bookshelf project. I then affixed the strips to the cabinets to make the raised shaker detail.

Easy peasy.

Adding shaker trim to cabinet doors

I used a smear of carpenters glue on the back of the strips and then I tacked them in place with my Dad’s nail gun. A bit of wood filler evened out the joints and an all over sanding smoothed everything out. I chose to have the vertical pieces run edge to edge on the drawers and doors, and then the horizontals ran between the two vertical strips.

For the drawer and the door that I’d trimmed earlier, the shaker strips covered most of the original handle. At the edges a good daub of wood filler took care of the hole. Here’s a sneak peek of how they look after painting. Not perfect, but good enough for me.

Adding shake style trim to cabinets

Anyways, before I get too far ahead of myself, how about a few more details on the painting? After I painted the kitchen cabinets at our first house, I swore I’d never do it again. Maybe my tolerance for DIY has improved because painting these cabinets was much less torturous.

A few things were different this time around.

  1. After priming I used the Advance paint formula from Benjamin Moore as opposed to a stinky heavy duty oil paint. I’ve been super impressed by the finish I get from Advance, and clean up is a breeze.
  2. I painted just the fronts of the doors. Sure it’s a shortcut, but I didn’t feel the need to flip them over and paint the insides too.
  3. I split the painting into two stages because I chose two different colours. The uppers and two blocks of lower cabinets are all BM Cloud White (the same colour as we’ve used on the trim elsewhere in the house). The lowers on the sink section are BM Wrought Iron (the same colour as Matt’s bathroom). One coat of one colour took just 30-45 minutes–much better than the week of 16 hour days I spent in our last kitchen.

As soon as the drawers and doors were dry, I put them all back in place.

Laundry room cabinet makeover

The room may still need to be painted, cleaned and decorated, but it’s already looking 100 times better. Since installing the doors and drawers, I’ve found myself making special trips downstairs to the laundry room just to admire the cabinets.

That’s not weird, is it?

This is a super cheap, easy way to makeover basic cabinets. I highly recommend it.

And because this is a progress report, here’s where the rest of the makeover stands:

  1. Add shaker style trim to the cabinets
  2. Paint the cabinets
  3. Install doors and drawers
  4. Remove ceiling rack – By Oct. 3
  5. Patch ceiling and walls – By Oct. 3
  6. Prime walls and paint ceiling – By Oct. 10
  7. Paint and install baseboard and paint window trim – By Oct. 10
  8. Deep clean (sink, counter, floor, machines) – Oct. 13 (Happy Thanksgiving Monday!)
  9. Paint walls – By Oct. 17
  10. Level washing machine – By Oct. 19
  11. Build and install ceiling rack – By Oct. 24
  12. Build and install towel bar – By Oct. 24
  13. Install cabinet hardware – By Oct. 24
  14. Build and install light fixture – By Oct. 26
  15. Decorate – By Oct. 31

I knocked off steps 4 and 5 in the past week, but added one new step (#10). I don’t know how I forgot that the washing machine shakes like it’s going to take flight every time it goes into the spin cycle. We have to fix that.

So week one of the One Room Challenge is over. Five (or hopefully less) to go. If you haven’t had a chance, I highly recommend checking out the link-ups on Calling it Home. The 20 participating bloggers post on Wednesday and then the linking participants (like me) share our progress on Thursday. There’s an impressive range of projects and lots of inspiration. Exactly what this challenge is all about.

Have you ever made over cabinets with trim or another add-on? How about painting cabinets? Have you ever taken on that fun task? What’s your favourite cabinet style? Anyone know what that nineties built-in handle style is called?

Smokey Hollow

This year’s birthday present is one of the most special gifts I’ve ever been given. Matt, my family and his parents all went in together to buy me a painting.

Smokey Hollow

The painting is of a waterfall in the town where I grew up.

I hiked the trails around this waterfall and waded in this creek so many times. The waterfall doesn’t really have a name, but the whole gorge around it is called Smokey Hollow (which is also the name of the painting). I’ve heard a couple of explanations for the name Smokey Hollow. One is the mist from the waterfall made the hollow “smokey.” The second is literal smoke which came from all of the mills that used to be throughout the valley. In fact, the creek that runs over this waterfall is called Grindstone Creek.

Wherever the name came from, this is a beautiful spot that’s very special to me, and to have it memorialized in a painting was something that I couldn’t resist.

This was painted by a local artist named Brian Darcy. He paints nature and farms and the countryside. I could buy pretty much every one of his paintings.

This particular painting, I’ve wanted since I was in high school. It means so much that my family came together to give this to me.

Since we painted the living room and set up the bookcases on the opposite side of the room, we had a perfect wall for it.

Smokey Hollow by Brian Darcy

Matt made all of the arrangements to buy the painting, but what made this extra special was that we actually got to meet Brian. We saw some of his works in progress and learned about his painting process and heard some of the story behind the Smokey Hollow painting.

He even gave us copies of a little study he did from the painting. Down in the bottom right corner on the shore of the creek, there’s a little cluster of pink wildflowers. Flitting around the flowers is a Swallowtail butterfly. Well, Brian took that scene and did a separate small little painting.

Summer fields by Brian Darcy

My family has known for a long time that I wanted this painting. Last year, my Mom went down to Smokey Hollow and took a picture for me. She had it printed and framed and gave it to me for my last birthday.

Smokey Hollow photo

I still need to find the perfect place to hang this one. Since Smokey Hollow is such a special spot for me, I think I’m allowed to have two pictures of it.

Anyone else have a story of finally getting something you’ve waited a long time have? Do you have any mementos of where you grew up? Even though this was a gift, this is Matt’s and my first time spending any significant amount of money on art. I have to say I’m feeling pretty grown up about it. Have you invested in art?

One room challenge – Laundry room makeover

I am so excited for October’s project. Remember back in September when I didn’t have a project on my to-do list and I took apart the laundry room? Well now it’s time to put it back together.

I’m even more excited for this makeover because I’m going to make the laundry room my part of the One Room Challenge.

One Room Challenge

Linda at Calling it Home created the ORC three years ago as a way to help people stay on track and finish a room. Over the next six weeks, a group of bloggers and a whole bunch of joiners like me will be making over one room. We’ll be posting weekly updates on our blogs. So it’s not all that different from how I’ve handled my other projects so far this year.

Now, I will admit that I’ve gotten a little bit of a head start on this challenge. I trimmed out the cabinet doors and painted them last month.

I wanted to complete the makeover in October, but I knew two weekends this month were booked for non-DIY activities. As a DIYer with a day job, I absolutely need my weekends if I’m going to finish this in one month.

Well, it turns out that the ORC gives me six weeks. So I’ll have a bit of a cushion.

The purpose of today’s post is to introduce my room and tell you my plan.

Everyone, meet the laundry room. Laundry room, meet everyone.

Laundry room before

Here’s the part where the laundry room tells you a little bit about himself. We are very fortunate that we have a great space to start from (and yes, I took these photos after the makeover had already started–bad blogger). There is lots of counter space and built-in cabinets. We have a utility sink and our new (okay two-year-old) front loading washer and dryer. Even though we’re in the basement, we have a nice large window.

Laundry room before

before19

Now we redid the basement when we first moved to the farm. However, the makeover pretty much stopped at the edge of the laundry room. I scraped the stipple ceiling, took down the fluorescent light fixture, removed some posters that had been tacked to the front of the cabinets (why?) and that was it. Oh, except for our new washer and dryer (love you babies).

Since the room is open to the rest of the basement, I’d really like it to be as pretty as the rest of the basement. And right now, it’s not.

Laundry room before

So this makeover is purely aesthetic, and I’m working with what is there in the laundry room already.

Here’s the vision:

And here’s the plan:

  1. Add shaker style trim to the cabinets
  2. Paint the cabinets
  3. Install doors and drawers
  4. Remove ceiling rack – By Oct. 3
  5. Patch ceiling and walls – By Oct. 3
  6. Prime walls and paint ceiling – By Oct. 10
  7. Paint and install baseboard and paint window trim – By Oct. 10
  8. Deep clean (sink, counter, floor, machines) – Oct. 13 (Happy Thanksgiving Monday!)
  9. Paint walls – By Oct. 17
  10. Build and install ceiling rack – By Oct. 24
  11. Build and install towel bar – By Oct. 24
  12. Install cabinet hardware – By Oct. 24
  13. Build and install light fixture – By Oct. 26
  14. Decorate – By Oct. 31

Fourteen easy steps to laundry room bliss. Simple right?

Is anyone else doing the One Room Challenge? Do you find pretty laundry rooms as exciting as I do?

Bringing back the books

I didn’t really have project this month, but I did say that I wanted my books back. That meant finishing the bookshelf makeover that I started in August.

You might recall that in my original photo you could barely see the bookshelves because they were painted such a dark brown (oh, and hidden behind boxes that have been packed for two and a half years).

Bookshelves and boxes of books

Well, not anymore. Behold the view from the same angle.

Living room bookshelves

Bright and white and, best of all, filled with books. Hello beloveds.

The bookshelves wrap the one corner of the living room and tuck behind the comfy lounging chair that I inherited from my grandmother.

Corner bookshelves

I’m pretty happy with how things have come together. I know a lot of people struggle with styling bookshelves, and I’m no different. I’m decently satisfied with the middle section right now.

As always, the contents of the shelves have a lot of meaning for us. Besides the books we have some very special treasures.

The trophy is Matt’s grandma’s won for a school running race in 1935 when she was in high school, my dad made the small lidded wood pot on his lathe, and the hammer on the top right was a gift from my grandmother to Matt and unscrews to reveal decreasing sizes of screwdrivers. Towards the bottom, we have a brick I found in the backyard of our first house that has our city’s name stamped on it. Below that there’s a picture of Matt and me at Niagara Falls back when we first started dating, and beside that a miniature replica of Rodin’s The Kiss. (Rodin is our favourite sculptor. A miniature of The Thinker is on an adjacent shelf). The half naked man (or more accurately naked half man) was a high school art class project.

Bookshelves

I want to tuck a few more knick knacks in some of the empty spaces, and I definitely need to get some bookends. I’ll continue to futz with the arrangement, but regardless of what things look like, I’m thrilled to have my books back.

Perhaps it’s because I had bookshelves on the brain, but as I was pulling my shelves together they seemed to be popping up on other blogs as well:

I cannot explain how thrilling it is to have my books back. I came across a few I’d forgotten I had and of course lots of old favourites. In fact the borrowed book that I was half-way through may have been set aside in favour of an old favourite. (I never do that. I’m always a one-book-at-a-time woman).

Plus, setting up the bookshelves gave us an excuse to paint some more of the living room and unpack about 16 boxes that had been piled in the corner. The room feels so much more finished! … Well, we’re still a long way from finished. At least it’s a little bit closer to the vision in my head.

How do you handle book storage at your house? Besides books, what’s on your bookshelves? Any tips on styling bookshelves? Who else is a one-book-at-a-time reader?

Liebster Award

A few weeks ago, I got a tweet from The Party Girl that they’d nominated me for a Liebster Award. Like most blogging awards, this one’s about spreading the love. I’m definitely feeling the love from Ashley, Fernanda and Victoria. Thanks ladies!

Liebster Award

This post is also my chance to pass on the love. I have 11 nominees of my own a little further down.

Here are the rules for the Liebster Award:

  • post the award on your blog
  • thank the blogger who presented this award and link back to their blog
  • write 11 random facts about yourself
  • nominate 11 bloggers who you feel deserve this award and who have less than 250 followers
  • answer 11 questions posed by the nominator
  • ask your nominees 11 questions

You can see the number 11 figures prominently in the Liebster Award. So here we go.

11 facts about me

  1. I’ve never broken a bone, had stitches or a cavity. But I’ve gotten nosebleeds since I was a child… in the winter I get them daily. Not fun.
  2. I would gladly eat pizza for every meal. Lots of mushrooms, please.
  3. I had long hair pretty much all my life, and then when I was 28 I cut it all off into a pixie cut, which I love. My hair is stick straight and won’t hold a curl. I’ve never dyed my hair.
  4. I’m the oldest of four kids.
  5. I can sleep for 12 hours straight and am happiest with 10 hours a night… although I hardly ever get it.
  6. Breakfast is my favourite meal of the day.
French toast

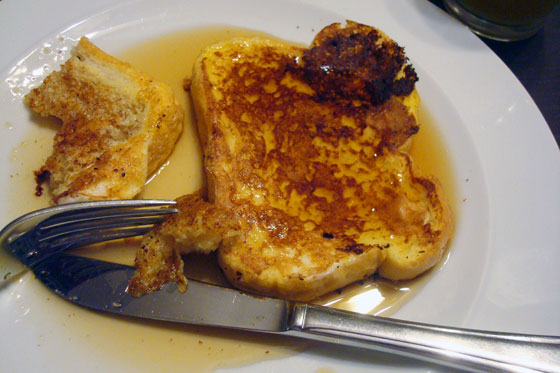
French toast is good for dinner too.

  1. I hate ironing, but I don’t mind washing dishes.
  2. Easter is my favourite holiday. Even better than Christmas or my birthday.
  3. I wear earrings everyday. My face looks funny without them.
  4. My favourite music is 80s classic rock. And I love to listen to music while I cook.
  5. I love junk food–candy, chocolate, Coke, chips. Salty always wins over sweet for me.

Answers to The Party Girls’ 11 questions

1. What’s the story behind your blog’s name?

I think my blog’s name is pretty self-explanatory. I write about our 129-acre farm and our efforts to make it our forever home.

2. What are you favourite blogs?

Oh there’s so many. Sticking with the 11 theme, I’m always happy when I see posts from DIY Diva, Yellow Brick Home, Little Green Notebook, IHeart Organizing, Young House Love (hope they come back to blogging), Smitten Kitchen, That MuttManhattan Nest, For the love of a house, Amanda’s Adventures in Sewing, and Four Square Walls in my feedly.

3. Where were you born and where did you grow up?

I was born and grew up in a small-ish town in southern Ontario about an hour west of Toronto. One of the requirements of our perfect farm was that it be in the same area as my hometown. Matt and I now live just a half hour away from where we grew up.

4. Do you like to travel? What’s your favourite place you’ve been to?

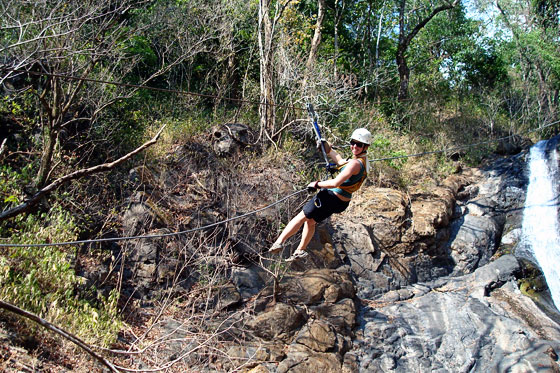
I like to travel, but since buying the farm I’ve become a real homebody (farmbody?). For our honeymoon, Matt and I went to Costa Rica, and it was amazing. Body surfing in the ocean, horseback riding up a mountain, zip-lining through the forest and swimming in a river in the middle of the jungle were experiences I’ll never forget.

Zip lining in Costa Rica

5. What do you love about blogging?

I love having a record of the life we’re building on our farm. Sometimes it’s easy to get discouraged by the amount of work needed for the house and the property. Looking back at my blog reminds me that we’ve actually made progress and how special it is to live here.

6. What is the number one thing you’d like to get out of your blog?

It’s been really cool to connect with people who share my interest in renovating, country living and of course doggies. I hope that continues.

7. What’s one thing you’ve always wished you knew how to do?

It’s a toss up. I have always wished I knew how to dance. I love to dance, and I do it whenever I get a chance. However, I’m not super coordinated, and I’m always jealous of those who are. I also wish I could drive standard. Matt had a standard car, and let me try a few times. I didn’t practice enough to get really proficient, though.

8. What is your favourite post from your blog?

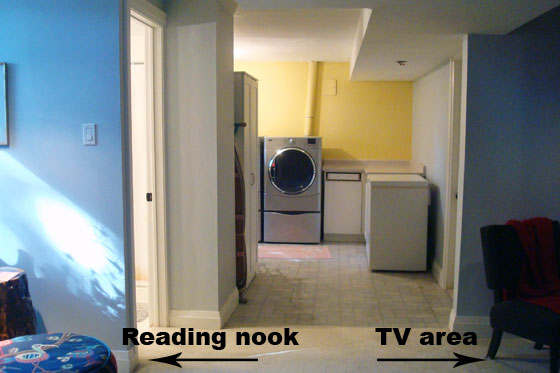
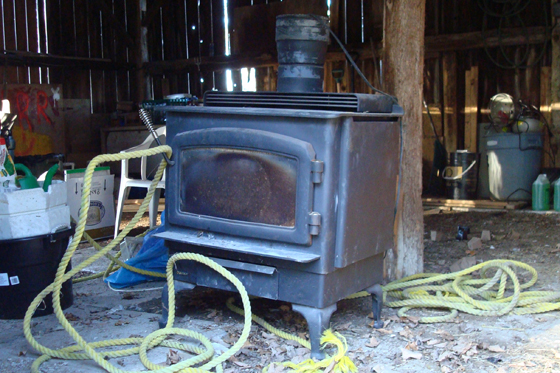
Oh I don’t know what to say. I went through my archives of 416 published posts and I can’t pick. I love everything in the family category, my before and afters, and projects like my nightstands-to-dresser and my barrel-to-ottoman. A post that stands out for me is an early one from a month after we moved into the farm. We had just started the basement reno (oh, if only we knew it would be 9 months before our basement would resemble a basement again), and we’d removed the woodstove that had been in the basement. This was the first moment that I realized I could write funny. I didn’t know I could do that. (At least I think it’s funny).

Wood stove

9. What is one lesson you’ve learned since starting your blog?

My blog has taught me how easy it is to “work” on something that you love. Writing three posts a week for going on three years is not a small commitment, but I love doing it.

10. What’s your favourite movie and why?

Thomas Crown Affair with Pierce Brosnan and Rene Russo. Humour, mystery, adventure, love and a happy ending. Plus, Rene Russo is a super strong female with a great wardrobe.

11. What are you reading right now?

The Next Best Thing by Jennifer Weiner. My favourite books have likeable characters and a happy ending. I’m not sure yet that this one fits the requirements. Regardless, spending 10 minutes with a book while I eat my breakfast cereal is a nice way to start the day.

My 11 nominees

  1. Lightly Crunchy
  2. Apple Hill Cottage
  3. Outtakes on the Outskirts
  4. September Farm
  5. Westlake Musings
  6. Joyfill
  7. Woof! Tails from St. Simons Island
  8. Dockwood Furniture
  9. Creative Gleanings
  10. Catherine’s Chronicles
  11. Sewing Pies

11 questions for my nominees

  1. What is one lesson you’ve learned since starting your blog? (Yes, I copied Party Girl)
  2. Describe your ideal weekend.
  3. Would you rather wash dishes or do the laundry?
  4. Are you crafty? What’s your craft of choice? If you’re not crafty, what do you wish you knew how to do?
  5. What’s one post we’ll never see on your blog?
  6. Who would play you in the movie about your life?
  7. What colour have you considered painting a room in your house but haven’t had the guts?
  8. What advice would you give someone who’s just started blogging?
  9. If you were on an island and could only bring three things, what would you bring?
  10. What was the last gift you gave someone?
  11. What has surprised you about blogging?

And for another 11, this post is now longer than 1,100 words. Time to stop typing and hear from you. Pick a couple of the 22 questions in this post and share your answer. Or weigh in with random fact about yourself.

Transplanting season

In case you missed it, fall is here. (The autumn tablescapes, fall home tours and Hallowe’en decorations proliferating the blogosphere are a big clue. We bloggers appear to have trouble living in the moment). Anyways, we’re officially into fall. And it’s official transplant season.

Now I have to confess that I got a bit of a head start this year. I transplanted peonies back in August, and a couple of weeks ago Matt and I moved a few trees around.

I generally pay little attention to gardening timelines. With our gardens in the state they’re in, if I wait until the “right” time to move my plants it will take me decades to get things where I want them.

You’ve seen that we have lots of peonies spread all over the property. My mission this year was to move a few of them into the gardens I’ve established.

Bright pink peonies in front of a steel silo and old barn

I don’t profess to being any type of transplanting expert.

My usual technique is to try to keep as much of the soil around the plant intact as possible. Of course, the first peony I dug up was surrounded by weeds, and I had to hack at the roots to get rid of everything non-peony. If you’re curious, here’s what peony roots look like.

Peony tubers

The other thing I’ve learned over the years is to not replant the plants too deep. Transplanting makes it easy because I just keep them at the same level they were.

Transplanting trees

The other component of my not-at-all-scientific transplant process is to water the heck out of them. I remember when I first started gardening I read an article that recommended aiming for “quagmire”-like wetness. So far, September has been pretty rainy, so we have had plenty of help keeping up the quagmire factor, although we have supplemented with hoses and buckets as needed.

Watering transplanted peony

We have a few more trees and bushes yet to move before fall gets too far along. Oh and bulbs to plant. Don’t forget to do those too. The transplanting PSA just never stops.

Are you doing any transplanting this fall? Do you have any transplanting tips?

Golden beans

I know, I know. In the story the eggs are gold and the beans are magic. But in our case, it’s our beans that are turning gold.

This is our first time growing soybeans, so we’re learning as we go. It turns out that as the beans ripen, the plants turn yellow.

Soyabean field

The pods are plump and fuzzy.

Soybean pods

Inside, we have actual beans. Edamame anyone?

Open soybean pod

In other fields in the area, where the beans are a bit older, the plants have gone past gold and are all the way brown. I still have no idea how far away we are from harvest time. We’re continuing to learn about this farming thing.

Is it harvest time where you live? Do you like edamame?