Piano trio

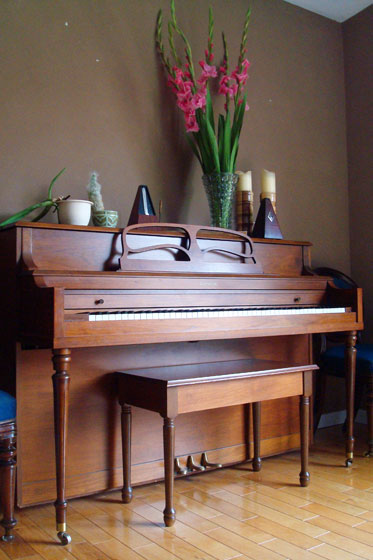
Searching for a spot to put the bouquet of very tall gladiolas that my Mom brought to the farm, I eventually found my way to the piano in the dining room. With the pretty flowers in place, I took the opportunity to photograph this piano, which joined our family about a year ago.
Matt's grandma's piano

It’s a new addition to Matt’s and my little family, but not to Matt’s extended family. It’s his Grandma’s piano. This picture shows her at the piano with Matt’s two older brothers.
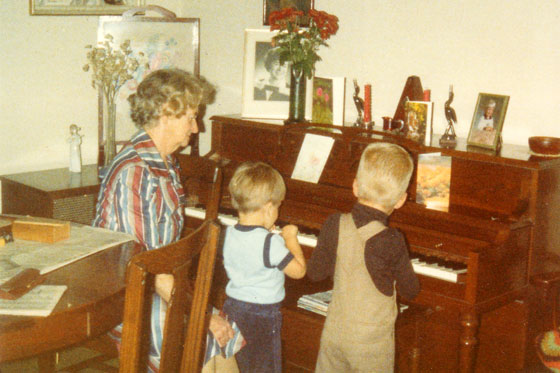
Matt's grandma with her piano

I played piano for many years, eventually earning my Grade 8 from the Royal Conservatory. My parents bought an electric piano for my sisters and me. A few years ago, they gave Matt and me the piano, which I really appreciated after not having a piano in my life for many years. However, I’ve always wanted a “real” piano. There’s something about wood and wires that was important to me.

Last summer, Matt’s aunt gave us his Grandma’s piano. I don’t play that often anymore–and when I do, my fingers are so rusty that I spend most of my time on scales, chords and arpeggios–but I’m still thrilled to have a “real” piano and especially one with family heritage.

Cecilian piano

The arrival of this instrument led to a bit of a game of musical pianos in our house.

My childhood piano moved to the basement. Its ability to play songs on its own and various other instruments aside from just piano is always a hit when the nephews come to visit.

We also had a third piano–the one that came with the house. This piano has lived in the cold cellar since we did the basement reno. It was a monster–big, heavy, beat-up and badly out-of-tune. Even if we could have lifted it, it wouldn’t have fit up the stairs. But I was adamant about keeping it because it was my “real” piano.

Well, once Mama’s piano arrived at the farm, I gave Matt the green light to get rid of the squatter piano.

(Piano aficionados may want to skip the next part).

The piano came out of the basement in relatively small pieces. The harp was still a monster to haul up the basement stairs. Matt did most of the work dismantling and evicting the piano. We have to extend thanks to my Dad, who dropped in for a visit and ended up swinging the sledgehammer and helping to carry the harp up the stairs. Then Matt’s Dad came by with his truck and helped Matt take the harp to the local charitable metal donation bin.

I did keep one piece of the old piano: this key, which now sits on top of Matt’s Grandma’s piano.

piano21

On the back side of this key, there’s a very faint signature. I think it says Ernest Pare Feniseur. I’ve type the name into Google, but haven’t turned up any results.
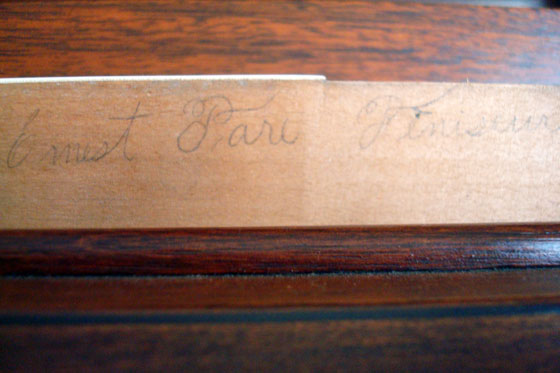
Piano key

Decorating the rest of the top of the piano, I have our valiantly persevering cacti, a metronome that we found in the house, my Mom’s gladiolas in my grandmother’s vase, Matt’s grandmother’s metronome and two candlesticks turned by my Dad (topped with candles that were burned at our wedding). Yes, I’m just a wee bit sentimental.
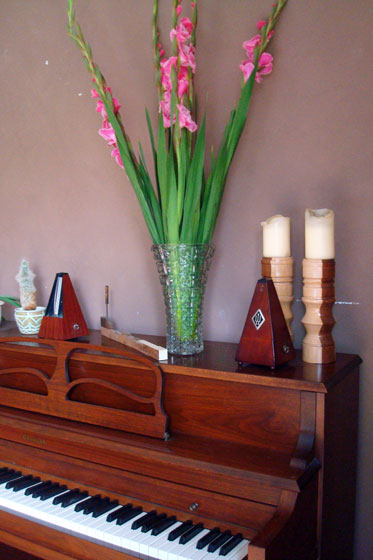
Matt's Grandma's piano

Together, they all make a pretty special corner of the house.

Who else played piano growing up? Do you still play? Anyone else have a piano at their house?

#OneBoardChallenge

Did you happen to catch the #OneBoardChallenge last week?

Jen from House of Wood initiated it. She challenged 16 other bloggers to build something from a single 1x8x8 board.

#OneBoardChallenge

The projects were amazing. I was super inspired by how creative and skilled people are.

Here are some of my favourites.

DIY Round Mirror by Build Basic. I really want to make this.

DIY Round Mirror Frame by Build Basic

Interlocking tiered display shelf by Sawdust Girl. I like the precision of these shelves.

obc_sdg

Cool geometric art by Sawdust & Embryos. Complete with a pop of pink.

Geometric art by Sawdust & Embryos

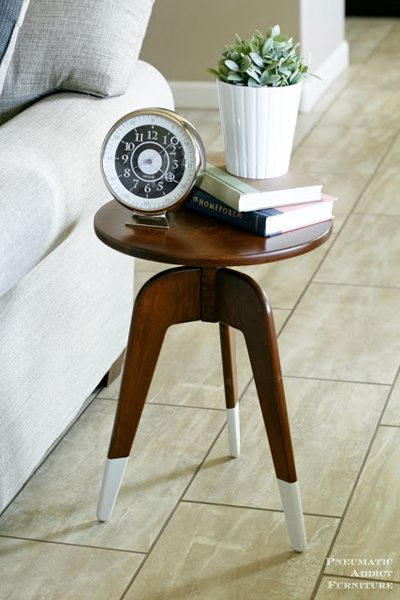
A modern three-legged end table by Pneumatic Addict. I’m amazed that this is made out of one rectangular board.

Modern three-legged end table by Pneumatic Addict

I admit, this challenge got my brain churning. I’m not sure what I’d build if I had only a 1x8x8.

What would you build?

New thrones for the queen

It’s been almost two years since we got our new dining room table. I’ve been on the look out for chairs ever since.

I saw six at the Christie Antique show last spring, but by the time I made up my mind to buy them, they were sold. Argh. So frustrating. I mentioned to Matt the other week that I haven’t been able to get those chairs out of my mind. A couple of days after that conversation, I swung into a local antique store, and right by the front door was a group chairs, very similar to the ones I’d lost out on more than a year ago.

They were a style that I’ve always liked, even if they did not meet most of the original criteria I had for dining chairs:

  • Contrasts with, yet complements, the traditional dark wood table. — These ones pretty much match the table.
  • Reasonably price, especially as I wanted eight. — They were priced at $50 per chair, and there were eight of them.
  • Not upholstered. — Umm… not so much. Upholstered on the seat, upholstered on the back, both the inside and the outside.
  • Slightly country feel. — Not at all. This Chrystiane profile ties into the traditional side of my decorating aesthetic.

Despite not matching up with what was originally in my mind, I liked them, Matt was okay with them, and the price was right (especially after I talked the dealer down a bit more).

They came home with us.

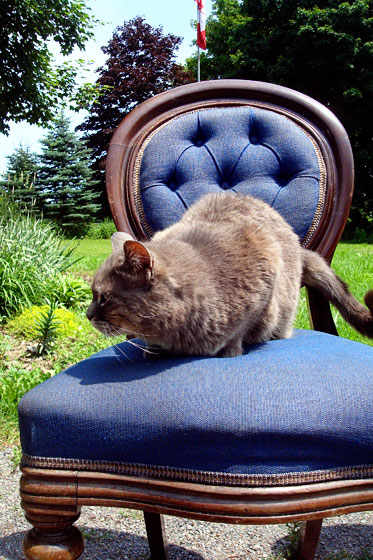
While they were airing out on the driveway, our quality control manager, Ralph, performed her inspection.

Ralph the cat on the dining chair

“The seats seem adequately cushy, although you may want to reupholster someday.”

Ralph the cat on the dining chair

“The legs have a nice profile. The joints seem to be secure. Some of the casters are missing or broken. The finish could use a little work.”

Ralph the cat inspecting the dining chairs

“Some of the trim is coming loose in spots.”

Ralph the cat inspecting the dining chairs

“Overall, I think they’ll do. They have a nice style, and they cast good shade.”

Ralph the cat inspecting the dining chairs

For someone who lives in a barn, our girl has some definite opinions on furniture.

After vacuuming the upholstery and wiping down the wood, the chairs made their way into the dining room. (Ralph returned to the barn).

And here’s how they look around the table.

Dining chairs and table

Don’t the legs play nicely together?

Dining chairs and table

The chairs (and goodness knows the table) will all need to be refinished someday. I think I might try some Restor-A-Finish on the chairs first to tide us over. My Mom’s used it a few times and I’ve been super impressed.

The upholstery is another issue. Matt is not a fan of the blue. The fabric is mostly in decent shape, but it’s scratchy and faded. Reupholstering looks like it would be fairly basic, aside from the diamond tufts, but eight chairs, seats and backs (both inside and out) would be a lot of work–and I don’t think Ralph would help. It would be fun to try out different fabrics though. I’m pretty sure I remember Sarah Richardson using three different fabrics on chairs like this.

Overall, I’m pleased with the purchase, and very happy to finally have chairs that work with our table.

What type of chairs do you have at your table? Do you go antique shopping? Who else has a story of the antique that got away? What fabrics would you choose if these chairs were yours? Have you ever used Restor-A-Finish? Who handles quality control inspections at your house?

Six-month performance review

I like setting goals. It helps me stay focused and actually accomplish some things. When it comes to projects around the house, my annual home goals are what I use to stay on track. I’ve learned over time that it’s helpful to check in during the year to see what progress we’ve made.

We’re halfway through the year, so it’s a good time to see how we’re doing on Home Goals 2015.

In keeping with my goal to be a little more flexible this year, I haven’t been super ambitious when it comes to projects and schedules. I have to say that as a result this year has been a bit more enjoyable, project-wise.

I also feel like we’ve been decently productive though. Here’s how we’ve done so far this year.

Master bedroom

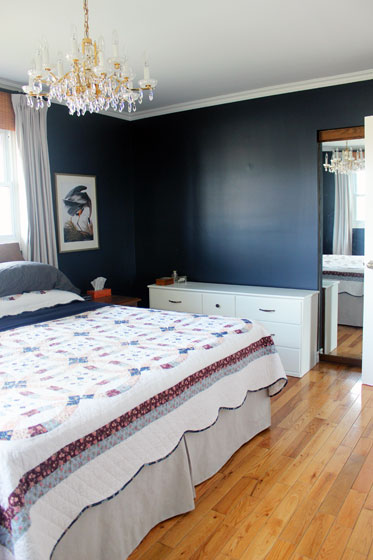
With a little extra motivation thanks to the One Room Challenge, the master bedroom is done. I love it.

Navy blue and white master bedroom

Basement art

I haven’t tackled this light-weight project yet, beyond buying a few frames and formulating some plans. This seems like a good indoor project once the weather changes.

Furniture

I haven’t made a lot of progress in this area either. I did buy a ladder/step-stool/chair that reminded me of my grandmother–and a lot of you of yours. Furniture shopping and building is another good fall project.

Step chair

Vegetable garden

The vegetable garden has been front and centre for the past few months, and I’m thrilled with all of the progress we’ve made. It’s been on my wishlist since we moved to the farm, and it’s totally happening. The garden has been a tonne of work, but things are growing and we couldn’t be happier.

Squash plants

Beyond the vegetable garden, I feel like we’re a bit ahead when it comes to outside tasks for the first time since moving to the farm. Part of it is because I’m choosing to not worry about the rock piles and old flowerbeds that I want to get rid of. A bigger part of it is that we’re three years in, so the gardens that we’ve worked on since moving to the farm are actually starting to look like gardens.

So two out of four. We’re midway through the year, and we’re midway through my Home Goals 2015. Appropriate.

How are you doing on projects this year? Do you set annual goals? What do you want to accomplish in the second half of 2015?

“Wait-no-more” organizing challenge

This is the post you were supposed to get on Friday. So much for “wait-no-more.”

My office is the least set-up room in our house. As such it’s a constant challenge to stay organized. I’ve shared my shame before more than a year ago, and, apparently, I’m going to do so again.

This time it’s mostly just a build up of paper. I have a hard time staying on top of my paper always. Despite a rainy Sunday two weeks ago, I just couldn’t motivate myself to tackle it.

Piles of paper on top of the filing cabinet

Then, Jen at IHeart Organizing posted a “Wait-no-more” organizing challenge. She’s tackling four trouble areas in her home. I may not do four, but I was going to get my butt in gear and do at least this one.

Jen shared a cute printable to help get the organizing started, so the first step was filling that out. She asked what’s working and what’s not working. It was really good to consider that before I just dove into cleaning up the paper.

IHeart Organizing printable

The wood plate that my Dad made for us works very well on the hall table for mail. Unfortunately, mail and papers also find their way to the kitchen island, which doesn’t work so well. I still love the little nook in my office. The bulletin board, calendar and dresser drawers all work to help keep us organized. I love the drop zone for my keys, sunglasses, wallet. Unfortunately, I’ve dropped a few too many things in the drop zone–the curse of a flat surface.

Paper storage options

On the other side of my office, the wire caddies on the wall could work to store paper until I’m ready to file it. Unfortunately, I forget which bin is which and end up stuffing everything in together. Some labels would help me stay organized. The filing cabinet may be ugly, but it also works. We are a paper household, so we need a place to stash it all. What doesn’t work so well is the top of the filing cabinet–another flat surface that is just a magnet for piles of paper.

Paper storage options

The plan for the week was to sort, reconcile, file and label.

Matt was out with friends on Friday night, so I finally got started. (Do I know how to have fun or what?) Another rainy day on Sunday allowed me to finish the job.

I only do the filing and reconciling every few months (I’ve tried monthly, and I just don’t stick with it). I’ve learned that I need various systems to control the paperwork between reconciliations. (My problem this time around was that everything got a little out of control).

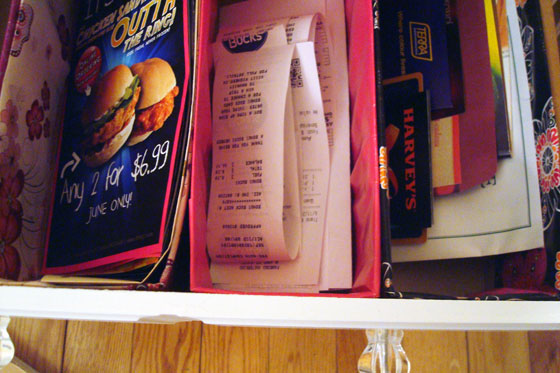
The first part of my system is a receipts bin. This is just a cereal box covered in wrapping paper (a tip I picked up from IHeart Organizing) and tucked into a drawer in my office. Receipts come out of my wallet and into the bin. (Other bins hold gift cards, takeout menus and coupons).

Receipts

The statements and other mail go into the wall caddy. I don’t think I’ve shared this project before. The organizer was one of those white wire things. It had been left behind by past owners, and I’d tossed it in a closet. When I was first organizing my office a year ago, I realized it might work to sort the mail. Remember the first tip of storage and organizing–use the vertical space.

I hit the organizer with some ORB spray paint and screwed it to the wall. It looked good and could have worked well, but for some reason it was hard for me to remember what papers went in what bin. The labels that I added last weekend make it much more functional. I just chopped up a paint stick, drilled a hole in the end, wrote my categories on them with a marker and then tied them with twine to the bins.

Mail organizer

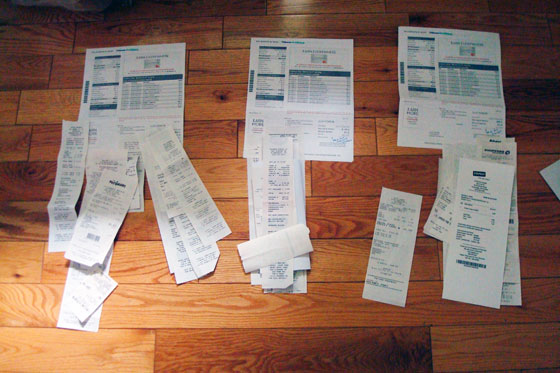
Then it was time to get sorting. There were lots of piles of statements and receipts spread out across the office floor at various points on the weekend.

Reconciling credit card bills

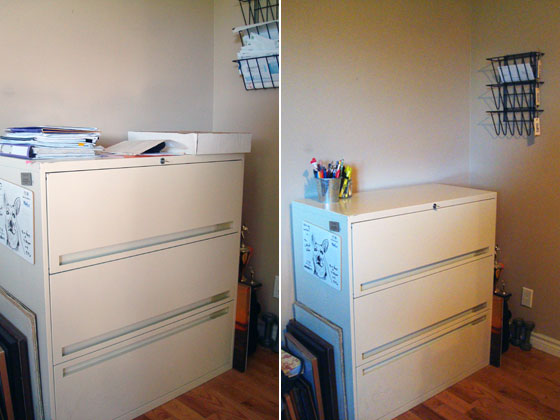
I made a few new files and tucked everything into the filing cabinet. And here’s the before and after to show how far the office–or at least this corner–has come.

Paper work before and after

There’s obviously still some more organization to go (pictures tucked on the floor around the cabinet) and some decorating that’s needed (very, very boring blank wall above the cabinet). There’s also still my nemesis–a big flat surface with the top of the filing cabinet. Even worse, it’s now completely clear and just waiting for clutter.

I need to come up with something to decorate or use the top of the cabinet so that it doesn’t become another drop zone. Any suggestions?

I’m sure paper will gang up on me again, but I feel better for having it under control at this moment.

Thanks Jen for organizing the “wait-no-more” challenge.

How do you tackle paper organizing at your house? Or are you paperless? Does anyone else reconcile like I do? I always feel a little neurotic matching up every receipt. What’s your biggest organizing challenge?
Simple belt storage solution

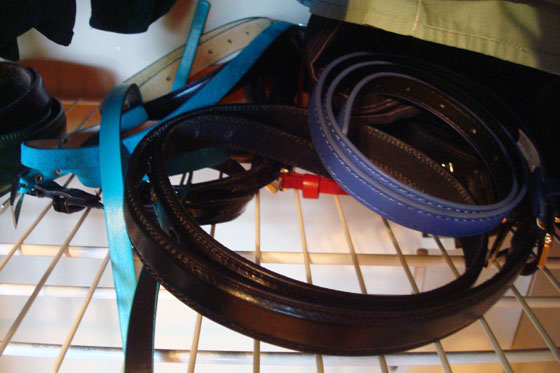
When we switched bedrooms, we switched closets too. I knew one thing I wanted to improve in the new closet was my belt storage. They’ve been tangled and tossed onto a shelf since we moved in.

belts2

When I still lived with my parents, I came up with a solution that worked very well for belts: cup hooks.

belts23

In the past, I’ve screwed the cup hooks directly into the drywall or plaster of the wall. However, this time I decided to go for something more portable so that I can move it if I ever relocate closets again. Screwing the cup hooks into a length of wood worked. Then I simply screwed the wood into the wall of the closet.

Simple belt storage solution

Super simple DIY. Super simple storage. My happiness is not commensurate with the simplicity of this project.

How do you organize your belts? Who else is a fan of cup hooks? Does organization make you happy?
How to apply preglued veneer on curved edges

More than two years ago, I wrote a tutorial on how to apply preglued veneer edging. Veneer edging covers up the raw edges of plywood and makes your piece of furniture or whatever it is you’ve made look like one solid piece of wood.

When I made the headboard for the master bedroom, I had a scenario that I’ve never dealt with before: applying the veneer to a curved edge. So today I’m posting an addition to my previous tutorial.

The same tools, techniques and principles still apply (mostly):

  1. Cut a piece of veneer slightly longer than the section of plywood that you’re covering.
  2. Line it up along one edge and apply heat and steady pressure to melt the glue.
  3. Firmly press the veneer down with a wood block (it will be too hot to touch with your hands) until the glue sets.
  4. Trim the overhang with a file.

For a convex edge (think the outside of a U), I didn’t have to do anything special. For a concave edge (think the inside of the U), I had to make a few more adjustments. On the more gentle curve, I found the very tip of my iron worked to soften the glue. I just had to work slowly, about an inch at a time.

Applying preglued veneer edging to a curve

Pressing the veneer into place as the glue dries is really, really important. On a curve, it’s particularly easy for the veneer to pull away from the plywood. A narrow pressing block or your fingers (protected with a glove or a rag)–along with patience–are essential.

For the tighter curves, I discovered why I still have a curling iron in my bathroom cupboard. The barrel was just the right size to fit into the curve at the top of the headboard. Once the adhesive was soft, I firmly pressed the veneer onto the plywood and held it in place until the glue set.

Using a curling iron to apply veneer edging

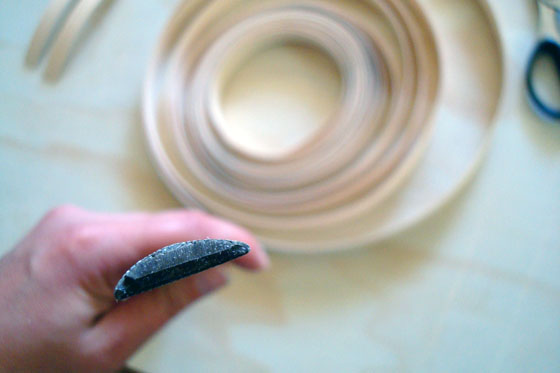
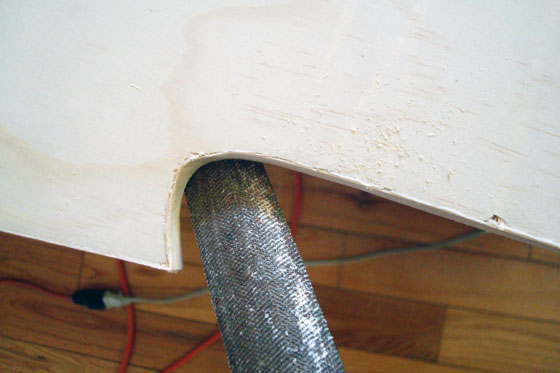
To trim the veneer, I always rely on a file. For the curved edges, I used the curved side of the file.

Curved profile on a file

Triming veneer on a curve with a file

A couple of swipes over the edge with fine sandpaper further smoothed veneer, and then it was ready for staining along with the rest of the headboard.

(And yes, the veneer takes stain and urethane and paint just like real wood).

Here’s the final product–in its impossible to photograph location in front of the window.

Applying preglued veneer edging to a curve

Anyone else have any tips for working with veneer edging? Who else has an old curling iron kicking around? Have you ever used beauty tools for DIY?


Making DIY dropcloth curtains – 8 lessons learned

In the last post, you saw the easy layered window treatments in the master bedroom. I promised more details on the dropcloth curtains I made.

Blackout blind, bamboo blind and drop cloth curtain window treatments

There are lots of tutorials out there on how to make dropcloth curtains. So I’m not going to write one here. Plus, I totally made these up as I went along, so a tutorial doesn’t really exist. I did want to share some of the things I learned from making my DIY curtains, though.

How to make dropcloth curtains

1. Dropcloths come with seams. I assumed that my 9 by 12 foot dropcloth would be one single piece of fabric. It wasn’t. All of my dropcloths had a seam down the middle. One had a centre seam plus an additional patch along one end.

For my two widest curtain panels, I just left the seam alone. It’s a bit thicker than I would like and a wee bit puckered, but I decided I could live with it if it was hidden in the folds of the curtains.

For the other curtains, my seam ripper and I spent some quality time pulling out the stitching.

Ripping out the seam on a dropcloth

2. Dropcloths come with holes. The canvas fabric of the dropcloths is not perfect. The rustic quality of the weave and the few strands of blue and red that were here and there are some of the elements I like best about using this fabric.

However, in a couple of spots my dropcloths went beyond rustic and veered into unraveled. So if you want to make anything out of dropcloths, check them over carefully. You don’t want to end up with a hole in the middle of your project.

3. Wash and iron before you start. Pre-washing your fabric is a basic tenant of sewing. I didn’t want my curtains shrinking (not that they’re going to be washed often) after I put the effort into making them, so I washed my fabric before I started sewing.

Dropcloth fabric is heavy duty. As a result, it wrinkles easily and the creases are really difficult to remove. I found that ironing the dropcloths when they were still damp from the washer helped to remove the worst of the wrinkles.

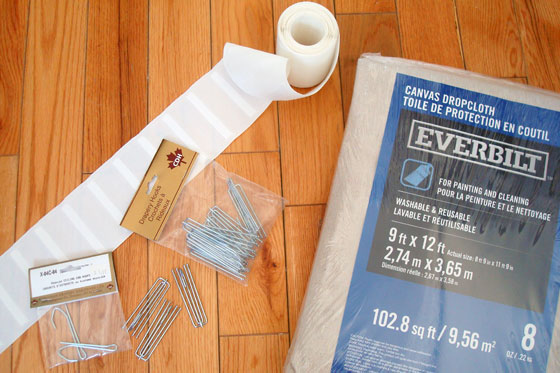
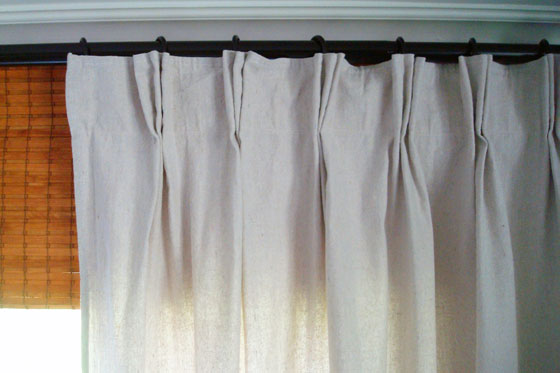
4. Use curtain tape. (Britt, this tip’s for you). From what I hear, making pinch pleat curtains is pretty tedious. Lots of measuring and calculating. A much easier solution is to use curtain tape. This is a kind of mesh fabric strip with channels on the back. You pair it with some special multi-pronged hooks, and it basically forms the pleats for you. I bought mine at a local fabric store.

The pleats are softer than they would be if you sewed them without the tape, but that was okay for my rustic fabric and my farm setting.

I sewed the tape along the edge of one of my dropcloths, put in the hooks and voilà, pinch pleat curtains.

Using curtain tape to make pinch pleat curtains

Using curtain tape to make pinch pleat curtains

Using curtain tape to make pinch pleat curtains

Pinch pleat dropcloth curtains

You can space your pleats as far apart or as close together as you want. I left one empty “pocket” for a space of about 6 inches between each pleat.

Pinch pleat dropcloth curtains

5. Use curtain tape to measure your curtains. Before I sewed the curtain tape onto my fabric, I formed all of my pleats until I had a strip that was as wide as I wanted my curtains to be. Then I cut the curtain tape at that length, removed the pleats and used the tape to measure the dropcloth fabric.

6. There are different types of hooks. The magic pleat-making hooks are very handy. They come in two different forms (there may be more, but I tried two). Whatever form you choose, the hooks hook onto the rings that go on your curtain rod. Option 1 has the hooks at the end, so the curtains hang a bit below the rings. Option 2 has the hooks in the middle, so the top of the curtain hangs up against the rings. This is the type of hook I ended up using.

There are also special non-pleating hooks (just plain single hooks) to hold up the ends of the curtains where there are no pleats.

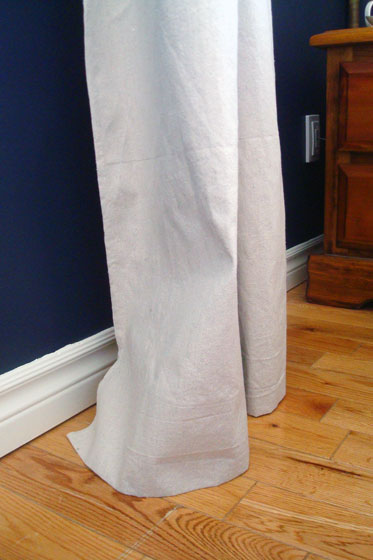
7. Take your time hemming. I wanted my curtains to just brush the floor. For my first set, I hung the curtains, found the spot where they met the floor, and then I used a ruler to measure the rest of my hem from that point. The result was curtains that were the right length at one or two spots, but for the most part they scuffed, not brushed the floor.

Curtains hitting the floor

For my second set of panels and for the bed skirt that I also made out of dropcloths, I skipped the measuring tape. Instead, I used pins to mark the fabric at about 1/4 to 1/2 inch off the floor. I pinned my way across the bottom of the curtains, marking about every six inches. Then I pressed the hem using the pins as a guide. It wasn’t scientific, but it resulted in curtains that just brushed the floor.

8. You can totally do this too. Dropcloth curtains are pretty easy to make. Honestly, I found them a bit tedious. The only sewing is in straight lines. Loooooong straight lines. However, boring they may be, sewing straight lines is not difficult.

Dropcloth curtains in a navy master bedroom

Let me know if you try them yourself.

Have you ever made your own curtains? Any tips to share from your experience?

Linking up with: Happy Housie DIY Challenge Party

How to make simple layered window treatments

When I had the brainwave to move our bedroom across the hall, Matt didn’t understand why we couldn’t just stay in our current room. He went along with my plans, but he had one requirement: he wasn’t moving in until we had curtains.

Blackout blind, bamboo blind and drop cloth curtain window treatments

We haven’t had curtains on any windows in any room since we moved to the farm. With no neighbours, privacy is not a concern.

However, our new bedroom is on the east side of the house. There are fewer trees on that side, so more light comes in the windows. At night, the lights on the barn and the driveshed and even headlights from the cars on the far-away road shine into the room.

Plus, east equals sunrise. If we wanted to sleep past dawn on any summer morning, we needed curtains.

But I wanted more than just curtains. I stumbled over Kristine’s window treatments on the Painted Hive and thought her solution was ingenious. (So I really can’t take credit for this idea).

Kristine’s solution is a great mix of form and function.

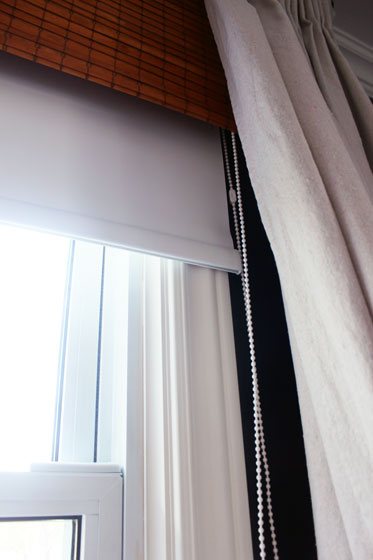
Function starts with a basic blackout vinyl roller blind, which I mounted above the window casing.

Vinyl blackout blind hidden behind bamboo blinds and dropcloth curtains

Form comes next.

The blackout blind is hidden behind a bamboo blind. Or what looks like a bamboo blind.

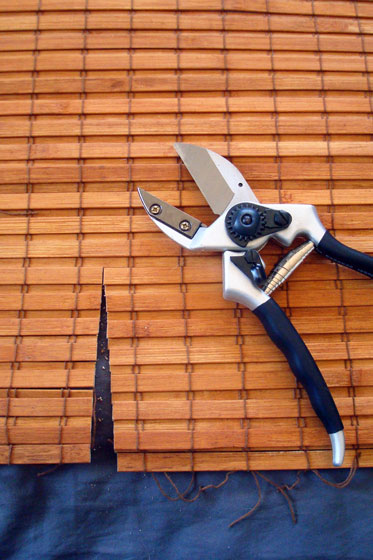
In reality, it’s basically just a valance. I took one bamboo blind and chopped it to pieces. For the main window over the bed, I was able to use the full six foot wide blind, but I only wanted it to be about 16 inches long. To shorten it, I clipped the strings that hold the slats together and knotted the ends so that the blind didn’t fall apart. I’m not going to lie, tying hundreds of tiny strings into tight double knots was pretty tedious.

For the smaller side window, I needed a narrower blind. A set of strong pruning sheers and Matt’s strong hands clipped off the excess width. Then, I again cut the strings to give me a 16 inch length and tied another whole bunch of tiny knots.

Cutting a bamboo blind

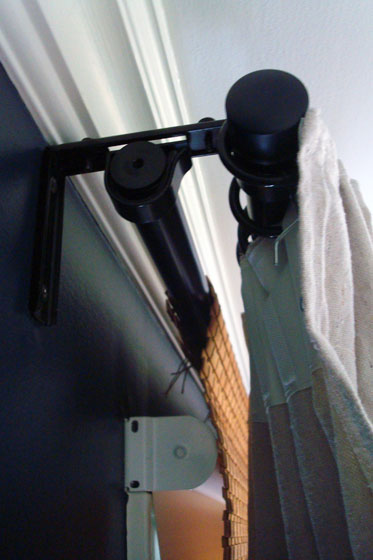
To put bamboo blind in place, I installed a double curtain rod just below the crown molding. I chose the Räcka and Hugad from Ikea.

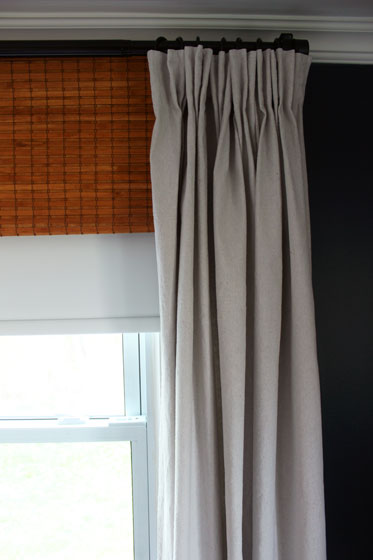
The bamboo panels just drape over the rear rod (I tied them in place) and hang over the top of the window. They hide the blackout blind and, because I hung them so high right under the crown molding, they make the windows look much taller.

Double curtain rod

The front rod supports the dropcloth curtains that I made. The curtains are completely functional, but we don’t need to use them, thanks to the blackout blind, so they’re mostly just for form. They do hide the edges of the two blinds and help to block light from sneaking around the sides of the window though.

I’ll be sharing more about some of the lessons I learned from making dropcloth curtains in my next post.

I used the trick of hanging the curtains so that they fall just outside the window casing. This really does make the window look bigger in my opinion.

Altogether, the blackout blind, bamboo valance, double curtain rod and full length dropcloth curtains make for stylish and functional layered window treatments.

Blackout blind, bamboo blind and drop cloth curtain window treatments

Plus there’s the added benefit of keeping Matt happy.

Happy husband. Stylish master bedroom. I’m all set.

What are your master bedroom must-haves? Are you a blackout blind-er or a up with the sunshine-er? What’s your window treatment style?

One Room Challenge Week 6 – Master bedroom reveal

Cross the master bedroom makeover off my Home Goals 2015 list. Thanks to the One Room Challenge, this room is D-O-N-E.

Want to catch up on how we got here? Here are all of the previous posts:

It was hard for me to stay motivated in this makeover. The ORC was the push I needed to finally finish it off. I have to admit that I’m glad the room is done. Even better, I’m glad that it’s pretty… if I do say so myself.

Navy blue and white master bedroom

I think you’ll agree it’s definitely more stylish than where we started.

Master bedroom before and after

The best descriptors for this makeover are three words: simple, DIY and personal.

Simple

We kept things simple by working with what we already had.

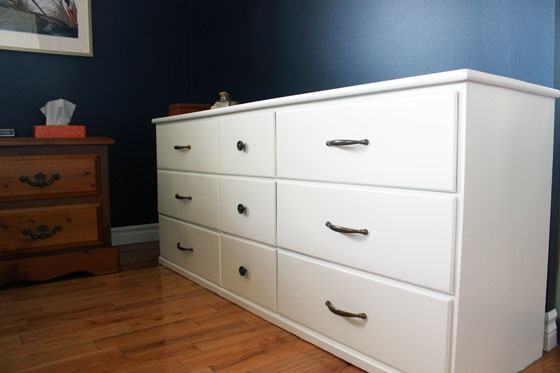
First up was fresh paint for everything: ceiling, walls, trim, the door and even the old garage sale dresser we bought when we moved into our first house. After going round and round on paint colour, I love the deep navy blue I chose for the walls (Hale Navy by Benjamin Moore).

White dresser with aged brass hardware

Paint took care of most of the transformation, but it only went so far.

For those that have been following along, you know the finish on the sliding closet doors was in pretty rough shape. I didn’t want to replace the doors though (remember, we were working with what we had), so I tried wallpaper for the first time. With a bit of help from my parents and two rolls of beadboard wallpaper, we added a nice country touch to the bedroom.

Navy and white master bedroom

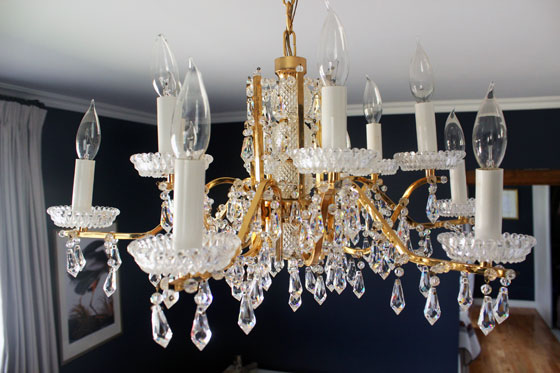
Where we didn’t go country was the lighting. Matt’s reaction when he first saw the chandelier was one word: “Liberace.”

Hello, sparkles.

Brass and crystal chandelier

Even with this light, we were still able to work with what we had (although not that awful ceiling fan, thank goodness) thanks to one of my co-workers. She invited me over to see her new (to her) house, and as we were eating dinner in the dining room she mentioned that they were going to replace the lighting. I said, “I’ll take it!” (Yes, I’m that dinner guest).

I wasn’t sure where I was going to use such a sparkly, brassy, glassy, shiny chandelier–we do live on a farm, after all–but it’s a perfect fit for this bedroom. Navy, brass, sparkle, white, wood… yes, please.

I love this view when I’m lying in bed. Also lovely is the smooth unstippled ceiling above it.

Brass and crystal chandelier

Which brings us to the DIY stage of this makeover (not that painting and lighting aren’t DIY).

DIY

Scraping the stipple ceiling was definitely the most involved DIY in this room. The other DIYs were much easier, but, given my lack of motivation throughout this makeover, tedious.

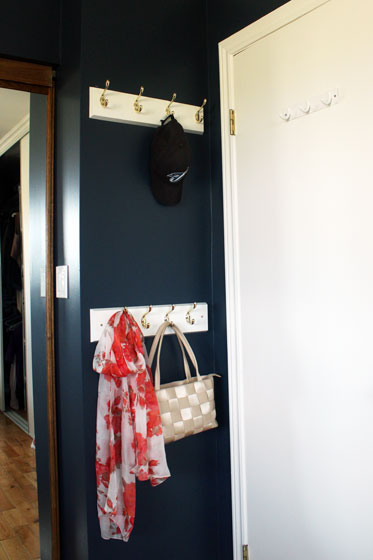
Well, not completely tedious. I knocked out a couple of hookboards really quickly. Having lots of hooks behind the door helps to corral the piles of clothes that appear so regularly in our bedroom. And if I’m being honest, these hooks are usually smothered in pyjamas and dog-walking clothes, not a pretty scarf and handbag–although Matt’s baseball cap is genuine.

Brass and white hookboards

The headboard was a difficult DIY just because I couldn’t decide what to do. Should it be upholstered? Painted? Curved? Square? It couldn’t stick up too high because it was going in front of the window. I didn’t want to spend too much money because some day post-whole house reno I hope to have a new master bedroom where I can build the wing chair style headboard of my dreams.

I finally decided on a simple wood headboard in an interesting shape. A leftover sheet of plywood and some careful cutting with my jigsaw fulfilled my vision.

After mixing a few cans of stain together, I was able to get a finish that’s a pretty close match to the nightstands from Matt’s childhood bedroom–although I had a really hard time photographing the headboard in front of the window, so I realize it’s kind of hard to tell.

I love the accents of the warm wood against the deep blue and bright white.

Navy, wood and white master bedroom

The other DIYs in this room involved a less typical power tool–my sewing machine. Although the fabric I sewed is a DIY staple–canvas drop cloths. I love the weight and the colour of these drop cloths. I used them for both the curtains and the bedskirt, and I will definitely be using them in future projects.

The window treatments will get their own post soon. They’re super simple, yet we have everything we could ever want: blackout blinds, bamboo blinds for style and full length pinch-pleated curtains–style and function

Navy and white master bedroom

Personal

The final guiding principle of this makeover–of my overall decorating philosophy–is to make it personal.

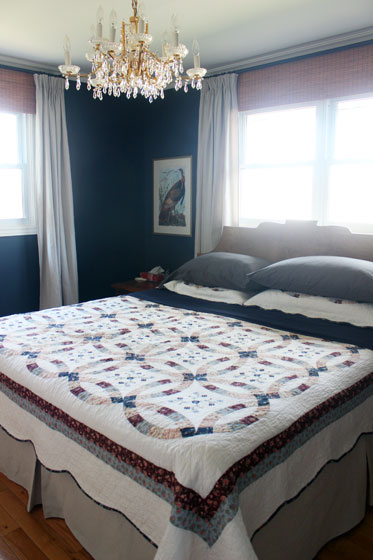
First up is the quilt on the bed. The quilt is from Walmart, but its patchwork pattern is special to me.

My grandmother was a quilter, so I’ve been exposed to this intricate handcraft my whole life. The double wedding ring pattern has been my favourite for years. I love the symbolism of having this pattern on Matt’s and my bed.

I admit, I wasn’t sure about the patterned quilt as this makeover progressed. So many rooms I see online are all about white or neutral bedding. I think that the quilt works in the room though, and it’s a lesson for me to use what I love, not what’s trendy or stylish.

Blue and white master bedroom

The other really personal element is the art that I chose.

The two pictures on either side of the bed are beautiful Audubon posters. On my side is a Great Blue Heron, an elusive bird that visits the pond occasionally. It’s always really special when I catch a glimpse of one. On Matt’s side is his favourite bird to see at the farm, the wild turkey.

Audubon prints

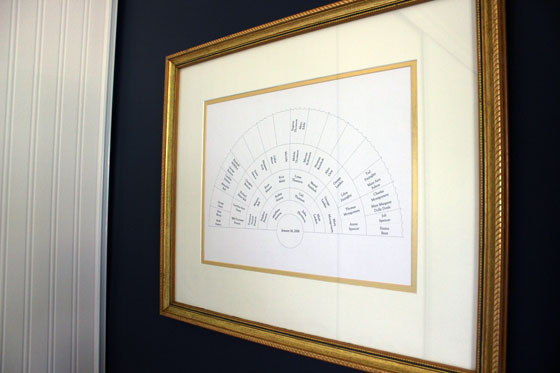
The final art can’t get much more personal, a family tree. I made each of my sisters a family tree like this when they got married with their wedding date in the middle circle. Now Matt and I have one of our own. (If you want one of your own, Martha–who else?–has a free template).

Fan family tree

So simple + DIY + personal. Plus six weeks (okay, a little bit more). Plus a whole lot of motivation from all of you reading along and all of the other participants in the One Room Challenge. Equals one beautiful master bedroom. Thanks so much for following along.

Visit Calling it Home to check out all of the other amazing reveals.