One Room Challenge Week 5 – Professional help

We’re heading into the homestretch on the One Room Challenge.

One Room Challenge

Next week is the big reveal of my master bedroom makeover. Here’s where we’ve come so far:

The One Room Challenge is largely about DIY. It’s not a requirement, but most of the other bloggers participating are painting, sewing, carpentering all on their own like I am.

However, last week it was time for some professional help.

One of the quirky elements of this room is that the light switch was behind the door. When we used this room as a guest room, people would always walk in and reach for the light switch. I’d have to explain that no, it’s not where you’d expect it to be. You have to reach around behind the door.

Light switches behind the door

Apparently, I didn’t mind making things inconvenient for our guests, but now that we’re the ones living in the room, I wanted the light switch where it should be.

Matt and I discussed doing this ourselves, but the electrical in this house is a bit wonky. Plus, relocating the switch would involve lots of time in the attic–and lots of time with the insulation in the attic. Not fun. We also had some other minor electrical work on our to-do list, so we decided to bundle it all together and call in a professional.

When he first saw the bedroom, our professional questioned whether there was space for a switch. There’s a very narrow wall between the door and the edge of the closet. We had no way of knowing how the studs were configured. He got out his stud finder, picked a spot, and I held my breath as he punched through the drywall.

There was a narrow cavity. It was nearly the width we needed for the box, but just a bit too narrow.

Cutting drywall for a new light switch

Fortunately, it was close enough that a quick trim with the sawzall allowed the box to fit and didn’t compromise the stud.

Tracing the wire from the junction box in the ceiling to the switch turned out to be another bit of fun. There’s a join in the wiring somewhere, but the electrician wasn’t sure where. It looks like there’s a junction box in the closet of the bedroom next door, so that’s my guess. When we do our big whole house reno, we will definitely devote a portion of the budget to fixing all of the wiring.

Our electrician couldn’t get rid of the original switch behind the door. It’s a crowded box that appears to be feeding some other areas of the house. But a blank cover on the missing switch is something I can live with.

Blank plate covering a light switch

I’m just happy that I no longer have to live with the switch behind the door… although I still reach for it when I go into the room. This new switch, on the right side of the door, with a dimmer (can I have a hooray for dimmer switches?) is so wonderful.

Bedroom light switch with a dimmer

The bedroom is coming together. All of the cosmetic updates are looking really good. However, this little functional improvement is equally awesome.

Thanks to our awesome electrician. And thanks to all of you for following along so far. Only one week to go!

To check out the other ORC participants, be sure to visit Calling it Home.

One Room Challenge Week 4 – Update sliding closet doors with beadboard wallpaper

Progress picked up over the last week in the master bedroom makeover for the One Room Challenge. Mostly because for at least some of the time my workforce tripled.

Saturday morning, my parents showed up, wallpaper tools in hand. They were there to help me cover our severely beat up closet doors.

Here’s a summary of the projects so far in the master bedroom:

The One Room Challenge has been hugely helpful in getting this makeover moving after my motivation waned. The room is coming together. Which brings us to this week’s task: the closet doors.

The doors appear to have had a number of things taped to them in the past. When the tape was pulled off, so was the finish on the doors.

Master bedroom closet

My decorating philosophy at the farm is every room needs touch of something rustic. This bedroom is not at all rustic, but a touch of country would be appropriate.

Beadboard wallpaper would work.

I have never installed wallpaper. I’ve removed a lot of it, but never gone the opposite direction. I figured I’d need an extra pair of hands, so I decided to make sure the hands were experienced and called in my parents.

My parents measuring and cutting beadboard wallpaper

As she was brushing the paste onto the closet doors, my Mom recalled hanging grasscloth wallpaper in their first house in the late 1970s–on trend 35 years ago and on trend today.

Brushing wallpaper paste onto the closet doors

She also recalled cherry wood beadboard lining the stairwell at the farm where she spent summers when she was growing up. Doesn’t that sound beautiful? This wallpaper is not quite the same, but it’s a good shortcut in my opinion.

The wallpaper went up really quickly, especially with three of us working on it. (As you can see, Baxter was his usual helpful self). In less than two hours, the doors were all covered.

Beadboard wallpaper on sliding closet doors

Even though they were white-ish before, the wallpaper makes such a huge difference. The room looks so much fresher. And the vertical stripes make the doors look wider too in my opinion.

Beadboard wallpaper on a sliding closet door

It’s been awhile since my parents and I have worked together. It was really nice to have their help. Thanks, Mom and Dad!

I’ve been working on my own for the rest of this week, but I’ve still been productive. The headboard is almost finished–good thing because I need to get it out of the guest room so my brother-in-law can sleep there this weekend–and the electrician is here today to work on the lighting. We’re getting there!

  • Buy a new bed – Done
  • Remove popcorn ceiling – Done
  • Patch ceiling and walls – Done
  • Paint ceiling, trim, doors and walls – Done
  • Make/find window treatments – Done
  • Build hookboards for behind the door – Done
  • Paint dresser and replace hardware – Done April 6
  • DIY a headboard – By April 12 19 24
  • Refresh dinged up closet doors – By April 19 Done April 18
  • Relocate light switch – Cross your fingers that the electrician doesn’t run into any problems today
  • Replace light fixture – I’ll get the electrician to do this while he’s here
  • Come up with a jewelry storage solution – By April 26
  • Sew a bedskirt – By May 3
  • Decorate and personalize – Ordered prints April 6. I’m still waiting for them to arrive. Come on postal service!

Only two weeks to go. Visit Calling it Home and cheer on the other participants as they head into the homestretch on the One Room Challenge.

Linking up to: Happy Housie DIY Challenge Party: Patterned and Textured Projects

One Room Challenge Week 3 – Master bedroom headboard

Today marks the halfway point of the One Room Challenge. How are we here already?

One Room Challenge

This challenge seems to be flying past. Here’s where the master bedroom has come so far:

This past Sunday was my deadline to finish the headboard. It’s not quite done–yes, I’ve already missed a deadline–but I finally made a decision, so I can show you the direction I’m going.

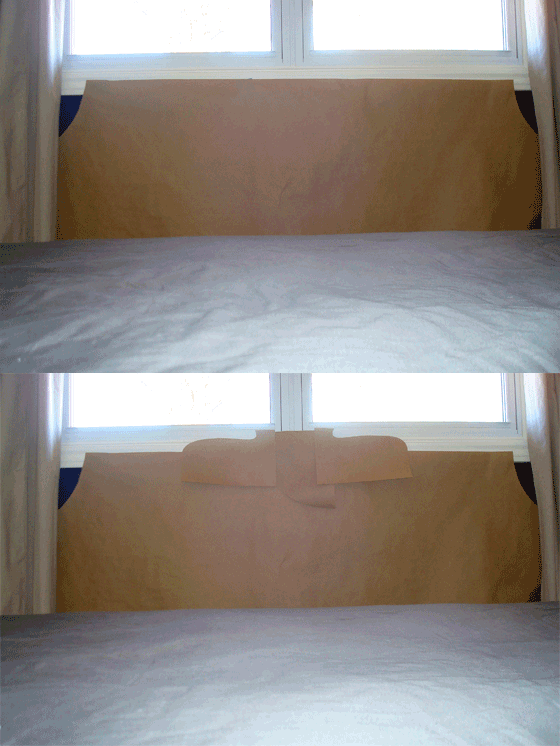
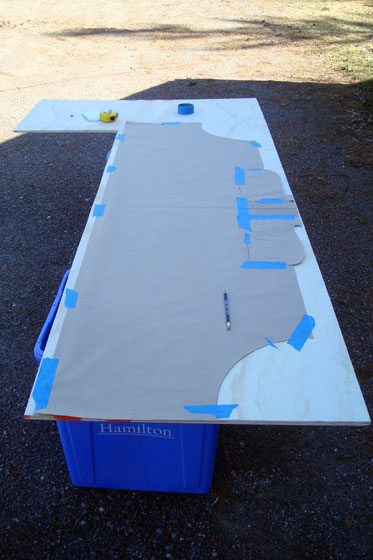
Headboard templates

The headboard was the spot where I didn’t have a clear vision. Should it be painted white like the dresser? Wood like the nightstands? Upholstered?

Brown paper wasn’t even close to the list… and it will not be the final product.

The paper is my mock-up and my template.

I decided to go with… drumroll… wood.

When I took a look at my master bedroom Pinterest board, I saw some common themes in headboards: one was a camel back shape and one was a more fanciful carved shape.

I decided to give the carved shape a try. I kept it simple, using a piece of plywood that I had left over from the growth charts I made for our littlest nephews. I think the unique shape of the edge will make up for the completely flat face.

Cutting out the headboard

After I traced my template, it was easy to cut out the headboard with my jigsaw. I still need to add some legs so that I can attach the headboard to the bedframe, and then I’ll use iron-on edging to hide the layers of the plywood. Finally, I’ll stain the headboard to match the pine nightstands.

So there’s a little bit of progress, but a little more work to do yet.

Here’s where we’re at on the overall makeover:

  • Buy a new bed – Done
  • Remove popcorn ceiling – Done
  • Patch ceiling and walls – Done
  • Paint ceiling, trim, doors and walls – Done
  • Make/find window treatments – Done
  • Build hookboards for behind the door – Done
  • Paint dresser and replace hardware – Done April 6
  • DIY a headboard – By April 12 19
  • Refresh dinged up closet doors – By April 19
  • Relocate light switch – The electrician is booked to come April 22
  • Replace light fixture – I’ll get the electrician to do this while he’s here
  • Come up with a jewelry storage solution – By April 26
  • Sew a bedskirt – By May 3
  • Decorate and personalize – Ordered prints April 6. Fingers crossed they get here in time.

Thanks as always for following along. Visit Calling it Home to check out the progress of all of the other One Room Challenge participants.

One Room Challenge Week 2 – Master bedroom progress report

It’s the beginning of week 2 in the One Room Challenge. Time for your first progress report on the master bedroom.

One Room Challenge

This makeover has been going on for a long time–longer than just the ORC. If you want to get caught up, here are the previous posts:

I’ve learned that I need schedules and deadlines if I want to complete a project in any reasonable amount of time. That’s part of why I love the ORC.

I posted my to-do list last week, but not my schedule. So to hold myself accountable, I’m going to put timelines on everything.

It may look like I’ve accomplished a lot already. Just remember this makeover has been running since Christmas.

Here’s where we’re at:

  • Buy a new bed – Done
  • Remove popcorn ceiling – Done
  • Patch ceiling and walls – Done
  • Paint ceiling, trim, doors and walls – Done
  • Make/find window treatments – Done
  • Build hookboards for behind the door – Done
  • Paint dresser and replace hardware – Done April 6
  • DIY a headboard – By April 12
  • Refresh dinged up closet doors –By April 19
  • Relocate light switch – The electrician is booked to come April 22
  • Replace light fixture – I’ll get the electrician to do this while he’s here
  • Come up with a jewelry storage solution – By April 26
  • Sew a bedskirt – By May 3
  • Decorate and personalize – Ordered prints April 6. Fingers crossed they get here in time.

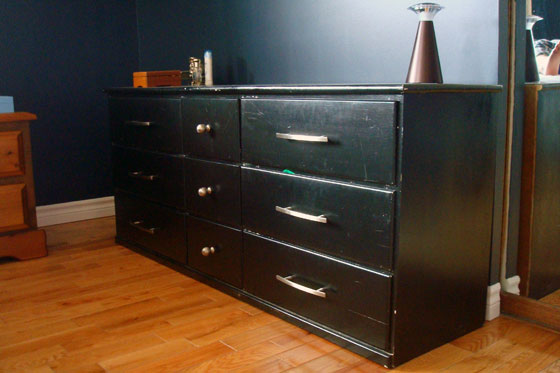
The main accomplishment in the past week is painting the dresser. I didn’t realize how badly scuffed and chipped the black paint was until I started to prep for painting. It’s amazing what your eyes miss when you look at something every day.

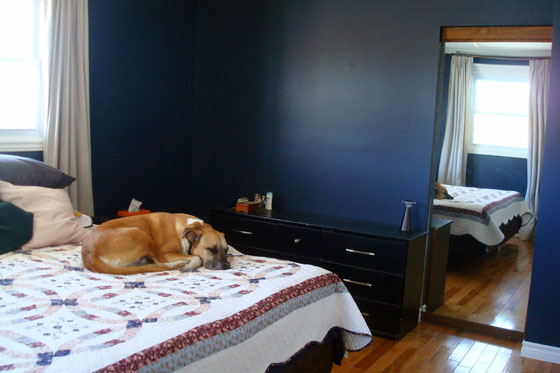
Black dresser before

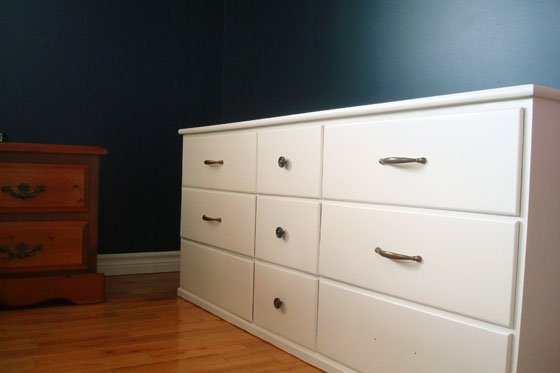
I’m really liking how the white paint pops against the dark blue walls. The brass knobs and handles tie in with the hardware on our pine nightstands–and even better the new handles are the same dimensions as the old ones so I didn’t have to patch or drill any holes. That’s never happened for me before, and it felt like a major victory. (And yes, I know I’m missing two handles. They’re back ordered and are supposed to come in a week or two. Missing hardware seems to be a recurring theme of my ORC participation).

White dresser with brass hardware after

I think I’ve made some decisions about the headboard, so I’m crossing my fingers I can get that one done next weekend.

Thanks for following along.

And be sure to check out Calling it Home for all of the other ORC projects.

Not quite a spring mantel

Despite the snow flurries that fell thick enough to coat the ground this weekend, I’m pretty sure it’s spring. Easter was early this year, but not that early, right?

Snow on Easter Sunday

It seemed like it was time to update the mantel for spring. We still light the fire most nights, but the snowshoes on the mantel seemed to be a bit out of season.

For me, styling a mantel is like styling a bookshelf–challenging.

I replaced the snowshoes with some green glass bottles. I separated the pair of antlers and spread out the trio of spherical tealight holders. But I’m not sure it’s working for me.

Fireplace mantel decorated for spring

I’ve learned I really like the pop of black from the lantern–and the glow of the candle at night–but I’m wondering if maybe I should do without it for the spring.

The glass bottles seem a little small to me. And I think their watery blue-green tone says summer more than spring.

I’d love your input and advice on what you’d do. Here are your constraints:

  1. The stone needs to be the main feature of the fireplace. That means no covering it up with a huge painting or mirror, although something smaller might be acceptable.
  2. I want balance, but I don’t want symmetry. Matching topiaries at either end of the mantel with a perfectly centred hurricane are not me.
  3. Bigger is better when it comes to tchotchkes. The fireplace is 8 feet wide and 9 1/2 feet tall and close to 4 feet deep. It’s a monolith. From the mantel to the lowest point of the ceiling is 40 inches. The accessories need to be equally large scale so they don’t get lost.
  4. I’m cheap, so there’s no way I’m spending much money on decor, especially if it’s going to change seasonally.

This post from Kim at Tidbits and Twine has an easy formula for styling a mantel. I particularly like her layers of anchor, weight and filler. However, I’d have to put my anchor off centre. 🙂

Here are some of the things I’m thinking of:

  • Something living (or more likely, given my luck with plants, a decent replica of a living thing)
  • Large crocks or bottles (or urns or tarnished trophies?)
  • Candles or lanterns of some kind (maybe an oil lamp or a candelabra could be fun)
  • Some appropriately “farmy” accessories (wagon wheel hub, grindstone, antlers)
  • Something appropriately seasonal (is there something that says spring besides the obvious tulips and hyacinths?)
  • Art (even though I don’t want a central painting, a smaller scale painting or sculpture or mirror might be nice)

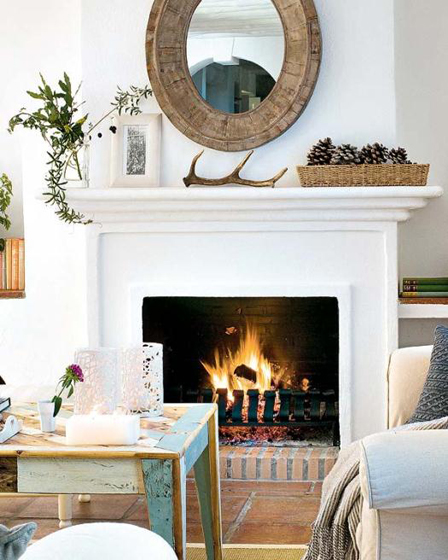
This picture speaks to me. Even though the fireplace is a completely different style from ours, are there some lessons I can apply?

Help me bring spring inside, even if it hasn’t arrived outside yet. What are your styling secrets for mantels? What accessories would you use?

One Room Challenge – Master bedroom makeover

It’s One Room Challenge time again. This will be my second time participating in the Challenge, and things are a bit different this time around.

One Room Challenge

The room I’ve chosen to make over–our master bedroom–is already part of the way there. Yes, I took a head start. But those who have been around here for a little while know that I stalled. The One Room Challenge is my motivation to finally finish it.

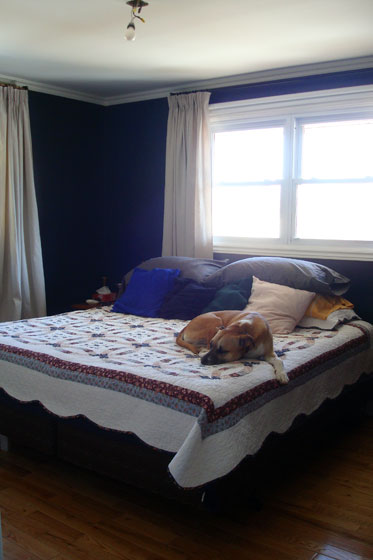
For those that are new here, here’s where we started–our former guest room. Pretty, ain’t it?

Master bedroom before

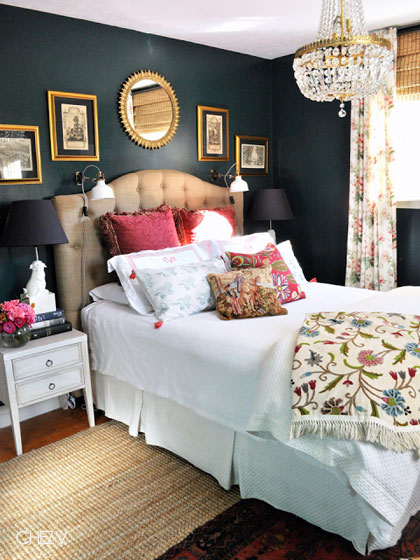
Here’s the inspiration (from another ORC participant, no less):

Black, white and gold bedroom

Source: Chez V (found via Little Black Door)

And here’s where we are today:

Master bedroom mid-makeover

Without a deadline, I’m finding it very easy to dilly-dally my way through this makeover. So the plan is to draw up a schedule and feed off the enthusiasm of other ORC participants and get this room done.

Here’s the plan (I’m reusing some of the text from previous posts so that those of you who are new can follow along):

  • Buy a queen size bed – Done, except we decided to really upgrade and went for a king size.
  • Remove popcorn ceilingScraping the ceiling was not the funnest way to spend a day, but this job is done.
  • Patch ceiling and walls – Also known as, “how I spent my Christmas vacation” (yes, Christmas. I told you this makeover has been going on too long). Patching took such a long time. Done, thank goodness.
  • Paint ceiling, trim, doors and walls – I had such a hard time picking a colour, but this one is done. Chez V’s makeover made me decide to go dark and dramatic with Hale Navy.
  • Make/find window treatments – This was the when the makeover stalled. I discovered I do not like making curtains. So boring. But I’m finally done.
  • Build some hookboards for behind the door – Extra hanging space is always a good idea.
  • DIY a headboard – No idea what I’m going to do here. White? Wood? Upholstered?
  • Relocate light switch – Oddly, the light switch is behind the door. It’s perfectly positioned if you used the mirrored pocket door from the other bedroom to enter the master. Weird.
  • Replace light fixture – I have a hand-me-down brass and crystal chandelier just waiting for a home.
  • Paint dresser and replace hardware – We have a beat up black dresser that we bought at a garage sale. I think it can be freshened up with some nice white paint and brass hardware.
  • Sew a bedskirt – I have some material left over from the curtains. A bed skirt can’t be as tedious as the curtains, can it?
  • Refresh dinged up closet doors – It appears our closet doors spent their past life as bulletin boards, except with tape rather than pushpins.
  • Come up with a jewelry storage solution – Notice I didn’t say a new solution. I’ve had no solution, and tangles of necklaces are getting really old.
  • Decorate and personalize – It will be nice to finally personalize a bedroom. Although the giant pink ape you saw above probably isn’t the personalization I’m looking for.

And finish it all by May 7 in time for the ORC finale. Stay tuned. And be sure to check out Calling it Home for all of the fabulous makeovers–or this week the plans for fabulous makeovers.

Master bedroom move-in

I mentioned at the beginning of the week that we made a wee bit of progress on the master bedroom makeover.

Here it is.

Baxter sleeping on our bed

Yes, we have moved into our new bedroom. And obviously, Baxter is exhausted from the journey across the hall.

It’s still not done, but having our bed in the room and our clothes in the closet–and our dog on the bed–feel like major progress to me.

You may recall that this makeover started 3 months ago. Right after Christmas, I scraped the stipple ceiling. That was honestly the hardest part of the project. There’s no good reason why this is taking me so long.

The master bedroom is one of my Home Goals for 2015. One of my other Home Goals is to take it easy on the projects and not hold myself to such strict timelines as I did last year.

Obviously, I’m succeeding at the latter of those goals.

For some reason, I’m just not getting excited about this makeover. I’m hoping that will change soon though. The spring One Room Challenge launches next week. I’ve decided that finishing the master bedroom is going to be my entry.

One Room Challenge

I was super excited about the laundry room makeover that I did for the Challenge last fall, and I really enjoyed participating with all of the other bloggers.

So I’m reverting to my old ways. There will be detailed timelines, regular updates and lots of progress. (Please, let there be progress).

Until then, commiserate with me, please. Do you have a long-running makeover? Have you ever undertaken a project that didn’t seem that interesting? Any tips for pushing through?

Laundry room rug – Ikea hack

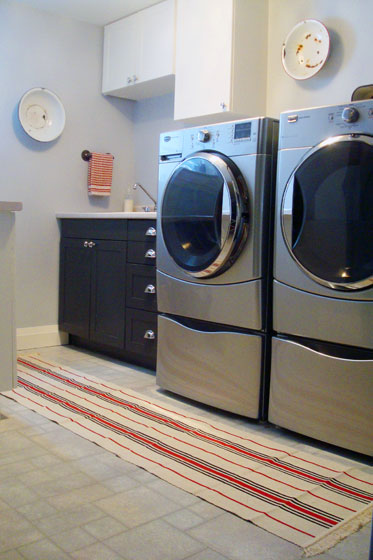
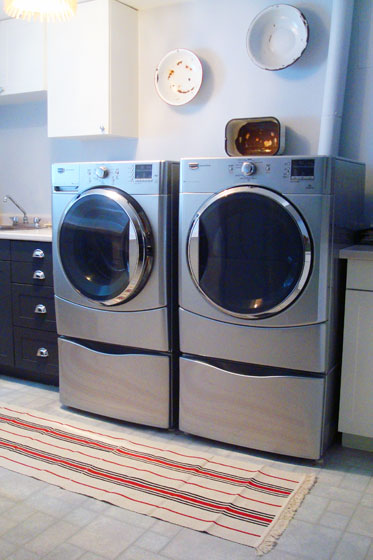
Three Ikea Signe rugs made into a runner in the laundry room

I finally found a rug for the laundry room… or rather, three rugs.

It was hard to figure out the exact dimensions that would work in this room. With jig and jogs around cabinetry and laundry machines and the drying rack, the rug could only be so wide. But it was a relatively long room. Did I want the rug to go just in front of the washer and dryer? Just in front of the sink? All the way from wall to wall?

I eventually decided that it made sense to have a rug in front of the sink, the washer and the dryer.

Three Ikea Signe rugs made into a runner in the laundry room

But then came the question of material. I liked the idea of a natural jute rug, but I wasn’t confident I’d find one that met my measurements for a price I was willing to pay. I’ve seen some great antique and vintage patterned rugs on other blogs, but, again, price was a factor and availability is always challenging

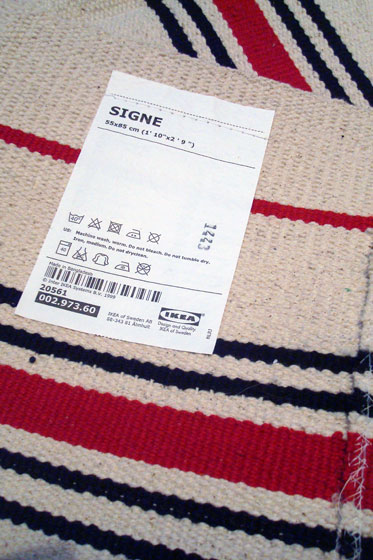
Then, during an Ikea trip, I came across Signe.

It was a fairly natural tone with pops of black and red, two accents I used a bit in the laundry room.

Plus it was cheap: $2.99.

Three Ikea Signe rugs made into a runner in the laundry room

The downside was it was short. One rug was less than 3 feet long. But for $2.99, I could buy three.

At home, I laid them out in the laundry room. This just might work.

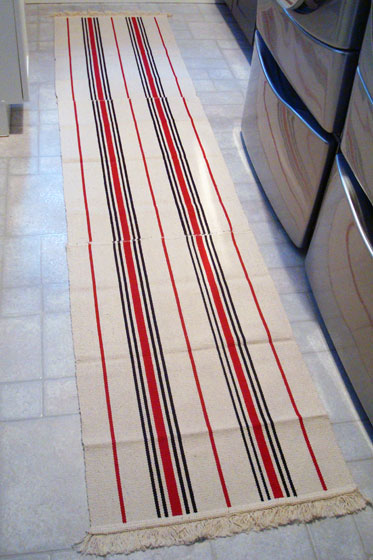
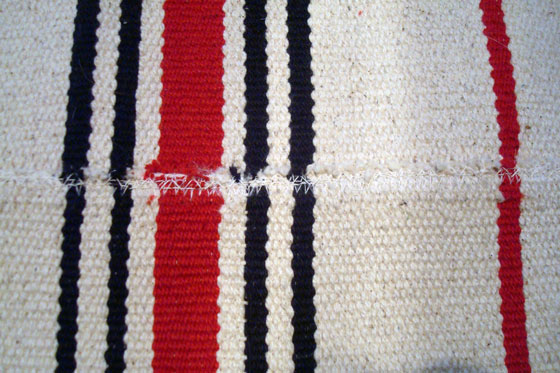
After an afternoon spent ripping off fringe and some time spent with my sewing machine, I had a runner the exact dimensions I needed–8 feet long by 22 inches wide.

I used a wide zig-zag stitch to join the rugs end-to-end, doing my best to match the stripes.

Three Ikea Signe rugs made into a runner in the laundry room

The result was the right colours, the right size and the right price. It’s a nice finishing touch in the laundry room.

Three Ikea Signe rugs made into a runner in the laundry room

Lighting fail

Have you seen the Barometer light from Ikea?

Ikea barometer floor lamp

I love its traditional form. I really wanted it for the basement. In fact, I wanted it so badly that I braved Ikea on Dec. 27 to buy it.

Ikea during Boxing Week. Oy vey.

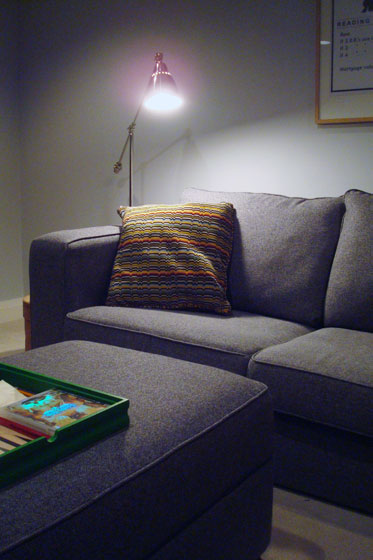
We have a corner at the one end of the couch that needs a lamp. When we set up the basement, Matt put an old round wooden crate from his grandfather as an end table and stuck one of our garage sale brass lamps on top.

Wooden cheese crate as a low end table

I love the crate, but the lamp has always bugged me. The table’s short, so the shade sits right at the arm of the couch. The metal in the rest of the basement is shiny chrome or closer to oil-rubbed bronze. The brass just doesn’t work.

Unfortunately, the Barometer doesn’t work either.

Ikea Barometer light

I mean, it’s pretty. The silver finish works. The height works… kind of. It’s a good task light if I was going to be sewing or reading in that corner of the couch. However, my usual activity when sitting on the couch is watching TV. We need a lamp that sheds just a bit of light so the basement isn’t lit solely by the glow of the TV.

The light that the Barometer sheds is closer to an interrogation. Just looking at this picture hurts my eyes.

Ikea Barometer light

We tipped down the shade, slid the light farther away from the couch, adjusted the arm. We just couldn’t make it work. No matter where we sat, we were squinting from the Barometer’s glare. 😦

So back to Ikea I went, this time to brave the returns desk. That’s nearly as much fun as shopping on Boxing Day + 1.

And it’s back to the drawing board on the basement lamp. Honestly, I think Matt had the right idea. As wonky as the low lamp looks, it gives the light we’re looking for. Now just to find something better than the brass.

Sprout

I’ve had a post sitting in my draft folder since December. Back when we were deep in the fireplace redo, I wanted to think about something prettier. So I wrote about styling the mantel. In that post, I listed some of the things I was thinking of for decor.

At the top of the list was something living (or more likely, given my luck with plants, a decent replica of a living thing).

Well, it turns out that I may not be able to keep plants alive when I want to, but the mantel is taking care of the something living all on its own.

In the joint between the two barn beams, a little plant has sprouted. I thought it was just a cobweb, so I “picked” it before I realized what it was.

Plant growing out of a mantel

The barn beams had been laying outside for who knows how long. There are some worm holes, some soft spots and, obviously, some seeds. The indoor climate is apparently just what this little sprout was looking for.

Not quite what I had in mind when it came to mantel decor, though.