The season of making

I love making presents for people. (And I love getting handmade presents too).

Some of my making so far this year has been peanut butter balls for Matt, blanket shawls for several people (need to make one for myself–I love those shawls), chocolate zucchini breads for my team at work (using homegrown zucchini of course) and a wood sign for a special colleague.

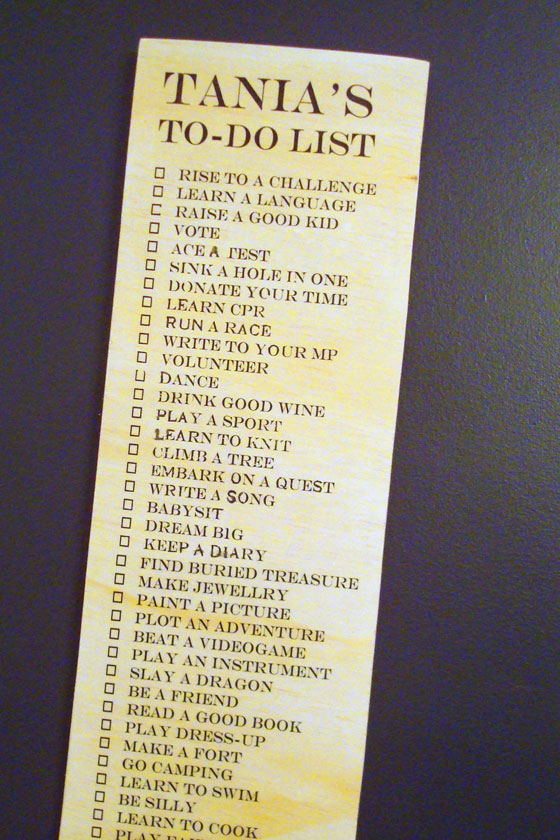
Life lessons wood plaque

I’m not good at making friends at work, but Tania and I really connected. In the new year, she’ll be starting a new job in Toronto. I will miss working with her.

When I was thinking about a going-away gift, I thought back to the conversations we’ve had during our late evenings in the office. Usually, we end up talking about life and what’s really important. I thought about this growth chart that Becky from sketchy styles made. It is full of good lessons for any age.

I scaled it down a wee bit, added checkboxes rather than height markings, changed a couple of items (“drink good wine” seemed appropriate for my friend) and renamed it a to-do list rather than a hero chart (Tania is the queen of to-do lists).

Life lessons wood plaque

I gave the sign to Tania yesterday, and she loved it. She also totally got it. That’s the best part of gift giving: finding the perfect gift that matches up with the people you’re giving to.

Are you making any gifts this year? What’s the best gift you’ve ever given? Have you ever received a special handmade gift?

Linking to: Happy Housie Get Your DIY On: Wall Decor

2/3 of a china cabinet

Somehow, I’ve ended up married to a person who cannot–cannot–pass by a Value Village without stopping in. Now I enjoy thrifting as well. However, more often than not, I end up walking around the VV parking lot with Baxter, as I prefer not to leave him in the car.

So a few weeks ago, Bax and I did our shopping in the parking lot.

I’ve been on the hunt for a china cabinet to use for storage in my office. There just happened to be a pair of bookcases sitting outside the VV that I thought might work. A quick conversation with the clerk confirmed that they weren’t sold, and he was more than happy to be spared carrying them into the store.

When we got them home, it turned out they were a bit too big for my office. However, I thought they might work for the dining room.

I’ve been on the hunt for a new china cabinet for the dining room for a little while. In fact, it was one of the items on my Home Goals 2015 list.

I had visions of using a big 1990s style entertainment unit for the dining room. I was blown away when I first saw Thalita’s entertainment unit makeover in her kitchen, and it sparked all kinds of ideas.

An entertainment unit–one that used to hold those huge boxy TVs–would give me a tonne of storage. And even though these are more bookcases than TV cabinets, they totally do.

90s bookcases as china cabinet

The cupboards below hold our wedding china, wine glasses and other serving pieces and keep them sheltered from dust–even with a lovely cutout in the back of the cabinet.

Wedgewood Oberon china

Wine glasses and plates

The shallow drawers are perfect for candles and cutlery.

Candle storage

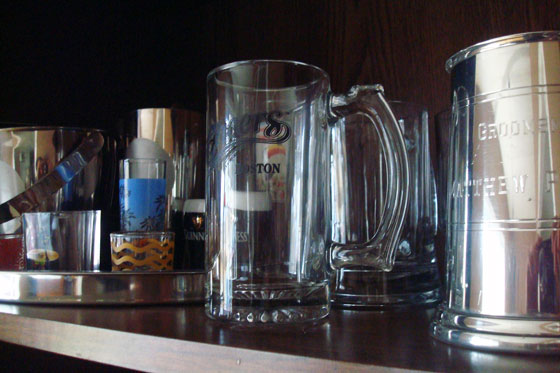
The shelves above hold the prized Bleu de Roi china that I inherited from my grandmother and some bar supplies along with Matt’s collection of steins and shot glasses.

Bleu du roi china

Steins and shot glasses

I haven’t done much styling for these shelves. I’ve more just unloaded various cupboards.

And this set up is definitely not final.

My original vision was for three bookcases. I still have plans to build a middle section to tie the shelves all together. Plus remove the arch at the top of the cases, update the trim and the hardware, add glass doors to the upper section (I don’t believe in dusting, so open shelves and I do not get along) and then paint everything.

90s bookcases as china cabinet

Plus someday I’d like to paint the walls in the dining room, relocate the antlers, etc. etc. etc.

For now though, I figure I’m at least 2/3 of the way there.

Big news from Illinois!

Before I get into today’s guest post from Sarah in Illinois, I wanted to mention that I guest posted on That Mutt yesterday. Visit Lindsay’s blog to read all about Baxter’s favourite toy–and enter to win one for your own furry friend.

And now on to Sarah’s latest post. (I won’t say any more because I don’t want to scoop her big announcement!)

There has been a lot going on over here in the past two weeks! The big news is that the day before Thanksgiving Steve and I went to the courthouse and got married! We have been dating for almost 6 years and engaged for close to a year and anytime anyone asked, we told them that we were not going to have a big wedding, but no one knew when. It was a Thanksgiving surprise for everyone!

Sarah and her new husband Steve

We got together with Steve’s family for Thanksgiving and had a great time and ate too much and visited and watched football. I also had Steve’s niece take our picture for our family Christmas card. Back at home, I have started my Christmas shopping, our tree is up, lights are on the house, Christmas is in full swing!

Brightly lit Christmas tree

We bought new LED lights for our tree and we were so excited to see the patterns that it splashed on our walls and ceiling!

Since there is so much that goes on leading up to Christmas, I wanted to make sure we focused on our favorite things and didn’t get overwhelmed with trying to get everything done. I asked the kids what was something they wanted to make sure we didn’t forget to do and they both agreed that we can’t miss making gingerbread houses! So we still have that to do, plus finish shopping, plus all our family dinners. And I still have a gift to make for our handmade gift exchange that my girlfriends and I are going to do.

As for home improvement projects, I have to admit Steve and I kind of burnt ourselves out over the summer. We have done absolutely nothing around the house and I think we have both decided that it is time to get back to work! I came home one night this past week, and Steve had grout mixed up and we got to work grouting our hallway.

Grouted tile

We laid the tile early in the summer and have been walking on ungrouted tile all this time. I am so thankful that we both have our drive back to work on the house! We have a sort of game plan for this winter, and I am getting excited about tearing the house apart and fixing it back up! I am hoping that my future posts will be filled with projects that we have finished!

Congratulations, Sarah and Steve! It’s great to get your DIY-mojo back. Oh, and getting married too. That’s big. 🙂 All the best to you both.

Sarah will be back in the New Year with more updates about (married) life, home renos and country living.

How to add a harp to a lamp

My thrift store lamp that you met on Friday had a lot of things going for it, especially after its spray paint makeover. However, there was one thing missing that I didn’t notice until the very end: the harp.

The harp is the little bracket that goes around the light bulb and holds the lampshade.

I admit, I was a little intimidated by the prospect of installing a harp. I hear about a lot of people rewiring lamps, but I’ve never attempted that myself. It turns out it’s not hard. In fact, I just started trying to take the lamp apart and was able to figure it out pretty much on my own.

Step one was to remove the socket from the lamp base. It just unscrewed, and the cord was loose enough that I was able to pull it out a little bit.

Removing the socket from a lamp

The wire was still buried deep in the socket, so I started trying to figure out how to access it. A close examination revealed a seam in the middle of the socket. You can see it partially opened here.

Removing the socket from a lamp

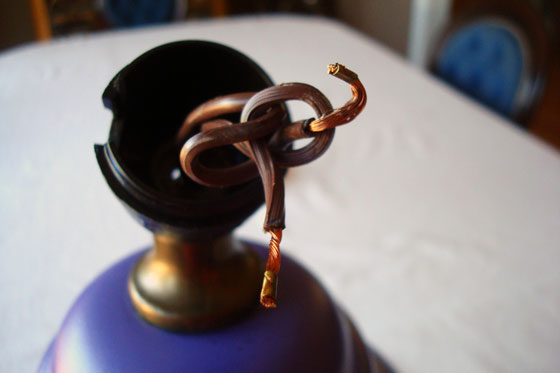
The socket easily unscrewed, and I could see where the wires attached to two screws. I could also see a really intimidating knot. Gulp.

Taking apart a lamp socket

A couple of turns loosened the screws enough to unhook the wires. Quick tip: I marked which wire went to which screw (one’s gold and one’s silver) by straightening the gold one and leaving the silver one hooked.

Taking apart a lamp socket

I was really, really hoping to not untie that knot, but in order to remove the bottom part of the socket–never mind putting on the harp–I had to. With the knot untied, the socket easily slid off and the harp bracket easily slid on.

How to add a harp to a lamp

After that, it was a (relatively) easy process of reassembling the socket. I slid the bottom part of the socket back into place. I retied the knot. (Okay, this was a bit complicated.) It turns out the knot is called an underwriters knot. I watched this animation a few times as I was tying my own knot. I hooked the wires back over their screws, and then screwed everything back together. I had a reassembled lamp that now included the bottom part of the harp.

How to add a harp to a lamp

The upper part of the harp slid onto the bottom bracket and I gave myself a congratulatory pat on the back.

How to add a harp to a lamp

And then I had to choose a lampshade. Last week I asked for your input, white or grey. So what did I end up choosing?

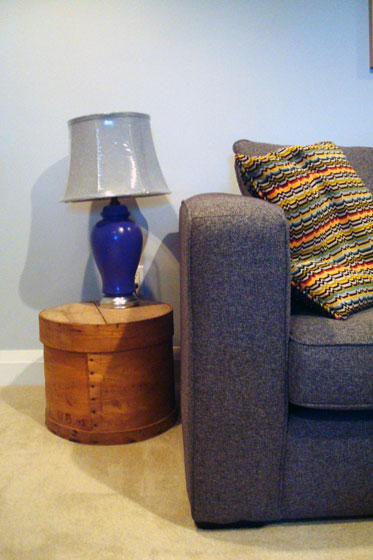
I went with the grey. It was pretty much the universal favourite last week, and I decided that I liked its flared shape best.

Purple lamp with flared grey shade

And another detail on the basement comes together. Slowly but surely I will finish this space.

Have you ever rewired a lamp? What DIY projects do you find intimidating?

Linking up to #DIYLightingChallenge

Lamp makeover

November is turning into lighting month over here. Last week was the dining room chandelier and the basement chandelier. This week I have a new lamp to show you.

If you think back to February, you might recall that I posted about struggling to find a lamp that I liked for the end of the couch in the basement. Well, things move like lightning over here–lightning I tell you–because just 9 months later I’m ready to show you my solution.

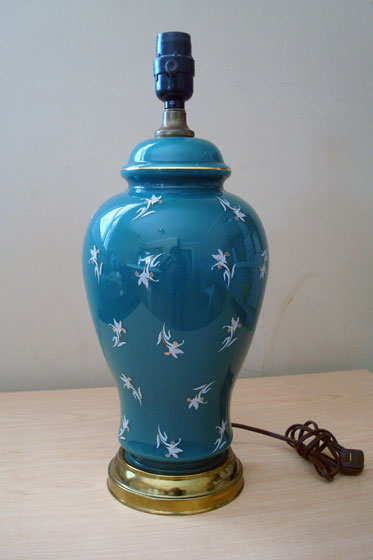
Lamp makeover before

Ummm… not quite.

A thrifted lamp was my starting point. It was the right height. I liked the shape. The base wouldn’t take up a whole lot of space on our tiny end table.

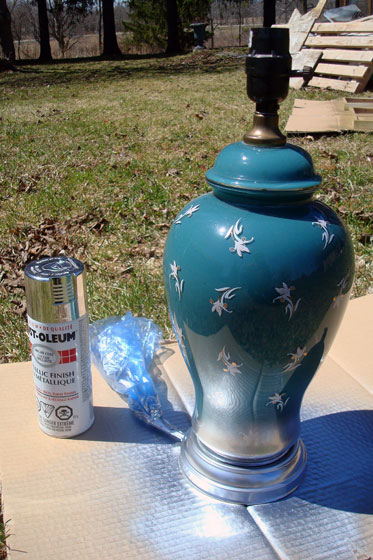
I took care of the brass with the same shiny silver spray paint that I used on the original dining room chandelier.

Lamp makeover

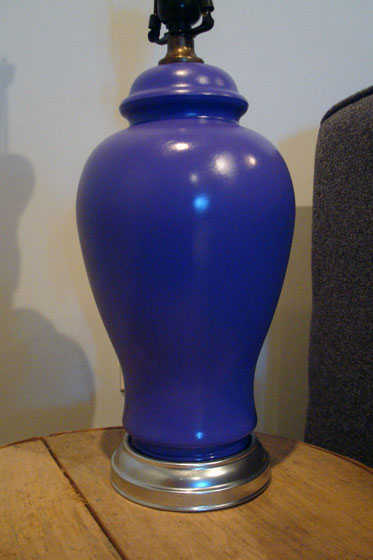
As much as I liked the turquoise colour, I was not a fan of the flowers. So everything got a coat of deep purple spray paint.

Purple lamp

Purple?

Yep.

I like having pops of colour in the basement, and purple is a colour I’ve not used yet.

Turns out the purple works. I really like how it looks in the basement.

But I have a dilemma.

What lampshade looks best? (Ignore the shiny cellophane wrapping.)

I have a (slightly crooked) grey option.

Grey lampshade

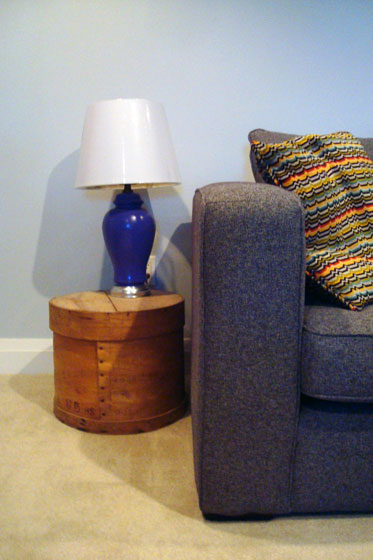
Or a white option.

White lampshade

What’s your vote?

Christmas card display

It’s Thanksgiving this week for my American readers, but as she celebrates Sarah in Illinois is already looking ahead to Christmas. Timely, as we’re exactly one month away from Christmas. Yipes! Sarah is back today to share a cute DIY for displaying Christmas cards.

One of my favorite parts of Christmas is checking the mail box for Christmas cards. I love sending and receiving cards and putting them on display. However, I have never really had a way to display them that looked nice.

This year I decided to turn to Pinterest to come up with a plan. There were so many cute ideas, but I did not use one specific image as my inspiration. I searched for “Christmas card holder” and used an idea from here and a feature from there, and this is what I came up with:

Christmas card display

I started by making a frame out of simple 1×2. I decided I wanted the inside of my frame to be about 16×20 inches, but that measurement could easily be adjusted to any size.

I cut my 1×2 at a 45 degree angle making sure that the right and left side were exactly the same length and did the same for the top and bottom. That way the frame would be square.

Cutting 1x2s on a mitre saw

The trickiest part of the whole project was nailing the frame together. Because I am stubborn, I didn’t ask for help. But having someone to help hold the pieces would be easier. Using screws would also have been easier, but I didn’t want the screw heads to show.

At this point, I grabbed some stain that we had sitting around and gave it a good coat and wiped off the excess. Many of the inspiration pictures that I was looking at used chicken wire as the background, but I felt the chicken wire was too “country” for my taste so I planned to use hardware cloth.

I found these little bitty clothes pins to use to hang the cards on the wire.
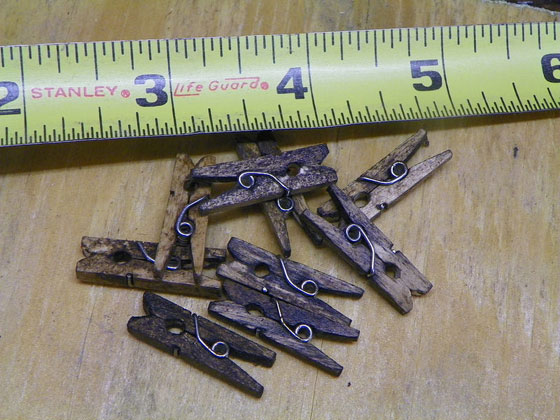
Mini clothespins

They came as bare wood, so I used the same stain as I did for the frame to give them a little interest. I used tin snips to cut the hardware cloth to size and then stapled it to the back of the frame.

Hardware cloth stapled to a wood frame

For the pennants, I had to do some experimenting. I used quarter-inch plywood and cut it in a strip 2.5 inches wide. Then I had to cut it into the pennant shape. But I didn’t know what angle that should be. So I just tried until I liked the way it looked.

I set my miter at 45 degrees, and I didn’t like that angle, so I changed it to 30 degrees. That was better, but I still felt it wasn’t exactly what I wanted. The next pre-marked measurement on my saw was 22.5 degrees, so I tried that and thought it looked just right!

Cutting penants on a mitre saw

After I cut several pennants, I used a little drill bit to put holes in the top to string some jute through.

Drilling holes

But before I strung them up I painted with a little craft acrylic paint. All that was left was to hang them at the top of the frame. I did that by tying the string to the back of the frame on the hardware cloth.

My frame is now hung on the wall and ready for the first card to come in the mail!

Christmas card display

What a cute display, Sarah. It’s just country enough, in my opinion. To see what else is inspiring Sarah, follow her on Pinterest.

I hope that Sarah and all my other American readers have a great Thanksgiving.
Dining room chandelier reborn

I’m thinking I may have been a little hard on our old dining room light in my last post. I may have given you the impression that I hated its copper-wired, frosted-glass, brushed-nickel guts.

That’s not entirely the case.

I just hated them in the dining room.

Ugly dining room chandelier

I actually thought the light might work in the basement.

We’ve had one persistent pigtail hanging around in the basement since we finished the reno down there (almost, ahem, two years ago, ahem). I always have a hard time finding lighting that I like. But then it occurred to me that with a little bit of help, the dining room light might work just fine.

The help came in the form of bright silver spray paint.

Rustoleum metallic finish

I spy with my little eye a chandelier hanging in a tree (and a finial stuck on a stick).

Spray painting a chandelier

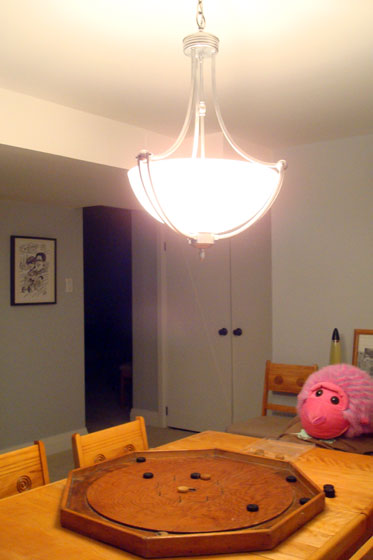
I’ve used bright polished silver lighting in other areas of the basement, so I wanted to stick with that theme. The spray paint isn’t quite as shiny as I’d like, but it’s close.

I’ve not yet found a way to photograph the basement that doesn’t come out with it looking horrendous. So just trust that this light is an improvement over the pigtail, okay?

Basement chandelier

Focus on the giant pink ape playing crokinole under the new chandelier.

Basement chandelier

This chandelier is a win on two fronts:

  1. It came in well under my $100 lighting budget.
  2. Our house is now pigtail free–for a few weeks at least.

Have you ever made over a light fixture? What’s your favourite metal finish?

Rustic industrial chandelier for the dining room

Hundreds–nay, thousands–of lighting sins are committed everyday all around the world. There are boob lights, too-plentiful potlights, green glowing fluourescent lights, tragic ceiling fans… several of which we have in our own house.

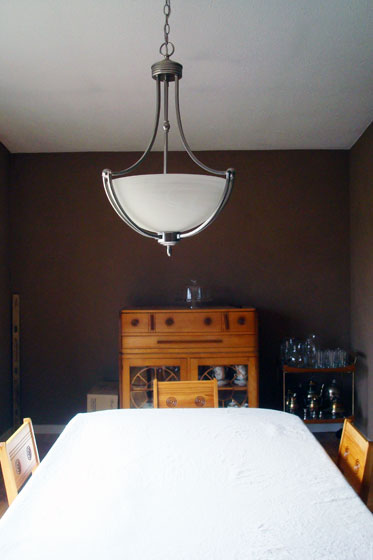
And then there’s this. The original chandelier in our dining room.

Ugly dining room chandelier

At first glance, it may not seem overly offensive. However, let me enumerate its sins:

  1. The finish was brushed, which is my least favourite metal finish ever.
  2. Only one out of its three bulbs was working (okay, this is more our fault than the light fixture’s).
  3. Its design (is this 1990s?) was not at all a fit for our country setting.

You all know I’ve been trying to make this house look a little more farmy. So I’ve been casually on the hunt for a new light fixture.

As usual, it had to fall below my $100 threshold (applies to both light fixtures and chairs–yes, I’m that cheap), and it had to be a bit farmy.

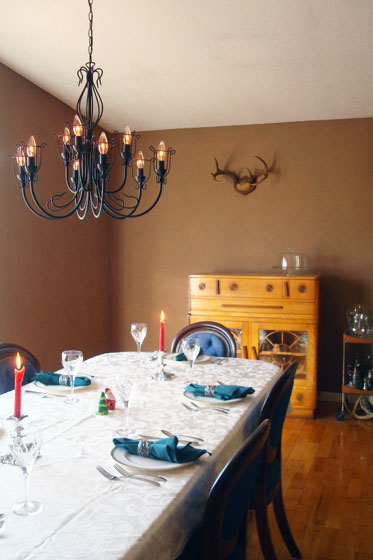
I struck gold (or rather black) at Rona one evening. The chandelier was light and open. It was large enough to work in the vaulted ceiling in our good size dining room. It was slightly industrial, slightly rustic.
Industrial rustic chandelier

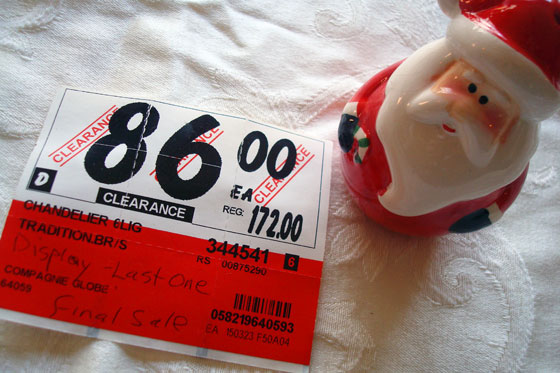
And it was on sale. Serious sale. As in it was the last one in the store and it had to be sold. As in it was finally in my price range. Merry Christmas to me!

Discounted chandelier price tag

The staff member in the lighting department took it out of the display–and took out the expensive Edison bulbs it had been styled with. I bought cheap chandelier bulbs and carted everything home.

After finally installing it, I could not be happier. It’s a perfect fit for our dining room and our country setting.

Industrial rustic chandelier

Industrial rustic chandelier

Industrial rustic chandelier

No more lighting penance for me.

What’s the biggest lighting sin in your opinion? Are you committing any lighting sins at your house? What’s the best deal you’ve ever found on a light fixture?

Spooky Hallowe’en mantel

Hallowe'en mantel

As cute as the pumpkins were on the fireplace mantel, I had a different idea for Hallowe’en decorations.

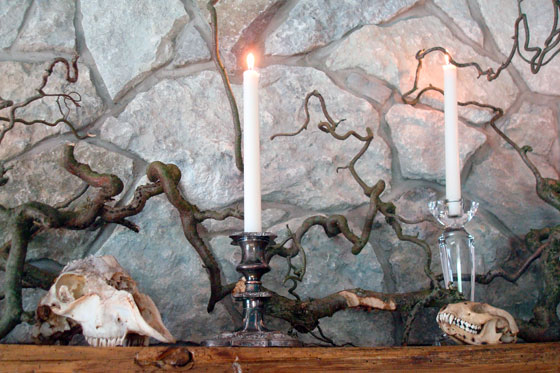
It’s a little bit haunted forest with all of the twisty branches.

And it’s a lot haunted forest with my collection of skulls.

Hallowe'en mantel

I had the idea for a little while, but it really came together when Matt’s Mom brought home these silver candlesticks for me. They used to be Matt’s grandmother’s (the same grandma that had the piano). Their tarnished finish was perfect (although I’m sure not up to Mama’s standards–and I’m sure she never thought they’d be displayed with skulls either).

Halloween mantel

It looks extra spooky with the candles lit (although it doesn’t translate in pictures very well).

Hallowe'en mantel

Hallowe'en mantel

Happy Hallowe’en, everybody.

How are you celebrating? Have you decorated for Hallowe’en? What’s your preferred Hallowe’en style: spooky ghouls or cute pumpkins? Does anyone else have a creepy collection?

Fall mantel

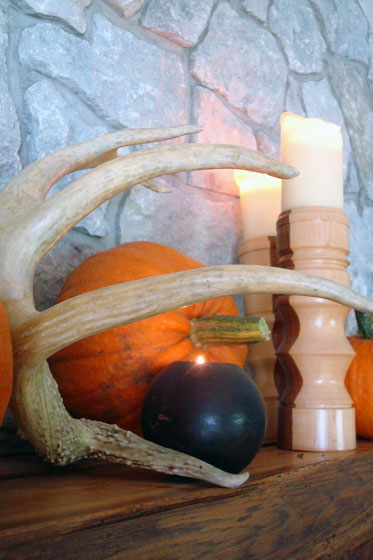
Pumpkins, antlers and candles decorating the mantel

There have been some beautiful fall home tours going around the blogosphere recently. I’ve held off on bringing fall inside, trying to hang onto summer just a little bit longer. However, now that it’s October, I can’t deny that fall is here.

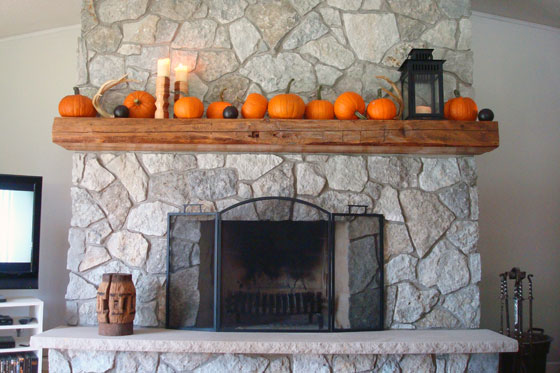
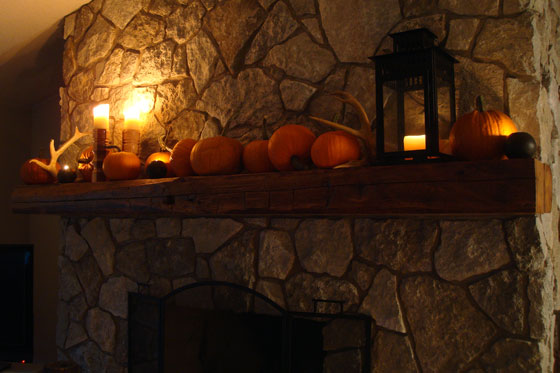
This is our first fall having a working fireplace, so that’s where I started my decor. Behold the fall mantel.

Stone fireplace decorated for fall with pumpkins

The black lantern, wooden sphere tealight holders and antlers have become staples on the mantel. For fall, I added two wooden candlesticks that my Dad made and a whole bunch of pumpkins.

Antler, pumpkins and candles decorating a fall mantel

These 10 pumpkins are probably only about half of what the garden has produced this year. From what I’ve read, squash (and pumpkins) need to cure in a warm-ish place before they’re stored for the winter. So this display is about both form and function. (And yes, that’s the Blue Jays game on the TV in the background. Summer continues even into October. Go Jays!)

Pumpkins, antlers and candles decorating the mantelAntler, pumpkins and candles decorating a fall mantel

I love the barn beam mantel so much. The wood against the stone is beautiful. Now with the pops or orange and black it feels right for fall.

The only thing we have yet to do to fully embrace fall is light the fire.

Candles lit on the fall mantel

How are you decorating for fall? Have you had a fire at your house yet? Did anyone else grow your own pumpkins? Any suggestions of what to make with the pumpkins (besides jack o’ lanterns)? How about tips to store the pumpkins? Who else is watching the baseball? Let’s hear it for the Jays!