Deep thoughts on DIY from the dog

I’m excited to share that I’m now a regular contributor to ThatMutt.com. This gives me an outlet to write about dog training, care and of course my favourite dude, Baxter. You can read all of my posts at ThatMutt here. My latest post went up on earlier this week. A slight variation is below.

“I’d help you put up those curtain rods, but I don’t have a drill.”

Uh-huh? What about no thumbs, no vertical reach and a tendency to spend most of your time asleep, dude?

Baxter installing curtain rods

“You think a paintbrush makes up for not giving me a drill? This pooch likes power tools, lady.”

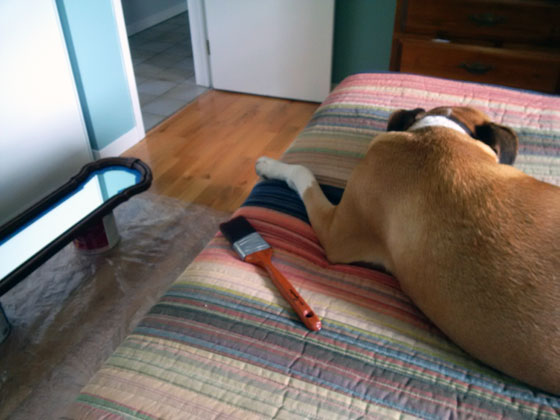
Baxter and his paintbrush

“Oh, and you made fun of my thumbs and my height. You’re on your own for painting that mirror. This is what I think of your paintbrush.”

Baxter avoiding painting

“Ahhhh… dreamland, where doggies have drills… and thumbs.”

Baxter dreaming of not painting

With Baxter’s help (or perhaps despite it), the guest room is now done. The reveal is coming up next.

Let’s get vertical

In the words of organizing guru Olivia Newton John,

Let’s get vertical, vertical
I wanna get vertical
Let me hear your closet talk

That’s not how it goes?

That’s how it went in the closet under the stairs… and it’s fabulous.

Building shelves in this closet was one of my home goals for this year.

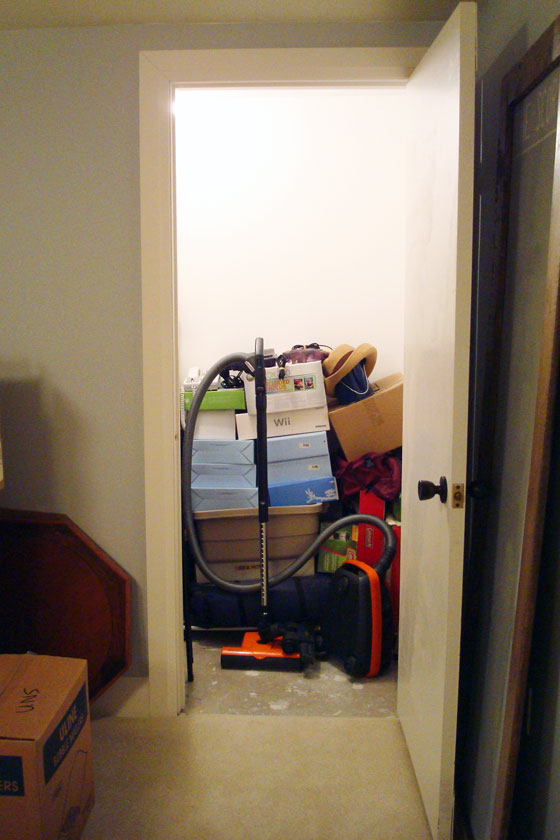
We have a great storage space, but without shelves it was just a pile.

Messy closet

Disorganized closet

Confession, I hadn’t even put away our Christmas decorations because I didn’t want to go to the work of digging through the pile to find the storage bins.

But no longer.

Building shelves in the closet under the stairs

Christmas is tucked away, along with camping gear, electronics, artwork. There’s even a place for the vacuum and folding chairs.

Building shelves in the closet under the stairs

I used my very simple technique of affixing cleats to the wall (I used 1x3s) and then putting pre-finished white melamine shelves on top. The wrinkle with this closet was the stairs. I could only put the cleats on the back and one side wall, so I needed to find another way to support the end of the shelves that tucked under the stairs.

A few 2×3 braces screwed into the stairs solved that problem.

Building shelves in the closet under the stairs

Because I went vertical, we can fit a tonne of stuff in here. In fact, we have more than a shelf and a half empty–room to grow!

I think my favourite part is that I have a nook that perfectly fits the vacuum. Some mail organizers on the wall hold alternate attachments and extra bags.

Storing the vacuum and its attachments

Sturdy hooks hold our folding chairs and little step stool.

Store folding chairs by hanging them on the wall

And there’s still room to walk beside the shelves and access everything even at the far end.

Sing it with me, people. Let’s get vertical, vertical…

The fireplace gets a German accent

It occurs to me that I haven’t shown you our winter mantel yet.

This year is pretty similar to last year. The snowshoes, the candles, the antlers, the lantern.

But there is one new addition.

Courtesy of Matt.

Autographed Heino album on the mantel

I’m not sure why this has to go on the mantel.

Autographed Heino album

Apparently, back in high school when instant messaging was just getting going (oh Lord, I just did the math and that was 20 years ago… holy moly), Heino was Matt’s avatar.

I don’t think Matt was a particular Heino fan. I’m not sure he’s even heard his music. Don’t ask me to decipher the mind of a teenage boy.

Somehow, his oldest brother remembered this, and when he saw this autographed Heino album in a thrift store the other week, he bought it for Matt.

Autographed Heino album

And now it’s on our mantel.

Fortunately, spring is almost here, so I’ll be redecorating soon and the winter mantel (along with Heino) can move on.

In the meantime, I leave you for the weekend with Heino, a Hit Medley. You’re welcome.

Who else’s partner “helps” with decorating around the house? Do you remember IMing with your friends–way back before texting? Better yet, do you remember your avatar? Do you collect vinyl (despite appearances, we do not)? Is anyone a Heino fan?

Distressed about distressing

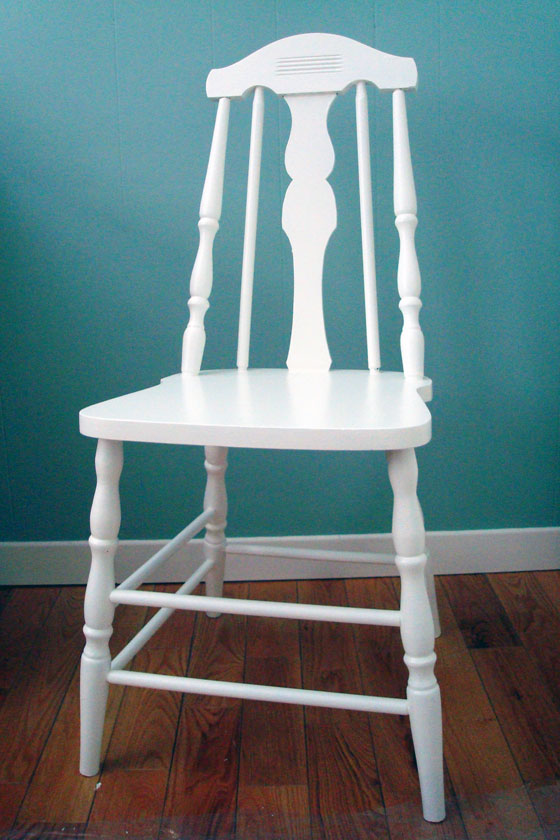
I was face-to-face (face-to-seat?) with the chair. I had spent days painting it, working my brush around every spindle again and again. The old brown stain had been replaced with a warm white finish.

White painted wooden chair

But I was about to change all that. Or I would if I could bring myself to step towards the chair.

I had a piece of sandpaper in my hand, and my plan was to rub it over my freshly painted chair making it look older and a little bit worn.

“Do I really want to do this?”

“If it doesn’t work or I mess it up, I’ll have to paint the chair again.”

“But remember the vision.”

My vision for the guest room is to embrace a bit more rustic style. A slightly shabby chair would fit in better than a perfectly painted one.

I lifted the sandpaper and got to work.

Distressed painted wood chair

The end result looks okay, I think. Definitely more interesting than the plain white chair. I’ve never been a shabby chic person, so I’m still adjusting to this look. Now that the guest room is coming together, though, I feel like the chair fits in.

Distressed painted wood chair

The plan for the weekend is to focus on the curtains, which are pretty much the last to-do for the guest room aside from some more accessorizing. I should be sharing the finished space with you soon.

Have you ever distressed furniture? Did it make you nervous? Are you a fan of the shabby chic style? What causes you anxiety when you’re making over furniture?

Good thrifting week

Last week was a good thrifting week. On Thursday I scored a rocking chair (for our someday front porch).

Even though my backseat was (obviously) full I stopped at another Value Village and found something else I wanted. I’ve been looking for a large metal shelf, but I was loath to spend more than $100 for something new. Finding one second hand for $30 was a no-brainer. Of course it was huge and there was no way it was coming home with me when my car was already loaded.

Thrift store metal shelf

Fortunately, when I returned the next day, it was still there.

And now it’s in our cold cellar (a room that’s impossible to photograph thanks to no windows, fluorescent light and a whole lotta concrete).

Home decor storage in the cold cellar

This may not look like much, but it’s a big improvement over what was here before.

The previous owners left us a desk, but when it came to storage or organization it was pretty useless.

Mess

I’ve been stashing some of my overflow home decor in the cold cellar, and it was time for an upgrade. Up being the operative word. We all know that using vertical space is the best organization technique there is.

Now I have a place for all of my home decor accessories–including my very own lighting emporium. (And a reminder that future thrifting trips should not include anymore lamps).

Lighting storage

Gathering lights, shades, baskets, bins, trays, shelves and bottles from all over the house and consolidating them in the cold cellar made me very happy last weekend. I even unpacked two boxes that have been packed since we moved to the farm… nearly four years ago.

I love getting organized. Almost as much as I love a good thrifting score.

Have you done any thrifting recently? What do you like to buy? I knew I had a thing for chairs. The lighting obsession was a bit of a surprise. Do you have a home decor stash? How do you store your home decor? Who else loves getting organized?

Keeping score

I feel like I’ve crossed a new milestone in blogger-dom. I used chalkboard paint.

I know. It’s like nearly four years in, I’m finally a serious blogger.

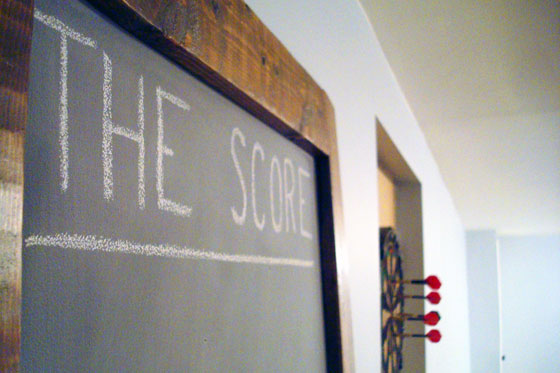
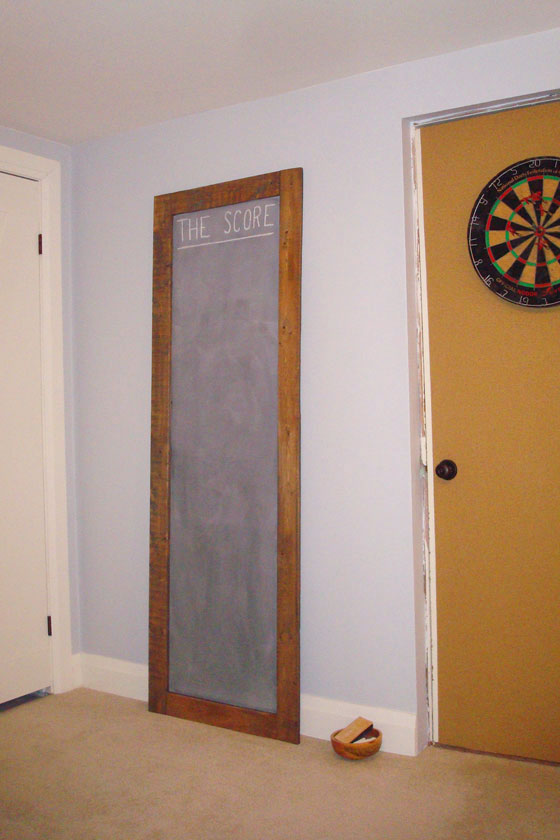
Tall chalkboard for score-keeping in the games room

I’ve been wanting to add a chalkboard to the long room in the basement for awhile now. This is the room that holds our pingpong table and dartboard.

I figured a chalkboard would give us a place to write down the score, and it could also play the role of “art”–one of my home goals for 2016 being to decorate the basement.

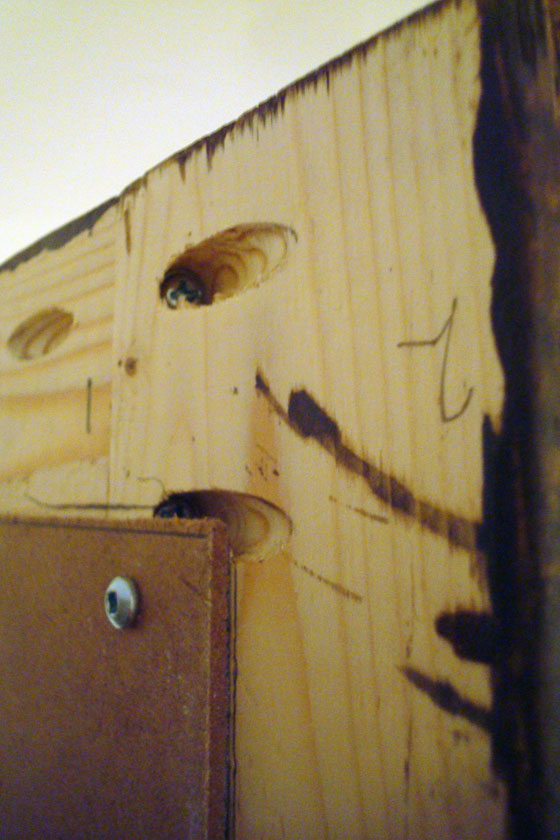
I used rough cut 1x3s for the frame and screwed them together with my Kreg Jig. Lesson learned, lumber this thin will split if you screw into it sideways. Cut a new piece, redrill the pocket holes, screw into the end grain, all is well.

Pocket holes with the kreg jig

The frame is stained with a mix of Minwax Classic Grey and Provincial. I find as I proceed with decorating this house, my style is getting more and more rustic–hence the rough cut lumber and the grey stain.

The chalkboard itself is a piece of hardboard coated with chalkboard paint. With chalkboard paint (for those that aren’t in the know), you have to “season” it before you use it. That means you rub it all over with chalk and then erase it. If you don’t do this, your writing won’t erase properly. However, this eliminates the beautiful black finish and makes your board very grey. I was a bit disappointed by this, but I think I can live with it. I’m not prepared to buy a big piece of actual chalkboard to fix it.

Tall chalkboard for score-keeping in the games room

The chalk and eraser sit on the floor in a wood bowl that my Dad made.

Chalk and erase in a wood bowl

Now we just have to clear Matt’s box collection off the pingpong table so we can actually use the chalkboard (darts is not my sport). Keeping it real for you.

Tall chalkboard for score-keeping in the games room

Speaking of sports, are you watching the Superbowl this weekend? Have you ever used chalkboard paint? Any darts tips to share?

Halfway to a hospitable guest room

This house is the first time we’ve had an honest to goodness spare bedroom. We like it when people come to stay with us. However it doesn’t happen that often. Perhaps because the room has never been very welcoming.

You saw last week that making over the guest room is one of my home goals for 2016. Today I’m ready for the first progress report.

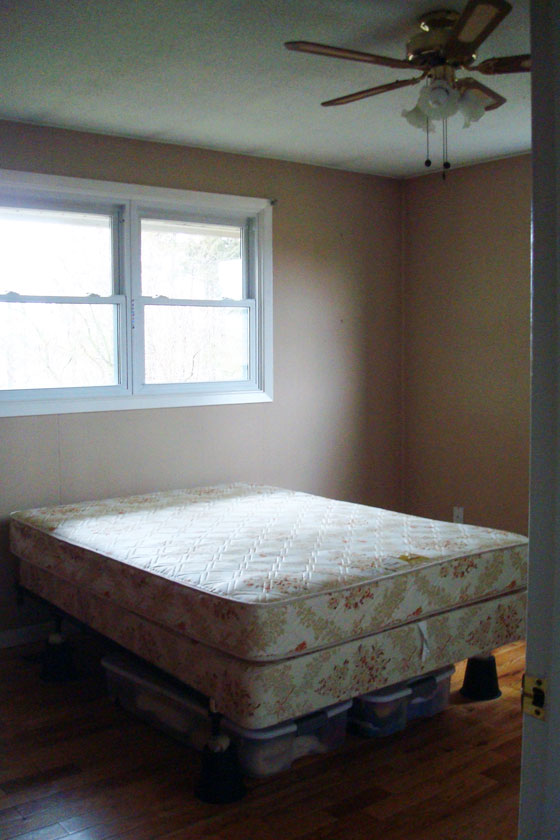
Here’s a really bad photo to show roughly where we started. (We usually put sheets on the bed when we have guests).

Guestroom before

The specialest features of this room were the stippled ceiling, ugly ceiling fan and pseudo wood paneling. And everything was dirty. Incredibly dirty, as is the norm for any untouched space in this house.

I’m almost ashamed to remember that we used this room as our bedroom up until about a year ago. When we scraped the ceilings after Christmas, the water running down the walls left brown and grey dirt tracks. So gross.

Despite its… specialness… this room is not going to be a hard fix. Here’s the to-do list:

  • Scrape the stippled ceiling
  • Paint the ceiling, walls and trim
  • Replace the light fixture
  • Make window treatments
  • Refinish the desk chair
  • Strip the paint off the metal bedframe (and maybe repaint)
  • Decorate and personalize

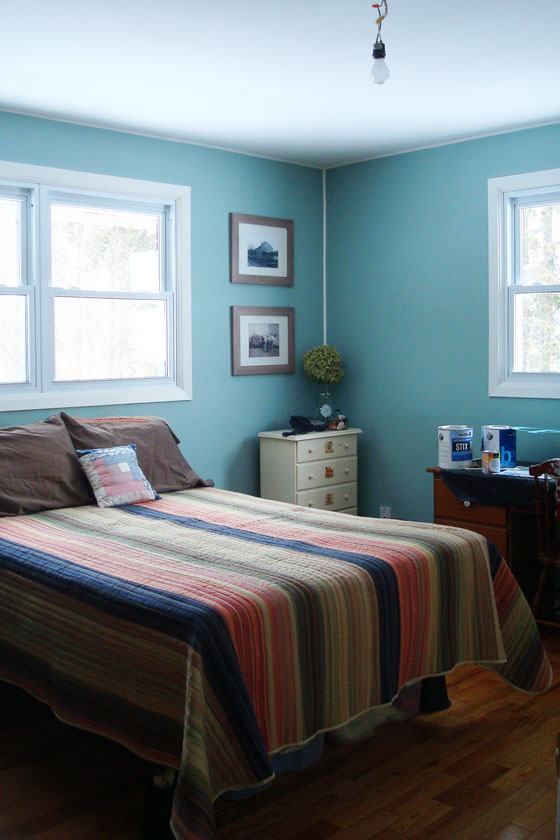
And here’s where we are so far.

Guest room makeover progress

Better, right? Even that paneling looks okay now that all of the holes are patched and it’s painted a pretty blue-green (Wythe Blue from Benjamin Moore).

We’ve obviously made really good progress, but despite appearances I feel like I’m only halfway. If I’m being completely honest, I’ve moved onto decorating (hanging pictures, adding the flowers) as a way to avoid starting on the curtains.

The finishing touches are usually the hardest part of any makeover, right? But if we truly want a hospitable room, we should give our guests the option of sleeping past dawn. Sigh. Curtains here I come.

Do you have fake wood paneling at your house? How about a guest room? What must-haves should I include in our guest room?

Home Goals 2016

I really enjoy the process every January of setting my home goals for the coming year. (If I’m being honest, I start thinking about them in December or even earlier). I’m not big on resolutions on the personal front, but on the home front my annual plan helps me stay focused.

This year, I’m going to try to continue last year’s plan of striking a balance between productivity and a bit of relaxation. There’s still lots to do, of course. But it’s been four years since we bought the farm. Obviously, our renovation pace is not even close to breakneck.

We are approaching the point where we have either really big projects (kitchen, bathroom, garage, master suite) or small stuff (paint the guest room, dining room, my office). For now, I’m keeping the focus on the small stuff.

Which will help me to continue another theme from last year: frugality. We did pretty well on that front in 2015. You’ve seen some of my long-term renovation plans already, so continuing to save money in 2016 will be helpful.

And that’s the first goal on the list: get an idea of how much the Big Reno is going to cost.

Beyond that, the focus is going to be on small, frugal things.

Guest room

Matt and I got a start on this at the tail end of last year by scraping the stippled ceiling. We have more to go to make it match the picture in my mind.

  • Paint the walls and trim
  • Replace the light fixture
  • Make window treatments (ugh… I really don’t want to sew curtains again)
  • Refinish the desk chair
  • Strip the paint off the metal bedframe (and maybe repaint)
  • Decorate and personalize

Finish the basement

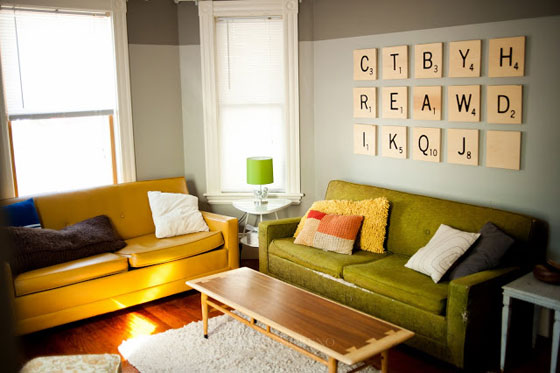
Scrabble art for the basement

Source: insideways

The basement was our very first project when we moved to the farm. But the nit-picky finishing bits are still hanging around. I just need to get my butt in gear and get it done.

  • Trim around the cold cellar doorway
  • Finish the built-in storage area in Matt’s bathroom
  • Make/buy art to finish off the space (this one’s a carry-over from the 2015 home goals)
  • Build shelving in the closet under the stairs

Furniture

My list of wanted furniture is getting shorter and shorter.

  • China cabinet for my office
  • Coffee table for the living room
  • Reupholster slipper chair for my office (in the same beautiful Brissac Jewel by P Kaufmann that I used for my bulletin board)

Vegetable garden

Last year’s top home goal returns. There’s still more to do to make my dream vegetable garden.

  • Hang the gate
  • Edge the garden
  • Build raised beds around the perimeter
  • Build trellises for the raspberries, tomatoes and squashes (we can’t have the squashes running rampant again this year)
  • Plant perennials: grapes, asparagus, rhubarb, more raspberries
  • Run a waterline out to the garden

Outdoor clean-up

Manicured meadow

Source: LandVest

I’m going to be a bit ambitious this year and add a second outdoor task to the list. The task of cleaning up this property could be a full year project for a full team of people. It’s a job of picking up rocks, extracting weeds (fire worked well last year), grading (and maybe adding a bit more topsoil), seeding grass, mowing. And it’s a matter of picking my spot… and being satisfied with a spot, not all of them. Here are my options:

  • North side of the house
  • West side of the house
  • On the edge of the woods at the north side of the house
  • Around the barn (all points of the compass)
  • Behind the driveshed and around the garden
  • At the foot of the driveway
  • Along the shore of the pond (oh how I want to clear the shore so that I can get close to my pond)

Six goals for 2016. I feel like there’s a bit of symmetry in that. Most important I feel like these goals should be relatively achievable.

In fact, the year is already off to a pretty good start.

The guest room is well underway, and I’ve started a few projects for the basement too.

You’ll see some of those soon.

Are you setting goals for 2016? What projects do you hope to complete this year?

Focusing on the New Year

Sarah in Illinois is back with her first post of the year. Like me, Sarah was busy making presents before Christmas and she has big plans for 2016.

Hello again from Illinois! It is finally winter-like here. As I am writing this this high today was 16F (-9C for us Canadians). That is the coldest we have had yet this year.

I hope everyone had a nice holiday season. I went to my final holiday party this past Friday. My girlfriends and I decided to draw names to exchange gifts with the one rule that the gifts had to be homemade.

It was so fun to see the creativity that everyone came up with. There were homemade lotions, shave cream and such, a pumpkin roll and necklaces, a burlap wreath, a knitting needle holder.

The gift I received was from my personal trainer cousin. She made me a plyo box and workouts to go with it. We discuss working out quite often and she is always on hand to give me advice and a plyo box gives me new workouts, with more interest than just running up and down my road. A plyo box can be used to jump on, sit on and do workouts off of and I am sure many more things that I haven’t learned yet.

The gift that I gave was for my tea-drinking cousin. I found a few ideas on Pinterest of a tea bag dispensing house.

Tea dispensing house

I didn’t follow any directions and I didn’t take step-by-step pictures, but basically I made a house like you would for a bird house. I made the roof removable so that it could be refilled. The doorway is where you can see and remove the tea bags. I used a sample tea bag to make sure the opening was wide enough for a bag to slide through. Then Steve had the idea to notch out an area for your finger to fit and pull out the bag.
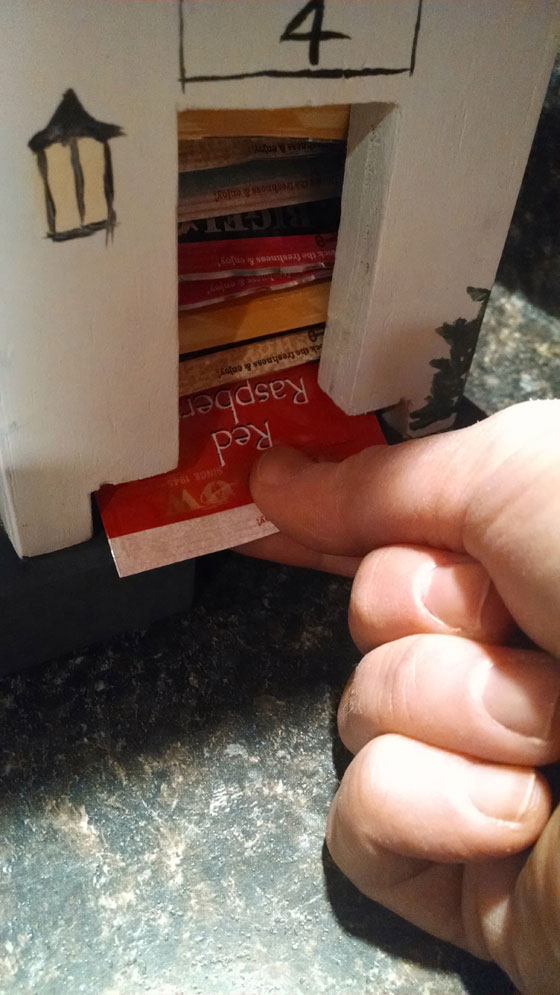
Tea bag dispensing house
That was a great idea and I am so glad that he thought of that. After gluing the walls together and nailing the base on, I sanded and filled in the cracks with wood filler. After a final sand, I gave the whole thing a base coat of acrylic craft paint. Then I hand painted on the windows and greenery. I finished with a coat of clear matte spray paint to seal in the craft paint. I think the receiver was happy with the gift!

The hostess made us a table full of appetizers and also had a hot chocolate bar and a Bellini toast at the end. It was such a great time to visit and such a fun way to end the holidays!

Now that I am really thinking about the New Year, I am of course thinking of resolutions.

I like to have some direction to start the New Year. But this year I am doing something different. Instead of coming up with a list of resolutions I have come up with a word as a theme for this year. It took me a few days to come up with one and I used this website: myoneword.org to help me narrow one down.

The word that I am using for 2016 is “FOCUS.”

I think that is a word that can be used in so many areas for me. I have a bad habit of starting things and not finishing them. Focus can be used to remind me to stay with the project I started. I also let technology distract me. Whether it is Facebook or Instagram or one of the many gaming apps on my phone, I seem to find things to do other than what I should be doing. So focus is going to be the word to try to get me on track!

I can’t wait to get some projects started to share with you. We are definitely adding on to our house this year, so that will be something that I will be sharing throughout the year. We already have received our first seed catalog so that means garden planning is not too far away. I think this is going to be a busy year at our house.

I hope you all have a healthy and happy 2016!

I love the idea of all those handmade gifts. Sounds like you have big plans for the year ahead, Sarah. I’m looking forward to seeing them unfold under your laser focus!


Looking back at Home Goals 2015

There are all kinds of retrospectives and reflections happening in the blogosphere right now. My look back will not be nearly as emotional or deep as some of the ones going around.

I feel like 2015 was a pretty good year for this blog and our projects at the farm. Last January, I said I wanted to be flexible and not knock myself out renovating all the time. I definitely feel like I managed that. I also had a few more personal posts mixed in over the course of the year, and I’ve made some progress on that front too.

For now, it’s time for the annual report on how we did on Home Goals 2015.

1. Master bedroom Check!

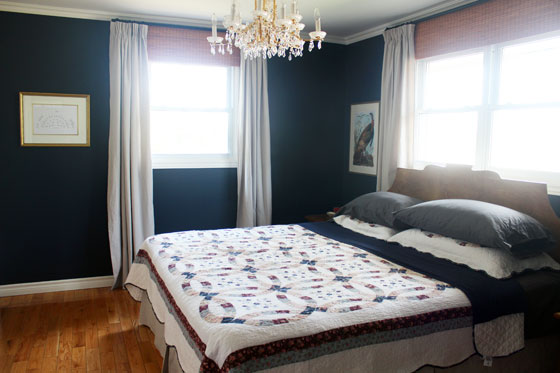
Thanks to the One Room Challenge, we have a beautiful master bedroom. I love having another room completely done.

Dropcloth curtains in a navy master bedroom

2. Basement art No check.

The smallest task on the list–and the one I was most enthused about at the start of last year–was the one where I made no progress. This one will carry over to 2016.

3. Furniture Partial check.

Looking back over the year, I was a bit surprised at how much furniture we bought, made or made-over. We did better than I thought. However, there’s always more on the list, hence the partial check.

  • Found 2 bookcases that I’m going to make into a china cabinet for the dining room. They still need their makeover, but they’re working okay for now.
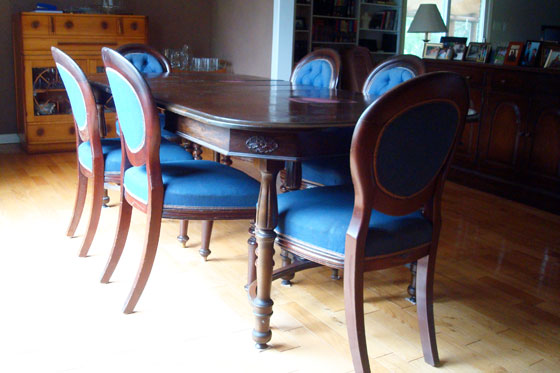
  • Found a set of 8 dining room chairs that match our table nearly perfectly. They’ll need to be reupholstered and refinished someday, but once again, they’ll do for now.
  • Found a ladder/step-stool/chair that reminded me of my grandmother–and a lot of you of yours.
  • Made a headboard and painted a dresser as part of the master bedroom makeover.

Dining chairs and table

4. Vegetable garden Big fat check.

My one and only outdoor goal for the year was a huge success. It started when I decided to build the garden in Matt’s “goat ring.” To get rid of the weeds, our nephew and I lit it on fire, I spread out the world’s biggest tarp, and then Matt rototilled the whole thing. We planted and watered and then we harvested… and harvested… and harvested. Along the way, I built a gate, and Matt and I put up chainlink all the way around. And then at the end of the season, I spread manure over the whole thing.

Tomatoes ripening in the garden

There’s still more work to be done. It’s a garden, which I’ve learned is synonymous with work. However, it’s established. It produced food. We’re still eating our harvest. And I’m so enthused about this year’s plans.

But that’s the stuff of home goals 2016. Those will be coming up next week.

How did you do on your goals in 2015? What was your big accomplishment?