We’re gonna need a bigger rug

The famous line of “you’re gonna need a bigger boat” was uttered in reference to a murderous shark. Obviously, the mud and dirt outside our front door is less threatening than a very large fish. However, protecting the house from Mother Nature’s ongoing assault is a no less of a battle.

Most of the year, two mats at either door in the mudroom are sufficient for containing the dirt that comes in on our boots. However, in the winter, when the mud and the wet increase, a bigger rug was required.

I needed something durable that would trap lots of dirt. And it had to be cheap, of course.

Growing up, we always had a cocoa mat at the front door. And I always hated it. It was scratchy and ugly, in my naive child’s opinion. However, it worked, and when we moved into the farm last year, it was only a few weeks before I went out and bought one of my own.

Now that I needed a bigger rug, I decided cocoa was the way to go. Rona sells cocoa mat by the linear foot, so I decided to buy two strips and make my own rug with the help of some duct tape.

I “tacked” the seam every foot or so with a short piece of tape making sure to keep the two runners tight and even. Then I went over the join with a single strip of tape. My helper carefully checked everything.

Seaming a rug with duct tape

I cut the rug to the exact length using a drywall square to get a perfect straight edge.

Cutting a rug using a drywall square

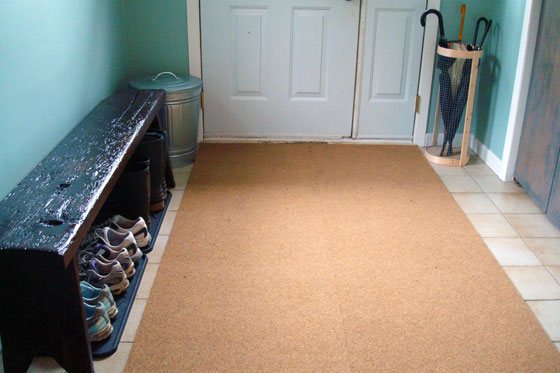
The finished rug is 52 inches wide by 9 1/2 feet long. The seam is mostly invisible.

Homemade cocoa mat is a mudroom

It probably won’t keep sharks at bay, but so far it’s doing a good job of handling the dirt that keeps trying to invade the house.

Have you ever made your own rug? Are you on the like or dislike side of cocoa mat? How do you handle floor covering at your entryway?

Beautiful beat up bench

You may have thought that after a full week of posts we were done with the mudroom. No way! It’s my first finished room. I’m going to savour this for awhile yet.

To start, I’m sharing my favourite project, my beautiful beat up rustic wood bench.

Rustic wood bench in a mudroom

I love this bench.

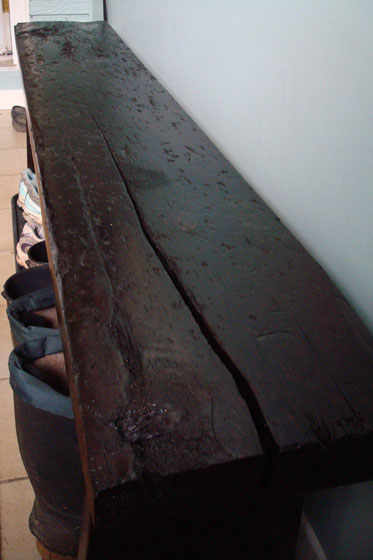
My nephew Nicholas and I designed it, built it and stained it. It’s made out of one single plank that I found in the barn. I looked for the most beat up piece of wood I could find. It’s full of knots, splits and gouges. We sanded and sanded the bench so that it was smooth enough to sit on, but made sure all of the “defects” still showed through. Unfortunately, when it came to staining the bench, the wood was so thirsty that it sucked up every single drop of stain (Minwax Provincial), so the bench came out much, much darker than we expected. Some of the knots and gnarls aren’t as obvious now because of the dark tone, but I still think it has good character.

Knot hole in a rustic wooden bench

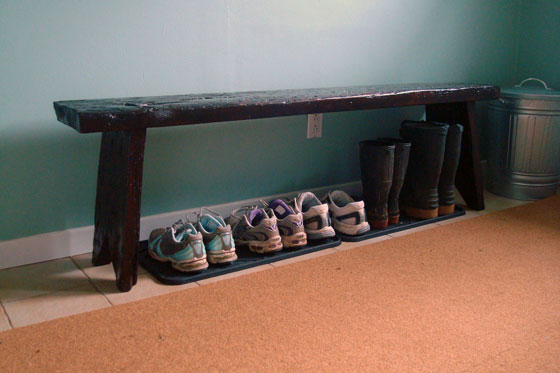
We designed the bench to some very specific requirements. We wanted the legs to be wide enough that we could put two trays of boots and shoes underneath. The seat had to be a comfortable height for sitting and also high enough that Matt’s tall boots would easily fit underneath. And we wanted it to be relatively slim so that it didn’t take up too much space in the room.

Rustic wooden bench

My nephew and I went back and forth on the design of the legs and finally settled on a simple upside down V cutout. I used my Kreg jig to attach the legs to the bench top. This was the first project that I used the Kreg for, and I quickly learned that the Kreg is built for standard modern day lumber. This plank was milled back when 2x4s were actually 2 inches by 4 inches, so it’s fatter than today’s lumber. We made the jig work, but it was a tight squeeze in a few spots.

It’s a very simple rustic wood bench that’s perfect in a country house. I’ve dubbed it the “Nicholas” after my design sidekick. If you want your own Nicholas, you can’t have the nephew, but you can have the bench. Click here for the plans.

Who else has a construction sidekick? Have you ever designed and built your own custom piece of furniture? Are there any other Kreg fans out there? Who else has stained a “thirsty” piece of wood? Are you a fan of the “distressed” look of beat up lumber?

Mudroom reveal

This post has been a long time coming, and I’m not meaning just this week. Fixing up the mudroom was on the fall to do list last year. I started the project but never quite finished it. However, I am now declaring the mudroom done, and today is the day for the reveal–the first room reveal on the blog.

Aren’t you just so excited?

I know I am!

Just a reminder, here’s where we started.

Mudroom before

And here’s where we are today.

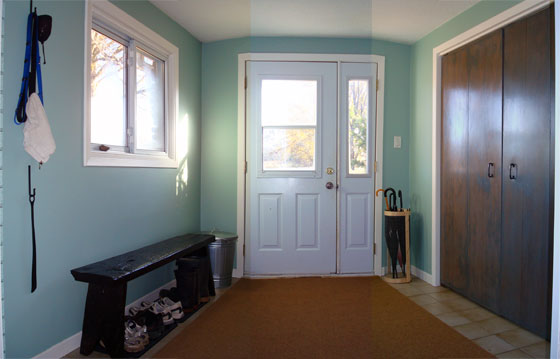
Simple bright country mudroom

Better?

As I said at the beginning of the week, this was a cheap and cheerful update, so paint was the most important weapon in my arsenal. I took down the hooks on the walls and the old shelving in the closet, stripped the pinwheel wallpaper, patched the drywall and spread nice fresh paint over all of the walls–simple white primer in the closet, Wythe Blue on the walls and Cloud White on the trim.

Painting the trim was the biggest delay on this project. I just could not motivate myself to do it, so the mudroom sat with blue walls and flesh trim all through the winter and spring. However, when we were trying to convince Baxter to spend time in the outdoor dog run, the mudroom proved to be a good place to hang out. I could listen for barking or whining to assess how he was doing, and I could see when he escaped… all while painting trim.

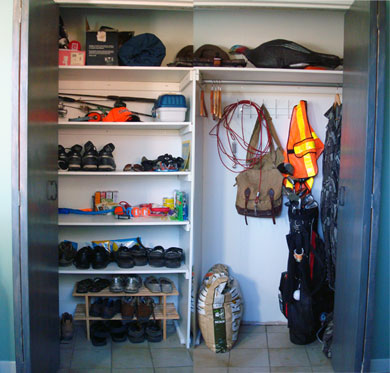
Along with addressing form, I also had to address function, which mostly meant the closet. I decided to split the closet in half, allocating one part for hanging some of our outdoor gear and storing taller items and at the other end adding floor to ceiling shelves for everything from shoes to cat treats to dog toys to work gloves to sport equipment.

Closet storage

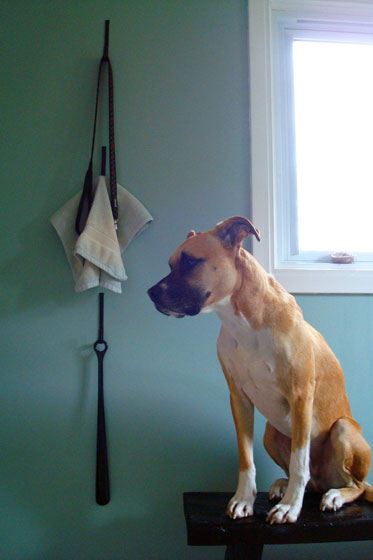
I reused the two sets of hooks from the old mudroom, installing the wire one in the cupboard and removing the three wrought iron hooks from their backing board and hanging them vertically to handle leashes, the towel we use to wipe Baxter’s feet before he comes in the house and our ever-so-handy shoe horn.

This ridiculous woman made me climb up on this bench when everyone knows dogs are not allowed on the furniture. I'll just stare at my leash and think happy thoughts until she's finished with that clicky thing. #pleasesendhelp

This ridiculous woman made me climb up on this bench when everyone knows dogs are not allowed on the furniture. I’ll just stare at my leash and think happy thoughts until she’s finished with that clicky thing. #pleasesendhelp

The bench that Baxter’s not so fond of is just about my favourite part of the makeover. It’s just a simple rustic bench, but it gives us a place to sit down and put on or our take off our shoes. Plus our most frequently worn shoes and boots tuck conveniently onto trays underneath. My Pinterest challenge umbrella stand hangs out in one corner and in the opposite a galvanized metal pail (Knodd from Ikea) holds bird seed. A large cocoa fibre mat covers the floor to trap dirt, leaves and puddles.

Mudroom

This is about the limit of the accessorizing I’ve done in the mudroom, unless you count rotating display of feathers, pebbles, egg shells and nests that I bring home and arrange on the window sill.
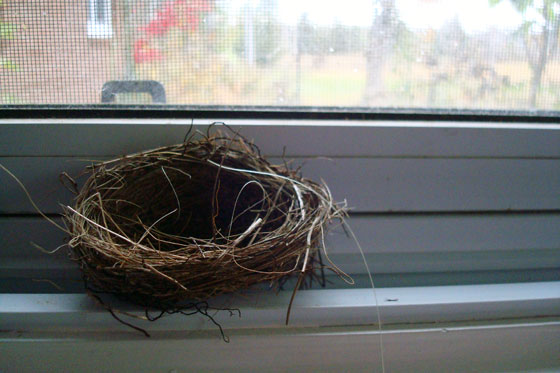
Birds nest made of grass

The mudroom is not heated, so we’re strategic about what we store out here. For example, on a freezing winter morning I can handle putting on chilly boots, but I absolutely need a warm coat. So coats live in the closet inside the house, and boots live on the tray under the bench.

The best thing about this makeover is that everything now has a place. Need a pair of safety glasses? I know exactly where they are. Hungry cats at the door? Oh look, here are some treats for them. Found a golf ball? Add it to Matt’s stash.

The second best thing about the makeover is that the first impression of our house is no longer cloaked in the smell of manure. For some reason, that’s what the mudroom smelled like when we first took possession. Yuck.

And yes, I do consider being organized more important than being not smelly.

In the category of “even better if,” I didn’t do anything to the popcorn ceiling, the boob light, or the unpainted front doors, so there could still be some work if I feel like it. For now, I don’t, and I’m not really too concerned with these leftovers.

The one thing that I really should fix is the doorbell. I managed to kill it during the makeover when I was trimming a section of drywall to prepare it for patching. (Don’t tell Matt. All he knows is the bell stopped working. He doesn’t know it’s because I accidentally cut through the wires). A wireless version would be a good fix… and prevent any future mishaps.

Overall, I’m thrilled with the mudroom, even though it doesn’t yet match my ultimate vision. This is a good interim solution. It looks nice. It works well. It was a simple update, and we didn’t have to spend a lot of money. Let’s look at it one more time, shall we?

Simple bright country mudroom

I may be a year later than planned in finishing this project, but we are finally all set for whatever mud or snow Mother Nature throws at us this winter. And I’m even more thrilled to cross one room off my to-do list.

So, what do you think of the makeover? I know a lot of people were voting for opening up the closet and putting in some built-ins. Are you on board with my interim solution? How are you getting ready for winter at your house? Who hates painting trim? Has anyone else spent a full year making over one room?

Mudroom inspiration

How many people dream of a mudroom that looks like this?

Yeah. Me too.

This was not in the cards for our mudroom update.

Some day, I plan on having this mudroom. However, that will involve demoing the current mudroom, building a front porch, relocating the front door, constructing an attached garage and converting part of the pool room to my dream mudroom–complete with heated floor and built-in cabinetry. This is a project that is somewhat, shall we say, down the road.

My current mudroom project was all about the budget challenge: make the room both functional and pretty for minimal money. That meant DIYing, reusing and lipsticking. You know, a makeover, not plastic surgery.

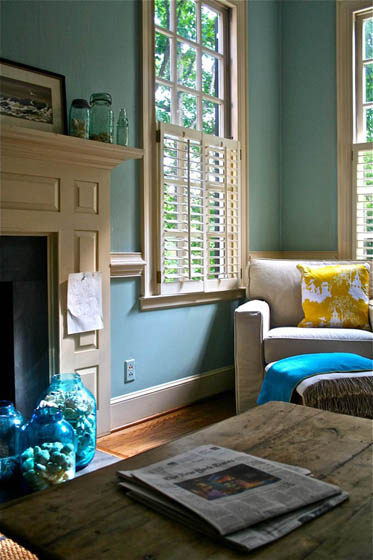
The first decision that I made was exactly what colour of lipstick. It might be an unconventional choice for make-up, but I knew I wanted to go blue–something like the sky outside. The mudroom is a transitional space between inside and out. It seemed appropriate to reference nature. While paint usually intensifies when it’s put on the walls, I was worried that the colour actually might appear lighter in the mudroom, given the number of windows we have. When I saw Wythe Blue on House of Turquoise, I knew I’d found my paint.

I may be more than a year late to the Wythe Blue party, given that Benjamin Moore named it colour of the year for 2012, but I finally made it.

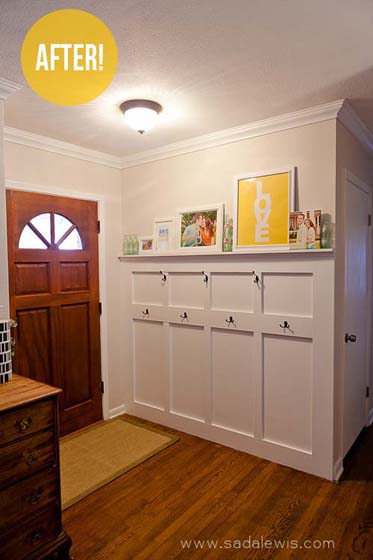
Inspired by this entryway update from Casa de Lewis, I considered installing paneling, or board and batten, or even just a very simple plate rail.

But then I remembered that with two doors, a window and a large closet, actual wall space was pretty limited, and I decided that extra mill work wasn’t worth the effort (plus, let’s be real here, it would have upped the budget ever so slightly, and I am super cheap).

I also wanted a place to sit down and put on/take off my shoes. By that I mean, a better place than the park bench plopped in front of the closet doors. A simple rustic bench with enough space to tuck boots underneath would do nicely.

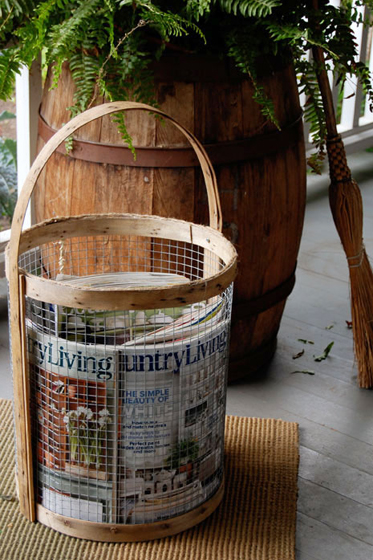
My final inspiration is for a project you’ve already seen: the umbrella stand inspired by Karen’s Country-Living-inspired basket–wow, that’s very inspirational.

My plan was to put it all together, cross my fingers and hope that when it came time for the big reveal, I had a tearjerker What Not To Wear moment and not an Extreme Makeover gone wrong.

And that will be coming up next.

What’s your favourite shade of blue paint? Have you added paneling on your walls? How do you handle seating in your entryway? Are you a What Not To Wear fan? Who remembers Extreme Makeover when it was plastic surgery?

Mudroom before

How many of you out there dream of a proper mudroom? [Both hands way up]
I have always wanted a mudroom–a place to put jackets, shoes, bags, mail, keys, boots, gloves, hats, toys, leashes and everything else that seems to live in that in-between space of outside and in.

Since moving to the farm, I’ve learned that a mudroom is a necessity. Because, you see, there’s mud.

Mud with a tire track, a boot print, and a puddle

A transitional space where the mud (and leaves, grass, gravel, dirt and all of the bits that surround us) can stay is essential. Sure some of mother nature still ends up in the house, but sometimes she stops in the mudroom to look around first.

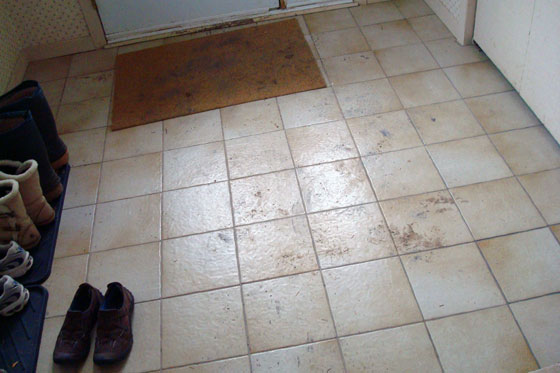
Mud smeared on a tile floor

Fortunately, our house came with a mudroom. Unfortunately, it didn’t quite match up to the vision in my head.

Here are the befores, starting with a not-at-all-weird panoramic image composed of three pictures. At this point, I’d added a mat in front of the door and some boot trays in an attempt to corral some of the dirt. The bench was supposed to give people a place to sit down and take off their shoes. The fact that it was placed in front of the closet was only slightly inconvenient.

Mudroom before

The good feature was that it was a big room (9 1/2 feet by 9 feet) with lots of natural light.

There was lots of space in the closet (if only we could access it) although the storage wasn’t as functional as it could have been. At the one end, the shelving was held up with the metal posts people normally use to stake trees. Of course, they were rusted.

Falling apart wire shelving in a closet

The not so good features were that it was all the same flesh tone. And that flesh tone was made up of lots of different textures.

There was the painted anaglypta wallpaper on the closet doors, the pinwheel wallpaper on most of the walls, the painted brick where the addition tied into the original house and to top it all off the popcorn ceiling.

Mudroom issues

This definitely was not the first impression I wanted to give when people came to my house. And it’s not the first thing I wanted to see when I came home at night.

Stick around, and I’ll show you what I did to fix it.

But first, I want to hear from you. What’s your favourite feature of the original mudroom? What would you do to fix it? Do you have a mudroom? What is absolutely essential in your dream mudroom?
Paintings, pillows, Property Brothers, oh my!

My good friend Catherine and I headed into Toronto a few weeks ago for the Fall Homeshow.

Catherine and I at the fall homeshow in Toronto

Neither of us knew what to expect, but we’re both enthusiastic about our homes, so we decided it would be a fun way to spend a day together. We decided to go on the Saturday so that we could check out the Property Brothers.

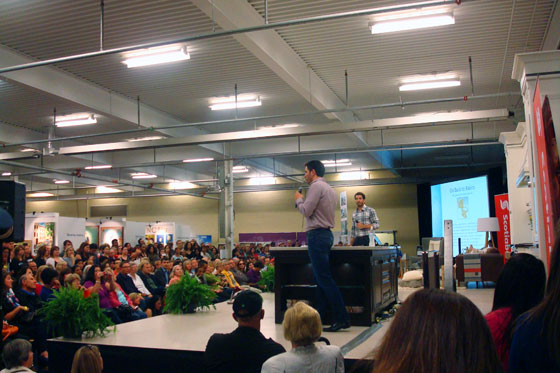
As you can see from the photo, the PB presentation was a mob scene. Soooo many people, Catherine and me included.

Property Brothers Drew and Jonathan Scott at the Toronto Fall Homeshow

Apparently, ’tis the season for me to be dazzled by TV personalities. Just like with Sarah Richardson a few weeks ago, I was impressed by Drew and Jonathan. Their presentation was straight-forward, funny and down to earth. They had a lot of good tips for people about everything from renovating to decorating to financing. I actually really like their show because I’m all about seeing the potential in a place and then working to make it live up to my vision. Plus, I think their designs are usually pretty liveable. BTW, there’s also a little known third property brother whom we also got to see.

Away from the main stage, there were lots of booths and lots of vendors. I had expected more exhibits, but pretty much every booth was someone selling something. Nobody was pushy, but I guess I was just looking for more inspiration than actual products.

There was one particularly inspiring exhibit by Habitat for Humanity where bloggers, handymen and women and other people had all upcycled various items from the ReStore. There was lots of creativity from shelving units to furniture to wine fridges and even a light fixture.

Habitat for Humanity Restore exhibit at the Toronto Fall Homeshow

And amongst all of the vendors, there were two that I now covet.

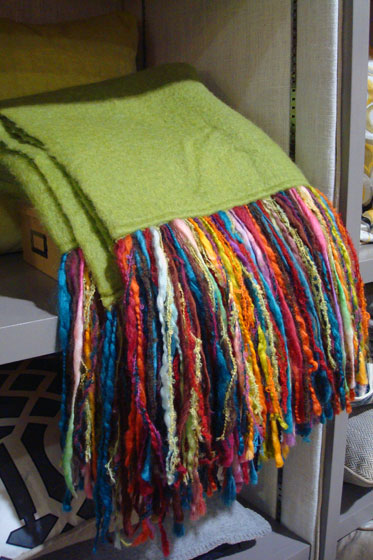
The first was textiles from Andrea Hylton home. She had amazing pillows and blankets in beautiful colours and patterns. There were mellow earth tones, saturated jewel tones and sophisticated fabrics that would work upstairs. There were funky patterns and bright colours that would work in the basement. Can’t you just picture this green mohair throw paired with Strandmon in the basement? I could have bought everything in her booth.

Green mohair throw with multicoloured fringe by Andrea Hylton

The second booth where I again could have bought everything was artist Beverley Jenkins. She does amazing oil paintings. I love original art, and some day I’d love to have a few pieces of my own. I would have started with the birch forest at right below without any hesitation if only it hadn’t been out of my budget.

Paintings by

The really unique thing about her paintings is how highly textured they are. She sculpts the paint on with palette knives making a three-dimensional canvas. I tried to get a picture of the paint, but I’m not sure it really comes through.

Detail of oil painting

Catherine was the perfect partner to go to the Homeshow with because she’s all about embracing whatever comes. So while the vendors may not have been what we came to see, we got into the spirit, trying out crazy chairs that gave full-body massages, watching cooking demonstrations, having detailed conversations about shower heads with a plumbing vendor, filling out surveys, entering contests and getting our pictures taken in our “dream” room at the Scotiabank booth (mine was the kitchen. Catherine chose a great backyard patio).

Scotiabank dream room at the Toronto Fall Homeshow

All in all, it was a fun day, and I did end up coming home with some inspiration. The best part was getting to spend time with one of my best friends. Catherine just bought her first place this summer, and she’s been busy painting, decorating and making it her own. Check out her blog to see her space.

Who else has made it out to a homeshow recently? Is anyone in the process of decorating a new house? Are there any other Property Brothers fans out there?

You can never have too many

I may have mentioned a couple of times that I have a bit of a thing for chairs. Just in case you missed it, this is the fifth post this month on the topic of chairs (out of a total 11 posts). I may have a bit of a problem, people.

Fortunately, I also have a supportive husband who does things like buy me a wingchair for my birthday and recruits his parents to go pick up another chair when the universe decides to support my habit by bestowing a chair on me as a prize for registering for BlogPodium.

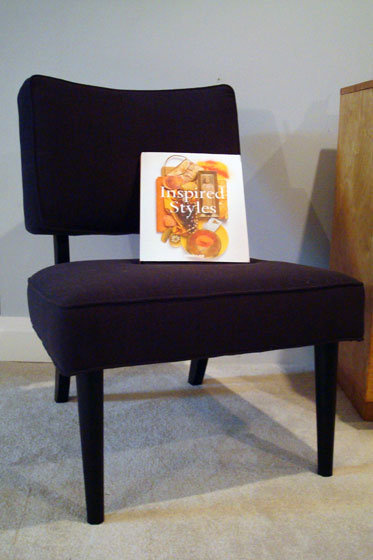
So after a day spent absorbing lots of lessons about blogging, meeting a bunch of great people and picking up the second half of the prize, the decorating book Inspired Styles from Kravet, I came home from BlogPodium to find the Austin chair from Decorium sitting in my living room.

Here are the two halves of the prize together in Austin’s new home in the basement.

Decorium Austin chair and Inspired Style book

Inspired Styles is full of inspiration from different designers, including Candice Olson, who have all made fabric collections with Kravet.

Candice Olson profile in Inspired Styles

Austin is already set up in the basement. His dark wood legs and deep grey upholstery go perfectly with our Decor-Rest sectional.

Dark grey occasional chair and grey sectional in a TV room

How good does he look?

Thanks to Decorium, Kravet and BlogPodium for a great prize. And thanks universe for enabling my chair obsession collection.

Birthday wish come true

See my full review of the Ikea Strandmon.


It was my birthday over the weekend. BlogPodium was my present to myself, but what about that other item that was on my wish list? A certain chair that I was hoping my family would give me…

Sitting on a cardboard box

Hmm… that’s certainly a new chair. Not sure about the style… or the comfort for that matter.

Let’s take a closer look, shall we?

Ikea Strandmon box

Ooooh! Goody, goody, gumshoes. I think my birthday wish has come true!

Behold Strandmon in my basement.

Ikea Strandmon wing chair

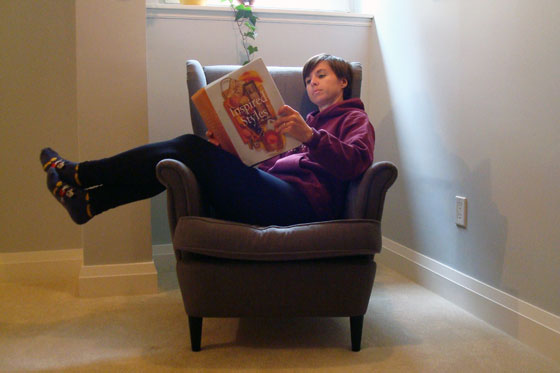
Behold me in Strandmon (reading the Inspired Styles book that I won through BlogPodium… and wearing Mickey Mouse socks… hmm).

Lounging in Ikea's Strandmon wing chair

All of my previous discomfort is gone. I love Strandmon. He perhaps may have the title of most comfortable chair ever. It’s only fair. After all, he shares the room with the most comfortable couch ever.

Thank you Matt and all of my family members for going in on this gift.

Now for a footstool and side table… and boy do I have ideas, people. Stay tuned!

Did you add any new furniture to your household over the weekend? What are some of your favourite birthday presents? Does anyone else buy themselves gifts for their birthdays? Does anyone else wear cartoon character socks?

Find a seat

Now that we have our new dining table, my attention is turning to my favourite furniture: chairs.

Here are my criteria for new dining chairs:

  • Contrasts with, yet complements, the traditional dark wood table.
  • Reasonably priced–especially as I’d like to buy eight.
  • Not upholstered.
  • Slightly country feel. We live on a farm after all.

Here are some of the options I’m thinking of.

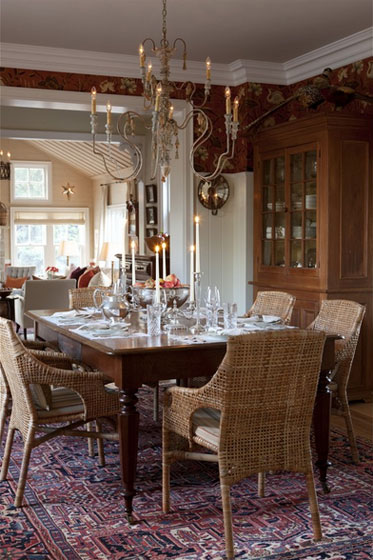
The front runner right now is something wicker or woven. Sarah Richardson used rattan arm chairs around the table at her farmhouse. I’d probably go more of a parsons chair route, as I want to squeeze as many people around the table as possible, but I really like the contrast and casual feel of a woven chair.

Sticking to the wicker theme, I also like the woven seats and the ladder backs on these chairs from for the love of a house.

Jen at Rambling Renovators found some great cross back chairs for a decent price. Their weathered finish would tone down the formality of the dining table and still keep the country feel that’s appropriate for our setting. Ikea has a white version that would contrast nicely with the dark wood table, but they look pretty plastic in person.

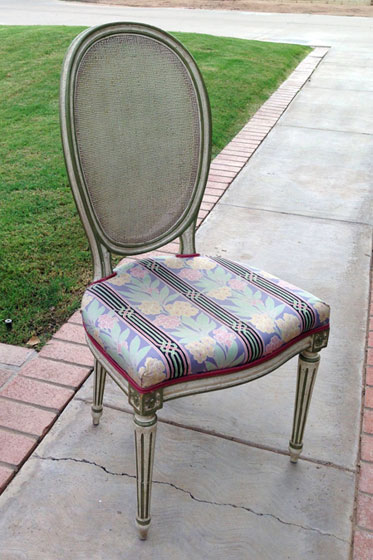
Jenny at Little Green Notebook recently scored a great deal on some Louis style chairs. The fluting on the legs picks up on some of the details from the table, and with a white glaze or slightly distressed finish we could still avoid the matchy-matchy dining set look.

Or I could just collect a whole bunch of old chairs, paint them all the same colour (cream, maybe?) and use them. I’ve seen people do this quite successfully. It would definitely be country and would probably be the cheapest option. I’m just not sure that that much mismatching is my style.

Sigh. I see why dining room sets are popular. Easy. No need for creativity or independent thought. Convenient.

What do you think? Do you like any of my ideas? Or do you have a suggestion of your own? I welcome any and all advice. How do you handle mixing and matching in your house?

Table for 2, 6, 10… everybody

Every time we have people over for dinner, I realize we need a larger dining room table. The table that we have fits four comfortably, six if we squeeze. A typical family dinner, no matter whether we’re hosting Matt’s family or mine, usually involves about eight people, not including us. Special occasions like Christmas or Easter when we add in extended family require a second table and lots of extra chairs.

Well, we may still need a few extra chairs, but we should now be set in the table department.

Antique dark wood dining table

I’ve been casually searching kijiji every so often (more popular in Canada than Craigslist), looking for a few very specific pieces of furniture. A couple of weeks ago, browsing the dining tables, I came across a beautiful antique dark wood table for an incredible price. I emailed, the seller replied, a meeting was scheduled. I borrowed my dad’s truck, we met, the table was examined, money was exchanged (a whole $130) and the table came home with us.

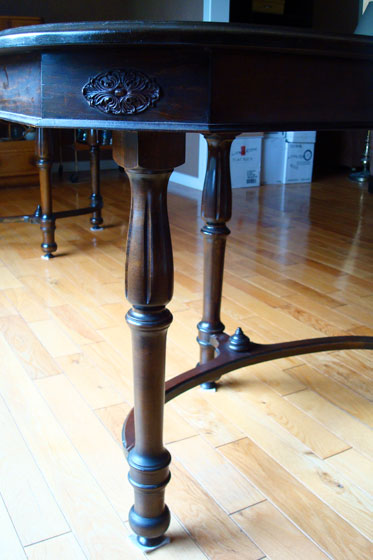
I know nothing about antiques, but I know I like this table. The unique legs obviously drew me in first. The size was what sold me: four feet wide by eight feet long when it’s fully extended. It has four leaves, and I think it could probably stretch to include a few more.

Triple curved legs on an antique dining table

At some point I may have some more leaves made. I feel like our dining room can comfortably accommodate up to a ten foot table. If we do add extra leaves, I’ll definitely need to also add an extra support leg of some kind in the middle. The table has a wee bit of a sag when it’s fully extended, but nothing too noticeable.

I would also like to have the top refinished someday. It’s pretty rough, but since I use a tablecloth most of the time, I can wait on the refinishing. The finish on the legs and apron is in great shape, so I’m hoping that I could find someone who would just refinish the top.

Damaged top on an antique wood countertop

I do need some bigger tablecloths. But not too big. I still want to see the pretty legs.

So who wants to come over for dinner?

Has anyone else had success with second hand shopping online? Any antique experts out there who can share what to look for in furniture? Anyone have any tips for refinishing furniture?