Tips to create a stylish and dog-friendly home

I recently wrote an article for homify that combines my two loves–dogs and home decor. (My husband is another one of my loves, but that’s a post for another time).

I know that many of you are also dog lovers, so I thought I’d share my tips for creating a stylish and dog-friendly home. From dog beds (complete with a trio of super cute dachshunds) to dog showers, there’s a whole range of ideas–and cute puppy photos.

I’d love to hear what makes a dog-friendly home for you.

For many people, home isn’t home without a dog…

A dog-friendly home is one that is comfortable for both its human and animal occupants. There should be a balance of style and function and–good news–it’s easy to have both.

Read my tips.

What makes your home dog-friendly? What do you wish you had that would make your home friendlier? (For me, it’s definitely a dog shower in the mudroom).

How to encourage egg laying in the winter

Back in December, Sarah in Illinois shared some of the lessons she’s learned since adding laying chickens to her farm. In the post, she mentioned mentioned that their egg production had declined as winter set in. She had a few ideas to encourage more laying, and today she’s back to share what happened.

If you remember my post a couple months ago, I gave an update on the chickens and mentioned that their egg production had declined.

I thought that it was either from lack of daylight or cooler temperatures. I was willing to try to add some artificial daylight, but that I was not going to risk a barn fire by adding heat.

I am happy to report adding some light did the trick.

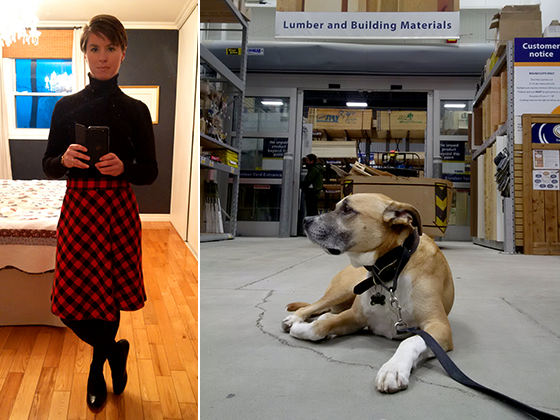
I went to the local home improvement store and purchased a light socket with metal shade. All you do is add a bulb and plug it in.

I took it a few steps further.

First, I chose an LED bulb. I am serious when I say that a barn fire is one of my worst fears, and I was going to take no chances in using a bulb that would get hot.

An LED did the trick. It produces almost no heat at all. I can rest my hand on the metal shield while it is on and there is no chance of me, or the chickens, getting burned.

As you can imagine with a traditional bulb there is no way I would be able to touch the shield, it would burn me instantly.

The second thing I did was to secure the fixture.

It came with a clamp to attach it where you need light. There is a good chance that it wouldn’t move, but I wanted to make sure it did not fall and rest in the straw in the bottom of the coop. So I ran a screw into the clamp after I had it where I wanted it.

No crazy chicken antics will cause the lamp to fall.

My final step was to add a timer. I have it set to come on every morning from 6 to 7 am and again from 4 to 8 pm.

After I had all of this in place I waited.

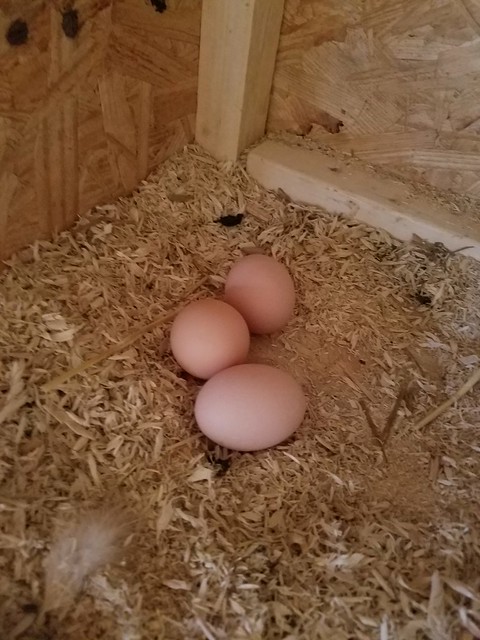
After about a week I found 2 eggs in the box.

And then a few days later I started getting 3 eggs a day.

I even had a bonus day yesterday where all 4 chickens laid an egg.

I can say that this project was a complete success, and I have no fear of burning our barn down.

I also have progress to report on my project goals that I listed in my last post.

One of my projects is to make over my Grandma’s Saint Francis statue.

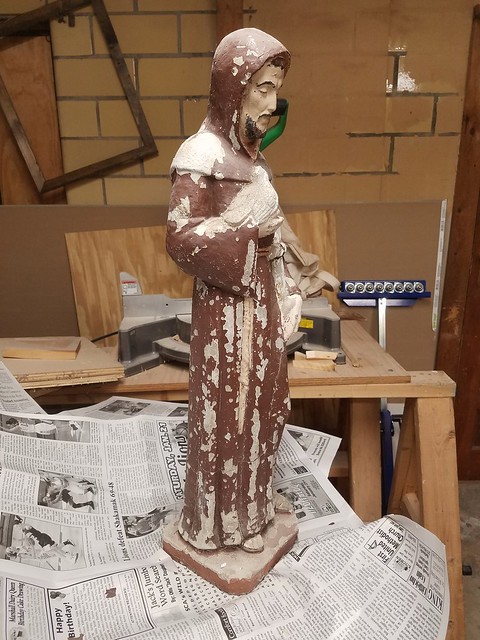
I started by scraping off all loose paint. I did not intend to remove all the paint, only the paint that was loose and came off easily.

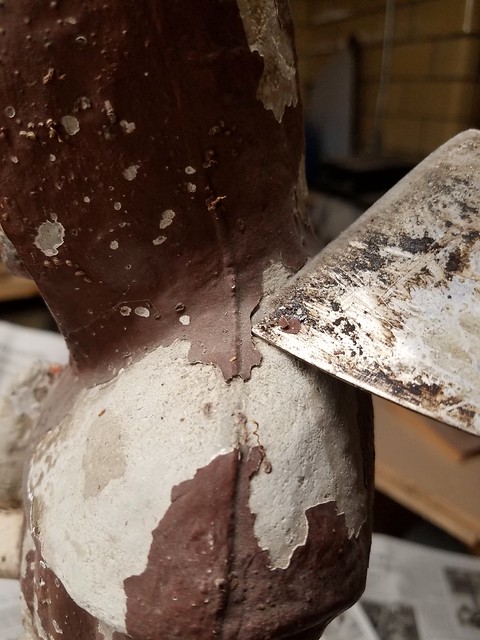
For the most part the concrete is in good shape but it has broken off of the base.

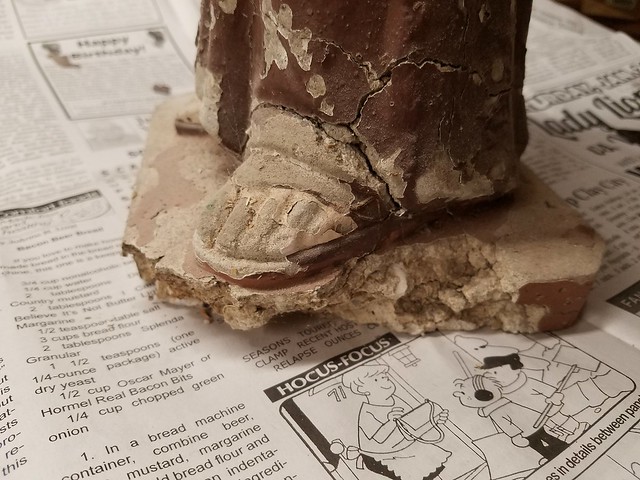
I am sure there are products meant for this type of project, but I chose to use what we had sitting around. We had a partial bag of thin-set mortar that we had used to install tile in our house. It sets up extremely hard, so I thought that once it is painted, it may work just fine.

I really don’t know about the longevity for this use, but I decided that it was worth a shot. I mixed some water and made it thick enough that I could apply it with a putty knife.

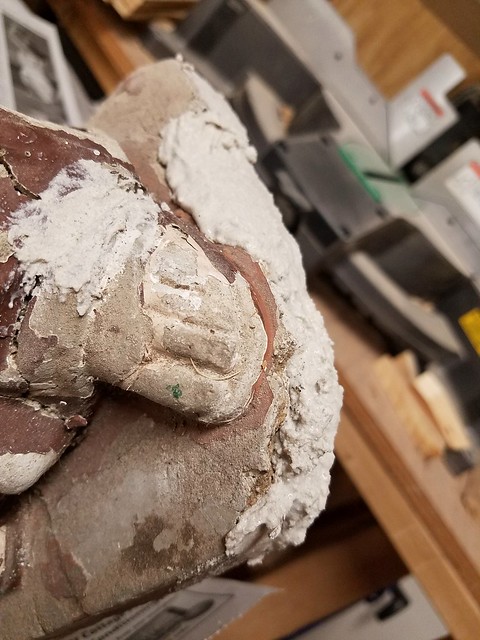
I knew that I wanted to add a couple layers instead of one thick layer so I purposely left the first layer bumpy instead of smooth so that the second layer will have something to attach to. I waited for it to dry and hoped that it would work.

24 hours after I added the thin-set to the statue, I started thinking that it is not going to work. I think the thin-set is too crumbly and will not hold up long term.

But that’s okay. I tried it, and I will try something else and report back how it goes.

Way to give things a try, Sarah. I’m glad that the chickens’ light worked so well. It’s great that you’re able to get fresh eggs again. I would miss those! Hopefully you’re able to find something that works for your Grandma’s statue too. 

Looking for robot vacuum recommendations

Vacuums are sucking up a lot of my thoughts these days. (Sorry. I couldn’t resist).

After much debate, we bought a Sebo canister vac several years ago, which works very well–when I use it.

I’m just not good at vacuuming, people. I don’t mean it’s beyond my ability. It’s just beyond my desire. There are approximately 8 million other things I’d rather do than vacuum.

So that means that dog hair, farm dirt, project dust (actual sawdust this week) accumulate. Our floors are regularly a disaster.

I long for a robot vacuum, but our Sebo was expensive. I feel like I can’t justify spending a not insignificant amount of money on another vacuum just because I’m lazy.

But then the universe started talking to me, sending me signs.

My sister got a Neato Robotics Botvac. (Isn’t that a great name?) And she loves it.

Neato Robotics Botvac

When I was at her house the other week, I spent some time following the vacuum around, watching it navigate the room and throwing things in front of it just to watch it pick them up. It did. (Aren’t I an amazing guest? You totally want me to come to your house, don’t you?)

John and Sherry at Young House Love talked about how their Roomba didn’t live up to their expectations in a recent podcast.

And then Thalita at The Learner Observer posted about her crumb-fighting, dog-hair-sucking sidekick bObi.

So I’m putting it out there to the universe. Anyone have any opinions on robot vacuums? Any recommendations on one that can handle an incredibly sheddy dog as well as farm dirt and a household under near constant renovation? Is it worth the investment? What chores do you struggle with?

Odds and sods

New buffalo check plaid skirt and shopping with my dog at Rona

Today, I have another odds and sods post for you, where I bundle together some of the little things that are happening around the farm and some things that I’ve seen out on the worldwide web.

  • I don’t shop at Rona a whole lot, but I ended up there last Friday, and they may become my favourite store because they allow dogs! I love stores that allow dogs–even though Baxter doesn’t quite have the energy for shopping.
  • Before I tore my office completely apart, I managed to sew a skirt that’s been in my head for a looooong time. Flannel buffalo check laid on the bias (AKA diagonal). It’s a little bit country and a whole lot comfortable for the winter.
  • We’re at an exciting time in our family. Nephew #1 has his driver’s license–so proud of him. Nephew #3 turned 3 a week ago. Nephew #5 should arrive in the next week or so–so extremely excited. Niece #1 arrives in a couple of months. Oh and Matt and I celebrated our 9th wedding anniversary yesterday and 19 years together this month. Craziness.
  • Alexandra Franzen is a writer whose posts inspire me. This one for the “the hard worker, the un-complainer, the tenacious warrior, grinding and slogging and striving to create something beautiful in this world” was a particularly motivating way to start the year.
  • Other words that are inspiring me right now: “No, we don’t do busy.
  • Thalita, who runs The Learned Observer, is someone I connected with online and then met in person a few years ago at Blog Podium. Now she’s a super busy Work At Home Mom of twin boys and is embarking on a new career as full-time blogger. The work that goes into making your dreams come true is significant, and I’m so impressed by what she’s been able to accomplish. I’m loving following her journey and cheering her on virtually.

I am more than ready for this weekend.

It’s been a bit of a tough week at the day job, with 26 meetings in the past four days and lots of extra hours to get at least a little bit of work done. I am grateful that I’m still on a four-day workweek schedule, so I’m willing to put in the extra time to get that balance.

However, I am looking forward to a few days of hiking, getting back to painting the furniture for my office, sleeping in, snacking and spending time with Matt at our farm.

What’s inspiring you this week? What have you been up to? What are your plans for the weekend?

Office oddities

My office,which we’re making over, is an odd little room. It is by far the smallest of our bedrooms. It has a weird floorplan. And it’s also apparently haunted. Yup. You read that right.

Here is a floorplan that is mostly to scale. Note the off-centre window and light. The weird little niche just inside the door. The pocket door that leads into our bedroom (which comes in handy as the switch for the second light is in our bedroom).

Office floorplan

When we scraped the ceiling, we uncovered evidence of earlier walls, and Matt came up with the best explanation I’ve heard so far to explain the odd layout.

It appears that at one time the room was divided roughly in two. Matt’s theory is that half the room served as a large pantry for the kitchen, and the other half was a big walk-in closet off the bedroom. (You can kind of see the lines on the ceiling around the dangling light bulb).

Evidence of old walls on the ceiling

The closet theory explains why there are three full-length mirrors in this one little room–even the pocket door is mirrored. As dated as the mirrors are, they come in handy when I’m sewing and want to see how things fit, so they will be staying.

My office before

I’m doing my best to make the layout work for me. You may remember that our long term plan is for this room to become the foyer when we relocate the front door to the house. So I don’t want to do any major renovations that will be ripped out down the road.

I think I’ve come up with a furniture plan that will work.

Office furniture layout

I figured out how to make use of the tiny niche a few years ago when I set it up as a command centre with a tall narrow dresser, bulletin board and our calendar.

Beside the pocket door, there’s a track light on the ceiling. This makes that wall the best location for my desk.

I bought the china cabinet specifically because it was the exact dimensions to fit on the wide side of the window. The cabinet could also go just inside the door (where our filing cabinet is currently located). However, I feel like a tall piece of furniture might crowd the entryway too much.

I’m hoping that all of the changes will exorcise the ghost in the office.

When we were scraping the ceiling, the room got a little humid. The words “Raven Room” appeared in the steam on the window.

Raven room

So very, very odd.

Do you have an odd room at your house? How about a haunted room? How would you lay out the furniture in this room?

Makeover plans for my office

Our first project of the year is well underway, so it’s past time for me to catch you up. As I mentioned in my Home Goals 2017 last week, we are redoing the last of our three bedrooms, the room that is going to be my office.

My office before

This room has been my office since we moved here, but it’s never been set up as a functional office. It had a filing cabinet to hold our paperwork and a desk (left by the previous owners), which held my sewing machine. That was pretty much it.

Along the way, we added furniture that we weren’t using elsewhere, which gave me a place to store magazines and patterns. But most of my fabric, office supplies and knickknacks were still in the cardboard boxes that I’d packed when we moved from our first house–almost five years ago.

Having a pretty, well-organized, high-functioning room where I can craft, sew, write and work is important to me, and we’re finally going to make it happen.

Here is some of my inspiration.

And here’s our to-do list and an update on where we’re at so far.

  • Scrape ceiling – It has become a tradition that over the Christmas holidays we scrape a ceiling. This year was no different.
  • Paint ceiling, trim and walls – With the ceiling scraped, everything could be painted. The trim, ceiling and closet look so fresh with a coat of white and the walls are a fun dark turquoise.
  • Add new shelf to closet – I bought the shelf on Friday. I just need to trim it to fit.
  • Redo china cabinet and desk – I’ve stripped and restained the tops of the desk and the cabinet and primed the bases. I’m hoping to continue painting this week.
  • Reupholster slipper chair – The legs of the chair got a beautiful dark stain while I was doing the desk and the cabinet. I have the fabric. I need some foam. Then I’ll teach myself upholstery.
  • Reupholster ironing board – Because a primary activity of the office is sewing, I have an ironing board in the room. It needs a new cover to match the new office.
  • Unpack all of my boxes and decorate – Oh I am so excited to do this finally.

I don’t have any pretty photos yet. Here are some progress shots.

First up, the guest room, which is holding all of the things that used to be in my office. Oy vey. My poor pretty guest room. I hope no one wants to come visit for a little while.

Clutter in the guest room

Matt doing the messy work of scraping the ceiling.

Matt scraping the stippled ceiling

Where we’re at as of yesterday afternoon. Beautiful smooth ceiling, bright trim, oh so purty turquoise walls… and a makeshift paint shop.

Progress in the office

I do not like refinishing furniture indoors, but it’s a necessity in January in Canada. My freshly painted walls were so dusty, and I don’t have enough space to lay out all of the pieces that need painted. Argh. This stage is going to take a little while, but I’m feeling good about the progress we’ve made so far.

What do you think about the progress and plans? Do you have an office? What do you use your office for? How do you balance the pretty and the function in a work space?

A walk by the creek

Creek flowing over rocks

Care to join me on an evening walk along the creek?

We’ll start at the front of the property where water from farms to the north of us drains onto our land. It flows along the border of the front field, cuts under the driveway and then picks up another stream. From here it snakes along the perimeter of the corner field following the edge of our pine forest.

Creek

Partway along, we come to an old bridge that once connected the field to the forest. I discovered this bridge on one of my first rambles in the early months of owning the farm. I remember how excited I was, although I have yet to attempt to cross the bridge.

Dilapidated bridge

Some day, we may repair the bridge and establish some pathways through the forest.

Dilapidated bridge

As we near the mouth of the pond, the creek drops, swirling under trees, around boulders and over rocks.

Creek flowing over rocks

Unusual weather for January in Canada–five degrees and day after day of rain this week–has the water high and flowing fast, yet ice still coats the grass along the shore.


Fast flowing water in the creek

We end our ramble at the pond where the ice is melting in this January thaw.

Pond during a January thaw

Just one small problem, we’re on the wrong side of the creek and the bridge is out. Be careful getting home. 🙂

Have a great weekend everyone. May I suggest you go for a ramble?

Building a garage in a barn

Have I mentioned how much I want a garage? So far this week we’ve started the days with heavy frost that took forever to scrape off the windshield and freezing rain that coated everything in ice. More rain is forecast this week, which means I will get wet coming and going from my car to the house.

Sarah in Illinois recently built a garage with a bit of help from family. She is here today to share the process and an extra special feature that makes it even more useful.

About a year ago, on a Friday night, Steve and I were laying underneath my SUV in our freezing cold garage. A few days earlier my transmission had went out, and since Steve has some experience as a mechanic and has no fear of tearing things apart and putting them back together, we decided to save some money by removing it and reinstalling a used transmission by ourselves.

Except things weren’t going well.

We were tired, sore, cold and frustrated. I drew the line when I laid my head down in a puddle of transmission fluid. Steve and I looked at each other, and he said, “I will own a car lift.” At the time I agreed but knew that lifts were really expensive, and we really didn’t have a good place to install one.

A couple months went by and a customer ordered a new car lift from the shop where I work. It is not often that we sell one, and I got to talking to him about his old lift. He said that it still worked. It just wasn’t working for him anymore. I grabbed my phone and called Steve and gave him the customer’s phone number. Two days later we owned a used car lift.

Now for the important part. Where the heck were we going to put it?

We have a large pole barn on our property, but it has a dirt and gravel floor. In one corner the previous owner had built a woodshop with a small concrete pad. We decided to extend this pad and basically make a garage inside a small part of the pole barn.

This picture is showing the woodshop inside the pole barn with two walls removed.

For several weeks we spent evenings and weekends tearing out two of the old walls of the woodshop and framing up for a concrete pad. When we had the framing ready Steve, my Dad and brother took a day off work and poured and finished the pad.

I am so thankful that my family is so helpful and knowledgeable with projects like that. They ended up saving us quite a bit of money.

Once the pad was cured, it was time to build the new walls.

We borrowed some scaffolding to help with the new tall walls and to install some insulation board on the ceiling.

Steve and I believe that having good insulation is very important in any building project. What we have chosen to put on the ceiling is not ideal, but we have limited options with a tin roof. We seriously considered spray-on foam insulation, and honestly it’s probably what we should have done. But right now we are settling with what we have.

To install the vertical supports of the lift, Steve and my dad used concrete anchor bolts. They drilled holes using a hammer drill then inserted the sleeve and bolt into the hole. When the bolt was tightened it expanded to hold tight to the concrete.

One of the final steps was to install an overhead door. The pole barn has huge sliding doors on two sides, but this wasn’t handy for the new garage. So once again family came in very useful. My dad is known for not throwing things away in case he needs it someday. Well, it worked out for us. He had all of the parts and pieces for an overhead door.

We had to frame in a smaller opening, and then Steve, my Dad and my stepson took some of the tin off of the sliding door and covered the new smaller opening.

This week Steve has been insulating the walls. We still want to add another overhead door and of course he has to fill it with all of his tools and supplies. But basically we are going to call this project done.

And I have one happy hubby!

Great job, Sarah and family. I love that you did this all yourselves. Your family sounds very helpful and very handy. How great that your Dad had the door already! It looks like a great space for you and Steve. That lift is pretty cool.

Home Goals 2017

Alright. It’s officially time to start looking ahead. Time to share my Home Goals 2017.

Unusually, I’ve not been thinking about these for the past few months. Some of them have solidified over the last few weeks–one of them even started just before the end of last year. Some of them came together just as I was writing this post.

I think we’re getting to the stage where more things are done around the house–and the things that are yet to come are biggies. As in so big we’re not ready to tackle them yet (although I really, really, really want a garage).

However, there’s still enough to keep us busy for another year. Here’s what’s on the list.

My office

Turquoise and brass file cabinet from DIY Mommy

Source: DIY Mommy

Ahhh. My office. Finally a room of my own (thank you Virginia Woolf–not an affiliate link). I don’t know as I can convey the monumentalness of this project–except by making up words. Five years ago we moved to the farm. Since that time, moving boxes have been stacked against the wall in my “office.” I want to unpack and truly have a functional office. Finishing off my office will finish off another milestone for the house: the final bedroom.

The transformation is already underway. This is the project that Matt and I started right at the end of December–gotta keep up our holiday tradition of scraping a stippled ceiling.

Clean up the pond shore

Property clean up has been on my list every year. And every year I end up working on whatever spot shows up in front of me. This year I want to be a little more plannful. This year, I am cleaning up the pond shore–how’s that for an emphatic statement.

The pond is my favourite place on our whole 129 acres. And I haven’t been able to easily access the shore the whole time we’ve lived here. I’ve considered enlisting professional help, but I think if I put out a call, I should be able to find a few family members willing to wield chainsaws and weed eaters for a weekend.

Vegetable garden

The vegetable garden was our major project last year, and as a result I feel like we’re in very good shape to start this year’s growing season. However, there are a few things I’d like to add this year, like rhubarb, a second row of berries (maybe raspberries, maybe something else) and maybe some more grapes.

Most important, this year I am going to keep the weeds under control–another emphatic statement. I’m hoping a deep mulch will help me not spend my whole summer weeding.

Flower gardens

Last year our flower gardens were entirely neglected as the vegetable garden consumed all our time. This year I want to give them at least a little bit of attention.

I’ve dumped plants randomly in two beds at the front of the house, and they need a bit of organization. I’d like to add some more shade tolerant flowers to the turnaround.

I’m also planning to remove the flowerbeds at the back of the house (there are only so many hours in a day, and mowing is easier than weeding).

Basement

I’ve said it before. The basement has been hanging around long enough. This is the year we’re going to finish it once and for all–including fun art.

New barn cat

Ralph the barn cat

This one may be more of a farm goal than a home goal.

We have an outstanding barn cat in Ralph. So outstanding that we’d love for her to teach someone the wisdom of her ways. I’m not sure exactly how we’re going to go about finding her an apprentice, but we’re going to figure it out.

So there you have it. Six goals. Two inside, three outside, one alive. Some big, some small, one with a tail. Some easy, some tedious, some furry.

We’ll see how this goes.

Time to get started!

Do you have any goals for this year? What would you like to accomplish at your house? Any tips for introducing a new barn cat? Anyone want to help clear the shore at the pond?

Staying in

Cozy night in the living room in front of the fireplace

Our living room is definitely a work in progress. I’ve shared bits and pieces, like our bookshelves, the sideboard turned sofa table with its display of family photos, the TV stand, the bar cart turned side table and of course our fieldstone fireplace.

Even though there are still things on my to-do list (just don’t look up to the stippled ceiling or giant green ceiling fan, okay?) we love our living room. In fact, this is the room we use the most at the farm.

We are home bodies and prefer to stay in most of the time. Over the holidays, the mattress company Leesa reached out to me and asked me to share the elements that make up my perfect night in. Since this topic is such a fit for me, I wanted to participate.

Most evenings, we come home from work, light a fire and then we have dinner in the living room. Since finishing the fireplace two years ago, this room has become the place we spend our winter evenings.

For me, a wood burning fire is essential to a winter night in. Building this fieldstone fireplace was a dream that I had for years, and it added such country character to our home.

While a brown couch is not the most popular decor choice, it’s a very livable piece of furniture. This is the first piece of furniture we bought when we moved into our first house, and it’s almost 10 years old and still comfortable. We sit, watch TV, eat, sleep and work on this couch–and, yes, doggies are welcome too.

Baxter snuggling on the couch

Obviously, the throws (or as I grew up calling them, afghans) are functional and not just decorative, especially on a cold winter night. Leesa has a blanket to go with their mattresses. It looks super cozy and warm–a great option for staying in, whether you’re snuggling on the couch or dozing in bed.

For me, I’m all about incorporating personal and family pieces in my decor and these knitted afghans are completely that. My Grandma, who taught me how to knit, made the one draped over the back of the couch, and I knit the one with the flowers.

Rounding out my perfect night in are my favourite two-legged guy, a few candles, my favourite fizzy drink, a salty snack and some good TV–we love Ken Burns’ documentaries and are making our way through Baseball (not an affiliate link) right now–it’s so good.

Since moving to the farm, we’d rather be here than anywhere else. Having a living room that’s truly for living is the perfect encouragement for staying in on cozy winter nights.

Are you a home body or do you like to go out on the town? What makes a perfect night in for you? Any other documentary fans out there? Do you have any afghans at your house?

Disclosure: I’m not receiving product or financial compensation from Leesa for this post. This is simply a topic that resonated with me, and I liked the idea of being part of this series with Leesa. Learn more about the Leesa mattress