Update: See how our counters have held up after one year and after four years.
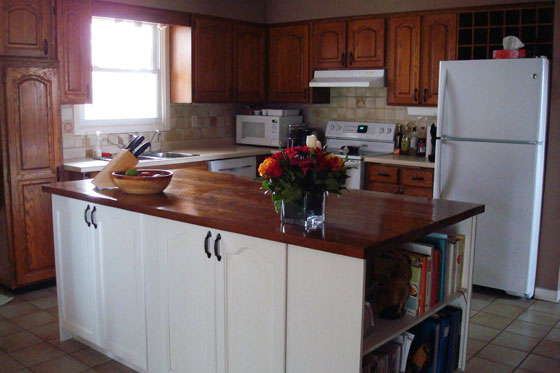
With our new kitchen island, we decided to do an inside out colour scheme. By that I mean that we reversed the existing finishes that were already in the kitchen.
Around the perimeter of the kitchen, we kept the natural wood cabinets and the light countertop. On the new island that we added in the middle, we chose white cabinets with a wood countertop.

I wanted to keep the wood tones consistent, so when it came to finishing our DIY wood countertop, the usual methods–wax, oil–were out, as they would have left the countertop too light in colour. I sampled lots of stain until I found one that matched the existing cabinets as closely as possible–Early American from Minwax.
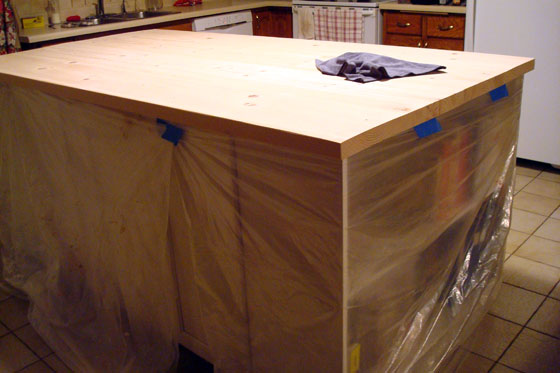
To prepare to stain the countertop, I wrapped the island in plastic drop cloths to protect our nice white cabinets and went over the wood with a tack cloth to pick up any dust and bits that might interfere with the finish.

For staining, I used the standard technique of brush it on, let it sit, wipe it off.

After letting the stain cure, it was on to the waterproofing stage. Given that I was working on a countertop, I wanted something very durable and of course food safe. I chose to go with Waterlox after reading positive reviews online.
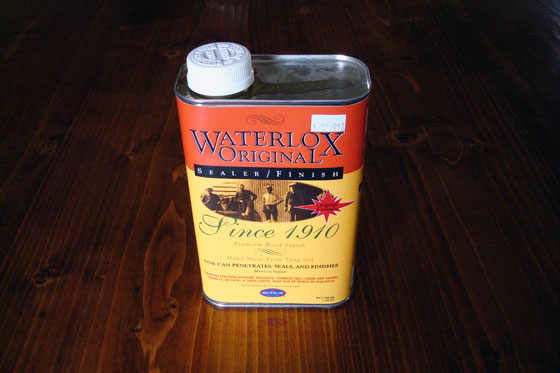
I followed their very detailed how-to guide on their web site to make sure I got the finish I was looking for. Waterlox was pretty easy to use.
I did four coats, brushing it on liberally with a natural bristle brush and letting it dry for 24 hours between each application.
Here’s some of the pros, cons and lessons learned.
First, Waterlox stinks when it’s wet. After the first coat, we developed a routine of putting the Waterlox on right before going to bed. We opened the windows, turned on fans, switched off the heat (since we had windows open) and closed the bedroom door. Given that it was March, it wasn’t necessarily the best weather to have windows open, but it was necessary both for the odor and for the cross ventilation needed to dry and cure the finish. The worst of the odor did ease after a couple of hours, thankfully.
Second, sanding between coats is not recommended with Waterlox. Instead, the guide tells you to wipe down the countertop with mineral oil before each coat to get rid of any dust. I did this, but I still feel the finish isn’t quite as smooth as I would like. I’m used to using Varathane where I sand between each coat and get a super smooth finish. The Waterlox guide recommended using a very fine steel wool between the second-to-last and last coat of finish to sand out any rough spots, which I did, but it’s still not perfectly smooth.
Third, the finished surface is very shiny. I used Waterlox Original Sealer/Finish, which is recommended for the first few coats (or all coats, if you choose) and is listed as having a medium sheen. A satin finish is available, but honestly I was too cheap to buy another can, so I did all four coats with the Original.

After the final coat of Waterlox, we let the island top cure for a full week without putting anything on it.
Now that we’re using the island, the finish seems to be both waterproof and durable.
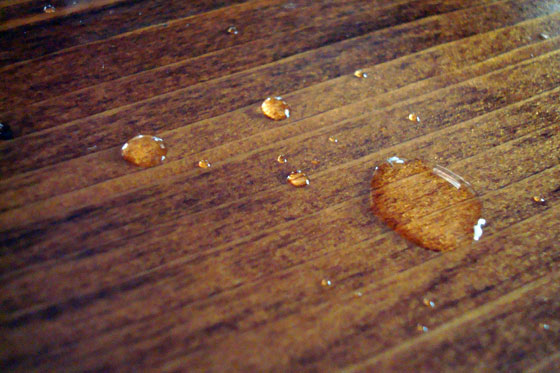
Given that it is a wood counter, we use a cutting board if we’re chopping and cork pads for any hot dishes. However, there are still occasions to put the finish to the test. If we spill (which of course never happens), liquids bead up on top of the surface. When we slide dishes across the counter, we don’t have to worry about scratching the finish. The wood wipes down really easily and looks fresh.
Finishing our homemade wooden countertop was a question of both form and function. I wanted to match the wood tones we had in the kitchen, and I also needed it to stand up to actual kitchen prep work. Done and done.
Update: See how our counters have held up after one year and after four years.