Last post I shared plans for Ellie’s playroom makeover. Today, I’m back with an update. Thanks to March Break, we’ve made really good progress.
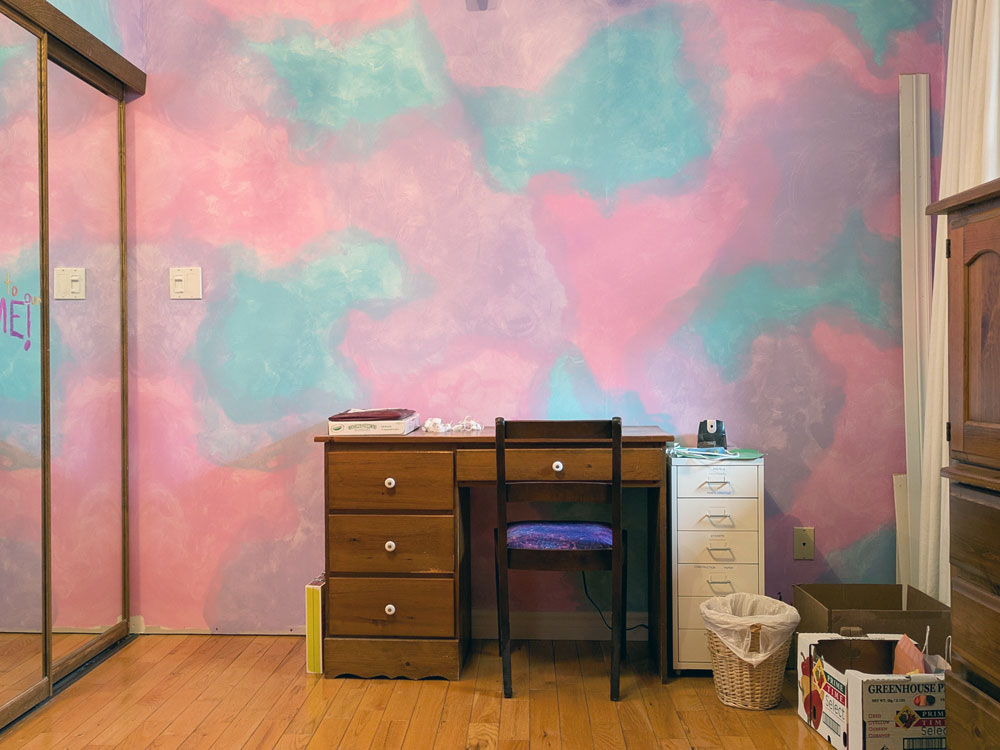
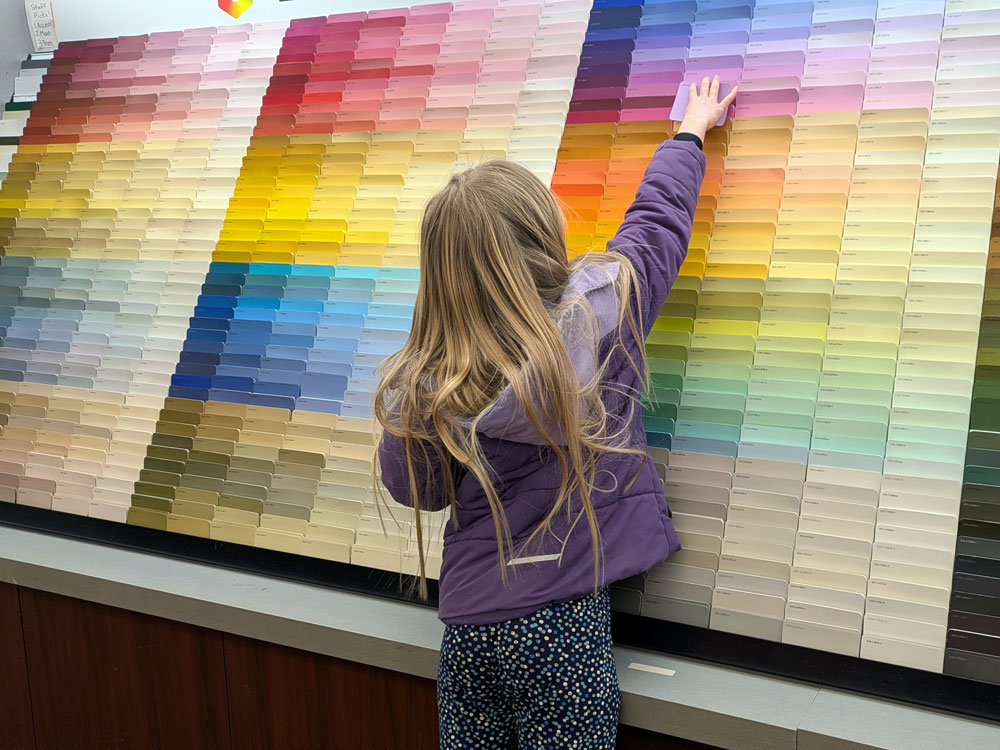
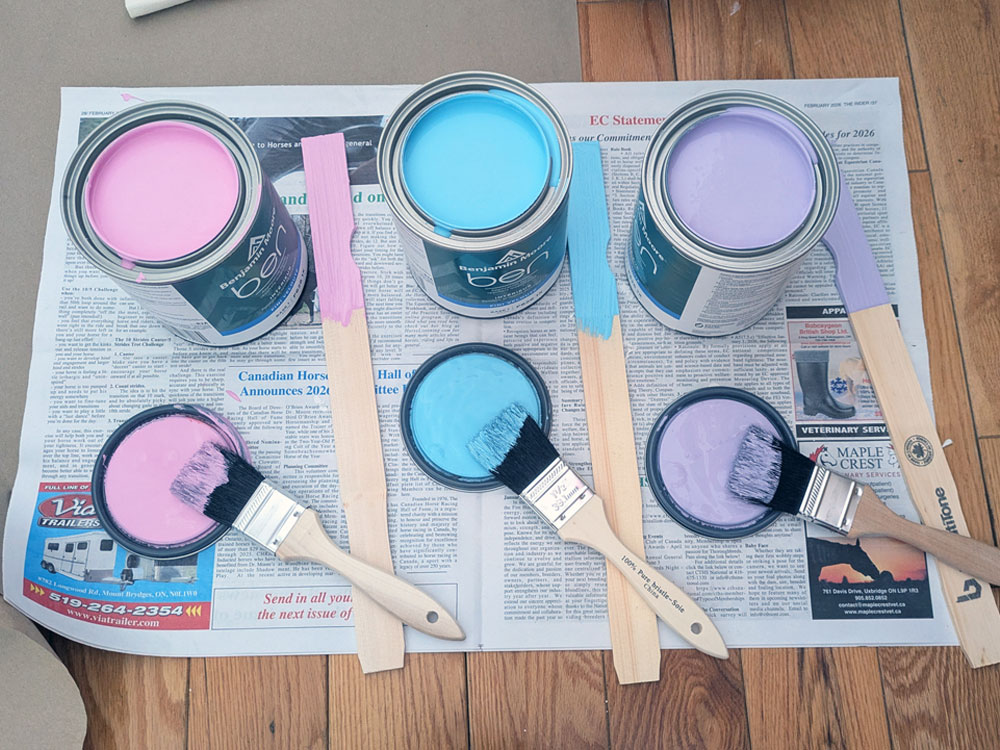
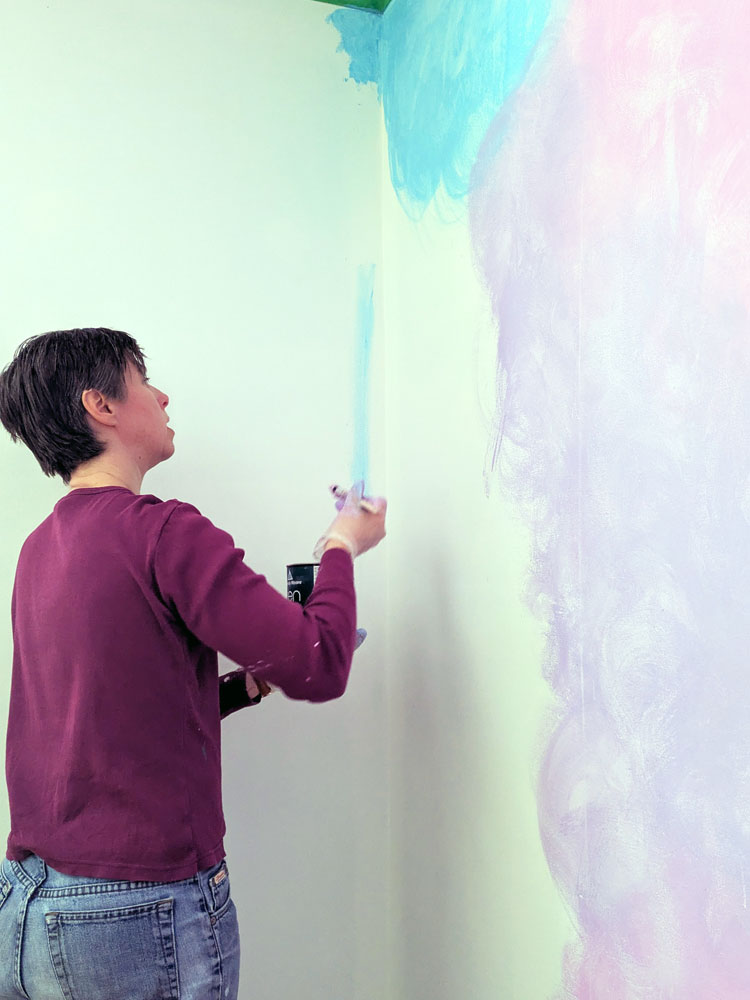
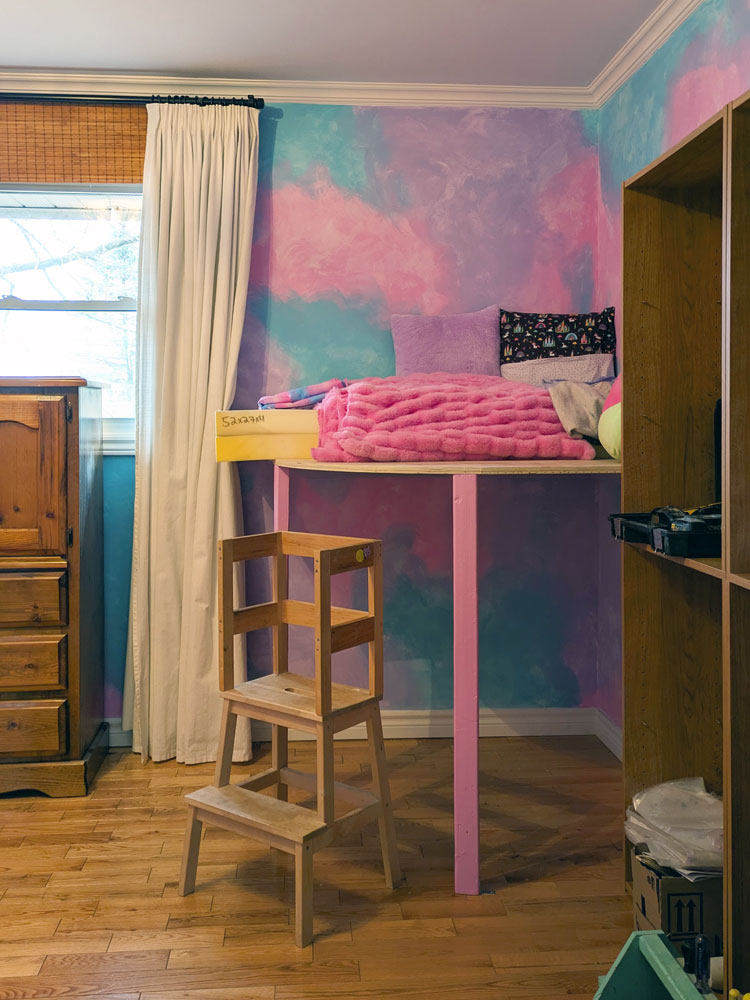
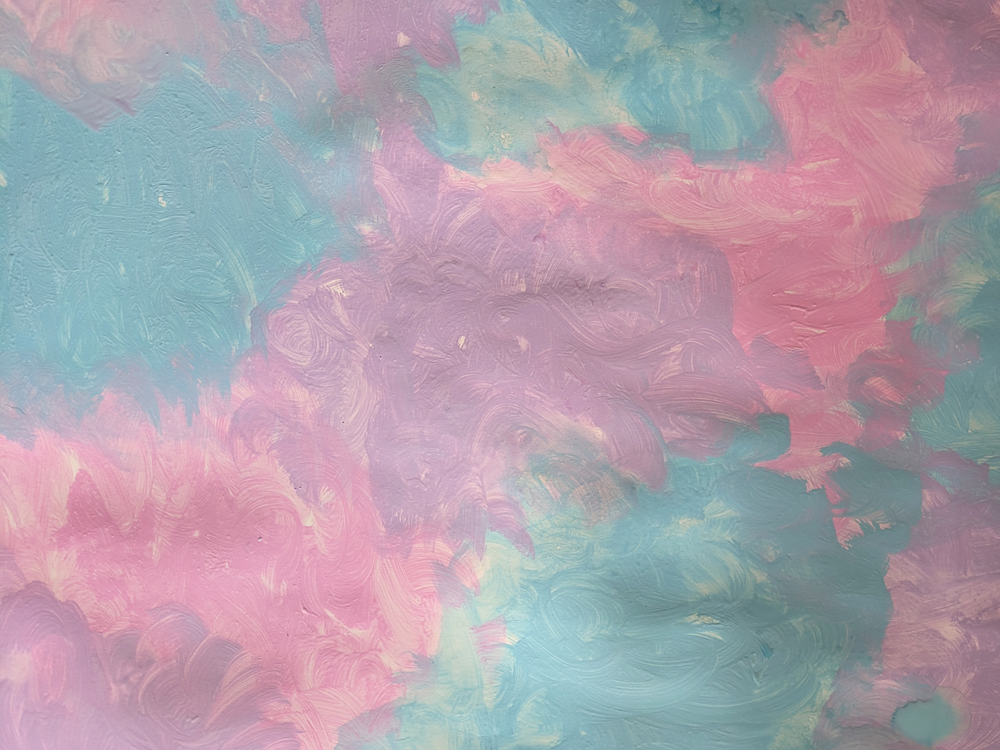
The biggest milestone is paint. Look at these walls. Ellie couldn’t decide what colour she wanted. Then she spotted a pink, purple and blue cloud-like shoebox and said, “If I could paint the walls like that, that’s what I want.” We took a look for wallpaper, sought advice from staff at a couple of paint stores, searched for tutorials online, collected lots of paint chips, tested some samples and then went for it. She loves the result.
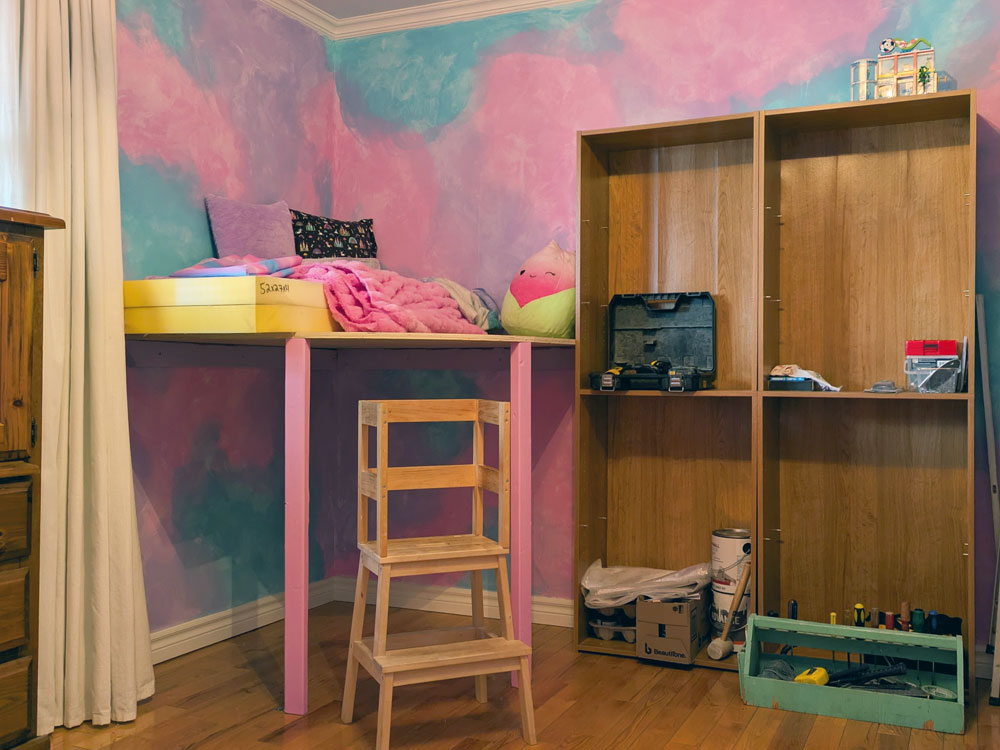
We also started building a cozy corner. High on the priority list for this room is a reading nook. Ellie loves an oversized chair, so we considered a few options and then decided to build a loft nook. This way, she still has a lot of floor space for other activities. The platform is in place and next up is cushions (and a taller ladder).
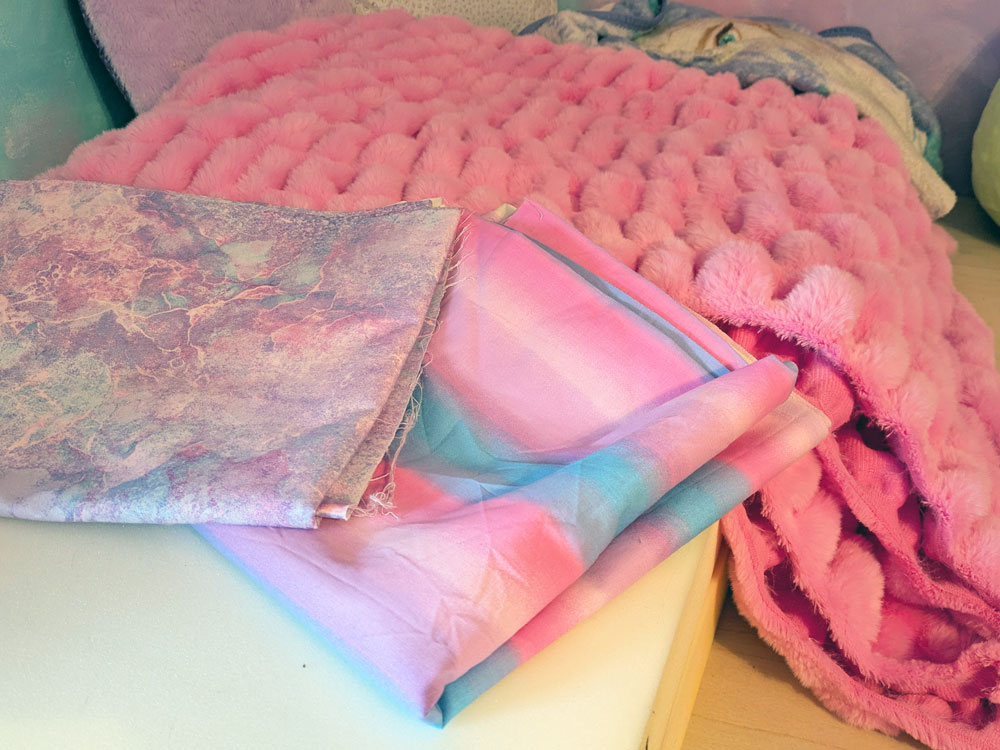
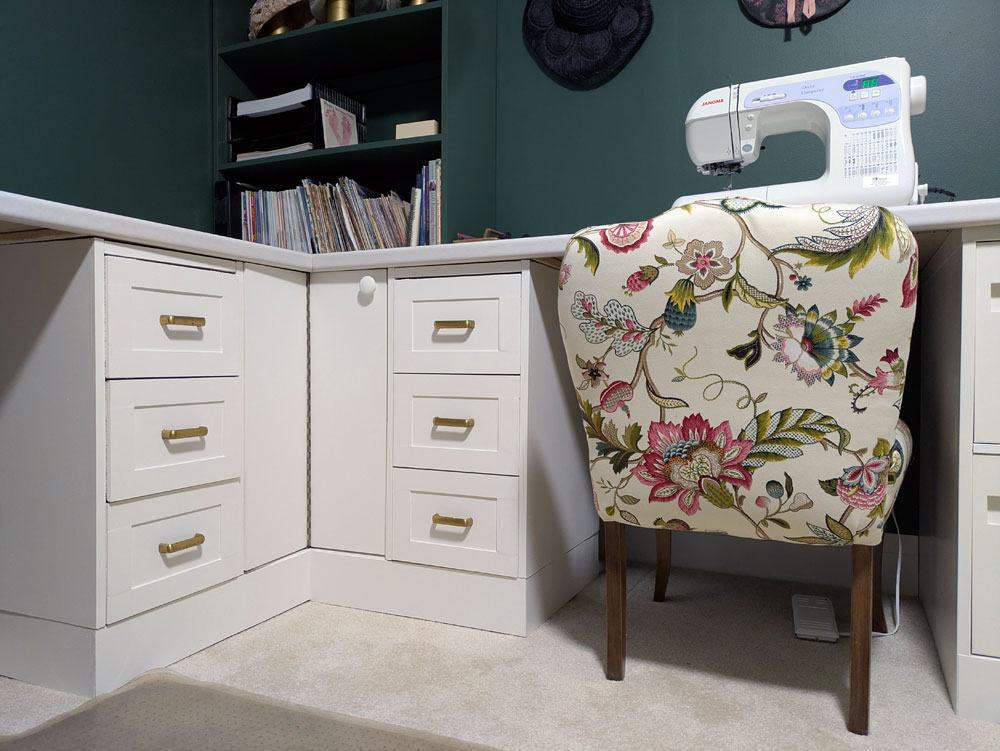
On the topic of cushions, while she was off for March Break we also went fabric shopping. Ellie picked out a bunch of beautiful fabrics that all coordinated really well with the walls and with each other. We’ve recovered the desk chair already. Other fabrics are going to make curtains and a cushion for the cozy corner and cover a large bulletin board that we’ll hang over her desk.
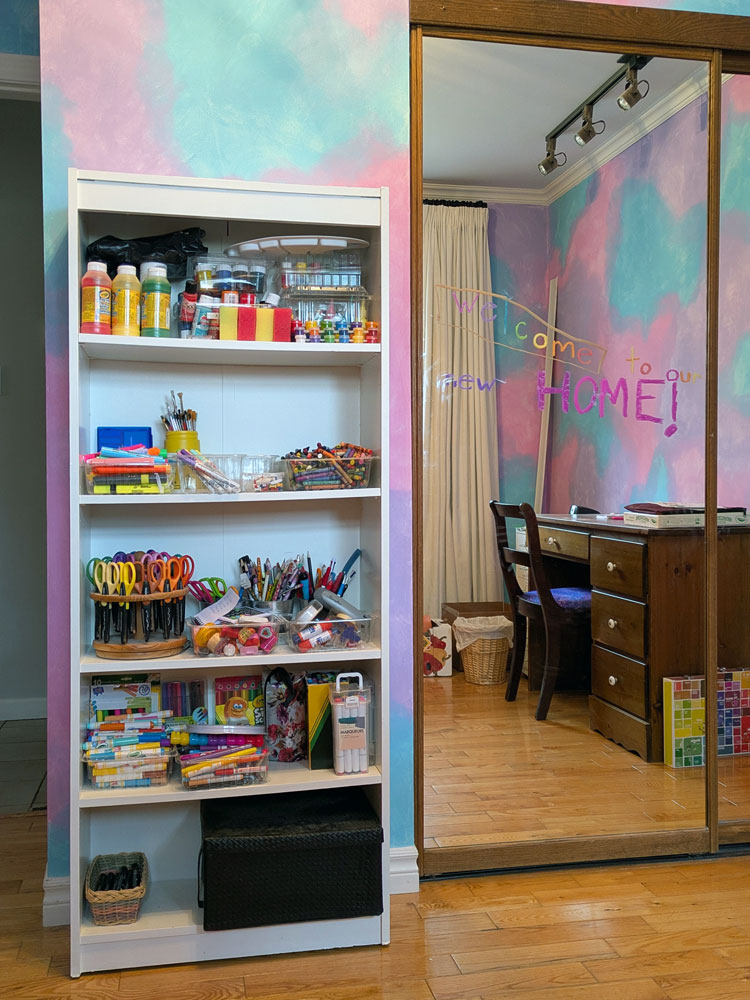
We’ve already started putting the room back together a little bit. Shelves and bins are set up in her closet, and we’ve loaded them up with crafts and dolls (note the welcome message on the mirror). The desk is in place, curtains are hung, and we reorganized her main craft shelf. The dress-up zone is back with hooks and a big basket of outfits. Matt’s nephew helped me carry in some bookshelves that we had stashed in the barn, so I’ll be redoing those to give Ellie more storage. Some pillows and blankets have been added to the cozy corner and we’ve already snuggled in with a few chapters of her current book.
This is turning out to be a really fun project. Everything is designed for Ellie and what she likes and what she does. We’re really enjoying working on it together and seeing it come to life.
Imagine you are a creative young child. Your mind is brimming with ideas for drawings, stories and crafts. You’re inspired by everything you encounter and want to try so many things.
Now imagine the perfect space to fulfill all of that imagination and creation.
That is my goal in making an amazing play space for Ellie.
This project has been on my wishlist for awhile, and we’re finally making it happen.
The space we’re using is Ellie’s old nursery. This room has gone through a few different phases.
When we first moved in, it held boxes that we hadn’t unpacked… for about five years. Then it became my office. Then Ellie’s nursery. Then a shared office-sewing-creating-playing space for both her and me… but with no real functional or decorative changes.
Now it’s time to make it Ellie’s own room again.
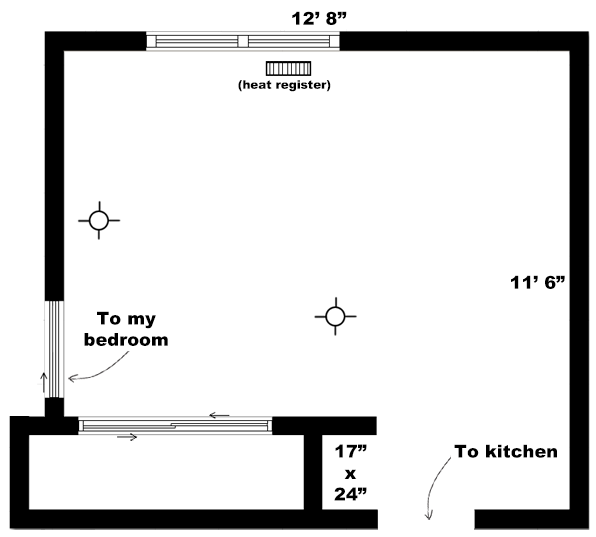
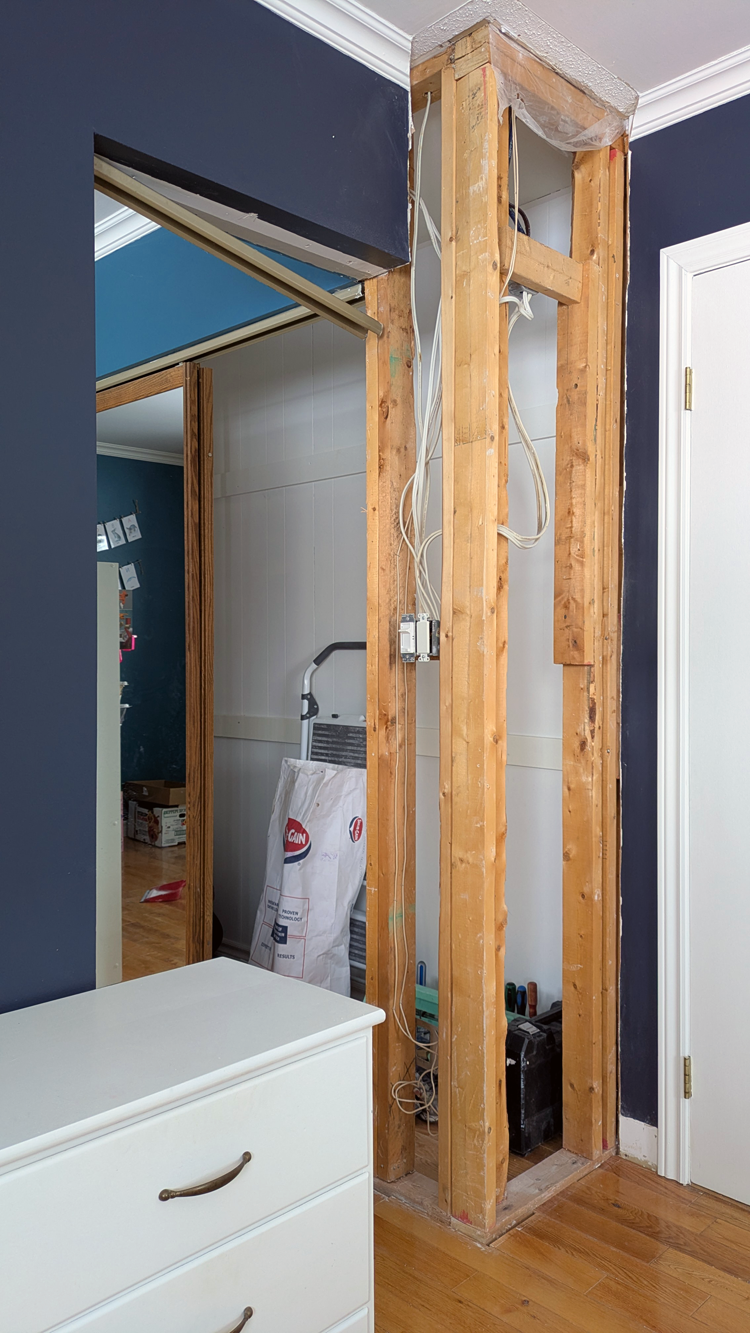
The first step was a bit of construction. Some readers may recall that there was a pocket door between this room and my bedroom. It was helpful when this room was Ellie’s nursery, but not necessary any longer. So I wanted to fill in the doorway. Normally this would be straight forward, but I decided to make it more complicated. Beside the pocket door and behind the door to my bedroom, the wall bumped out by about one foot. If I was going to wall-in the doorway, I might as well straighten the rest of the wall at the same time. (The floorplan below might help to clarify my description.)
I removed the little bump out. This involved stripping the drywall, taking out the old studs, relocating some electrical, framing the new wall and hanging new drywall.
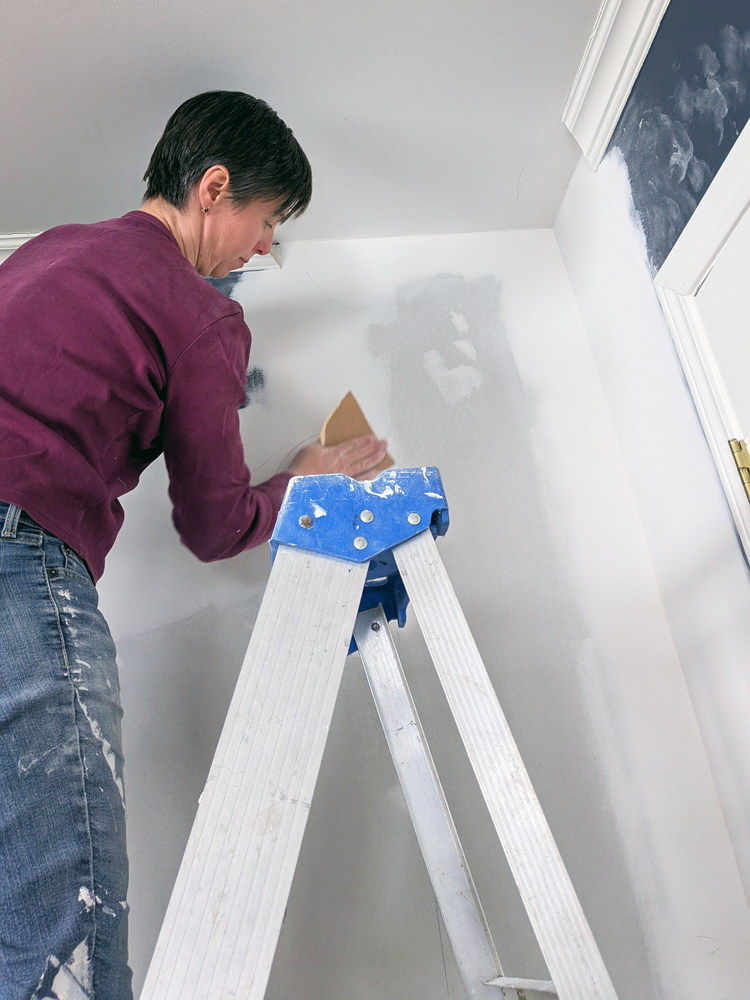
I finally finished the drywall on the weekend, so we are now ready to officially begin the playroom makeover.
First up is paint, and Ellie has picked such a fun design–pink, purple and blue water colour tie dye. We have plans for a little loft in one corner, which will serve as a cozy reading nook on top and a secret fort below. My DIY knock-off Eames hang-it-alls will return for a dress-up zone. Matt’s desk will remain to give her a good crafting and creating spot. And we’ll be adding lots of storage for all of her toys and supplies.
We’re both really excited by this project and are enjoying working on it together. I’m sure we’ll be even more excited with the result.
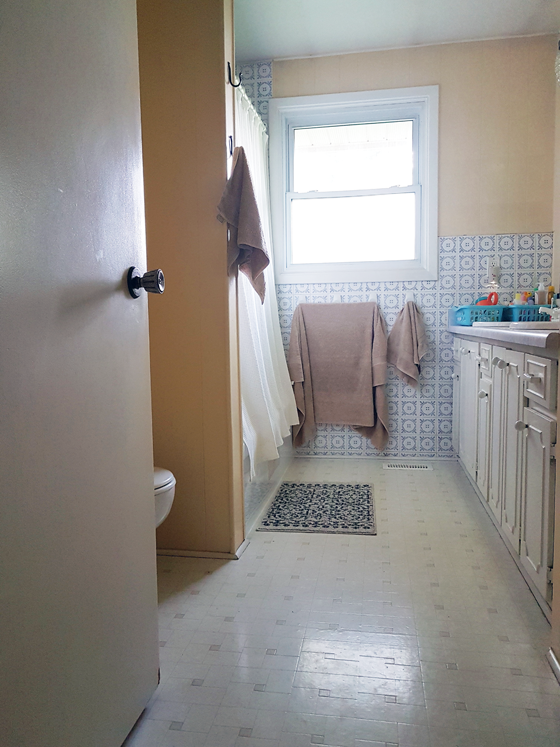
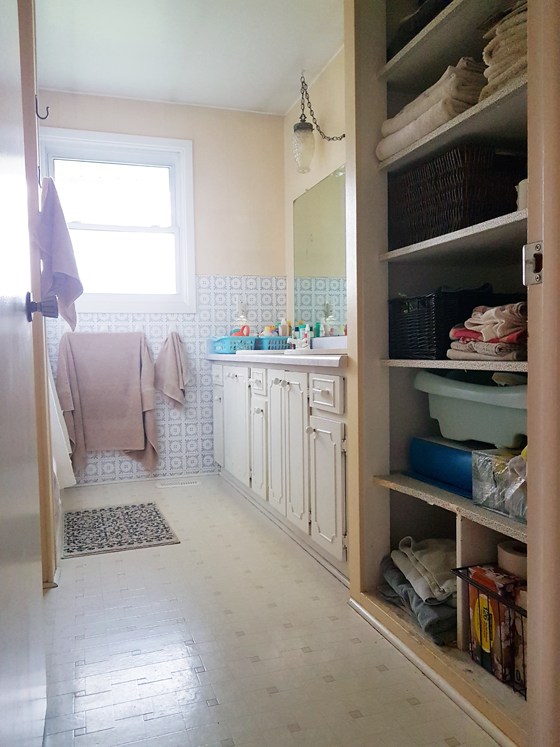
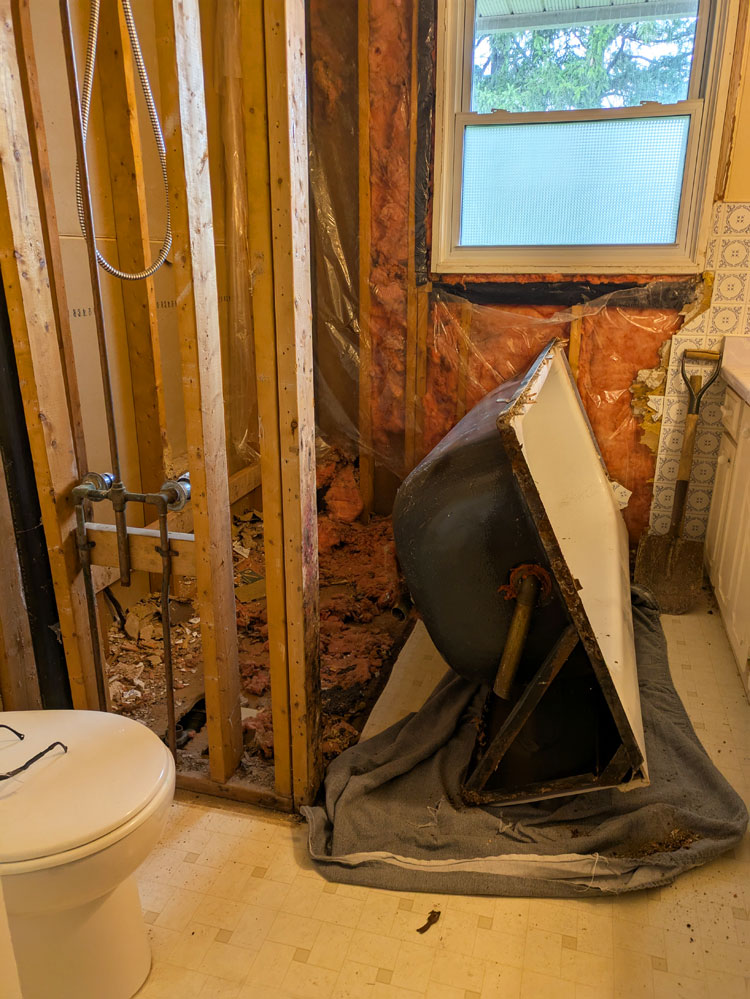
“A huge main bathroom with double sinks, a huge vanity and tons of storage. (The cracked sink, 1970s tile, painted paneling on the walls and Care-Bear-colour-palette on the counter top are examples of potential.)”
This is what I wrote about the main bathroom when I first introduced it on the blog thirteen and a half years ago.
I finally fulfilled that potential. The main bathroom renovation is done. And it is so beautiful.
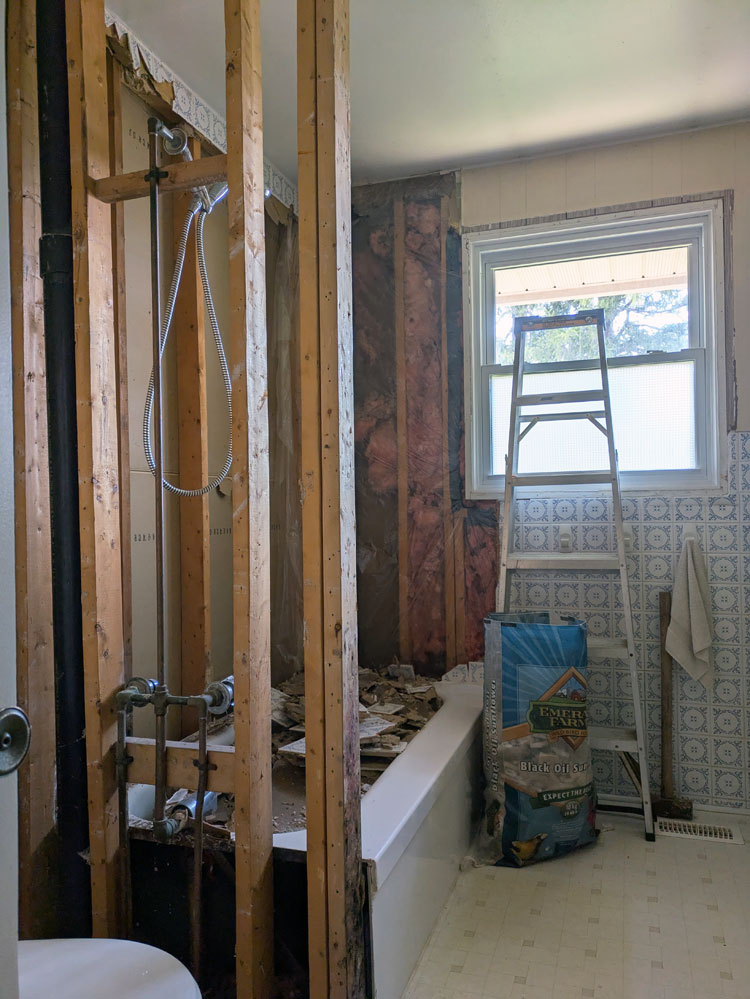
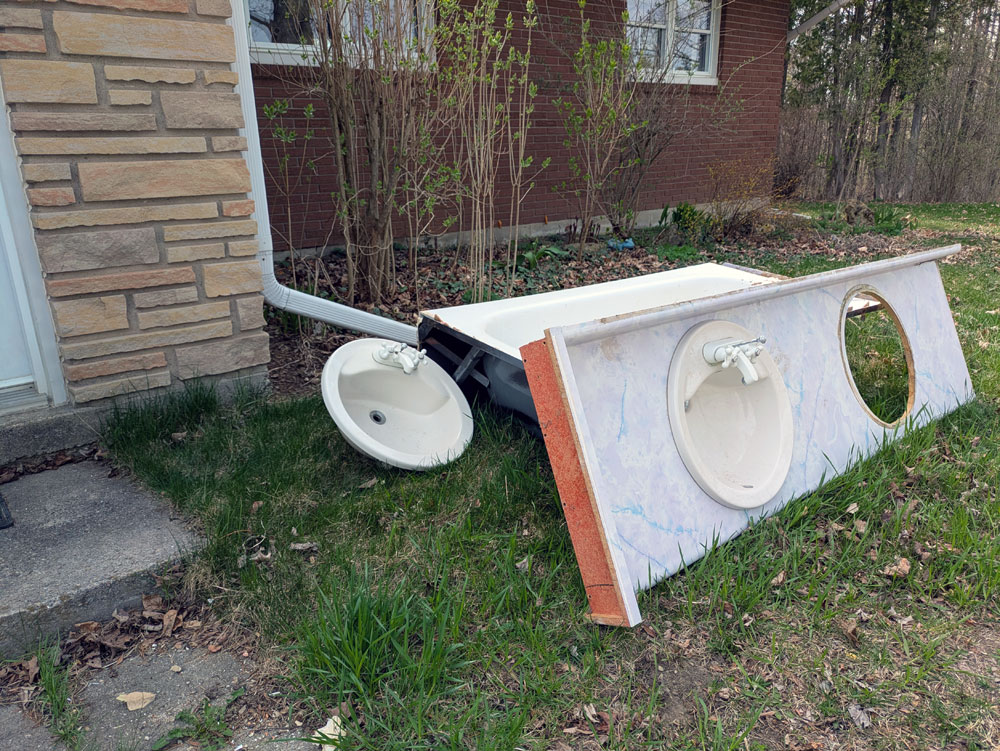
I took everything out–the fixtures, the two tubs, the fake paneling, drywall, insulation, Care-Bear counter top–and redid it all.
My philosophy for the past 13 years was if I was going to renovate, I wanted to do it completely and ensure the end product was exactly what I wanted.
It is.
I’m going to dive into all the details. But first, here are a few before and afters.
Bathroom before and after
All the details on our new country style bathroom
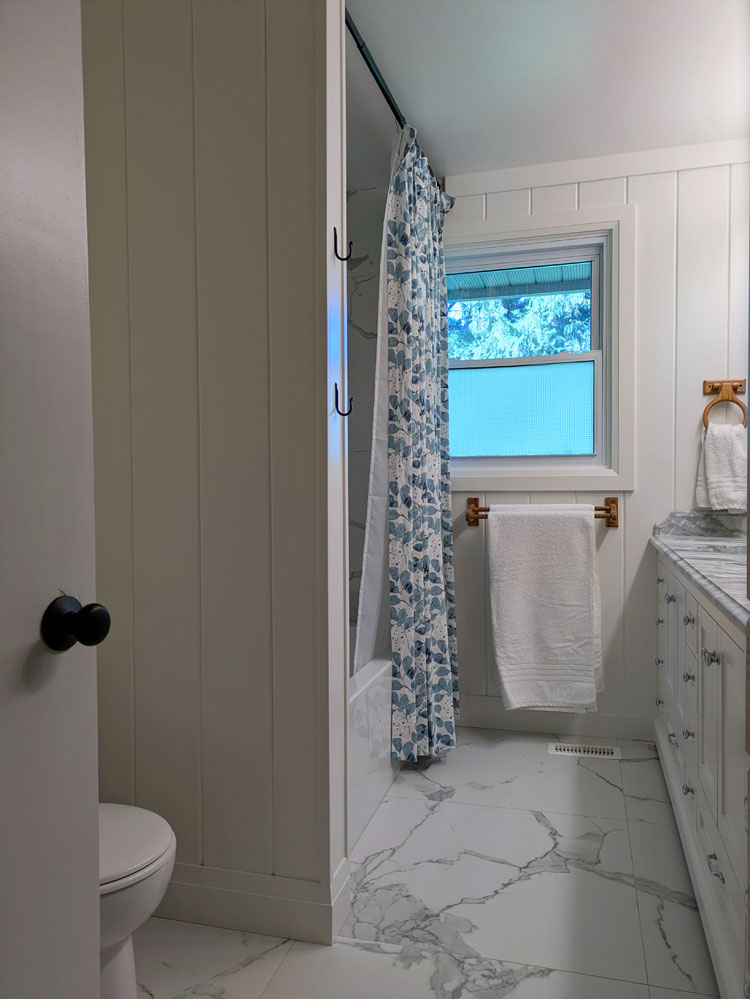
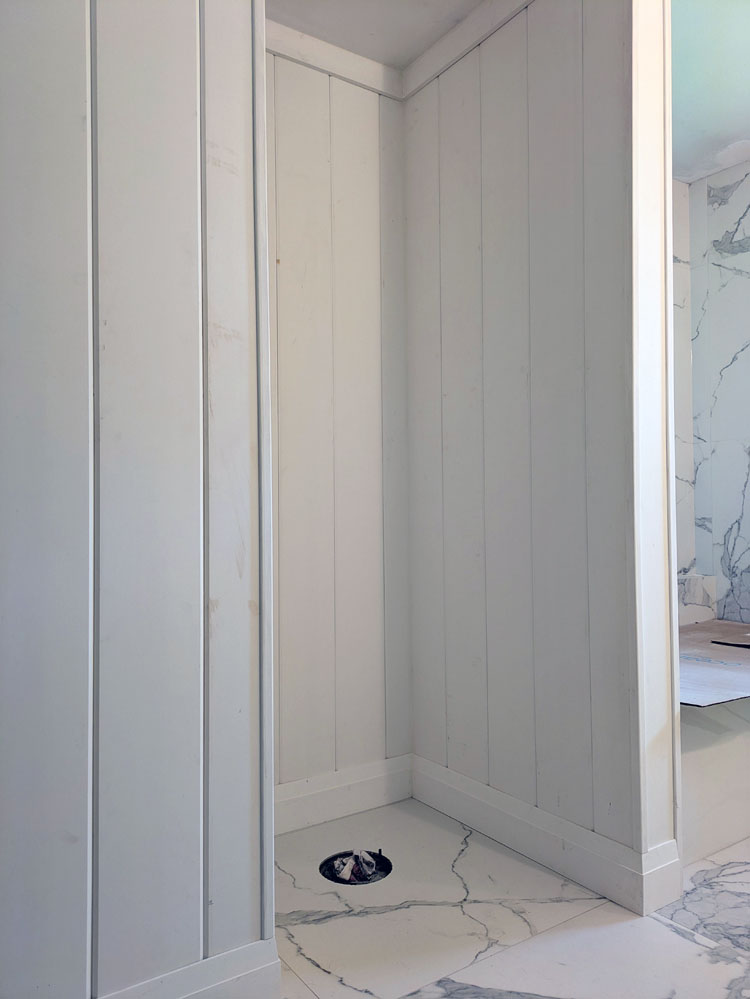
Behind the walls are new wiring, pipes and insulation. The walls themselves are beautiful pine V-groove paneling. A big upgrade from the fake sheets that were there before. With every renovation in this house, I’m trying to add more farmhouse style, and I felt like the paneling was a good way to do that in the bathroom.
I kept the walls white (Benjamin Moore Cloud White) to keep the look fresh. The white paint highlights the V-groove which gives a subtle texture and interest to the walls. Plus going with white allows the other parts of the bathroom to stand out.
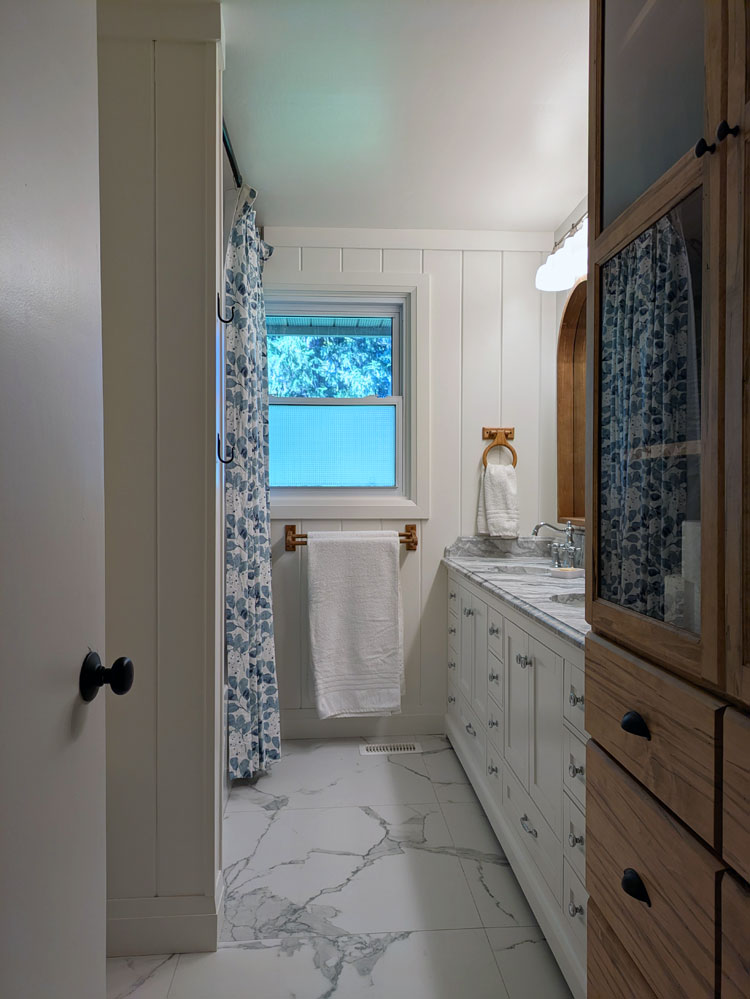
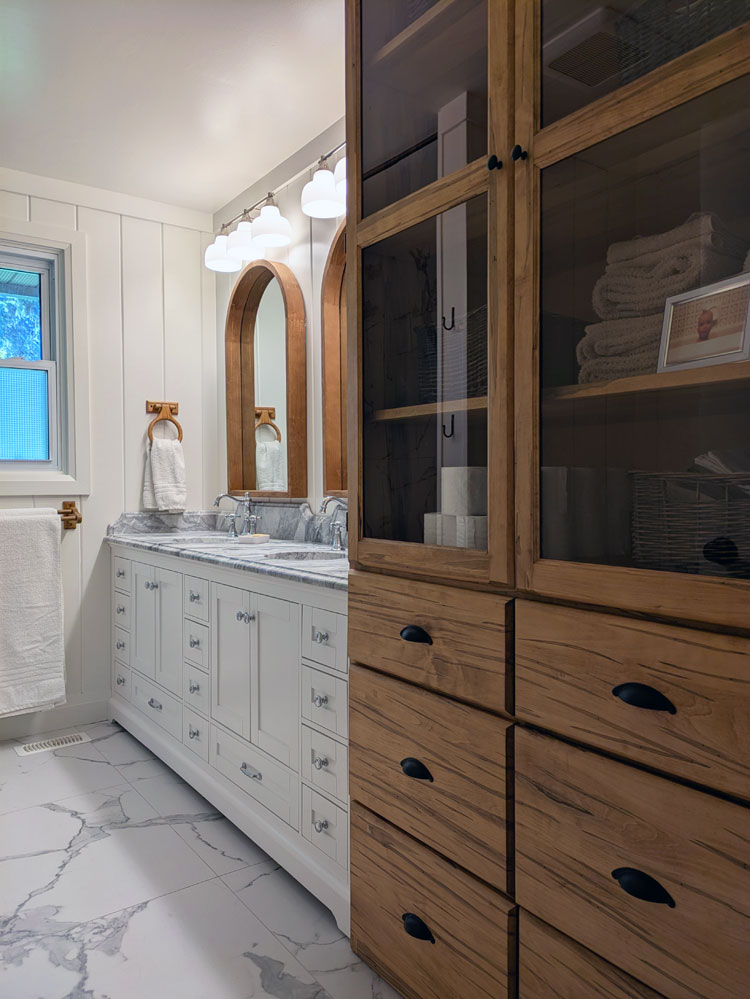
I can’t decide what stands out most to me. Is it the huge wood storage hutch? The sparkly taps? The beautiful marble? The veins of the tile? The leafy shower curtain?
I love how all of the elements of the bathroom work together so well.
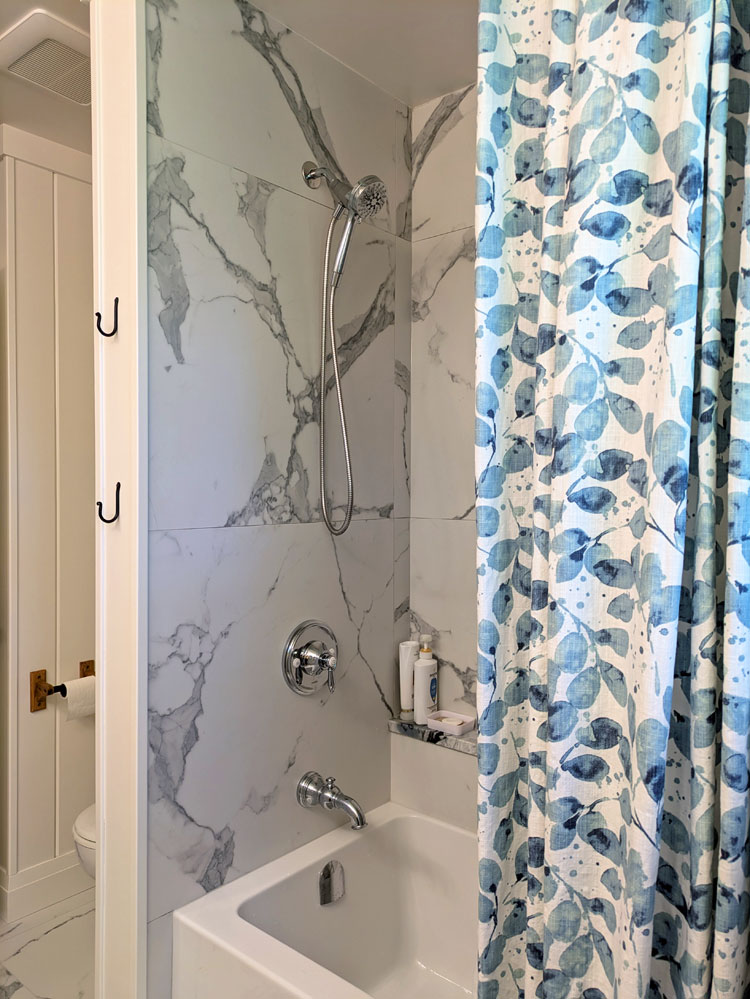
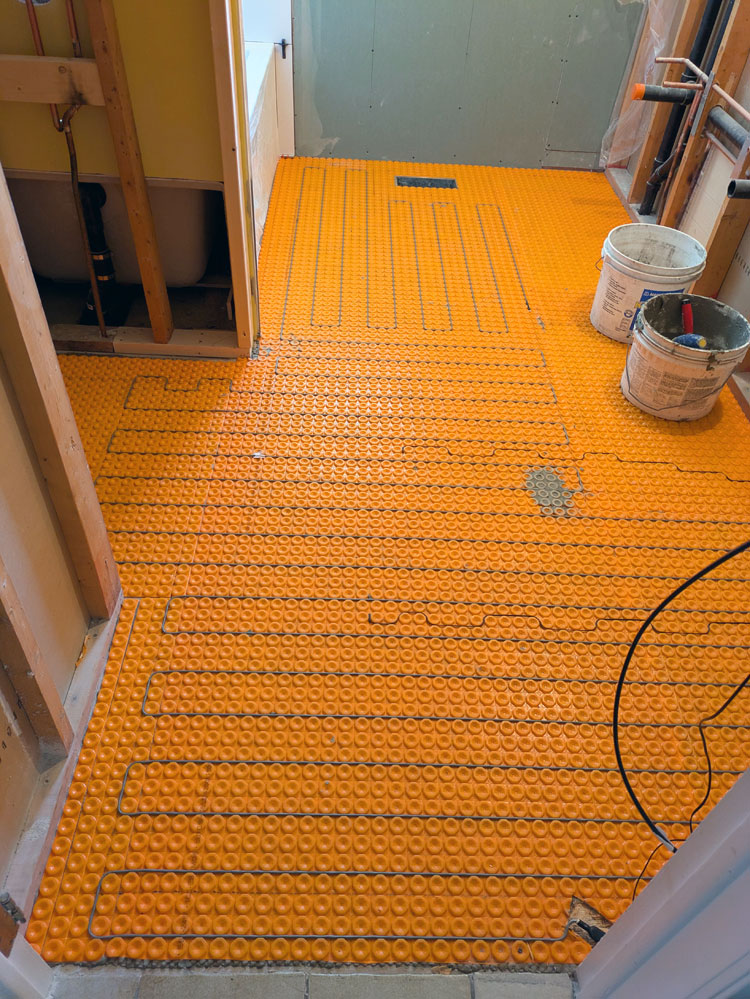
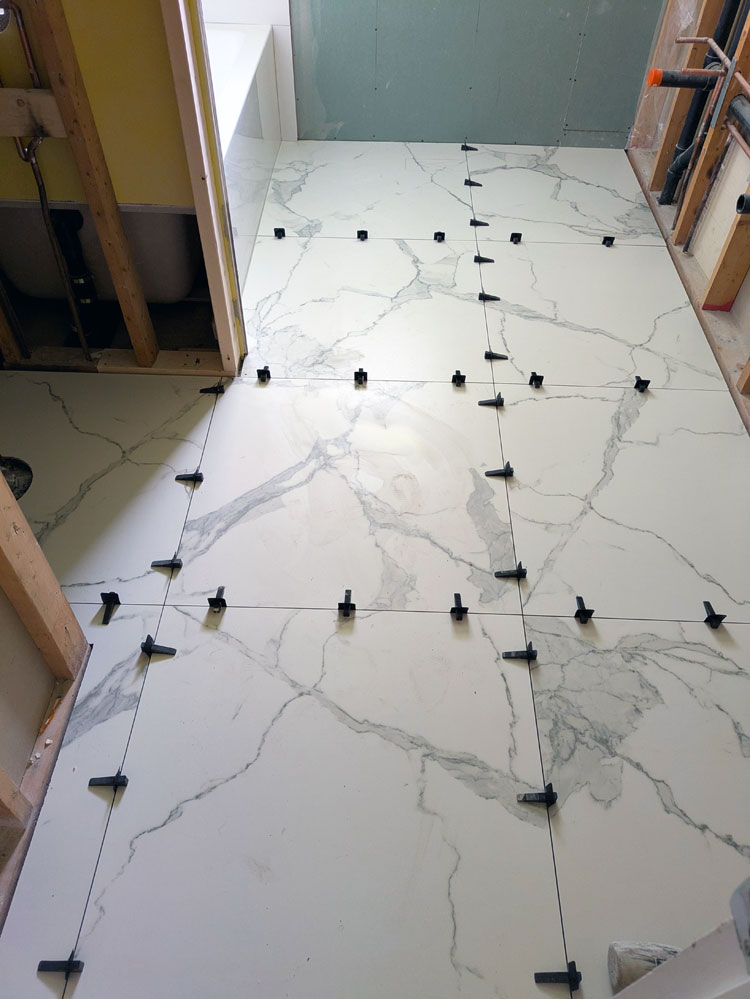
For the floor and tub walls, I chose very large tiles with strong veining. The large size is very practical for cleaning (minimal grout!). The finish is matte, which feels appropriate for the farm and contrasts with some of the other sparkly bits in the bathroom. The tiles themselves are also full of contrast with grey lines snaking and swirling over the warm white background. I also had in-floor heat installed, which makes the floor so comfortable.
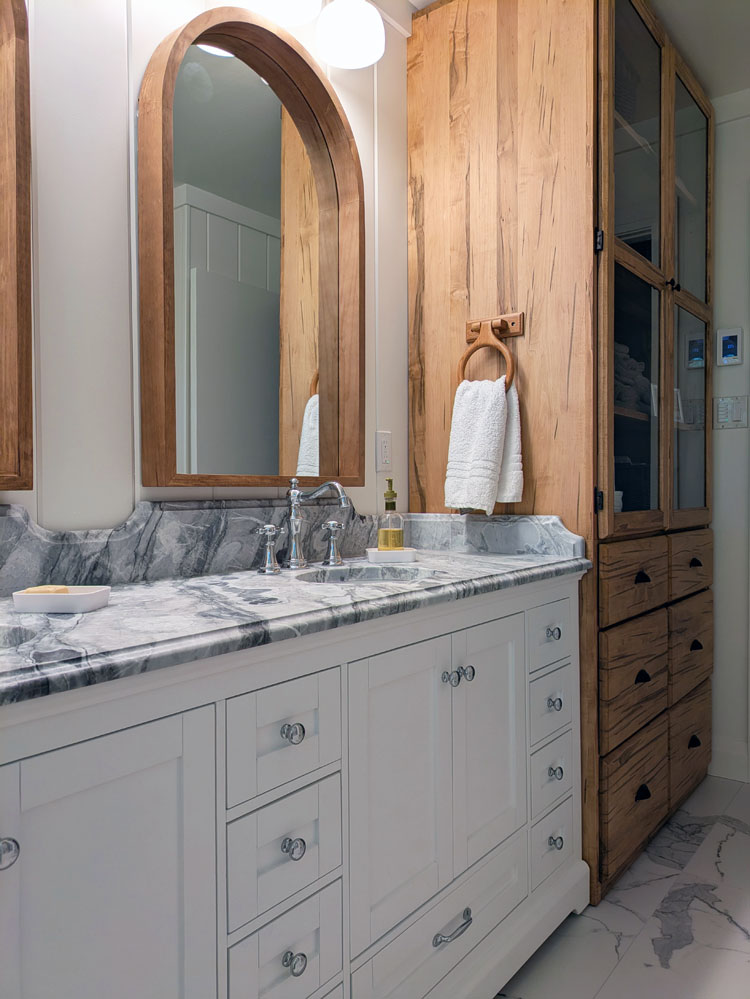
Accompanying the tiles is our marble on the shower ledge and countertop. This marble is a statement. It’s dark and light and dramatic. Adding to the drama is the beautiful ogee edge, the sculpted backsplash and sidesplashes and the leathered texture. I’m so glad I added these details.
I’m also glad I added the ledge all along the side of the tub. It was a simple adjustment to make at the construction stage. The ledge gives us so much storage and I much prefer the look over a niche. Bumping the tub out by 4 inches didn’t impact the function of the bathroom, and we still have plenty of space between the tub and vanity.
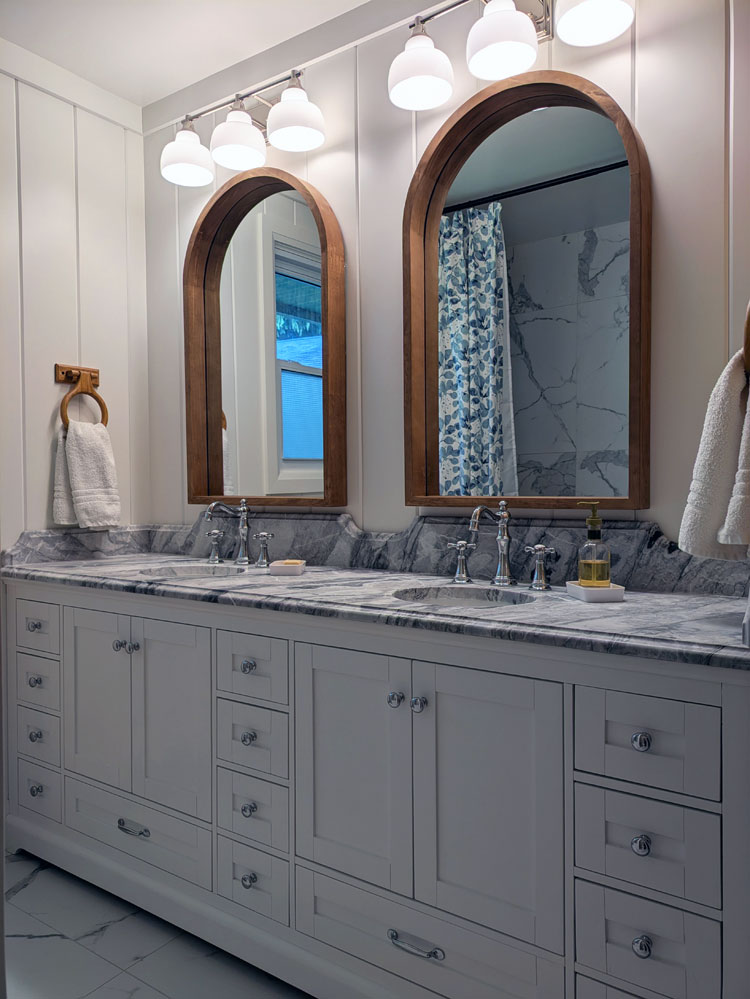
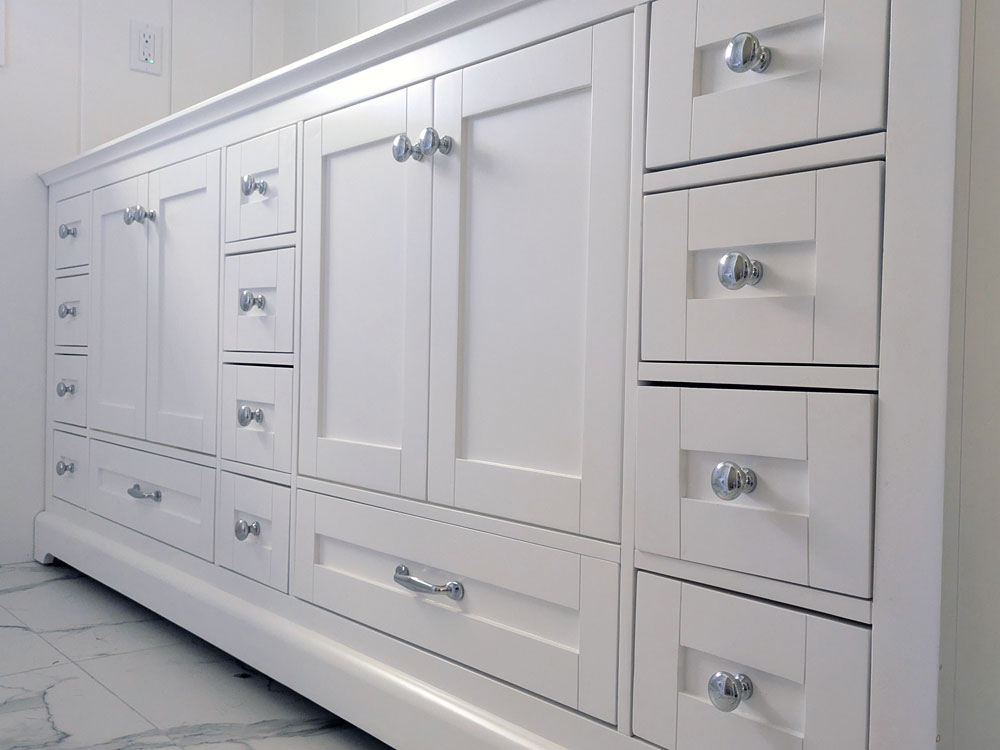
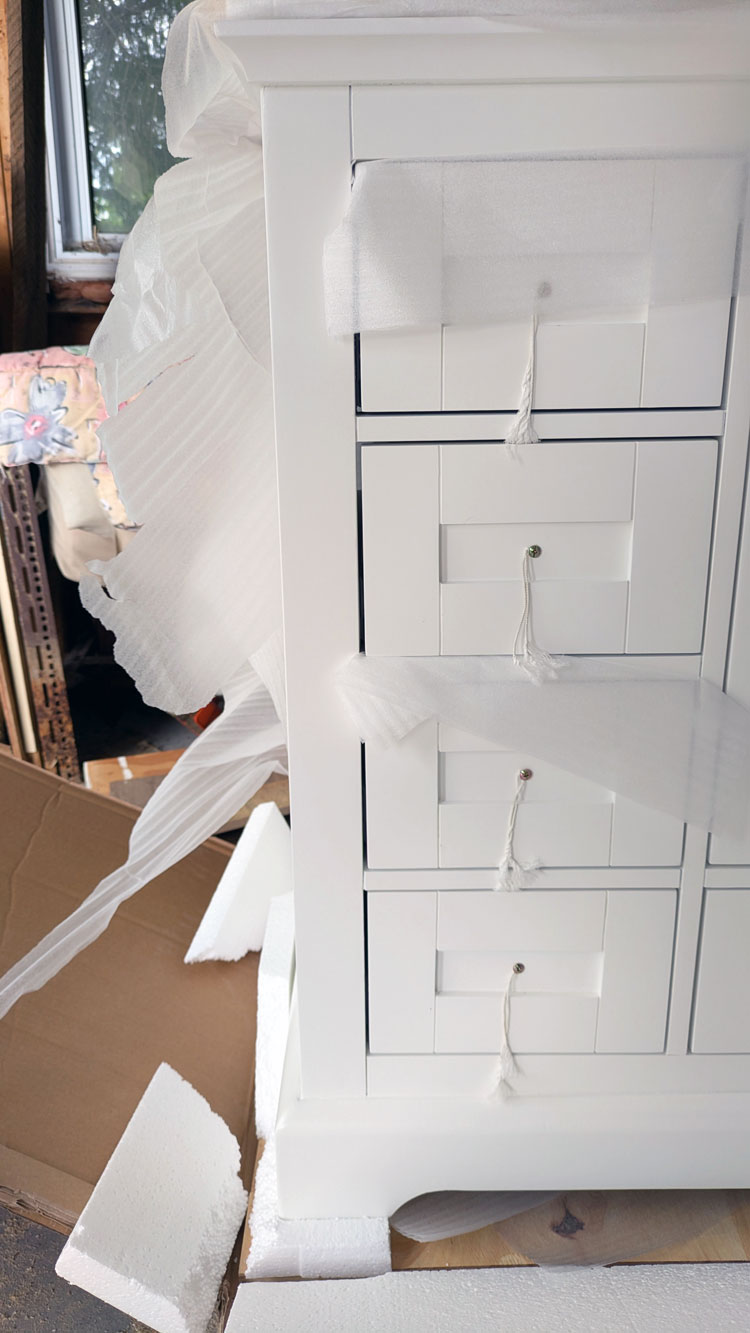
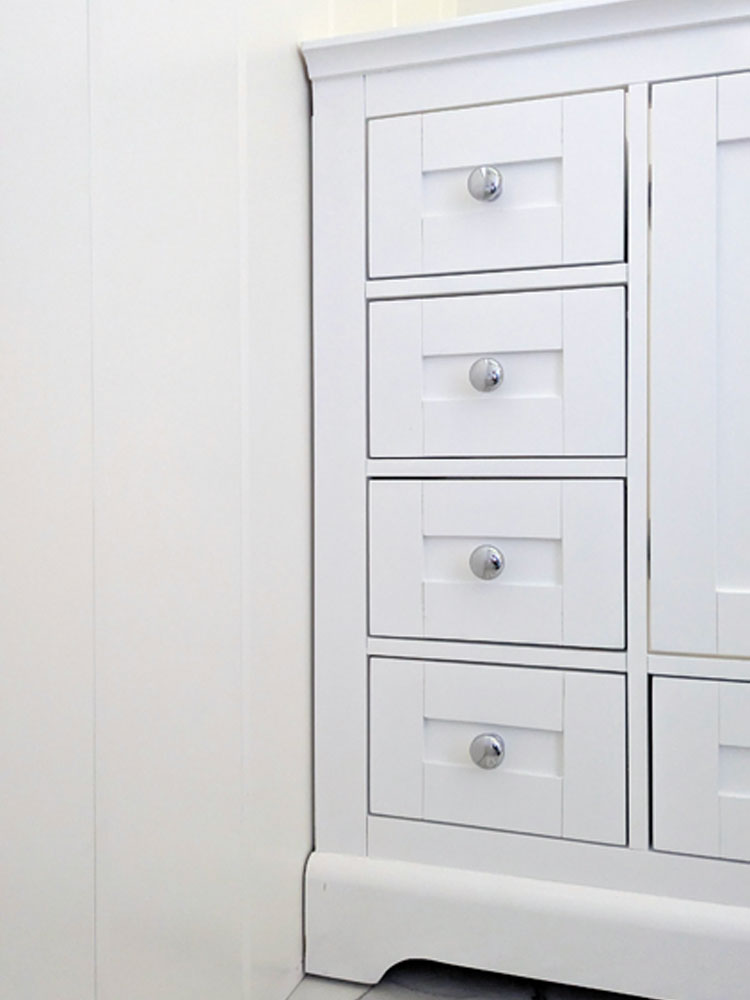
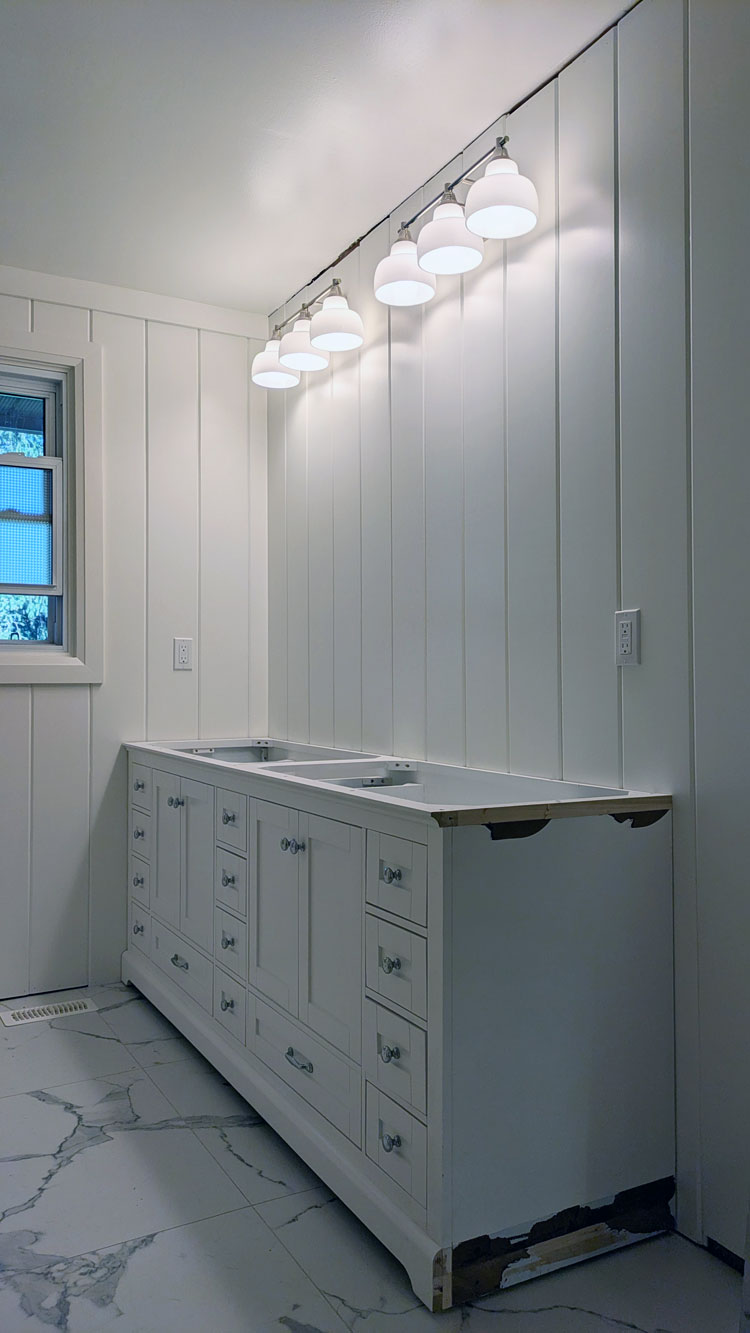
The vanity is exactly the design I had in mind for years. Drawers, drawers and more drawers. I’m so pleased I was able to find it off the shelf. At first, I was concerned that the drawers would be too small. They are quite shallow and narrow. However, they work really well for most things–the perfect amount of space for toothbrushes, hairbrushes, makeup and lots of space to separate things out. Certain containers or bottles don’t fit. Fortunately we have taller storage elsewhere (more on this below).
The vanity led to the one change of plans I needed to make in the renovation. The sinks I had ordered turned out to be too big. Fortunately, the company I worked with to source all of the fixtures quickly supplied another option, and I was able to make the exchange. The sinks we ended up with are quite small, but they are adequate for most bathroom tasks, like washing our hands and brushing our teeth. Most important they fit with the vanity, the taps, the counter.
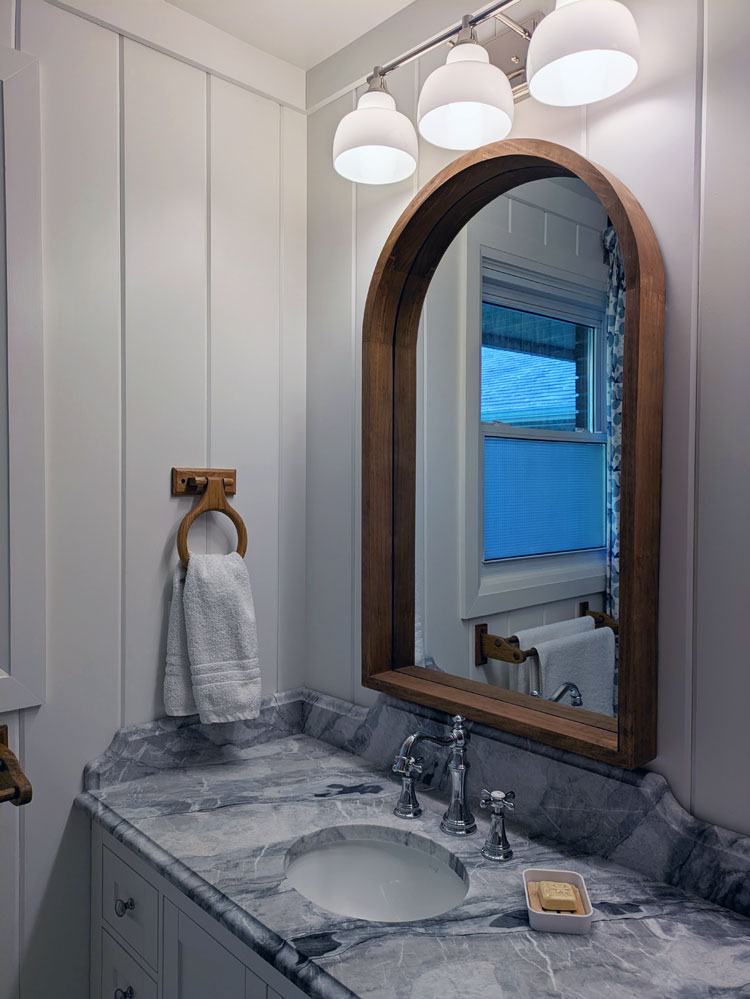
The taps were another spot where I was trying to create some of that historic farmhouse feeling. From the beginning I knew I wanted old style cross handle taps. That’s exactly what I found: very traditional and a little bit fancy. Their sparkly finish, cross handles, high arc add so much brightness to the bathroom.
In my initial plan for the bathroom, I had expected to have more of a mix of metals. I had planned for the lights and vanity hardware to be on-trend brass or gold. But as the bathroom came together, I couldn’t make the finishes work. I decided to go with the simple chrome hardware that came with the vanity, and that made the light fixture decision easy–sparkly silver there too.
We still have a bit of a mix with a few hits of black in the hutch hardware, hooks and curtain rod.
Instead of mixing metals, I decided to warm things up with a lot of wood accents. This is another touch of farmhouse style. The mirrors were the very first thing I bought for the bathroom. The wood frame and arched top add softness to the other square lines in the room.
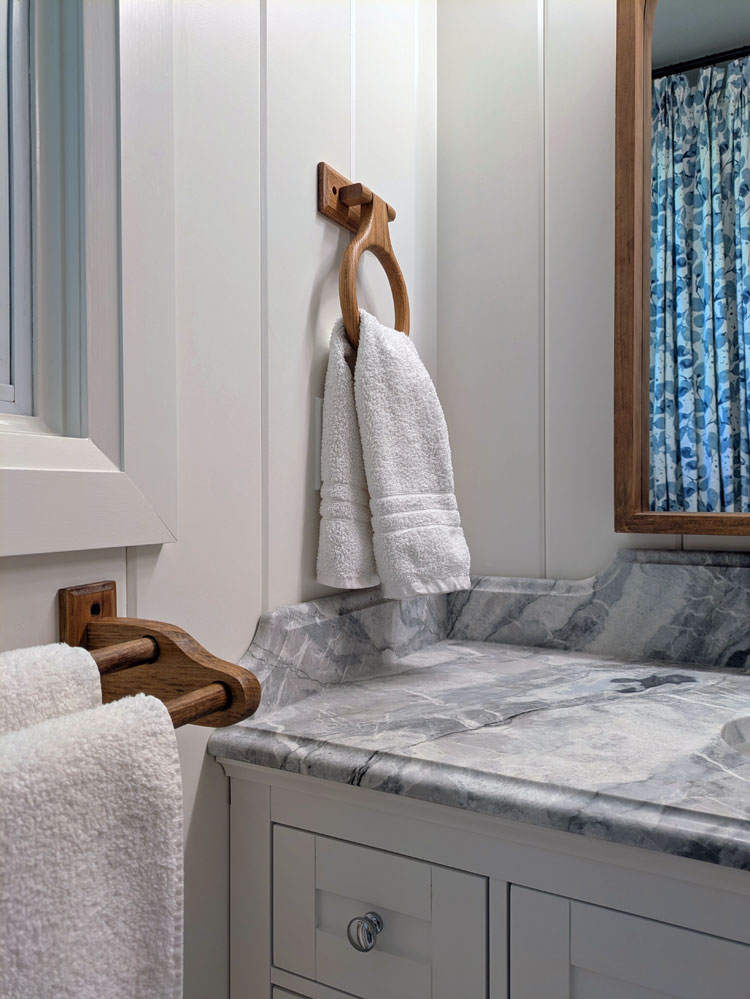
I had always envisioned wood towel rings and accessories. Thanks to Facebook marketplace, some refinishing and a little bit of my own construction, I was able to make it happen.
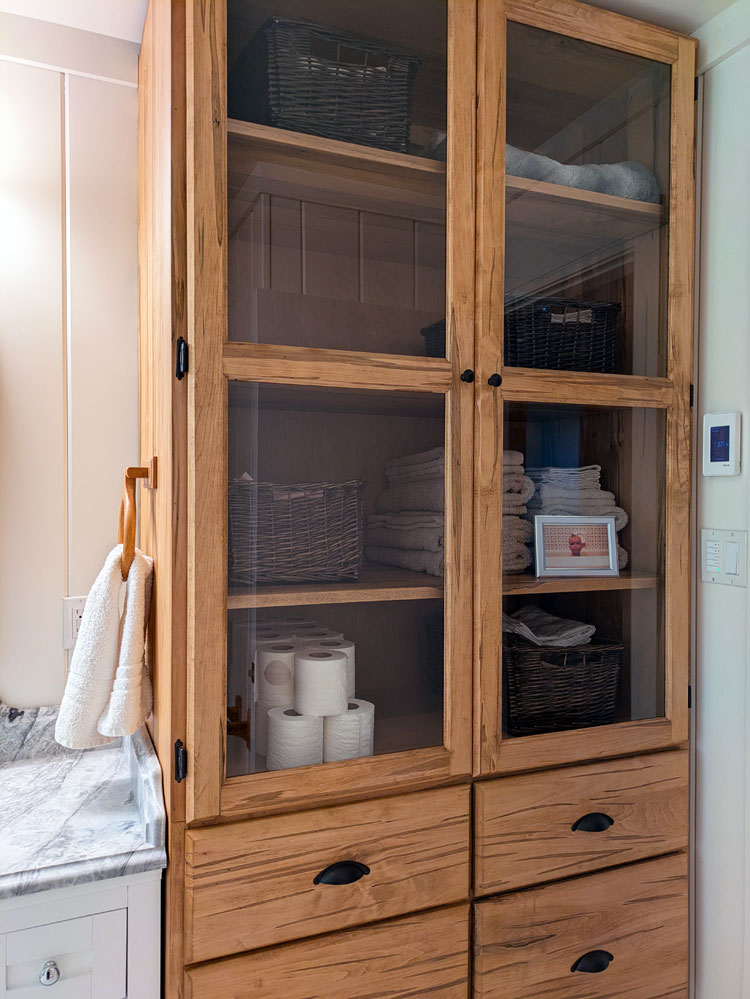
Of course, the big wood storage hutch is another standout. As I wrote 13 years ago, the bathroom had tons of storage, mainly a large linen closet. Unfortunately, its open shelves were ugly and not super functional. Replacing the closet with this hutch adds so much to the bathroom.
Storage of course. I designed the hutch to have 6 super deep drawers. Towels, bottles, soap, medicine, first aid supplies and more all easily fit in the hutch. The upper section with its four shelves holds towels, toilet paper, sheets, blankets with lots of room to spare.
Beyond storage, the hutch adds so much beauty. The maple wood looks perfect for the farm.
The final finishing touch was the shower curtain. This is our only bit of colour in the bathroom. I chose a watery blue leaf fabric that has a beautiful mix of dark and light that echoes some of the tones in the tile and counter. I sewed the curtain myself. I wanted it to be traditional, so I added some pleats at the top. This gives the curtain lovely fullness. It’s also full length from ceiling to floor which makes the bathroom feel so much taller.
This bathroom renovation was not quick. I began taking the room apart in April and finally hung the shower curtain at the end of September. Beyond those 5 months is the 13 years.
It was worth the wait.
I documented the bathroom renovation on my Instagram as well. You can check out all of the videos at Part 1, Part 2, Part 3 and Part 4. Thanks to everyone for following along on the blog and on social media and cheering me on through this project.
Anyone want to go to the bathroom? (I realize that may be an odd question, but I really hope you say yes, because I have things to show you.)
Our main bathroom is looking so good. We are still under renovation, but I’m making progress (one of the realities of DIY is that things usually take a while).
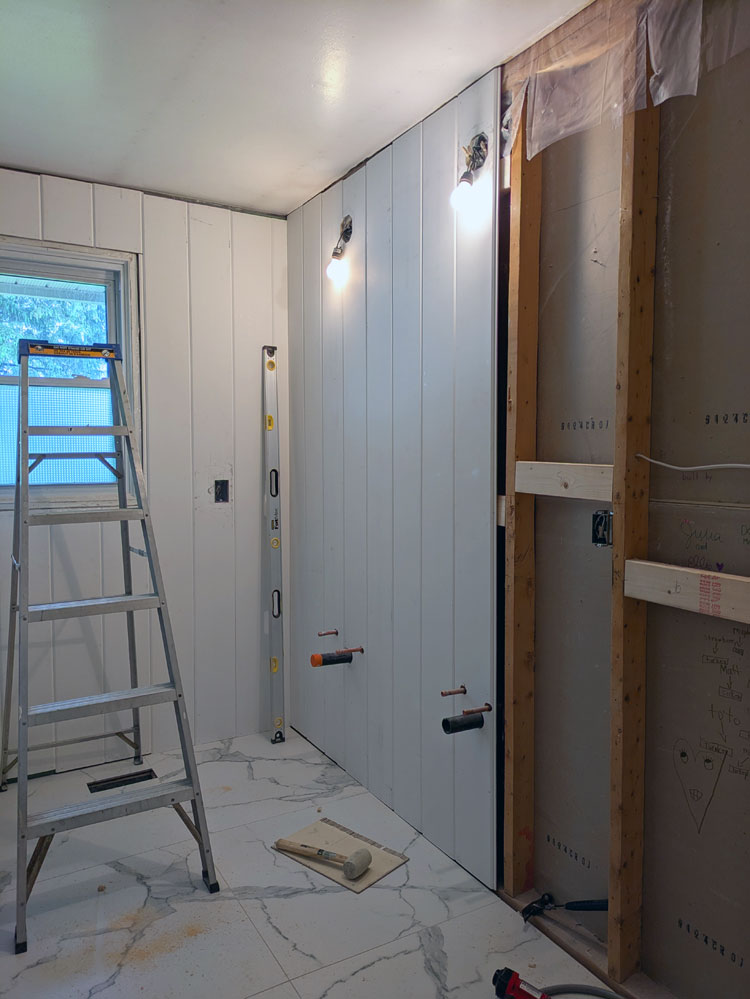
My last update took you through demo, plumbing and electrical rough-in, tile and the start of the wall panelling.
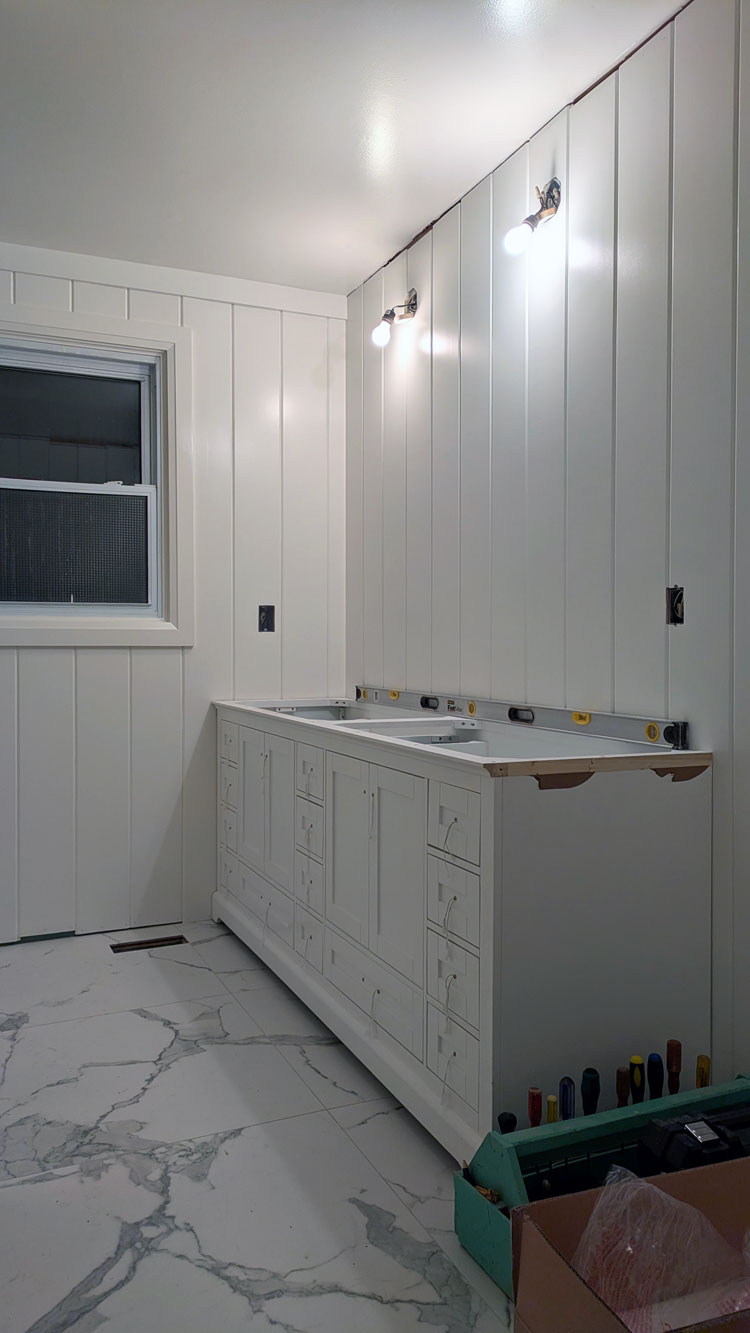
Now, the panelling is up and painted. The vanity is in place. And the electrical is complete. Today I’m going to share the details of how it all went.
This bathroom has been a stretch for me in terms of my skills, and panelling was something I’ve not done before. I chose a pre-primed, tongue and groove, pine V-groove for all the walls. I started installing it behind the door so I could hide any mistakes, but everything worked out fine.
I prepped for the panelling by installing blocking between all the studs about halfway between the ceiling and the floor. This gave me an extra spot to nail the boards and ensure they were fastened securely. I used my Dad’s long level to make sure each board was straight and a rubber mallet to make sure the joints were tight. Then I face nailed each board top and bottom and one nail through the tongue into the blocking.
Once the panelling was up, I moved onto the trim. Trim was essential because it covered all of the gaps with the V-groove. I did window and door casing, baseboard, flatstock along the ceiling, and corner pieces over every outside corner. There are a few spots that still need trim, but I’m waiting until the vanity and hutch are complete before I install these finishing touches.
Trim is slow and challenging because I had to be super precise with every measurement, every cut and every install. But it turned out really well and finished off the panelling beautifully.
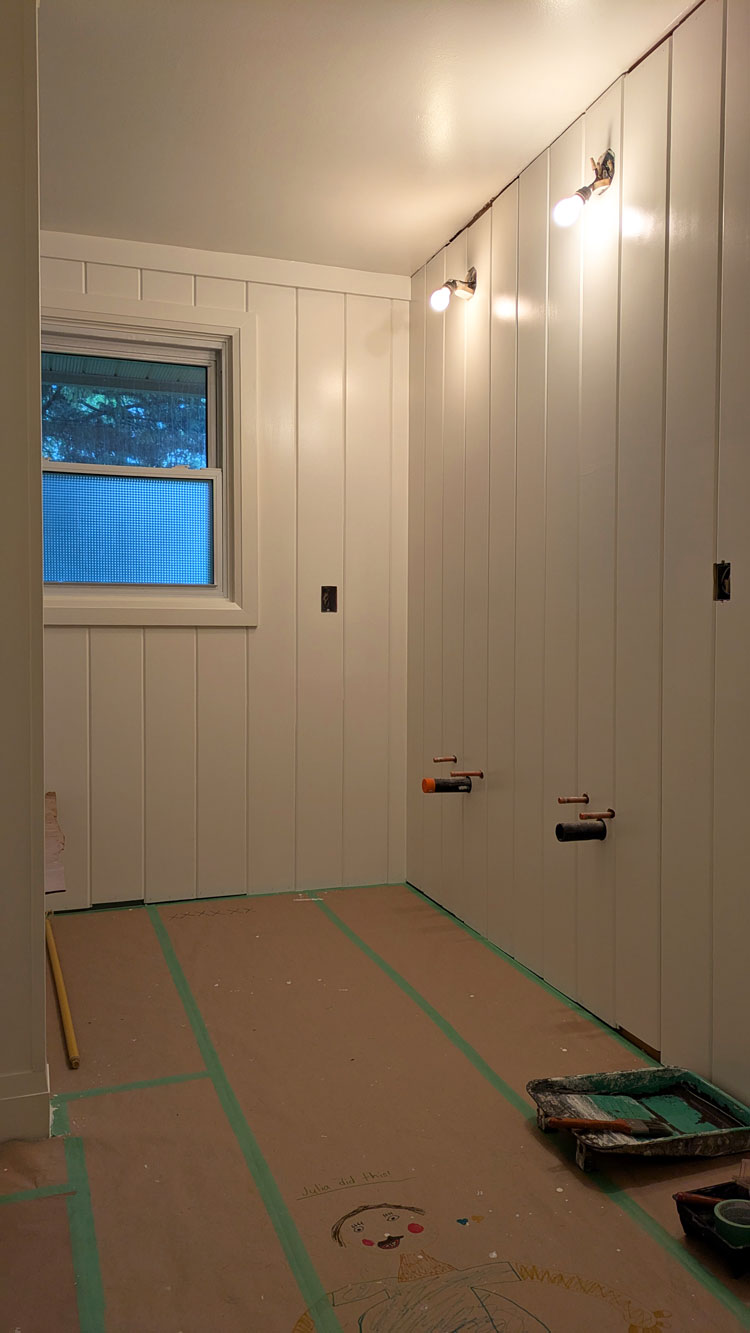
Then came paint. While I hadn’t installed panelling before, I had painted it in the mudroom. There, I rented a sprayer to ensure I got into every groove. I didn’t love the sprayer. The rental process was not straight forward, and my spraying technique wasn’t great. For the bathroom, I decided to try a roller and brush and hope I could get into the grooves and achieve a good finish.
It ended up working out really well. I cut in around the ceiling, floor, corners, door and window with my brush. It was tedious, but I covered everything well. Then, as I hoped, I was able to squish my roller into the V-grooves between each panel, so they were completely painted. Then I carefully went over the whole board with the roller to smooth out any excess paint.
I chose to paint the bathroom white. I’m not a white room person usually, but I really like the warm white we have on trim and furniture throughout the house (Benjamin Moore Cloud White). I thought it would look good for the bathroom. The V-groove adds a lot of texture to the walls, so there is good visual interest. Plus the white lets the other elements of the bathroom–the tile, counter and wood hutch–stand out.
I used Benjamin Moore’s Advance line. This is my go-to cabinetry paint, so I figured it would be extra durable for the bathroom.
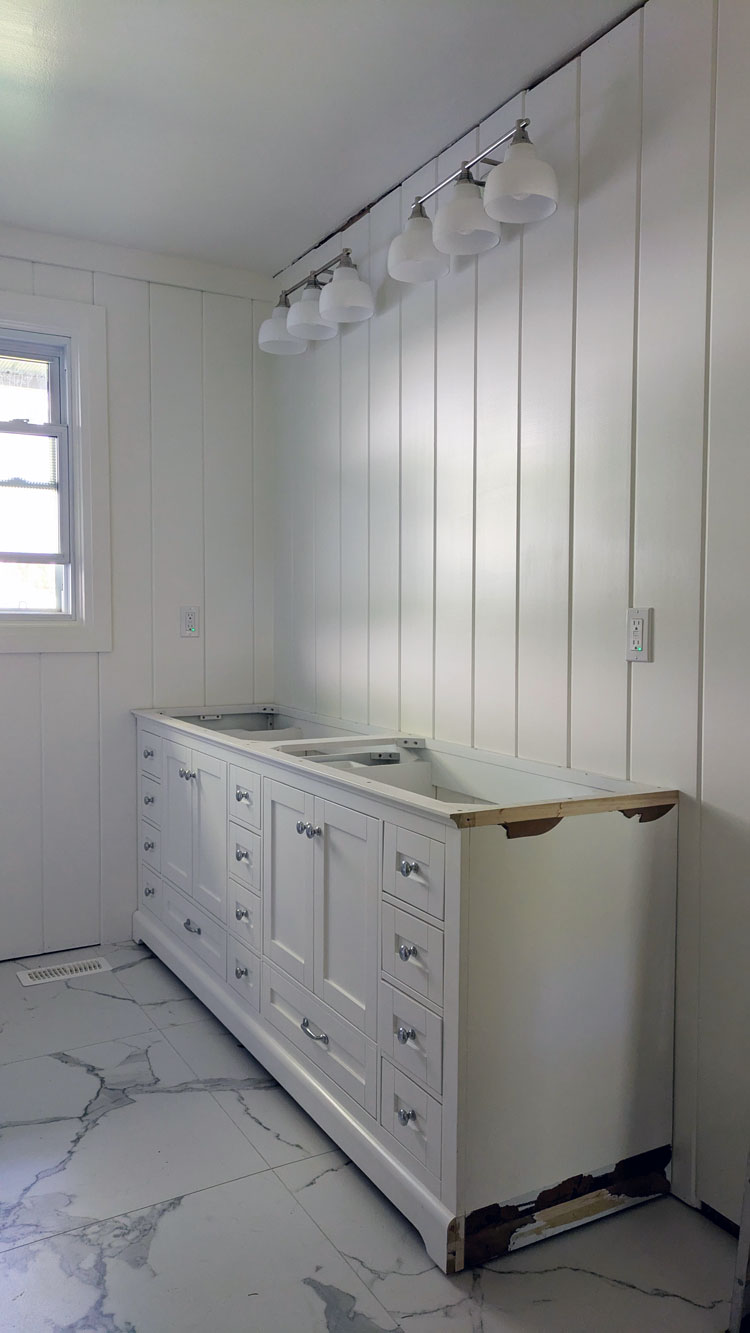
Next up was the vanity. I picked the vanity design a very long time ago (before Ellie was born). I had stumbled across an image of a vanity with cabinets under the sinks, but they were shorter than usual. Under the cabinets were drawers. I loved the idea of drawers for extra storage, rather than wasting space with a big cupboard.
I knew I wanted simple shaker doors and it was going to be white.
When I ordered all of the bathroom fixtures, the consultant I worked with looked at my plans and said, “You’ll need custom for the vanity.” So I called numerous cabinetry companies and tried to find someone to make my dream vanity. When I finally found one to give me a quote, the estimate came in at $9,000 and they couldn’t build it until the fall. Umm. No.
I hopped online and was amazed to discover a vanity very close to what I wanted at Home Depot. It was the size, colour, profile and even more important drawers I wanted. It was half the price of the custom vanity. And it could be here in a week. Sold.
The vanity did need some adjustments. It’s meant to be free-standing, but I wanted it tight to the wall and the hutch I’m having built. To make that happen I had to cut off a bit of trim at the top and bottom on either end.
Cutting into a brand new vanity is a bit nerve wracking. The amputation also required turning the vanity upside down, which was too heavy for me to do on my own.
So I exercised my phone-a-friend option and that friend, her very precise engineer husband, and weight-lifting son came over to help. They removed the necessary pieces and then carried the vanity inside. It was a tight fit, but they made it into the bathroom, and I was so pleased once I saw it in place.
One of my concerns with the vanity was the colour. Would the white be too cool against my creamy walls? Would I have to paint the vanity? The white looks great. It’s not an exact match to the walls, but it is definitely on the warmer side. The surgery worked and the vanity fits tight to the wall. All of the nicks and cut marks will be hidden.
One of my other concerns with the vanity was the hardware. The online listing said it came with brushed nickel hardware, which was not the look I was going for. I planned to source hardware that fit the pre-drilled holes. But as I unscrewed the hardware (it was installed backwards for shipping), I discovered it was polished, so I decided to install it.
The decision to go with the polished hardware solved another dilemma–the lighting. In my original mood board for the bathroom, I had thrown in a light, but I really had no idea what kind of light I wanted.
I planned to mix metals. Chrome on the taps and maybe towel bars? Black on the hutch hardware and hooks? Brass on the lights and vanity hardware?
I searched through so many lights online and couldn’t find ones that seemed exactly right. I wandered lighting boutiques and big box stores. I added to my Pinterest board. I polled my family with various options.
I finally ordered a gold light that I liked. But when it arrived, it turned out I didn’t like it that much. The gold was very brown. Almost copper. It blended with the frame of the mirrors, when I wanted it to stand out. It was not the look I was going for.
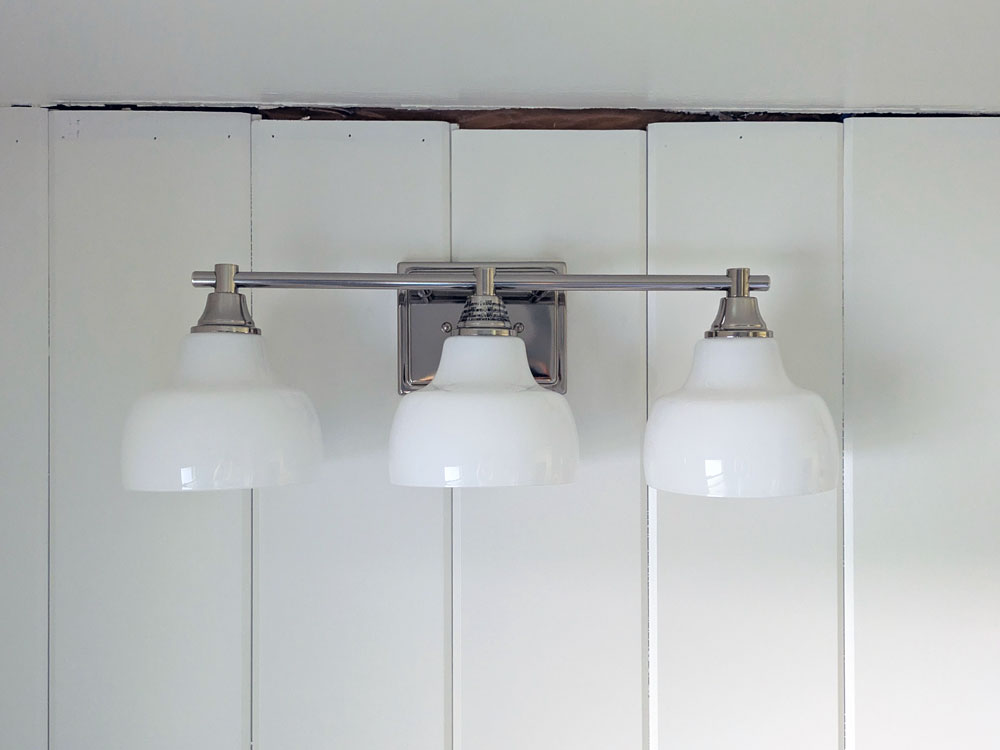
The polished vanity hardware helped me decide to skip bringing brass or gold into the bathroom. I would still have the touches of black I was planning, but the lights were going to be shiny silver.
I went back to a light I’d seen at Home Depot. It had white milk glass-esque shades like the schoolhouse lights we have in the hall and kitchen. It had bright shiny polished metal. Even better, it was in stock at my local store–critical since the electricians were coming in 5 days.
So I bought the lights. When I unpacked them at home, I decided I still liked them.
The electricians came and installed the lights, plugs, floor thermostat, timer for the fan and dimmer switch for the lights. So electrical is done.
The bathroom feels extremely bright with our new lights and white walls. We went from two bulbs to six, which is a big glow up. Fortunately, we have the dimmer switch. We also went from one plug to two. And of course there’s the heated floor. So many upgrades.
I’m really glad to have one trade completely finished. The biggest tasks that I had to tackle are also done. I managed to finish the painting before Ellie finished school for the summer. All of my jobs now are very manageable.
As more and more pieces come together, I’m thrilled with how everything looks together. I had a very clear idea of what I wanted in the bathroom and how I wanted it all to look. But when designing a bathroom, you pick these big, really hard to change things like a tub, tile, vanity, countertop mostly in isolation. Then you cross your fingers and hope they all look good in the room together. So far, they do, which makes me very happy.
I’m documenting the bathroom reno and sharing it in a series of videos on Instagram. Follow me at juliaon129acres, and catch up on all the construction in the bathroom highlights Part 1 and Part 2.
Have you ever modified a brand new piece of furniture? How do you feel about the metal mixing trend? Are you a polished or brushed person? Are you a white room person?
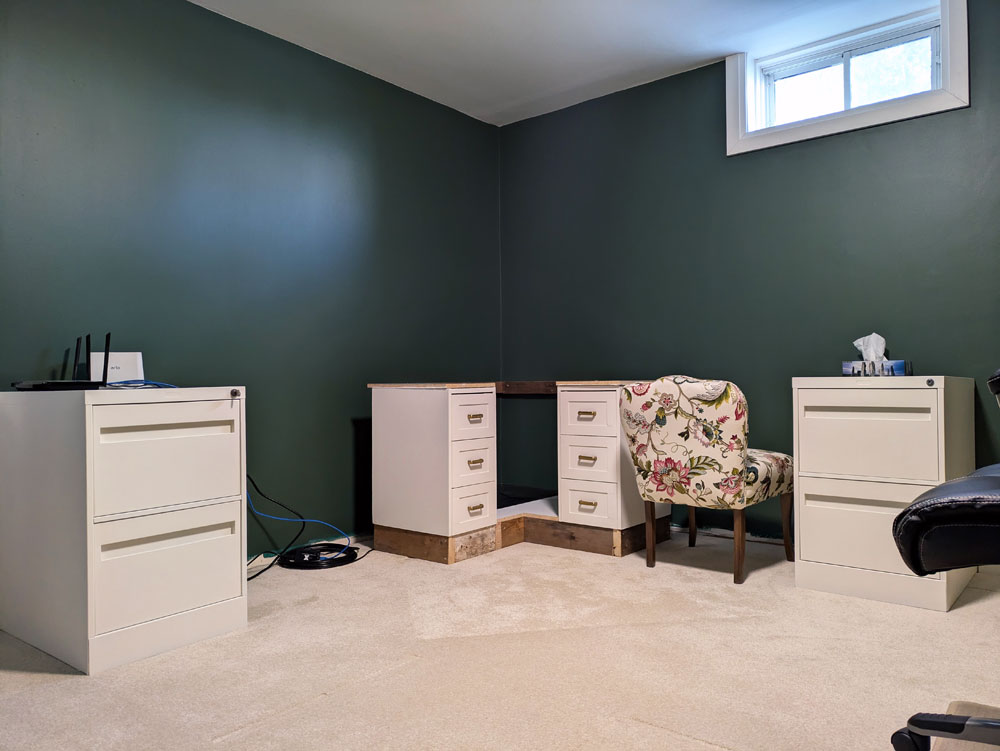
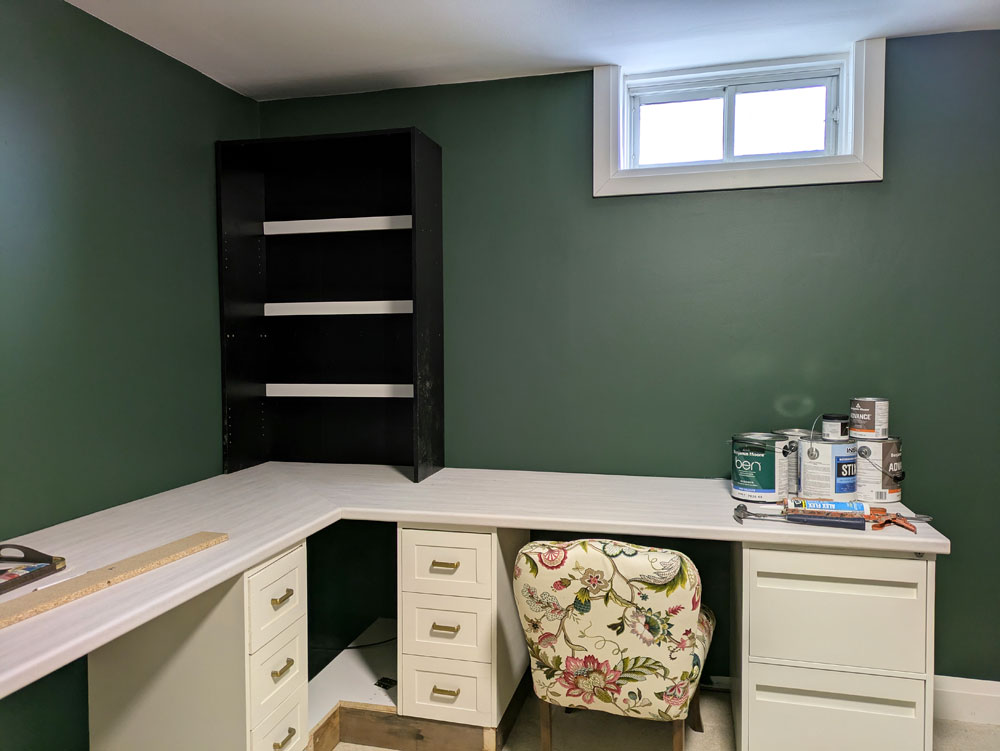
Take one old desk, two file cabinets, a bookshelf, a countertop and a dream and what do you get? The desk in my new office.
My vision for the desk was pretty clear right from the start. I knew I wanted two work stations. I knew I wanted file storage. And I knew I was cheap.
Fortunately, I also knew I was handy.
I came up with the idea of a long counter that wrapped around the corner. Underneath there would be regular desk drawers and file drawers. In the corner on top there would be open shelves for storage and display.
I knew what I wanted. Now I had to make it happen.
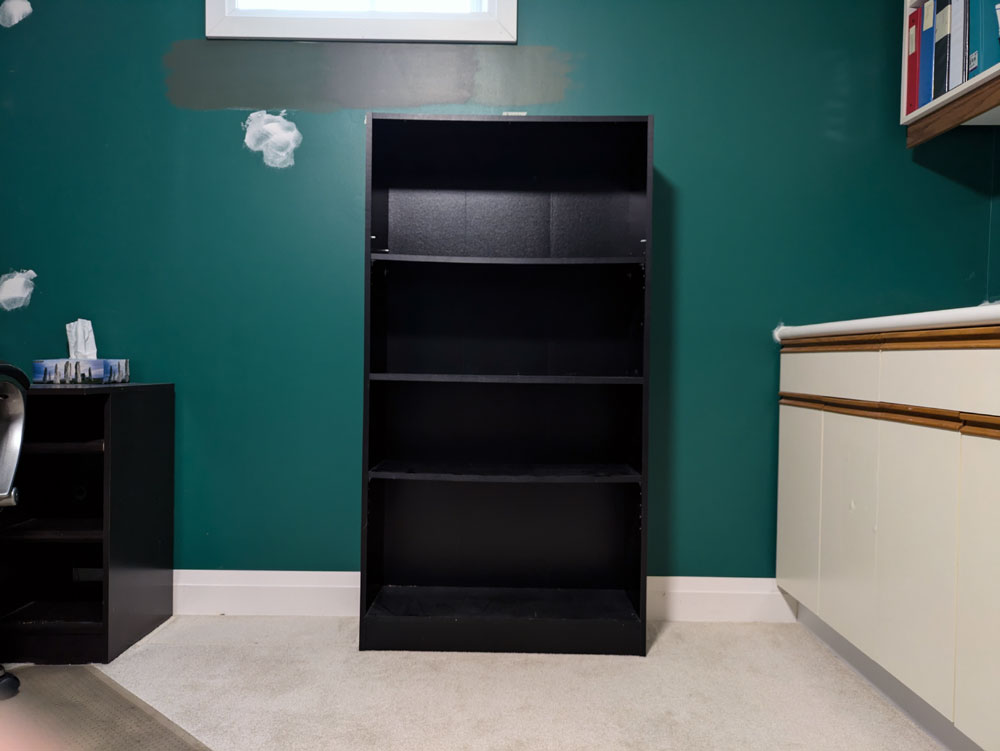
When we cleaned out Matt’s office, I left one bookshelf behind with the plan to use it for the hutch on top of the desk. One component, check.
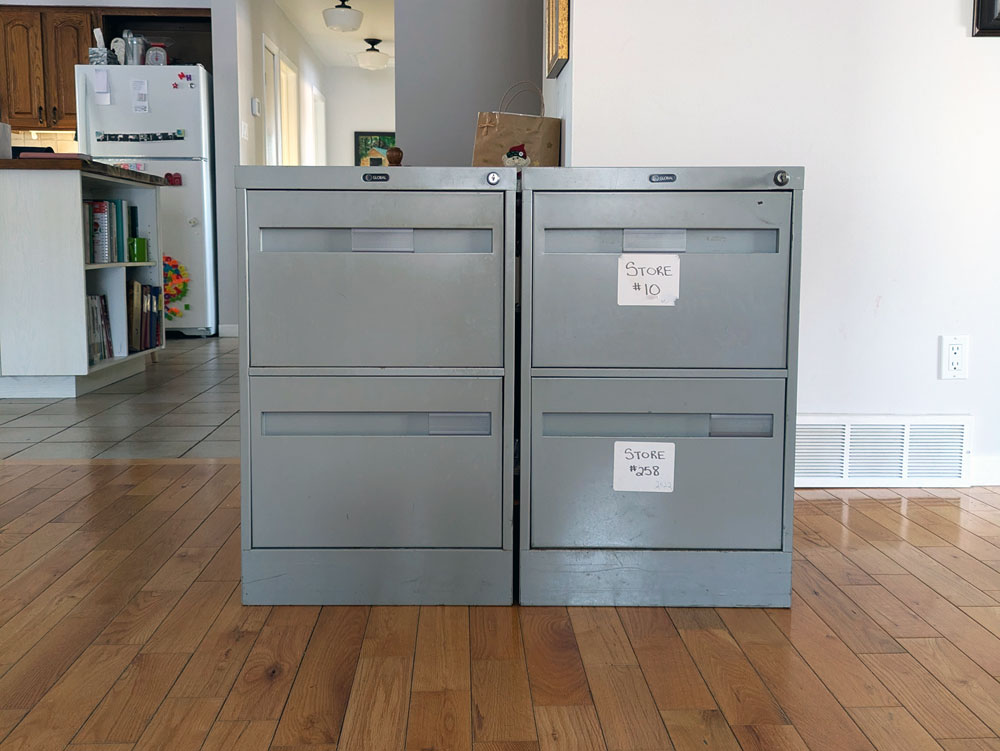
Then I moved on to the file cabinets. I wanted cabinets with a decent amount of storage that were the right height to support a counter. I found a matching pair at a used office supply surplus store.
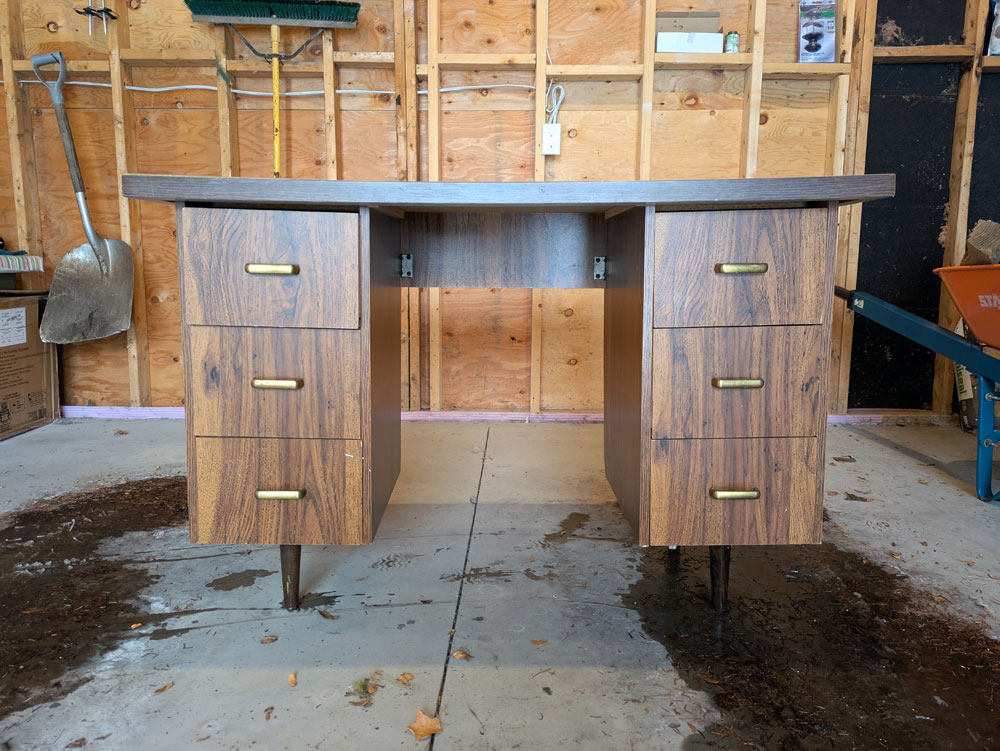
Next came the drawers. I considered building them and really didn’t like that idea. A search on kijiji netted me an old desk with two towers of simple drawers.
When we picked up the desk, the seller asked Ellie, “Is this going to be your desk?”
She said, “No it’s my Mom’s.”
The seller was a bit horrified. (The desk was pretty rough.) He said, “I have a nicer one in the house.”
I said, “No. This is exactly what I’m looking for.” And in my head, “You’ll never recognize it when it’s done.”
Elements procured, it was time to put them together. Or take them apart and then put them together.
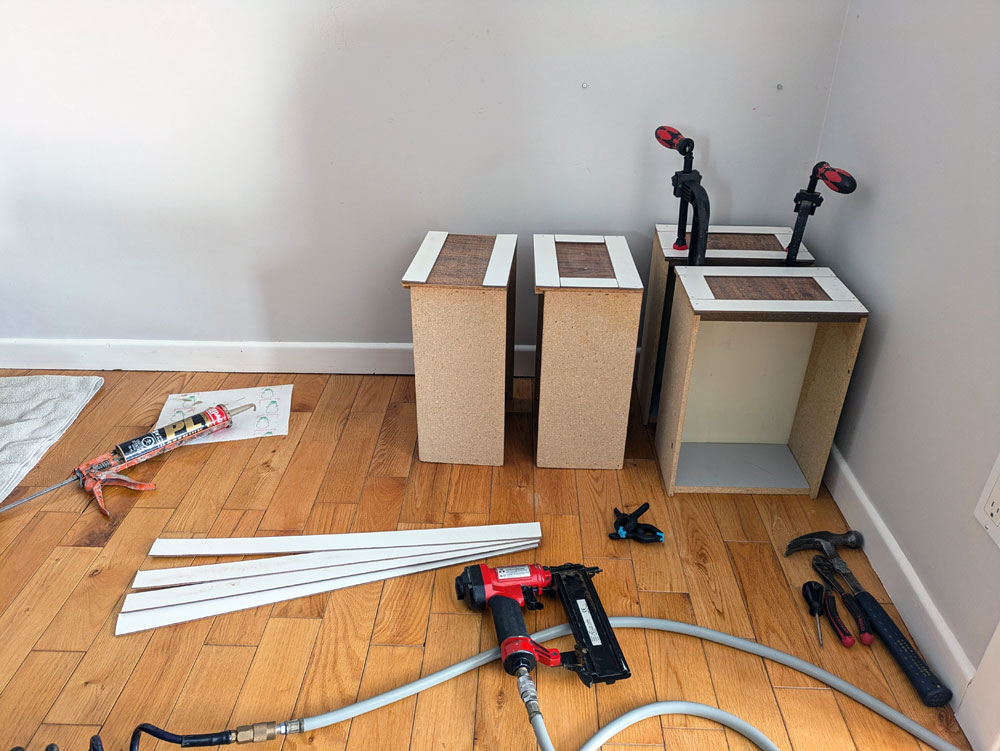
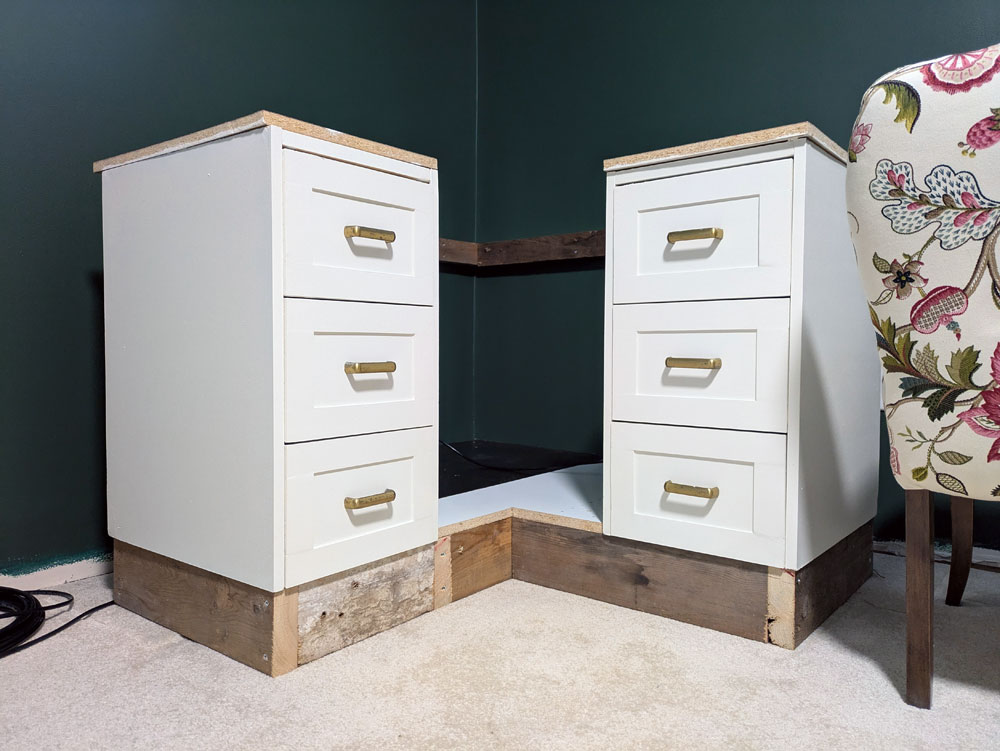
I removed the legs from the desk then cut the top so that I had just the two towers of drawers. Then I revisited the fake shaker technique I used in our laundry room and added strips around the edges of the drawers to give them the recessed panel profile. This is always the stage where I’m questioning my life choices and wondering how this is ever going to look good.
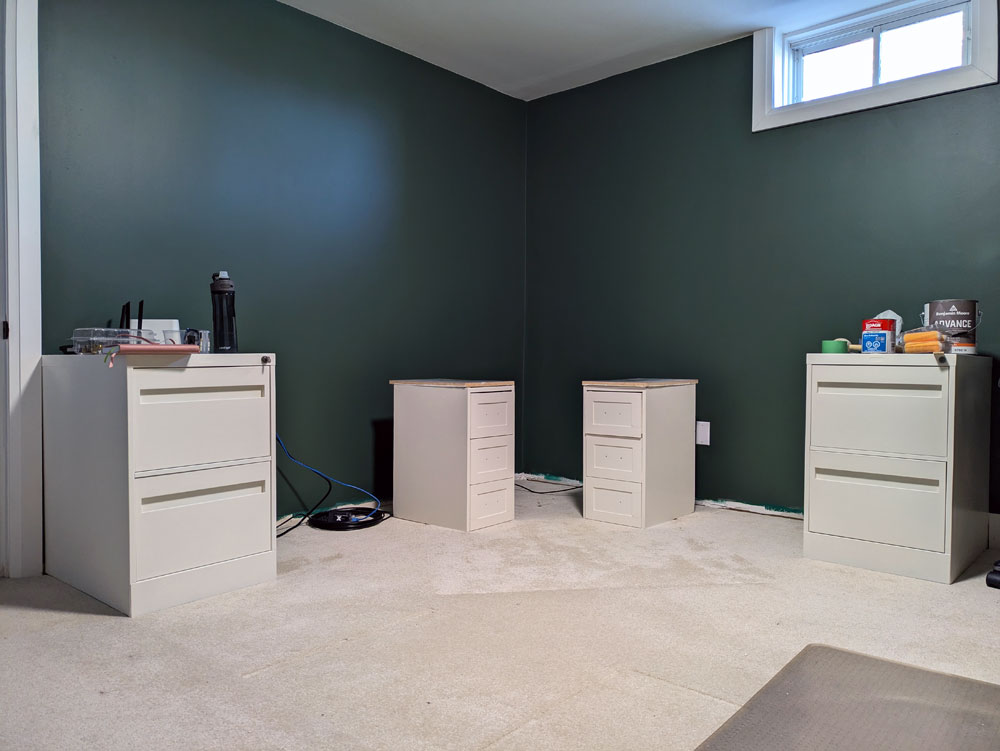
Wood filler, sanding and paint make everything better. I also painted the file cabinets my go-to furniture colour, Benjamin Moore Cloud White.
I was finally at the reconstruction stage. I set the file cabinets at either end of my L-desk. The drawers were going to go in the corner of the L, but they were a bit short.
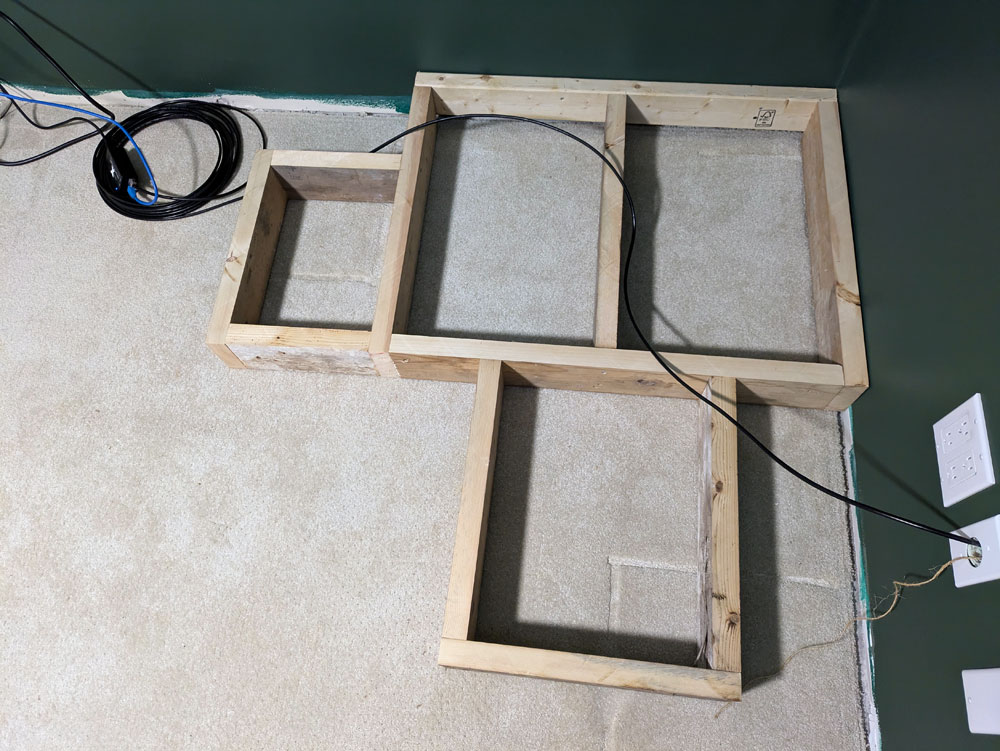
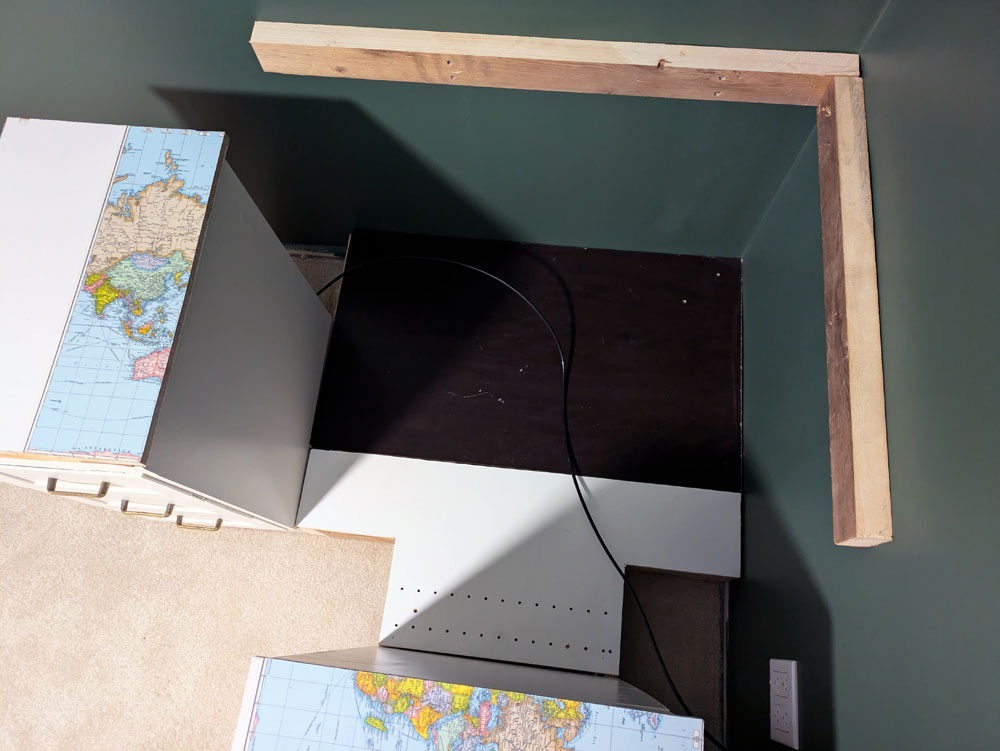
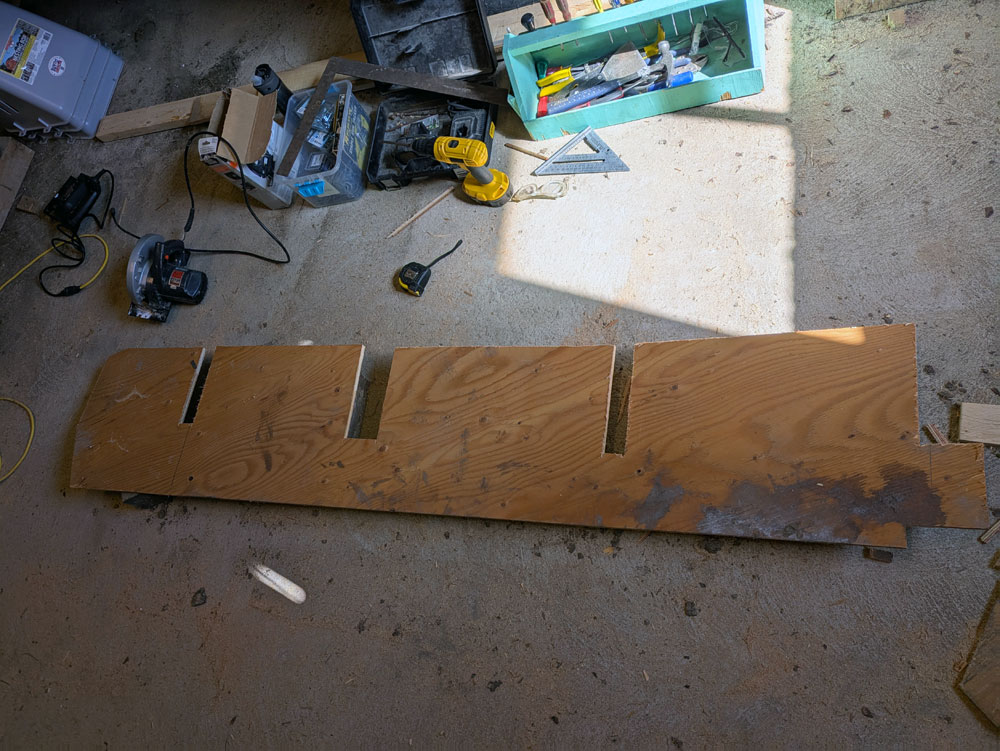
I built a little platform in the corner that raised the drawers up to be even with the file cabinets. The drawers are shallower than the file cabinets and I had to make sure I had access to some electrical outlets, so the platform appears to be oddly shaped.
After debating spacing and dimensions a bit, I decided to make the corner into a functional cupboard, albeit with a very small doorway and a patchwork floor. This is the spot for memorabilia and rarely used things.
With the drawers in place, I threw a piece of plywood on top and took the desk for a test drive.
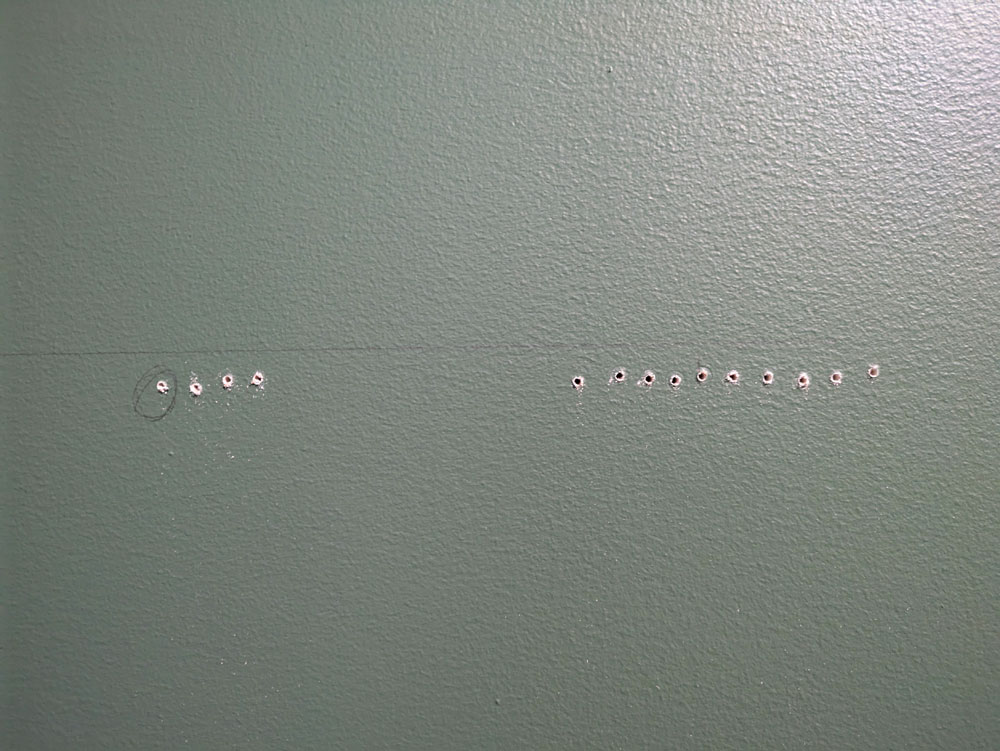
Everything was level and felt good, so I placed my order for a countertop. I went with a simple laminate counter. I added some ledger boards on the walls for additional support (after drilling just a few holes to find a stud).
The counter also rests on all the drawers. Thanks to the size of my file cabinets, the desktop is extremely deep. Lots of space to spread out.
Bottom half done. Onto the hutch.
I cut Matt’s bookcase so it was the height I wanted and then I positioned all of the shelves and fastened them in place. I added extra bracing along the back as well.
I debated what colour to paint the shelves and ended up deciding on the same green as the walls, rather than white. After few coats of paint, I lifted it onto the desk, set it in place and screwed it to the wall. Some wood filler and paint touch-ups finished it off.
The final step was a door for the corner cupboard–and we just happened to have a corner cabinet in the barn. I removed the door, cut it down to the size I needed (carefully preserving the hinges), gave it a coat of paint and… couldn’t figure out how to fit it in place. Fortunately, I live with a small person who is keen to help, so she climbed into the cupboard with a flashlight and pencil and marked the hinges for me. (Throughout the construction process, she liked the idea that the corner was a hidden fort just for her, so she had no problem climbing in when asked.)
I was then able to drill the holes and screw in the hinges. A wooden knob, some painted hardboard for the toe kick and reinstalling the baseboard were the final touches. The desk was done.
I am not a cabinet builder and fine carpentry is not my strength. I am really proud of how the desk turned out. I was able to take an idea, a bunch of furniture pieces, put them together and create an awesome, functional, attractive result.
Anyone else have any Frankenstein furniture? Have you every remade a piece of furniture? How do you prefer to work? Do you have a dedicated desk? Or do you move around?
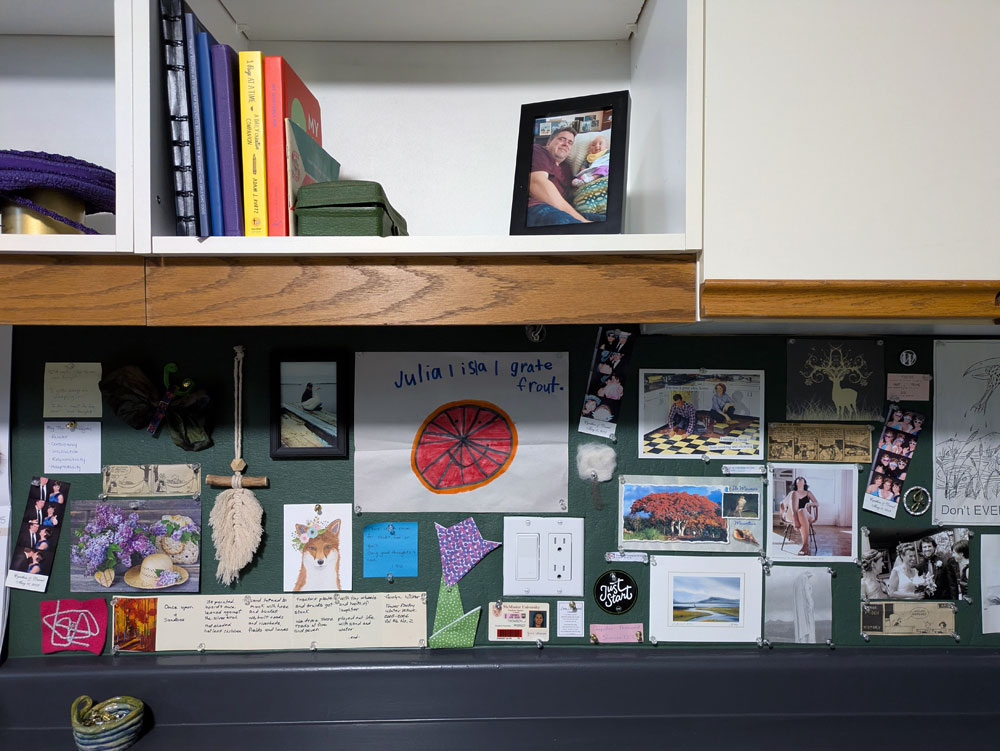
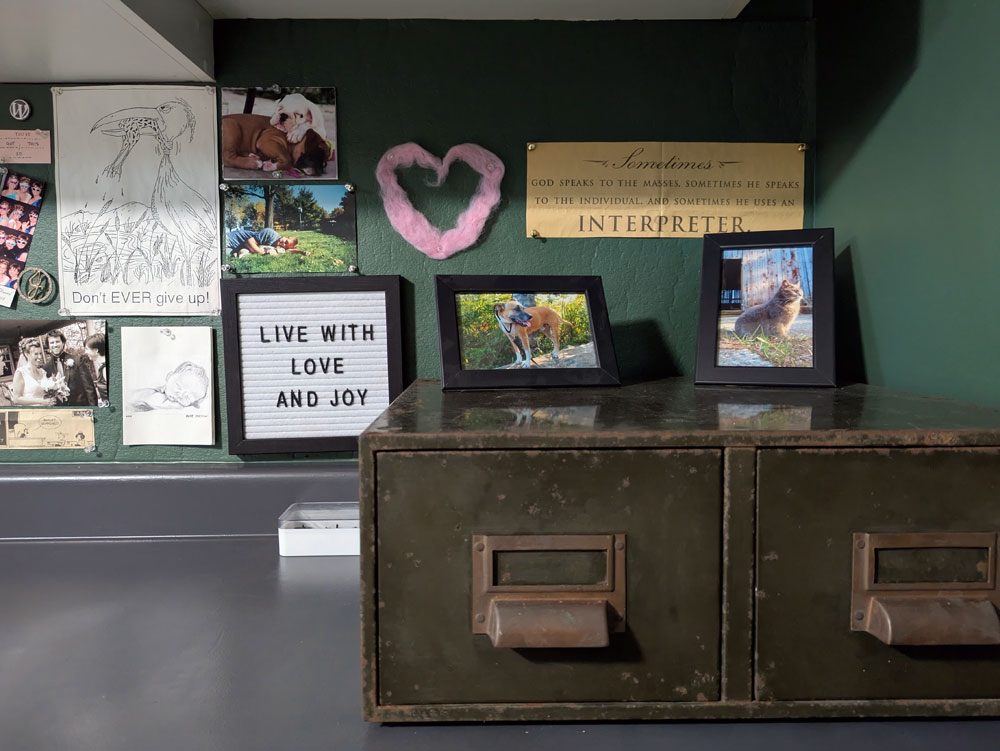
I love a bulletin board. I collect pictures, sayings, mementos–things that inspire me. There are also reminders that I jot down and Ellie’s many art creations. They all need a place to live, and my preferred home is a bulletin board.
In my new office, I debated where that bulletin board should go. Matt had one on the wall above his computer. I could do the same and even reuse the same board. But I really liked the idea of hanging some nice art above my computer instead.
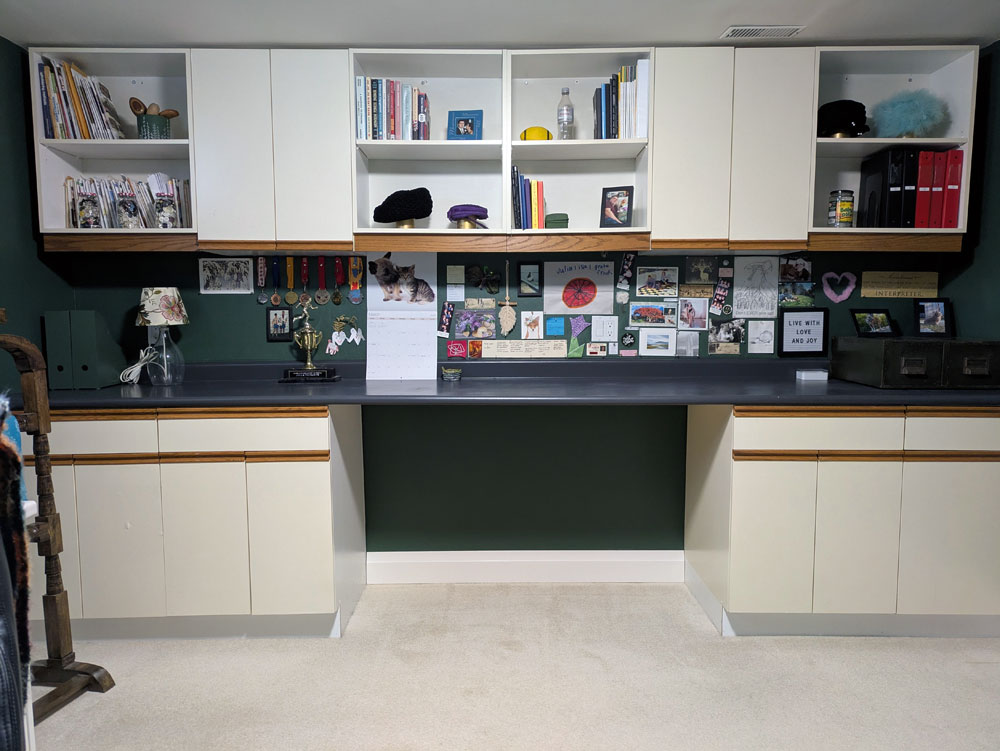
Then I thought of the cabinets on the other side of the room. What if I made the “backsplash” a giant, long bulletin board?
I had used cork shelf liner at our first house to make a bulletin board over my desk and it worked pretty well (a couple of layers were needed as this cork is very, very thin).
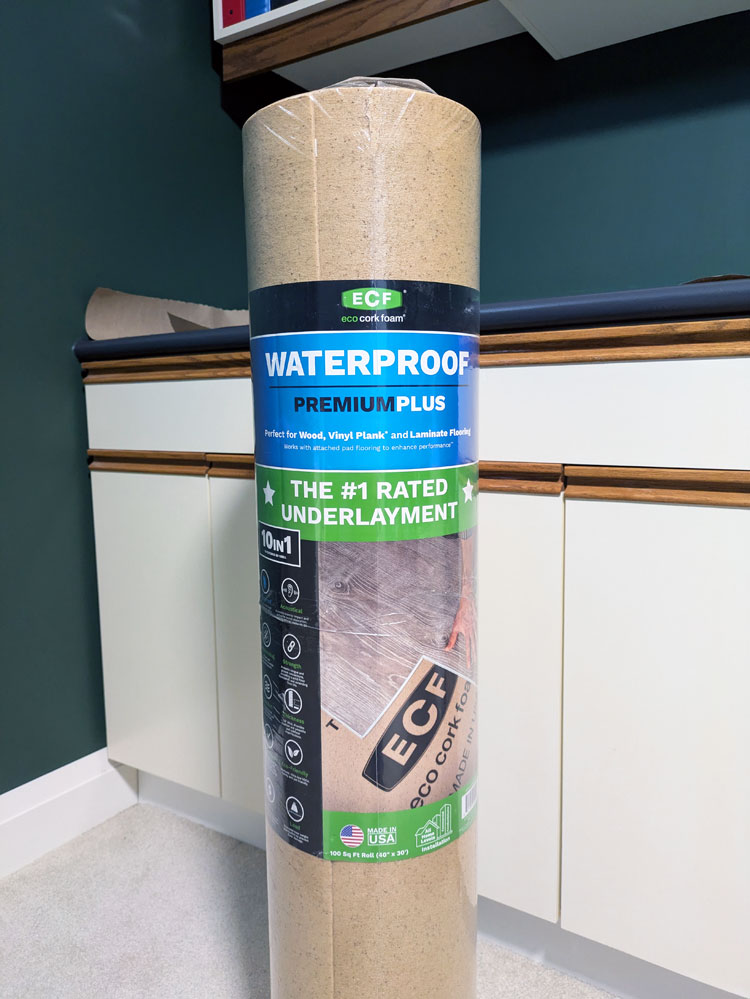
A quick tour of Home Depot showed me that I would need many, many packages of cork and it wasn’t the dimensions I needed. Then I thought about cork flooring underlayment. I had put a strip on the cold cellar door where we have our dart board. Maybe it would work for the office?
I decided to give it a try.
The underlayment comes in a roll 40 inches wide by 30 feet long. Plenty for what I needed.
I did a quick test. I put a couple of layers together and stuck a pin in it. It was nice and squishy and seemed to hold well.
I decided to go for it.
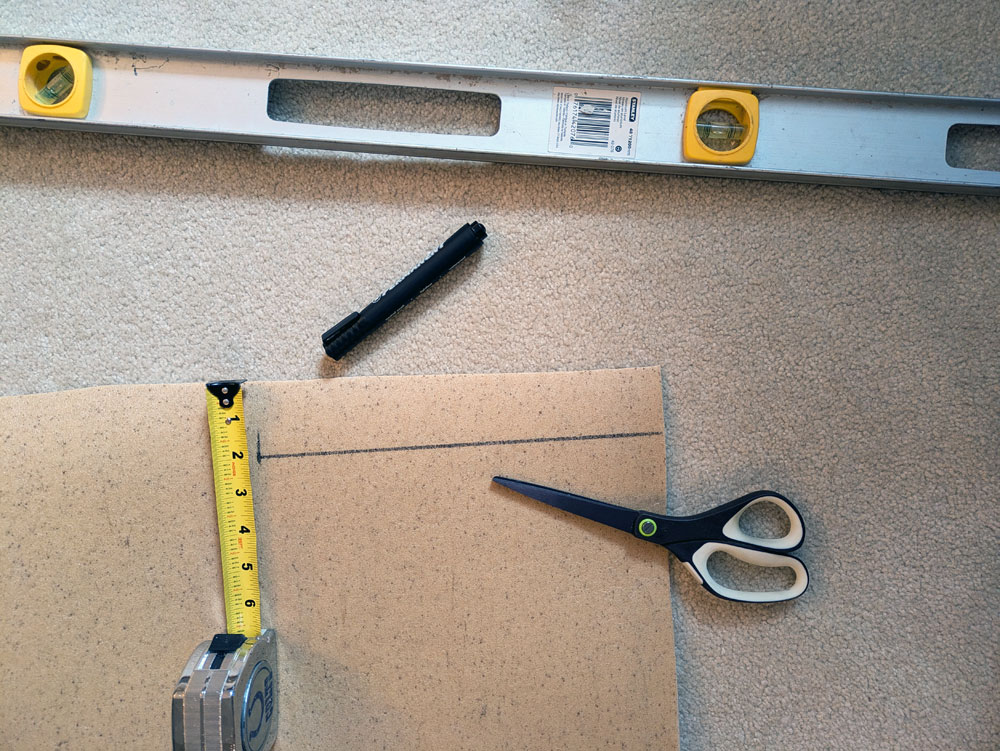
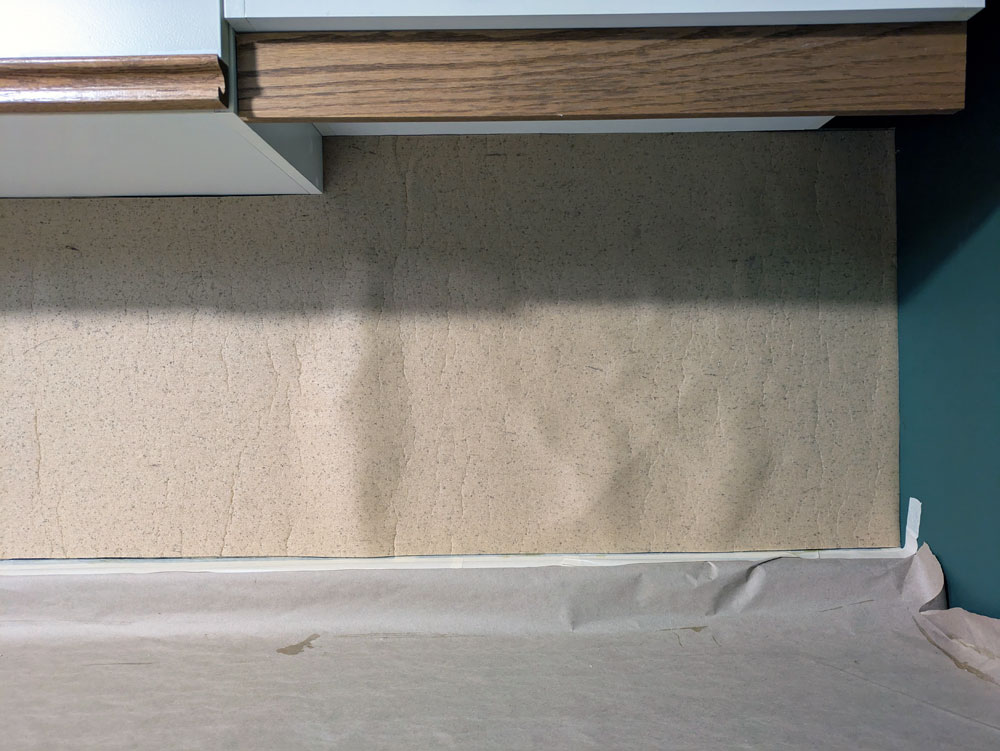
I rolled out the cork. My first step was to cut off the plastic “fringe” that’s along the one edge. Then I measured the space between my cabinets. There were a few ups and downs as a couple of the cupboards are fitted for under cabinet lights. I very carefully plotted everything out with a marker and cut along the lines with my scissors. The cork cut super cleanly and easily.
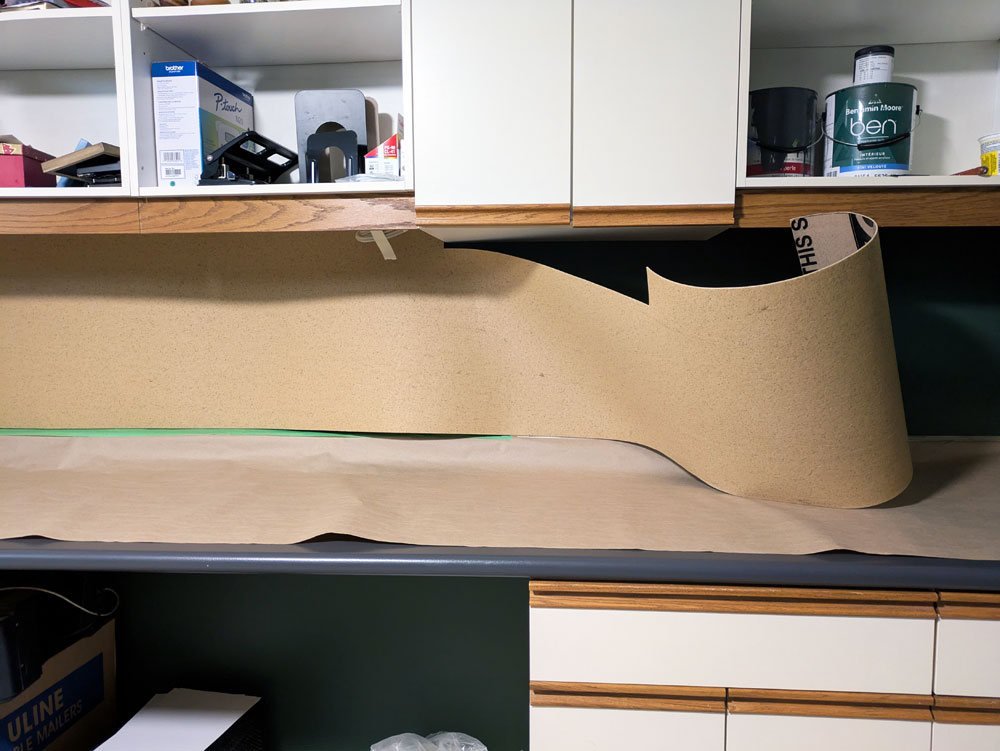
Then I took my first layer for a test fit. I had a few gaps that were bigger than I wanted, but overall it was a pretty good fit. I was ready to put it on the wall.
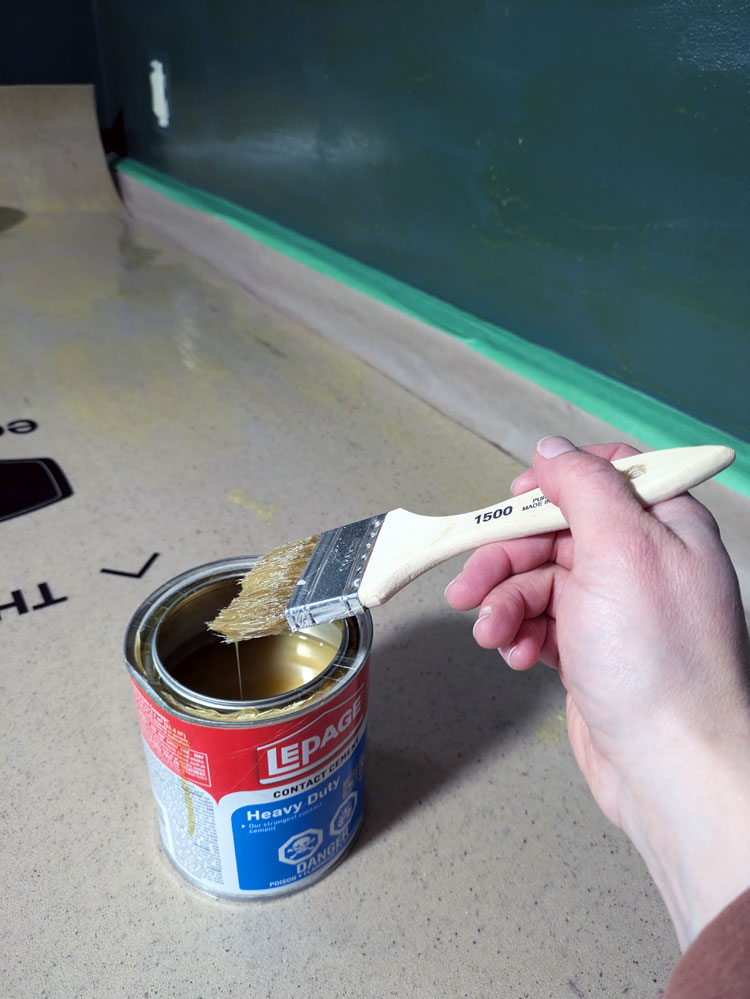
I removed cover plates from the outlets and covered the plugs with tape. I taped off the edge of my counter and covered the whole surface with paper to protect it from the adhesive. Then I laid the cork facedown on the counter and coated the back of it with Contact Cement. I also put a layer of CC on the wall. (Cheap chip brushes are good for this, as you will be throwing them out after gluing.)
Warning about Contact Cement. The fumes are super strong. I had the window wide open (in January) and the door closed.
I recommend following the application directions for CC exactly. Put on a generous, even layer. Let it dry for 30 minutes. Have an extra can of CC to make sure you can fully cover your wall and cork.
The issue I ran into in this project (more on that in a moment) was all because of the Contact Cement. I went through CC much faster than I expected, so some areas didn’t get that “generous” coating. (A 946mL can covers 25-33 square feet. My backsplash was about 20 square feet, so ideally I would have had two cans for each layer of cork.) I also was impatient (and it felt wrong to let glue dry), so I only let it set for about 20 minutes before putting the cork on the wall (still within the guidelines, but on the low side).
So after that foreshadowing, let’s proceed with the install.
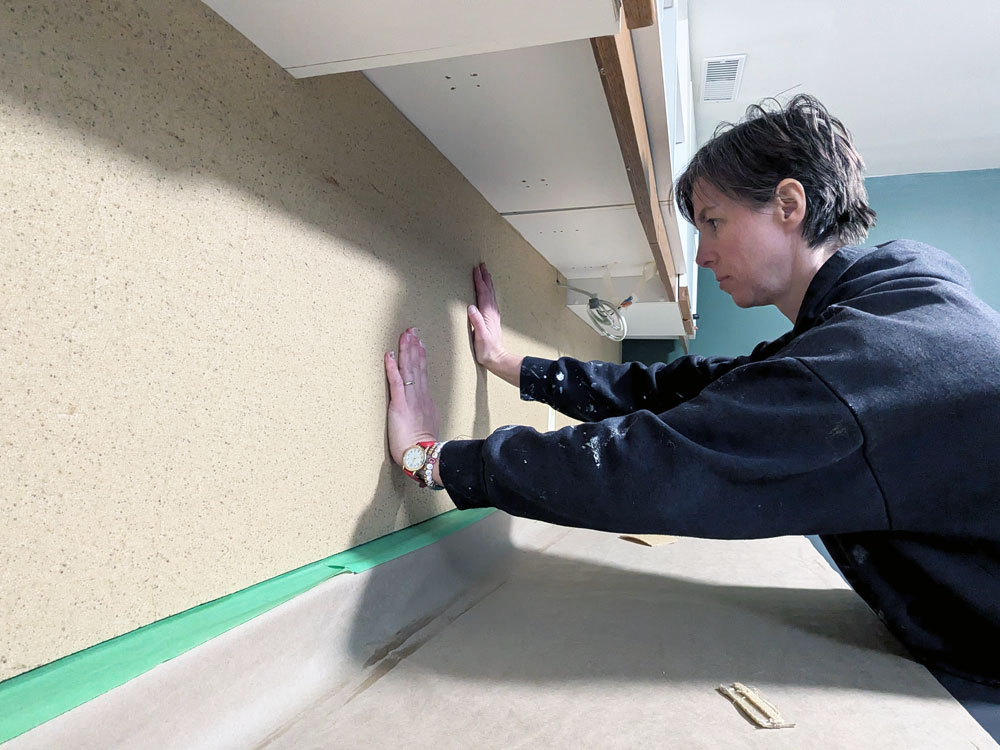
Once the Contact Cement had dried (kind of), it was time to put up the underlayment. I started at one end, got everything lined up as best I could and worked my way down to the other end. Depending on the size of your bulletin board, having an extra person would be helpful for this step. The Contact Cement on the cork sticks as soon as it touches the CC on the wall. You don’t have any wiggle room. With a long, floppy piece of cork, getting it smooth and aligned on my own was a bit awkward.
Once the underlayment was in place, I went over the whole length of cork and pushed it firmly into the wall. I went back and forth, up and down several times.
Then, I did it all again for a second layer. I was able to make some adjustments to my measurements to compensate for the little gaps I had in the first layer. I also cut out the plugs between each layer, just a rough cut around the outlets for now.
Two layers likely would have been enough, but I could still feel the wall when I pushed in a pin, so I decided to add a third layer of cork. However, I was out of Contact Cement, so the third layer had to wait until a trip to the hardware store.
When I came back the next day, I was dismayed to discover a huge bubble at the end of the bulletin board where I’d done a thinner coat of CC. This was also the spot that had cured for the shortest amount of time. The other end was smooth, flat and securely adhered.
I decided to slit the cork with my utility knife, peel it back and repaste it on the wall with my fresh Contact Cement. Then I proceeded with my third layer of cork, which I knew would cover the repair.
The next day, though, was deja vu. There was another bubble at the same end, and this one seemed even larger. My initial reaction was, “Well, I guess I know where I’m hanging the calendar.” But as I looked at the bubble, it seemed too large to leave. It was a significant bulge and would have been noticeable even behind a calendar.
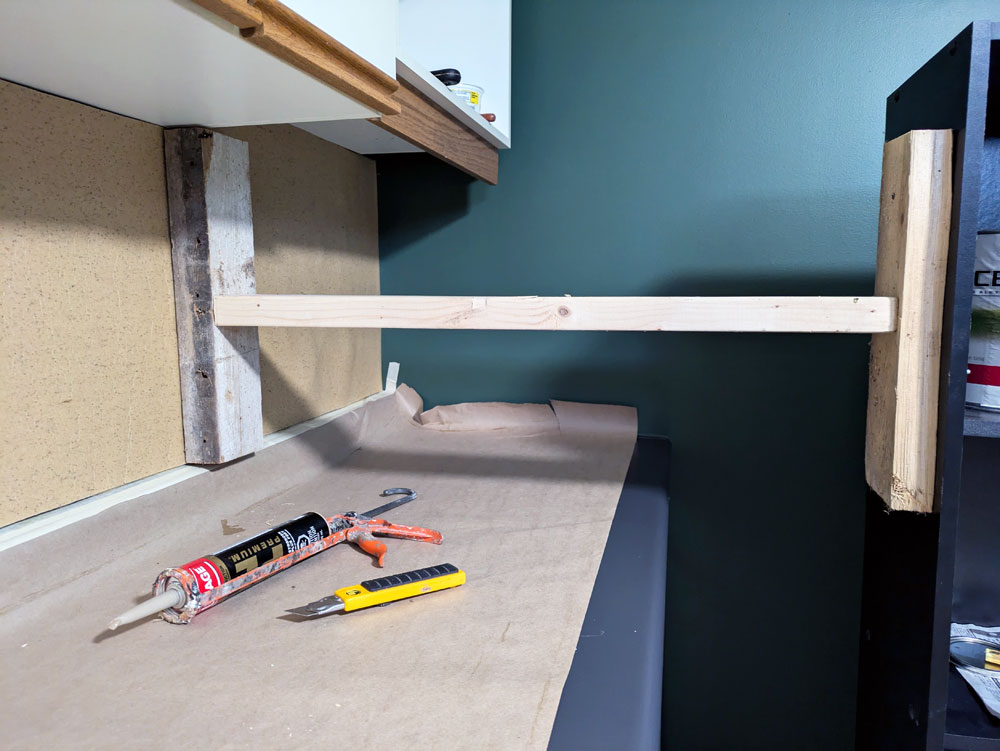
So I came up with a plan. I would cut a small slit in the cork. Then I would fill the bubble with construction adhesive. I would brace a 2×4 against the cork to push it into the wall while the adhesive set.
So I went to work. My small slit became quite large, as I cut open the whole bubble. But I was able to squirt construction adhesive into the whole area. Then I put my brace in place and not so patiently waited the prescribed 24 hours.
When I took the brace out, the bubble was gone. The cork was perfectly flat and securely stuck to the wall. The cut wasn’t super noticeable, and I hoped it would disappear even more with a coat of paint. Worst case, it was still a spot to hang my calendar. (Spoiler alert: the calendar ended up elsewhere.)
I decided to paint the bulletin board because I didn’t love the colour of the underlayment. It’s a bit yellow and not a true brown cork. Plus I liked the idea of the bulletin board blending in with the rest of the walls a bit more.
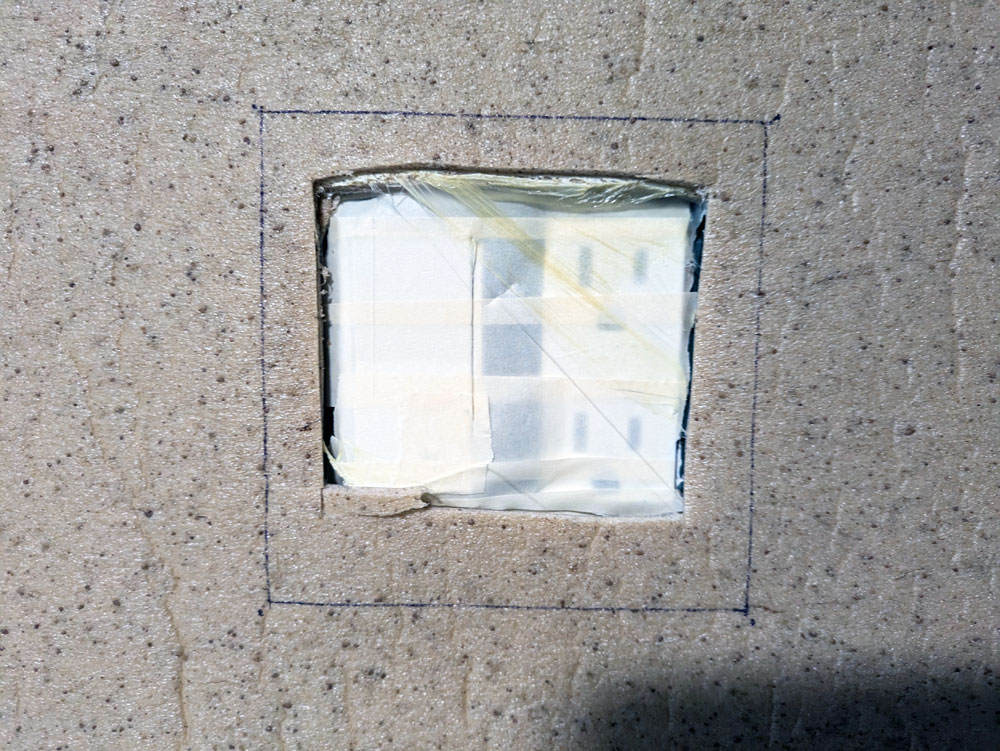
Before painting, I did my final cut around the two outlets. I traced the coverplates and very carefully cut the cork back. The outlets are recessed now into bulletin board.
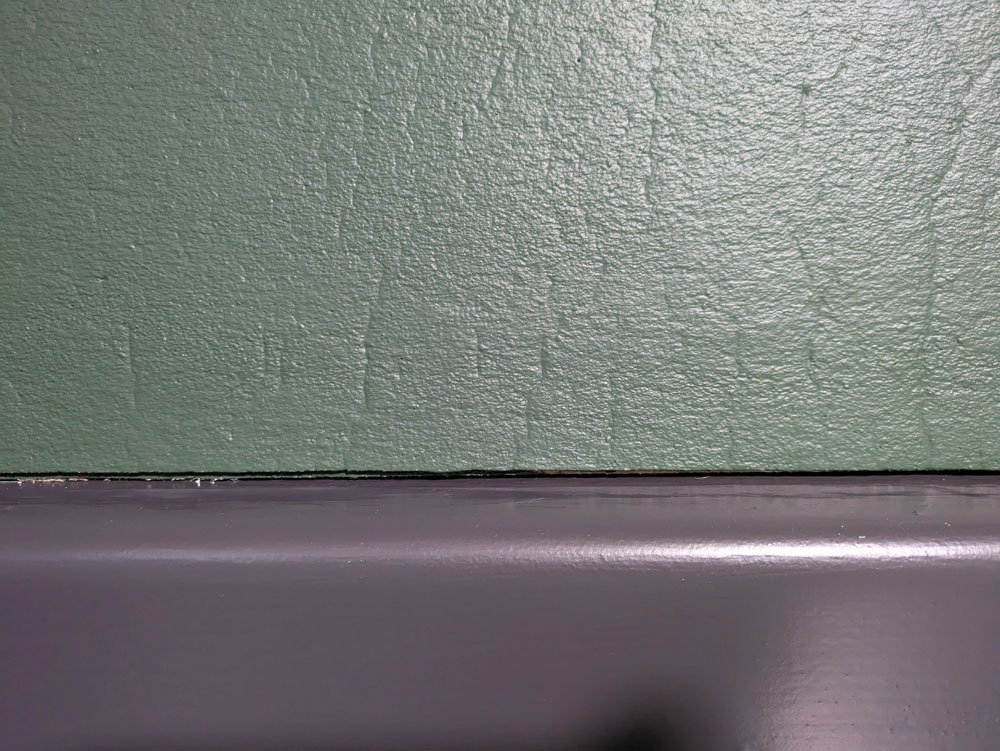
I primed the cork with my go-to Stix primer and then did two coats of green paint. The cork took the paint really well, and I really like how it matches the walls.
After painting, I took all the masking off the outlets and countertop. That’s when I found the gap between the bulletin board and the counter was more noticeable than I liked. I decided to caulk the edge of the cork where it meets the counter. Then I went over the caulk with another coat of paint. This made a really clean edge.
My third layer of cork was a bit more “wrinkly” than the earlier layers. This layer was closer to the centre of the roll of underlayment, so it was wrapped more tightly and had some creases in it. The creases were a bit visible on the wall, but they mostly smoothed out as the cork relaxed.
Once I started to load up the bulletin board, all of the flaws disappeared. I love how this project turned out. The wall is full of things that make me feel inspired, happy and loved. And I have plenty of room to grow.
I also love the trial and error–and ultimate success–with this project. I felt like I was returning to some of my old DIY days. I’m still that scrappy, creative, hard-working, cheap, make-it-happen person, and I like tapping into that.
Who else likes a bulletin board? Do you have a place to display creations and inspiration? Has anyone else had to adjust mid-project when things aren’t working out as you planned?
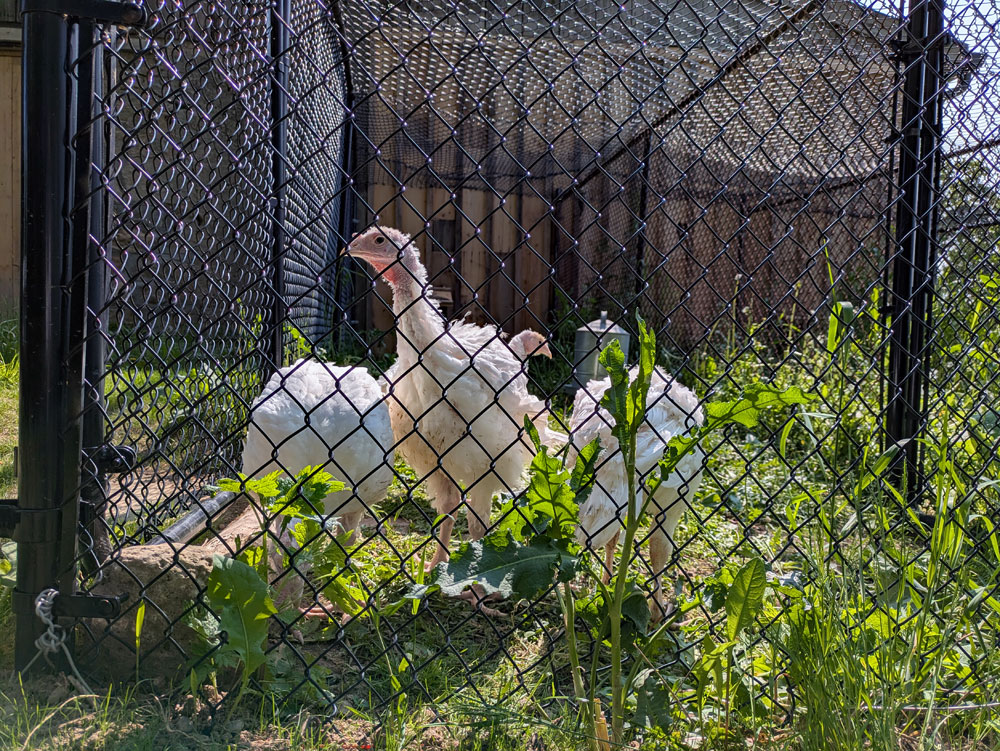
The birds moved into the coop about a week ago, and I am proud to say this project is done.
Today I’m going to share all the finishing touches that went into completing this space.
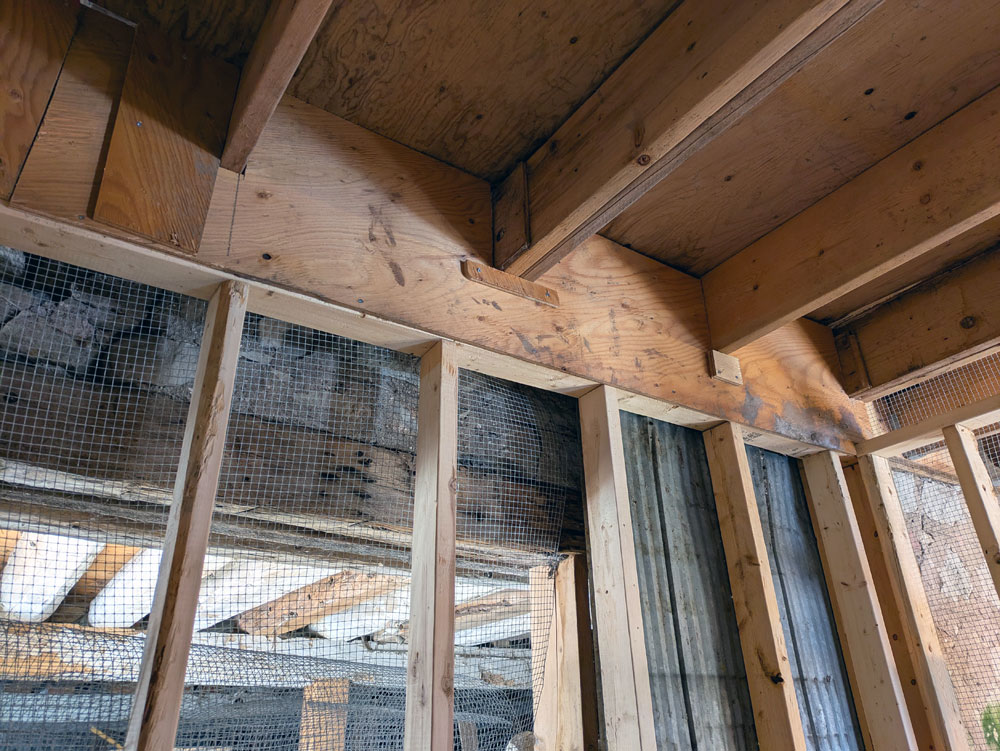
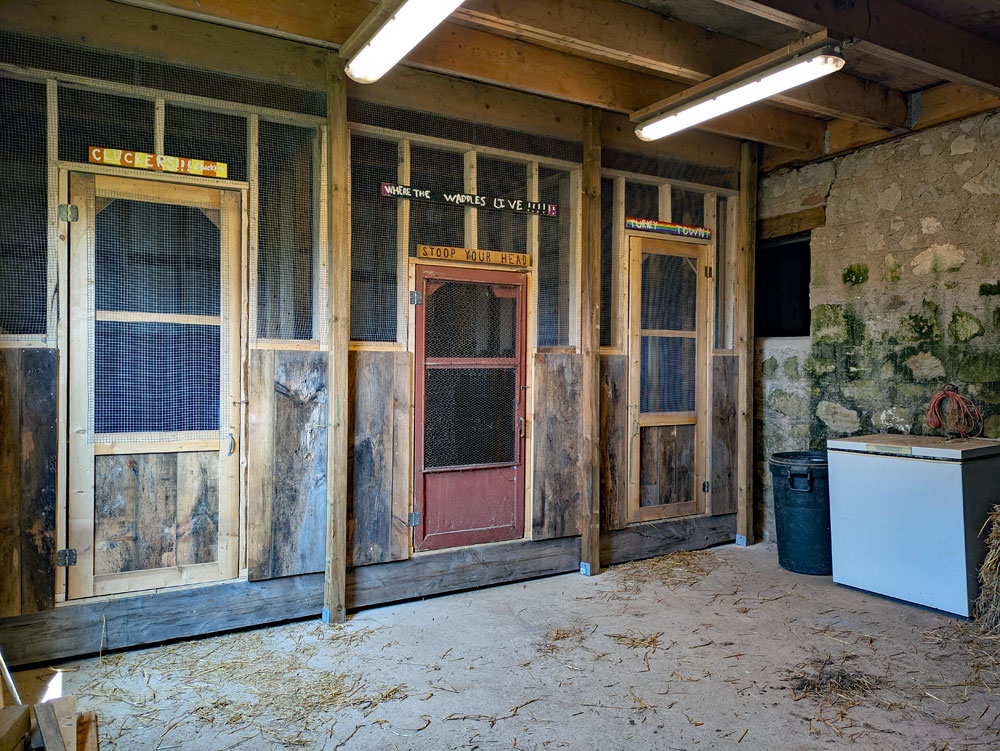
When we last visited the inside, the walls and doors were done, but the pens were not fully secure. I added mesh, boards, whatever worked around the perimeter of the coop along the ceiling. This will hopefully ensure that no climbing crawling predators can sneak over the top of a wall. It was fiddly work to make everything fit.
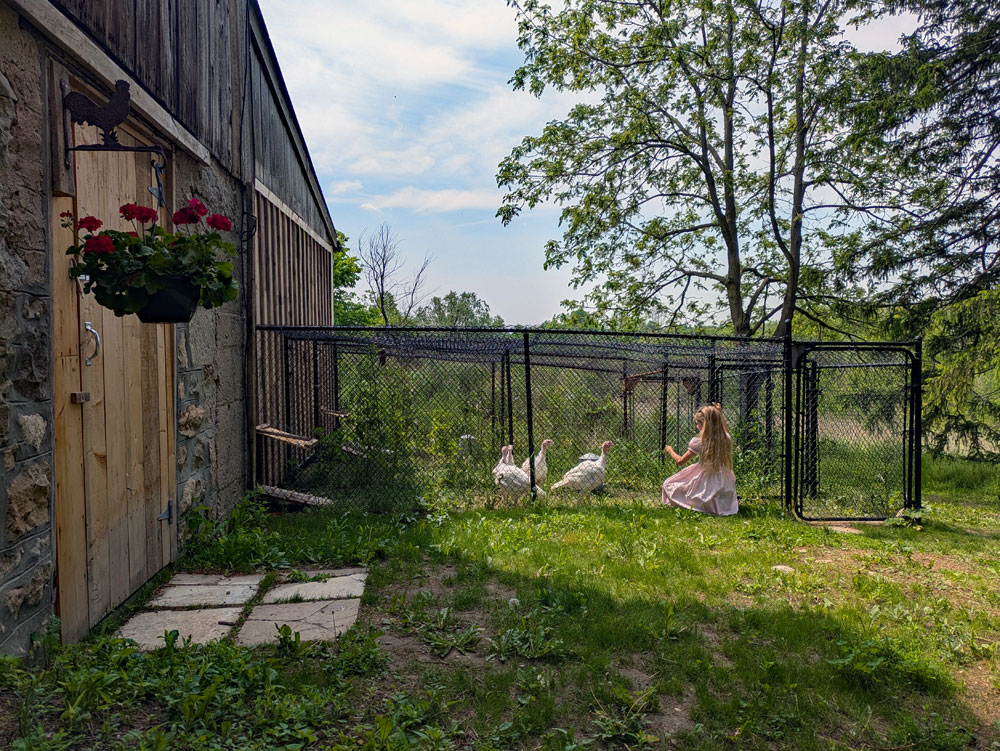
I also added a motion activated solar light on the back of the barn as an extra deterrent to anyone who comes creeping up through the field.
Then I needed to fit out the interior of the pens.
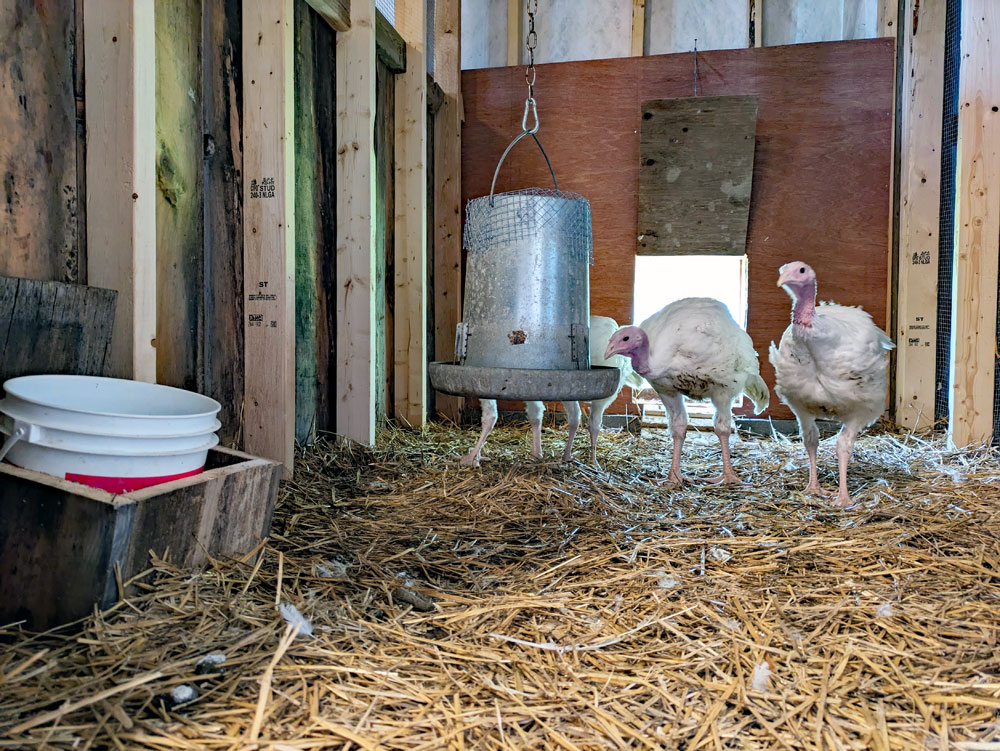
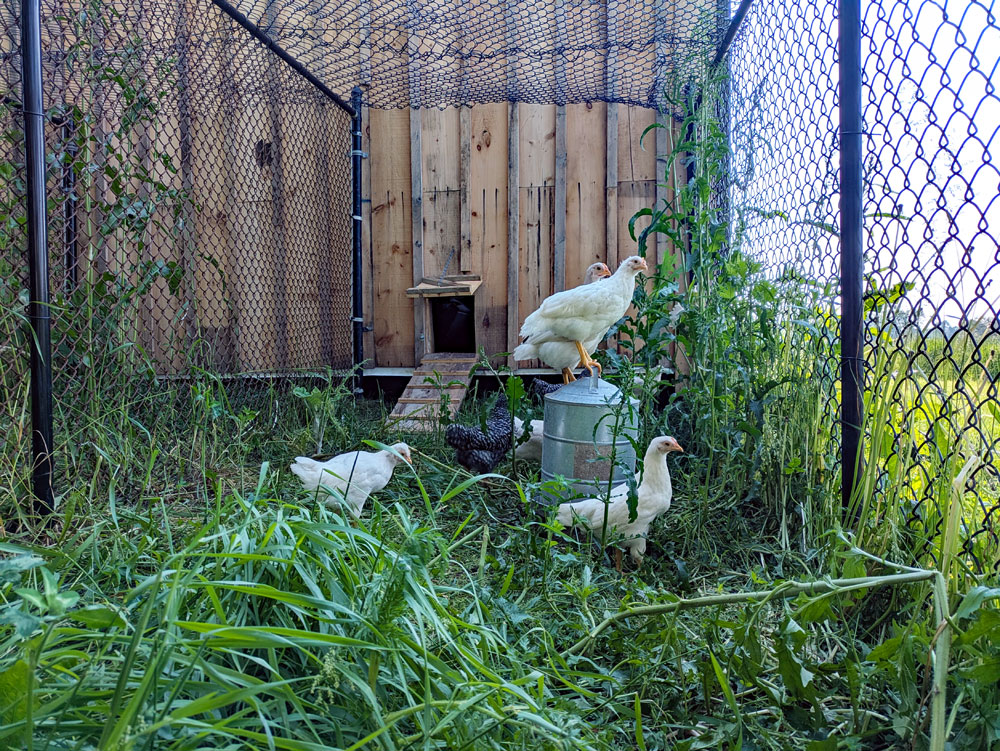
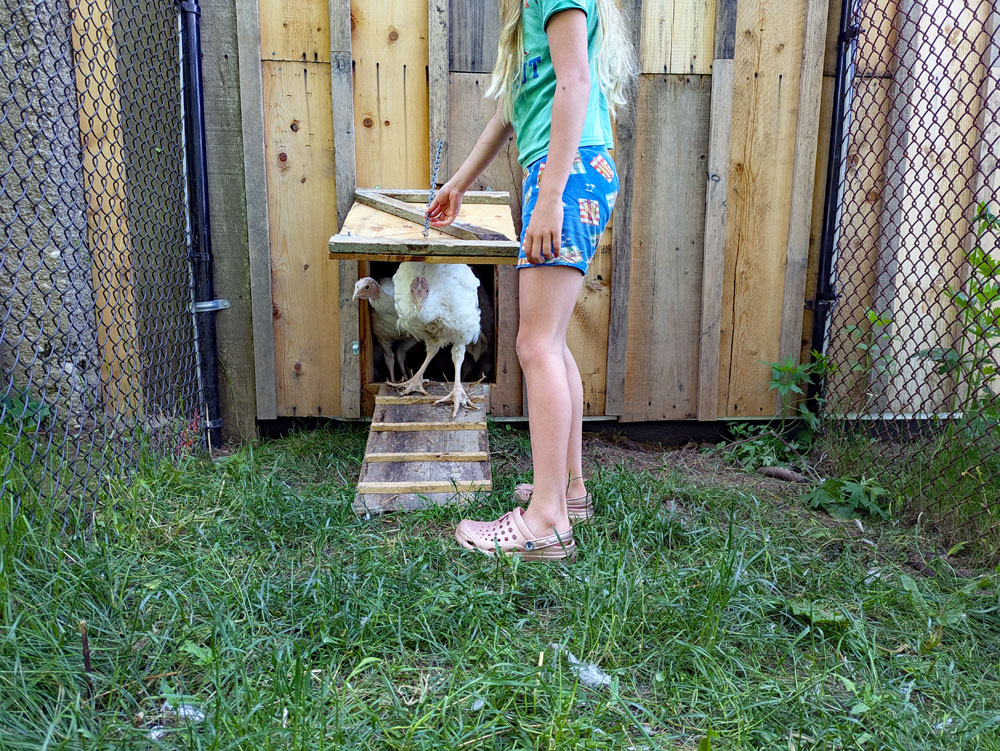
For the turkeys, this was simple: a feeder and a waterer. I found an old metal hopper feeder in the barn, so we washed it out, covered the top with mesh (to hopefully dissuade rodents) and hung it from the ceiling. It’s working very well for the turkeys. For their water, I went with a simple bucket. I built a little box to hold the bucket so the turkeys can’t tip it over (something they loved to do in the brooder). Right now the box is sitting on the floor, but I can attach it to the wall if I want to raise it up.
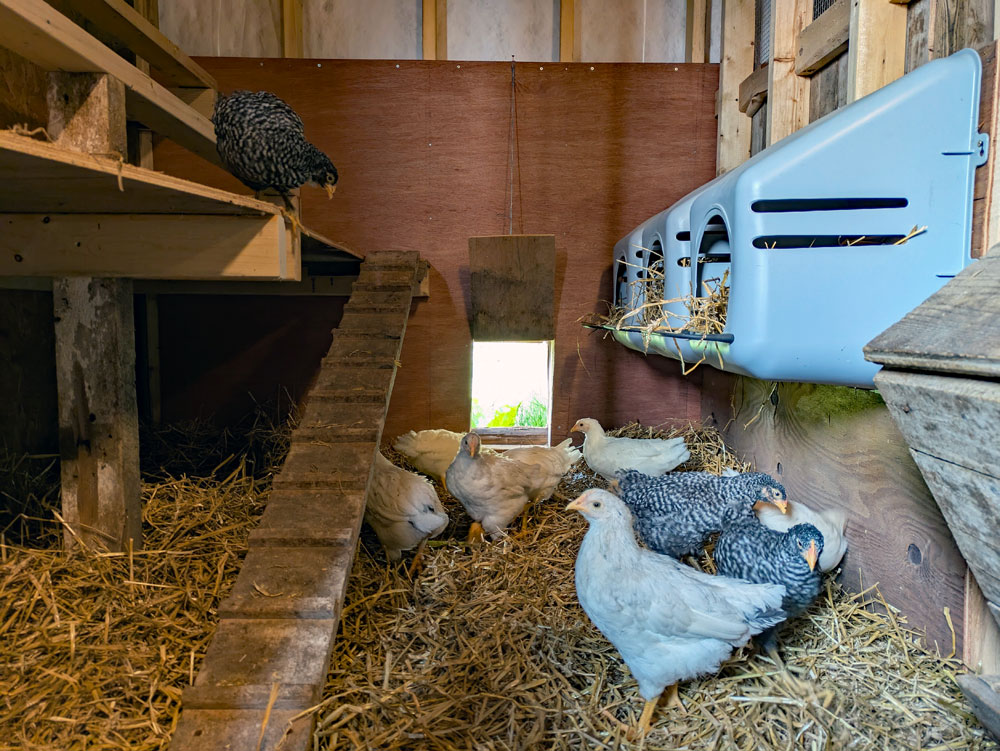
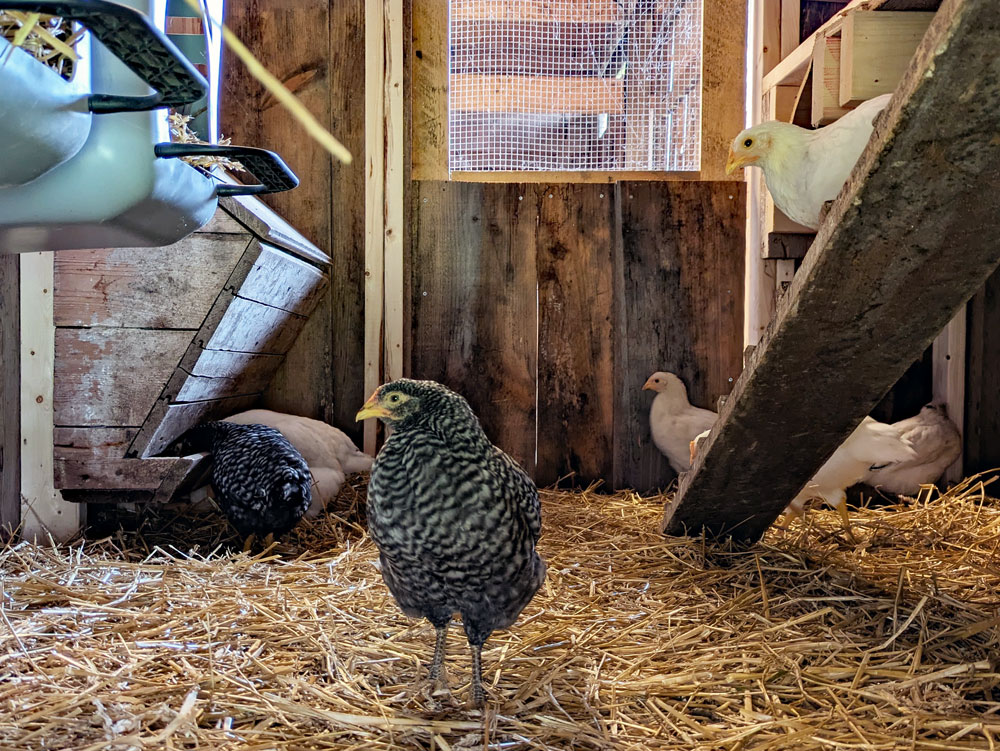
The chicken fit out took a little more work… and a relocation. The hens needed a few more things in their stall. Water and food, of course. But also nesting boxes and roosts. As I was planning the roosts, I realized everything wasn’t going to fit in the centre stall, which I had assigned to the chicks. But the end stall was a few inches bigger… just big enough for everything they needed. So they moved next door.
The nesting boxes are simple plastic bins that screw to the wall. They lift off the screws easily so I can dump out the straw or even rinse them out if I need to.
For the roost, I spent some time researching to figure out the best approach. Here’s what I found. Build your roost as the highest option in the pen. Chickens like to be high to sleep, so if your nesting boxes are the highest thing, that’s where they’ll sleep. Since I want them to sleep on the roost, I made sure the roosts were higher than the nesting boxes.
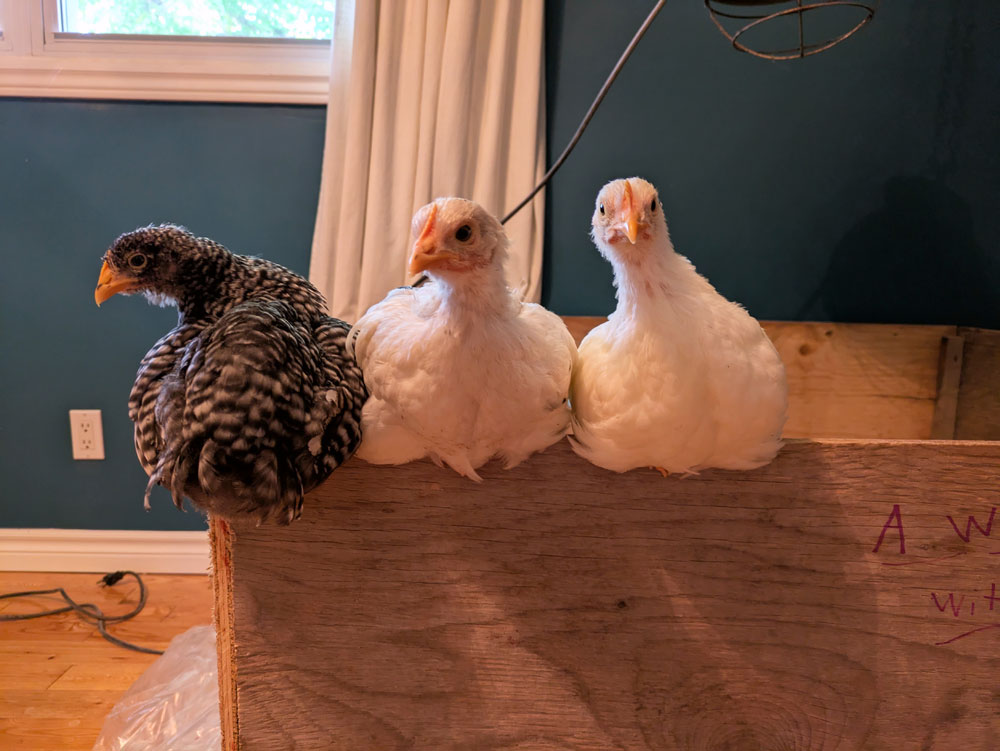
I also found that chickens like a sturdier perch. They are not songbirds who will wrap their toes around a branch (although watching them walk along the edge of the brooder box, I think they do pretty well). So I went with 2x4s laid flat for a nice wide perch.
The other topic was optimal spacing. The recommendation was 12 inches per bird. Since our order was for 15 birds, that meant 15 feet of roost. Our pens are 8 feet long, so this worked out easily to 2 roosts along one side of the pen.
A feature I added courtesy of my Dad is a poop board under the roosts. Roosts tend to be a messy area. Chickens poop in their sleep and sometimes even lay an egg. The board under the roosts will hopefully catch the mess and then I can easily scrape it off, rather than changing all of their bedding.
All of my research and planning complete, I went to work and built the roost. Along the way I also decreased our chicken order. The pen was starting to look a bit tight, and I was worried the birds would be too crowded. So I dropped our order to 9 birds. We ended up with 10, as the hatchery seems to have a practice of giving 1 extra chick. We have lots of room for everyone to be comfortable… and we’ll still have lots of eggs.
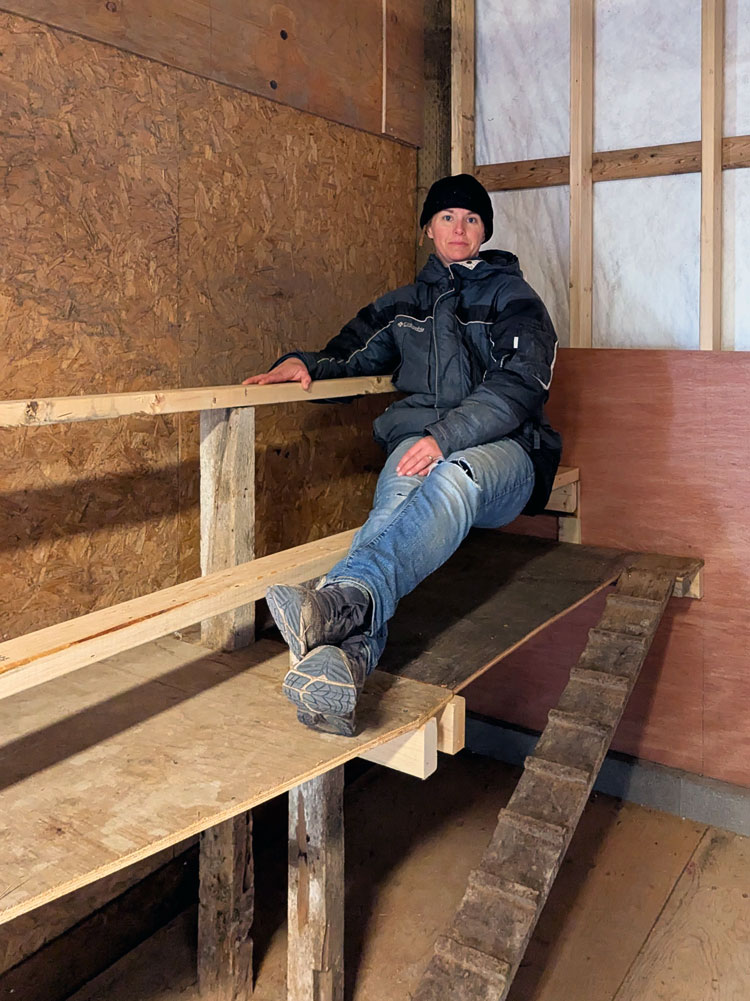
The roost turned out well… nice and sturdy. (From my attire, you can tell when I was working on this.)
Then I added a little ramp that we had from the old coop in case any birds needed help getting up. It’s on a hinge so we can easily lift it out of the way when we need to clean out the stall.
The final touch was, once again, feed and water. The chicks have another bucket in a box, just like the turkeys for their water. For their feeder, I went with a wall mounted version to save space. This was another souvenir from the old coop that happened to fit perfectly in the remaining wall space.
After the first week, I made a couple of adjustments to decrease the size of the opening where the food comes out, because the chicks were spilling a lot of food, but otherwise it seems to be working well.
Each flock also has water in the run with two large metal waterers that we had stashed in the barn. (Yes, that is 2 chicks standing on top of the waterer.)
Ellie made some signs for each pen. The turkeys live in Turkey Town. The centre stall is Where the Waddles (will) Live. The hens are The Cluckers.
The final detail came from my Mom who bought me a coop warming present of a happy red geranium. This hangs by the door on a chicken plant hanger that used to be on the side of the house. I kept it during the garage demo and have been saving it for exactly this spot.
Since the turkeys and chicks moved in everything has been working really well. They seem comfortable in their pens and in the runs. We lock them in every evening, and it’s an easy task to move through the run, herd them inside, drop their little doors and latch them shut.
In the morning we open the little doors and they pop right out flapping and stretching. They’re eating down the grass and weeds that had grown pretty high in the runs.
I opened the gate between the Waddles and the Cluckers runs, so the chickens have double outdoor space. I had wanted this option during the run construction, which is why I had our contractor add extra gates. I’m pleased that it’s working as I envisioned. It’s nice to give the chickens some extra space and this way the grass doesn’t get overgrown. Win-win.
As a whole, the coop is working as I planned. I’m so proud of this project. It was a big build for me. I had help along the way on demo with my cousins, clean up with our landscapers, fencing with our contractors, walls and more fencing with Matt’s Dad, which I’m very grateful for. But the design and most of the work is mine.
It took figuring and muscle and time and energy and skill. I had what it took and I made it happen. It’s a really good feeling to see the birds in there, chirping (no clucks or gobbles yet), scratching, eating, drinking, snoozing, flapping… birding as they’re supposed to.
Thanks so much for following along with this project and cheering me on throughout it.
I shared the final video updates of the coop construction on Instagram. Follow me at juliaon129acres. If you want to relive the whole construction process, check out the coop highlights (part 1, part 2, part 3).
(If you want to check out some before photos, check out this post or this one. If you want a refresher on what my plans are for this space, this post has a moodboard, floorplan and more details.)
I started taking the bathroom apart at the end of April. I took down the tile and panelling. I pulled out the tubs (there were two, one layered over the other), vanity, floor and linen closet. Everything came out fairly easily, and I am really proud that I was able to do it myself.
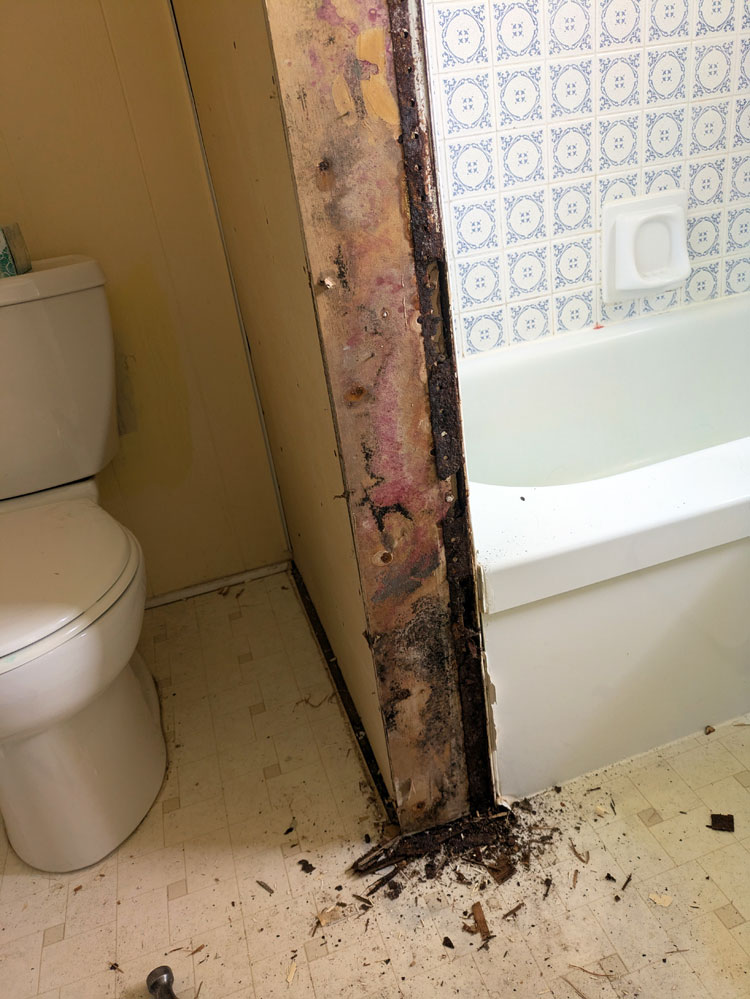
Demo is where you find all of the dirty secrets–dirty being both a literal and figurative term. I confirmed that some water had been leaking at the edge of the tub. I had expected that and the damage fortunately was very minor (one moldy stud). I discovered squirrels or other critters had set up a clubhouse under the tub at some point. There were walnut shells, bones, candies, a cigarette pack and all kinds of disgustingness under there.
Everything cleaned up and I had a blank canvas to begin to put it all back together.
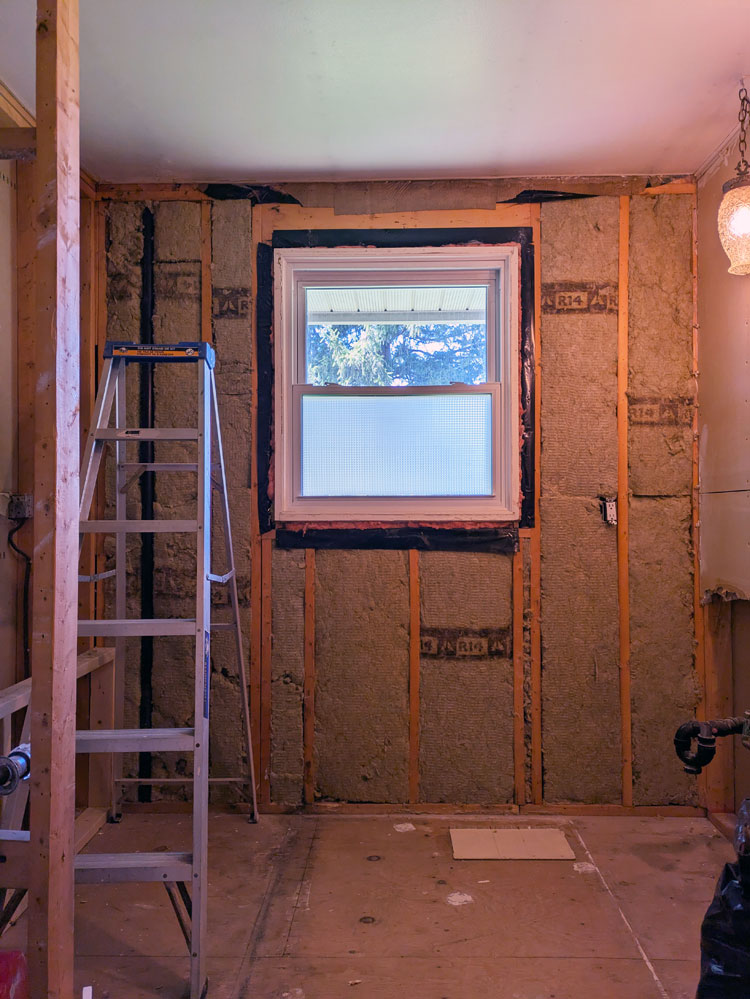
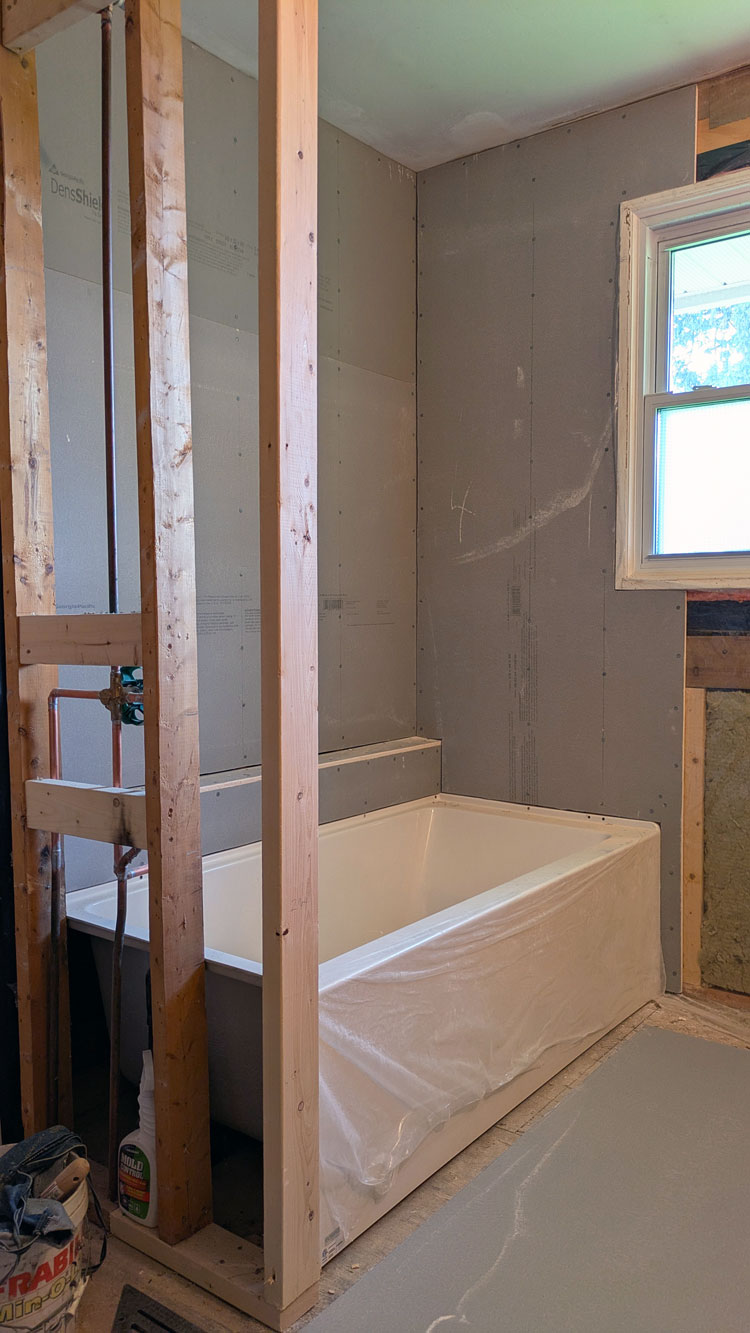
I put in new insulation and vapour barrier on the exterior wall. I adjusted the framing around the tub, as I’m adding a ledge for shampoo and soap all the way along the wall.
The plumber came and roughed in all the pipes and drains. He had to shift the taps and drain for the tub slightly, as the ledge pushes everything out a few inches. The plumbing under the sink was very tangled. Now it’s tidy and tucked between the studs. We installed the tub and removed the toilet.
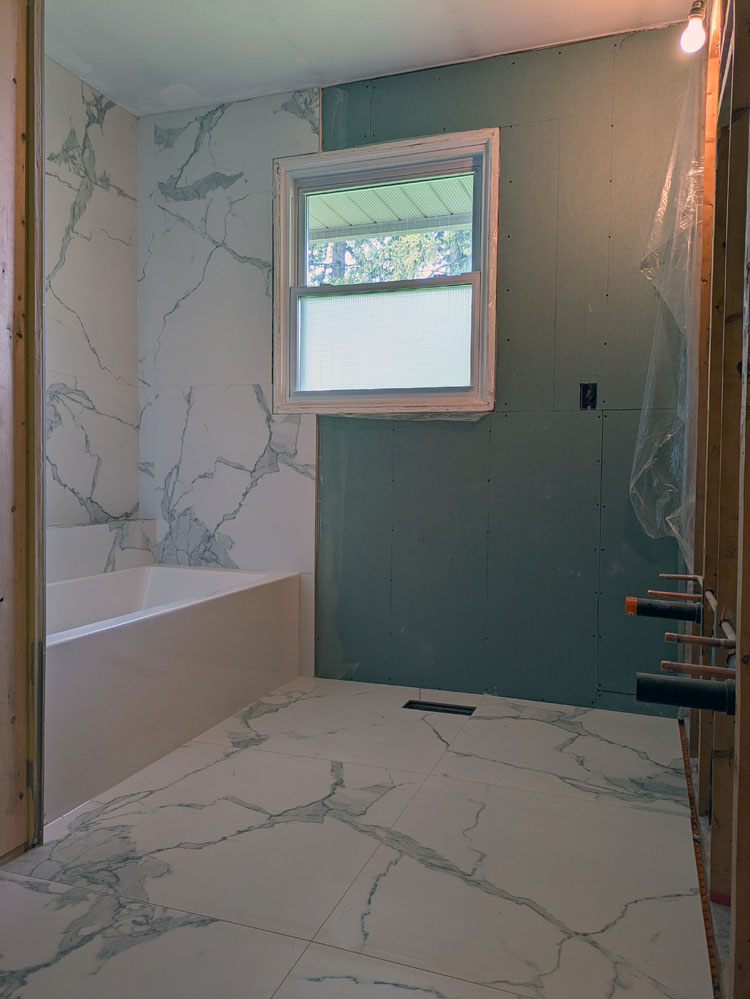
I chose the deepest alcove tub I could find. I wasn’t able to make space for a longer tub, but baths should be a bit more comfortable with the new tub.
The electricians came and roughed in all our new wiring. One vanity light became two, one plug became two. They wired the floor for heat. We also got a new circuit panel, as our old one was maxed out.
Then the project came back to me for a few days. I installed tile backer and drywall.
The tilers came and they brought our beautiful new tile with them. It was exciting to see the first pretty things go in the bathroom. They installed the heated floor membrane, tiled the tub walls and then the floor.
I chose a very large tile (32 inches by 32 inches) to minimize the amount of grout I have to clean. Just two tiles covered the full length of the tub. Nine tiles did the whole floor.
Then the project came back to me again for the wall paneling. I’m installing pine V-groove paneling. It’s similar to what we used in the mudroom and a big step up from the fake 1970s era paneling that was in the bathroom before.
And that’s where the project is at currently. I’m slowly working my way around the room putting up the walls.
For the past month, I’ve been trying to stay ahead of my trades and have everything they need ready to go. Now the pressure has eased a bit, and I’m working at my own pace. Though I definitely want to keep moving and complete most of the work before Ellie finishes school for the summer.
Despite the pressure–and a few disgusting moments–I’ve been having fun with the renovation. I’ve waited a long time for this project, so to finally be underway is very satisfying. It’s also fun to see the elements I’ve chosen (tile, tub, taps, vanity) arrive and (slowly) be installed. So far, I’m loving my choices and it’s so exciting to see this project coming together.
I’m documenting the bathroom reno and sharing it in a series of videos on Instagram. Follow me at juliaon129acres, and catch up on all the construction in the bathroom highlight.
I was unsure what colour I wanted to paint the office for a long time. Back when we first set up the room, Matt picked a forest green (Benjamin Moore Manor Green). It was not my favourite colour, but it was his room, so I didn’t say anything.
Once I decided the office was going to be mine, I was more than ready to repaint.
I liked the idea of sticking with some shade of green. I like green and it would be another memory of Matt. I knew I wanted dark olive green a few places in the room (namely the vintage metal drawers I found years ago at an auction). Did I want it on the walls too?
I finally decided to go for it. But then I had to figure out what green. I sampled several: High Park, Rosepine, Cushing Green, Peale Green. They were too light, too grey or too brown.
Ellie’s comment was, “So you’re painting the office garbage can green.”
Thanks, girl.
I returned to the paint store in search of my goldilocks–not garbage can–green.
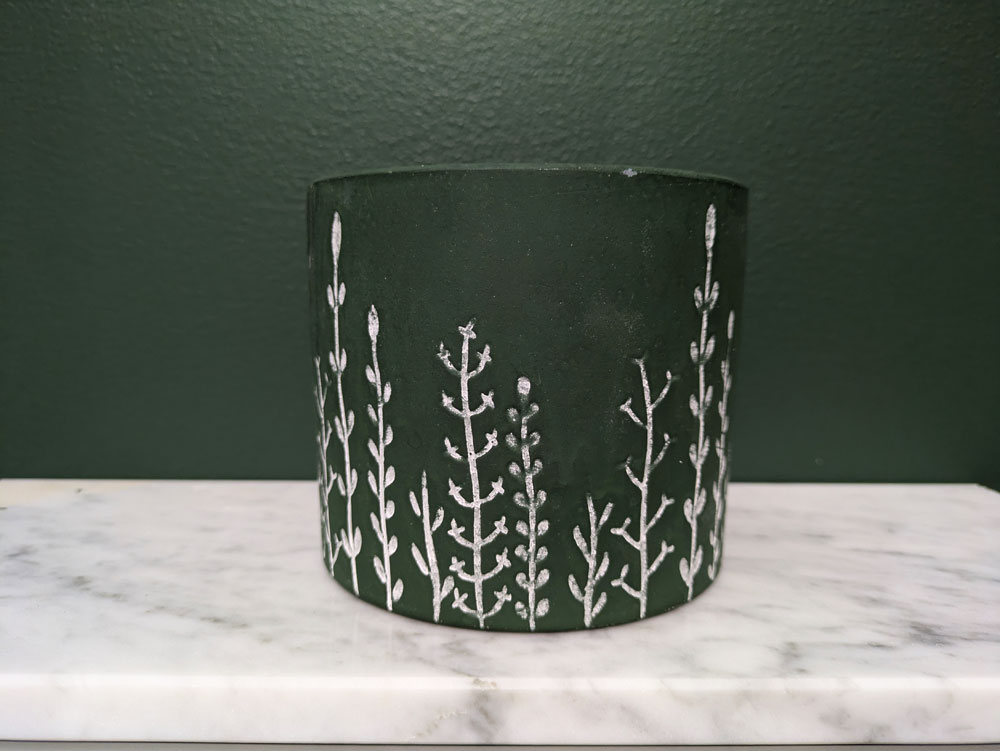
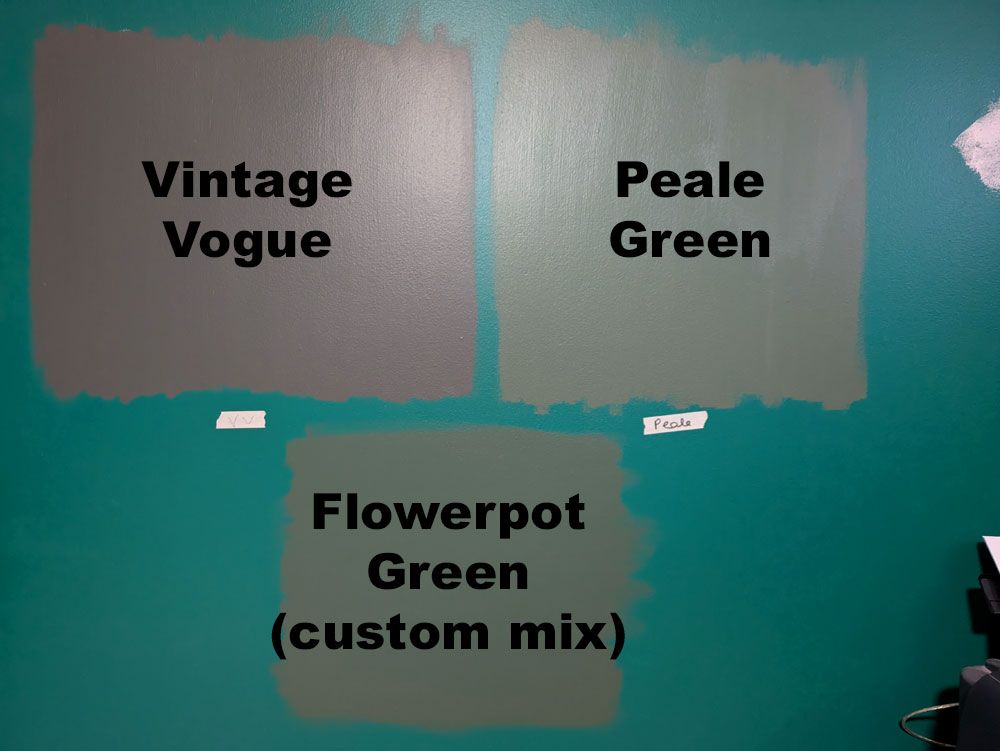
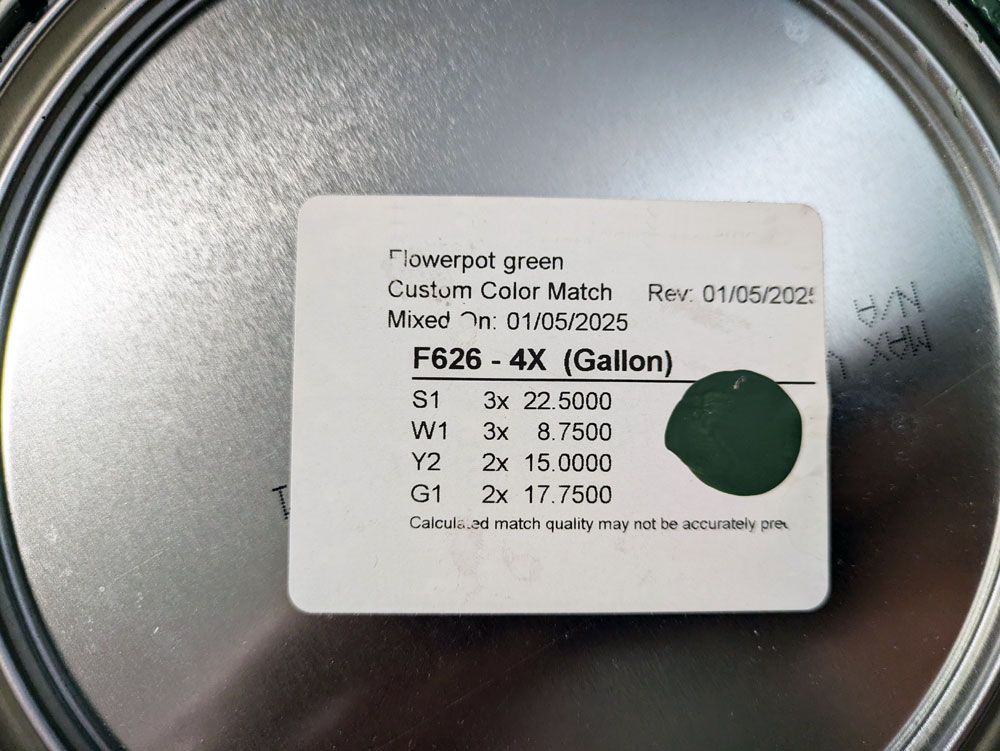
I bought two more samples: the oh so popular Vintage Vogue and a custom shade matched to a flowerpot my sister gave me for Mother’s Day.
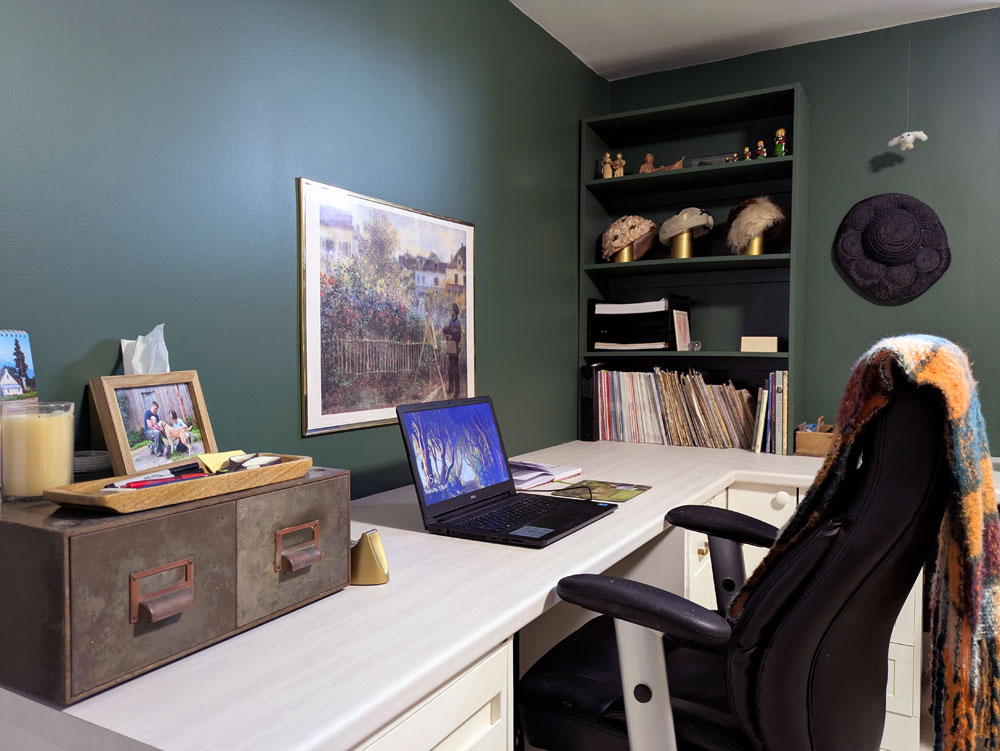
Back at home, I put them on the walls… and Flowerpot Green was the winner. It’s dark, but not black, not brown, not grey. It is definitely green, and it picks up the tones of so many of the things I used in this room.
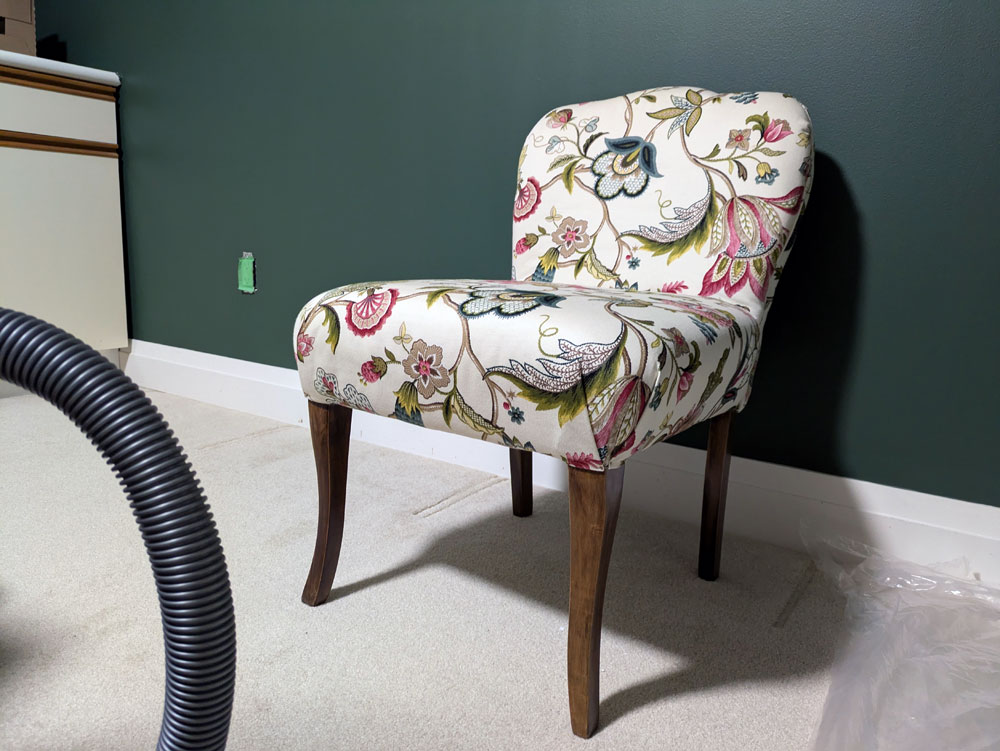
I had a few moments of hesitation as I was painting the first coat, but then I decided I liked it. When I moved my vintage slipper chair in just to see, I loved it.
My Mom’s reaction gave me another reason to love it. Her comment the first time she saw the room was, “Oh, this is the colour we had in the living room and dining room at home!” She was remembering a time that my grandmother (a frequent redecorator) got new furniture, painted the living room dark green, and then sewed curtains to match.
So from my grandmother to Matt to my sister taking care of me on Mother’s Day, my new office paint is full of history and meaning and family. That feels like a good choice to me.
Do you have a favourite colour? Have you ever had a custom paint colour mixed for you (this was my first time)? Are you a fan of neutrals? Or do you go for colour? Who prefers light shades over dark?
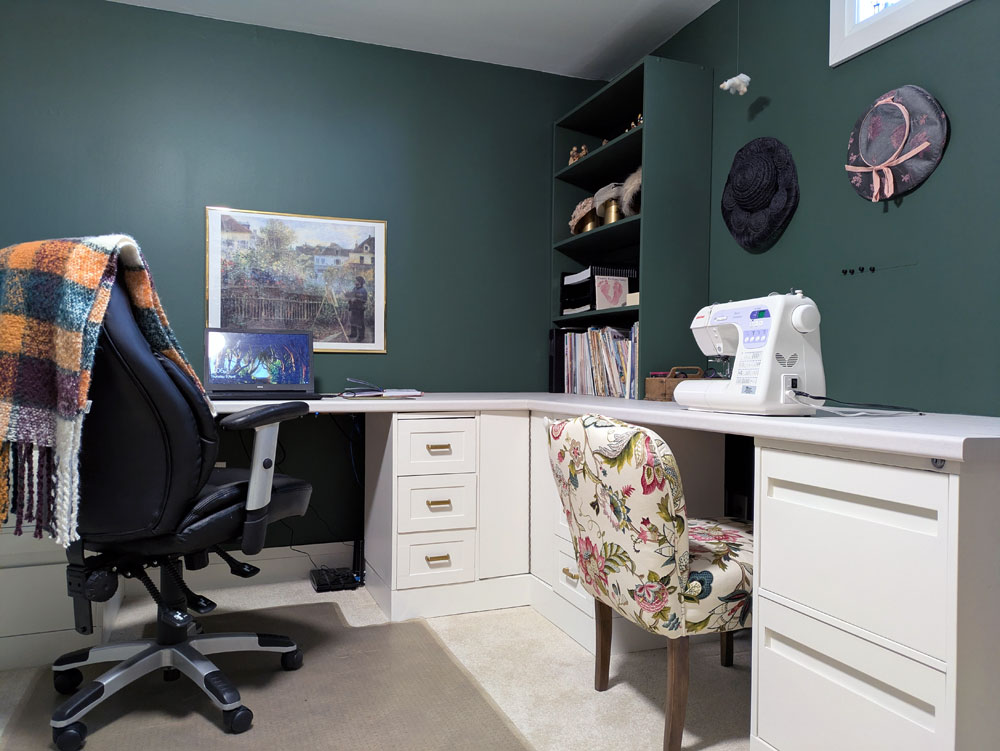
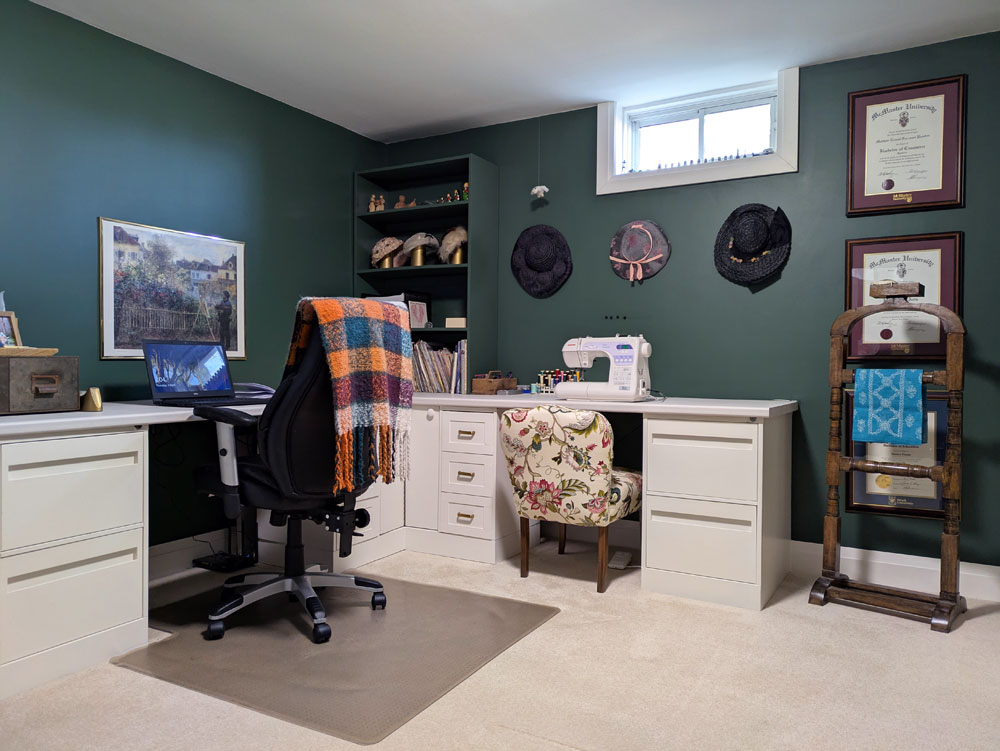
My Mom taught me to sew when I was young, as her Mom had taught her. As my great-grandmother taught my grandmother. Now I have a new space for sewing, crafting, writing, working, creating. A space filled with heritage and history from these women and so many other special people in my life.
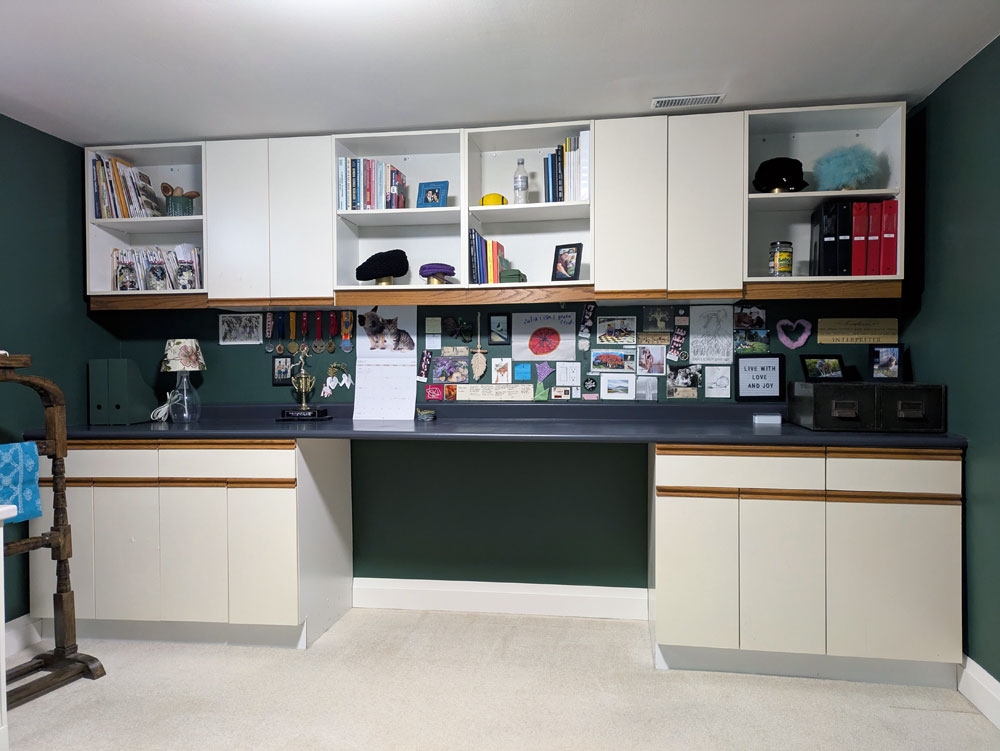
Welcome to my new office.
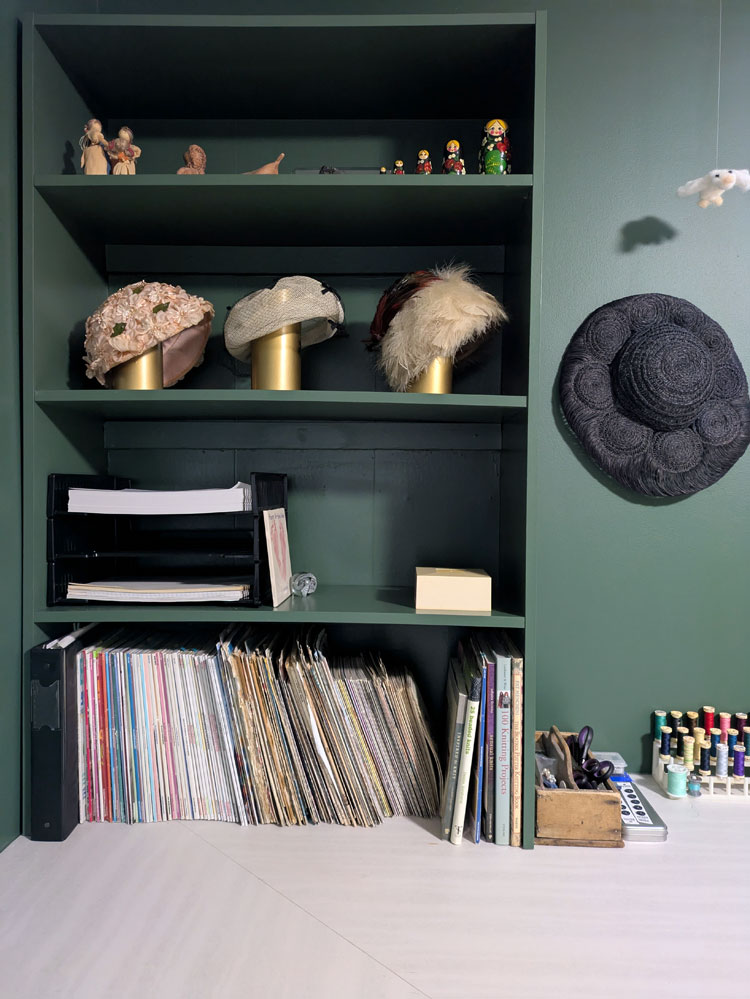
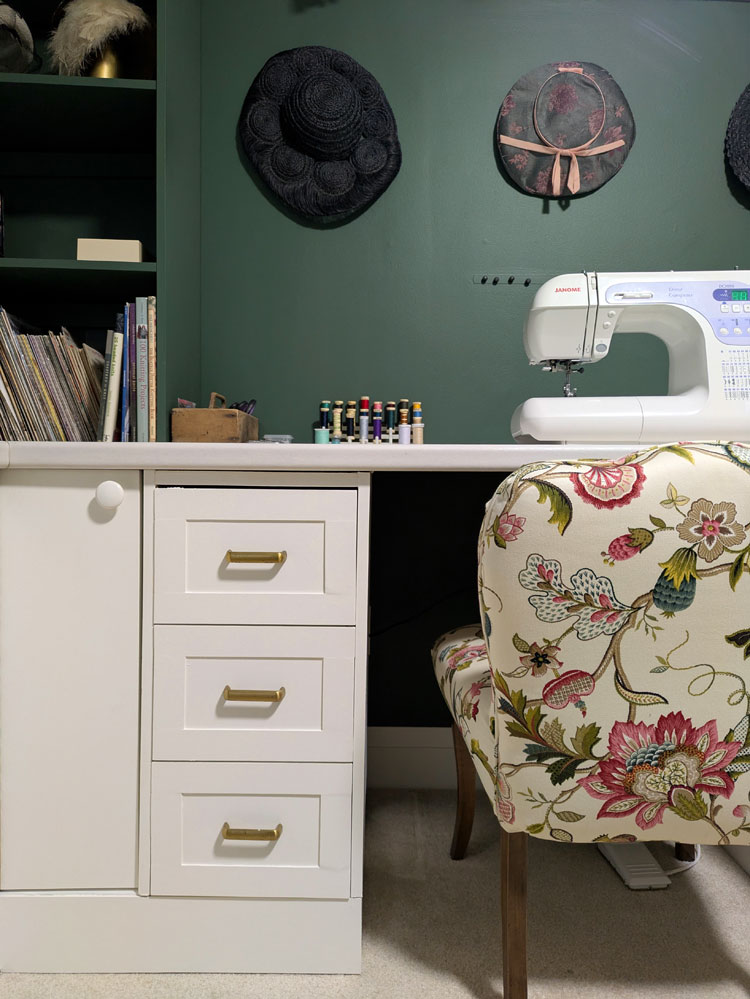
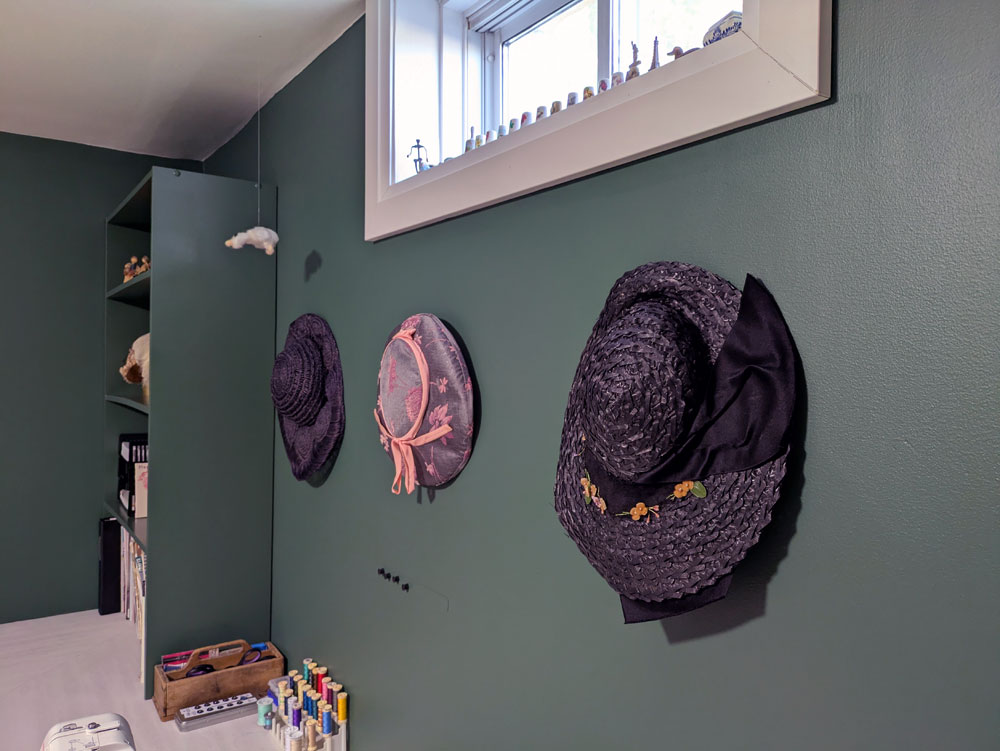
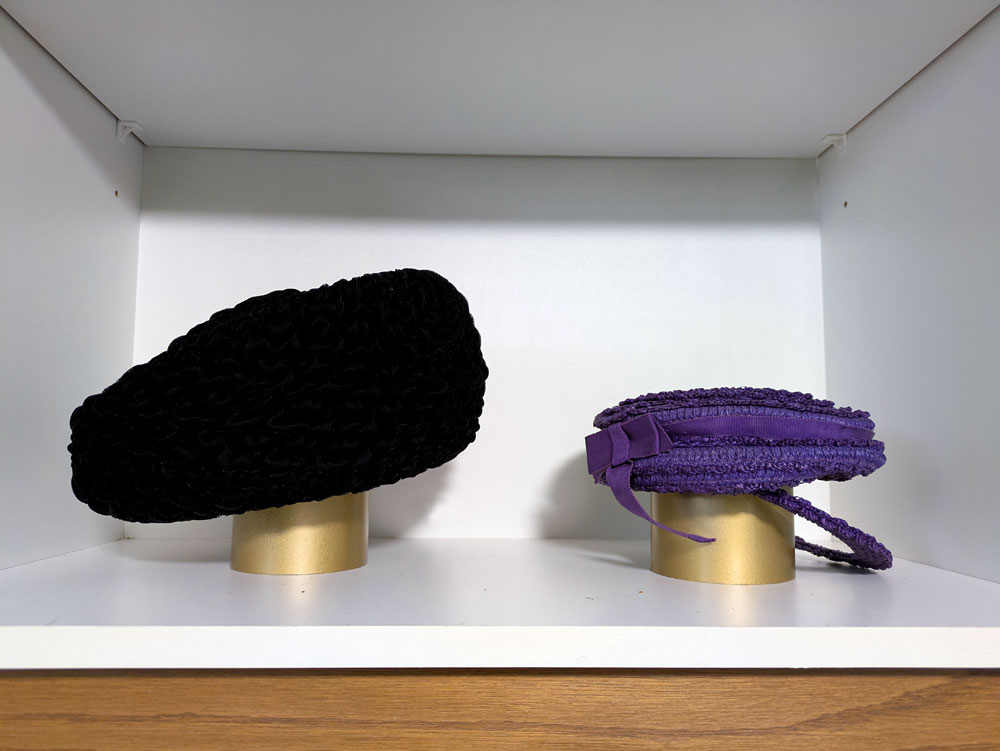
Spread around the room, you will see my collection of vintage hats. Most of these are my grandmother’s. One was made by my great-grandmother. I remember finding a scrap of material in my Grandma’s stash and recognizing it from the hat. I was blown away that someone could simply make a hat. This legacy of creativity and ability is something that I’m very proud of and try to live up to.
As I was decorating the room and styling the shelves, I realized that the hats needed some support. They didn’t look right just sitting on the shelves and I couldn’t see their details clearly. Of course, my initial thought was, “I need some heads.” But I quickly came up with another solution. I chopped up a broken pipe we had left over from redoing our sump pump outflow. I sprayed the pipes gold and voila. Cheap, simple, fancy hat stands. Creativity and ability, check.
The rest of the shelves are filled with books, photos, sewing patterns, mementos. There’s a pickle bottle Matt’s Dad found that is made by Matt and Steve–their names. There’s a football my Dad bought me when I was a baby. There’s a collection of buttons in a powder box that smells just like my Grandma when I open it. So many precious, special things that I can see and enjoy now that they have a home.
Matt and I installed the cabinets when we set up this room as his office. They provide such great storage for all of my sewing, knitting, wrapping and other supplies. I would like to update the doors and give everything a coat of paint some day, but for now I am enjoying their storage and ignoring their style. This is the first time I have ever had all of my sewing and knitting materials in one spot, and it’s so helpful for projects.
The backsplash is a very long bulletin board. This corkboard is full of things that I find inspiring, beautiful, fun. Cards from friends, crafts from Ellie, even a few notes from Matt. I will be sharing more details about this project in a future post.
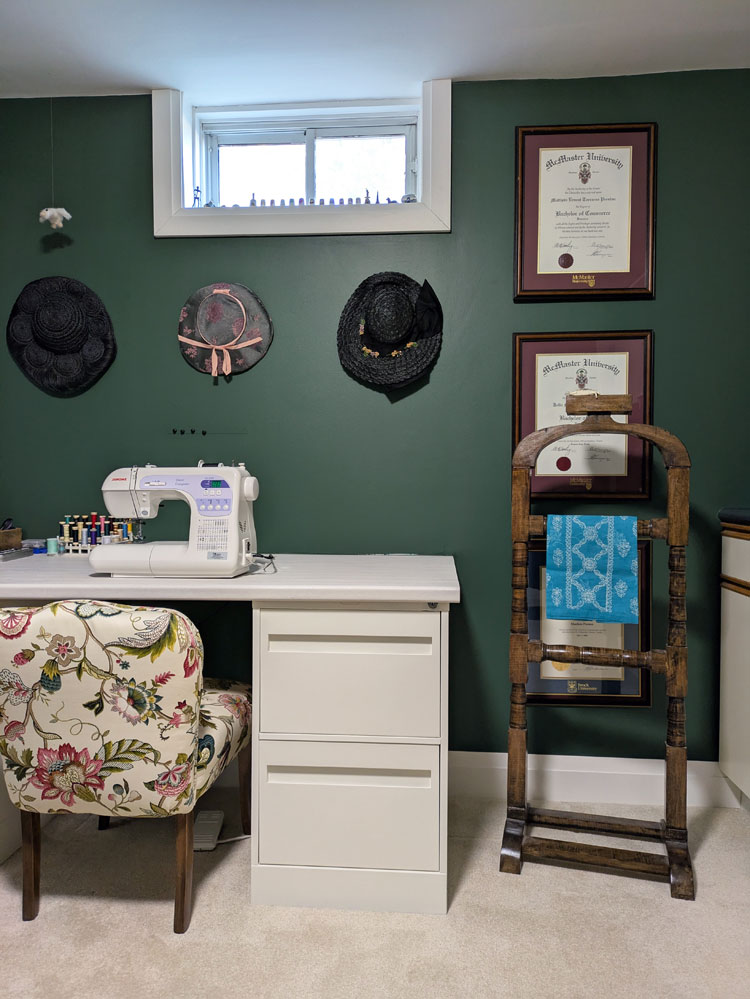
The biggest function is the huge corner desk. I have two workstations here, one for my computer and one for my sewing machine. Each zone comes with its own drawers for office supplies or sewing materials. There are also four large file drawers that hold all of our paperwork and even some extra crafting supplies. Above the desk, I have some open shelves for more storage and display. I’ll be going into more details of how I built this desk in an upcoming post because I am very proud of how it turned out (more creativity and ability).
As part of the sewing zone, I have a valet stand that my Dad built for me. When he took up woodturning, he had some signature things he liked to make. One was valets like this. It is perfect for holding in progress sewing projects. Behind the valet I hung Matt’s and my diplomas. They fit perfectly in this space, and I like that Matt and my Dad are both part of this room. So many legacies in this one corner.
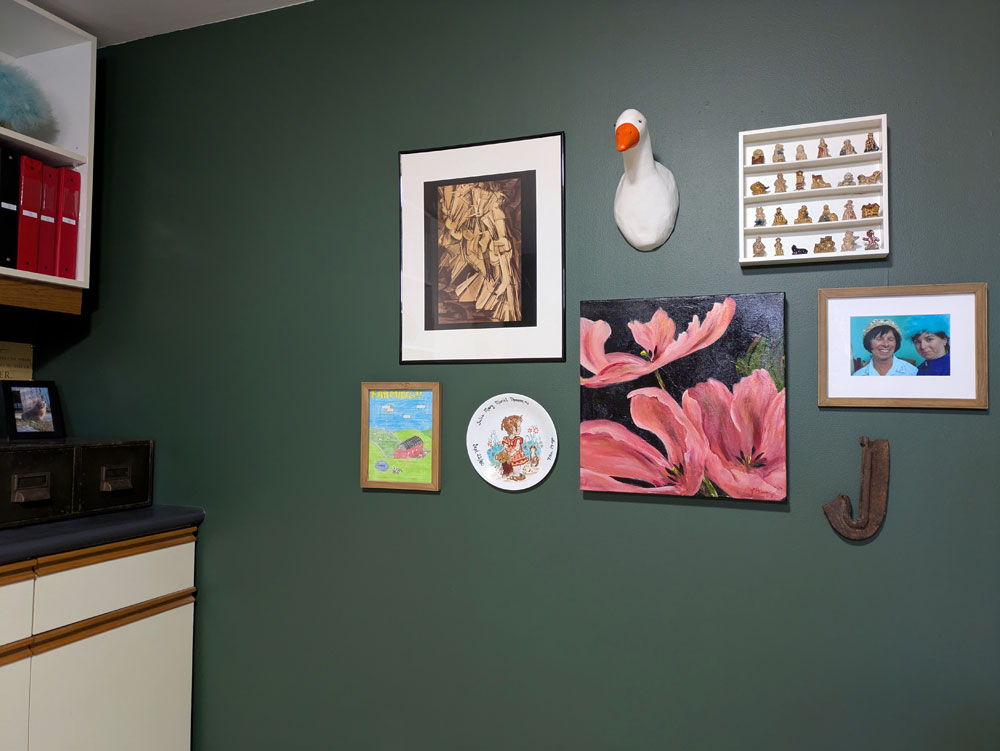
A gallery wall on the other side of the room holds more pictures and things that are special to me. The window sill holds a collection of thimbles from Matt’s Mom and other small trinkets. Ellie needle felted a goose to look like my long ago pet Bill and I hung it from the ceiling so it flies over my sewing machine.
The two sets of green metal drawers came from an auction we went to years ago. They’ve been in the driveshed ever since waiting for the right spot. Now, one sits on the counter and the other on my desk. They give great extra storage, and I love their rustic green patina.
There are so many details in this room, I feel like I could keep going forever. There are a few things I’m still hoping to add (Matt chose the cheapest light fixture possible, and it’s terrible), but I love how this room turned out right now. It is functional. It is pretty. And, like all my spaces, it is personal.