Summer project report

Take a journey with me back to February, would you?

Don’t worry. You don’t have to actually go back to the time of snow and cold and dark.

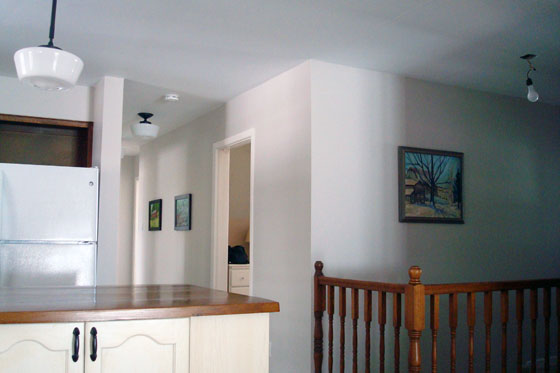
Just remember back in February when we painted the foyer, kitchen and hallway.

Hallway painted Benjamin Moore Abalone

Now let’s go back a little bit further to January when I posted my 2014 Home Goals, and I said I wasn’t going to paint the living room this year.

Well, I lied… kind of.

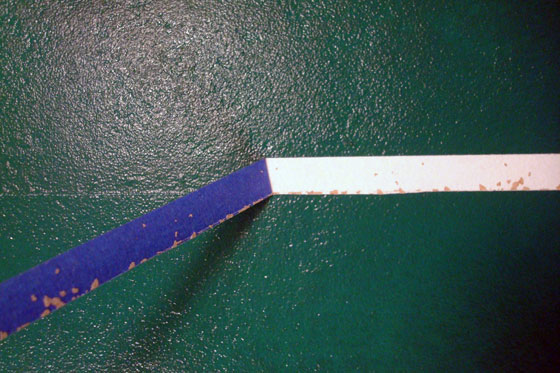
The kitchen, hall, foyer and living room all run together, so I planned to paint them all the same colour. Knowing that I wanted to set up my bookshelves this year, back in February Matt and I painted one wall of the living room–the wall I planned to put the bookshelves on. I figured once my shelves were set up and full of books, I wouldn’t want to take everything down again to paint behind them.

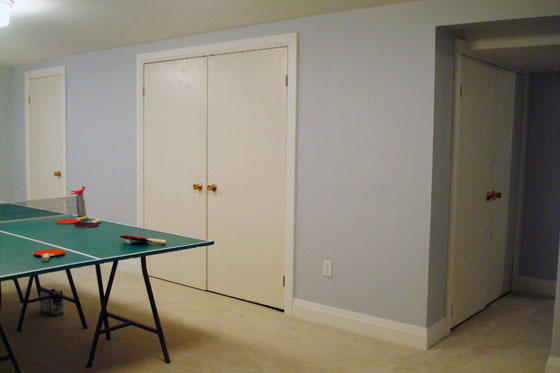
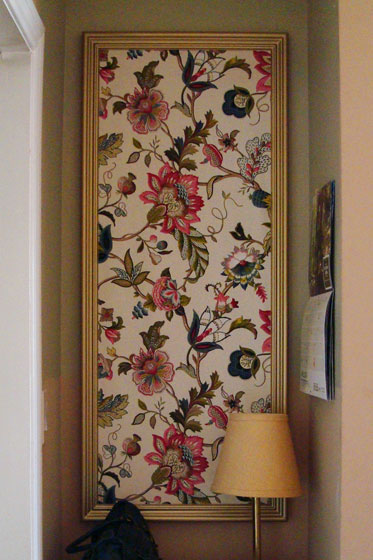
So the living room has looked a little bit like this for the past six months. Stylish, I know.

Half-painted living room

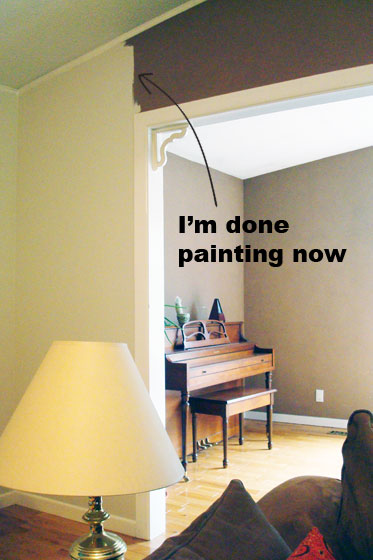
Well, the thing is, when I started the bookshelf makeover this month, I realized that if I put the shelves where I originally planned, we wouldn’t have room to walk around the couch and into the dining room. I decided to put them on the opposite wall. A wall which was unpainted. Whoopsie-doodle.

So my August project report goes something like this.

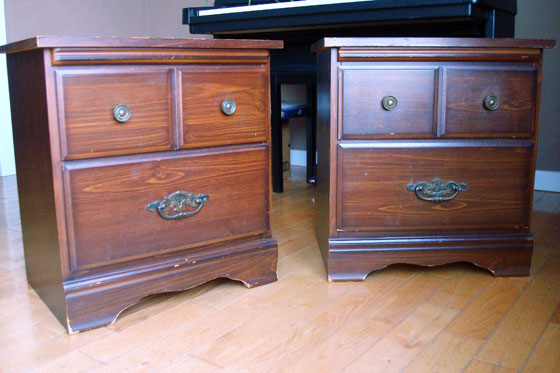
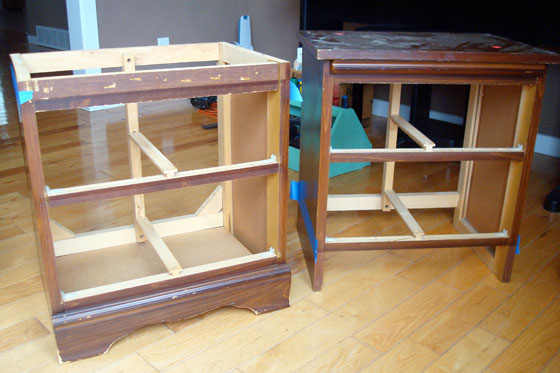
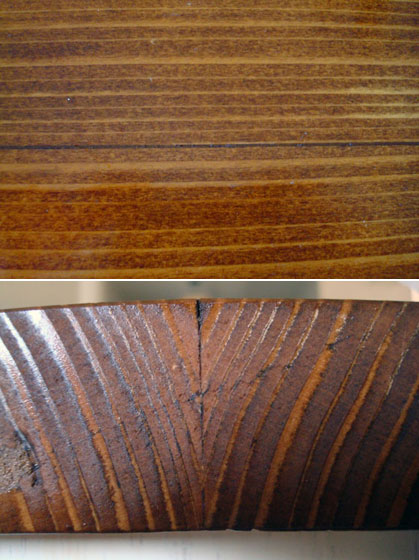
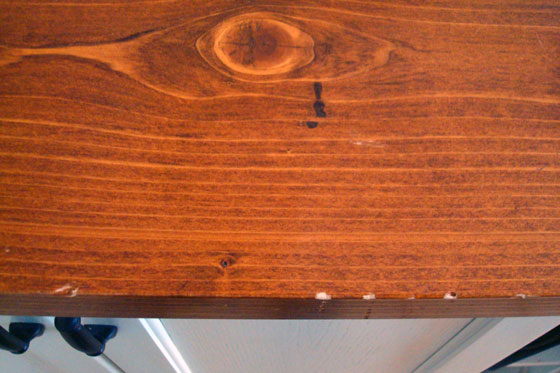
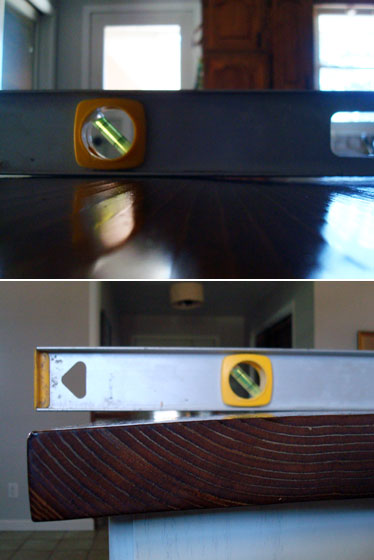
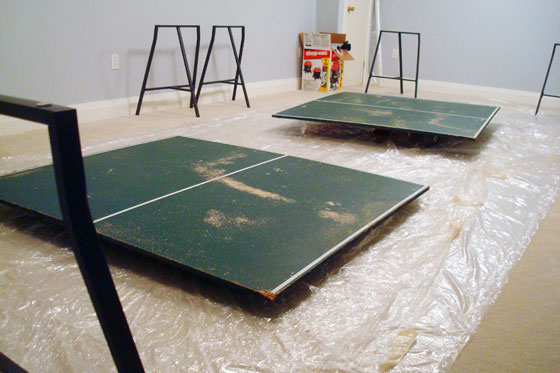
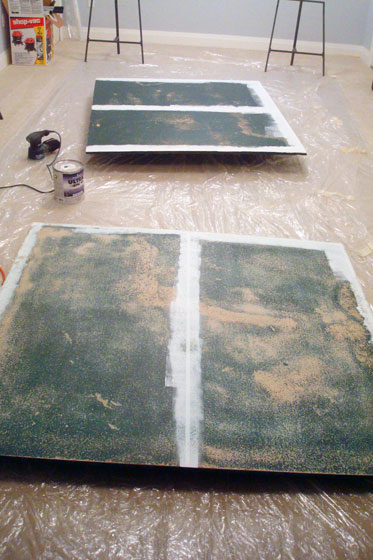
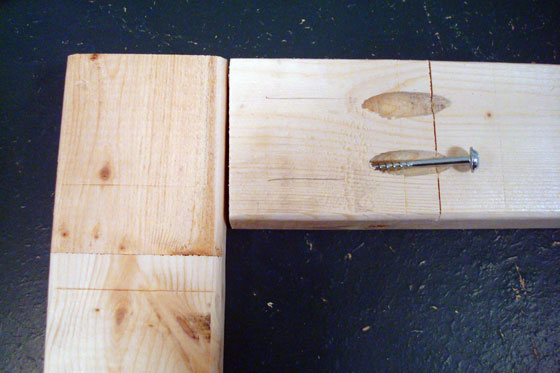
  • Put the bookshelves that had gotten damaged in the move back together.
  • Took the big fat bookshelf apart, cut it in half and rebuilt two new sets of shelves.
  • Added iron-on edging to the new shelves where I needed to.
  • Stripped the paint off the TV stand.
  • Raised the TV stand by half an inch and added trim around the bottom.
  • Painted the TV stand.
  • Realized I was going to have to paint the living room.

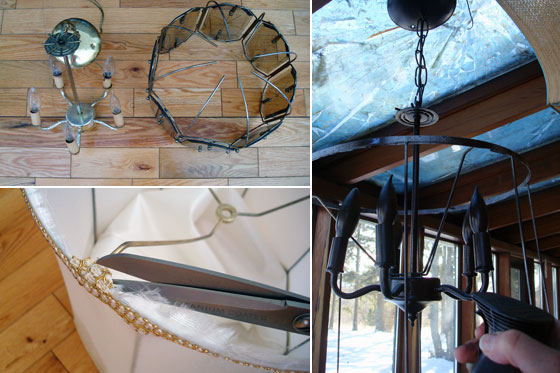
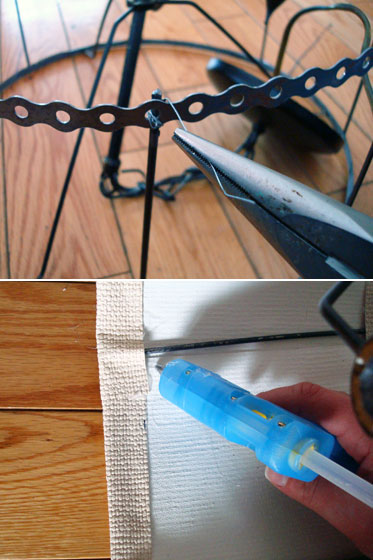
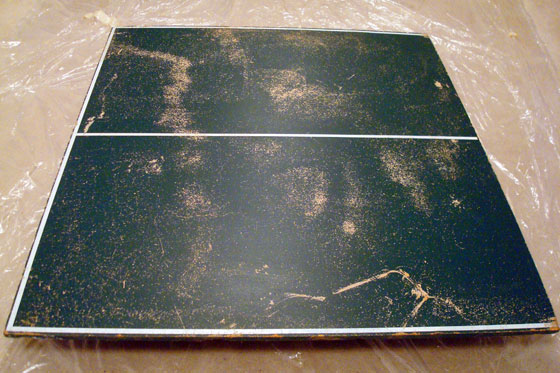
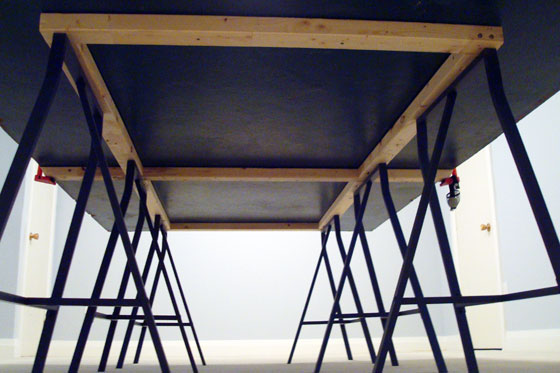
Here’s some evidence that I did actually do some work on the bookshelves.

Steps in my bookshelf makeover

Despite my progress, the bookshelves are kind of on hold right now. They’re all set up in the guest room ready to be painted. However, I’ve shifted my attention to the living room.

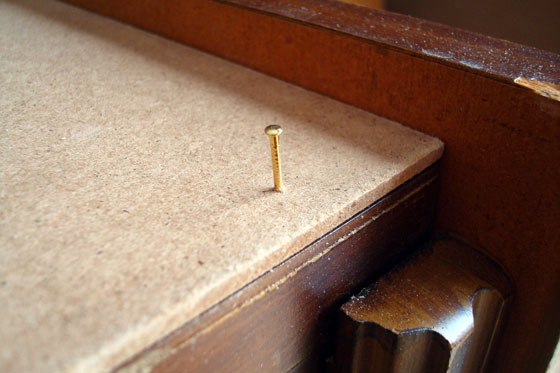
The prep process is exactly the same as what we had to go through for the hallway:

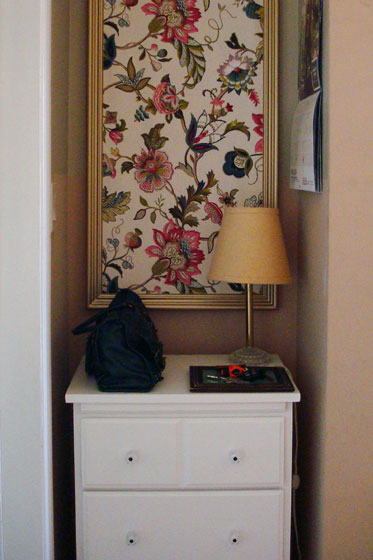
  • Pull out nails where pictures were hung.
  • Take off cover plates.
  • Sand the incredibly rough walls.
  • Patch holes and divots.
  • Wipe down the trim.
  • Paint the trim.
  • Prime the walls.
  • Paint (two coats).

The living room is both simple and complicated to paint. Complicated because it’s a vaulted ceiling that requires a big ladder to reach the top of the wall. Simple because on the two walls I’m painting, there is an archway on one and a patio door on the other. The actual wall space is minimal.

And yes, you read that correctly. I am painting only two walls. Of the four walls in the living room one is already painted (as you saw) and the other contains the fireplace. I am not painting around the fireplace until we’re done whatever we do with the fireplace.

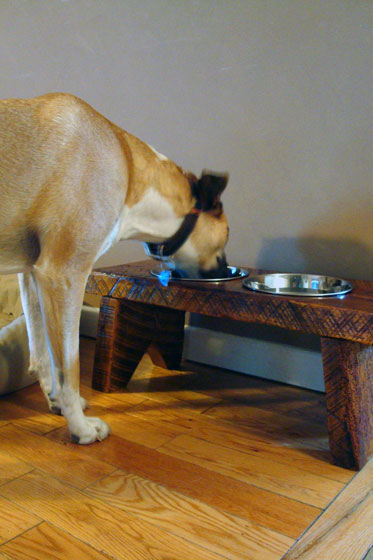
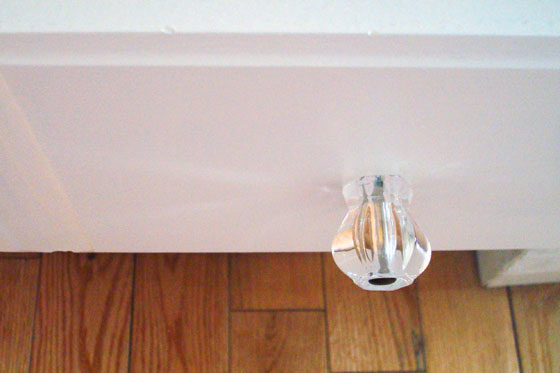
So my August project is another bit of a fail. I did manage to get the TV stand completely finished though. I’ve put it in place, even though we’ll likely have to move it when we paint. I had to finish something this month.

TV stand before and after

What did you accomplish this month? Have you ever gotten mid-way through a project and only to find your to-do list has grown?

Taking paint off melamine

The question of the day was can I strip paint off of melamine? The answer was kind of.

This is not my favourite piece of furniture. (Not the TV. I love my TV. My problem’s with the TV stand.)

TV stand

I attempted to build it when we lived at our old house. We had gotten a new TV. We needed a TV stand. I had some white melamine left over. So I sliced it up and went to work.

Cutting went fine.

Assembling not so much.

I didn’t have the right tools or fasteners and as my rocky, shaky shelf collapsed for about the fifth time, I called my Dad.

My Dad and I knocked it together in no time, but when I painted it I ran into trouble again.

My roller was disintegrating as I painted, and I ended up with all kinds of bits stuck to my shelf. It didn’t improve with time. The dark brown paint showed dust really easily, and when I tried to wipe it down, the dust just got caught in the flecks and it looked even worse. Believe it or not, this is the bottom shelf after I’d wiped it down.

Dust stuck in bumpy paint

I decided to include the TV stand as part of my bookshelf makeover this month. I’m not planning to strip the paint off of all the bookshelves, but the finish on the TV stand was just too awful. I needed a fresh start.

I went with my usual chemical stripper, and it worked pretty well. The stripper made quick work of the paint, even though it’s a heavy-duty oil-based enamel. The stripper also took off the white coating on the melamine. I’m not too worried because I’m going to be repainting, but the finish was a little bit rough. I went over it with my sander to smooth everything out. It may not look great, but I think it’s going to be okay.

Stripping paint off melamine

This week my Dad and I are tackling the rest of the shelves. We’ll be cutting down, putting back together and adding trim. Painting will come soon after. The TV stand should be looking much better the next time you see it. Maybe I’ll even like it by that point.

Have you ever tried to take paint off of melamine? Have you ever painted melamine in the first place? It’s not that hard to do… as long as your equipment is half decent. Has anyone else run into problems with disintegrating rollers? Do you have a piece of furniture that you don’t love?

Popcorn ceiling and barn doors

So July’s project was my biggest failure yet. Remember that dirty bumpy stippled ceiling in the guest room/soon-to-be master bedroom?

Popcorn ceiling

Yeah. It’s still there.

The week that I was planning to start operation popcorn, Kate posted about removing the stipple ceiling in the flip she and her husband are working on. She mentioned doing an asbestos test before she started. Our house is built the era where asbestos might have been used, so I thought a test sounded like a good idea.

However, finding a test kit was harder than expected. It seems home tests are an American thing. I ended up finding one online. So the extent of my progress this month is a credit card charge and my Dad’s drywall sander sitting in a corner of the guest room. 😦 (Please note as well the light switches behind the door. Really convenient.)

Drywall pole sander

Wanna see some actual progress? Let’s look at some other doors instead.

Hello basement barn doors.

Basement door makeover

Here’s the before picture just for reference.

Slab doors

Yes, redoing the doors was June’s project, but the painting was left until July. It must have been something about this month because, like with the stippled ceiling, the final stages of painting and hanging the doors didn’t go smoothly.

For painting, I planned to use my Dad’s sprayer… or rather I planned to have Matt use my Dad’s sprayer. Well, the air compressor conked out, so spraying was a no go. So much for all of the time we spent tarping the driveshed.

Our mechanical difficulties are totally on me. I was the one who set up the air compressor. Earlier the same day I’d killed the push mower, so I obviously had a hex working when it came to mechanical objects.

Painting became a team effort as Matt rolled and I brushed. Soooooo sloooooow.

Painting the basement doors

Installing the doors turned out to be another headache. Only five out of the nine doors that we made over fit smoothly back in place. Somehow, two doors grew so that they were too fat for their openings. The closet door that we’d accidentally put the trim on the wrong side wouldn’t close because the trim hit the doorstop (I don’t know why I didn’t realize this would be a problem). The best one was discovering another door where I’d put the Z on the backside. No idea how I missed this.  My mistake left the completely flat slab door facing out into the room–exactly the situation I was trying to correct.

Ugh. I was very frustrated.

It took a few hours of work spread over a few days to fix my mess ups, including repainting. Double ugh.

Matt was very patient, installing and removing the doors multiple times as I tested the fit.

Finally, all of the doors fit, swung smoothly and closed properly.

I installed the old hardware that I’d ORBed, and I called this one done.

ORBed doorknobs

The Z detail is subtle–the strips are only about an eighth of an inch thick–but I think it’s a really nice touch. Our barn doors are absolutely a lot more interesting than the flat slab doors. Plus they fit really well in our farm setting.

Slab doors become barn doors

Slab doors become barn doors

Issues aside, this is a pretty easy update–and much, much more affordable than buying nine new doors. It would have been even cheaper if I hadn’t bought all new hinges. All in, this makeover cost less than $200 (although I did use glue and nails that I already had):

Panels (two sheets of hardboard cut into 6-inch strips): $18.53
Hinges (Stanley Home Designs in Egyptian bronze-I couldn’t find the exact version online, but this one is close although a little more expense): $96.39
Paint (Benjamin Moore Cloud White in the pearl finish): $59.67
Spray paint (Rustoleum Oil Rubbed Bronze): $11.28
Total: $185.87 (just over $20 per door)

Our master bedroom makeover may not have started, but our basement makeover came a lot closer to finally being finished.

Let’s just not discuss that the basement was summer 2012’s project.

Raised dog food stand

Special occasions should be marked by presents. So for Baxter’s Gotcha Day, I made him a dinner table all his own.

Dog food stand made of old barn wood

I took inspiration from the DIY Pet Food Station that Kim and Scott made for their Jack over at Yellow Brick Home. As much as I coveted the hairpin legs that they used (love the industrial-rustic mix), I didn’t find any at a price I was willing to pay. So I went to the bench I made for the mudroom and adjusted it to be doggie size.

Like with the bench, I dug into my beat-up antique lumber stash in the barn. People, these planks are absolutely amazing. Sure they weigh 3 tonnes and are covered in poop and who knows what, but they’re phenomenal. The plank I chose was too big and heavy for me to move on my own, so I lopped off a 4 foot piece with my circular saw and got to building.

I think the details on the construction are pretty self-explanatory, especially if you reference my bench plans. I used my Kreg jig to attach the legs with three screws each. In terms of finished measurements, the stand is 10 inches high, 24 inches long, and 10 inches deep. The legs are at about a 15 degree angle and are 8 1/4 inches end to end. The bowls are 7 1/2 inches in diameter.

Dog food stand made of old barn wood

Cutting the circles for the bowls was the hardest part. I drew my circles using the bowls for a template. Then I drilled a hole so that I had a spot to insert my jigsaw blade, and I cut along the line. I think I figured out why this wood is so darn heavy. It is super duper dense. My jigsaw blade broke before it was even halfway around the first cutout. Initially the cutting was so slow that I thought my blade was dull. But when I installed the new blade after my first one snapped, it still took a significant amount of force to push the jigsaw along the line ever, ever so slowly. And I had to do it twice! Darn dog needing water as well as food.

To seal and protect my dense, hard, beat-up beautiful wood, I turned to Waterlox, the same solution we used on our DIY kitchen counter. It’s food safe for humans, so it’s an appropriate finish to use on a stand whose sole purpose is to hold (dog) food. Nothing’s too good for my puppy.

Dog food stand made of old barn wood

From my past experience with the bench when it turned black because it sucked up so much stain, I knew that the wood would be thirsty, and boy was I right. It took about three coats before the finish started to build up and look shiny on the wood. Even then, there were some sections (the ones with the most worm holes) that just sucked the Waterlox right in. All in all, I did a total of 6 coats of finish.

After that, it was simply about putting the bowls in the stand and filling them up! Tip: kibble on its own isn’t very appetizing. Sweet potatoes make it much more palatable. (That is, if you’re Julia. If you’re Matt you give in to the sad eyes and put ketchup on it. Yeah, my husband and the dog are totally related.)

Dog food stand made of old barn wood

Bon appetit, Baxter. Or as Matt says, “Mangey, mangey”–as in French “mange” with an “ee” ending. (He and the dog share their own language as well as the same taste buds.)

Do your pets get presents? How do you handle pet food at your house? What’s your pet’s favourite food?

Operation popcorn

You know those things that you have to do, want to do, but don’t really want to do? That’s this month’s project.

The plan is to start our master bedroom makeover. Step one is remove the popcorn ceiling (the fan’s on the list too).

Popcorn ceiling

I’ve been saving this project until I could open the windows, as there is likely to be a bit of dust and mess.

What are you up to this July? Do you have any tips for removing stippled ceilings? In the basement, I scraped some and sanded others. Sanding’s way messier, but I got a nice smooth finish and had to do less patching.

How to make a fabric-covered bulletin board

While the dresser may be the workhorse of my new office nook, the beauty queen is definitely the fabric-covered bulletin board that hangs above it.

Pretty home command centre

Since I was working with such specific measurements in this tiny space, I decided that my best option was to make my own bulletin board.

Home Depot sells prefab cork panels that are 48 inches by 24 inches, very close to the dimensions I needed, so I started with that. Then I found a piece of decorative molding to build my frame. I considered some of the very fancy crown moldings, but a lot of those are very wide. Given that I only had about 20 inches total to work with, I didn’t want to take up too much space just with the frame. I wanted as much pin-up space as possible.

For the back of the frame, I bought some 5/8 inch by 2 inch strips. After ripping them in half, they were about half an inch narrower than my molding. By attaching them to the back of the molding with some glue and little nails, I was able to make a recessed area for the cork to sit.

How to make a bulletin board

I used my mitre saw to cut each side of the frame to the right length at a perfect forty-five degree angle. Tip: When you’re cutting pieces on an angle, mark your desired length as you usually would at 90 degrees. Add a tick mark to the left or right to remind yourself which way you’ll need to angle your cut your.

Cutting decorative molding on an angle

Each corner got a few dabs of glue, and then I nailed them together with my Dad’s nail gun. Tip: To check that your frame is square, measure diagonally from corner to corner. The dimensions should be the same between each diagonal pair. Twist your frame a bit to the left or right until your measurements match exactly.

Checking for square

Once my frame was perfectly square, I caulked all of the nail holes and corner joints. Tip: Keep a damp sponge on hand as you’re caulking. Wetting your finger before smoothing out the caulk gives a nice even finish. Plus the sponge gives you a spot to wipe any excess caulk off your hands before you get it all over yourself. Not that I’m speaking from past experience, or anything. Oh, and make sure you choose paintable caulk.

Wet your finger before smoothing out caulking

I let everything dry and then it was time for paint. I knew I wanted a bit of glitz, so I decided to go with gold. A few light coats of spray paint did the job.

With the frame done, I moved on to the cork. The prefab piece was close, but just a bit too wide. It cut easily with a knife, and then a quick rub with fine sandpaper smoothed any ragged edges. Tip: Cut the the cork about 1/8 inch to 1/4 inch smaller than the frame. A little bit too loose is better than too tight. Plus any gap will be hidden by the recessed channel behind the frame.

Cutting cork with a knife

Covering the cork in fabric was no more complicated than wrapping a present. I cut the fabric about 6 to 7 inches bigger than the cork panel, so that I had plenty to wrap around the back. I pulled it taunt and stapled it in place. The corners got a bit of extra pleating and a few extra staples.

Staple the corners on the backside of the cork

I slipped the cork into the frame. To hold it in place, I tacked staples part way into the frame at four different points around the back side of the frame. I can easily pull these out if I ever want to change the fabric.

Use staples to hold the bulletin board in the frame

I flipped it over and was dazzled. Pretty! Pink! Flowers! Colour! Gold!

Fabric covered bulletin board

I was so dazzled that I didn’t spend too much time coming up with a technical solution to hang it on the wall. I just wanted it up. My solution was two finishing nails hammered into the drywall on the same level. Their small heads fit easily between the edge of the frame and the cork, and the board is light enough that that’s all the support it needs.

Anchoring securely might be more important if you have small children or other things you don’t want bulletin boards falling on, although we’ve had no issue with the board shifting or falling since I installed it.

Fabric covered bulletin boards are a pretty easy and popular DIY. Have you ever made one? How do you bring beauty to functional pieces like bulletin boards? Are you a floral sparkle fan?

How to make a tall narrow dresser

When I reorganized the tiny nook in my office, I knew that I had to add some kind of storage. A dresser was the ideal solution. Drawers would allow me to tuck things away, and the surface would give me a spot to write notes and set my purse and keys.

So I had some pretty specific requirements: drawers, about counter top height, oh, and it had to fit in the nook, which was 16 inches deep by 24 inches wide. Of course, it also had to be cheap.

Well, I had no luck finding a piece of furniture that met those standards. However, I soon realized that nightstands often have drawers and are usually small enough to fit this little space. While nightstands are much shorter than countertop height, they usually come in pairs. Couldn’t I just stack them one on top of another?

It turns out, yep, I can.

Here’s what I started with. Two little nightstands I found at the Salvation Army thrift store for $12 each.

Two vintage night stands

First step of any furniture makeover: remove the drawers and the hardware. It turned out that one of the drawers contained a plastic hardhat, so I got distracted by that for a little while. Consider this your PSA to always wear safety equipment (hardhat, safety glasses and ear protection) while DIYing.

Geeky safety equipment

Anyways, back to work. I started taking apart the dressers. I popped the backs off of each of them. Then I took the top off one and the bottom off another. The nightstands came apart really easily. The backs were just stapled in place. The top was attached to corner blocks that were screwed in place. The decorative trim at the bottom was tacked with some little nails. I needed a few different tools, and I was thankful for my stubby screwdrivers that fit in some of the tighter nooks and crannies, but dismantling these pieces of furniture was not a taxing task.

Dismantled night stands

Once they were apart, it was time for something that was a little more taxing: cutting. The nightstand that was going on the bottom had to be trimmed along the top, and the one that was becoming the top half had to be cut down along the bottom. Clear? I measured the spacing between the drawers to figure out exactly where to make my cut and marked the line with painters tape.

Marking a cut line with painters tape

Four quick slices with my circular saw, and the dressers were the right height. I set them on top of each other and was super excited. It was looking like I envisioned.

Making a dresser out of two night stands

Now I just had to figure out how to actually attach the two halves. When I’d taken apart the dressers, I’d removed some side braces. I was able to reuse those pieces on the inside of the dresser. I ran them half on the bottom and half on the top and screwed right through the side into the brace. My dresser was now all one piece and it was solid, but it was ugly. No amount of wood filler was going to fix that joint.

Attaching two night stands to make a dresser

The solution was overlaying a very thin panel along the whole side. I had 1/8 inch MDF, which I cut down to the exact dimensions of the side of the dresser. I tacked it in place with small finishing nails, and it covered up the gap completely.

Tacking a board in place with small brass finishing nail

A bit of wood filler camouflaged the joint on the front of the dresser. While I had the wood filler out, I filled the holes on the drawers where the original pulls had been and a few other spots on the dresser where the veneer was chipped.

Filling holes with wood filler

After a light sanding all over, I primed the dresser and drawers, and then they all got a coat of creamy white paint–Cloud White in Benjamin Moore’s Advance formula. This was my first time using Advance, and I really like it. The finish is nice and smooth (I used a foam roller), it has none of the stickiness that you sometimes get with latex after it dries, and it has been very durable. In the past, I’ve used heavy duty oil paints on furniture or cabinets. The clean up is a pain and the stench is noxious. None of that is an issue with Advance, and in my opinion it’s held up just as well as an oil finish.

Painting a dresser with a foam roller

The finishing touch for the dresser was new crystal (plastic) nobs. This is one area where I got a bit neurotic. The nobs that I chose had a metal post that went through the middle. The posts were brushed nickel. I’m not a fan. Plus, I already had oil-rubbed bronze and gold/brass elsewhere in the office. I’m not good with mixing metals, so I spray painted all of the metal pins with oil-rubbed bronze spray paint. It was easy, but probably not entirely necessary.

Crystal drawer nobs

As you saw last week, the dresser fits perfectly in the nook. It ended up being the exact right height, and I’m loving having all of the drawers to keep me organized.

Tall and narrow DIY dresser

What second hand furniture have you made over? Have you ever made two pieces into one? How do you handle hard-to-furnish spots with specific dimensions?

DIY wood countertops one year later

See an update on our counters after four years.

A year ago, I wrote about how we DIYed our own wood countertop. Since then, this post has become far and away the most popular on the blog. Given that we’ve been living with our homemade counter for a year now, I thought a good topic for today’s post would be an update on how our DIY counter has worked for us.

The simple answer is the counter has worked great. Here’s what it looks like today.

DIY wood countertop 1 year later

Just a reminder, here’s how the counter looked a year ago.

How to make a wood countertop

Here are a few more details on how the counter performed.

The biggest measure of this counter’s success is the joints. After a year of use, they’re still nice and tight. Squaring off the edges of the boards, gluing the seams before screwing them together with my Kreg Jig, cramming every joint full of wood filler and sanding everything perfectly smooth have ensured that the counter has held up really well for us.

Joints in a homemade wood countertop

The finish has held up as well. The tone of the wood has stayed constant, and the Waterlox sealer has been a great protector. Originally, the finish was pretty shiny. It has dulled a little bit over the past year. We’re not the best at wiping down the counter religiously, but no matter what we spill or how long something sits on the counter (ahem), it wipes up easily.

We have one spot that has stained, but it wasn’t from food. Of all things, it was from a plastic bag. We had set a regular grocery store bag on the counter. The bag had some red writing on the outside, and that dye somehow transferred onto the counter. No matter how much I scrub, this dye will not come out.

Red dye on wood counter

It’s well known that wood is softer than the other countertop materials that are out there. It dents pretty easily. After a year of use, there are some imperfections in our counter. Most are the size of a quarter or smaller, and this one’s about the deepest.

Dent in a wood countertop

The dents don’t worry me at all. We use a cutting board when we’re chopping, but if something leaves a mark, I don’t get upset.

Along one edge of the counter, we have some small chips. These were from a unique incident that had absolutely nothing to do with cooking. The night that we picked up our dining room table, Baxter got a little upset at being left alone in the house. To make himself feel better, he ate the pan of brownies that had been left on the counter. When he reached for the pan, his toenails left some marks on the edge of the counter. These marks are particularly noticeable because they go down below the stained surface. (The dark marks near the middle of the image are features of the board and aren’t a stain or damage that we’ve inflicted).

Chips in the edge of a wood counter

In my post a year ago, I talked about how the counter had warped a little bit and how we were able to flatten it by trimming the end and carefully screwing it to the cabinets. The boards have warped a little bit more over the past year. If you run your hand over the surface, you can feel a bit of a wave. The middles have curved up and the edges have curved down. The warp isn’t severe enough to impact the usability of the countertop and it’s not noticeable to the eye, unless I pull out the level to show you the gaps.

Warp in a DIY wood countertop

We don’t coddle the counter, and a year later it’s obvious that it’s had some use. I am really pleased with all of the choices we’ve made a year ago: going with wood, the colour of the stain, the Waterlox sealer, and especially making it ourselves. Everything has worked out really well.

The counters are still going strong four years later–although there are a few provisos.

DIY light fixture (fail?)

I have another thrifted light fixture makeover for you today. Remember this beauty from my thrifting post?

1980s light fixture redo

When I was in the checkout line at Value Village, the woman ahead of me said, “What a great find! So classy!”

I said, “Oh, thank you.” In my head I was thinking, “Are you insane? This light is completely 1980s. It will look nothing like this when I’m done.”

My plan for the foyer was to replace the giant ceiling fan with a small chandelier covered by a simple drum shade.

Here was my chandelier.

1980s light fixture

Here was my drum shade.

Vintage lampshade

It was vintage lighting fest over here.

I took apart the light, took apart the shade, merged the two together and spray painted everything oil-rubbed bronze.

1980s light fixture redo

I shortened the shade and added a new fabric cover.

1980s light fixture redo

Then I installed it over the stairwell.

Crooked drum shade

Hmmm… not quite what I envisioned. As Matt said, “Woman, what were you thinking?” I stood there and laughed.

Then I got out my glue gun. A couple of daubs of glue held the shade a bit straighter.

Foyer light fixture DIY drumshade over a chandelier

I’m still not sure if this is quite what I envisioned. The inside looks a bit rough in some spots, and the ribs of the shade show through when the light is turned on.

1980s light fixture redo

Another layer of fabric on the inside might solve both of these issues, but it would also lessen the light. This light is much brighter than the ceiling fan that was there before, which I like as our foyer tends to be a bit dim.

I’m content to live with it for awhile until I make up my mind. Either way, it’s an improvement over the fan that was there when we moved in and the pigtail that we wired up when we were painting.

I’d love to hear your to opinion. Do you think this is a #DIYfail or #victory? Have you ever made over a light fixture?

How to refurbish a ping pong table

It’s St. Patrick’s Day, so today’s post is all about something green. Our new(ish) ping pong table.

Refurbished pingpong table

This ping pong table was a bit of an experiment. We found the top (in two pieces) in the barn when we first moved in. It was pretty dirty and had even been pooped on by the swallows that live in the barn.

I am always optimistic, so one day last summer, I dragged the two halves outside. I have no idea how I managed to move them by myself because each piece is extremely heavy. I haven’t been able to carry them on my own since. I scrubbed with a brush and sprayed with the hose until all of the poop and dirt (and a fair portion of the original green paint) washed away.

Damaged pingpong tabletop

Matt did not share my optimism that the table could be rehabilitated. That night he tucked the pieces deep into a corner of the driveshed. I have no idea how, though, because the tabletop is heavy even for him to move on his own.

Despite his lack of enthusiasm for the project, Matt did help me carry the top into the house. Then, one weekend while he was out of town, I went to work.

This project was a total experiment, and I’m sure ping pong purists out there will be horrified. But (spoiler alert) everything worked out, so I’m sharing my technique with you.

There were two big issues with the table: 1) We had no legs to go with the top. 2) The top itself was not in great shape.

The leg issue was easy to solve with six trestle style legs from Ikea (Lerberg).

Ikea Lerberg legs for a pingpong table

The top took a little more effort.

I started with a coat of fresh white paint over the lines. After sleeping on it for the night, I realized I really should have sanded the top first, so the next morning I basically started all over again. I sanded down the top, which was not an indoor task. Sanding resulted in a fine green powder over the whole room–not the best scenario with our nice light carpet. There was a defined line between where the drop cloth had protected the carpet and where the green dust had floated beyond the drop cloth’s reach. I was very glad Matt was not home to see the mess I had made.

Refurbishing an old pingpong table

The Shop Vac erased the green mist, and I was able to get back to the painting.

White paint went on again, and, then once it was dry, I taped off the lines. Since painter’s tape doesn’t come in ping pong line widths, I had to very carefully trim it.

Cutting painters tape to narrower width

Then the tape got a quick coat of white paint to seal it, and after some drying time I moved onto the green. Since I wasn’t sure if this was actually going to work, I used some regular latex paint that we had left over from Matt’s office. It’s Manor Green from Benjamin Moore in case anyone’s interested.

Refurbishing an old pingpong table

The green took about three coats, I think. On the final coat, I carefully peeled off the tape to reveal the white lines. Some of the white flaked off (I think giving the white more time to dry, or even doing two coats would have been helpful).

Refurbishing an old pingpong table

Chips aside, the finish was a massive improvement over the table’s previous state. In fact, Matt was so impressed when he arrived home that he started to think that maybe I wasn’t entirely crazy in wanting to save the table.

So now I had a tabletop and I had table legs. How to put them together?

Refurbishing an old pingpong table

It turned out that the Lerberg legs are a bit shorter than regulation ping pong height of 30 inches–hey, I have some standards. Using a few 2x3s and my Kreg Jig I built a frame to attach to the underside of the tabletop.

Using a Kreg Jig to screw 2x3s together

I screwed the frame to the tabletop… or at least to one half. The top ended up being too unwieldy and heavy as one big piece, so I didn’t screw everything together. We set the top on the frame and the frame on the legs, and we think each piece is heavy enough to stay in place on its own.

Frame for the underside of a pingpong table

The six Lerberg trestles mean the table is very leggy. However, we really needed the support in the middle of the table as well as at each end.

We got a very simple cheap net at Walmart. It’s called an “everywhere table tennis” from EastPoint, and we just clipped it onto the table. Again, I wasn’t sure that this refurbishment was actually going to work, so I didn’t feel the need to invest in a professional net.

Anywhere table tennis net by East Point

With the table set up, Matt broke out the paddles, tapped one of the balls across the net, and it bounced. It worked! We had a functional ping pong table.

I had no ping pong skills, but after a week of daily practice, I’ve improved a lot. I finally won a game against Matt yesterday (he also may have let me win one). My ping pong prowess aside, refurbishing the table was a definite win.

Have you ever rehabbed a piece of furniture that seemed beyond hope? Anyone have any ping pong pointers? How are you celebrating St. Patrick’s Day?