Reading nook details

There are so many elements that I love in my new reading nook that I had to write a separate post where I can share all of the details.

Colourful reading nook with a stump table and Ikea Strandmon

At the core of the nook is obviously my much-loved Strandmon from Ikea. This is a seriously comfy chair. However, I like to lounge with my feet up, so I needed a footstool. Strandmon is not a tiny chair, so I wanted something that was a decent size and perhaps even could double as additional seating if we have people over. The bird ottoman fit the bill. It’s a complete DIY that ended up being super easy. You won’t believe what’s underneath that pretty fabric that so many of you liked. Stay tuned for a how-to post coming up next.

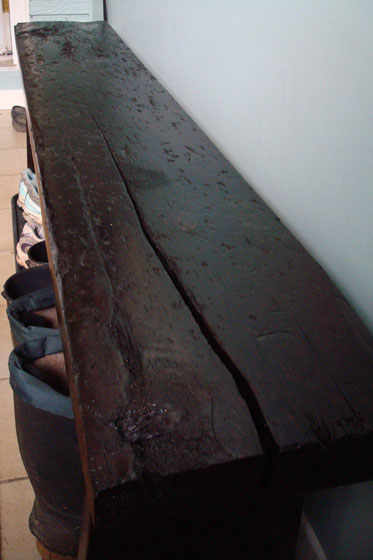
The stump side table is my rustic touch for the nook. It’s another DIY, this time completed with the help of my father-in-law. Most of the stump tables I’ve seen tend to be pretty short–and super expensive. I don’t know about you, but I wasn’t prepared to spend $200+ on a log when I have hunks of wood just lying around outside.

The nice thing about DIYing the table is that I could make it exactly the height I wanted. I don’t like to have to work too hard to pick up my drink–reaching kind of defeats the purpose of relaxing. So we cut the log so that the top of the table matches up with the top of Strandmon’s arm.

DIY stump side table

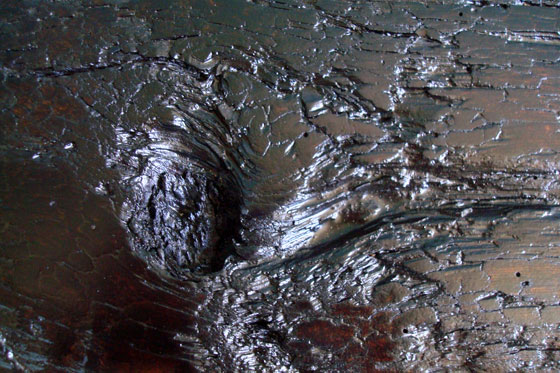
I’ve actually been saving this particular log just for this project for a little while now. I intentionally chose a log that had lots of knots and bumps and personality. After lots and lots of sanding, I coated it with three coats of varathane to seal it and glued a piece of cork to the bottom just to protect the carpet.

When it came to choosing art for the nook, the decision was easy. This monkey print hung in Matt’s grandpa’s house (not painter grandpa, other grandpa), and when his grandpa passed away Matt asked for the picture. Its bright colours and fun theme fit in perfectly with the feel I’m going for in the basement.

See no evil, hear no evil, speak no evil, have no fun moneky print

While Matt loves the picture more for its connection to his grandfather than for the subject matter itself, this picture has led to a bit of a monkey collection for Matt. He has a see-no-evil, speak-no-evil, hear-no-evil figure on the windowsill and another trio of monkeys stuck into the ivy.

Hear no evil, speak no evil, see no evil monkey figurine

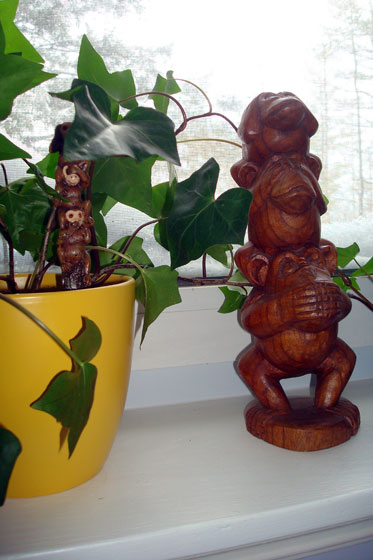
Speaking of the ivy, you saw my yellow pot awhile ago. Somehow I’ve managed not to kill the ivy, and it’s actually thriving. The oversize games piece was made by my dad who is a wood turner and happily takes commissions from his oldest daughter.

Window sill vignette

I’m not quite satisfied with my windowsill vignette, but I’m not sure how to fix it. I think I might need something that’s a little more horizontal? Or something that sits on top of the books? In the comments on Monday, Margaret suggested lowering the monkey picture might help to bring everything together. Any other input would be most appreciated.

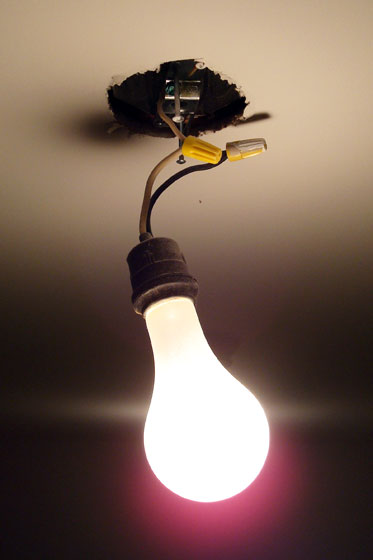
While the window gives us great natural light–a huge benefit considering we’re in a basement–during the reno we added an overhead light in the centre of the nook. I liked the idea of a pendant rather than a flush mount or a lamp. However, it had to be mostly glass so that it didn’t obstruct the view out the window, and we had to hang it pretty high so that I don’t konk my head when I stand up. After weeks of searching, this simple pendant ended up being just what I wanted and just $50. Score!

Bella pendant by Catalina from Rona

The newest addition to the nook is our fleece Hudson’s Bay point blanket that Matt’s aunt gave us for Christmas. I love the point blanket pattern, and the pop of white plus the brightly coloured stripes work really, really well with everything else that’s going on in this nook.

Colourful reading nook featuring Ikea Strandmon wing chair

It’s so nice to have a quiet corner to curl up. Matt can be playing a game or watching a movie over on the sectional, and I can be in the same room, but doing my own thing. All of the little details come together to make it a very special, cozy space.

I’d love to hear what is your favourite part of the nook?

Source list:
Wall paint: A custom grey somewhere around Bunny Gray from Benjamin Moore
Trim paint: Cloud White from Benjamin Moore
Wing chair: Strandmon from Ikea
Stump side table: Made by me with an assist from my FIL
Bird ottoman: Made by me (how-to is coming), fabric is Crazy Ol Bird Midnight by Swavelle/Mill Creek
Light fixture: Catalina Bella 1-light pendant from Rona
Yellow plant pot: Rona
Monkey statues: Gifts
Oversize games piece: Made by my dad, painted Seaport Blue from Benjamin Moore
Monkey print: Family heirloom
Hudson’s Bay fleece point blanket: Gift (from The Bay… I mean, it’s from Matt’s aunt, but you can buy your own at The Bay)

Last minute gift: Hand made wooden monogram

Usually I’m a last minute shopper/crafter when it comes to gift giving. (Exhibit A: I’ve done absolutely no Christmas shopping yet). However, back in March, inspiration struck and I whipped up a little gift for my sister and her husband. My plan was to give it to them as a housewarming present. Never mind that at that point they hadn’t even started building their new house.

Well, the house is done, and they’ve moved in, so the present has now been presented… and now it’s time to share it with all of you. Just in time for those looking for a simple craft to make as a Christmas present. Sorry that you don’t get to actually unwrap it like my sister did.

Wooden initials medallion

I was inspired by the wooden monograms created by Jamie Givens that I spotted through Pinterest. Mine is nowhere near as large or as professional as Jamie’s, but I’m pretty pleased with how it came out nonetheless.

This medallion ended up being about 12 inches in diameter. I used pencil tied to a string tied to a nail as a makeshift compass to draw the outer circle and then two more lines for the inner rings. A couple of vertical and horizontal lines finished off the letters. Then, I used my drill to make a hole for my saw blade and my jigsaw to cut out the initials.

A handheld jigsaw and my limited skill level means the lines are not perfectly straight, but I’m not sure how many people will notice that (except for all of you now that I’ve pointed it out). I tried to fix some of my mistakes during the sanding stage, but it was difficult to get the sandpaper into all of the nooks and crannies. The ‘D’ ended up being a bit stencil-ish, as I realized part way through cutting that I needed some way of keeping the centre of the letter still attached (duh).

My one piece of advice to anyone who tries this project is to be careful what wood you choose. I started with some planks I had lying around in the barn, and hidden splits became visible really quickly when my medallion broke in two. Plywood would probably work pretty well, as long as you don’t mind seeing the layers on the edges.

It’s neat to see how letters and names go together. In my sister’s case, she and her husband have a pretty symmetrical monogram. How about you and your partner? How do your initials combine? Have you made any gifts this holiday season? Do you usually make or buy gifts for people? Any go-to housewarming (or Christmas) gift suggestions to share? Who else is a last minute gifter? Please tell me someone else out there hasn’t started shopping yet.

Linking to: Happy Housie Get Your DIY On: Wall Decor

How to build simple closet shelves

When I first asked everyone’s advice on what we should do in our mudroom makeover, the most frequent suggestion was to pull off the closet doors and make built-in storage with a bench, cubbies, shelves and hooks. While I love that look, I knew I needed places to put things more than I needed to be able to sit down. The biggest improvement I could make to how the mudroom functioned was to build more storage in the closet.

As you saw in the reveal, I split the closet in half, putting floor to ceiling shelves at one end and a single shelf over top of a hanging rod at the other.

Closet storage

To build these simple shelves, I went with my go-to shelving material: white melamine. It may not be the fanciest, but this stuff is easy. It comes in 12-inch or 16-inch widths (I chose the 16) and 8 foot lengths. One long edge is pre-finished. There is no painting (although you can), no sanding, no special tools.

To support the shelves, I screwed 1x2s (which I did paint) into the wall studs with 3 inch screws. The shelves simply sit on top.

White melamine shelving on 1x2s

For the top shelf, I used 1×3 as I wanted a wider board to attach the rod.

How to attach a closet rod

The divider in the middle is a piece of melamine run vertically. There was a cut-out in the ceramic tile floor for some long-ago shelving system, so I filled that with a 2×4 and cut a channel to hold the melamine in place.

Supporting a closet divider

The melamine comes in 8 foot lengths, so for my 9 1/2 foot closet, I had to splice a few of the shelves. My technique was to tack a piece of melamine underneath. It’s perhaps not the most attractive solution, but tucked inside the mudroom closet I wasn’t super concerned about appearances. It’s sturdy and will easily hold a golf ball collection or anything else you want to put on it.

Joining melamine shelves together

The sturdiness of melamine is its best feature in my opinion. As long as it’s properly supported, it can hold a decent amount of weight and won’t sag. To prevent any droopiness, it’s important to put the 1×2 supports along all three sides of the shelf, not just at either end.

I know there are much more attractive storage systems out there, but, for a behind closed doors solution, this simple set up of melamine and 1x2s works for us. Even better, it’s completely custom and accommodates exactly what we need.

How do you handle closet organization? Has anyone else built a custom storage system? Any other melamine fans out there?

Beautiful beat up bench

You may have thought that after a full week of posts we were done with the mudroom. No way! It’s my first finished room. I’m going to savour this for awhile yet.

To start, I’m sharing my favourite project, my beautiful beat up rustic wood bench.

Rustic wood bench in a mudroom

I love this bench.

My nephew Nicholas and I designed it, built it and stained it. It’s made out of one single plank that I found in the barn. I looked for the most beat up piece of wood I could find. It’s full of knots, splits and gouges. We sanded and sanded the bench so that it was smooth enough to sit on, but made sure all of the “defects” still showed through. Unfortunately, when it came to staining the bench, the wood was so thirsty that it sucked up every single drop of stain (Minwax Provincial), so the bench came out much, much darker than we expected. Some of the knots and gnarls aren’t as obvious now because of the dark tone, but I still think it has good character.

Knot hole in a rustic wooden bench

We designed the bench to some very specific requirements. We wanted the legs to be wide enough that we could put two trays of boots and shoes underneath. The seat had to be a comfortable height for sitting and also high enough that Matt’s tall boots would easily fit underneath. And we wanted it to be relatively slim so that it didn’t take up too much space in the room.

Rustic wooden bench

My nephew and I went back and forth on the design of the legs and finally settled on a simple upside down V cutout. I used my Kreg jig to attach the legs to the bench top. This was the first project that I used the Kreg for, and I quickly learned that the Kreg is built for standard modern day lumber. This plank was milled back when 2x4s were actually 2 inches by 4 inches, so it’s fatter than today’s lumber. We made the jig work, but it was a tight squeeze in a few spots.

It’s a very simple rustic wood bench that’s perfect in a country house. I’ve dubbed it the “Nicholas” after my design sidekick. If you want your own Nicholas, you can’t have the nephew, but you can have the bench. Click here for the plans.

Who else has a construction sidekick? Have you ever designed and built your own custom piece of furniture? Are there any other Kreg fans out there? Who else has stained a “thirsty” piece of wood? Are you a fan of the “distressed” look of beat up lumber?

Wee-wee-wee all the way home

You might think from the title of this post that we are adding some little piggies to the farm. However, the opposite is actually the case. We are getting rid of some pigs… pigtails that is.

Pigtail light fixture

Most of our lighting in the basement is still pigtails—much to Matt’s annoyance. The conversations go something like this. “You can’t say the basement’s done until it’s all done. Including light fixtures.” Finding the right light takes time though, so rather than choose the wrong fixture, I’m fine to live with pigtails.

Matt, not so much.

However, in my defense, I bought the lights for the long room nearly six months ago. They’ve been sitting in their boxes stacked in the corner beside the shop vac for just that long. Yes, I could install them myself, but under the division of labour in our marriage, Matt is the electrician.

Well, the electrician finally got fed up with the pigtails and decided to send those little oinkers packing.

Replacing pigtails with flush mount ceiling light fixtures

Better, right?

Obviously, it’s still not “done” (the absence of furniture and art, the unpainted closet door, and the shop vac still in the corner kind of give it away), but baby steps, people. Or maybe piglet steps.

Vanquishing the dungeon

This week, we have been reviewing Matt’s and my first basement renovation. Now it’s time for everyone’s favourite part: the befores and afters.

Here’s a reminder of where we started. The blue room before:

Ugly basement

And here’s the no longer blue room after. The hot water tank is now accessible through louvered (vented) closet doors. The clothes closet to the left is now deep enough for a hanger.

Renovated basement bedroom

The other side of the blue room before:

Basement room painted blue

And after (slightly crooked complete with a Matt photo bomb). This nook under the stairs may look a bit tight, but a desk tucked in there perfectly and made a good study space.

Renovated basement nook under the stairs

The yellow room before:

Ugly basement painted yellow

The transformation in the yellow room was limited mostly to new flooring, paint and trim. Can I have a “so-long, see-ya” for that mustard paint? I did eventually say sayonara to the flourescent light fixture too, although I apparently don’t have a picture of that.

Renovated basement bedroom

Another thing I don’t have a picture of that I really wish I did was an after of the hallway shelving area. Can you take my word for it that it looked better than this?

Ugly basement

A few months after finishing the basement, we found the farm and listed our house for sale. By that point we had renovated it top to bottom. Within three weeks, our the house was sold.

Our first house was a good testing ground for Matt and me and prepared us for our forever house. Where, as always, the renovations continue.

Battling the dungeon

On the quest to renovate the basement at our first house, Matt and I dove in with our characteristic “go big” approach.

Everything that was in the basement came upstairs and was stacked in the dining, living and bed rooms making for a lovely “Hoarders” atmosphere.

Items from the basement stacked in the dining room

Downstairs, just like we would do a year later at the farm, we went back to the concrete. Buh-bye blue room.

Gutted basement
And farewell weird shelving area.

Gutted basement

We reframed. We rewired. We reinsulated.

Basement renovation

We drywalled. Lots of drywall, although not as much as last summer. Lots of taping. Lots of pasting.

Basement renovation

We laid new flooring, and we painted. We installed new trim, new shelving, new closet rods and doors.

Curious how it all turned out? Were we able to banish the dungeon?

Tune in next for the reveal.

How to sharpen a shovel

In case you haven’t noticed, I’ve been spending a lot of my time outside landscaping. What you definitely haven’t noticed… probably because I haven’t shared this with you before… is that much of my landscaping time is spent hopping up and down on my shovels trying to convince them to sink into the dirt. Or hacking away at defenseless plants trying to cut through tough roots.

Obviously, it was time to sharpen my shovels. Past time, rather.

Round mouth shovels with dried dirt stuck to them

The solution? Call my Dad.

Unfortunately for me, the solution is never that easy. Fortunately for you, I now have another how-to to share.

As soon as I pulled into the driveway at my parents’ house, shovels in tow, I realized that I was not going to be able to simply hand them over to my Dad. A whole sharpening station was set up in the driveway with a grinder, visor and safety glasses–multiple pairs.

There was going to be a lesson.

But first there was going to be a lecture.

“You know, back when I was on the construction site” (my Dad was a construction superintendent before he became a general contractor) “I had a labourer who would have taken those shovels away from you if he’d seen how you left them all covered in dirt. That’s not how you take care of your tools, Jules.”

Fortunately–or unfortunately depending on how you look at it–my Dad did not take away my shovels. He did brush them off, but then he gave me a demonstration with one of his smaller shovels of how to sharpen them on the grinder. Most important lesson: keep your fingers out of the way of the grindstone.

Sharpening a small shovel on a grinder

Keeping my fingers away was easier on my big scoop shovels when I could hold them by the handle. However, they were a little more unwieldy because of their larger size. Also unwieldy: my Dad’s visor which was not sized to my head at all, but did provide complete eye protection.

Sharpening a shovel on a grinder

To sharpen the shovel, hold the back side of the blade at a very shallow angle against the grindstone. Start about halfway down the edge of the blade and curve around to the tip. Do a couple of passes on one side and then on the other.

Direction to sharpen a shovel

After running the shovels through the grinder a few times, I had a nice shiny, sharp edge.

Sharpened shovel

The shovels don’t magically become fillet knives, but they are much sharper and much easier to work with. Since sharpening, I have transplanted trees, bushes and flowers. Holes have been dug. Plants have been split, roots humanely cut with minimal trauma.

Oh, and the shovels have also had a shower.

Washing a muddy shovel

In addition to learning how to sharpen a shovel and remember to take care of my tools, I also learned why we used a standalone sharpening station set up in the driveway, rather than my Dad’s stable grinder that’s bolted to the bench in his work room. When the sharpening lesson was finished, he picked up the grinder and loaded it into my trunk.

I guess this means I have to do it myself from now on. My Dad’s wanted to give me this grinder for awhile now, and it will definitely come in handy for us. Although it is yet another tool to take care of. Thanks, Dad, for the lessons and the tools.

Path preview

Please gaze upon my bliss.

Herring bone brick pathway

Yes, that’s right. My definition of bliss is a brick pathway. So what?

But isn’t it so pretty? I realize some of you who voted for the traditional brick pattern–or “running bond” as I learned from a commenter–may not agree that this looks lovely. The vote came out very close, which really surprised me: 63% herring bone to 38% brick. I honestly thought herring bone would be the clear favourite.

I chose to go with the herring bone after spending a few days looking at the layouts that I’d mocked up last weekend. I just decided that I really, really liked the way it looked.

Bricks laid in a herring bone pattern

Laying the brick in the herring bone pattern and getting the bricks to bend smoothly around the curve was a bit more challenging than it would have been if I’d chosen another pattern, I’m sure, but I just fudged the spacing between the bricks as I needed to.

I still have to fill all of those spaces with sand. I found two bags of something called “magic sand” in one of our junk piles. The description said that it was a polymer infused sand made to fill the joints between paving stones. That sounded like just what I needed so I dumped the bags onto the bricks and managed to fill the joints for the first three feet of pathway. I’ll pick up the rest of the sand this week and hopefully finish off the path next weekend.

I say hopefully because along with needing more sand, I also need a few more bricks. What might be a little hard to see in the top photo is that as the path heads into the shade, about six feet from the end, I ran out of brick.

Brick pathway laid in a herring bone pattern on a bed of sand

I knew I was going to be short, and I actually made it much farther across the turnaround than I expected to. Apparently 362 bricks are just not enough. They are enough to make me blissfully happy though.

Time to zigzag or stay on the straight and narrow?

Remember this picture from my 2013 home goals?

A lush garden with a brick path winding through it

This is my inspiration for the garden I’m building on the turnaround at the front of the house. Lush. A little bit wild. A beautiful brick walkway winding through.

Honestly, the path is an excuse to use up some of the piles of bricks that we have lying around the farm. But, it does have two additional benefits: the path will save us from having to walk all the way around the turnaround when we want to get to the other side (it’s farther than you might think) and it will be an attractive feature at the front of the house (I hope).

The path is next up on the landscaping list. I’ve dug out the route across the turnaround and gathered my bricks. Now I’m just trying to decide how to lay them: trendy herring bone or traditional brick pattern.

Herring bone brick walkway

If I go with the straight brick pattern, I’ll probably do six courses, not the five that are pictured here. If I go with the herring bone, this is pretty much what it’s going to look like. I’m not going to cut the bricks, so the edge will be a bit ragged. It will probably be hidden eventually by all of the lush plants, but that might take a little while.

I think I know what you’re all going to say, but I’m going to put it to a vote nonetheless. What do you think?

For those who might be concerned by the photo above, I am not going to lay the bricks directly on the dirt. I’m planning a base of sand, which we also just happen to have a huge pile of lying around. I’d use gravel, but the gravel in our pile (yes, we have one of those too) is a bit too large to provide a really stable base.

No matter what pattern I end up using, I’m planning on leaving about a half inch gap between the bricks. Does anyone have any experience with polymeric sand? I’ve heard that it’s good for filling the spaces between the bricks.

Feel free to expand on your opinions on polymeric sand, the beauty of herring bone, dos and don’ts of brick laying, fast growing plants and any other topic that strikes you in the comments. I appreciate any advice.