Playground upgrades

Over the summer, Ellie’s playground got a few upgrades.

The treehouse has been a hit, and I’m so glad that I made it for her. It’s large and high (with room for her to grow) and has most of the things she likes (she is very proud that she has mastered the firepole).

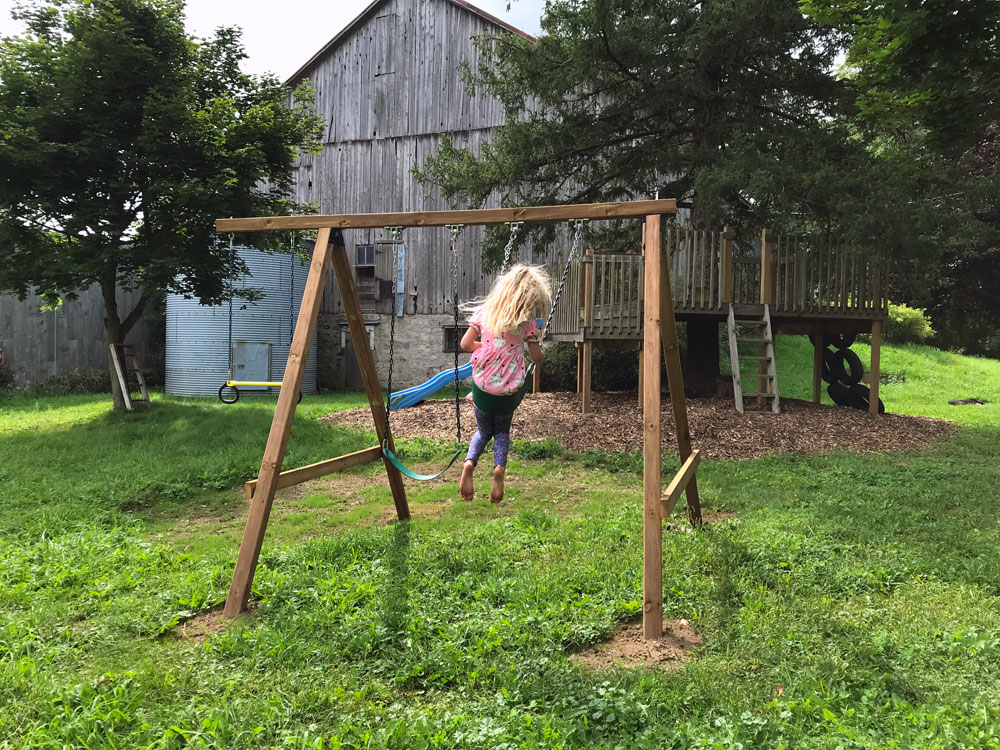
She had very quickly outgrown the little playground that I bought for her three years ago, so this spring I sold it. The departure of the playground meant we no longer had swings, so building a swingset was on my to-do list.

But before I could get to the swingset, we did a few other things.

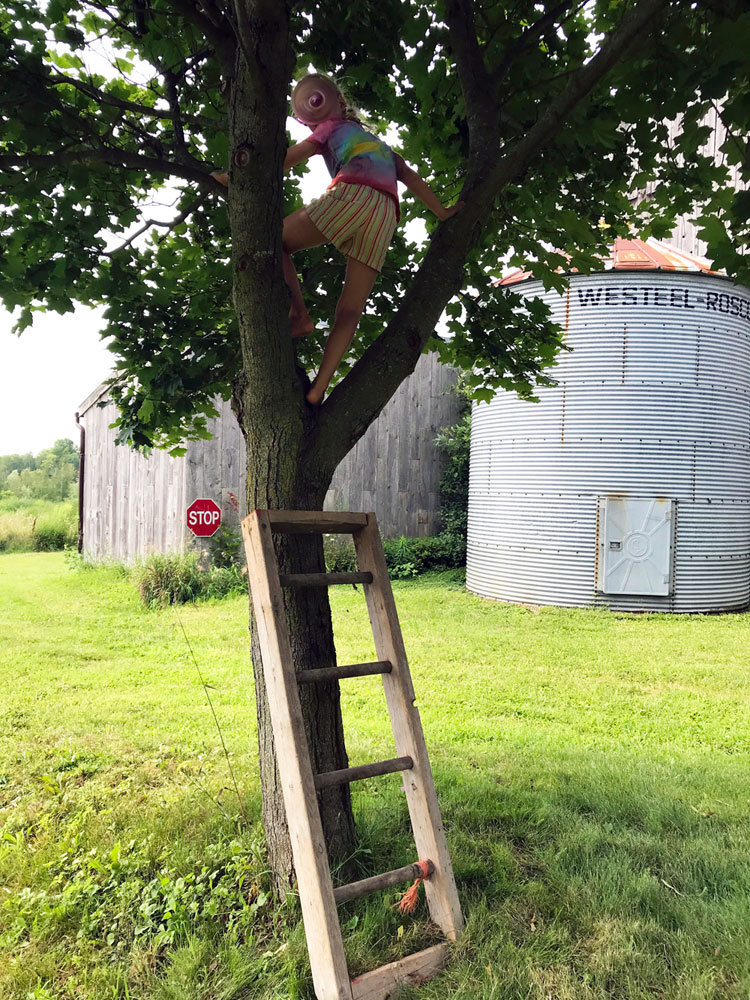
First was adding a simple ladder to her climbing tree. I knew we had a little section of wooden ladder somewhere in the barn. When I stumbled across it one day, I immediately grabbed it and brought it out to the tree she likes to climb (but can’t reach the lowest branches on her own).

A little digging anchored the bottom of the ladder into the ground. A few screws anchored it into the tree. And our girl scrambled up right away. She also enjoys jumping off the ladder. (I’m used to her leaping, so my heart doesn’t completely stop anymore.)
Next up was spreading woodchips under the treehouse. I’d had a load of mulch delivered for this purpose and the pile was where I wanted to put the new swingset.
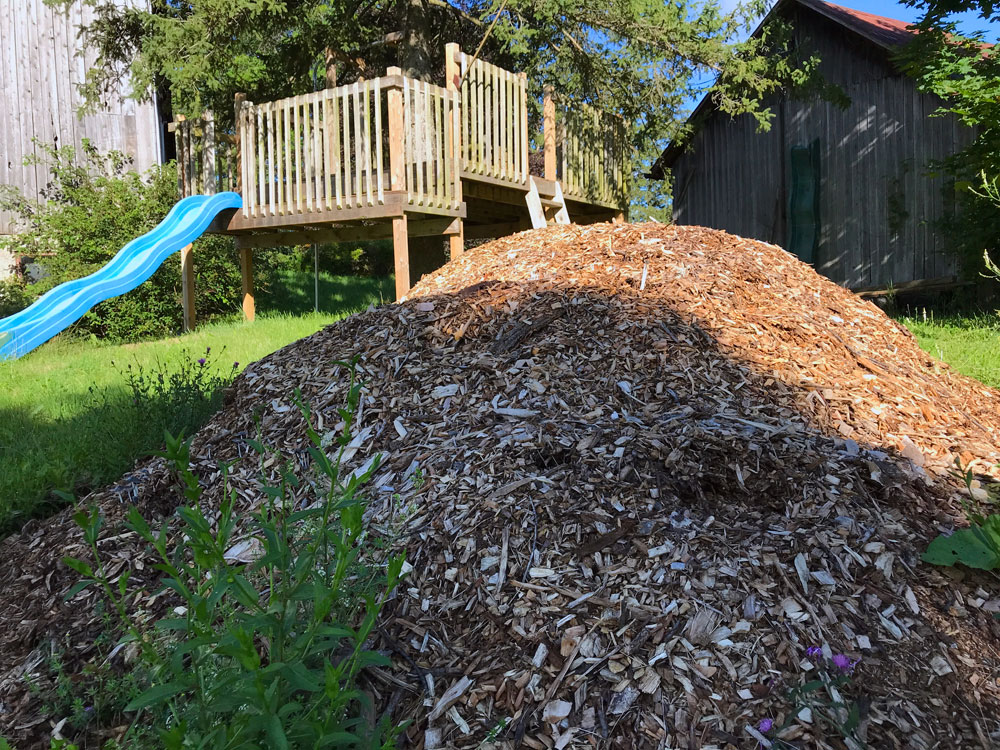
Unfortunately, when I was ready to move the mulch, the tractor wasn’t due to a flat tire. A shovel, a pitchfork, a wheelbarrow and tenacity got the job done.

First I mowed the grass under the treehouse extra short. Then I covered it with a layer of cardboard. (That person you saw heaving surprisingly heavy bales of cardboard from the drugstore’s recycling pile into the trunk of her car? That was me.) Then I spread a very thick layer of chips under and around the treehouse.

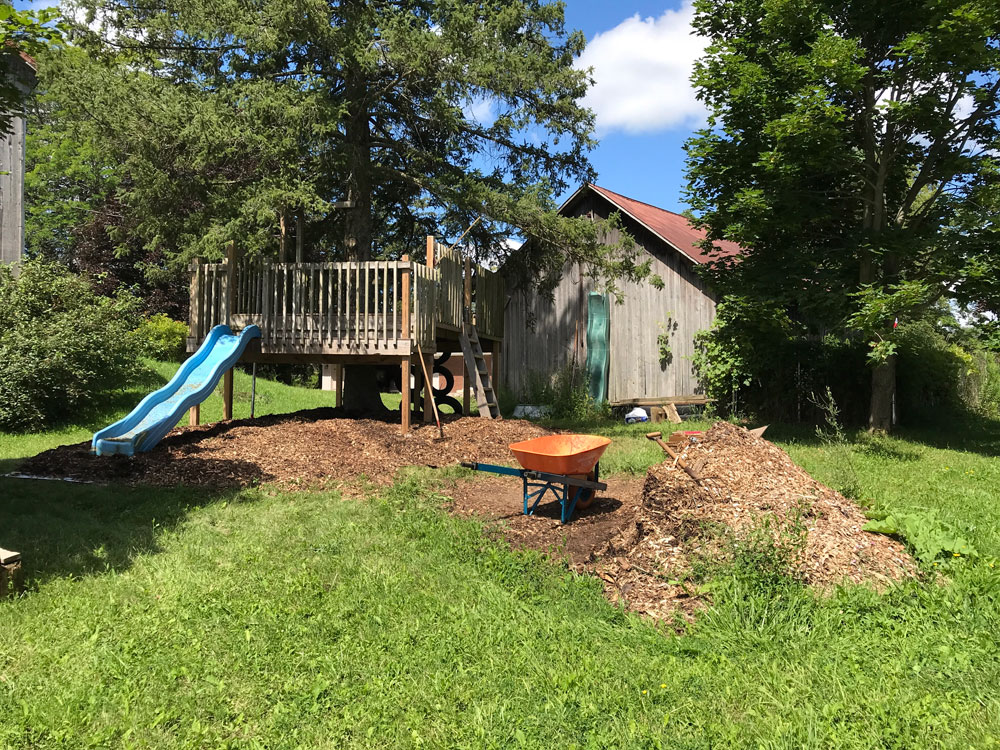
The mulch cleaned up the treehouse so much. No more crazy grass and weeds sticking up here and there. No more contortions as I try to mow under the platform. Ellie also enjoys it as it makes a softer landing zone for her jumping.

With the mulch pile gone, I moved onto the swingset. I had bought a set of brackets and swings off kijiji last spring. I’d even bought the 4×4 lumber I needed to go with them and found the instruction manual online, and then it all sat in the garage for the winter.

Assembling everything was pretty straightforward. Though moving, attaching and flipping 10 foot tall A-frames required some creativity (thank goodness the tractor was back in action by then). My sister also gave me a lift to move the swingset to its final position.
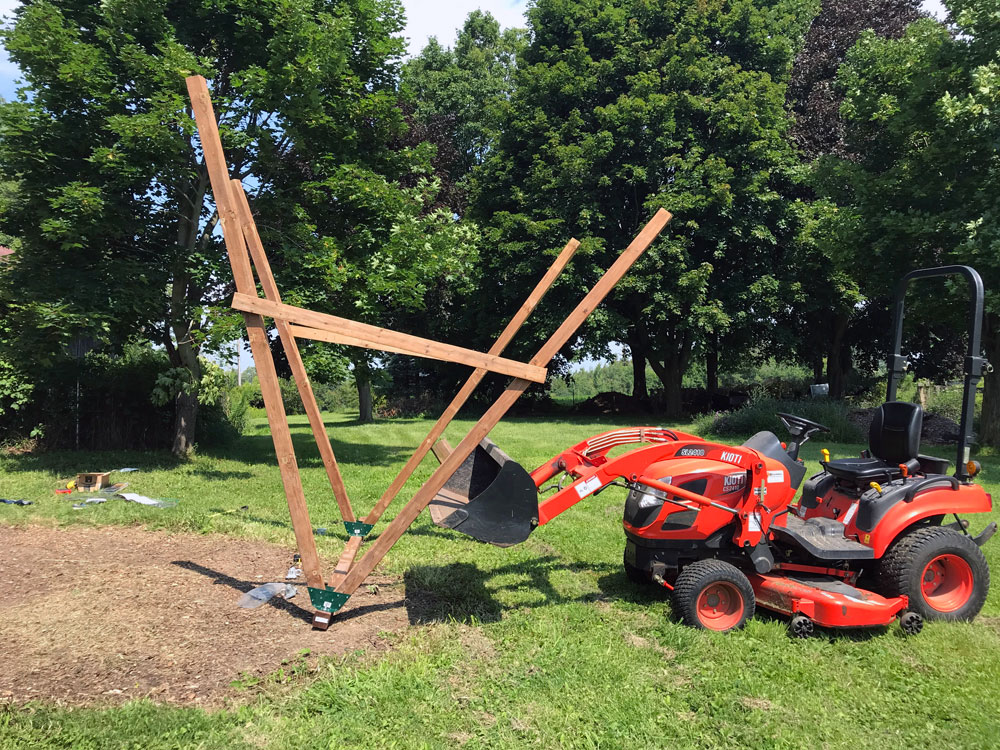
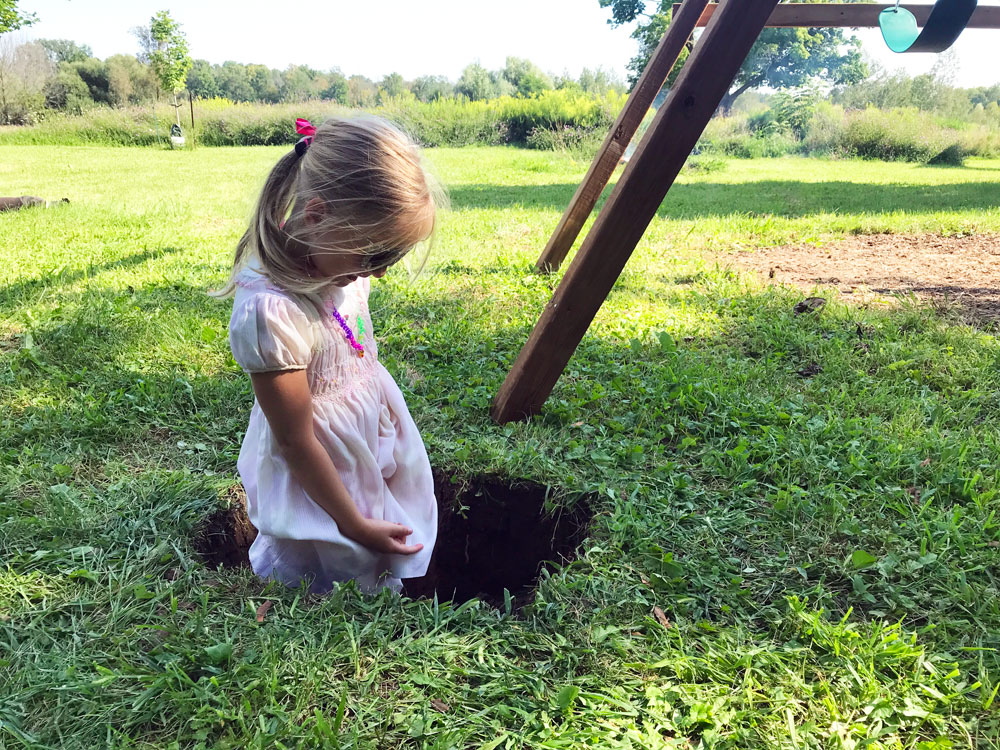
I purposely chose ten foot lengths, even though the manual called for eight, as I planned to sink the A-frames into the ground to anchor them securely. Matt’s Dad helped me dig the holes and move the posts into them. Then a few bags of concrete, some dirt on top and a sprinkle of grass seed, and the swingset was complete.
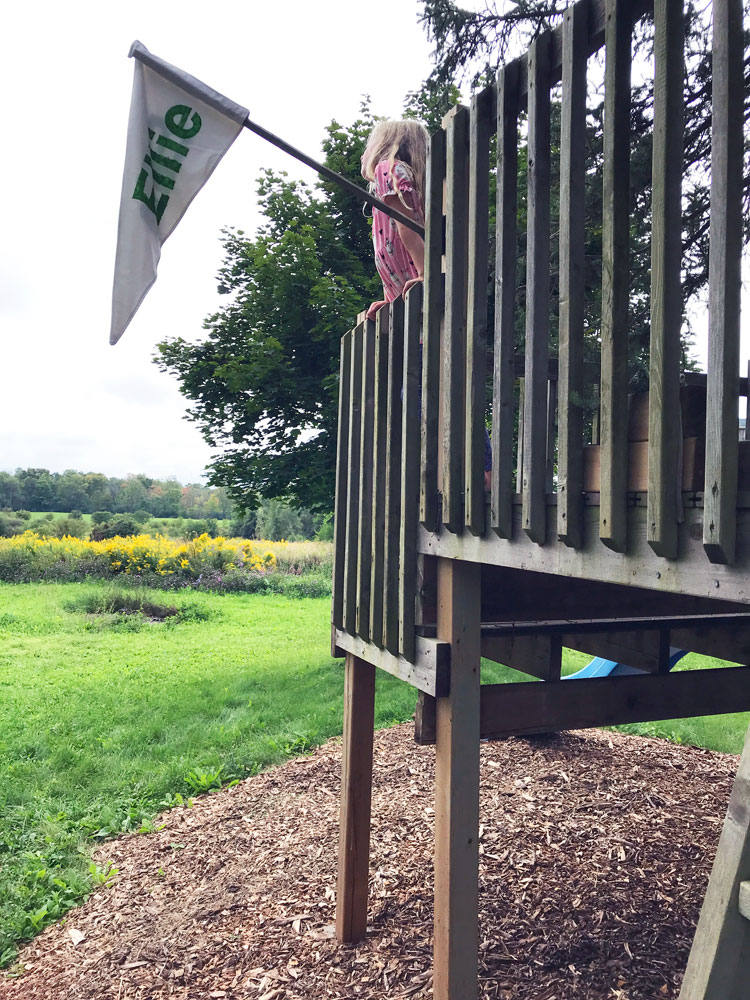
The final touch for the playground was a flag. The bracket and flagpole have been on the treehouse for more than a year, but I finally sewed up a personalized pennant last week. Ellie helped to colour in her name, and she now loves waving the flag around.

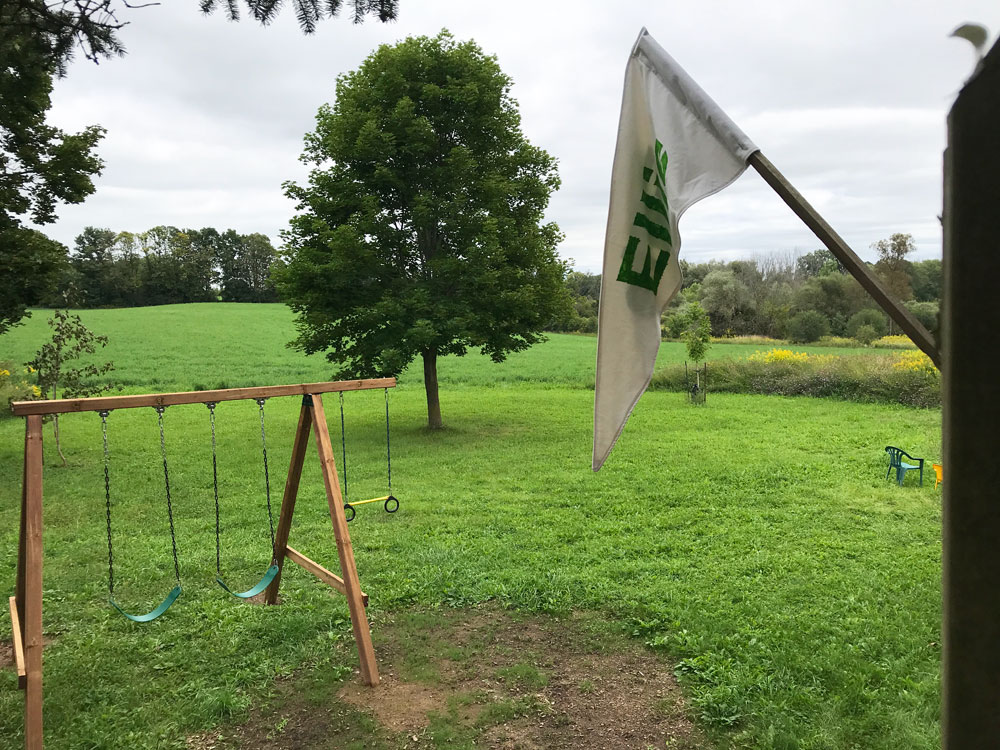
This spot has come together as a great play zone for our girl. Ellie now has a treehouse with tire ladder, firepole and slide, a climbing tree, and swingset with two swings and bar or rings.

A true playground in our own yard.
Vegetable garden update

The vegetable garden is a mix of highs and lows right now. A nice change, since the last few years have been all lows all the time.

I’m not quite as high as I was last fall, when the garden was cleaned out for the season and I had grand visions for the possibilities that awaited us. But I’m not in the doldrums either.

I’m working at it.

We are using about half the garden this year. One quadrant has mulched pathways and beds that I established last fall. My mission there has been filling the beds (mixed success) and maintaining the paths (mixed success there as well).

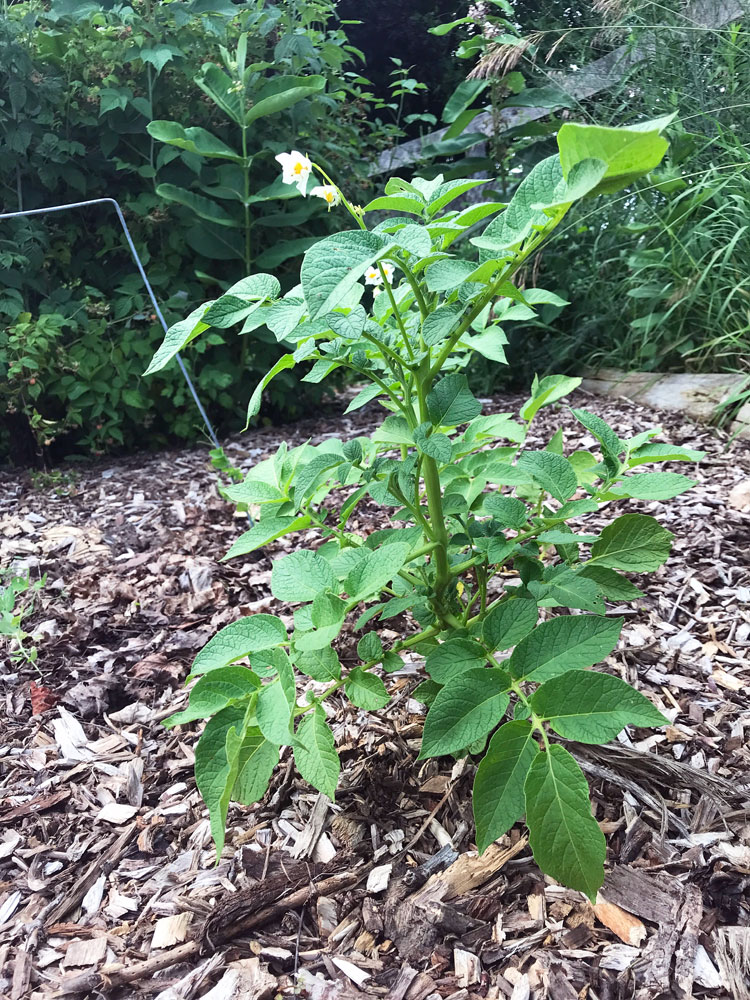
The highest of our highs is a surprise. Three potato plants that appeared at the edge of one of the mulched pathways. I am pretty sure the last time we planted potatoes was 2018, so these have been lurking in the weeds for some time. Potatoes are always Matt’s, so these three plants feel like a gift from him. We’re calling them Daddy’s potatoes, and we’ve pledged to always leave some surprise potatoes in the garden.

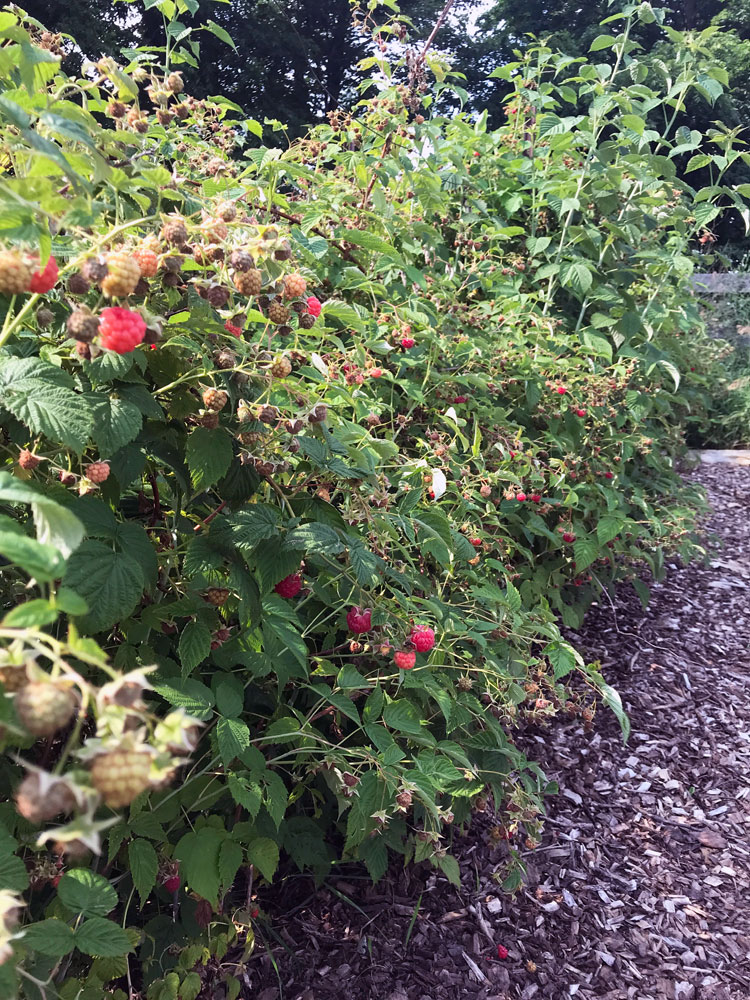
The next high is our raspberries. We have so many canes and they are loaded with fruit. One of the highlights of working in the garden this spring was hearing hundreds of bees pollinating the berries. This is also our first year harvesting from plants I transplanted from Matt’s Dad, and the berries are beautiful.

The lowest of our lows is of course the weeds, which are still thriving. I’m reminding myself that they are very well established. It’s going to take effort to knock them back. Thistles and milkweed are our major invaders. (I know milkweed is important for monarchs. We have lots all around the farm and have transplanted many plants this year. I’ve decided they don’t get the vegetable garden too.)

Then we have the plants that I want to grow in the garden. These are not as well established as the weeds. We were a bit late in planting this spring, so they’re all still a little small. We also used our old seed stash, so we’ve had some spotty germination. The old seeds worked great for the tomatoes and watermelon, but the zucchini, carrots, and lettuce didn’t come up at all and the beans and peas are sparse. I bought fresh cucumber, spinach and beet seeds, but the beets didn’t sprout either. (Though I did have a spinach salad for lunch yesterday.)

But speaking of tomatoes, our bumper crop of seedlings led me to open another quadrant of the garden. This one had been tarped, so it was fairly weed free, but there were no rows or paths or beds. I stuck 70 tomato plants in the ground and figured I’d deal with the infrastructure later. But of course as soon as the soil was exposed to the light, the weeds sprouted. The tomatoes are not placed how I want the beds to be, so I can’t work around them to put in my paths and beds. But I’m going to try to lay down some cardboard in between the rows to try to fight the weeds a little bit.

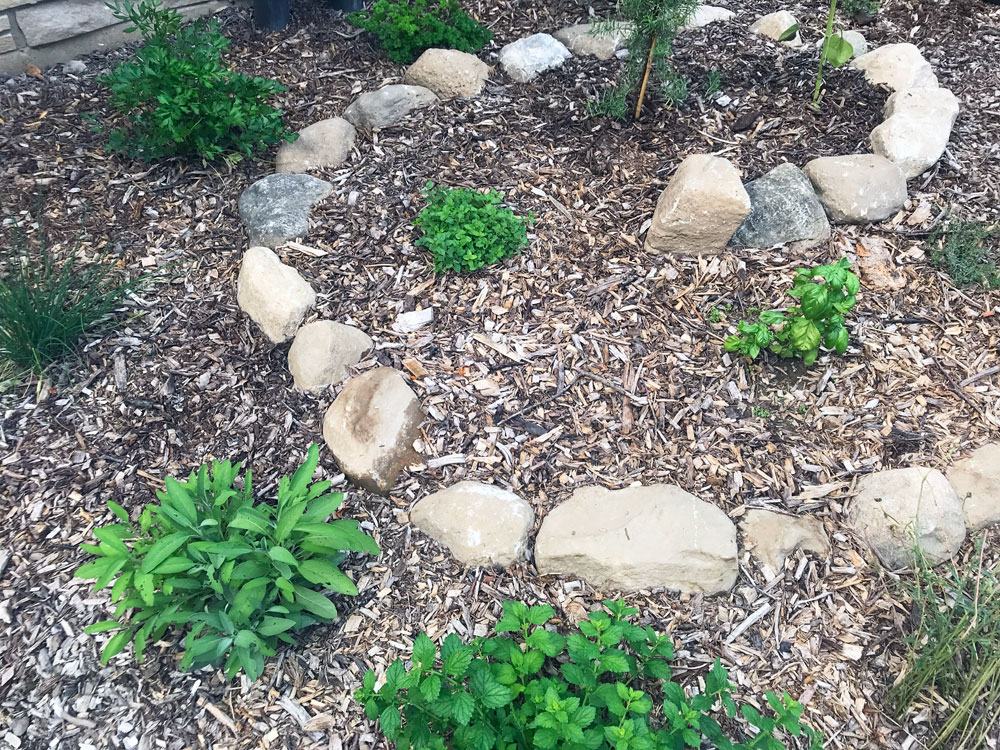
I planted the herb spiral at roughly the same time as the tomatoes, and I mulched the spiral with wood chips. We have had barely a handful of weeds from that whole bed, so contrasting the herbs with the tomatoes has been a great lesson in the power of mulch.

I’m so committed to my no dig and mulch and cardboard and paths and beds that seeing and walking on the exposed soil in the tomato section felt weird. The areas where I spread cardboard and mulch last year are definitely less weedy than anywhere else in the garden. They’re not weed free. I didn’t have enough cardboard to do the whole quadrant, and the cardboard I did have has now decomposed. So the weeds have broken through in spots, but there are not as many and they are much easier to deal with than the bare soil.

I think I entered no dig expecting truly no dig. The weeds would succumb with one application of cardboard. The worms and bugs and plants would thrive. My garden would be lush and beautiful and low maintenance.
The more I’ve studied, the more I realize that it’s a process. Battling the weeds takes time. Finding my balance of mulch, compost, interplanting, succession planting and just plain planting takes time. I believe that no dig is best for the soil, animals, bugs and plants. I also believe we can get there to a lush and beautiful (but not necessarily low maintenance) garden. I’m working at it.

How is your garden growing? What are you growing at your house? Are you a mulcher? Anyone else experimenting with different growing methods?

Home Goals 2023 mid-year report

We’re halfway through 2023. (Yeah, I know. How did that happen?)

We’ve made progress on all of the home goals I set for this year (yay!) and I’m excited about how far we’ll get over the rest of the year.

Are you excited to check in with me? Here’s how we’re doing so far.

Coop

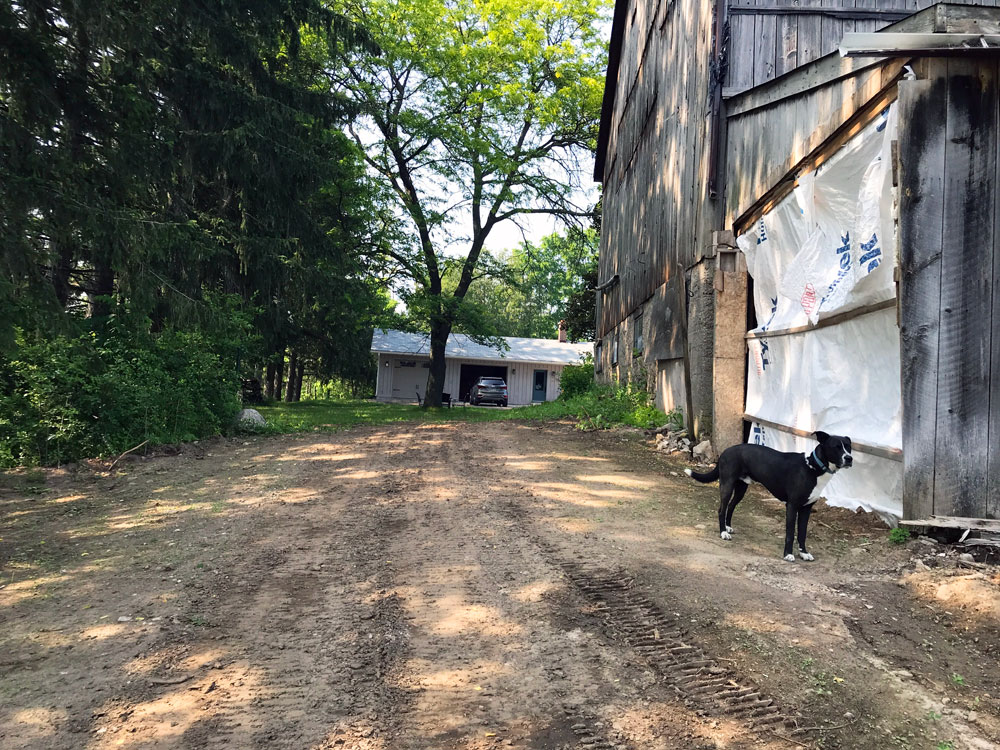
Black dog standing on dirt beside a barn. A hole in the barn wall is covered in a tarp.

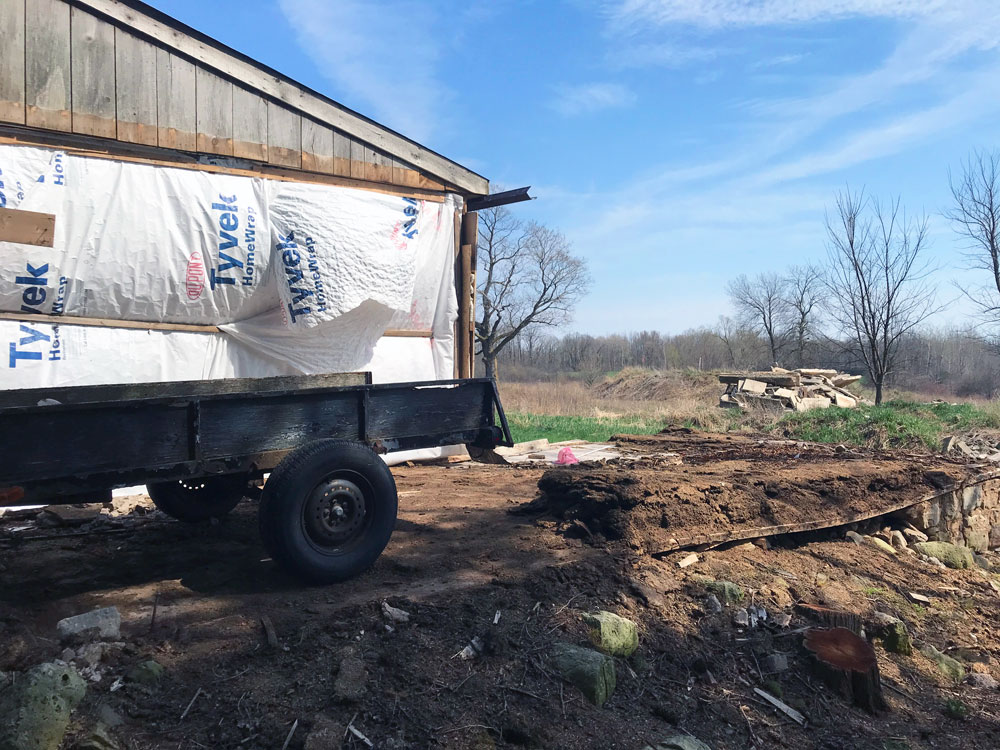
The last trace of the 100-year-old coop disappeared last month when the crumbling foundation became part of our (now massive) rockpile behind the barn. It was a huge job, and I was grateful that our landscapers were able to handle it while they were here for our patio construction. Next up, the building phase, starting with a new wall for the (still massive) gaping hole in the side of the barn.

Patio

Black dog laying on a stone patio. An unfinished chair is in the background.

The patio is almost done and it’s fabulous. All the details are coming soon.

Swing set

Pile of woodchips beside a treehouse.

The swing set fittings and lumber that I bought last year are still stacked in the garage. I sold Ellie’s too-small playset, so we have a spot for her new swings. Then I took delivery of a big pile of mulch, which was dumped in the swing set site (say that six times fast). As soon as I spread the mulch underneath her treehouse, I can build her bigger swing set. In the meantime, our girl has mastered the firepole on her own. She’s so proud of herself, and I am too.

Vegetable garden

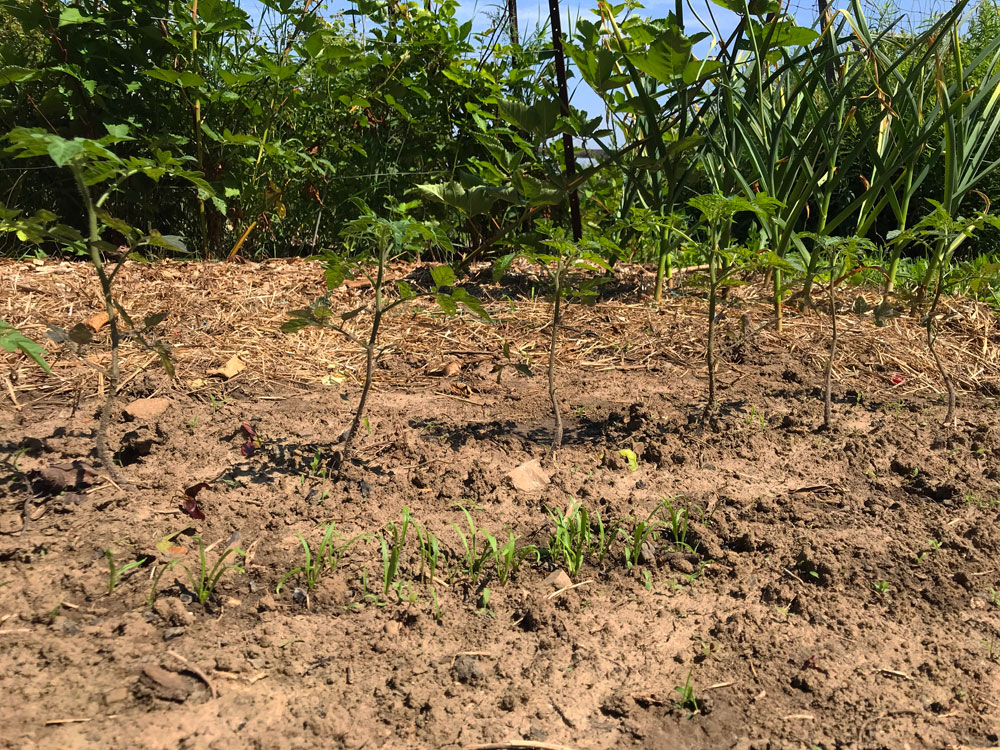
Tomato seedlings in a garden

I’m still trying to be cautious in the garden. Some days I’m quite optimistic. Others I feel like it’s close to being overrun with weeds (as has happened in years past). We have mostly cleared and planted about half the garden. We have 70 tomatoes, 6 watermelons, plus beans, beets, spinach, carrots, lettuce, zucchini, peas, cucumber, grapes and about a trillion raspberries on their way. I feel like we are getting closer to a no-dig, not too weedy, productive garden. But it takes constant vigilance right now.

Turnaround garden

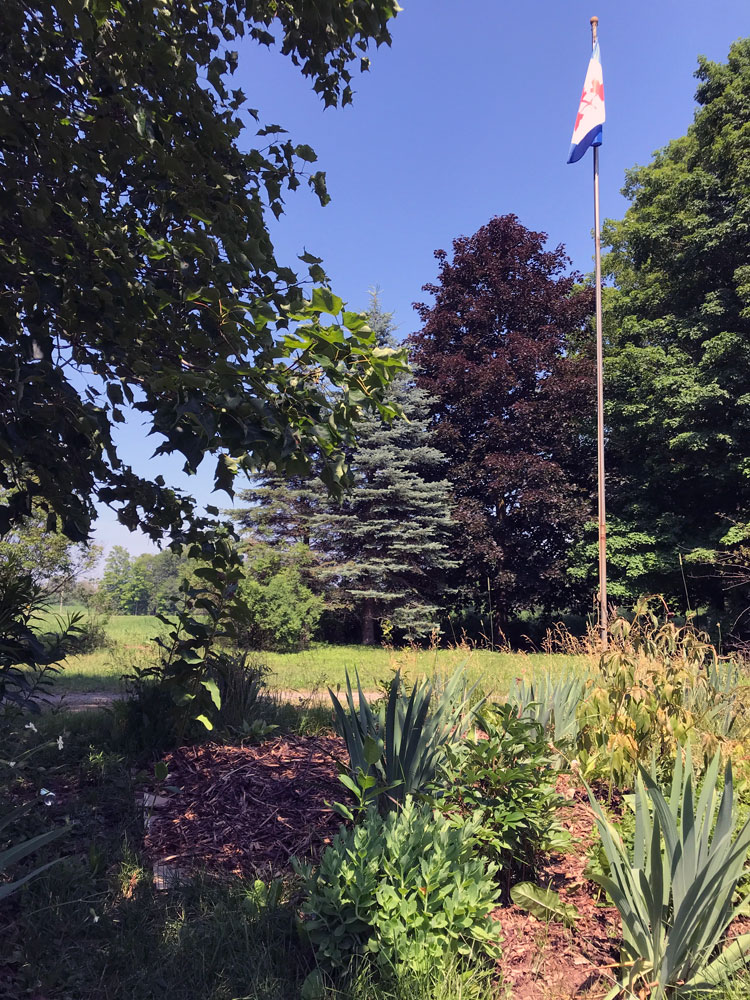
Pearson Pennant flag flying over a flower garden

Most of the plants Ellie and I moved to the turnaround last fall survived. We’ve added some more, made a path to the flagpole and spread some mulch. There’s lots more to go yet, but we’re getting closer to my original vision to fill the whole turnaround with plants.

Ellie’s bedroom

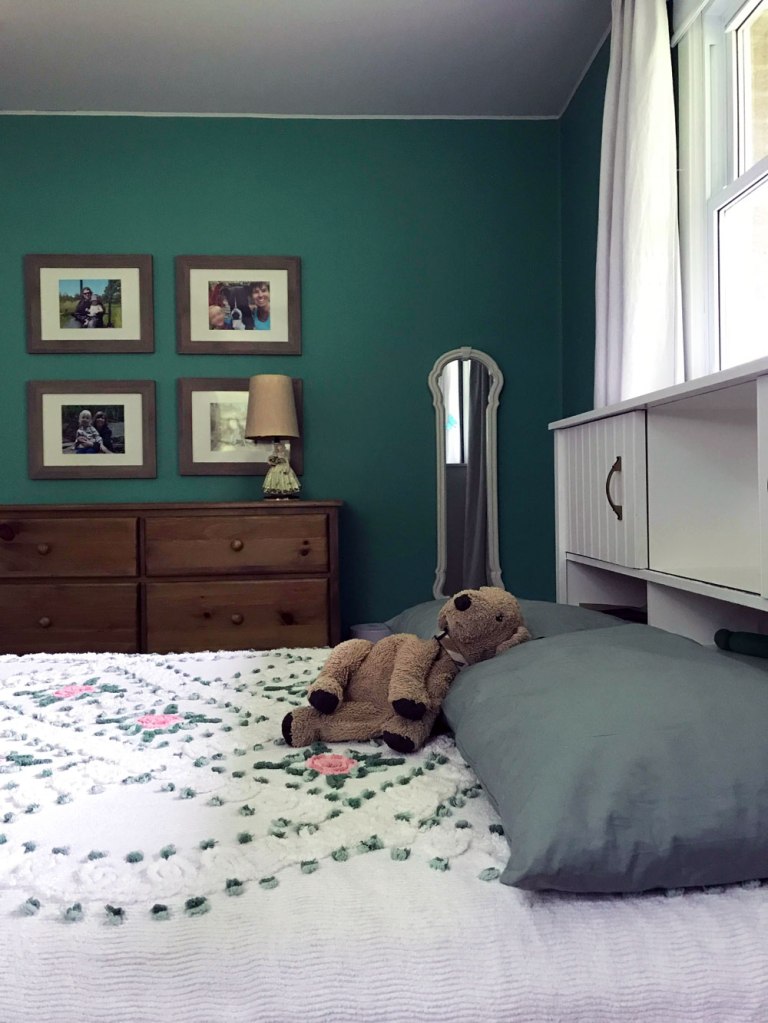
Ellie loves her new room. She has been sleeping in there for several months (although this weekend she started sleeping on the floor). I still have a few things I’m hoping to do to fully finish off the space, along with convincing her to move back into her bed.

I’m really proud of everything we’ve accomplished so far. Every item on my home goals list has had some attention. At the start of the year, I felt like we weren’t just playing catch up anymore or fixing things that were broken. We are finally making progress. Reviewing these goals makes me feel like we’re making lots of progress. I hope the momentum continues.

What’s your big accomplishment so far this year? How are you doing on projects this year at your house? Do you have any home goals?

Landscaping… revisiting the long list

As I was writing about our patio project and the herb spiral around the well, I took a journey through the blog archives. I came across this post that I wrote just over 10 years ago about the plans I had for outdoor projects and another about some of the progress we’d made.

I marveled at what I accomplished in one weekend and then laughed at myself for all of the landscaping I thought I would accomplish in one year. We’ve completed most of the projects, but they definitely took more than one year. In fact, some of them are still in progress.

The post also included my long term plan, which, I said, “will take who knows how long.”

Funnily enough, we haven’t done too bad on that long term plan. What I enjoyed most, though, was seeing how little my plans have changed over the past 10 years. Some of the projects are done. Some are not. But I still want to do them.

Come take a look back (and ahead) with me.

Here’s our (extremely ambitious) list from 2013.

Landscaping plan for this year

I’m still working on the turnaround garden (though we were in pretty good shape by 2015). We eliminated most of the flowerbeds around the house, but the ones we kept need ongoing attention (welcome to gardening). I’m continuing to ignore the rubble and rock piles, though they’ve been very helpful for the fireplace and sunroom demo and every rock pick-up we’ve done for the past 11 years. We kept the longe ring and put the vegetable garden there (also in 2015). The pond shore was a saga for many years, but we finally cleared it and built our firepit (in 2020–just 7 years late).

Here’s the long term plan.

Long term landscaping plan

The garage and the driveway trees and lights are done. The bridge over the creek, the tree line clean up and the coop are in progress (some farther along than others). I still want to level the dirt pile behind the barn (now known as Grassy Hilltop courtesy of Ellie), although it’s come in handy over the past few weeks when our contractors needed topsoil (and Ellie does not like the idea of Grassy Level Ground). I still imagine how nice it would be to have a dock down at the pond, and I still want to shift the laneway to the back field slightly westward.
Overall, I’m proud of what we’ve accomplished. And I’m learning that landscaping is a process–and usually takes longer than I planned. Each thing I do builds on something I did before. And there’s always more to come. Thanks for following along.
Do you have a long list for projects at your house? Do you find what you want changes over time? Who else is ambitious about how much you can accomplish?

Planting a spiral herb garden

As part of the patio project, the garden around our well was completely ripped out. It hurt a little, as this garden was our most established flowerbed, and the plants were huge. But Ellie and I did a lot of transplanting last fall, and despite our rushed, late season, haphazard technique, the plants survived. Our contractors were also very obliging and moved some of the larger shrubs for us.

Faced with a blank slate, I started to re-evaluate the well garden, and I decided to try an herb garden. Herbs can be lovely and decorative, and also of course functional. This garden is very close to the kitchen, so it’s a convenient location for herbs. Plus it receives a lot of sun, which most herbs like.

I decided to try a different planting pattern: a spiral. (Hint: a garden hose is helpful to plan out the curves.)

I came across this idea on Pinterest. Spirals are an established technique for planting herbs. Usually people use some kind of edging (bricks, rocks, wood) and build a twisting bed that gets higher toward the centre. The spiral creates different growing conditions based on where you are on the curve, and herbs are planted in specific locations based on how much sun or water they prefer.

The well garden is round, so it’s a perfect shape for a spiral. I didn’t make ours rise very much, as I don’t love the “tower” visual, but I think the design and principles will still work. We have lots of rocks, so I used those to lay out the spiral, and we even had a start on the herbs.

My Mom gave me a big planter of herbs for Mother’s Day, so I used that. Matt’s parents gave Ellie a lemon balm plant, which she loves. Another friend gave me some echinacea. We also have chamomile growing wild around the farm, mint behind the house, and chives that I transplanted from my parents years ago. Ellie and I bought one lavender bush, a plant which I’ve wanted to add to the farm for a while. I also took a broad interpretation of beneficial plants and added some milkweed too.

It took us just a couple of hours to lay it out and put all the plants in the ground. Everything is small and a bit droopy right now, but I’m looking forward to seeing them grow.

Thinking about this new garden was energizing and fun, and I’m excited by how it came together.

Do you grow herbs at your house? Have you tried any new gardening techniques? How do you mix beauty and utility in your garden? Anyone else starting a new garden this year?

Vegetable garden 2023

This year’s vegetable garden is underway. You may recall that I ended 2022 on a high. Not because we’d had a successful gardening year. We didn’t. I was excited because I’d done a lot of clean up last fall and had high hopes for a successful garden this year.

I’m still optimistic–though I am remembering that I still have to put in the work.

After being neglected for so long, our weeds are very well established. I laid down cardboard last year, using the no dig method to try to smother them. However, I ran out of cardboard, so there are lots of weedy spots. Also, some weeds have broken through the cardboard. So I’m going to have to deal with them.

But, on the topic of putting in the work, I’ve done some weeding and am proud of the progress.

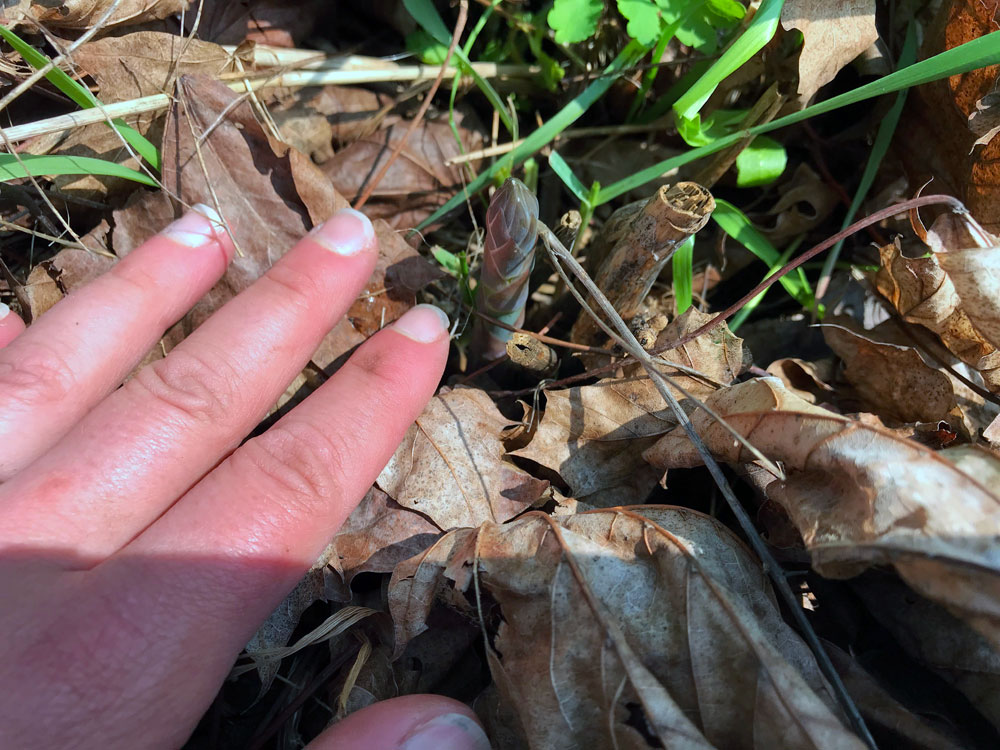
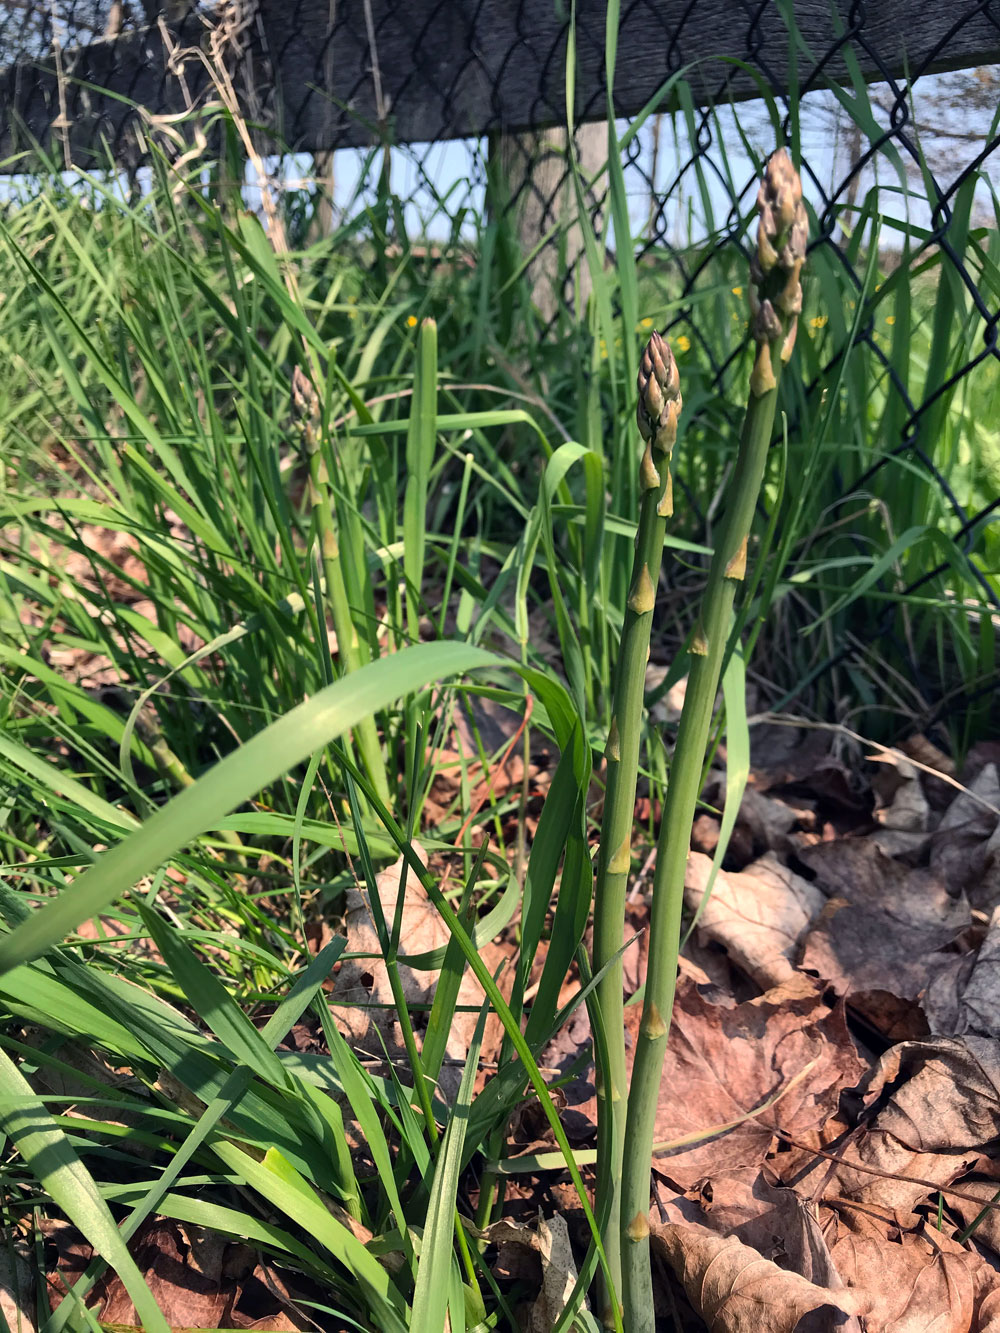
Our asparagus is up, and we are finally going to have a harvest. (This will be our first time picking any asparagus since I planted the seeds in 2016 and transplanted the plants in 2019.) It may not be much, but there are several stalks that pass the pencil test. I’m sure our asparagus will grow much better when it’s finally freed of the grass that’s trying to choke it.

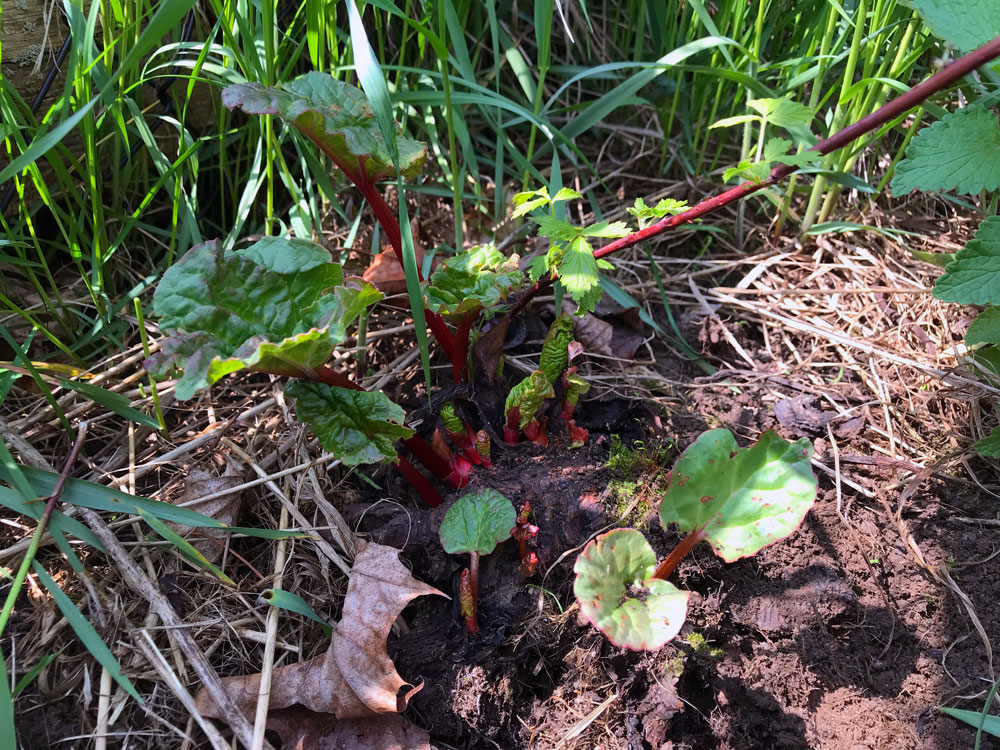
The rhubarb is up too. It’s a bit spindly, so again, some attention there with weeding and compost will cheer it up.

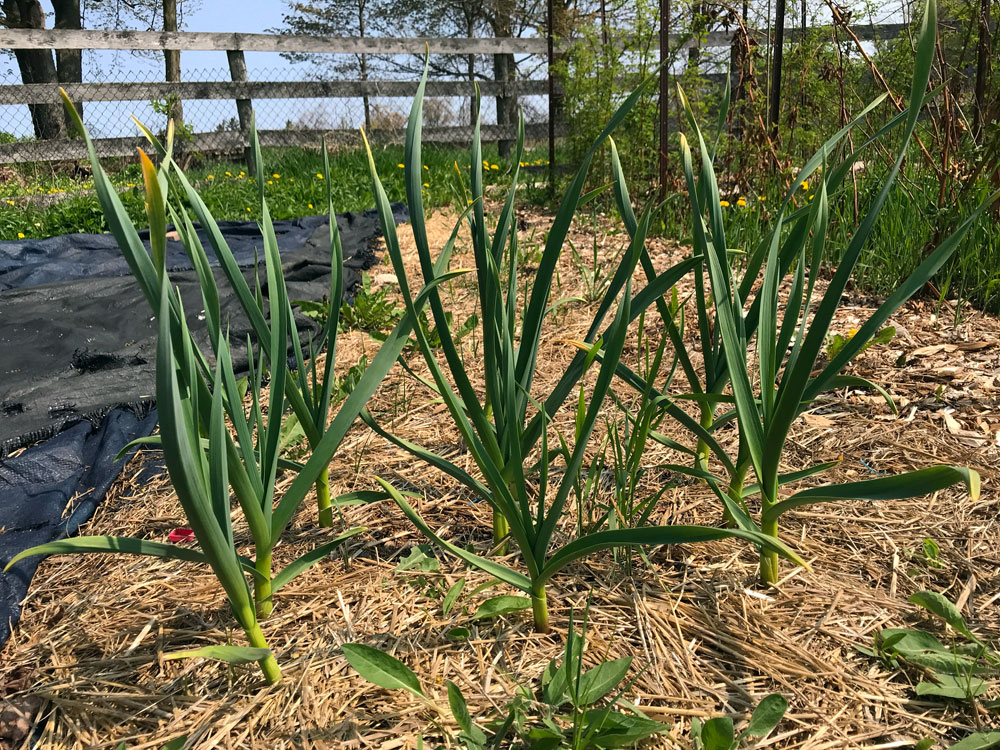
We planted garlic for the first time last year, and it is very happy. I am too. Put it in in the fall. It pops up in the spring and is the first sign of green. Hopefully we all live happily ever after–or at least until harvest.

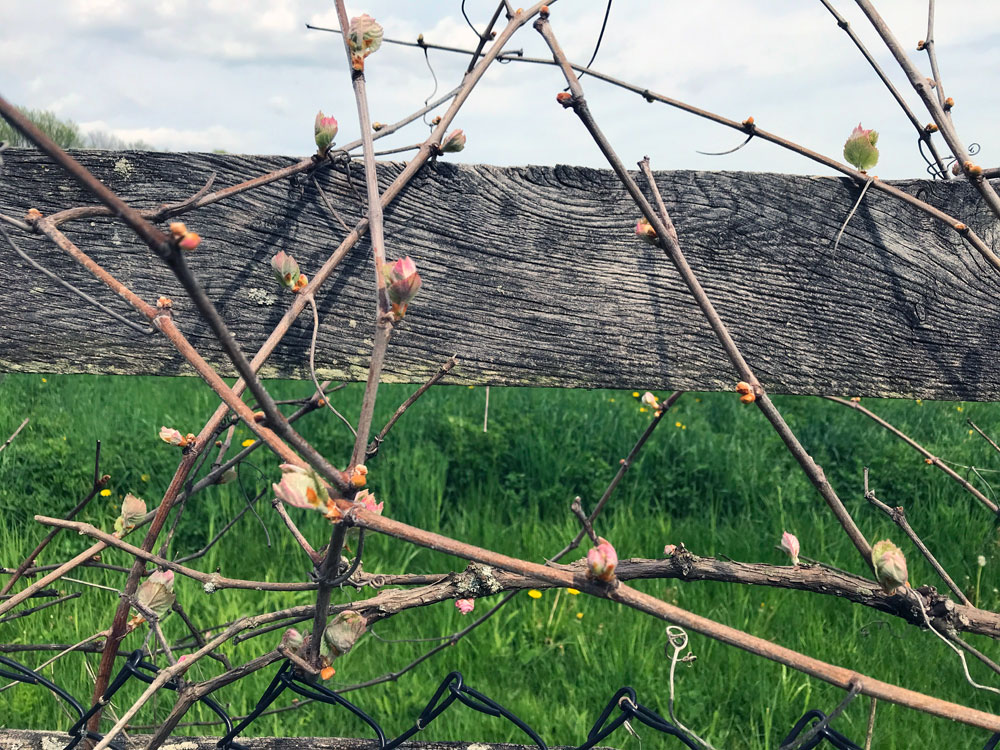
It looks like one of our grape vines has died, but the rest are alive. The pink buds that appear before the leaves unfurl are one of my favourite sights. The raspberries and blackberries are thriving, especially since I removed some of the weeds around them.

I’ve also mowed the garden once, in case it’s not clear that we still have a long, long way to go.

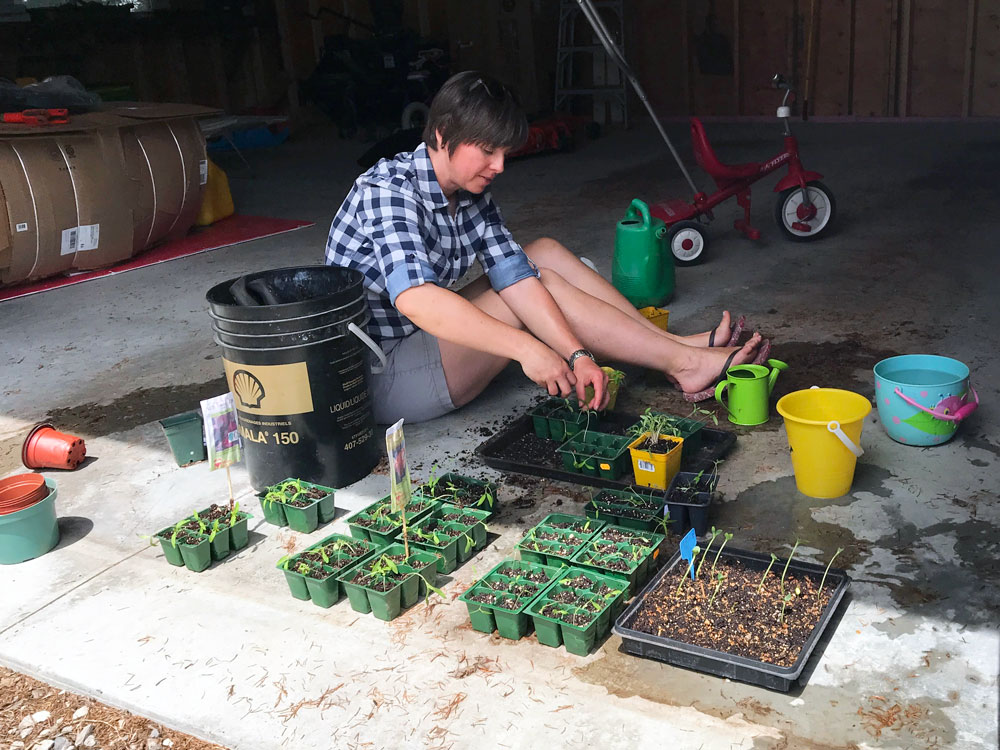
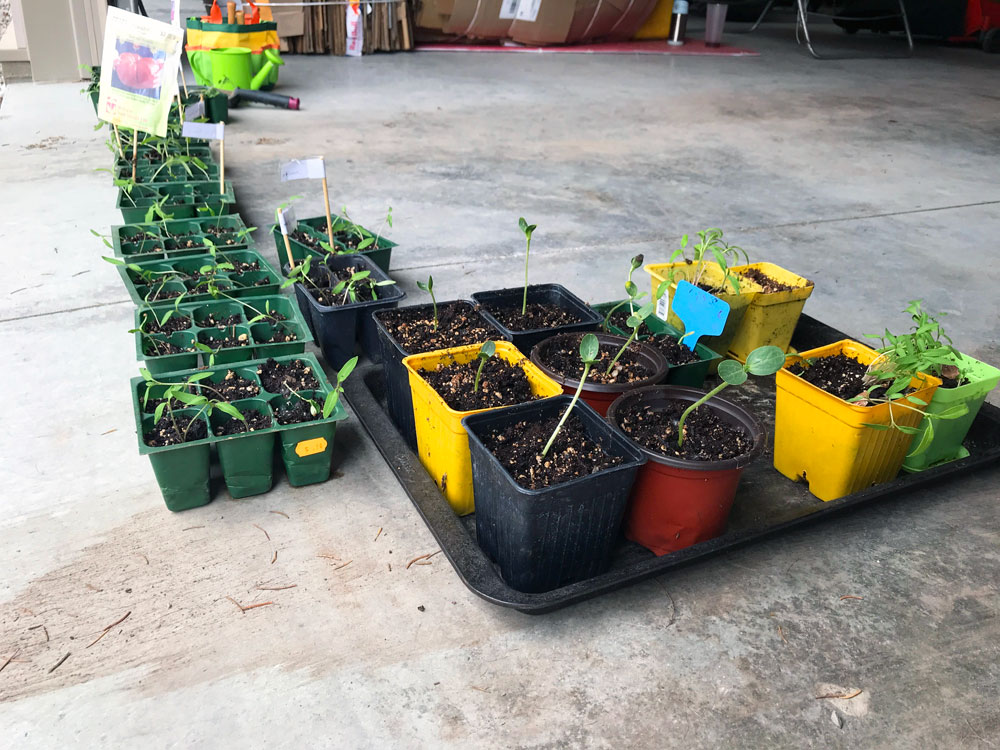
Inside the house is where we’re having our biggest garden success so far. Ellie and I went through our seeds and picked some to start indoors. We planted three kinds of tomatoes, watermelon, broccoli and cauliflower. All of our seeds are pretty old, so I wasn’t optimistic. This is a reset year where I’m just trying to get back in the gardening groove. Old seeds are sufficient for me right now.

I am amazed that it looks like every single seed sprouted, except for the cauliflower. We have so many seedlings and they seem really healthy. We repotted the tomatoes and watermelon over the weekend and brewed some compost tea for them.

We have lots of other seeds that we’ll sow directly into the garden.

Our garden start so far is ups and downs, which I’ve come to learn is pretty typical of vegetable gardening. Hopefully we can put in the work, find our groove and have at least some successful harvests.

Are you gardening at your house? How is your garden growing? Anyone else starting seeds? Battling weeds? Looking for your groove?

Four tips for tackling an intimidating task

Remember when we bought a rotary cutter? (For those that need a refresher, it was in 2017.) We put it to work mowing the septic bed, meadow and pond shore. And then it got tucked into the driveshed and has been used rarely since.

Last year I cleared the septic bed and part of the meadow (again). But I didn’t use the cutter. The brush was too big by then, so I used my new-to-me reciprocating saw. Then Matt’s Dad came and used his chainsaw.

It was always my plan to use the rotary cutter too, but I never got to it last year.

Last week, I decided to give it a try.

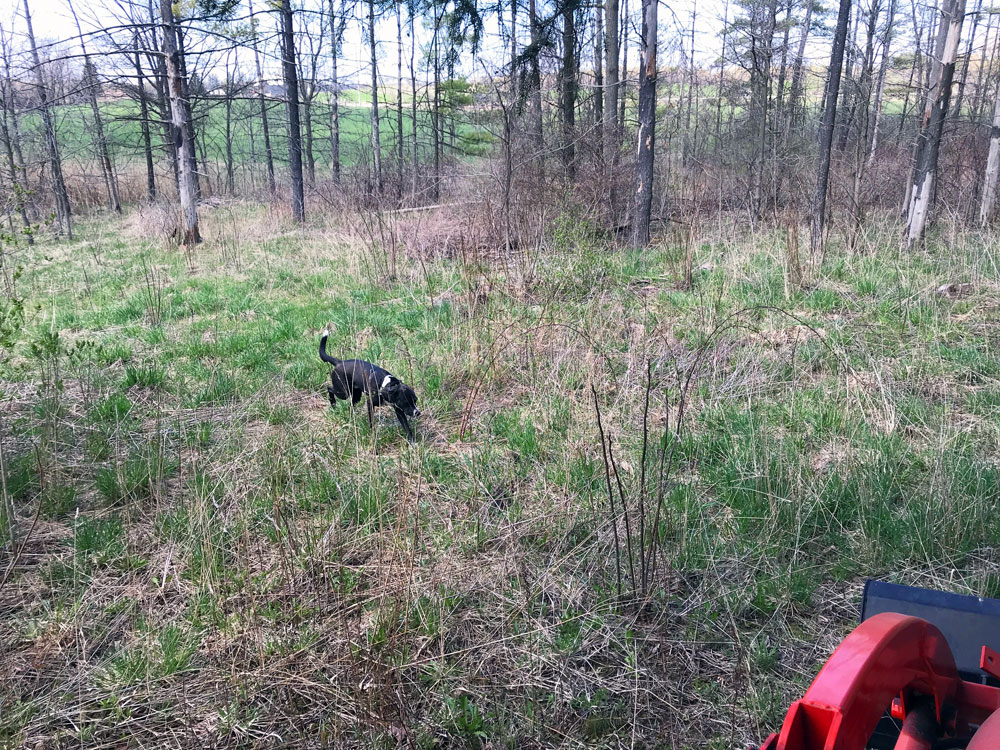
I took advantage of nice weather, a free afternoon, and Ellie at school to hook up the mower. Tasks like this are always a bit intimidating for me. The cutter is huge and heavy. It’s a bit tricky to get everything connected properly. The tractor doesn’t always have great traction, and the ground I wanted to mow was hilly and bumpy–lots of chances to get stuck. (Like Cigo in the photo below, who is actually tangled up in a wild raspberry bramble.)

But in about twenty minutes, I had the cutter connected. Alright. Let’s try mowing. Success.

An hour after I first came outside, I was done. A task that had been on my list since last year (longer if you look back to when we bought the cutter) was done.

I was so proud of myself. Conquering something that feels hard is a big accomplishment. Here are my tips for tackling an intimidating task.

Start small

Break your task down into smaller steps. Focusing on one thing at a time can be less intimidating than looking at the whole big project that you have to do. My initial plan was to see if I could get the mower hooked up to the tractor. Even if that was all I accomplished, I was going to call it a win.

Just start

Sometimes it’s hard to figure out where to begin. Or you feel you can’t start until everything is perfectly set up. With the mowing, at first I couldn’t figure out how to balance the mower. It was tilted way too far forward and the front edge dug into the ground if I lowered the hitch too far. Also, I couldn’t get the PTO to fully lock. But I started anyway. After my first pass, I figured out how to balance the mower. The PTO slipped off a few times, but I eventually got it to click. And in the meantime, I got some mowing done. Even if you don’t feel completely ready, start. You’ll already be accomplishing something.

Ask for help

There is no rule that says you have to do everything yourself. It can be hard to ask for help, but in my experience people are usually very willing to step up. With the mowing, I could have called our farmer, our tractor salesperson, or my cousin who helps mow our grass. They are all very kind, generous people who know exactly how to connect the cutter to the tractor and would be happy save me some anxiety–and muscle strains. Think about the task you’re tackling and who would be best to help.

Know when to quit

Intimidating tasks truly are hard. If things really aren’t working out, it’s okay to take a break and come back later. (Perhaps after exercising your phone a friend option, above.) Even if things are going well, it’s also okay to take a break. With the mowing, I’d cleared the areas I wanted to clear and I’d managed not to get stuck. (I’d also managed not to run out of fuel, but the gauge was very low.) There’s always more I can do, but sitting on the tractor eyeing additional overgrown areas, I said to myself, “You’re pushing your luck.” And I drove up the hill to the barn.

It feels really good to cross this task off my list–and to know that I can do it again if I need to.

I’m hoping to do at least a couple more mowings this year to keep the septic bed clear. Maintaining is much easier than starting from scratch (again).

It’s also easier knowing that I can do this–and it wasn’t that hard.

Do you have any accomplishments to share? Or any intimidating tasks that you need encouragement to tackle? What tips to do you have to tackle intimidating tasks? What outdoor work have you been doing at your place?

The middle

The part we all wait for in DIY is “look at the beautiful room/garden/furniture/shelfie/whatever I made!” The middle while you’re waiting is less beautiful, less photogenic, less interesting.

I’m in the middle.

I feel like I have little to report. But I like the regularity of writing a blog post for every Monday, so here I am. Schedules and deadlines–even when self-imposed–work well for me. In both blogs and renovations.

Ellie’s room makeover is on track. We’ve had paint week. Last week was window week (curtains are tedious, so I’m not giving you a whole blog post about the HALF A DAY I spent ironing or the wait at Ikea to return a too short curtain rod).

This week is bed week. I’ve washed the dusty bedframe, added beadboard to the headboard, bought a new can of primer and am ready to begin painting the headboard. The mattress is being delivered on Thursday.

We’re on track. In fact, we’re on track for lots of projects. As with Ellie’s room, there’s not much to share yet, but I’m going to mention them anyway.

Coop

I’m halfway through clearing the manure off the old coop foundation. Getting to this point involved detaching the the snowblower from the tractor and recharging the tractor battery, so there was progress on several fronts.

Patio

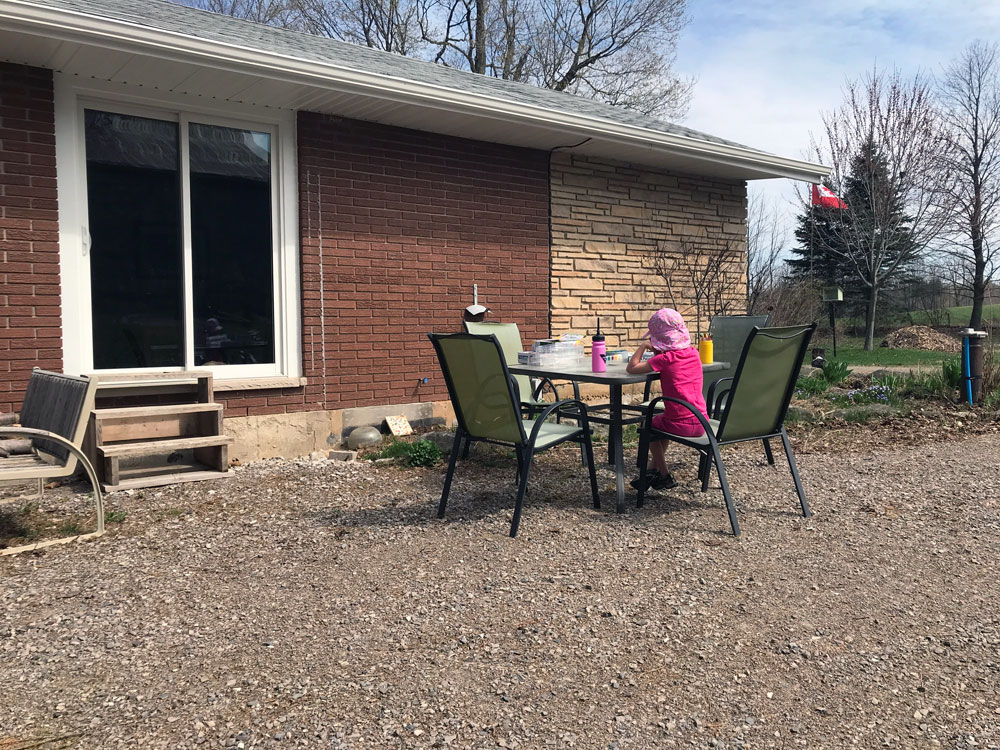
We had some lovely weather last week, so Ellie and I enjoyed breakfast and lunch on our currently-imaginary-but-hopefully-soon-to-be patio and confirmed that, yes, we would like a proper place to eat and sit. Cigo sprawled in the sun. We set up a small table and chairs and confirmed that they should fit on the new patio. Construction should start sometime in May (fingers crossed).

Gardens

Garlic is up in the vegetable garden. Transplants to the new turnaround garden seem to have survived. I have bales of cardboard and piles of mulch (and a brand new pile of very old manure) ready to be spread around. May may be garden month.

We keep moving ahead. Progress may not always be as quick as I want (I still can’t believe it took me a whole morning to iron curtains), but I know I’m getting closer to that beautiful, photogenic, interesting moment.

What projects are you in the middle of? How do you schedule projects? What tips do you have for persevering through the middle?

How to paint a room with a 5 year old

Welcome to week 2 of Ellie’s room makeover. Last week was paint week, and Ellie was involved in every part.

I see blogs occasionally talk about how to DIY with kids or the challenges of home reno with children. So I thought I’d join the conversation and share how Ellie (5 years old) and I painted her room together. Fittingly, I have 5 tips.

Start small

Painting a whole room should not be a child’s first project, in my opinion. Ellie’s first real build was just before she turned one when we put together her play table and chairs. Simple tools. Quick project. Since then, she’s been part of all different kinds of DIY (and she no longer tries to eat the tools).

Baby playing with screwdriver and drill

For painting (beyond her craft paints and paper), she’s practiced on a bird feeder and shelves. We’ve built up her knowledge and comfort level over the years, so that she is interested in and capable of being involved in painting a whole room.

When it came to painting that room, we broke it up into smaller tasks. The first day, we worked for about an hour doing the edging. The second day, I finished the edging and started the rolling while she was at school, but left a section for her to roll. The third day, I did the second coat solo.

Step by step

There are multiple steps to painting a room, and Ellie was part of all of them. This is a good way to get your child involved and excited (and have them participate without actually painting, if you prefer).

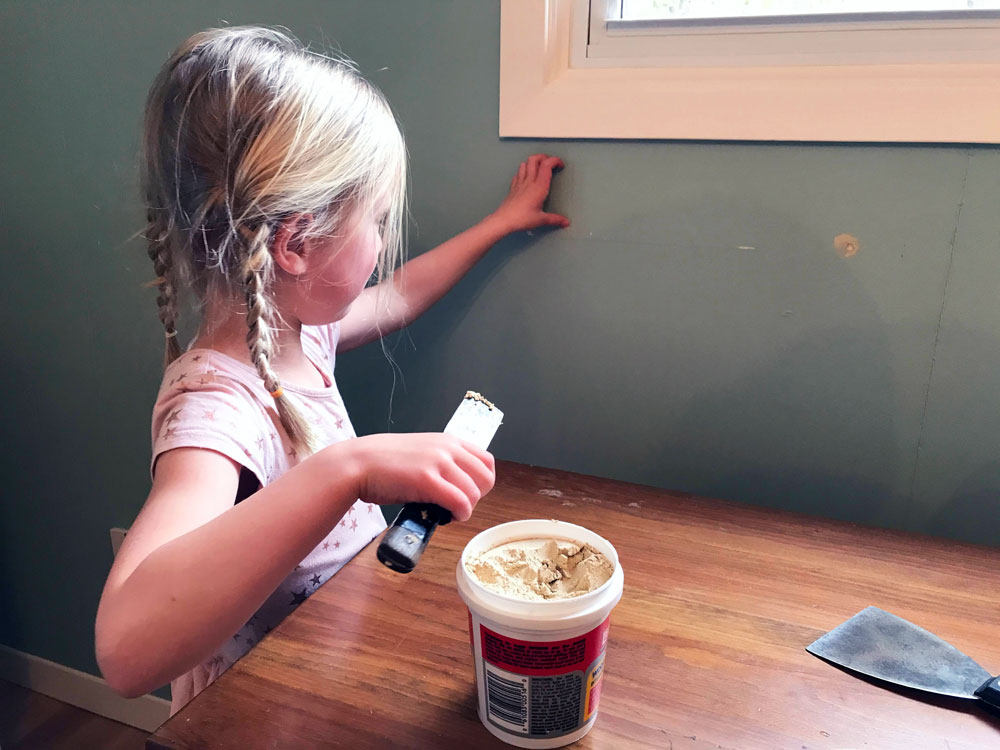
Planning what colour to paint. Going to look at paint chips. Buying the paint (we got to watch the colours being added to the can and then the can being mixed in the shaker). Clearing the room. Patching any holes in the walls (spying holes is a good task for a child). Sanding and priming the patches.

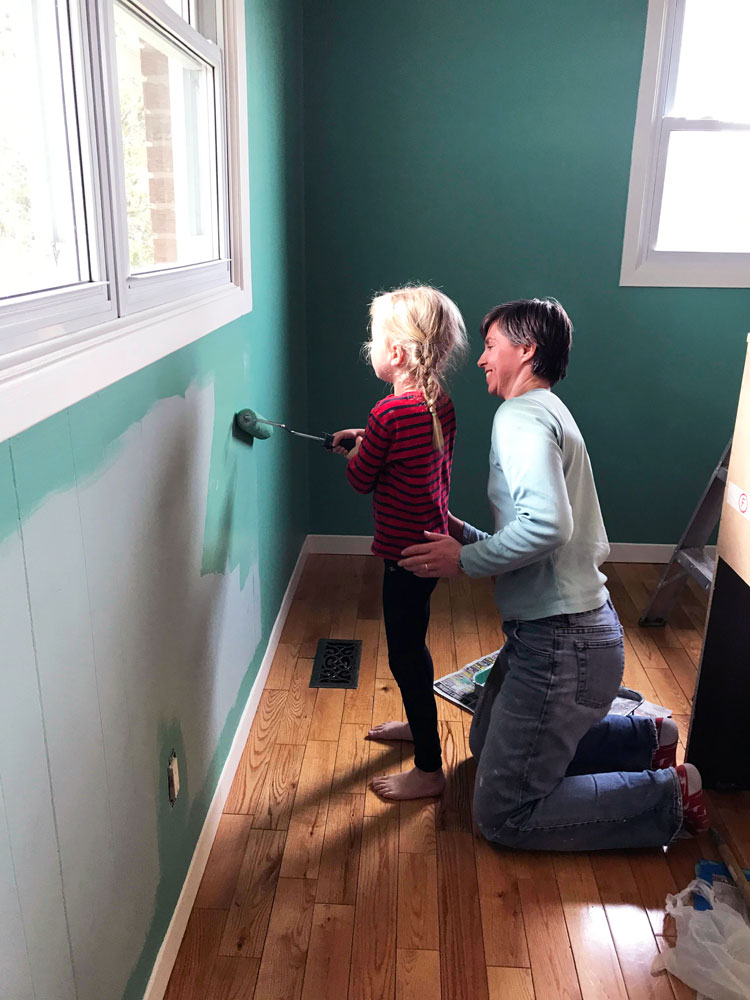
For the actual painting, there is both the cutting in and the rolling. Cutting is great for children as it’s done with a brush. Just make sure to pick a spot where precision isn’t required (more on this below). Rolling is a bit more challenging. Ellie tried the roller all by herself, but decided she preferred when we held the roller together, so we did.

Gear up

As with any DIY project, the right equipment is key to success.

Ellie prides herself on having “work clothes”–pants and a shirt that got paint on them when she was working on an earlier project. Having clothes that you don’t mind getting dirty is one less thing to worry about.

Choose a small paint brush and pour some paint into a smaller cup. These will be easier for your child to handle and minimize the mess.

Tape off trim or anything that you don’t want painted, lay out newspaper or dropcloths to protect the floor, and have some rags handy. (The dog and his bed are optional, though not in our house.)

Talk it through

Painting is like any other skill. You have to teach your child how to do it. Take a bit of time at the start to demonstrate the proper technique. Be detailed: how deep to dip the brush in the paint, how to wipe it off on the rim, how wide to make their strokes.

I had instructed Ellie to paint as wide as her hand. That was not a concrete measurement for her, and I noticed her edges were growing wider and wider. I ended up swiping a line on the wall with my brush so that she knew how wide to go.

Pick your spot

Ellie is careful and responsible. But she’s also 5, and this was her first time painting a room. I didn’t expect her technique to be perfect, so I thought about where she could do the least damage. We started with edging around the outlets. They’re low to the floor so they’re easy to reach. They’re small, so she can finish one off quickly and feel a sense of accomplishment. If she gets any paint on them, I can easily scrape it off once it’s dry. For the most part, they’ll be behind furniture so an imperfect finish won’t be an issue. I also assigned her each of the corners, starting behind the door.

Ellie strayed from her assigned spots once and started working her way across the wall. I explained that we were rolling that section and didn’t want to see brushstrokes there. She understood and went back to her corner.

No matter how careful you are, how well you prepare, or how skilled your child is, it’s also absolutely fine to smooth out your child’s brushstrokes while the paint is still wet. Touch-ups are also fine. We had a few spots on the trim that needed to be covered, which was no big deal.

The result of our teamwork is a fully painted room, and a great feeling of pride for us both. I love seeing her grow and learn. I know that I’m teaching her so many valuable lessons. Ellie, who was once reluctant about moving rooms, is now excited. Everyone who visited us this weekend for Easter got a tour of her new room.

Ellie has been around DIY her whole life. She’s comfortable around tools and knows how to be safe. She knows projects take time and she has to be patient. DIYing together is not always perfect. I’m not always as productive as I want to be. But I know the skills she is learning are important. And the experiences of doing these projects together is priceless.

Up next, window week. Blinds and curtains here I come.

Do you DIY with kids? What are your tips for helping kids learn to be handy? Any painting disasters or triumphs to share?

Ellie’s room makeover

Ellie’s room makeover was the first project of the year. We got started in January, clearing out the old guest room and coming up with a plan for the space. And then we stalled.

This is a relatively simple project that could be done in a week. A different kind of blog would even do it as a weekend makeover. We are now at the beginning of April, which means Ellie’s room has been going on for three months.

It’s time to get moving.

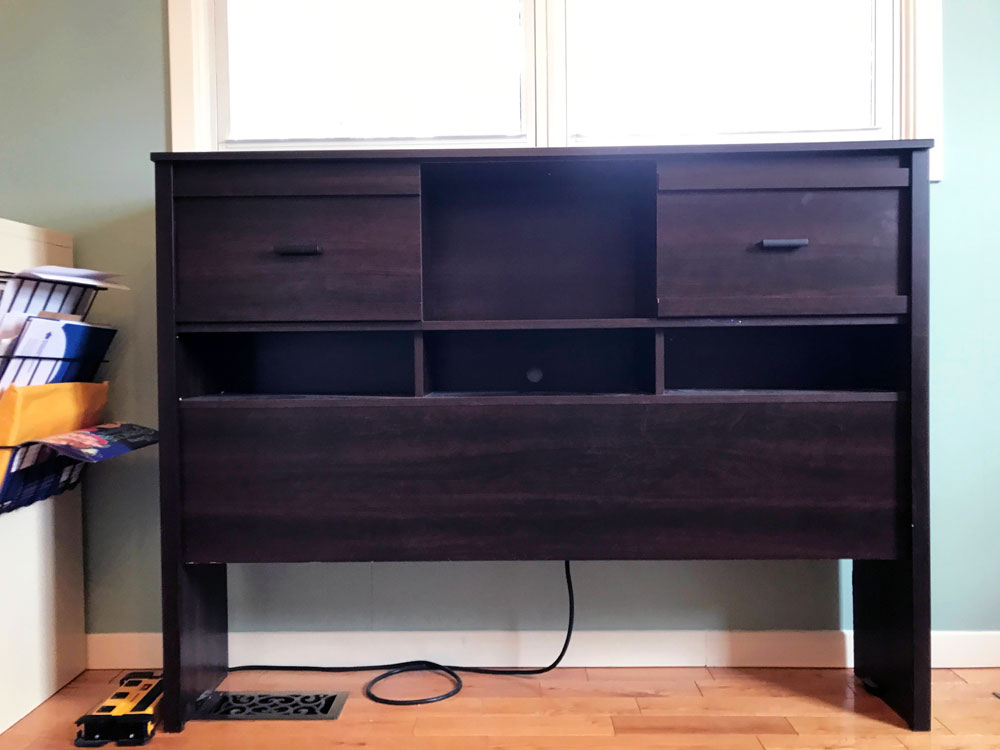
Fortunately, something happened a few weeks ago that brought my motivation back. I found a headboard.

Dark wood headboard

Ellie’s directive was that she wanted the same bed that she had, just bigger. I had planned to construct a headboard with a built-in shelf. But while browsing a thrift store, I found a double headboard that had shelves and sliding door cubbies, just like her current bed. I’m going to give it a coat of paint, attach it to a metal bedframe that we already have, buy a new mattress and cross this task off my list.

Speaking of the list, here it is.

Empty room – We finally got (pretty much) everything out this weekend. The big furniture was dragged into the middle of the room.

Furniture grouped in the middle of the room

Paint walls – We patched the holes, primed the patches and picked up the paint. Hopefully it goes on the walls this week.

Window treatments – I ordered new curtain rods which have already arrived. Blinds are on order. I need to sew a blackout lining for the existing dropcloth curtains. Then install my layered window treatments.

Bed – The doors to the headboard’s cubbies are going to get a little makeover, then I will paint everything white. I need to buy a new mattress and box spring. I dug the metal bedframe out of the driveshed. It needs a good cleaning and then I can attach it to the headboard.

Decorate – We’ll need some pictures on the walls, some accessories, a mirror.

Move in – We’ll make the bed, hang her clothes in the closet, bring in her books, and hopefully our girl will like her new room.

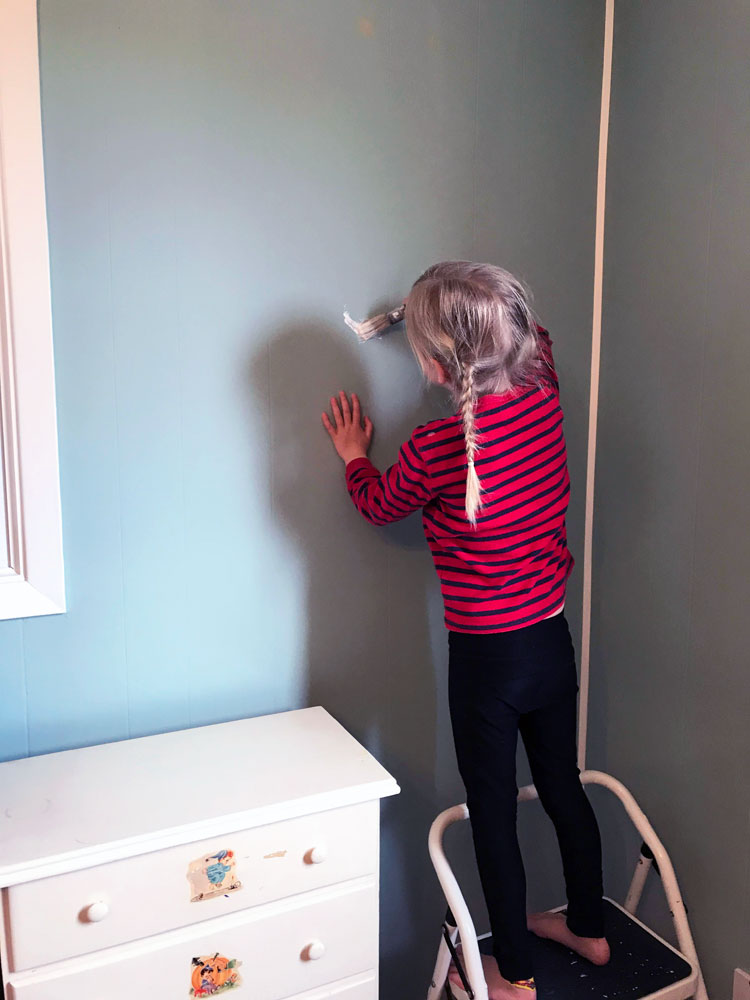
My plan is to tackle one thing a week (painting week, window week, bed week, etc.) until we’re done. Painting is up first.

Child painting a wall while standing on a small ladder

The One Room Challenge, which kicks off this week, is providing a little extra motivation. While I’m not officially joining up, I love the ORC for how it helps me focus and gives me a deadline. So I’m making Ellie’s room my own personal One Room Challenge.

Stick with me. We’ll get this done… eventually.

Anyone else have a stalled home improvement in progress? How do you stay motivated during projects? Have you made any good thrifting scores recently?