Squash harvest 2017

Wheelbarrow full of butternut and acorn squash

Squash seems to have become our signature crop.

The first year of the garden, we harvested 39 butternuts and about 70 acorns. Last year we intentionally planted fewer plants, but we still ended up with a tonne of squash (although I didn’t bother counting them… or at least didn’t record the count).

This year, we’re finally approaching a manageable number. This year’s squash harvest was 35 acorns and 11 butternuts.

Wheelbarrow full of butternut and acorn squash

Plenty for soups, side dishes and more. (Along with being our signature crop, they’re our signature food that we love to eat). I’m looking forward to trying this for my lunches.

Garden clean out is happening slowly. I pulled all of the vines off of our A-frame trellis and sent them to the compost pile. (I did not do any weeding.)

Squash A-frame trellis

Weeds or not, I’m calling the centre axis of the garden done for the season (as good as it gets is how we’re rolling this year).

Looking across the garden from the raspberry row to the squash trellis

Four quadrants and the perimeter raised beds still to go.

Hopefully I wrap those up before the snow arrives.

How to prune raspberries

How to prune raspberries

Pruning the raspberries was one of the items on my “putting the garden to bed” to-do list.

Pruning removes dead canes, opens the rest of the canes up to light and air and gives new canes room to grow.

The best time to prune is in the fall. The canes have finished fruiting. Leaves have died and fallen off. New growth won’t start until the spring.

The first step is to identify which canes are dead. You want to look for the canes that are woody. For our berries, that means I can see actual bark and it looks like the outer shell of the cane is peeling a bit. The cane in the centre of the picture below needs to go. The two on either side can stay to bear berries next year.

How to prune raspberries

Using sturdy clippers, cut the dead cane a couple of inches above the ground. Pull the cut cane out of the row and throw it on your compost pile. If your canes are very thick or tangled, you may need to clip the dead cane in half so that you can extract it from the row.

How to prune raspberries

It’s okay to have a little stump left behind. In a year or two, this stump will rot away.

How to prune raspberries

While you’re in your raspberry patch, now is also the time to weed (the last time this season). I also tuck the canes back under the wires of our trellis (here’s how we built our raspberry trellis). This contains the plants, helps them grow upright rather than flopping over and makes it easier for picking and care next year. You can see in the picture below one guy is on the wrong side of the wire (while his neighbour has bent over nearly backwards to grow within the row).

How to prune raspberries

At this time of year–especially while temperatures are still warm–the canes are pretty flexible, so it’s easy to bend and coax them under the wires. The result is a tidy row of plants with plenty of space to walk between the rows.

How to prune raspberries

How to prune raspberries

Has anyone else been pruning raspberries? Any tips to share? How are you doing on your garden clean up this fall?

If a tree grows at the farm…

Maple sapling alongside the driveway

Three and a half years ago, we got four maple saplings from Lowes. They were free and part of a giveaway in response to the ice storm we’d been through the previous Christmas. Three of the trees have survived, but interestingly they’re growing very differently.

We planted most of the trees alongside the driveway to further my ambition of having beautiful big branches arching over the driveway some day. One of these trees is the one that died. We planted the final tree on the turnaround. We already have a huge old maple that I love on the turnaround. But I’m worried that some day it may come to the end of its life, and I’d like to have a new tree established at that time.

The trees were all very, very small when we got them from Lowes, but they were all roughly the same size.

No longer.

For some reason, the tree on the turnaround is growing big and fat, while the two on the driveway are still fairly spindly.

Observe the one on the turnaround–with a handy maple leaf for scale.

Maple tree trunk

And now let’s walk down the driveway with our same measuring leaf.

Maple tree trunk

Does it seem weird to anyone else that these trees are so different? They’re supposed to be the same type of trees (red maples), planted at the same time on the same property and cared for neglected in the same way.

As I’m writing this, I’m looking out the window at the turnaround, and I’m wondering if this tree is different from the others. You can see in the photo at the start of this post that the driveway tree sports a crown of beautiful red leaves. The turnaround tree–which has many, many more leaves and branches–is still completely green. Hmmm. That would certainly explain why it’s growing differently.

Any other ideas? Any tips for tree care? I admit, my usual approach is to do nothing.

Long term tomato storage

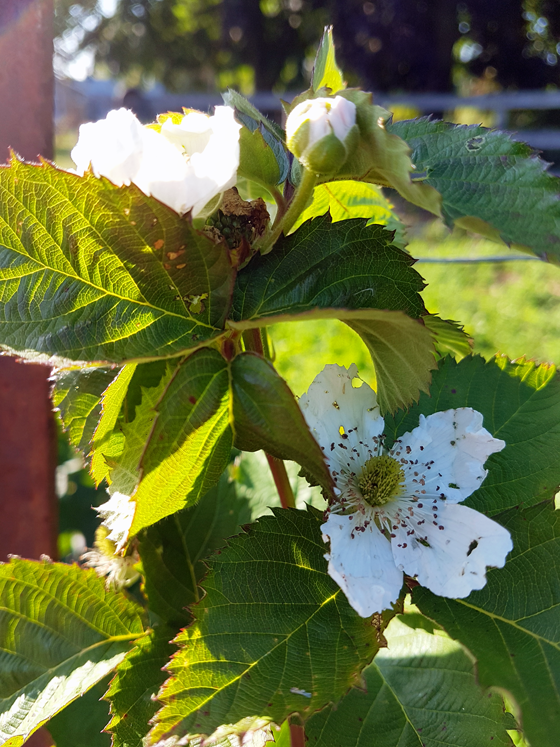
It’s finally starting to feel like fall here in Southern Ontario. We had an unexpected frost on the weekend that made me fear for our still growing garden, but we made it through fairly well. Sarah in Illinois is feeling the coming fall and looking to prolong her garden too. She’s here today to talk about how she’s trying to store that favourite garden fruit, tomatoes, for as long as possible.

Fall-like temperatures have finally hit Illinois and the cooler weather is a sure sign that the days for getting fresh vegetables from the garden are numbered. I posted earlier that I am learning the ropes of canning, but there are other methods for storing vegetables well after the frost arrives.

When I was choosing the tomatoes that I wanted to plant this year, I had on my list “Long Keeper.” Long Keeper is a variety of tomato by Burpee that is supposed to be great for winter storage. I tried to plant some from seed, but I am still struggling with the hardening off process.

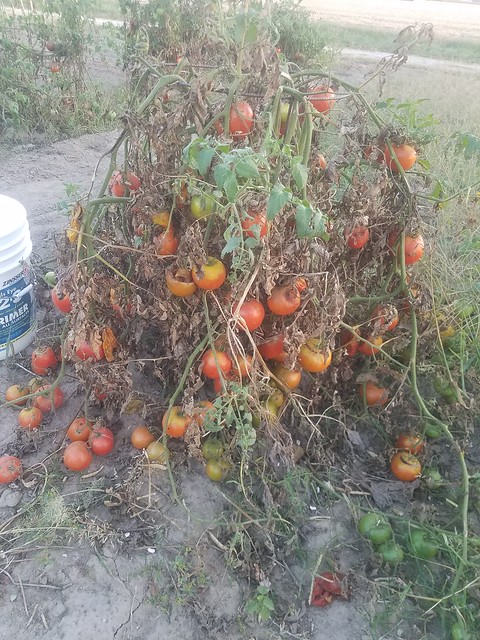
A friend provided me with several varieties of tomatoes that she grew from seed, I was excited to discover that one plant was a “Red October” which is another variety of storage tomato.

Thankfully, this plant did very well and had an abundant supply of fruit.

So now that I have all of these tomatoes, what is the best way to store them?

The info I have gathered from several sources has a few things in common.

  1. Store tomatoes so they are not touching.
  2. Store in a cool (but not cold), dry spot.
  3. Check often for spoilage, since one bad tomato can cause the others to spoil quickly.

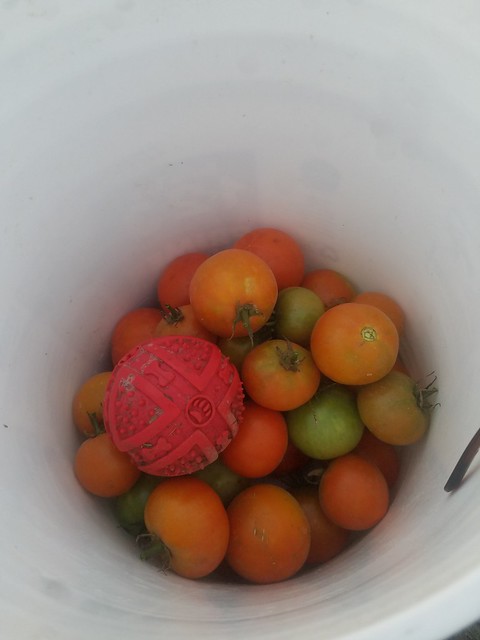
When I picked the tomatoes to store, I made sure to pick only the healthiest, firmest tomatoes. I figured that if they are already showing signs of over-ripening there was no reason to attempt to store them. I also picked them in varying degrees of ripeness. I am not sure if they will ripen well in the box or not.

Blitz quickly figured out what I was doing and added his red tomato-colored ball to my bucket. Man, it amazes me how smart he is!

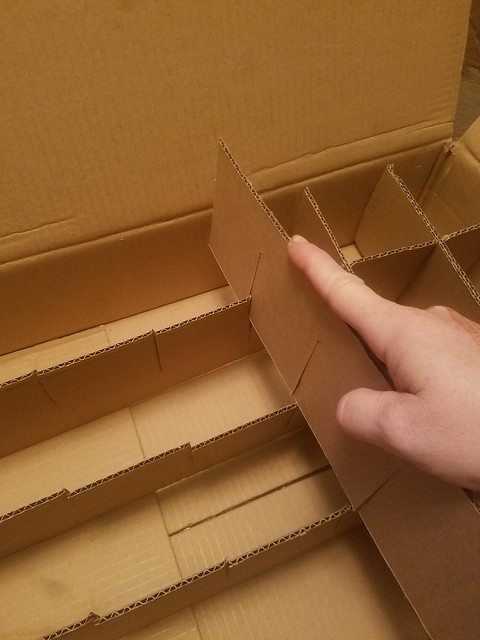
I have a seemingly endless supply of cardboard boxes at work so I picked a shallow box and made a cardboard grid to keep the tomatoes from touching.

To make the grid I cut pieces of cardboard the height of the box (4 inches in this case) and then I cut them the length of the box. Some I cut the length of the short side of the box, and some the longer length. I ended up with 4 longer pieces and 6 shorter pieces. Each box of course will be different and you can adapt it to your needs, but in this case my box was 15 inches by 21 inches. So when I evenly spaced the slats I had 3 inch squares for the tomatoes to sit in.

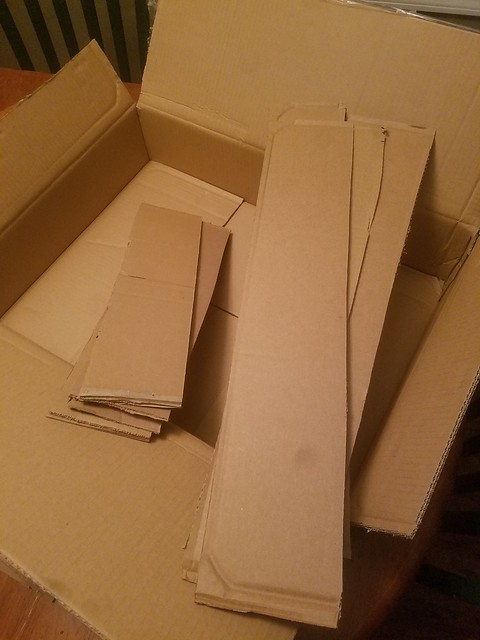
To get the slats to fit together in a grid I cut slits evenly across each piece. I made sure to cut each slit more than halfway so that the grid fit together nicely.

I was able to fit my slats together fairly easily. None of my measurements were exact so thankfully cardboard is forgiving and I could work everything into place.

Once my grid was in place I was able to fill it with tomatoes.

I have chosen to store the box in the garage attached to our house. This way I can keep a close eye on them to check for spoilage and I know that it will be a while before it freezes out there.

This really is an experiment. I have no idea if I will have garden tomatoes in January, or if they only last into October. So I plan to report back on how it is going and anything I learn along the way.

Have you ever stored tomatoes long term? Any advice for me? Have you ever grown Red October tomatoes?

I feel like this is as good a technique as any, Sarah. I’m curious to see how it works for you.

I received an interesting preserving cookbook last Christmas called Batch, and it talked about how there are so many more preserving techniques than just canning. Cellaring (like what you’re doing) and freezing were two additional techniques along with several others (and yes, there’s a whole section on tomatoes).

I slow roasted a batch of cherry tomatoes on the weekend. They’re super simple to toss in the freezer and then toss onto pizza in the middle of winter. Unfortunately, I got distracted and didn’t check them soon enough and they were beyond roasted by the time I pulled them out. I’m still mourning them a bit. But they’re in the composter now, so I may have some volunteer tomato plants next year.

September summer keeps the vegetables coming

The first weekend of fall was not at all fall-ish. Temperatures were over 30 degrees (85F), and it felt like 40 degrees (100F+) with the humidity. Matt and I both agreed that it felt like the hottest weekend we’ve had all year.

The good news about summer continuing into fall is that our garden is continuing to grow.

In fact, our blackberries have started blooming.

Blackberry blooms

I don’t think we’re going to get to the berry stage before the weather officially turns–it’s going to happen eventually–but we’ve managed to successfully get to the bean stage with our yellow bush beans.

Matt and I braved the heat on Sunday afternoon to pick our first couple of quarts of the year.

Yellow bush beans

Like our berries, the other crop I’m extremely skeptical about is our first try at eggplant. We were so, so late getting these plants in the ground. We have some beautiful purple little babies finally, but I’m not sure they’ll have time to grow up. (Isn’t the colour amazing?)

Baby eggplant

We picked and froze 35 jalapeno peppers over the weekend and have a whole lot more coming. I’m watching our bell peppers closely hoping they turn red soon.

Our tomatoes are still battling, and I managed to salvage a few dozen cherry tomatoes. I’ll be roasting these off tomorrow.

Zucchini are slowly persisting, although a few got away from me and grew a little too large for my liking. Zucchini bread coming up.

Basket of zucchini

We got such a late start on planting the garden this spring. I’m grateful that the weather has held, so that we actually are able to have a decent growing season. Summer’s my favourite season, so garden or not, I’m really hoping that the hot weather hangs around a little bit longer.

What’s the weather like where you are? What do you think my chances are of harvesting eggplant this year?

Foggy morning on the farm

Foggy morning on the farm

Last Friday we set record warm temperatures for November. But before the thermometer rose, the fog descended, making for a very murky morning walk.

Foggy morning on the farm

My favourite tree still stood.

Foggy morning on the farm

But it felt like the world ended at the edge of the farm.

Foggy morning on the farm

By the end of the walk, the sun had risen and the fog was burning off and the farm returned.

Foggy morning on the farm

I love seeing how the farm changes over a day, over an hour and over a season. Starting and ending my days here never gets old.

Winter rye cover crop in the vegetable garden

Winter rye sprouts in the vegetable garden

Look at our pretty green sprouts.

Fall in Ontario is about brown. Gardening season is done. Leaves, grass, flowers are all pretty drab. But we have one new crop growing.

This is our winter rye cover crop in the vegetable garden. It’s our first time trying a cover crop.

We love our garden and how productive it is. So we’re working hard to maintain the quality of our soil. Last year, I spread straw and manure all over the garden. This year, we’re going with so-called green manure.

In the spring, we’ll cut the rye and turn it into the soil.

Have you ever grown a cover crop? Do you have any green growing at your house?