Dining room chandelier reborn

I’m thinking I may have been a little hard on our old dining room light in my last post. I may have given you the impression that I hated its copper-wired, frosted-glass, brushed-nickel guts.

That’s not entirely the case.

I just hated them in the dining room.

Ugly dining room chandelier

I actually thought the light might work in the basement.

We’ve had one persistent pigtail hanging around in the basement since we finished the reno down there (almost, ahem, two years ago, ahem). I always have a hard time finding lighting that I like. But then it occurred to me that with a little bit of help, the dining room light might work just fine.

The help came in the form of bright silver spray paint.

Rustoleum metallic finish

I spy with my little eye a chandelier hanging in a tree (and a finial stuck on a stick).

Spray painting a chandelier

I’ve used bright polished silver lighting in other areas of the basement, so I wanted to stick with that theme. The spray paint isn’t quite as shiny as I’d like, but it’s close.

I’ve not yet found a way to photograph the basement that doesn’t come out with it looking horrendous. So just trust that this light is an improvement over the pigtail, okay?

Basement chandelier

Focus on the giant pink ape playing crokinole under the new chandelier.

Basement chandelier

This chandelier is a win on two fronts:

  1. It came in well under my $100 lighting budget.
  2. Our house is now pigtail free–for a few weeks at least.

Have you ever made over a light fixture? What’s your favourite metal finish?

Rustic industrial chandelier for the dining room

Hundreds–nay, thousands–of lighting sins are committed everyday all around the world. There are boob lights, too-plentiful potlights, green glowing fluourescent lights, tragic ceiling fans… several of which we have in our own house.

And then there’s this. The original chandelier in our dining room.

Ugly dining room chandelier

At first glance, it may not seem overly offensive. However, let me enumerate its sins:

  1. The finish was brushed, which is my least favourite metal finish ever.
  2. Only one out of its three bulbs was working (okay, this is more our fault than the light fixture’s).
  3. Its design (is this 1990s?) was not at all a fit for our country setting.

You all know I’ve been trying to make this house look a little more farmy. So I’ve been casually on the hunt for a new light fixture.

As usual, it had to fall below my $100 threshold (applies to both light fixtures and chairs–yes, I’m that cheap), and it had to be a bit farmy.

I struck gold (or rather black) at Rona one evening. The chandelier was light and open. It was large enough to work in the vaulted ceiling in our good size dining room. It was slightly industrial, slightly rustic.

Industrial rustic chandelier

And it was on sale. Serious sale. As in it was the last one in the store and it had to be sold. As in it was finally in my price range. Merry Christmas to me!

Discounted chandelier price tag

The staff member in the lighting department took it out of the display–and took out the expensive Edison bulbs it had been styled with. I bought cheap chandelier bulbs and carted everything home.

After finally installing it, I could not be happier. It’s a perfect fit for our dining room and our country setting.

Industrial rustic chandelier

Industrial rustic chandelier

Industrial rustic chandelier

No more lighting penance for me.

What’s the biggest lighting sin in your opinion? Are you committing any lighting sins at your house? What’s the best deal you’ve ever found on a light fixture?

Wonky wiring and a pair of pendant lights

At some point today, an electrical inspector will knock on my door. (Hopefully. It’s one of those “sometime between 8 and 5 things”). It’s been awhile since our electrician was here, but I’ve been putting off the inspection because my day job was requiring me to be in the office. I finally got a break at work and am working at home today, so the inspection can happen. I also finally got my fingers in gear to tell you about this update.

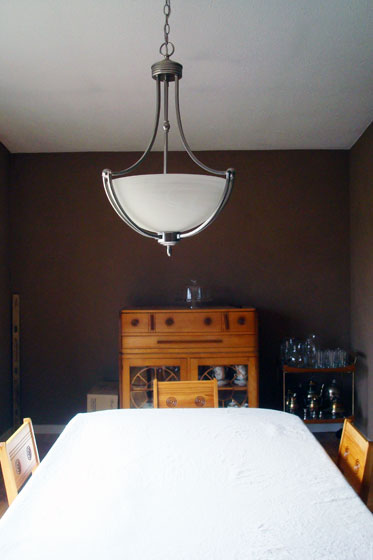
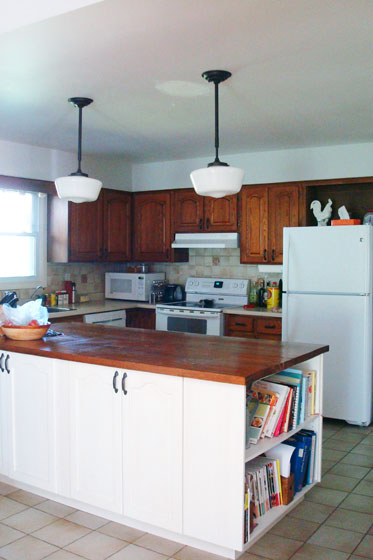
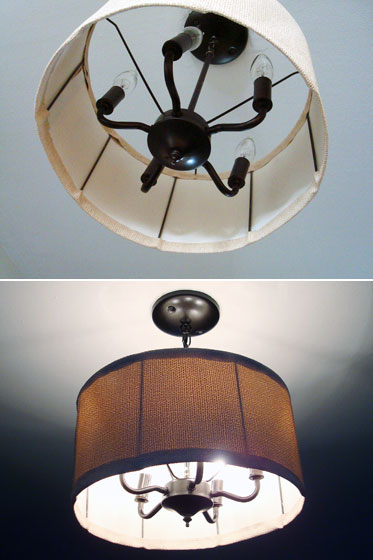
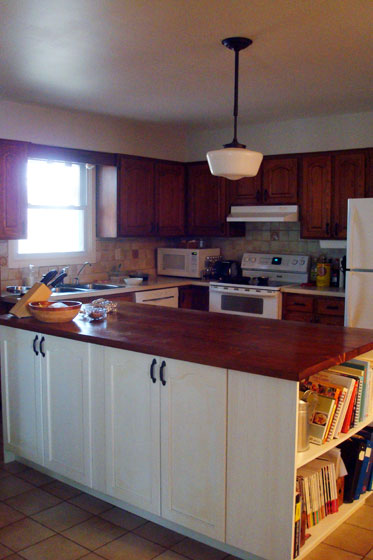
Matt and I had upgraded from the boob light in the kitchen to a school-house pendant some time ago. The fixture wasn’t in the right spot, though. It was off centre with the island and a single pendant didn’t look quite right.

Single school-house pendant over the kitchen island

I had ordered a second pendant back when we installed the first one (February 2014), but I didn’t want to tackle adding it on my own.

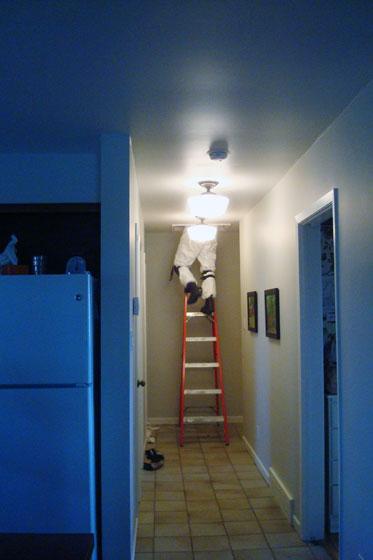
When we had the electrician here to move the light switch in the master bedroom, I had him relocate the existing kitchen light and add the second.

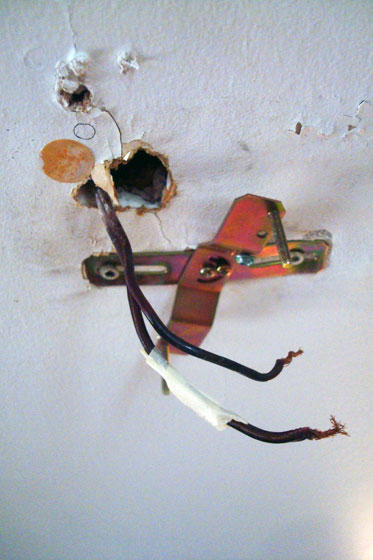
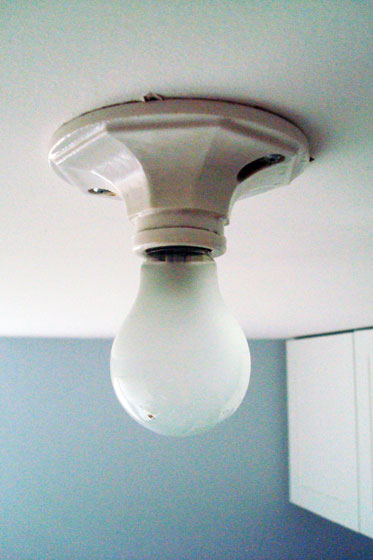
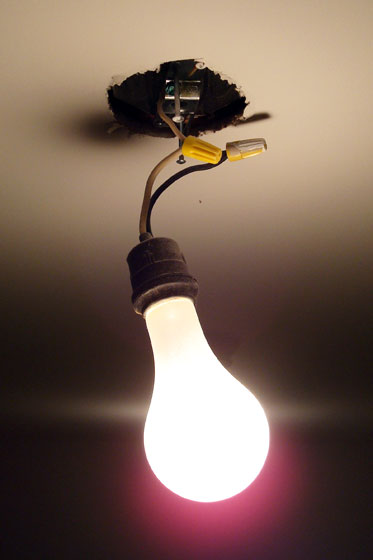
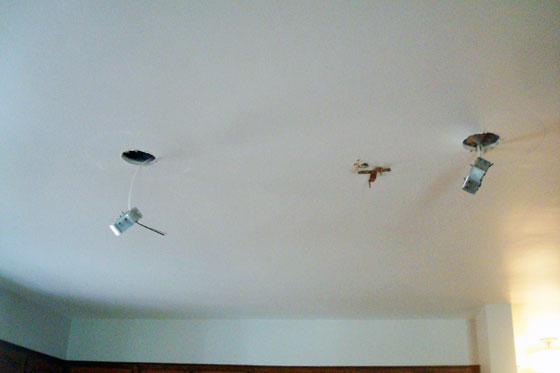
The wiring in this house is wonky. When the electrician took down the first pendant, I remembered exactly how wonky. There was no box to house the wiring. Instead, the fixture was attached to a couple of plates that were screwed to the drywall, and the wires–which wasn’t the right type either–just stuck out from a hole in the ceiling.

How not to wire a light

Obviously, it wasn’t right, but Matt and I had installed our new light anyways, knowing that we’d hire a professional to fix it soon. Well, soon turned out to be more than a year, but better late than never, right?

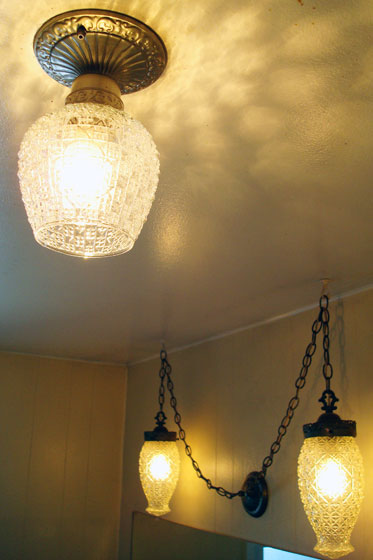
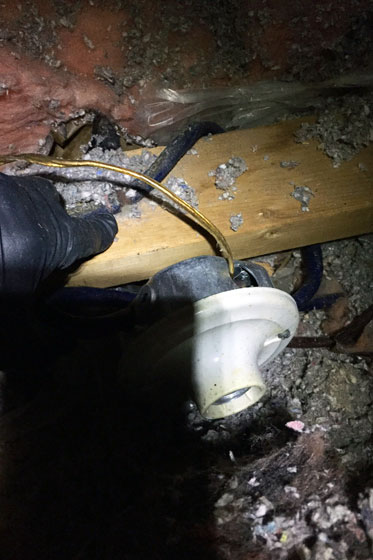
I was surprised when the electrician hypothesized that there was another light somewhere else in the ceiling. A close look at the drywall showed us a patch that I had never noticed. When he climbed up into the attic, he discovered the light (disconnected, thank goodness). This one had a junction box. It also still had the socket lamp holder attached to it. The light had just been turned so it pointed into the attic and not through the ceiling. What were they thinking???

Light fixture in the attic

The electrician drilled two new holes, inserted two new boxes and ran the new wires–and did all of it properly.

Wiring pendant lights over the island

I was happy to have a professional electrician fixing all of the mistakes. I was also happy that he was the one crawling around in the attic, not me. I like my DIY, but I’ve learned where to draw the line. Things that are beyond my skills or just plain unpleasant (and this hit both of them) are a clear time to call in professional help.

If you’re in the Guelph, Hamilton or tri-city area, I highly recommend Agentis Electric.

Electrician going into the attic

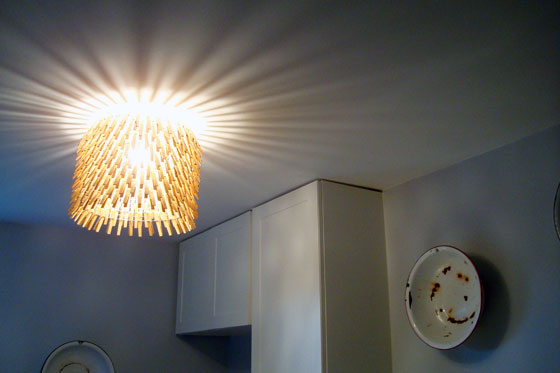
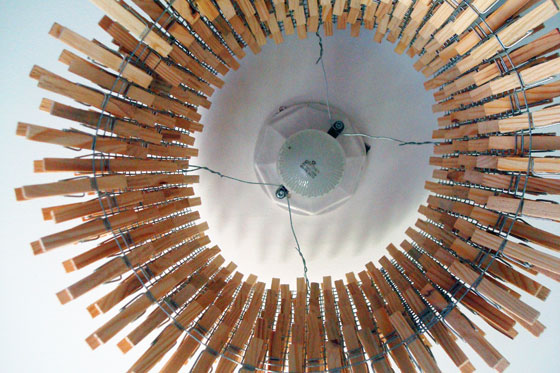
I did patch the hole in the ceiling on my own though (but I haven’t painted it yet). And here’s the finished product: pair of pendants, properly positioned–and properly wired–over the island.

School house pendant lights over the kitchen island

How do you decide when to bring in professional help? What’s the wiring like at your house? Do you have any light fixtures lying around just waiting to be installed? How do you handle lighting in your kitchen?

Lighting fail

Have you seen the Barometer light from Ikea?

Ikea barometer floor lamp

I love its traditional form. I really wanted it for the basement. In fact, I wanted it so badly that I braved Ikea on Dec. 27 to buy it.

Ikea during Boxing Week. Oy vey.

We have a corner at the one end of the couch that needs a lamp. When we set up the basement, Matt put an old round wooden crate from his grandfather as an end table and stuck one of our garage sale brass lamps on top.

Wooden cheese crate as a low end table

I love the crate, but the lamp has always bugged me. The table’s short, so the shade sits right at the arm of the couch. The metal in the rest of the basement is shiny chrome or closer to oil-rubbed bronze. The brass just doesn’t work.

Unfortunately, the Barometer doesn’t work either.

Ikea Barometer light

I mean, it’s pretty. The silver finish works. The height works… kind of. It’s a good task light if I was going to be sewing or reading in that corner of the couch. However, my usual activity when sitting on the couch is watching TV. We need a lamp that sheds just a bit of light so the basement isn’t lit solely by the glow of the TV.

The light that the Barometer sheds is closer to an interrogation. Just looking at this picture hurts my eyes.

Ikea Barometer light

We tipped down the shade, slid the light farther away from the couch, adjusted the arm. We just couldn’t make it work. No matter where we sat, we were squinting from the Barometer’s glare. 😦

So back to Ikea I went, this time to brave the returns desk. That’s nearly as much fun as shopping on Boxing Day + 1.

And it’s back to the drawing board on the basement lamp. Honestly, I think Matt had the right idea. As wonky as the low lamp looks, it gives the light we’re looking for. Now just to find something better than the brass.

My spin on a clothespin light

A lot of people had compliments for the clothespin light fixture in the laundry room.

Clothespin light in the laundry room

I can’t take credit for the idea or even the execution. I was inspired by this light from Young House Love.

I followed their tutorial pretty closely, and it was super easy. However, I did one thing differently and learned a couple of lessons along the way. I thought it might be helpful to share.

First the lessons.

I chose to do the same zigzag pattern that John and Sherry did. In their tutorial, they mention alternating squares. However, what they didn’t say is that they also skipped a row of wire between each row of pins. If you look closely at the pictures in the YHL post, you’ll be able to see the pattern. Skipping every other row gives a comfortable amount of space between the pins so that they lay at a nice angle all the way down the shade. And this makes the great pattern on the ceiling when it’s lit up.

Clothespin light fixture

And talking about laying at an angle, in the YHL post, Sherry emphasized that it’s important to have an even number of squares around the top to maintain the pattern all the way around the shade. However, she didn’t talk about how many squares there should be from top to bottom. I nearly trimmed the bottom row of mesh off my shade because I had an empty row of squares. However, if I’d done that, my bottom row of clothespins would have hung straight down while all the other ones sat at an angle. Having an extra row of wire at the bottom holds the pins on the angle. So, while you want an even number around the shade, you want an odd number from top to bottom.

Clothespin light fixture

And now for what I did differently.

My light is closer to a flush mount than the YHL pendant. I used an old single socket lamp holder that I had lying around as the actual light. You can’t get more basic than that. Or cheaper. (Or, let’s be honest, uglier).

Keyhole light fixture

It took me a little while to figure out how to attach the shade to the light. I didn’t love the cup hooks on the YHL fixture. My solution was to run two pieces of wire loosely across the top of the shade. I then looped each wire around the screws in the lamp holder. It’s pretty much invisible, unless you’re standing directly underneath the fixture looking up.

Clothespin light fixture

The YHL light used 320 pins. Mine has 288. The final dimensions are 64 squares around and 17 from top to bottom. The overall dimensions of the drum shade are 11 inches high by 14 inches in diameter.

I love that I have a light fixture made out of clothespins in the laundry room. Even better, I love how it looks. Thanks John and Sherry for the inspiration.

Have you ever made anything out of clothespins? Have you made your own light fixture?

Linking up to #DIYLightingChallenge

Foyer lighting options

At the start of the week you saw my attempt at a new light fixture for the foyer.

In the comments, you agreed with my feelings that my DIY fixture wasn’t quite right for the space.

Here are two of the other lights I’m considering as replacements.

The first is this hexagonal fixture. It’s a slightly updated version of the chandelier I bought at the thrift store.

Pros:

  • The design and the shape are a bit unique. I’ve not seen many fixtures like this around.
  • It’s the right size and height for the foyer.
  • It has three bulbs, so it should cast a decent amount of light.

Cons:

  • The metal is black, and the other lights on our main floor are oil rubbed bronze. I’d rather not mix my metal tones in this space, and I don’t think this piece can be painted easily.

Here’s my second option. I’d been considering a lantern-esque fixture, and this one is an attractive option.

Pros:

  • The metal on this light is antique bronze, which is closer to the ORB of our other fixtures.
  • The lantern design feels a little bit country to me, perfect for a farm.

Cons:

  • I’m concerned this fixture might be a bit too small to carry the whole foyer.
  • With only two bulbs, it won’t shed as much light as the first fixture or my DIY option.

I have a hard time spending more than $100 on light fixtures (I know, I know, I’m super cheap), and both of these options come in right around this price point.

Let’s put it to a vote.

Please feel free to suggest another option, if you’ve seen something that you think would work better.

Does anyone else struggle with finding good lighting? How do you feel about mixing metals?

DIY light fixture (fail?)

I have another thrifted light fixture makeover for you today. Remember this beauty from my thrifting post?

1980s light fixture redo

When I was in the checkout line at Value Village, the woman ahead of me said, “What a great find! So classy!”

I said, “Oh, thank you.” In my head I was thinking, “Are you insane? This light is completely 1980s. It will look nothing like this when I’m done.”

My plan for the foyer was to replace the giant ceiling fan with a small chandelier covered by a simple drum shade.

Here was my chandelier.

1980s light fixture

Here was my drum shade.

Vintage lampshade

It was vintage lighting fest over here.

I took apart the light, took apart the shade, merged the two together and spray painted everything oil-rubbed bronze.

1980s light fixture redo

I shortened the shade and added a new fabric cover.

1980s light fixture redo

Then I installed it over the stairwell.

Crooked drum shade

Hmmm… not quite what I envisioned. As Matt said, “Woman, what were you thinking?” I stood there and laughed.

Then I got out my glue gun. A couple of daubs of glue held the shade a bit straighter.

Foyer light fixture DIY drumshade over a chandelier

I’m still not sure if this is quite what I envisioned. The inside looks a bit rough in some spots, and the ribs of the shade show through when the light is turned on.

1980s light fixture redo

Another layer of fabric on the inside might solve both of these issues, but it would also lessen the light. This light is much brighter than the ceiling fan that was there before, which I like as our foyer tends to be a bit dim.

I’m content to live with it for awhile until I make up my mind. Either way, it’s an improvement over the fan that was there when we moved in and the pigtail that we wired up when we were painting.

I’d love to hear your to opinion. Do you think this is a #DIYfail or #victory? Have you ever made over a light fixture?

Vintage cut glass lights

We’re all familiar with the way too common boob light. Now meet the nipple light.

(A really bad picture of a really bad fixture).

Ugly 80s light fixture

This light graced the main bathroom.

Honestly, the light fixture is the least of the problems with this bathroom, but it really bothered me. It was painted, rusted and had absolutely no personality.

Browsing Value Village one day, I found a perfect replacement.

Value Village light fixture

At first glance, you may not agree that this is the perfect light, but let me show you the other lighting in the bathroom.

Vintage cut glass pendant lights

I’m sure your first reaction is not unconditional love for these lights (mine wasn’t), but they’ve totally grown on me since we’ve been living here. Sure they’re vintage. They’re a little bit rusted in a few spots. But they have personality. The shape of the shades is pretty unique and the glass, in my opinion, is just plain pretty.

Cut glass hanging light fixture

The cut glass on my thrifted fixture was a much better match than the nipple light. What wasn’t a match was the pseudo brass base. It took me three attempts to find the right colour of spray paint. ORB was way too dark. Pewter was too bright. Rosemary (what kind of a name is that for a metallic spray paint?) turned out to be the closest. It’s a silver with some gold undertones. It’s still a bit light, but it’s close enough.

Cut glass light fixture

Here’s how the lights look all together and lit up.

Vintage cut glass light fixtures

I love the patterns the cut glass makes on the ceiling. It’s a bit of prettiness that distracts me from the rest of the ugliness in the bathroom.

Alright, let me have it. What do you think of my lights? Are you a cut glass fan or are they too vintage for you?

Wee-wee-wee all the way home

You might think from the title of this post that we are adding some little piggies to the farm. However, the opposite is actually the case. We are getting rid of some pigs… pigtails that is.

Pigtail light fixture

Most of our lighting in the basement is still pigtails—much to Matt’s annoyance. The conversations go something like this. “You can’t say the basement’s done until it’s all done. Including light fixtures.” Finding the right light takes time though, so rather than choose the wrong fixture, I’m fine to live with pigtails.

Matt, not so much.

However, in my defense, I bought the lights for the long room nearly six months ago. They’ve been sitting in their boxes stacked in the corner beside the shop vac for just that long. Yes, I could install them myself, but under the division of labour in our marriage, Matt is the electrician.

Well, the electrician finally got fed up with the pigtails and decided to send those little oinkers packing.

Replacing pigtails with flush mount ceiling light fixtures

Better, right?

Obviously, it’s still not “done” (the absence of furniture and art, the unpainted closet door, and the shop vac still in the corner kind of give it away), but baby steps, people. Or maybe piglet steps.

How to install pot light trim

The end stage of a renovation involves a lot of little tasks: put on the cover plates, caulk the trim, touch up the paint, clean and dust everything. One of the little to-dos on our list was to put the trim on the pot lights.

My post on how to install pot lights is one of the most frequently accessed posts on the blog. But it’s unfinished. The housing for the pot light is just one part of the fixture. The other part is the trim, which goes on after the ceiling is finished.

Without the trim, the pot light looks a bit rough.

Pot light without trim

Our trim-less pot light

The first step in installing the trim is to wash a summer’s worth of drywall dust off of them.

Pot light trim in the sink

This step may be optional for some installations.

The trim should be made up of three pieces: the baffle, trim ring and spring or hook.

Pot light trim spring

This spring connects the trim to the housing

Step one is to attach the hook to the baffle. There should be little holes in the narrow end of the baffle specifically for this purpose.

Spring attached to pot light baffle

The end of the spring without the loop should be hooked to the baffle.

The next step is to connect your baffle and trim ring.

Putting trim on the baffle

This is probably the simplest step. Just slide the the trim ring over the baffle.

Remove the light bulb, so that you can reach into the housing. If necessary, adjust the height of the socket so that your bulb is recessed as much or as little as you want.

Adjusting the socket in a pot light

Loosen the wing nut, and the metal socket will slide up and down. Tighten it back up when the socket is positioned where you want.

To connect the trim, insert the baffle into the housing, stretch the spring and hook it into the cut out on the pot light.

Pot light trim hooked in place

On our pot lights, the cut out looks like a candy cane

I found I was able to reach into the housing and hook the spring by hand. If your hands aren’t as small as mine, needle nosed pliers may come in handy.

Screw the light bulb back in and admire your trimmed pot light.

Pot light

All done!

The trim reduces the brightness of the light somewhat and directs it downwards. I may adjust the height of the bulbs if we feel we need more light once we’re using the basement.

However, for now the pot lights are bright enough for me to admire our nearly finished basement. Is it weird that I stood there for nearly five whole minutes on the weekend just looking at the rooms and remembering how far we’ve come?