Thrifting with the in-laws

A few months ago (yes, I’ve been holding out on you guys), Matt and I went out to dinner with his family. The restaurant just happened to be next to a Value Village, so there was a family thrifting excursion after dinner.

After a little while in the store, Matt and I exchanged a look. His said, “I didn’t find anything. You ready to go?”

Mine said, “Nope. Absolutely not. I found something I’m quite excited about. You have to come over here right now.”

After years of searching I had found the cabinet that I wanted for my office. My office is our last untouched room–in fact it’s still full of boxes that have been in there since moving day. The cabinet is my trigger to paint the walls, unpack the boxes and finish this space in the way I’ve been imagining for years. So I was not leaving the store without this cabinet–no matter that I was surrounded by my in-laws.

In fact, the in-laws were a bonus. My father-in-law was our chauffeur for the night and his truck was just what we needed to transport the cabinet. My sister-in-law stood guard over the cabinet while I went to the cashier to pay. And my mother-in-law found my father-in-law and told him to bring the truck.

Ahhh, family.

Want to see what had me so excited? (In a very poorly lit picture?)

Vintage china cabinet

I have big plans for this cabinet. I think it’s going to be great. I’ll share some of my plans next week.

Do you go shopping as a family? Is there any furniture you’re hunting for?

June garden update

Sarah’s last post was her final report in our Dueling DIY garden challenge. She’s back today to share how her vegetable garden–and a couple of other things–are growing.

I thought I’d take this time to give a garden update. We have had an unusually cool start to spring and that means several of my plants got a late start. Thankfully though the temperatures have been rising and our garden is really starting to catch up. I will give a quick rundown of most of my crops. (Note: We got 1.5 inches of rain the day before I took the pictures below.)
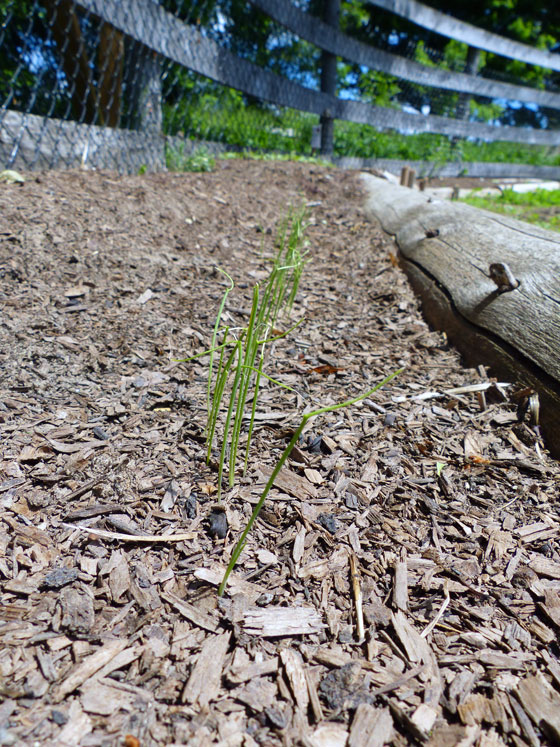
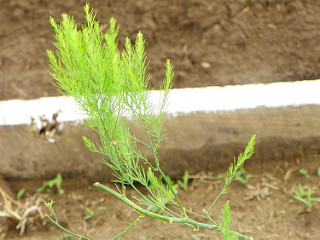
Asparagus

This is my first time raising asparagus so I really don’t know what to expect. I know that the first year or so I am just supposed to let them grow and that’s what I’ve done. Most of the plants don’t look very good, but maybe next year they will grow back even better. I am just using a wait and see method.
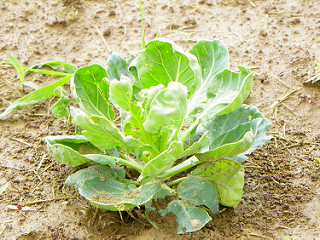
Asparagus going to seed

Brussels Sprouts

One of the plants that got a late start. I am hoping they recover quickly.
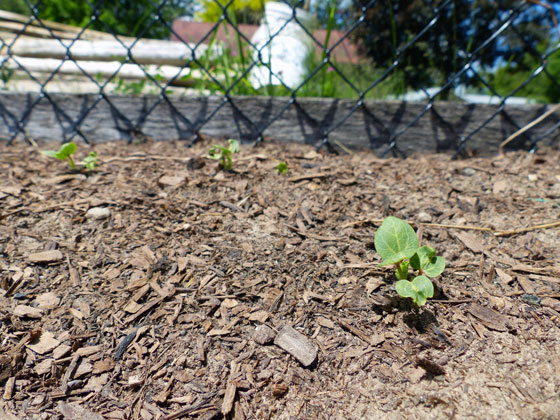
Brussels sprouts plants

Carrots

At this point I can say that the tops look really good. Hopefully it is looking just as good underground.
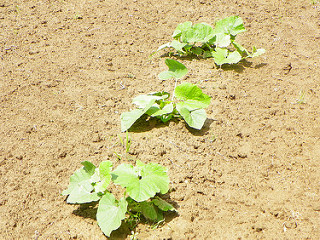
Cucumber

Also got a late start but really seems to be recovering. I planted 4 pickling cucumbers that didn’t make it though. That is disappointing.

Kale

I have planted 3 varieties. And they have all taken off like crazy. I have picked some for salads, but I am ready to make some kale chips this week.

Leaf lettuce

Even with a late start, our lettuce looks healthy, and I have picked a few salads worth so far.

Peppers

We have green peppers, red peppers, jalapeno and several other varieties. The plants are all fairly small at this point so I hope they take off soon.
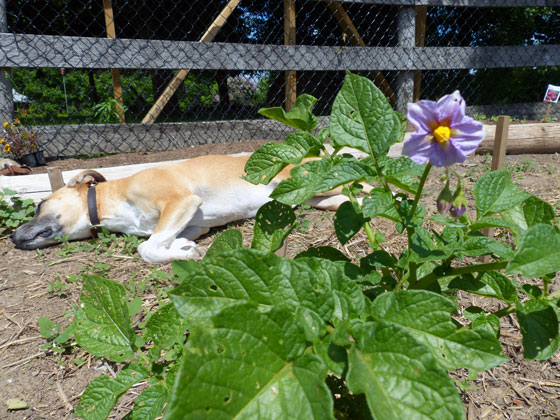
Potatoes

We have planted both a traditional russet and a thin skinned red potato. Like the carrots, the tops look great. I hope that means good things are happening in the ground too.

Rows of vegetables in the garden

Onions

The onions are very healthy. We really need to add them to more of our dishes so they don’t go to waste.

Radishes

Note for next year… plant less radishes. Seriously, we planted way too many and I am afraid they will go to waste. Anyone have any recipes or suggestions other than putting them in our salads?

Rows of vegetables in the garden

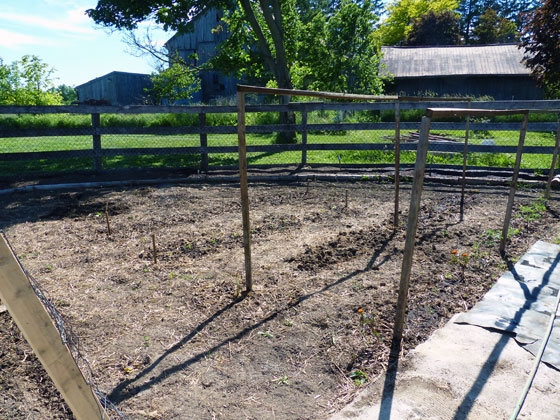
From right to left: lettuce, radishes, green beans, cabbage and potatoes
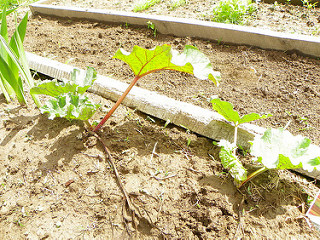
Rhubarb

Also my first year for rhubarb. When I first put it in the ground I was worried that it wouldn’t make it. Several leaves died off. But this week I noticed two really healthy new leaves so I think it is on the mend.

Rhubarb

Spaghetti Squash

The plants are looking great! I have left plenty of room around them to plant pumpkins hopefully in the next week or two.

Spaghetti squash

Strawberries

The plants look very healthy. This is one crop that Steve really wants to expand on next year, so we may have to add on to our garden again!

Sugar Snap Peas

Probably my favorite plant of the garden. I usually eat them before they even make it into the house. This is one plant that prefers cooler weather so I hope that I see some pods before it gets too hot here.
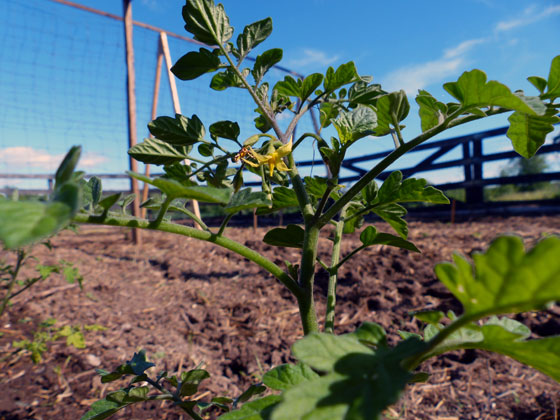
Tomatoes

Definitely our most used crop around here. Besides eating them straight out of the garden my mother-in-law cans tomato juice, and I plan to make salsa and pico de gallo. So it is a good thing that we have plans for them because I have planted 24 plants!

Actually, the plants that I started from seed are finally looking healthy enough to transplant so we will be nearing 30 plants.

They are all different sizes so I am hoping they ripen at all different times!

Tomato plants

I have a few things that I am still hoping to plant, but I am very happy that our garden is really looking great this year.

We do have two more things that we are growing around here:

Kittens

Jan asked for an update, and I am always happy to spend more time with these two before I find them new homes.

They turned 5 weeks as I write this, so we have another week or two before they are ready to leave. They are eating dry food pretty well and they are definitely becoming more active.

Kittens wrestling

If anyone from my area is reading this, I am still looking for homes for them if you are interested!

Striped kitten

Ahh. Super cute, Sarah. Too bad Illinois is a bit far away, because Ralph could use a sidekick. Congrats on the garden growth. Things are looking promising.

The best and the worst of people

I’ve written before about people throwing things in our ditches. A couch. A printer. Litter.

Last week, as best we can guess someone threw a cigarette. Now on it’s own, a cigarette is not an unusual find. Butts are plentiful on the shoulders of the road and in the ditch.

Cigarette butt on the side of the road

However, this butt ended up being unusual because we haven’t had much rain this spring. We ended up with a fire.

Aftermath of a ditch fire

When Matt arrived home from work, he was greeted by good Samaritan who had spotted the flames, pulled over, poured her water bottle over a smoldering fence post and called the fire department.

Burned fence post

We are very thankful that damage was minimal. The tree that was in the centre of the fire has some singed leaves, the fence posts are slightly charred and a patch of grass is ash.

Tree leaves singed by fire

I keep thinking about the Fort MacMurray wildfire and being grateful that this didn’t take off. The woman who stopped said to Matt she was surprised that no one else pulled over. We’re very thankful to her as well.

So litterers… the worst. Our impromptu firefighter… the best.

Hardboard and six favourite projects

There’s one material that I go to over and over for DIY projects: hardboard.

Hardboard

Hardboard is an engineered wood product also known as high-density fibreboard. Wikipedia says that it’s “made out of exploded wood fibers that have been highly compressed.” I’m not sure what exploded wood fibres are. By the time hardboard gets to the store, it has little resemblance to wood. It’s more like a super heavy-duty, super smooth cardboard. The main resemblance to typical construction materials is that hardboard comes in 4×8-foot sheets.

It’s less than a quarter inch thick, fairly light-weight, and cuts and bends easily. Sometimes it’s cut to other sizes than 4×8, finished with white on one side, or it’s also the material for pegboards.

Pegboard

Here are some of my favourite projects with hardboard:

Living room bookshelves – Hardboard makes a very sturdy back for shelves and bookcases. But it’s thin and fairly lightweight, so it doesn’t add bulk to furniture.

Monograms – Letters and words are popular decor trends. Hardboard is easy to cut with a jigsaw, won’t break or crack like solid wood, and is light enough to hang on a wall or sit on a shelf. I’ve found a quick pass of fine sandpaper can be helpful to smooth cut edges.

Ampersand monogram made out of hardboard

Ampersand monogram made out of hardboard

Doors and cabinet makeovers – Faced with boring slab doors in the basement and on the laundry room cabinets, I used strips of hardboard to transform them into barn doors and shaker-style cabinets. I was blown away by how successful the transformation was. I still love these doors. Plus the makeover saved us from spending money on new doors.

Making slab doors into barn doors

Score-keeping chalkboard – Hardboard is super smooth, and with a good primer and a foam roller, it takes paint very well. So I gave a sheet of hardboard a coat of chalkboard paint for a 6-foot tall, but very lightweight and easy to move chalkboard. Much lighter than actual chalkboard.

Cabinet door repair – Our kitchen needs a renovation, but until that day, we’re trying to hold things together however we can. Hardboard to the rescue once again. The cabinet door under the sink was separating from its frame. Backing it with hardboard has seen us through the last three years.

Holding a kitchen cabinet together with hardboard

Nightstand to dresser makeover – This dresser is one of my all-time favourite projects. Combining two nightstands into one dresser worked very well, but the join was very ugly. A panel of hardboard covered the seam and didn’t add much bulk to my narrow dresser.

I continue to find more uses for hardboard. And I’d love to hear if you’ve used it yourself. Any projects to share? What’s your go-to construction material?

Xs and Os

Saturday morning, I headed out bright and early for the Christie Antique Show. This annual event is the largest antique (and vintage) show in Canada, and it’s right in our neighbourhood. In fact, the conservation area where it’s held is one of Baxter’s and my favourite places to hike.

However, there was no hiking on Saturday. There were thousands and thousands of people and hundreds of vendors. Plus no dogs allowed.

I enjoy going to this show, but I have a confession. I’m not good at buying things. I’m not the type to buy something just because. And I’m not looking for anything specific right now.

So instead of shopping, I ended up playing, “What do I have already and how much is it worth?”

I think we all do that when antique shopping.

Some things I was blown away. A carved leather purse similar to one my MIL gave me was listed for $75. (Audrey, do you want it back now?) A vintage metal pedal tractor that my Dad has (not mine–it was his as a kid) was anywhere from $275-490.

Others were more reasonable. A silver butter dish similar to my butterfly dish was just $10. Snowshoes, which we got from my FIL, which decorate our mantel every winter were about $30. (Steve, do you want them back?) Metal card catalogue-esque drawers like I got from an auction a couple of years ago were everywhere and about $60.

Metal pedal car tractor

Carved leather purse

Metal drawers

Silver butterdish

Despite feeling like I already have everything I need–including some great benefactors–I did come home with one thing. I saw this little tic-tac-toe game on the edge of one of the booths. I’d been thinking about a tic-tac-toe artwork for the basement. But something more than a picture. When I saw this and it was only $10, I took the plunge (after offering $7). My plan is to hang this on the wall above the cabinet where we keep our boardgames.

Tic tac toe beanbag game

Did you do any shopping this weekend? Do you play the “what’s it worth?” game when you go shopping? Do you like to go antiquing?

Dueling DIY – The Final Update

Six weeks ago when I launched this Dueling DIY adventure, I thought, “I got this. No problem. I’ve got six weeks! Sarah’s going down.”

I had a somewhat ambitious list, but I thought it was entirely doable. Now that we’ve come to the end of the challenge and my final report, I’m stiff, I’m sore, I’m proud of what we accomplished… but I’m also a little bummed that I couldn’t cross everything off.

In that respect, Sarah, whose update you saw earlier this week, is the winner.

Here’s my final list:

  • Hang the gate
  • Edge the garden
  • Build raised beds around the perimeter
  • Build trellises for the raspberries, tomatoes and squashes (I have wood and wire, but nothing’s put together yet)
  • Start a few seeds indoors
  • Till in the ash, straw and manure (still only half the garden is done)

And a couple of maybes:

  • Weather permitting, plant grapes and potatoes
  • Run a waterline out to the garden (this one is Matt’s task, so I’m not really feeling too bad that we didn’t get this done)

So I made it just over halfway through my to-do list (56% if you’re wondering).

The perimeter beds were definitely a much bigger project than I anticipated–both in terms of the amount of work and their literal size. But I’m really happy with how they turned out. In fact, I’ve already started filling them up with onion (seeds), sunflower (seeds) and grapes.

Grape buds

Although filling might be a bit of an exaggeration. According to my original calculations when we started this challenge, the perimeter of the garden is approximately 175 feet. The beds are just over 2 feet deep, which means we have 350 square feet in the perimeter alone. I’m not sure Matt and I eat enough food to keep up with this garden!

Rustic raised beds in a round vegetable garden

The outer beds are obviously where I spent most of my time throughout this challenge, but the interior of the garden–or at least half of it–got some attention too. We’re now up to 5 rows of potatoes (who exactly is going to eat all these?). We have three rows of reds, which we grew for the first time last year, and then we have two new varieties that we’re trying out: Kennebecs (highly recommended by Karen at The Art of Doing Stuff) and Russian Blues (another Karen suggestion that I couldn’t resist adding just for fun).

Potatoes growing in the garden

Our sprouts have overcome their damping off and are growing well. In fact, I’ve moved on to the hardening off stage and they’ve spent a few days outside this week. Matt brought home some tomato plants to supplement our own seedlings. Those can probably go in the garden this weekend, but I’m going to let our sprouts grow a bit more before they move outside permanently.

Sprouts and seedlings

Aside from finishing the raised beds, our biggest accomplishment last weekend was wrestling an abandoned hay bale out of the tree line beside our big field (where it and a friend have lived for years)…

Bales of hay stuck in the trees

onto the trailer (seriously, it took us about 45 minutes to get to this point)…

Straw bale in the trailer

and up to the garden.

Straw bale for mulching the garden

I’m going to try the deep mulch method to deal with weeds, maintain moisture and add nutrients to the garden. This bale is going to be my mulch. Hopefully it’s enough because I do not want to go back to get his friend. What a ridiculous way to spend a holiday Monday morning.

So obviously work does not end on the garden just because Dueling DIY has concluded. Trellising and tilling and gating and waterlining are still going to happen. As is planting and growing and (hopefully) harvesting. And I’ll be sharing more garden updates as we go along–I can’t help myself.

The beauty of taking on a project like this Dueling DIY is that in the end we each win. We’ve each made progress on our gardens, and we’re closer to enjoying the fruits of our labour (literally) than we were six weeks ago.

Thanks for the motivation, Sarah. And congratulations on your victory. I may have to send you a potato as a prize. And thanks to all of you for following along, doing your own challenges at your homes and encouraging us.

How’s your big spring project going? What gardening progress have you made recently?

Dueling DIY – The Challenger’s Final Update

Six weeks ago, Sarah in Illinois and I started a Dueling DIY challenge. Our mission was to get our gardens in shape for the year through some friendly competition. Today, Sarah’s here with her final update on how she did. To see how we got here, check out all of our previous posts.

I have to admit, when I first made my list of things to finish for the challenge, I thought that I made it too easy on myself.

I saw Julia’s list and thought that I was sure to win.

However, what I learned was: most projects take longer than what I plan for, weather does not care what you have planned, and I procrastinate just as much as I did in high school when doing homework.

So as you can guess from what I have written so far, I did not completely finish everything on my list. But I sure made a valiant effort!

1. Make some kind of designated area (possibly raised bed) for annual vegetables such as asparagus and strawberries.

I call this 90% done. Everything is planted. Asparagus and strawberries are planted, rhubarb is in the ground and seeds and bulbs are planted for my cutting garden.

Raised beds made of barn board

For the borders I used old rough cut barn wood. We have a large pile of old wood out in the barn but I did not find enough long boards. So I am going to have to keep digging to find a couple more boards.

However, I am happy to have the two outside beds defined so that there is no fear of cutting too close with the mower.

2. Neaten and define north flower bed and add mulch.

Clean siding

Nothing new has been done here. Steve and I are debating on whether to buy a couple bags of mulch or dive right in and get a truck load.

Now that he is in the field all hours of the day, we still haven’t made the decision so the mulch didn’t get put on the flower bed. But I am still happy with how this flower bed is filling out.

Hydrangea mid-way through spring

3. Divide mums and spread around deck.

Mums around the edge of the deck

This is the first thing that I finished, and the mums are really taking off.

4. Make a designated gardening area complete with workbench.

This was my favorite project!

Potting bench

We were tearing out a room in our pole barn and so I had the countertop and the top shelf ready. All I had to do was make the framework.

Potting bench

I say that was “all I had to do” but designing the work bench from scratch was time-consuming. I knew I wanted a top shelf and a shelf underneath. I also knew I wanted a place to hang my tools.

Tools hanging on a potting bench

I used mostly older barn wood but a few pieces are newer pine so I used the darkest stain that I had on hand to try to blend the different woods together. I really could not be happier with the finished project!

Potting bench

So here is my final list:

  1. Make some kind of designated area (possibly raised bed) for annual vegetables such as asparagus and strawberries.
  2. Neaten, and define north flower bed and add mulch.
  3. Divide mums and spread around deck.
  4. Make a designated gardening area complete with workbench.

I won’t find out until Julia’s post to see how I fared in this competition, but I’m feeling kind of good about my odds!

I am so happy that we did this challenge. I guarantee if I didn’t have the constant competition in the back of my mind, I would not have gotten as much done as I did.

I would have made excuses about how I was tired, or how I had so many other things to do, and I would have avoided all of the hard work. But I am proud at how much I got done, and I am happy with my progress whether I “win” or not!

(It would be nice to win though!)

Okay. I’m impressed that Sarah can cross everything off her list. And that potting bench is awesome. I’ll be back on Friday with my final post in this Dueling DIY challenge.

Trilliums, trilliums everywhere

The trilliums are out.We see them along the roadsides, at the edge of the fields and–this year–in our front garden.

Last year, I carefully transplanted a couple of plants into the front garden. One of them survived and is blooming this spring.

Transplanted trillium

It’s a bit remarkable to me how many are around the farm. Growing up, I very rarely saw trilliums–Ontario’s official flower–and it was a special occasion when I did.

Trilliums in the woods

Now, even though I see them more regularly, it’s still special. Especially when it’s right outside my front door.

Have you ever successfully transplanted a wildflower into your garden? Do you have any elusive flowers in your area? What’s your state (or provincial) flower?