How to mend a torn window screen

In the category of better late than never, I’ve finally fixed our torn window screens.

Torn window screen

You may remember that one of the last jobs I completed on my fall to-do list (on the first day of winter, no less) was to remove all of the window screens so that I could clean and patch them over the winter.

So yeah. That didn’t happen.

Now June is here and I’d really like to open a window without inviting the local mosquito population inside. It was time to get on with mending the tears.

First I trimmed the ripped screen so that I had a regular shaped hole.

Square hole in a window screen

Then I cut a patch from my replacement screening. The patch should be about 1/4 inch bigger than the hole all the way around.

Patching a torn screen

Next I lined the patch up over the hole and sewed it in place. I used regular black polyester sewing thread and tacked the screening about every three holes.

Stitching a patch on ripped window screen

I stitched my way around the patch and when I got to the end I simply knotted the thread a couple of times.

The patch is not invisible, but it’s not very noticeable. Most important, it does the job of keeping the skeeters and other flying critters on the outside while letting the fresh air come through to the inside.

Patched window screen

I will take an open window over air conditioning whenever possible, so with the weather getting steadily warmer, the repaired screens are a cause for celebration for me.

How about you? Are you a fresh air lover or an air conditioning aficionado? Does anyone else have experience patching screens? I’m sure my method isn’t the only solution. What’s the mosquito population like where you are? We seem to have had a baby boom this year, so the screens are absolutely essential.

Death by landscaping

I am dead.

I’ve been working on a lovely introduction to this post referencing the Secret Garden and the joy of tending a neglected garden. But it’s not coming together for me, and I lack the mental power to make it work. Because I am dead.

You never heard any of the characters from the Secret Garden say, “I am dead. This garden has killed me.” Let’s be honest here, Ben probably said it, but Frances Hodgson Burnett did not include it in her story of love, childhood and horticulture.

In my story of love, adulthood, responsibility, country living and horticulture, landscaping has started.

The turn around has gone from mountain goat terrain to a blank slate, thanks mostly to our farmer with his heavy equipment.

Making a garden on our turnaround

I’ve weeded one flowerbed and my mother-in-law tackled two more. (All of the plant pots were left by the last owners. The plants are still alive, so I’ll be planting them soon on the blank slate of the turn around).

Weeding a flower garden

My father-in-law trimmed some of the trees and stumps around the pond. We still have a ways to go before we can actually mow the shore, but I’ve staked out the new fire pit, and we have lots of wood ready to burn.

Broken tree branch

Matt, my Dad and I dismantled one of our biggest rock piles on the property–and it only took us four hours.

Cleaning up a rock pile

I started building a new flower garden around the well head. And this is when I died.

Rock edged flower garden around a well head

Last year’s landscaping efforts were limited to some very cursory grass cutting. The property was unkempt when we bought it, and our neglect over the past year while we focused on the basement reno made it worse.

The amount of work required to bring a garden back after years and years of neglect is never mentioned in the Secret Garden. Sure there’s a bit of pruning and weeding, but mostly it’s romance and roses.

In the category of things get worse before they get better, even our efforts at clean up have led to more mess. Drilling the new well and trenching new waterlines destroyed one established flowerbed and left lumpy piles of very hard dirt in its place. Burning brush and scrap lumber as we’ve tried to pick up around the property resulted a mountain of ash and a half scorched spruce tree.

Landscaping was at the top of the list on my home goals for this year, and I will get a handle on the situation outside, even if it kills me.

How to stain and waterproof a wood countertop

Update: See how our counters have held up after one year and after four years.

With our new kitchen island, we decided to do an inside out colour scheme. By that I mean that we reversed the existing finishes that were already in the kitchen.

Around the perimeter of the kitchen, we kept the natural wood cabinets and the light countertop. On the new island that we added in the middle, we chose white cabinets with a wood countertop.

Kitchen island painted white with wood countertop

I wanted to keep the wood tones consistent, so when it came to finishing our DIY wood countertop, the usual methods–wax, oil–were out, as they would have left the countertop too light in colour. I sampled lots of stain until I found one that matched the existing cabinets as closely as possible–Early American from Minwax.

To prepare to stain the countertop, I wrapped the island in plastic drop cloths to protect our nice white cabinets and went over the wood with a tack cloth to pick up any dust and bits that might interfere with the finish.

Preparing to finish a wood countertop

For staining, I used the standard technique of brush it on, let it sit, wipe it off.

Staining a kitchen island

After letting the stain cure, it was on to the waterproofing stage. Given that I was working on a countertop, I wanted something very durable and of course food safe. I chose to go with Waterlox after reading positive reviews online.

Waterlox to finish a wood countertop

I followed their very detailed how-to guide on their web site to make sure I got the finish I was looking for. Waterlox was pretty easy to use.

I did four coats, brushing it on liberally with a natural bristle brush and letting it dry for 24 hours between each application.

Here’s some of the pros, cons and lessons learned.

First, Waterlox stinks when it’s wet. After the first coat, we developed a routine of putting the Waterlox on right before going to bed. We opened the windows, turned on fans, switched off the heat (since we had windows open) and closed the bedroom door. Given that it was March, it wasn’t necessarily the best weather to have windows open, but it was necessary both for the odor and for the cross ventilation needed to dry and cure the finish. The worst of the odor did ease after a couple of hours, thankfully.

Second, sanding between coats is not recommended with Waterlox. Instead, the guide tells you to wipe down the countertop with mineral oil before each coat to get rid of any dust. I did this, but I still feel the finish isn’t quite as smooth as I would like. I’m used to using Varathane where I sand between each coat and get a super smooth finish. The Waterlox guide recommended using a very fine steel wool between the second-to-last and last coat of finish to sand out any rough spots, which I did, but it’s still not perfectly smooth.

Third, the finished surface is very shiny. I used Waterlox Original Sealer/Finish, which is recommended for the first few coats (or all coats, if you choose) and is listed as having a medium sheen. A satin finish is available, but honestly I was too cheap to buy another can, so I did all four coats with the Original.

How to make a wood countertop

After the final coat of Waterlox, we let the island top cure for a full week without putting anything on it.

Now that we’re using the island, the finish seems to be both waterproof and durable.

Water droplets on a wood countertop

Given that it is a wood counter, we use a cutting board if we’re chopping and cork pads for any hot dishes. However, there are still occasions to put the finish to the test. If we spill (which of course never happens), liquids bead up on top of the surface. When we slide dishes across the counter, we don’t have to worry about scratching the finish. The wood wipes down really easily and looks fresh.

Finishing our homemade wooden countertop was a question of both form and function. I wanted to match the wood tones we had in the kitchen, and I also needed it to stand up to actual kitchen prep work. Done and done.

Update: See how our counters have held up after one year and after four years.

How to make a wood countertop

How to make a wood countertop

We’ve lived with our homemade wood countertop for more than a year now. To see my report on how it has worked for us, click here.

See the update after four years with our counters here.

Since we’d splurged on having our new kitchen island professionally made, I had to balance the scales and DIY the wood countertop.

There are some tutorials online and lots of inspiring photos, but in the end we pretty much winged it. Here’s what we did.

For our island’s 80 inch by 42 inch top, I decided that four 2x12s were the way to go. I chose spruce–the cheapest option at my local lumber mill. My first tip is to be very careful in selecting your lumber. I went through nearly the whole pile looking for the straightest, cleanest boards possible. Watch for chips, knots, bends and warps.

Once you’ve selected your boards, the first step is to trim them so that their edges are square rather than rounded. This will help you to get a smooth even surface when you join your boards together. I took a half inch off each side of my boards–or the staff at the lumber mill did for me.

Squared edges on lumber

We let our boards acclimatize inside the house for a day or so–especially important as the lumber had spent the winter outside and was completely frozen. We could hear them snapping as they adjusted to the temperature.

Once we were ready to start constructing the countertop, we laid out our boards and decided the best configuration.

Making sure we kept everything in order, we marked the backside of the boards for screw holes.

Measuring and marking lumber

We spaced the screws 8 inches apart.

Then, I set up my newest toy and drilled holes using my Kreg Jig–yup, I got one!

Using a Kreg Jig to drill holes in a wood countertop

I was pretty confident that the Kreg Jig would give us really tight joints, but we glued each board as well with carpenter’s glue just to make certain. Be careful not to use too much glue, as you don’t want drips or seepage on the good side of your top.

Gluing boards for a wood countertop

Holes drilled and glue spread, it was time to put it all together. Matt held the boards even and kept the joints tight while I went along with the drill and set each screw.

Connecting boards for a wood countertop

Soon enough, we had a large slab of wood. Don’t be confused by the stamps and the holes from the Kreg Jig. This is the underside.

Back side of a wood counterop showing holes from the Kreg Jig

We took our incredibly heavy countertop and flipped it over. I trimmed one end with my circular saw to get a nice flush edge. I left the other end ragged, because I wanted to wait until we had the island, just to make sure I got the length exactly right.

While the joints were really tight and pretty smooth, I still filled everything–every joint, every knot, every divot–with wood filler just to even out any imperfections.

Using wood filler on a wood countertop

Then, it was on to sanding stage. Using my little orbital sander and lots and lots of sanding pads, I went over the countertop time and time again. I started with a 60 grit and slowly worked my way up to finer and finer grits (80, 120, 240 and 400).

Sanding a wood countertop

Despite choosing a very cheap grade of lumber, it came up beautifully smooth and even with the sanding. Take your time with your sander and don’t skimp on this step.

We did have one issue arise with our DIY wood countertop. Once the boards were all together and the top spent more time acclimatizing inside the house, it started to warp a bit. I attribute this to the frozen state of our lumber before we started construction. By the time the island was installed and we set the counter on top, we had a pretty good wave going on.

Unfinished warped wood countertop

Aaaah! A wonky wavy countertop was not at all what I envisioned. Our cabinet maker diplomatically limited his comments to “I dunno about that countertop.” My Dad suggested shimming under the one edge, where the gap between the underside of the countertop and the top of the cabinet was about 1/4 inch.

To everyone’s surprise–including mine–trimming the length of the countertop helped immensely. I don’t know whether most of the warp was happening at one end of the boards, but it was laying nearly flat after we cut off the extra length. Screwing the countertop into place on the cabinets leveled it out a bit more–even though we were very gentle and didn’t overly tighten the screws for fear of opening the joints between the boards.

My enthusiasm for my DIY wood countertop was rekindled. However, it was basically a large hunk of raw wood sitting in the middle of our kitchen–an attractive hunk of wood, but not the most useable surface.

The next step was to finish and waterproof the wood–which I’ll talk about on Wednesday. Stay tuned.

See my review on how our wood countertop held up over its first year.

See my review after four years.

DIY fail… sorta

As a person who enjoys construction and DIY, I feel slightly guilty to admit that I did not DIY the big beautiful new island now sitting in my kitchen. I had planned to build it myself. I pinned lots of inspiration to my kitchen Pinterest board, took measurements and drew plans, but when it came time to put saw to wood, I wimped out.

Kitchen islands

Island inspiration (clockwise from top left) 1, 2, 3, 4

My original plan was to find a second-hand kitchen that had cabinets that could be reconfigured into an island. However, weekly visits to the Habitat for Humanity Restore did not reveal a suitable candidate and made me realize that any reconfiguration would not be straight forward. Then, one day at the Restore I found eight cabinet doors with cathedral arch tops that mimicked the style of our kitchen cabinets. I bought the doors, came home and drew up a plan.

Plan for a kitchen island

Once I sketched the plan, I realized that I simply needed four cabinet boxes and two sections of open shelving. Simple! My Dad and I could build it ourselves over the Christmas holidays!

That plan was discarded after my Dad and I spent the holidays building the TV cabinet, and I decided furniture construction is neither my best skill nor my favourite way to spend my days.

It was time for some professional help. I called my Dad’s kitchen guy and emailed him my sketch and my inspiration photos. There was a bit of sticker shock when we received the quote, but I’d already made up my mind that DIYing a kitchen island wasn’t for me, so we decided to go ahead.

We saved some money by using the doors that I’d bought at Habitat (for $5 each) and eliminating the corner posts that I’d drawn on my original design in favour of basic cabinet boxes. However, we balanced that out by paying our cabinet maker to spray the doors white, rather than painting them ourselves.

I don’t have a good excuse why I wasn’t in the mood to DIY.

However, on the bright side I did eventually return to my normal self.

Habitat was also my source for cabinet pulls. I found handles that matched the existing ones in the kitchen for just 50 cents each. I hopped on the ORB (oil rubbed bronze) bandwagon, spray painting all of the handles, including our very chipped original ones.

Brass cabinet pulls spray painted with Oil Rubbed Bronze

I knew things were definitely back to normal on the DIY front when I decided to make the wooden countertop myself. That’s a story for next week, though.

Is there anyone else out there who’s gone through a DIY slump? How did you get through it? Who else is an ORB fan? How do you decide what to do yourself and what to hire out?

DIY doldrums

I’m in an uncomfortable stage right now. I have unfinished projects staring at me from all over, and I’m not liking what I see.

Usually, I try to be a one project kind of woman.

However, I currently have a mudroom that’s half-way through a makeover, a new feature in the kitchen that’s spawned other updates (mysterious, I know. I’ll have lots of posts soon), some outstanding finishing touches around the basement and the beginnings of a spring to-do list.

In the mudroom, the sticking point is the trim. We’ve stripped the wallpaper, patched holes, painted the walls, installed new baseboard, made an umbrella stand, built a bench, hung some hooks and fit out the closet with new shelving.

The baseboard is fully painted, but the window trim has just one coat and the trim around both doors and the closet is still the lovely flesh tone.

Mudroom painted Wythe Blue by Benjamin Moore

Trim painting is slow and tedious, and not my favourite way to spend my time. Some of the more appealing jobs that are also on the mudroom to-do list are refinishing the closet doors and staining the bench.

The basement bathroom is some trim (seems to be a theme), a drawer and a single hinge away from being finished. I bought the trim and the drawer guides–both for the built-in storage unit–at least a month ago. I hung the cabinet door on the built-in also about a month ago, but couldn’t get the hinges aligned properly, so it hasn’t swung smoothly in all this time.

Built in bathroom shelving

Building a drawer, painting and installing the trim and trying a new hinge would probably take less than one day. For a little amount of time, the satisfaction of finally crossing one room completely off the to-do list would be large.

In the rest of the basement, I’d really like to branch out beyond the TV area and begin to furnish and decorate the other rooms. These bigger to-dos are accompanied by smaller ones like fixing a shelf in the front hall closet and repairing the window screens (remember this one from the fall to-do list?) so they’re ready to install as soon as warm weather arrives. Oh, and then there are the mysterious kitchen fixes.

Fortunately this weekend, I have not just one day, not just two, but four thanks to the Easter holiday. I have grand ambitions for the next four days.

What are your plans for your weekend? Is it all about chocolates and family dinners, or do you have a project list too? Happy Easter, everyone, whatever you get up to.

Umbrella-ella-ella, the country version

I finally took up the challenge, all in the hopes of resolving a challenging situation that has plagued me for years.

I’m speaking of course of the Pinterest Challenge and umbrella storage–life changing, I know.

Pinterest Challenge

The idea behind the Pinterest Challenge is, in the words of Sherry from Young House Love, to “stop pinning and start doing.”

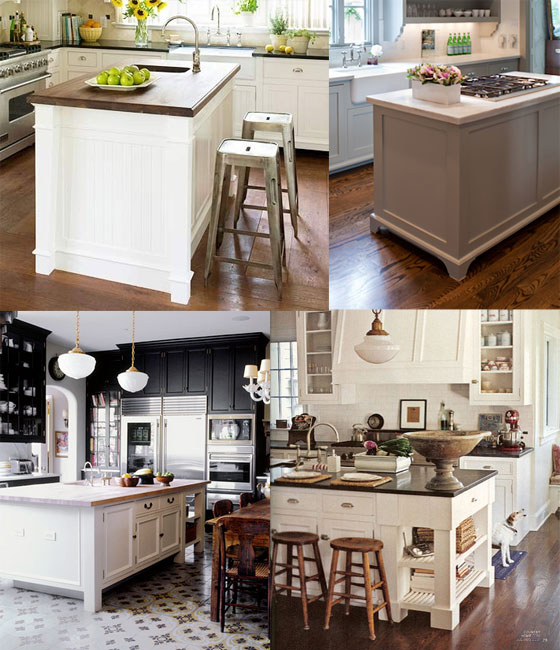
My (p)inspiration was Karen’s Country Living-inspired basket. Karen posted a great tutorial on her blog, The Art of Doing Stuff, back in the summer that I pinned right away with exactly this project in mind.

I used a few different materials (no peach basket) and changed up the assembly a little bit, but the end result is the same–a rustic, stylish and super functional basket. Perfect for wrangling all of our unruly umbrellas.

Rustic DIY umbrella stand

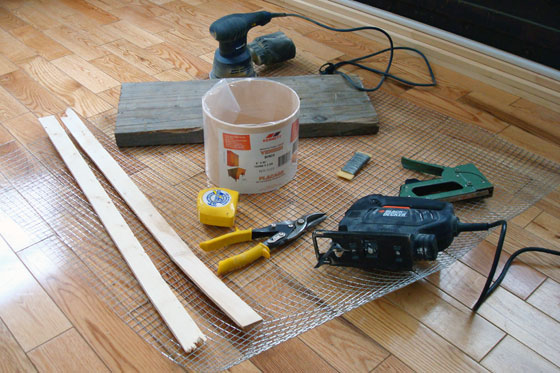
Here is the cast of characters:

Tools and materials for building a rustic umbrella stand

The materials: sturdy wooden board, wire mesh, veneer, wire and wood strips. The tools: sander, jigsaw, staple gun, snips, tape measure. Absent from this shot is a sharp utility knife, a metal ruler or straight-edge of some kind and a glue gun.

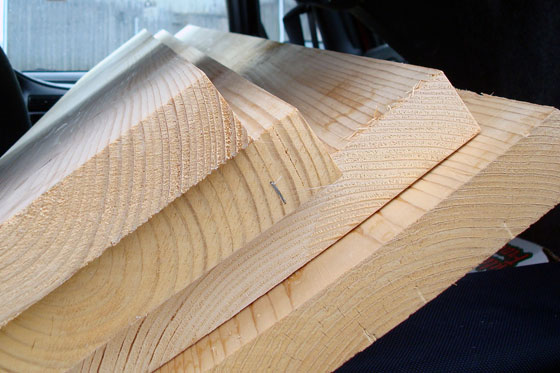
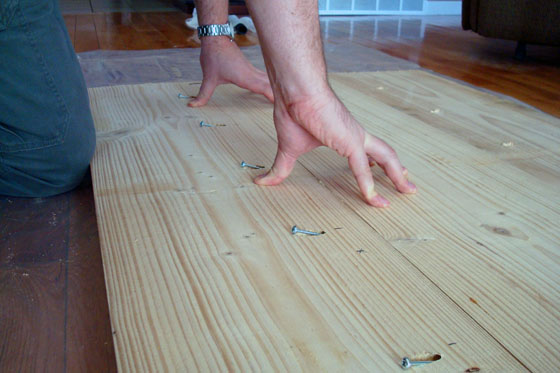
I chose a sturdy piece of wood for the base, as I wanted the stand to have some weight so that it would not tip over once it was full of umbrellas. Instead of a peach basket, I used a roll of veneer. The strips are the spacers that are used in big skids of lumber.

That woman in a business suit and heels you saw last week at Home Depot crawling around, stretching to reach under the stacks of lumber? Yeah, that was me. It’s hard to find strips that are long enough as most of them get snapped as people go through the piles, but they were the perfect rough texture for my basket, and best of all they were free.

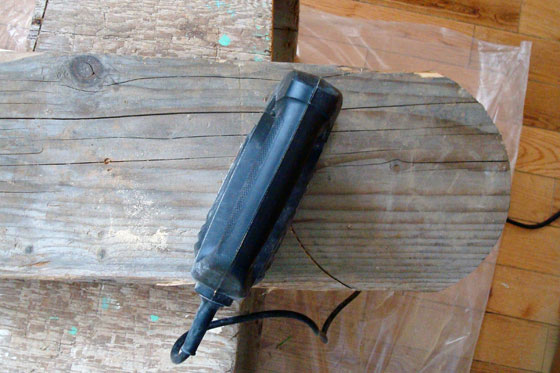
First step was to make the base. I used a plate as my pattern and cut the circle with my jigsaw.

Cutting the circular base with the jigsaw

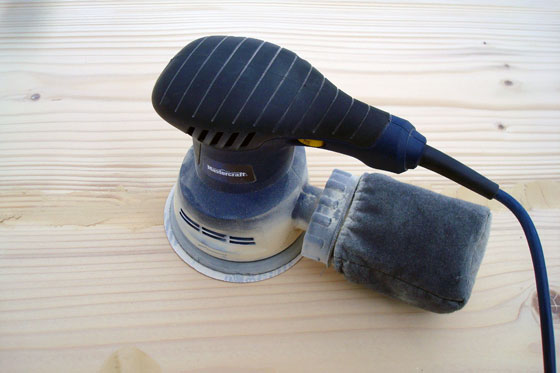
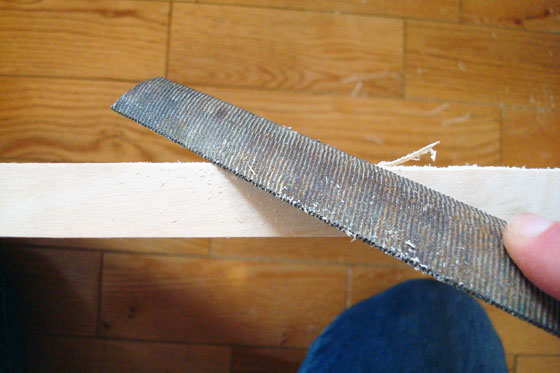
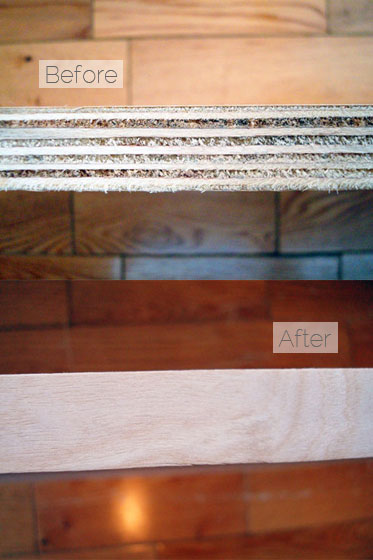
A few passes with my sander smoothed out the edges and took off the weathered grey outer layer–I wanted a natural wood finish for my basket.

Removing a weathered finish from wood with a sander

I rolled the base in the wire to figure out how long to cut the mesh–very scientific measuring method, I know–and nipped it across with my snips.

Cutting wire mesh with snips

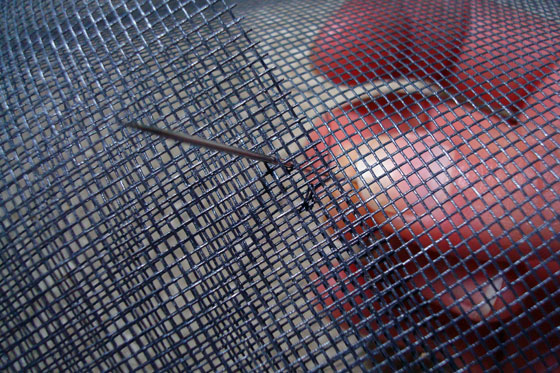
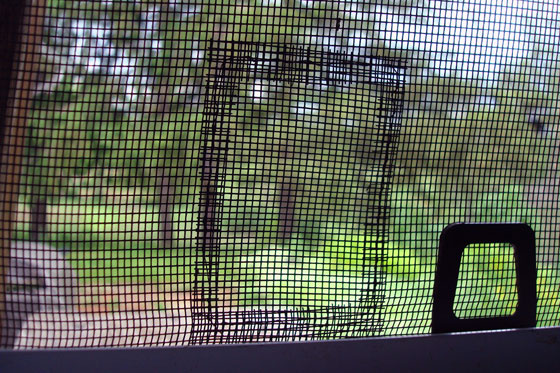
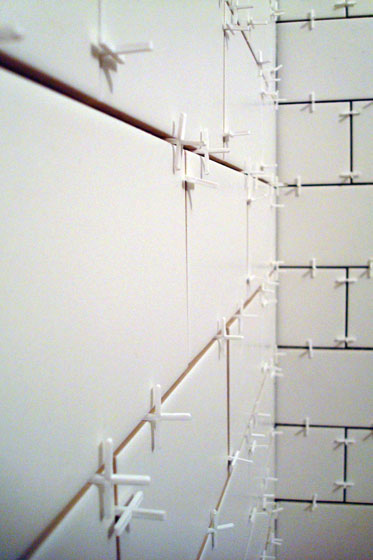
To form the mesh into a cylinder, Karen showed two options in her post: green wire and twine. I chose a fine silver wire that I already had on hand and wound it through each square. It blends in with the mesh perfectly. To deal with the springiness of the mesh, it’s helpful to “tack” it in a few spots with small lengths of wire.

Wiring mesh together into a cylinder

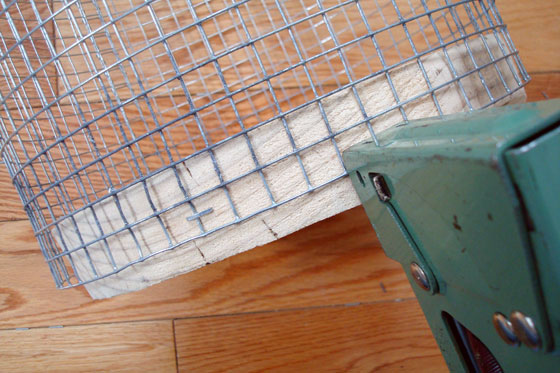
My wire tube was pretty good looking, but to make it a functional umbrella stand, it needed a base. I slid the wood disc into the mesh, lined it up along one of the rows of wire and stapled it in place.

Stapling wire mesh to a wooden base

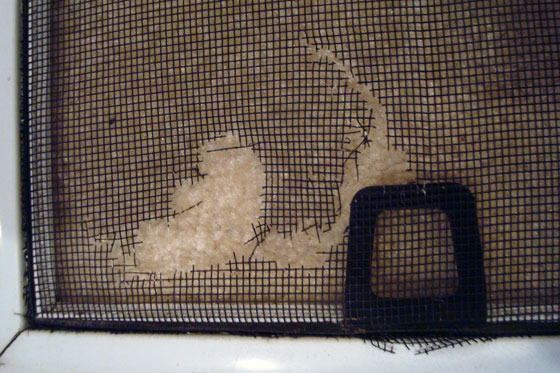
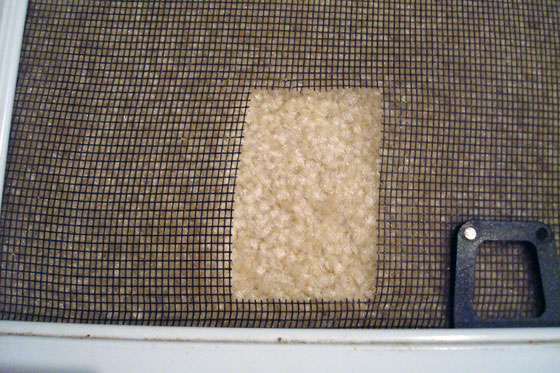
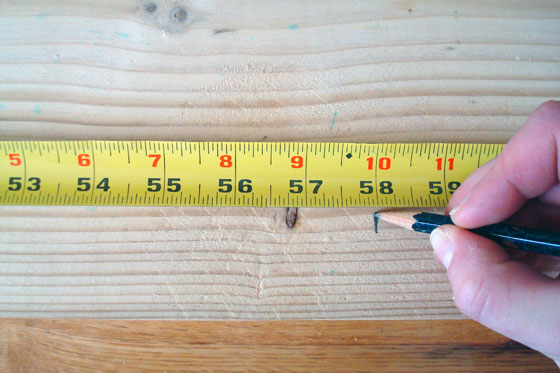
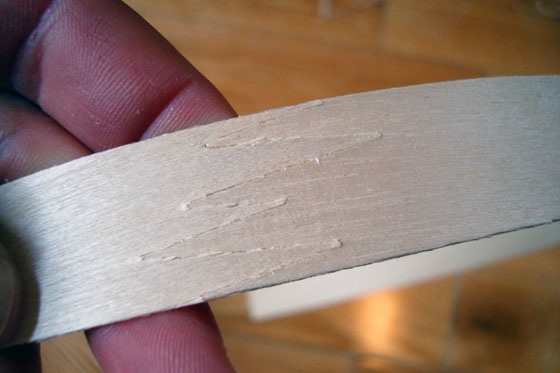
Now for the finishing touches. To cover up the staples, the raw edge of the base and the end of the mesh, I went to my roll of veneer. The veneer was about 6 inches wide, but I only needed strips that were 1 1/2 inches. This is where a good straight-edge and a sharp knife came in handy. I measured off my strips and then scored the veneer along the edge of my ruler.

Cutting veneer with a ruler and utility knife

The veneer was very thin, so the knife cut through it easily. The only challenge was that the knife wanted to follow the grain of the wood rather than the straight edge, so I had to make sure to keep the knife snug to the side of the ruler as I was cutting.

I had planned to tack the veneer to the basket with a couple of staples or small nails–I figured those would be in keeping with the rustic aesthetic I was going for. It turned out though that the veneer was pretty fragile. It cracked as soon as it was pierced. I returned to Karen’s tutorial and decided a glue gun was the way to go.

However, out of all of the tools that I own, a glue gun was not one of them, so the project was delayed until I could borrow a glue gun from my Mom. Turns out she had an extra from my grandmother that now belongs to me. Who knew Grandma was so crafty?

A bunch of daubs of glue around the base attached the veneer to the bottom of the stand. At the top, I sandwiched the mesh between two more strips of veneer and stuck them together with more glue. My edge turned out fairly tidy, so I didn’t apply twine like Karen did.

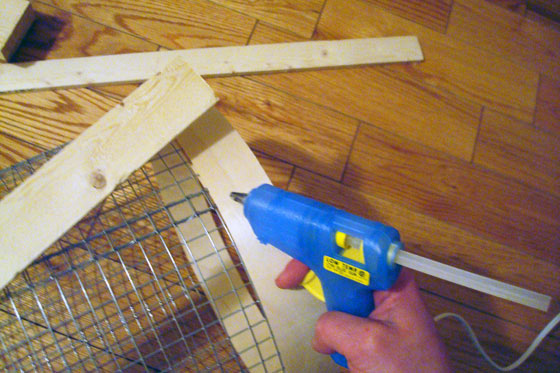
A couple quick nips with my jigsaw cut two of the lumber yard strips to the right length, and four more daubs of glue had them attached to my basket.

Using a glue gun to stick wood to wire mesh

Sorry for the poor image quality. The sun had set by the time I got to the glue gun stage.

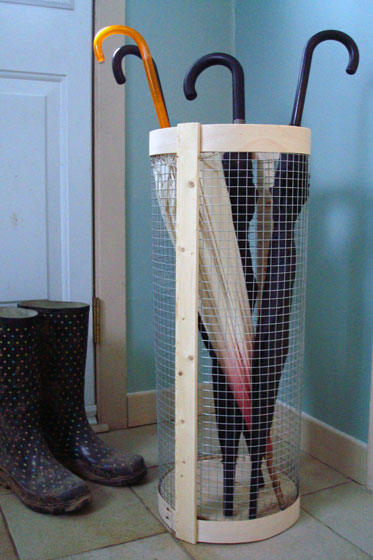
I had forgotten how easy it is to work with a glue gun. It held all of the wood in place really securely and the glue set up really quickly. In no time, I was able to transfer my finished basket to the mudroom and fill it with umbrellas.

Rustic wood and wire mesh umbrella stand

We do not do cute shiny rubber boots here. They started out cute and colourful, but they are now very muddy.

The basket is perfect. Exactly the right rustic style, and exactly the right size (9 inches in diameter and 25 1/2 inches high, in case anyone is wondering). It easily fits our four umbrellas and could probably handle a couple more. I am quite excited to finally have a place to put them and to no longer have to deal with them flopping out of the closet at me. In fact, every time I walk past the mudroom now, I switch on the light just to look my new umbrella stand sitting tidily in the corner. Yep, I’m a little weird.

Now we just have to finish off the rest of the mudroom. We painted the walls on the weekend, but I still need to tackle the trim (currently painted a flesh-tone, ugh), fit out the closet, refinish the closet doors and build a bench. Right now, the umbrella stand is the best thing in there!

Are there any other Pinterest addicts out there? You can see all of my boards, including the mudroom one, here. Have you been inspired to make anything from Pinterest or participated in the Pinterest Challenge? You can check out all of the projects on Sherry’s, Katie’sMegan’s and Michelle’s blogs. Anyone else have a crafty grandma–or are you a crafty grandma yourself? Does anyone else find umbrellas hard to store?

How to use preglued veneer edging

I’ve posted an addition to this tutorial: How to apply pre-glued veneer on curved edges

Our new TV cabinet that you saw at the beginning of this week is a thing of beauty in my (admittedly biased) opinion. However, this wasn’t always the case.

The cabinet is made of 3/4″ pine plywood. It’s paint grade, so the surfaces have a nice smooth finish. However, the raw edges are just that… raw. They’re rough and the layers of plywood are clearly visible. To finish off the edges, I used preglued veneer edging. This edging is very easy to use. Here’s what you do.

1. Gather your tools and materials.

Materials to apply veneer edging

This is a simple job that doesn’t require a lot of technical tools. Clockwise from bottom left, I have my roll of preglued veneer edging, my iron, a scrap 2×4 block, a file and scissors.

2. Set your iron to the cotton setting.

3. Prepare the edging. Use your scissors to cut a section of veneer that’s roughly half an inch longer than the edge you’re going to cover. You don’t have to be precise in your measurements. I just hold the veneer against the cabinet edge to figure out how long the section should be. You can work directly from the coil, but it’s easy for the veneer to get twisted, so I recommend cutting it into lengths first.

4. Starting at one end, carefully position the veneer against the edge that you want to cover.

Iron on veneer edging

The veneer will be slightly wider than the edge that you’re covering. Keep it flush on one end and one side and let it overhang the other.

5. With your edging in position, apply the iron to melt the glue.

Ironing veneer edging

I’ve found a “pressing” technique rather than an “ironing” technique works best. Just hold your iron in one spot for about 20 seconds. When you remove the iron, make sure the veneer is still aligned along the edge of the plywood. The glue will stay soft for only a couple of seconds so adjustments have to be made quickly.

6. Using your block of scrap wood, firmly press the edging onto the plywood.

Pressing veneer edging onto plywood

Press hard and slide the block back and forth over the section that you ironed making sure that the veneer fully adheres to the plywood.

Repeat steps 5 and 6 until the raw edge is completely covered with veneer.

7. Once the veneer has cooled, trim the excess that’s overhanging the one side with a file.

Trimming veneer with a file

File towards the face of your plywood keeping the file at roughly a 45 degree angle. There are tools that will trim the veneer as well, but the file has always worked well for me.

Your edge should now be nice and smooth and ready for stain or paint.

Finishing a plywood edge with oreglued veneer edging

Some tips for using preglued veneer edging:

1. When cutting the veneer with your scissors, try to get a nice 90 degree cut. This will give you a good starting point for your next piece.

2. Check for joints in the veneer before you glue it to your plywood.

Finger joint in veneer edging

The veneer is connected by finger joints that aren’t the most attractive and wreck the illusion of a solid piece of wood.

3. Don’t skimp on pressing the veneer with your block. You don’t want your veneer to peel off once your cabinet is done. Pay special attention to the edges of the tape to make sure it’s firmly stuck.

4. If you use the file to trim the veneer, clean the file every so often. The sawdust will fill the grooves and make it more difficult to get a clean edge. I just tap the file to knock out the dust.

5. Watch out for splinters.

Splinter beside my fingernail

Ouch!

Although iron-on preglued veneer edging can be slightly dangerous for klutzes like me, it is very easy to use. Ironing is one of my least favourite tasks, but for some reason ironing wood is less tedious than ironing clothes for me. Just a little bit of effort results in a very nice polished finished for furniture, shelves or other creations.

Have you used veneer edging before? Who else is not a fan of ironing? Is anyone else susceptible to splinters? I seem to get a few a week. I’m sure a few are in my future this weekend. How about you? Any special projects on tap for the weekend?

I’ve posted an addition to this tutorial: How to apply pre-glued veneer on curved edges

Video game heaven

Anybody know what this is a picture of?

Final fight nintendo game

I wouldn’t know what this is except that I live with someone who exposes me to such things. This picture is from Final Fight, a video game for the Super Nintendo.

Rather than asking what the picture is of, however, I should be asking you what it signifies. What this picture means is that Matt finally, for the first time in his life, has all of his video game systems set up at once.

The reason for this momentous occasion is our new TV cabinet.

TV cabinet for vintage video game systems

I’ve never been into video games, but Matt has played his whole life and has built quite a collection. However, it’s always been a case of he would get a new system and the old one would be packed away. On those days when he really wanted to relive his childhood and play his old Sega Master System (the first he ever bought), he was out of luck.

When we were renovating the basement, one of the criteria was to have a good TV area for watching movies and playing games–any game he wanted. So, we needed a TV cabinet.

And the cabinet needed to do a few things:

  • Accommodate all of the equipment: the TV, the satellite receiver, the Blu-Ray player and at least 10 video game systems.
  • Store DVDs and video games.
  • Keep all of the controllers, connectors and wires that come with video games handy but out of sight.
  • Keep everything tidy and organized.

I decided my best option was a custom cabinet, so I sketched up a plan, and my Dad and I went to work.

We went with adjustable shelves on the top section and drawers on the bottom. The overall dimensions of the cabinet are 80 inches wide by 16 inches deep by 33 inches high. The top gives us a spot for our phone (we need a land line in the country where cell service is a bit unreliable), our new 50-inch flat screen (more on that later this week) and a little bit of display.

The shelves are dedicated to all of the systems.

Video game systems in a TV cabinet

Matt has set up his XBox 360, PlayStation 2, Sega Dreamcast, Gamecube, Sega Genesis, Sega Master System, Nintendo 64, Wii, original Nintendo, Super Nintendo. Holes drilled in the back of the cabinet allow him to poke the wires through to hook up the systems.

The best part of the cabinet is the drawers.

Drawers in a TV cabinet for video games

There are four nine-inch-deep drawers along the bottom, and they hold DVDs, games and controllers. As we were building the cabinet, I kept increasing the size of the drawers, and I’m so glad that I did. They hold so much and make it so easy to keep everything tidy. It was a big pain to get four drawers perfectly lined up and sliding smoothly, but I can say now that it was worth it to have everything so well organized.

It’s also worth it to see how much Matt enjoys having all of his games at hand.

How many of you recognized the picture at the top of the post? Are there any other video gamers out there like Matt? In addition to Haggar and Cody from Final Fight, our basement has also hosted Link, Zelda and Mario over the past few weeks. What’s your favourite game? Have you ever built a piece of custom furniture? Any tips for constructing drawers? How do you keep video games or electronics organized at your house?

How tiling is like reality TV

I should have known. It was like a scene out of reality TV where someone says, “I completely trust my alliance. That million dollars is mine.” You just know that they’re going to be the next person voted off.

A month after  I naively wrote “I actually enjoy [tiling]. It’s not hard work.” the reno gods were still chuckling at me as I glowered at the untiled walls of the basement shower.

I decided I really do mind tiling, and I did everything I could think of to avoid it. I delayed, I procrastinated, I spent my time on other things (important things like baseboards and tractors and carpet, and less important things like parties and first snowfalls). However, none of these were tiling and none were enough to distract me from the ugly cement board, the cartons of tile and the need to bring the two together.

So I appealed to my alliance.

I negotiated with the reno gods: “I don’t need the whole Lotto Max jackpot. Just a little bit will be enough to finish the tile!” I bargained with Matt: “I don’t think I’ll do a good enough job. What if it ends up crooked and we hate it?” I pleaded with my Dad: “Please call your tile guy!”

The reno gods were silent. Matt was supportive: “You’ll do a great job. I have confidence in you.” My Dad was befuddled: “You, the woman who drywalled her own basement, are now intimidated by a shower stall?” But because he’s my Dad, he called his tile guy.

The tile guy said it would be $900.

$900? Just for tiling? With materials I already own?

$900 for professionals versus $0 for me. Ummm… “I guess I’m tiling a shower.”

So I booked a day off work. I booked my Dad. Just like the challenge part of the episode, I threw myself into the mud pit (mortar bucket?), and we got to work.

The first step was to figure out our starting point. Between the bench, the niche, the accent band and the vanity, there were lots of spots that I wanted to line up. However, the most critical was the top of the vanity, so we drew our level line from there.

Level line for tiling

Despite any appearances, the line is actually in line with the top of the vanity, and it is level.

Once we got going with our tile, the most important objective was keeping everything level and even. For me the solution was using spacers. I wanted fairly narrow joints, and every single one had to be the same. I may have gone a bit overboard.

Tile spacers

Too many spacers?

I had two bags of spacers, but those were quickly emptied. As I progressed around the shower, I kept going back to areas that had already set up and removing the spacers so that I could reuse them.

The other spacing issue I ran into was with the accent band. I’d chosen a marble mosaic tile that was slightly thicker than the white subway tile I was using the rest of the shower. I could have camouflaged the difference with a chair rail or another type of tile, but I really wanted a flat, clean, simple look. My tile supplier suggested putting a little extra mortar on the subway tiles to build them out to the same depth as the mosaic.

Back buttering the subway tile

Back buttering the subway tile

I back buttered for two rows on either side of the accent band. Because I only did it in this one spot, the walls have a very slight curve. I’m hoping it’s imperceptible unless you know it’s there (obviously, all of you will be diplomatic enough to not point it out when you come to visit, please).

Carrera marble tile accent band

Everything looks pretty even between the carrera marble accent tile and the subway tile. Doesn’t it?

The back buttering was tedious, but not particularly difficult. The trickiest area–and the point that I started to go slightly insane–was the niche.

When we were building the shower, I thought the niche was a great idea. No bars of soap and bottles of shampoo set on the bench or the floor. No caddy hanging from the shower head. Just a convenient built-in shelf.

It turns out niche functionality, good. Niche tiling, bad.

Because I’m a glutton for punishment, I wanted the pattern to continue from the walls right through the niche. That meant dozens and dozens of cuts. In the whole niche, there is only one full tile. Ugh. But, I have to say, the result was worth all of the extra figuring and cutting. And yes, the next photo is completely bragging.

Tiled shower niche

Look at that brick pattern marching right along!

We used a small piece of marble we picked up at Home Depot for the base of the niche, as I wanted a single solid piece on any horizontal surface. It’s slightly sloped so that the water, but hopefully not the soap, will run off.

In the end, tiling the shower is not as fun as sitting on the couch all weekend watching a reality TV marathon, but my early fears proved unfounded. I did do a good enough job, I think. Everything is nice and straight–and it will look even better when it’s grouted.

I may not have won the million dollars, but I didn’t get voted off the island.