Garden Olympics in Illinois

Today’s post from Sarah in Illinois further solidified my belief that we’re completely kindred spirits. Obviously, Sarah and I both love our gardens. I realized today that we also both love the Olympics. Sarah has come up with a really clever, Olympic-esque way of summarizing her garden’s performance this year. Let the medal ceremonies begin.

Our garden is just about done for the year. We currently only have two things still growing: peppers and pumpkins. In a future post I will go over some of the ways that I am preparing for next year, but for now I will review this year.

I started out with such high aspirations for our garden. And it’s a good idea to set your goals high, but when I look back over the year I need to be realistic with my results. I need to focus on what went well and not what didn’t. So I am going to go over the results in the spirit of the Olympics and start with my gold medal winners.

Gold medals

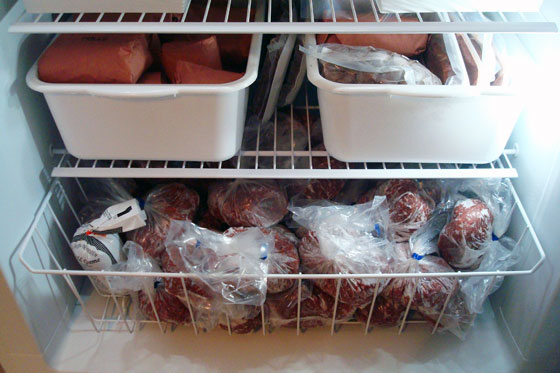
Sugar Snap Peas – With a mild spring and plenty of rain, I had a much bigger harvest than normal and I even still have some in my freezer.

Spaghetti Squash – I gave away several, I baked a few, froze some and I still have more to use up.

Kale – I couldn’t keep up with my Kale this year. I didn’t know what to expect when starting it from seed indoors and transplanting it, but it could not have done better.

Green Beans – We had an excellent first harvest and even got a few meals from a second harvest.

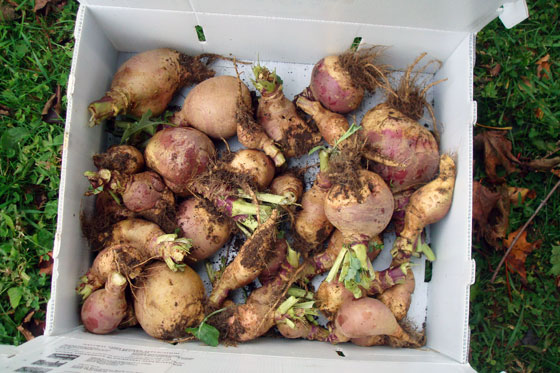
Potatoes – The potatoes did very well and we still have a meal or two to dig up before we close down the garden.

Peppers – Both our green peppers and our hot peppers really did well this year.

Silver medals

Radishes – The plants themselves did well. I just did a poor job of planning and planted too much at one time. So a lot was wasted.

Cauliflower – This was my first year for growing cauliflower. Again, the plant grew well, and I pinned the leaves closed like I was supposed to. Then I waited, and waited, and waited, and waited. Steve finally mentioned that he thought they should have been ready to pick by now. However, I had waited too long and they were all bitter. If I had been more vigilant they would have gotten a gold medal.

Tomatoes – The plants grew large and produced a lot of fruit. We made one harvest and took them to Steve’s mom to can. She made a few quarts of tomato juice from them. We had planned another harvest and then rain hit. In one weekend we got over 4 inches of rain and the garden was too soft for me to walk in. By the time the ground dried up a little and I remembered that we needed to pick tomatoes, most of them were rotten.

Sunflowers – The flowers are beautiful, but I did not pay attention to the amount I planted of each variety. I got several plants that are really pretty but only two are the type that you can harvest the seed from and the kids are disappointed that we will not have sunflower seeds to eat.

Bronze medals

Red Cabbage – I had planted 4 plants and they looked healthy, but I only was able to harvest one head.

Carrots – We planted the carrots too close together. The few that we harvested were good, but they did not have much room to grow very large.

Cabbage – I am thinking maybe cabbage moths or some type of pest took over the plants. All of the leaves were full of holes and we did not harvest any cabbage.

Asparagus – I didn’t know what to expect for my first year of asparagus. And I would normally think that maybe mine looked okay. Until I went to my brother’s and saw his first year of asparagus. His plants look so full and healthy and mine look so thin and spindly. I will have to add some new crowns next year.

There were a few vegetables that did not even show up to my “garden olympics” and so they did not get awarded anything:

Cucumbers – my plants this year were pitiful. Just pitiful. There is no other way to describe them. I think out of about 15 plants I harvested 2 cucumbers. TWO.

Brussels Sprouts – This was my first year of growing them and I knew that they didn’t seem to be doing anything. My thoughts were confirmed when I went out to the garden and saw Steve mowing the plants down. Apparently he had given up on them before I did.

Overall, I should be happy. We produced our own food. We grew food that was healthy and fueled our bodies with the best quality nutrients. There really is nothing I should be upset about. I should just look to improve next year.

In the meantime, I will keep checking on these vines and hope that we have some pumpkins to carve this year!

Great summary, Sarah. I think as gardeners we learn very quickly that we can’t expect everything to be a success. It even varies year to year. It’s really good to keep a record like this of what worked and didn’t, and use that to set goals and plan for next year. (BTW, I love the fuzzy fluffy sunflowers! I’m adding those to my garden plan for next year.)

Save

September garden update

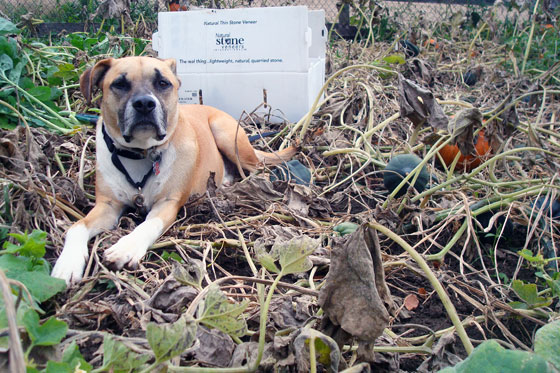
Look! We grew a puppy again!

Baxter in the garden

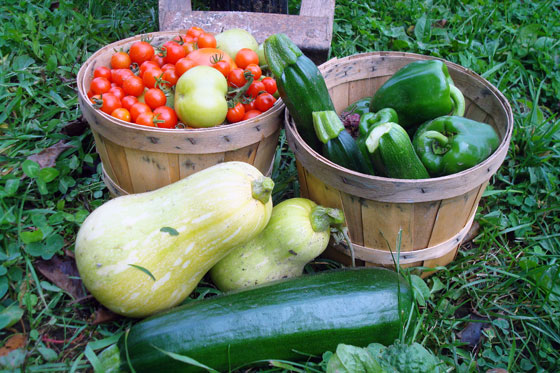
We grew a lot of other things too. Yet again, this garden is crazy productive.

Sicilian Saucer tomatoes

Purple peppers

Butternut squash

First year grape vines

Watermelon

Watermelon

Asparagus

Acorn squash

Red potatoes

The puppy didn’t fit in the basket.

Not pictured are the zucchinis that just won’t stop and hundreds of cherry tomatoes (I roasted a bunch last night for all kinds of goodness).

What’s growing in your garden?

Save

Save

Save

How to grow tomatoes vertically

This season in the garden, we’re all about growing vertically. I’ve shared how we’re keeping our raspberries upright. Today, I’m talking tomatoes.

How to train tomato plants to grow up a string

I love training my tomatoes to grow tall. They take up less space in the garden, and I think they’re also more productive due to increased air circulation, better sunlight and less contact with the dirt.

Since moving to the farm, I’ve used various methods to stake or cage our tomatoes, but this year for the first time we had space to build a proper trellis. This method is not new for me. I learned from how my Dad grew tomatoes in his garden.

How to train tomato plants to grow up a string

I used 2x2s to build a frame. Matt hammered three 2×2 posts into the ground leaving about 8 feet between each post. The posts were about 5 feet long, and he hammered them in about a foot, giving us a final height of roughly 4 feet. Then we screwed 8 foot pieces of 2×2 across the top of each post. This gave us rows that were 16 feet long.

Here’s a photo from back in the spring of the trellises in place.
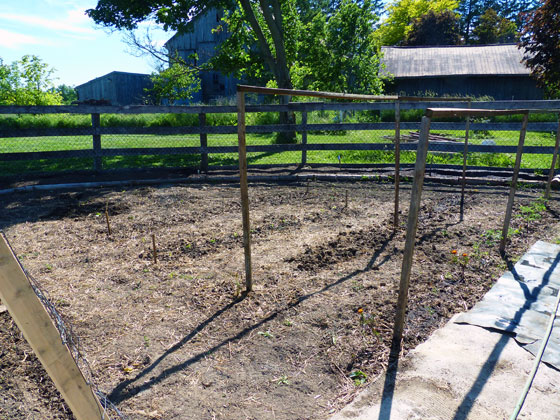
How to build a simple tomato trellis from 2x2s

We then planted our tomato seedlings underneath the trellis. Once they grew about a foot tall, it was time to tie them up.

Using twine, I tied a very loose knot around the base of the tomato stem. It’s important that the knot is loose as your tomato plant has a lot of growing to do, and you don’t want the twine to end up too tight.

How to train tomato plants to grow up a string

I then wrapped the twine around the stem a few times, making my way up the plant. Leaving a bit of slack, I tied the other end of the twine to the 2×2 crosspiece directly above the plant.

From then on, it was about basic maintenance. Every few days, I’d walk the row and continue to wind the tomato plants around the string.

I’m also pretty vicious when it comes to suckering my plants. I remove the lower leaves plus any “suckers” that sprout in the crotch between branches and the main stem.
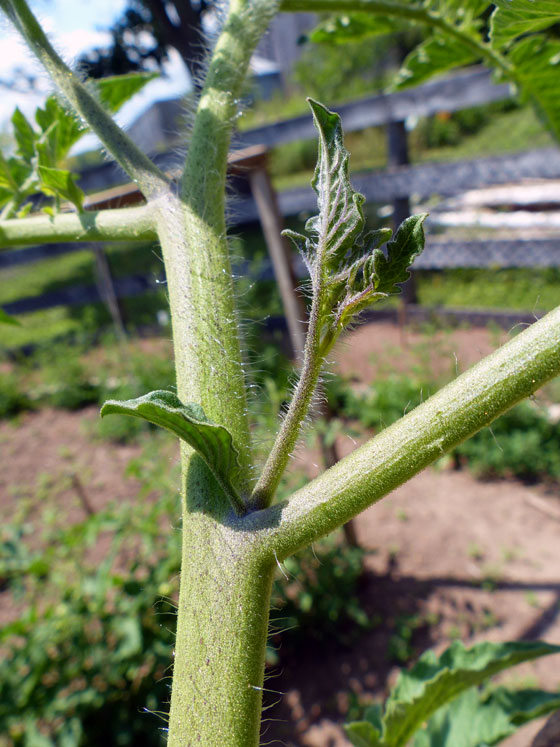
Tomato sucker

Suckering allows the plant to put its energy into producing fruit rather than more leaves and keeps the plants a manageable size. Suckering usually depends on whether you have determinate (bush) or indeterminate types of tomatoes. I always just assume I have indeterminate tomatoes and rip those suckers off.

However, we tried a new kind of tomato this year–Sicilian Saucers–and they did not take well to suckering. They kind of rebelled when I started pulling off their leaves, so I backed off and tried to let them do their thing a bit more.

I was still able to wind them up the strings fairly well, which is helpful because these plants and their fruit are super heavy. Our giant tomatoes would definitely be lying in the dirt if they weren’t supported by the trellis.

How to train tomato plants to grow up a string

Now that the plants and the fruit are very well established, I did go through and clipped off a lot of the lower leaves. I’m trying to get a bit more sunlight onto the Saucers to encourage them to ripen.

As the plants have grown, some of them have exceeded the height of the trellis. I’m tying them along the top 2×2 and just trying to support them so the stems don’t bend or break.

How to build a simple tomato trellis from 2x2s

So far this season, we’ve had a great tomato harvest. From the looks of our Sicilian Saucers we have much, much more goodness ahead.

Do you grow tomatoes? Are you into suckering or do you leave them alone? Have you ever tried to grow tomatoes vertically? What method do you use to trellis tomatoes?

Save

Save

Mid-summer garden update

Basket of potatoes and zuccini in front of marigolds in the vegetable garden

It’s been awhile since I shared what’s up in the vegetable garden. Deep in the middle of summer, lots is up. As in lots of beautiful vegetables.

Looking back at my last update from the end of June, I’m amazed at how much things have grown. Here’s the tour ’round the ring.

Quadrant #1, where the first three of the five rows of potatoes are ready to be dug.

Potatoes in the garden

The raspberries along half the centre axis. I think that the black raspberries (the mess on the left) will be coming out to be replaced with either more raspberries or something entirely different. We have enough growing wild around the farm that we don’t need them in the garden too. And they do not seem amenable to being tamed.

Two rows of raspberries

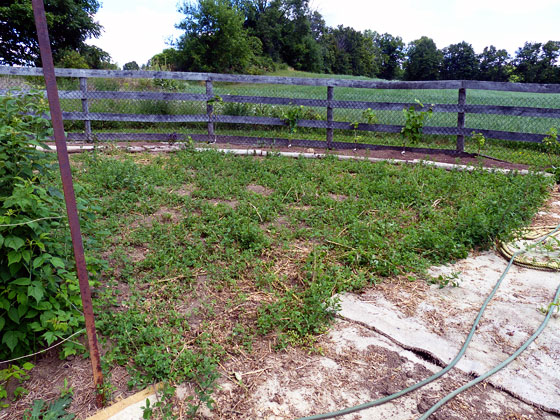
Quadrant #2 which continues to be weed central as there’s nothing planted here beyond asparagus and grapes in the perimeter beds. I actually broke down and mowed this section last weekend. Let’s pretend I’m a really sophisticated gardener and we’re intentionally letting this section lie fallow this year, okay?

Weedy section of garden

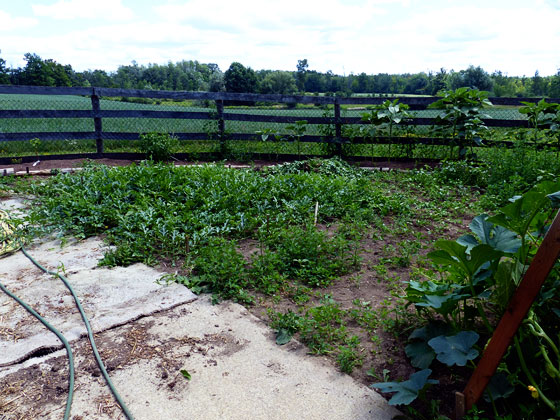
Quadrant #3, which also continues to be quite weedy. However, no mowing is happening here, as this is home to our watermelon, which have totally taken off (more on this below).

Watermelon vines growing in the garden

The other half of the centre axis is our squash A-frame. The vines are climbing! I’m very excited that the trellis seems to be working. We have baby butternuts, acorn squash and gourds.

Squash growing up an A-frame trellis

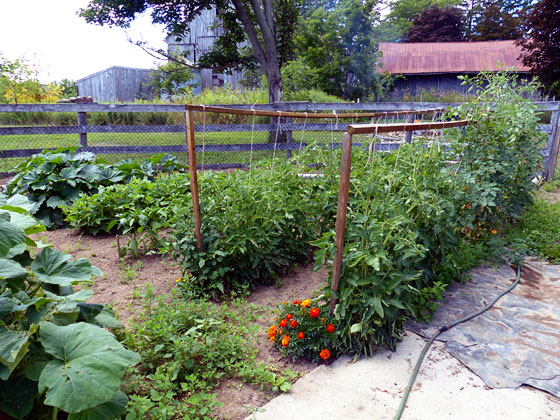
Quadrant #4 is the best looking, especially after Matt spent hours last weekend pulling weeds. It’s home to our very bushy tomatoes, peppers, beans and more zucchini.

Vegetable garden

I tried to pick a few highlights to zoom in on a little more. A few is hard, as I’m super excited about everything.

Most exciting is our watermelon. As in we actually have watermelon! They’re about the size of softballs right now, so they’re not quite watermelons, but they’re on their way.

Baby watermelon

Another vegetable that is exciting just by its presence is our yellow bush beans. Last year all of four plants sprouted. This year we have a whole row and each plant is loaded with beans and blossoms. We’re going to have more than enough beans to freeze for the winter.

Yellow bush beans

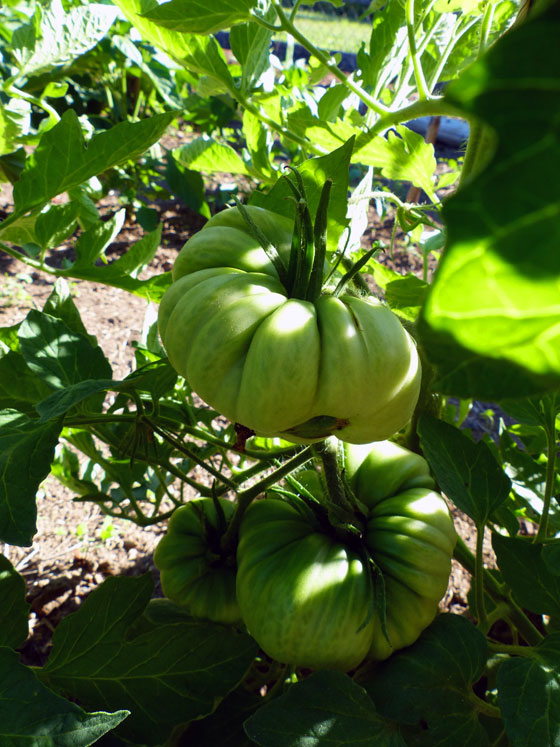
Also on their way are our Sicilian Saucer tomatoes. I picked up these seeds on a whim, so I’m not sure what to expect. The blossoms were huge, befitting the “saucer” name. We have some catfacing on the bottom of the fruits, which I’ve learned is common with big tomatoes. The fruits aren’t saucer-size yet, but I feel like they’re on their way to being quite large.

Sicilian Saucer tomatoes

The plants that I’m watching most closely are our grapes. A few of the vines have finally reached the top of the fence, and some tendrils have even started to wind themselves around the wires.

Grape vines

These are the highlights, but there are a few lowlights.

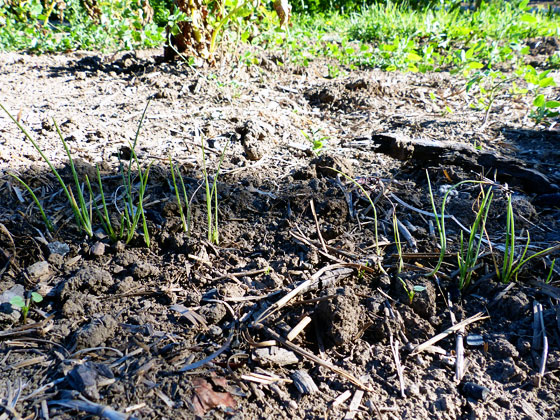
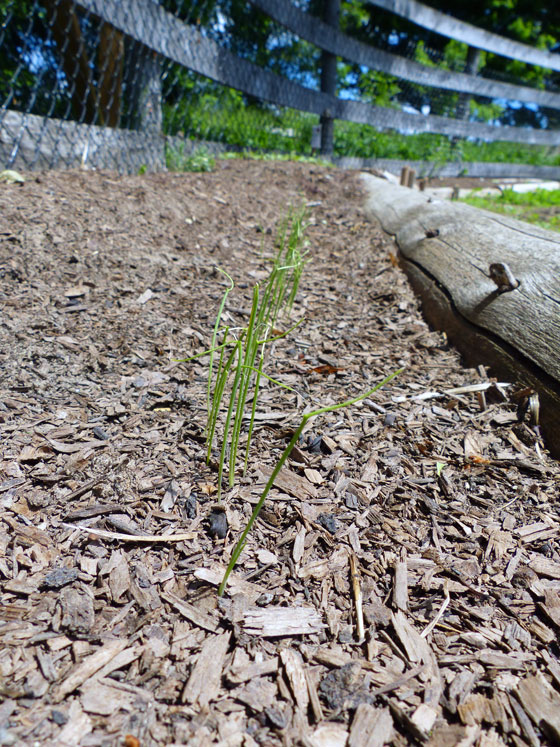
I planted the bunching onions in the raised bed, which are filled with the dirt we bought this spring. The onions did not like the dirt at all. They’ve looked like blades of grass ever since they sprouted back in June. Last weekend we transplanted those wee little sprouts into the main section of the garden. They’re already looking perkier.

Green onion sprouts

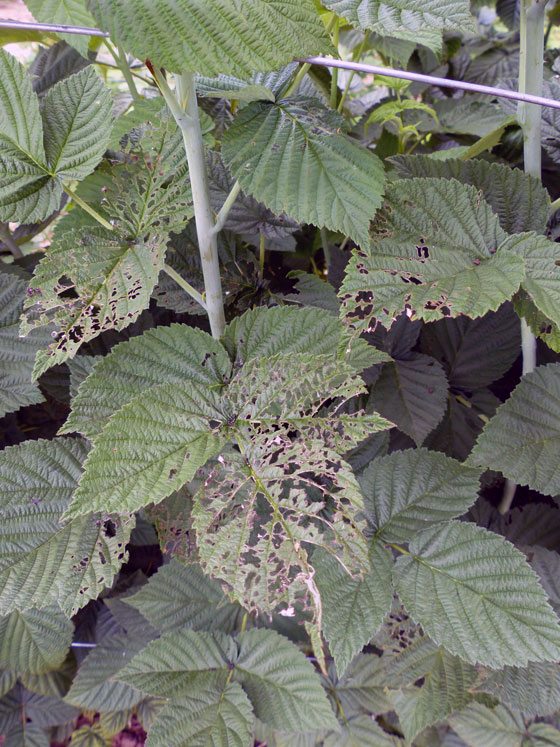
A few of the raspberries have been hit by Japanese Beetles. The damage hasn’t been too bad, and we have so many canes that I’m not miffed to sacrifice a few leaves. However, that doesn’t mean I’m not on a campaign against the beetles. It only took me a couple of days to get over my squeamishness at the crunch they make when I crush them.

Japanese beetle damage on raspberry canes

This one may not be a lowlight, but some of the tomatoes that we purchased as sprouts are growing oddly. The plants are all the same type, but the fruit are all different sizes. Everything from the size of a marble to the size of a pingpong ball.

And then we have a few plants where the stems that support the trusses have taken a turn and branched up into “suckers.” You can see the stem looping around and up in the photo below. I’ve never seen this before. Have you?

Sucker on a tomato truss

One final highlight that I have to share. As I was photographing the garden, I came across this guy in the watermelons. A frog in the garden is a good omen, right?

Frog in the garden

What we’re loving most is eating the garden–the vegetables and fruits only, no frogs. We have so much desire to cook in the summer, and our meals are so fresh and full of variety.

How is your garden growing? What fresh produce are you enjoying this summer?

Save

Save

Save

Save

How to build a raspberry trellis

Raspberries are a pretty easy crop to grow in my opinion. Last year I transplanted a whole bunch of raspberry canes from my parents’ garden to ours. The canes have grown and spread like crazy.

This year, the object of the game is to contain the canes–a little bit. Raspberry canes don’t bear fruit until their second year, so the first year is all about letting the canes grow… and grow… and grow.

The taller the canes grow, the more likely they are to fall over. A trellis can help to keep them upright and also keep the row a manageable width.

Here’s how Matt and I made the trellis for our berries.

How to build a raspberry trellis

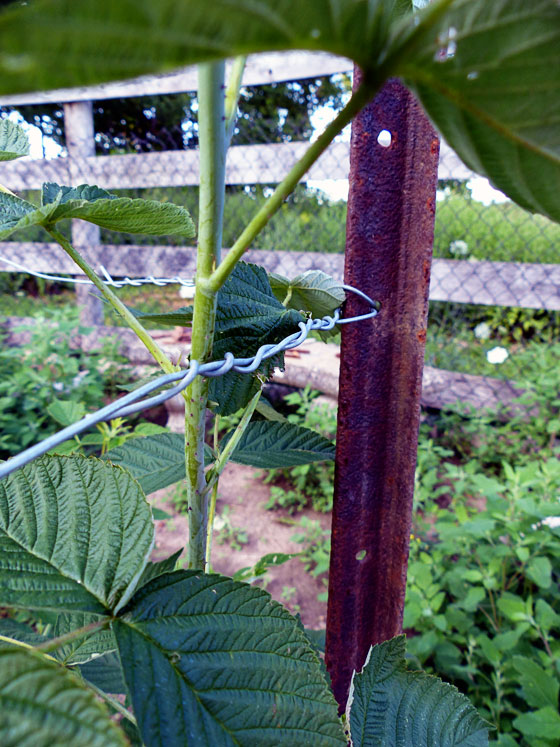
We started with metal T-posts. We happened to have a large quantity courtesy of past owners–free materials, yay! And I liked that the metal won’t rot like wood.

The posts were about 7 feet long. Matt hammered them into the ground leaving about 5 feet sticking up. We used six posts, three on each side, for our rows, which are about 18 feet long. The width of the rows is 2 feet.

Then I strung wire through the holes on the T-posts. There are three rows of wires, each about 16 inches apart.

How to build a raspberry trellis

At the final corner I doubled the wires back and twisted them around themselves.

How to build a raspberry trellis

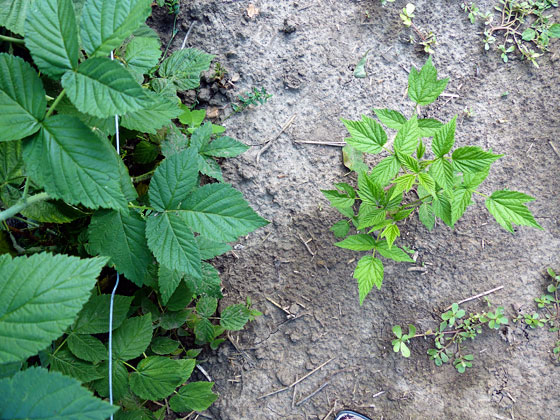
The raspberries grow between the wires staying nice and straight. About once a week, I walk along the row and make sure all of the growing canes are tucked inside the wires.

Any canes that sprout outside the row can be transplanted to inside the boundaries.

How to build a raspberry trellis

So far, we’ve had just a handful of berries, as we only started our canes last year. Our plants, though, have become thick and lush. With our trellis in place, we’re set to have a great crop of raspberries next year.

Have you picked any raspberries this year? Do you grow raspberries? Have you ever built a raspberry trellis?
Save

Garden at the end of June

Garden at the end of June

Much progress has been made on the garden. You might notice in the photo above that we have a gate! And it’s not just propped in place. It’s actually on hinges, and it swings and everything. It’s only been 10 months since I built the gate. Not at all unreasonable to wait that long to fully protect the garden, right?

Inside, things are slowly filling in. I’m trying to remind myself to be patient and things will grow… eventually.

Let me take you on a tour of around our garden as it’s growing right now.

Quadrant one is our most well-established. It is home to five rows of potatoes–three red, one Kennebec and one Russian Blue. Although I really could have done two Russian Blues given how many we had and how much space there is in this quadrant. There are also three zucchini plants. Then in the perimeter beds there are onions, beets, carrots and a selection of herbs.

Quadrant one of the vegetable garden

I’m a bit disappointed in the onions. They are spindly, some of the ends are brown, and I’m not confident that they’re going to size up. But I keep watering them and sowing new rows for my attempt at succession planting. (The beets in the background are doing excellent, however).

Green onions

Quadrant two is bordered by our perennial crops: raspberries, grapes and asparagus. The middle is empty however, and we don’t have plans to plant anything here. One of the things I’ve realized is that we can only handle so much with this large vegetable garden.

Quadrant 2

The asparagus isn’t that much farther along than the onions, but I’m beyond excited by it. I’m trying to grow asparagus from seeds, and I thought I wasn’t going to be successful. These seeds took so long to sprout. Almost three weeks. I thought it wasn’t going to happen. So these little tiny ferns are tremendous progress.

Asparagus sprouts

Quadrant 3 has a lot of growth, but not the kind I want. Welcome to weed central. Ugh. There are some watermelon seedlings in here, but I’m not sure they’ll last that much longer without some defense. The outside edge has our sunflowers which are growing incredibly.

Quadrant three in the vegetable garden

Quadrant four is slightly better than weed central, but not by much. This is our first year planting this half of the garden, so it’s taking more effort to clear out the weeds on this side. In this quarter we have two rows of tomatoes (under the wood frames), one of peppers, one of beans and three more zucchini plants. The outer edge has some more herbs, more sunflowers and our hollyhocks.

Quadrant four of the vegetable garden

You’ve caught glimpses of the centre axis already, but here’s the view that I’ve been working towards for the past two years. A long look between our two rows of raspberries, through the squash A-frame and out to the back fields.

Centre axis of a round vegetable garden

On Monday I posted about vision. The vision for this vegetable garden has been a long time coming, but it’s oh so wonderful to see it come to life.


Save

Save

Save

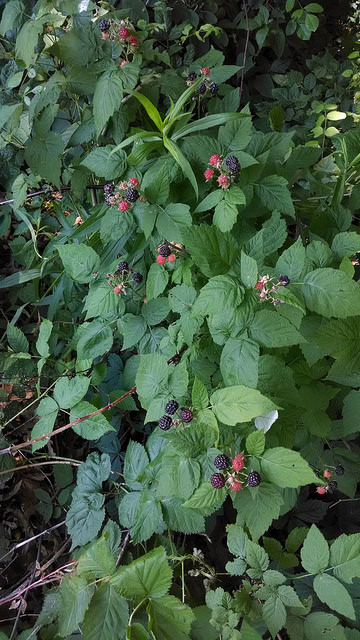
Wild raspberries in Illinois

Sarah in Illinois is kicking off summer with a quintessential summer activity: a family berry-picking outing.

One of the perks of my husband being a farmer and spending long days driving around backroads and secluded fields is that he finds secret spots.

Like the best mushroom hunting spot. Or like one day this spring when he took us out into one of the fields that he was getting ready to plant and showed us an eagle’s nest. The nest was so very big. We waited for quite a while but never got to spot an eagle.

His latest secret spot came to us Friday.

When he got home he said, “Tomorrow we are going raspberry picking!” In years past when he would see that the raspberries or blackberries were nearing ripeness, we would wait too long and the birds got to them first. So this year Steve said we had to go and we had to go immediately.

Saturday after breakfast we rounded up ice cream buckets and baskets, picked up Steve’s mom and headed to the field.

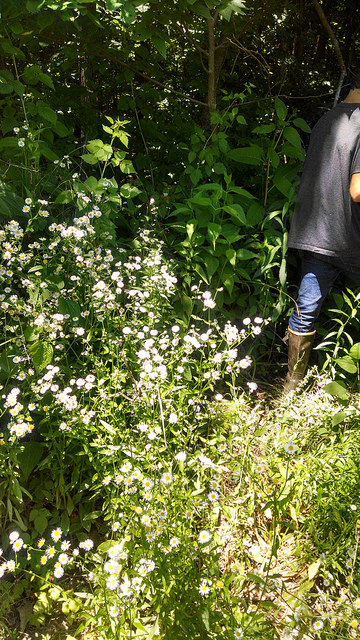
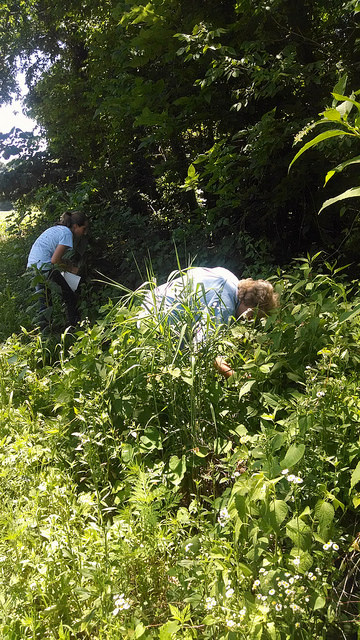
Picking wild raspberries

Picking wild raspberries

I think we were still a little too early but we picked for at least two hours.

Picking wild raspberries

Picking wild raspberries

And believe it or not, after Julia posted about her run in with a turtle, we ran across one in the field.

Yellow and black box turtle

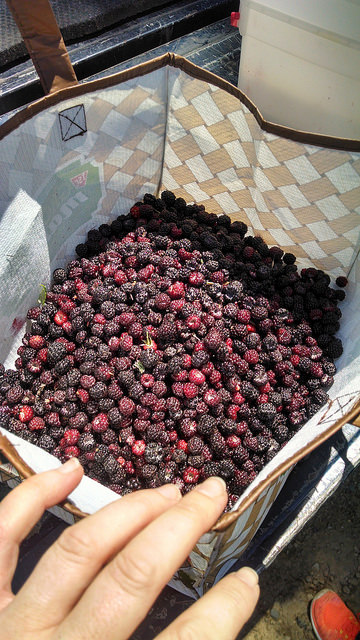
We ended up bringing home enough raspberries to freeze 3 quarts.

Bin of wild black raspberries

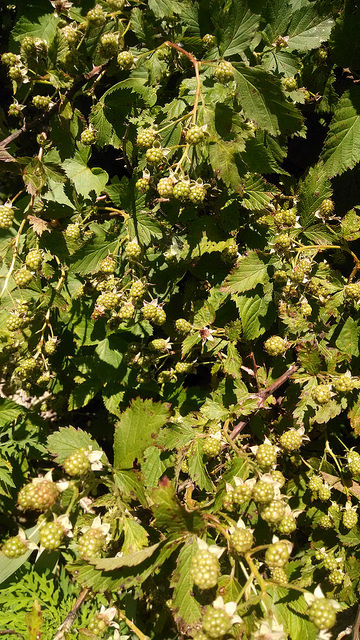
We have given Steve instructions that as soon as he sees these blackberries begin to ripen to take us back! There were even more blackberries than raspberry vines!

Unripe blackberries

What a great bounty of berries, Sarah! Strawberries have just started in our area, so we have a little while to go until the raspberries are ready. I can almost taste the sunwarmed berries when I look at your photos. Enjoy!


Garden in June

Vegetable garden in June

Every night when I get home from work, I walk through the garden. It’s one of my favourite times of the day–outside at the farm, seeing what’s grown during the day, appreciating all of the hard work we’ve done so far.

The garden is finally taking shape as I’ve envisioned it would from the start–as in years.

Sprouts are growing, from hollyhocks to beets to onions and sunflowers.

Hollyhock seedlings

Beet sprouts

Green onions

Sunflowers

Some of the plants have gone beyond sprouting and moved onto blossoming.

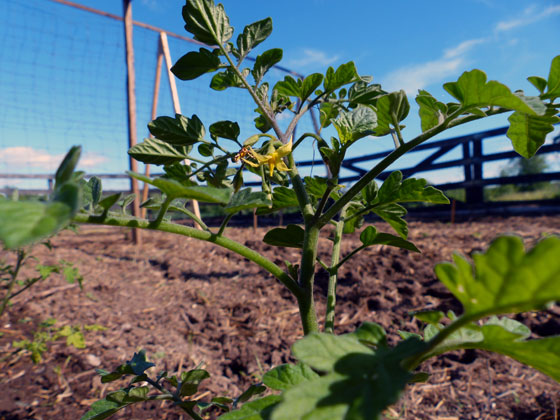
Tomato blossom

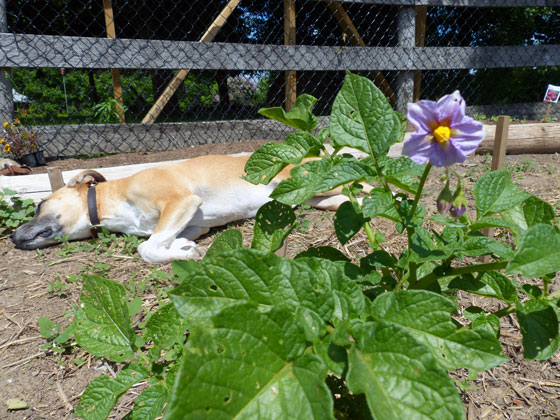
Potato blossom

Marigolds amongst the tomatoes

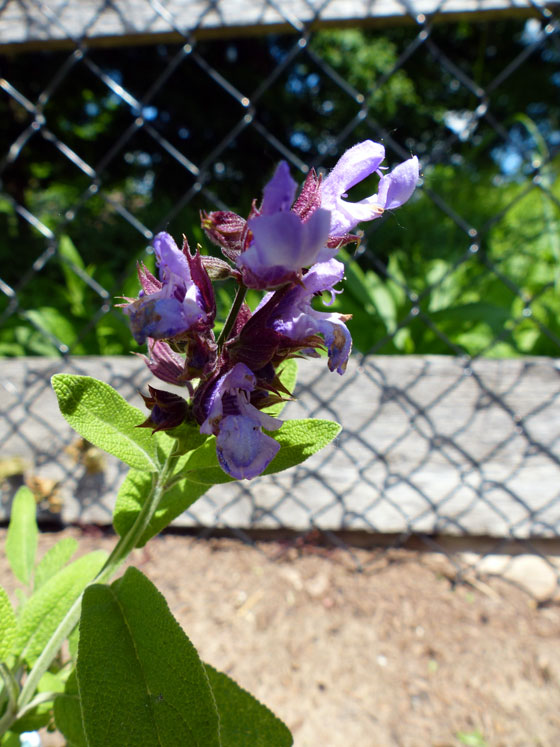
Sage blossom

There are even signs of fruit on the raspberries and grapes–although I’m working myself up to picking the grapes, as the vines are supposed to focus on growing, not fruiting yet.

Raspberries

Baby grapes on new vines

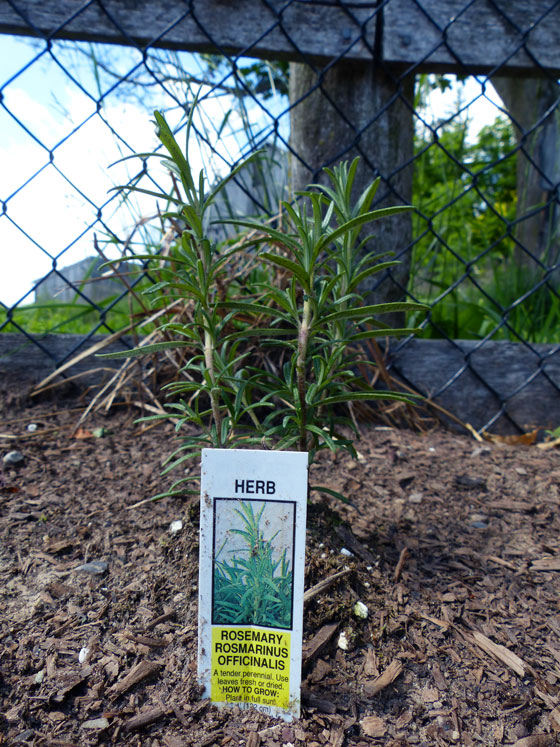
I’ve planted herbs all around the perimeter, lavender, thyme, sage, rosemary, basil.

Rosemary plant

The biggest progress since my final Dueling DIY update are the trellises for the squash, raspberries and tomatoes. I’ll go into more detail on each of these as we go through the season, but here are a few snapshots for now.

The tomatoes are planted under a simple 2×2 wood frame. I’ll add strings once the tomatoes grow a bit more.

Simple wood 2x2 tomato trellis

Matt hammered 12 steel T-posts around the 2 rows of raspberries. I still need to string wire between each post to hold the raspberries upright, but the hard work was definitely the posts. So much hammering.

Raspberries trellised with steel T posts

The biggest addition is our squash trellis. Fingers crossed this works to corral the squash. We have a big garden, but I learned last year that it was no match for squash.

A-frame squash trellis

We have a few more tasks to do before we can officially move into maintenance mode: hang the gate and spread the straw for our deep mulch experiment.

But for now, I’m enjoying my evening walks and seeing the growth so far.

What’s growing at your house?

Sweet times on the farm

I looooove maple syrup. Growing up, every spring my parents went to a Mennonite farm and bought gallons of pure maple syrup. Then they put it into containers and froze it, so we had it for the whole year. It was always a sad day late in the winter when we ran out of syrup.

Sorry, Aunt Jemima, you’re just not for me.

You can imagine how excited I am to be making our own maple syrup this year.

We jumped right in to tapping our trees with little thought to how we’d transform the sap into syrup. A lot of what I saw online talked about evaporators or cauldrons over fires. Pretty much everything said, “Do not boil sap indoors.”

We have neither an evaporator nor a cauldron, however. Nor did we have a ton of sap, so Matt and I threw caution to the wind and decided we were going to boil our sap inside on the stove. Daring, I know.

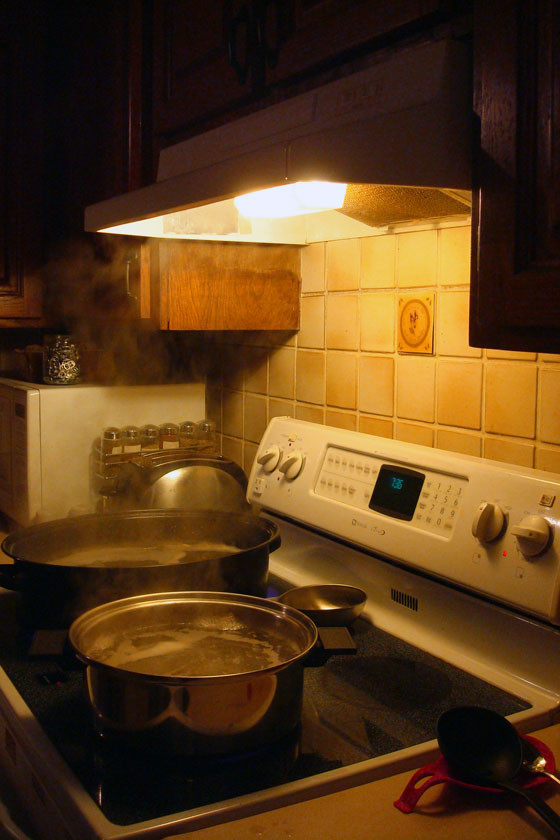
We selected some large pots–including our big roasting pan, dumped in the sap, set the burners to high and turned on the exhaust fan to suck out the steam. And you know what? It totally worked!

Boiling sap on the stove to make maple syrup

On an average evening, we found about 12 litres of sap was a good quantity. It fit in our pots easily and didn’t fill the house with too much steam. After boiling for about 3 and a half hours, the sap had transformed into syrup.

At first we just judged by colour and flavour, but Matt progressed to measuring the temperature. He found online that 218ºF (103ºC or so) was the magic number.

Tip to anyone who wants to try making syrup indoors, we used the soup pot as a finishing pot and transferred the sap from the roasting pan into the soup pot for the last half hour of boiling

Boiling sap on the stove to make maple syrup

The ratio for sap to syrup that we found online was 40:1, and that was our experience too. 12 litres (12,000mL) of sap made about 1 1/2 cups (375mL of syrup).

This picture shows another neat thing I’ve learned about syrup. I knew it came in different grades or colours, but I thought it was just the amount of boiling time that determined what grade your syrup was. It turns out it’s early versus late in the season. The jar on the left is from our second boil, and the one on the right is our fourth. See how the colour is subtly darker in the older syrup?

Homemade maple syrup

An aside about these old Crown canning jars. How perfect is the made in Canada label?

Homemade maple syrup in a Crown canning jar made in Canada

I’m loving having maple syrup again. It’s sweetened a lovely pumpkin soup, made a beautiful golden topping on vanilla ice cream (one of my favourite ways to eat it) and of course added just what was missing to my favourite meal of the day, breakfast.

Homemade maple syrup on French toast

I’m trying to be a bit frugal and not eat it all at once. We already have two full jars in the freezer, so I’m hoping to remember my childhood and make it stretch as long as I possibly can.

Are there any other maple syrup snobs out there? Have you ever made your own syrup? Any tips to share–whether for inside or outside boiling? Do you have a favourite maple syrup recipe?

Getting sappy

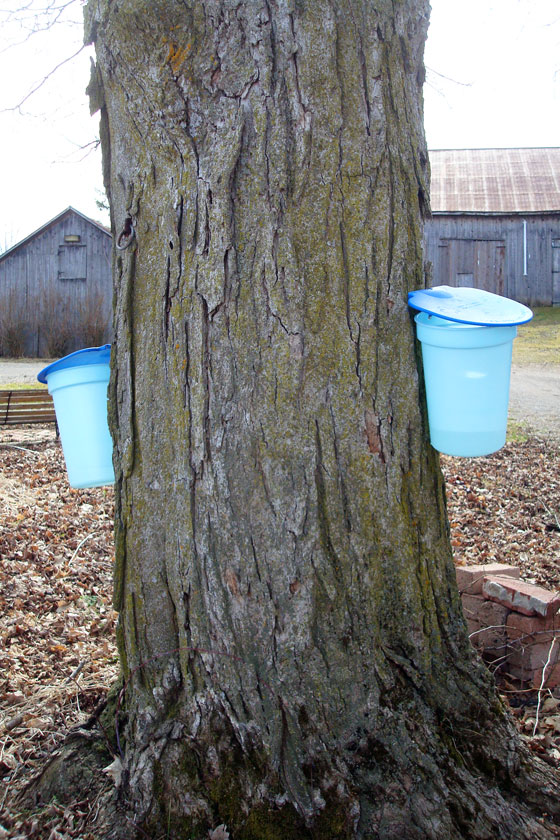
We have a new project for these last few days of winter. We’re tapping our maple trees!

Tapping maple trees

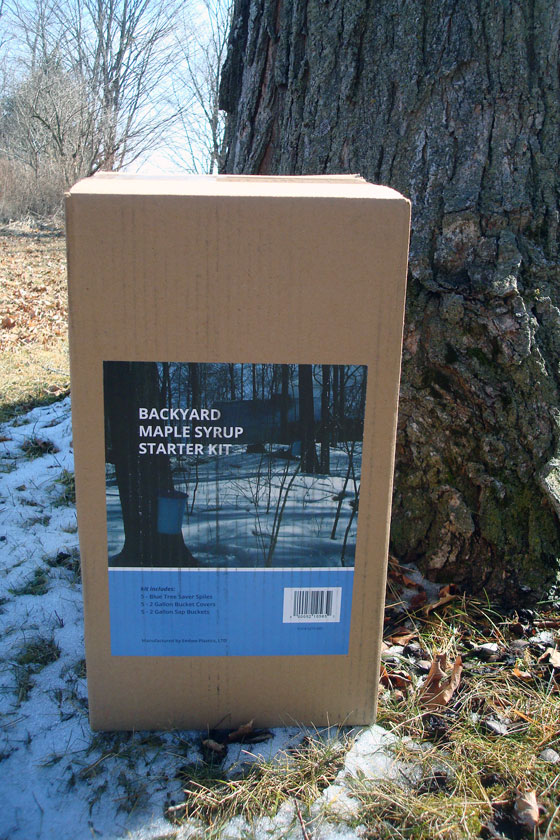
I picked up a basic starter kit at the hardware store. It came with five buckets, five lids and five spiles.

Backyard maple syrup kit

Thankfully the kit also came with instructions on how to get started. We selected trees that were the right size, drilled holes, stuck the spiles in, and watched the magic happen.

Tapping maple trees

The sap started flowing as soon as we drilled the holes. Matt was impatient saying, “Stop taking pictures! We’re wasting sap!” (Picture Kermit arm flailing). The maple syrup has totally turned into Matt’s thing.

Tapping maple trees

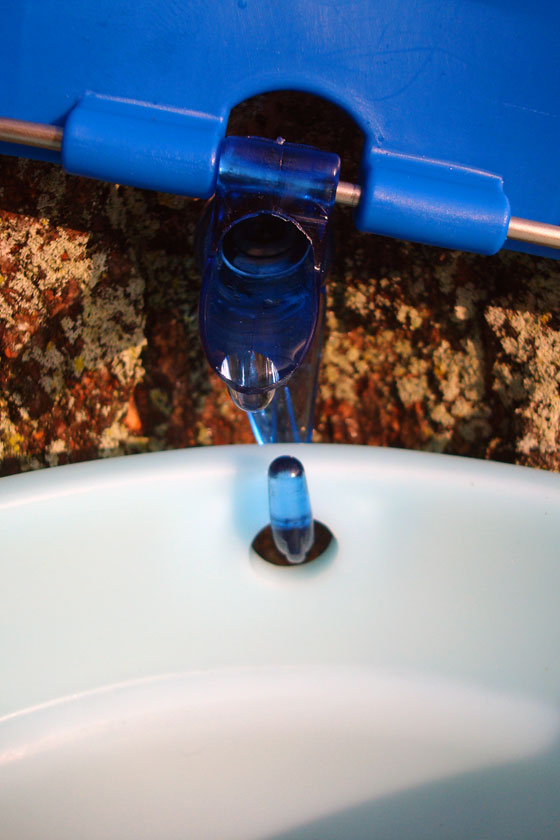
The spiles, buckets and lids all hook together in a pretty simple system. The sap travels up the tree, into the spile and then drips into the bucket.

Tapping maple trees

Tapping maple trees

Tapping maple trees animated gif

The sap run this year hasn’t been terrific. Last week temperatures shot up, and I had high hopes for a a lot of sap. However, the temperatures were so high that even night was above freezing. Apparently cold nights are critical for sap.

However, we have had a few good days where Matt had to empty the buckets several times.

Tapping maple trees

To collect the sap, Matt takes my biggest stock pot outside and empties the buckets into the pot. Then in the house we strain the sap to get out any dirt or bugs or twigs and put it in big containers in the fridge until we’re ready to move on to the syrup stage–which I’ll talk about in my next post.

Have you ever tapped trees? Are you trying anything new this time of year? What’s your big spring project?