Our new summer project

Last week I mentioned that we’ve added a new summer project to our to-do list. Unfortunately this project is driven by a problem. You got a bit of a glimpse of the problem in this photo that I shared on Friday.

What is this?

This is the drywall in the long room in the basement. And in case there’s any confusion, it’s not supposed to look like this.

We’ve had water issues off and on ever since we finished the basement. This spring was the worst.

In the unfinished space just beside the long room, this was the scene. Water seeping in at the joint where the foundation wall met the concrete slab.

Basement foundation leak

We surmise that this happened along the whole wall, including in the finished area. The baseboard swelled and stained. The carpet was damp. And behind the baseboard mold grew.

Water damaged baseboard

We had some water-proofing contractors come in a few weeks ago and give us quotes to fix the problem. Work starts today. So our formerly finished long room now looks like this. And it’s about to get worse.

Spray foam insulation

With the drywall removed the studs don’t look too bad. Yes there’s mold, but it doesn’t go too high on the wall, and the wood isn’t rotted at all. Even so, I’m not sure much of this will be salvaged, as our contractors are doing the waterproofing from the inside.
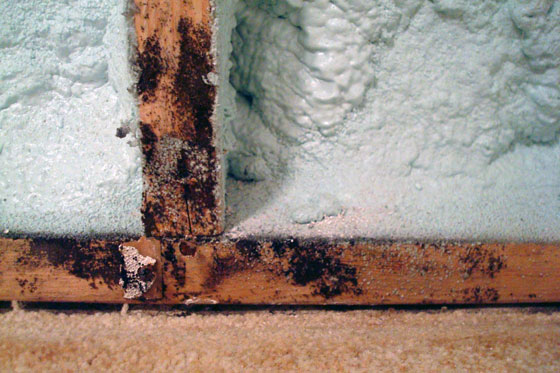
Water damage

The other area of focus outside of the long room is the cold cellar. The cold cellar is an addition, and when it was added, the concrete floor was poured just up to the old footings. In the spring or even on rainy days, the whole perimeter of the cold cellar leaks.

Water leaks around a basement footing

This area isn’t as worrisome, as it’s unfinished, but nonetheless we’d rather not have water in the house at all.

Our contractor is also going to redo our sump pump pit and put in a two new pumps–one on a battery back-up. During a power outage in one big storm this spring, Matt bailed the sump pit for four hours. We’d prefer not to repeat this situation… or worry about the power going out if we’re not home.

Waterproofing is one of those projects that I’m not super excited about. Cutting into our drywall was a bit heartbreaking after all of the work we put into finishing the basement in the first place. Plus it’s a lot of money just to get us back to where we were when we first finished the basement.

However, it’s a very important project. Knowing that this is our forever home, we want this problem solved.

Have you ever waterproofed your basement? Do you have any water leaks?
Save

Save

Save

Save

Home Goals 2016 mid-year report

Six months ago, I shared my Home Goals for 2016. We just crossed the halfway point of the year, so it’s time for my mid-term report.

Beyond sharing my Home Goals, I also started the year by sharing some of my ideas for the major renovation that we want to do… someday. And the first goal on the list was to get an idea of how much the reno is going to cost to help us figure out when that someday might be.

We consulted with a contractor, got some feedback on our plans and got some numbers. They’re big numbers… as in not any time soon numbers… but it was helpful to give us an idea of where we’re at.

In terms of specific projects, here are the rest of our goals.

Guest room

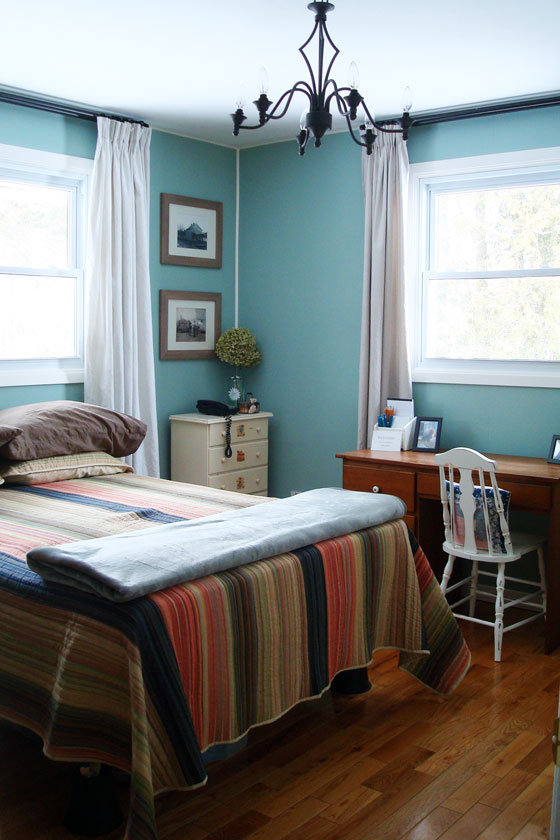
Robin's egg blue country guest room

The guest room was our first project of the year, and I’ve already done the official “reveal,” so I’m feeling pretty good about crossing this project off. However, there’s one task left on my original to-do list, which has also made it onto my summer to-do list.

  • Paint the walls and trim
  • Replace the light fixture
  • Make window treatments
  • Refinish the desk chair
  • Strip the paint off the metal bedframe (and maybe repaint)
  • Decorate and personalize

Finish the basement

Building shelves in the closet under the stairs

The basement was essentially finished a looong time ago. However, those niggly finishing details are still hanging around. Plus, we have two new summer projects, one that you know about and one that you don’t yet. (I’ll be talking more next week about things that are going to affect our basement progress).

  • Trim around the cold cellar doorway
  • Finish the built-in storage area in Matt’s bathroom
  • Make/buy art to finish off the space
  • Build shelving in the closet under the stairs
  • NEW Build a new closet in the basement
  • NEW Mystery project (more to come next week)

Furniture

Vintage china cabinet

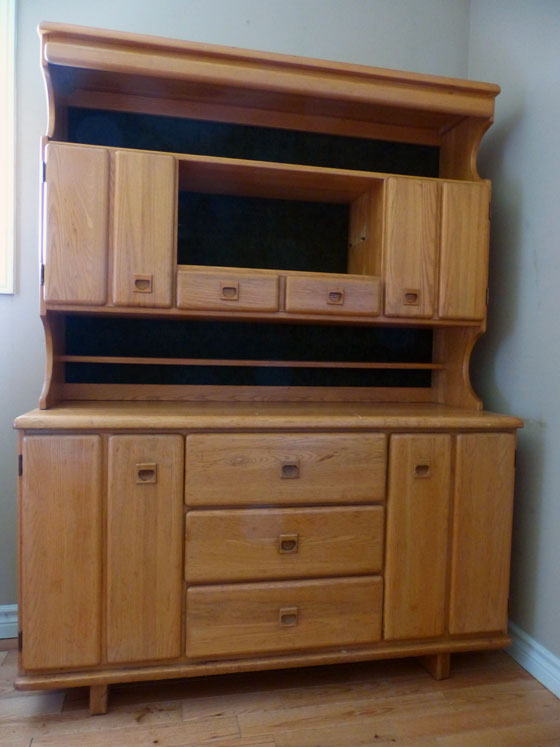
I’m always on the hunt for a few key pieces of furniture. So far this year, I’ve found one piece–the china cabinet for my office–but it’s still awaiting its makeover.

Vegetable garden

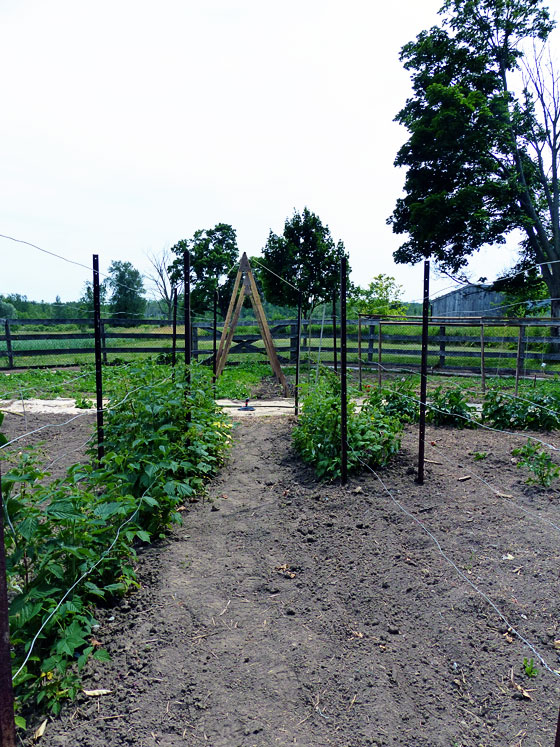
Centre axis of a round vegetable garden

My all-consuming summer project every year has become the vegetable garden. Thanks to Dueling DIY this spring, the garden is in really good shape.

  • Hang the gate
  • Edge the garden
  • Build raised beds around the perimeter
  • Build trellises for the raspberries, tomatoes and squashes
  • Plant perennials: grapes, asparagus, rhubarb, more raspberries
  • Run a waterline out to the garden
  • NEW Spread hay mulch over the garden

Outdoor clean-up

I ambitiously added another outdoor goal to the list, although I realized I’d have to pick my battles in terms of which area I chose to clean up.

Thanks to a bit of distraction at the start of the garden Dueling DIY, I’ve cleaned up the large lumber pile on the north side of the centre field and burned the long grass and weeds on the south side of the garden. Matt’s been mowing the burn, and it almost looks like a real lawn already.

Burned lawn

I’m feeling pretty good about what we’ve accomplished so far. Work on a farm never ends, but I love seeing the progress we’ve made.

How are things going at your house? Do you feel like you’re making progress on your goals?
Save

Save

Save

Summer to-do list

Summer officially arrives this evening. While I have grand plans of sunshine and hammocks and hikes and gardens and lots of time outdoors, I also have a handful of projects that I’ve been saving up for my favourite season.

Build a closet in the basement

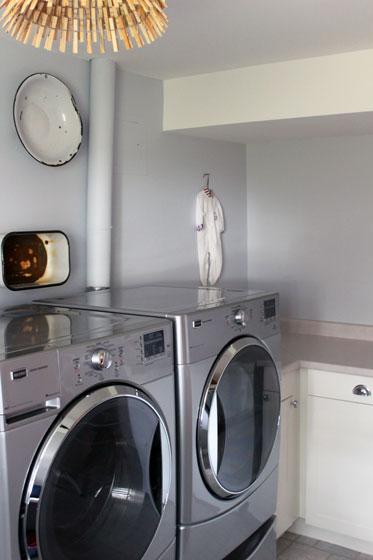
Enamel basins and infant sleepers hanging in the laundry room

Our house has fabulous storage. However, none of it is a match for my husband. I’m not sure Matt’s office ever successfully contained all of his stuff. Over the winter I had a brainwave. Remove some of the cabinets that are tucked between the dryer and the freezer in the laundry room (they’re already filled with his stuff anyway) and replace them with a full height closet. I think I can just about triple his storage space. And it should be a pretty simple build with some basic framing, drywall, bi-fold doors and shelves.

Sand scrabble tiles

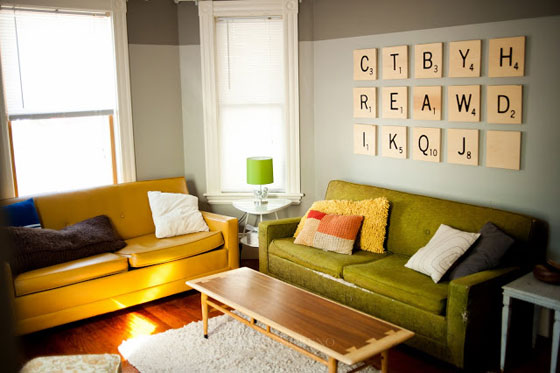
Scrabble art for the basement

Source: insideways

One of my Home Goals for 2016 is adding some art to the basement. Going with our fun and games theme, I want to DIY some Scrabble tiles. I’ve had the wood cut for months. Months, I tell you. I just need to sand them and then paint the letters. Sanding sounds like a good way to enjoy some time outside in the sunshine, doesn’t it?

Strip paint off the guest room bed

Robin's egg blue country guest room

The only thing missing from our beautiful guest room makeover is a proper bedframe. I have a great rustic metal frame in the barn, but the finish isn’t the greatest. I’m planning to strip it back to bare metal and see what it looks like. Paint stripping is an outdoor job IMO, so another good way to enjoy the outdoors.

Makeover office cabinet

Vintage china cabinet

Last week, you saw the china cabinet I’ve bought for my office and heard about my plans to rebuild the upper hutch. I’m so excited to have my office organized that I can’t wait to get started on this project. However, I have to put this lower down on the list, as other projects have been hanging around much longer. So this one’s a maybe summer project.

Puttering on some projects, keeping up with the gardens and relaxing on the farm. That’s my recipe for a good summer.

What’s your recipe? Do you have a summer to-do list? What are you looking forward to this season?

Hardboard and six favourite projects

There’s one material that I go to over and over for DIY projects: hardboard.

Hardboard

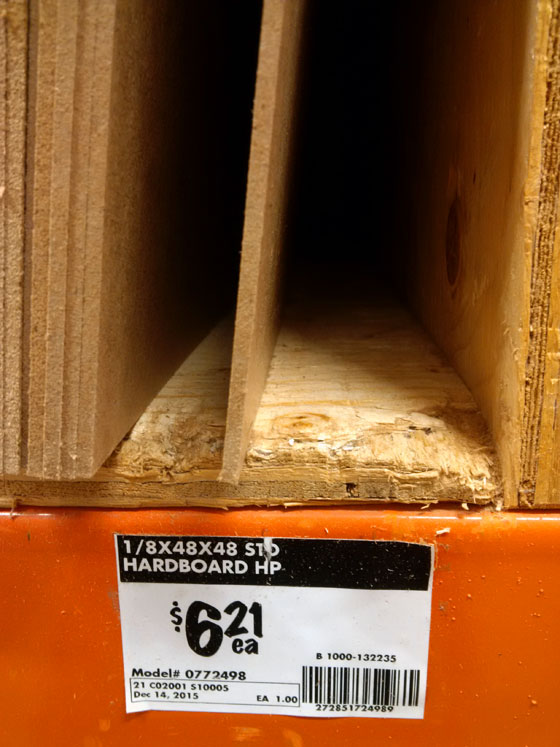
Hardboard is an engineered wood product also known as high-density fibreboard. Wikipedia says that it’s “made out of exploded wood fibers that have been highly compressed.” I’m not sure what exploded wood fibres are. By the time hardboard gets to the store, it has little resemblance to wood. It’s more like a super heavy-duty, super smooth cardboard. The main resemblance to typical construction materials is that hardboard comes in 4×8-foot sheets.

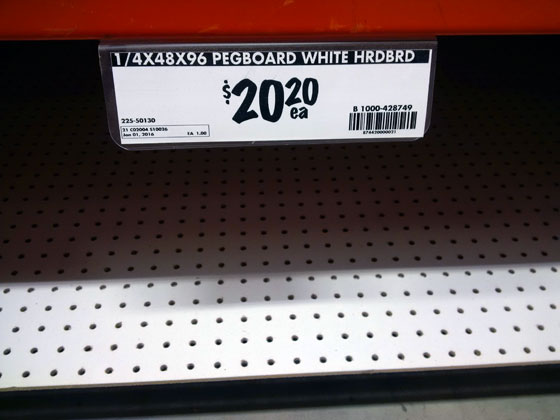
It’s less than a quarter inch thick, fairly light-weight, and cuts and bends easily. Sometimes it’s cut to other sizes than 4×8, finished with white on one side, or it’s also the material for pegboards.

Pegboard

Here are some of my favourite projects with hardboard:

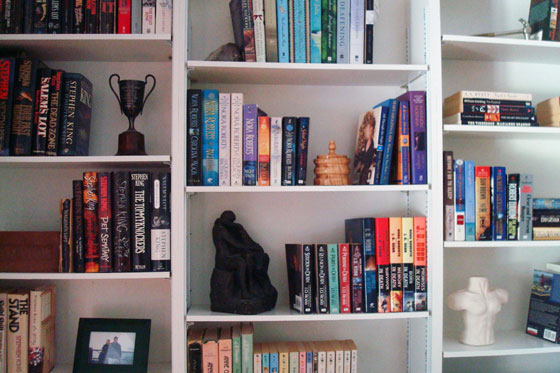
Living room bookshelves – Hardboard makes a very sturdy back for shelves and bookcases. But it’s thin and fairly lightweight, so it doesn’t add bulk to furniture.

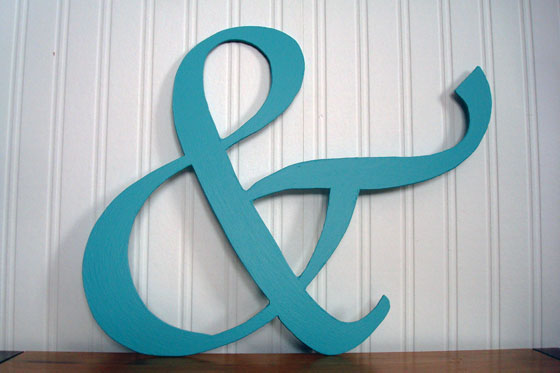
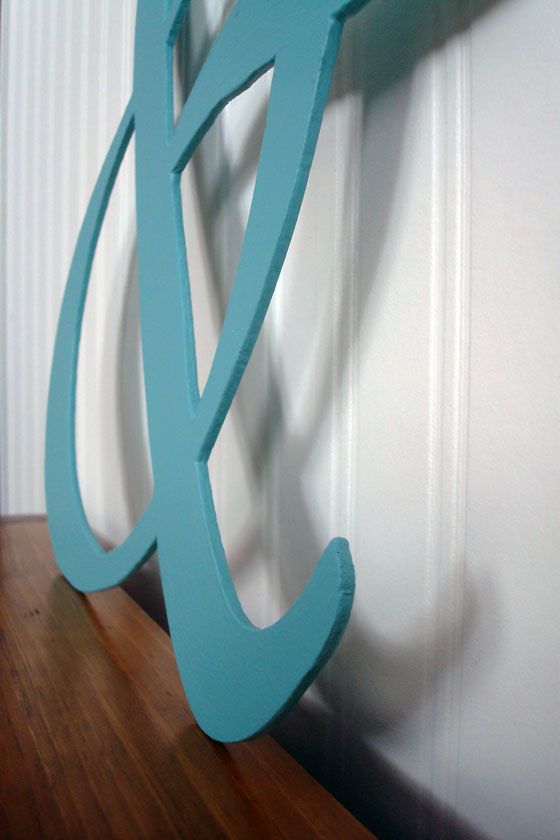
Monograms – Letters and words are popular decor trends. Hardboard is easy to cut with a jigsaw, won’t break or crack like solid wood, and is light enough to hang on a wall or sit on a shelf. I’ve found a quick pass of fine sandpaper can be helpful to smooth cut edges.

Ampersand monogram made out of hardboard

Ampersand monogram made out of hardboard

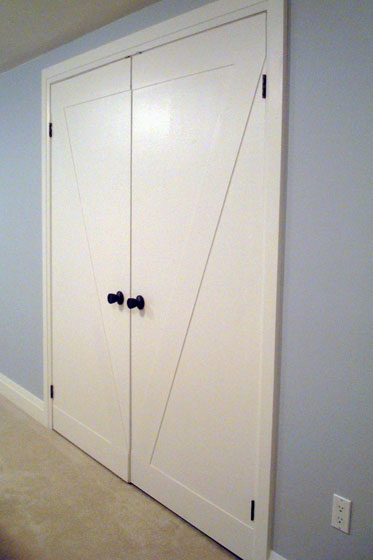
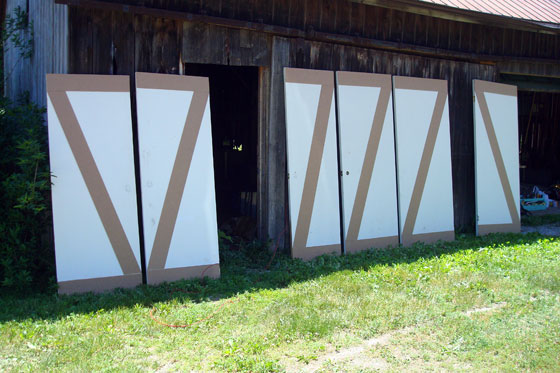
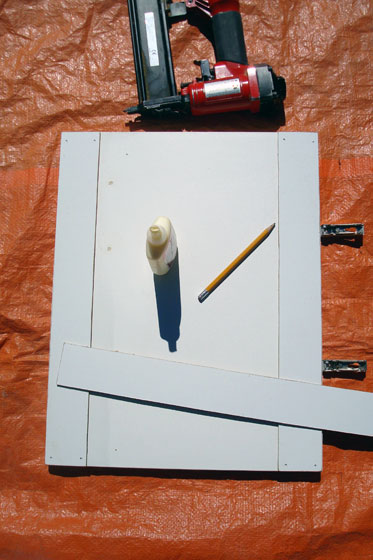
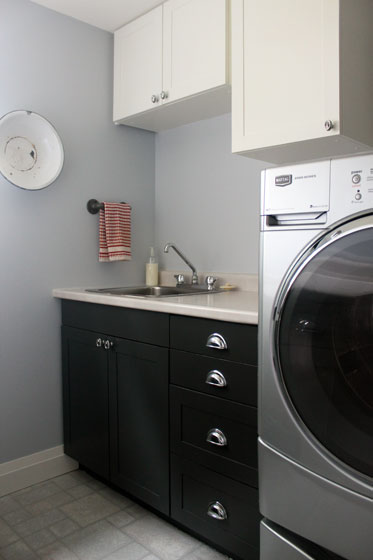
Doors and cabinet makeovers – Faced with boring slab doors in the basement and on the laundry room cabinets, I used strips of hardboard to transform them into barn doors and shaker-style cabinets. I was blown away by how successful the transformation was. I still love these doors. Plus the makeover saved us from spending money on new doors.

Making slab doors into barn doors

Score-keeping chalkboard – Hardboard is super smooth, and with a good primer and a foam roller, it takes paint very well. So I gave a sheet of hardboard a coat of chalkboard paint for a 6-foot tall, but very lightweight and easy to move chalkboard. Much lighter than actual chalkboard.

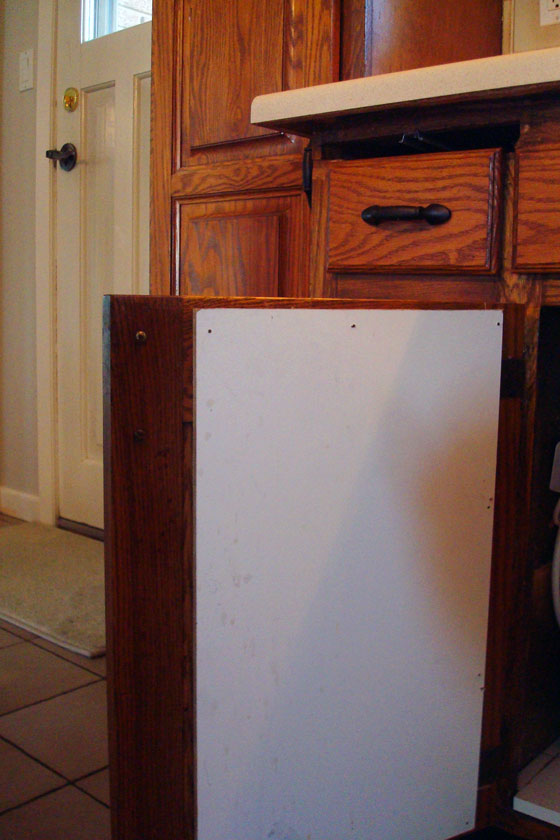
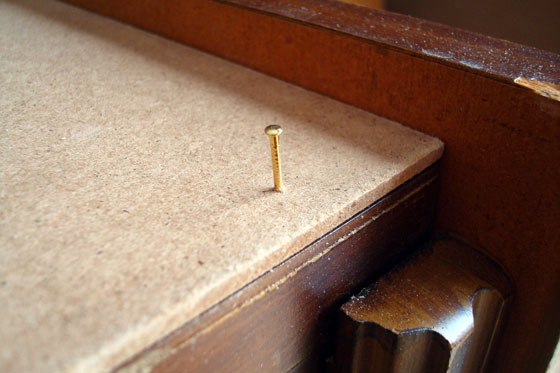
Cabinet door repair – Our kitchen needs a renovation, but until that day, we’re trying to hold things together however we can. Hardboard to the rescue once again. The cabinet door under the sink was separating from its frame. Backing it with hardboard has seen us through the last three years.

Holding a kitchen cabinet together with hardboard

Nightstand to dresser makeover – This dresser is one of my all-time favourite projects. Combining two nightstands into one dresser worked very well, but the join was very ugly. A panel of hardboard covered the seam and didn’t add much bulk to my narrow dresser.

I continue to find more uses for hardboard. And I’d love to hear if you’ve used it yourself. Any projects to share? What’s your go-to construction material?

Solar panels two years later

Two years ago we flipped the switch on our solar panels. It’s hard to believe we’ve had them that long. They’re still a bit of a novelty for us, and we check often to see how much power we’re generating.

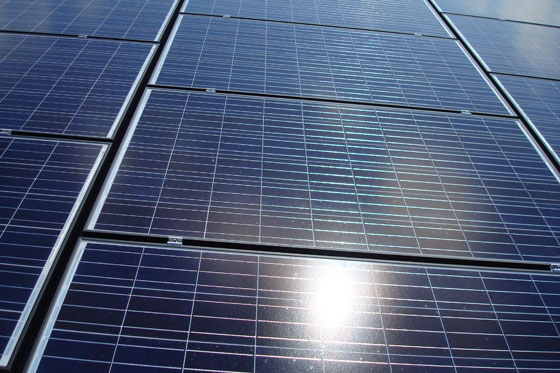
Solar panel array

Last year, I took a look back at our first year, remembering some of the highs and lows, and calculating how much we’d made and how long it would be until we’d made as much money as we invested in the panels.

I’ve been waiting to do the same thing again and see what progress we’ve made.

Last year, my calculations were only based on part of the year. While the panels were live as of the end of April, we didn’t receive our first cheque from the hydro company until July. This year is the first time we have a full 12 months of payments.

Just in case you’re new to our solar saga or don’t remember all the details, we’re part of Ontario’s microFIT program. Under this program, we install solar panels, and then the power that we generate goes back into the provincial grid. The province pays us $0.396/kWh. You can read about the whole saga of Going Solar here.

But now onto this year’s report.

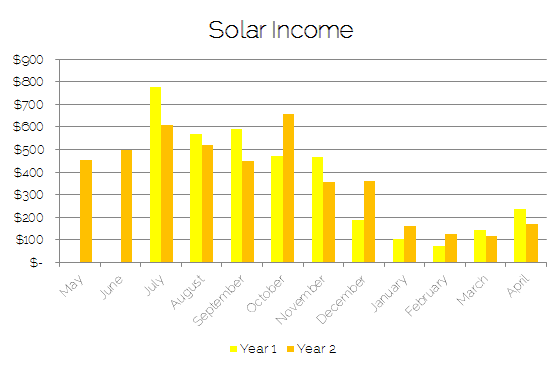
The grand total that we made on the solar panels last year was $4,473.91–up just a bit more than $850 over the year before.

So what does this look like? Something like this. The golden yellow is this year and bright yellow is last year.

Bar graph of income from solar panels

We had a better fall and winter this year compared to last year. Everybody knows it was a much milder winter, but it was also sunnier.

I was often amazed when Matt told me at the end of the day how much we’d made. When the sun’s in the southern hemisphere, it sometimes doesn’t matter how bright it gets during the day. The angle of the sun is just so bad that there’s no way our panels produce at their max. But even in the depths of winter we had days where we were making double digits, which was a huge win.

The other huge win this year was finally getting our HST refund. This is the 13% sales tax we pay in Ontario on pretty much everything–including the labour and materials to install our panels. Because we run the solar almost like our own small business, we’re able to claim a portion of the tax–in the amount of more than $4,000.

Our other big numbers were finally setting a new daily record when we finally broke the $28 mark and making $831 more than we spent on electricity for the whole year.

Because it was such a mild winter, we didn’t have any issues with snow on the panels like we did last year. Even the ice storm wasn’t a big deal.

In fact, now that we have them, we really don’t have to do anything–except count the deposits to our bank account.

Solar panels

Last year, I estimated that it would take about 9 years and 4 months before our income equaled the investment we made in the panels. When the panels were first installed, I thought 8 1/2 years was a realistic estimate. Using this year’s numbers, the payback period would be just over 9 years.

This is definitely a long term investment, but the money is only part of the equation for me. I really feel alternative energies like solar are something we need more in the world. And I feel like I have a personal responsibility to support these alternatives as I can.

At the farm, we rely on our own well for water and our septic for sewage, we have geothermal for heat and air conditioning, and we generate power for the grid through these solar panels. Plus we’re preserving 129 acres, doing our best to be responsible stewards of our own little chunk of the earth.

Looking for sawzall suggestions

One of the major perks of being a daughter of a contractor is the tools. Not only do I have access to all of my Dad’s tools, he also gives me tools when he upgrades.

That is the case with my hand-me-down vintage Sawzall.

Vintage Milwaukee Sawzall

Now I appreciate this saw. It’s come in very handy. But I think it’s time that I upgraded for myself.

My biggest complaint with this saw is the cord.

Cord and plug

I would love to have a cordless sawzall. But I have no experience with cordless sawzalls. Even the one that my Dad uses currently has a cord. So I’m looking for advice. Any suggestions of what to look for when I go shopping? What do you think is the best brand? Is a battery powered sawzall actually powerful enough to saw all?

Spring cleaning

Sarah in Illinois is here to start off the week. Sarah’s looking ahead to spring–and beyond–and has a great tool to share with us.

I am the type of person that likes to be organized, have a plan, make lists, etc. It makes me feel more focused on the job at hand, and I am more comfortable when I feel I have direction. One thing I did to feel more organized this year was to sign up for a daily email from Spring Cleaning 365. Each day I get an email with one small job to focus on for the day.

Obviously I don’t need anyone to tell me that I need to clean my toilet, or put a load of laundry in, but these emails remind me of some tasks that get overlooked.

When was the last time you took out the bottom drawers of your refrigerator and cleaned underneath? Or the last time you disinfected your TV remote? If you’re anything like me, it has probably been a while!

So I like the emails because they remind me of the areas that I usually overlook. The goal from the website is to do one small task a day and then you won’t spend much time on it, but I find it is usually works out that I do one or two a week and use the weekends to catch up.

Tupperware

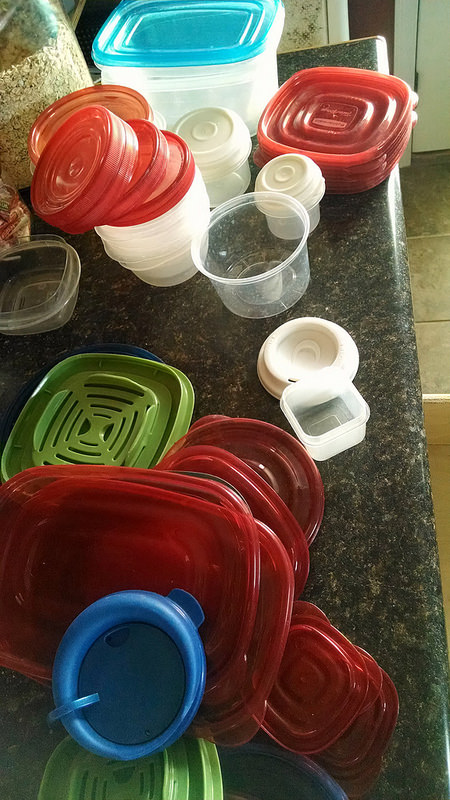
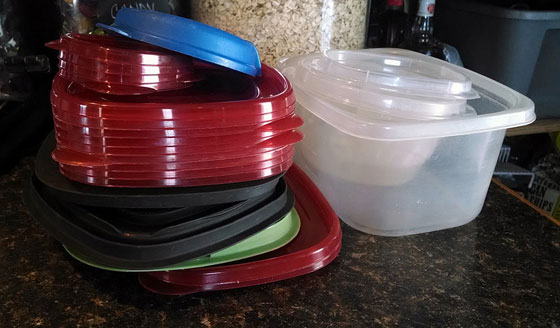
This weekend one of the projects I tackled was to sort my plastic storage containers. Between using them for leftovers and taking my lunch to work every day, we have a lot of containers. But over time many have lost their mates. So I took all pieces out of my cabinets and drawers and made matches.

Tupperware

Why did we have so many lids and so few bottoms!?

I couldn’t believe how many tops and bottoms had lost their mates. We had all of these extras left over. I am going to take the extras to my mom to see if she can make any matches with hers and then all the rest are going to be recycled. And now my cabinets and drawers close much easier.

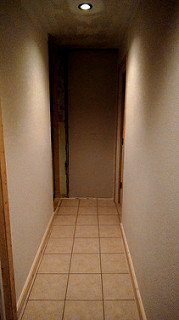
I did do a little work on our home improvement projects this week. Steve installed baseboard and door trim in our hallway last week and I finally took an evening and primed them. Next, I need to prime and paint the walls and put a coat of paint on the trim.

Hallway before

Before

Hallway after

After

The hallway will lead to the addition on the house. So the drywall you see at the end of the hall is where we will extend the hallway to two new bedrooms.

I have drawn out the floorplan and started my list of materials, so I can prepare an estimate for us and for the bank. As I think I have mentioned before, we are doing all of the work ourselves, so we will be our own estimators, designers, builders and coordinators. I am nervous and excited all at once.

What have you been working on in your home? Have you started any spring cleaning? Have you ever tackled a large home improvement project on your own? Does anyone have any advice for us on being our own project manager?

Spring Cleaning 365 sounds really neat, Sarah. Thanks for sharing it. Funnily enough, Matt and I did a tupperware cleanout ourselves last weekend. Although I cannot remember when I last cleaned under the fridge drawers, and I don’t think I’ve ever disinfected the remote.

Lunch with a side of architectural salvage

We had a couple of birthdays on my staff at the start of the year, so one of my team booked a lunch to celebrate. My staff always pick the restaurant, and this time they let me know I was in for something special.

They were right.

The thing was–and this is what my team knew–it wasn’t actually the restaurant that I liked best (although the food was very, very good). It was what it was attached to–a giant salvage yard.

Salvage yard

The yard was full of beams and bricks and who knows what else. We didn’t explore outside and instead prowled through one of the barns.

It was four floors, but we only took time for two (it was a work day after all).

There was a floor full of doors. All kinds. All sizes.

Salvage doors

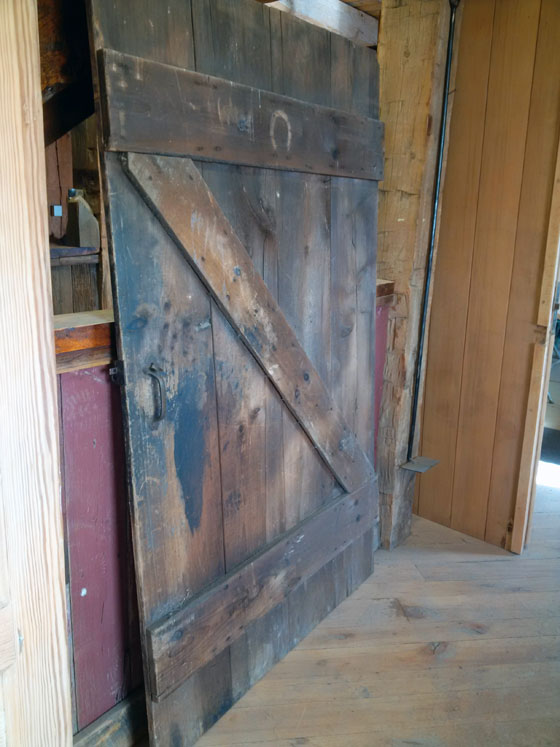
There were barn doors too, and I was sure to snap pictures for Matt.

Salvaged barn door

Although I more wanted him to see the price tags as opposed to the doors themselves. We have an assortment of barn doors at the farm, and I think this is a reason to take care of them.

Barndoor price tag

I loved seeing all of the options for reclaimed flooring. Lots and lots of really cool floors. This is just a small sample of the selection.

Reclaimed flooring

This one was particularly cool. Flooring from the floor of an old gym–complete with the original paint lines. Aren’t the colours neat?

Reclaimed wood floor from an old gymnasium

Beyond the wood, there were tubs, sinks, hardware and all kinds of other things I barely had time to glance at.

Architectural salvage

My team knows me well. I could have spent a whole day there, and I’m excited to go back to really explore.

If you ever find yourself in Waterloo, Ontario, make sure to check out Timeless Material Co. (and be sure to visit the cafe too).

Do you have a salvage yard near you? Have you ever bought architectural salvage? Would you use gym flooring in your house?

If you can’t stand the heat

Normally, the second half of that phrase above goes: “get out of the kitchen.” However, in this case, it’s “call a plumber.”

I mentioned awhile ago that we were having some issues with the cold water tap in my bathroom. As in it didn’t like to turn. As in hope you like scalding showers.

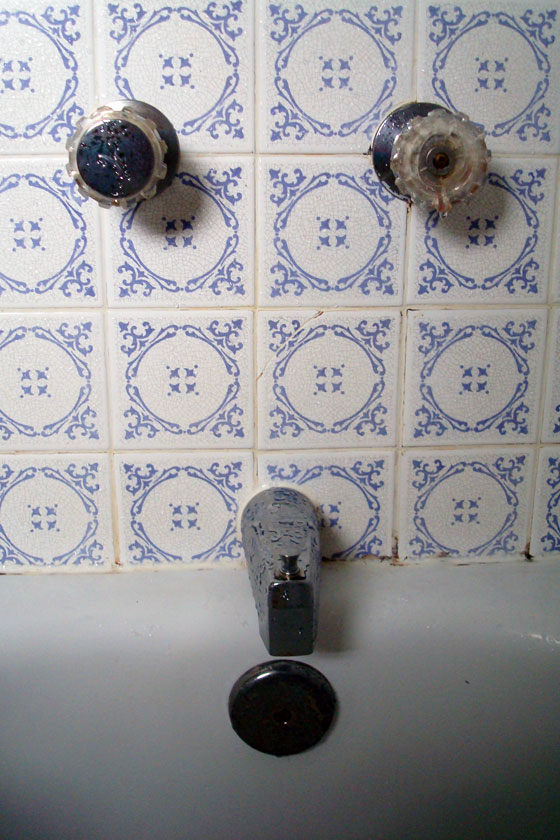
Old taps in the tub

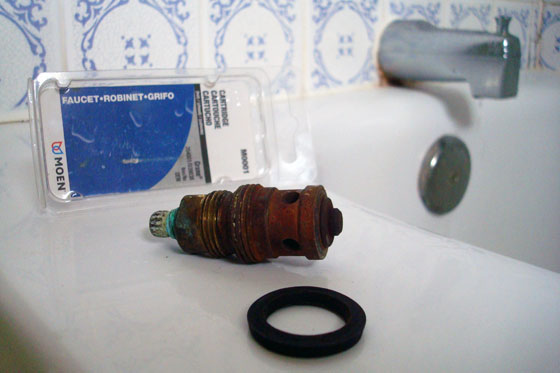
A consult in the Home Depot plumbing aisle suggested that the cartridge on the tap might be worn. We needed to figure out the brand of tap so that we could buy the right replacement cartridge. As there was no logo or maker’s mark anywhere on our taps, we turned off the water (to the whole house), took the tap apart, removed the cartridge and went back to HD to find a new cartridge that matched the old.

We found what we thought was the right one, but upon our return home, Matt and I could not get the cartridge properly installed. We screwed it in–repeatedly, cautiously turned on the water, and then quickly shut off the water as it sprayed and dribbled from all of the wrong places.

Eventually, we gave up and reinstalled the old cartridge.

Old tap cartridge

Over time, the tap got stiffer and stiffer. Turning it hurt my hand. I resorted to covering the tap with facecloths and towels to cushion my grip. I started to worry that one day I wouldn’t be able to turn the water off.

Plus the tap would only turn so far, and showers were approaching boiled alive territory. I like a hot shower, but there’s a fine line between hot and cooked.

We called the plumber.

In less than a half an hour, he installed the new cartridge–the very one that we had bought–with absolutely no problem.

Old tap cartridge

My next shower was like something out of the 20th century. Warm water at the turn of a knob. Temperature adjustments as needed. Wondrous.

Except it’s getting a little hot again. Turn the knob. Oh isn’t that wonderful how easily it turns.

Splish-splash.

Okay that’s still a little hot. Adjust again.

Rub-a-dub-dub.

Getting hot again. What’s going on?

About every 30 seconds, I had to adjust the temperature. Thanks to our new cartridge, I could adjust the temperature fairly easily, but constantly playing with the faucet wasn’t what I had in mind.

I tried turning on just the cold water. It ran for a little while, but gradually the flow decreased to a trickle. Turn it on a little bit more, and the same thing happened.

Old taps in the tub

We called the plumber again, and he thought that the cartridge might be a bit too lubricated and might be slipping. So before we were too tight and now we’re too loose. It’s like the Goldilocks of bathroom faucets.

We’re leaving it alone and the faucet does seem to be tightening up on its own. However, this bathroom reno can’t come soon enough–in case you can’t tell from the cracked mildewy tile you’ve seen all through this post.

Have you ever replaced a tap cartridge? Any tips in case we ever have to do this again? Why do you think the cold tap is turning itself off? What’s the worst idiosyncrasy in your bathroom?