Garden Olympics in Illinois

Today’s post from Sarah in Illinois further solidified my belief that we’re completely kindred spirits. Obviously, Sarah and I both love our gardens. I realized today that we also both love the Olympics. Sarah has come up with a really clever, Olympic-esque way of summarizing her garden’s performance this year. Let the medal ceremonies begin.

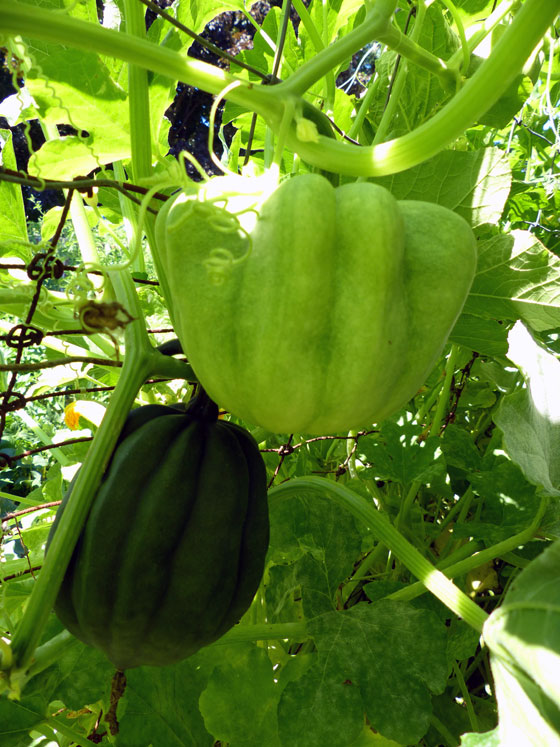
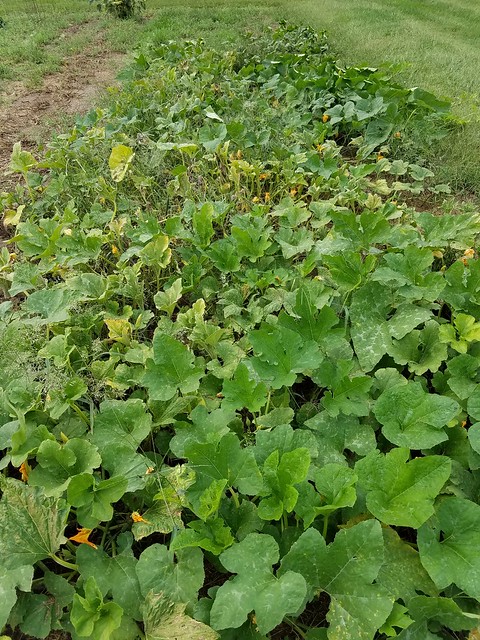
Our garden is just about done for the year. We currently only have two things still growing: peppers and pumpkins. In a future post I will go over some of the ways that I am preparing for next year, but for now I will review this year.

I started out with such high aspirations for our garden. And it’s a good idea to set your goals high, but when I look back over the year I need to be realistic with my results. I need to focus on what went well and not what didn’t. So I am going to go over the results in the spirit of the Olympics and start with my gold medal winners.

Gold medals

Sugar Snap Peas – With a mild spring and plenty of rain, I had a much bigger harvest than normal and I even still have some in my freezer.

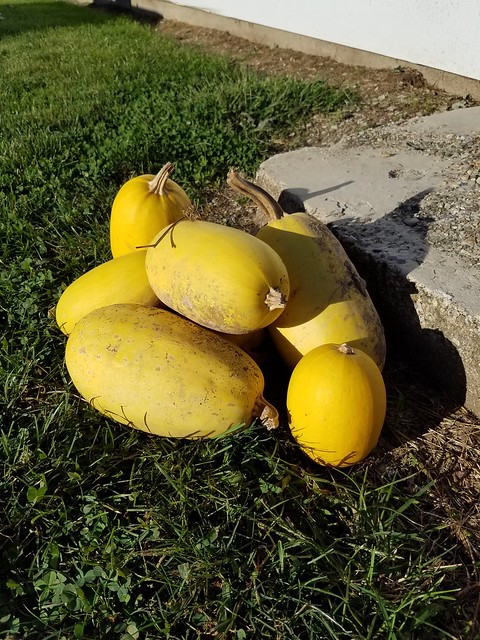
Spaghetti Squash – I gave away several, I baked a few, froze some and I still have more to use up.

Kale – I couldn’t keep up with my Kale this year. I didn’t know what to expect when starting it from seed indoors and transplanting it, but it could not have done better.

Green Beans – We had an excellent first harvest and even got a few meals from a second harvest.

Potatoes – The potatoes did very well and we still have a meal or two to dig up before we close down the garden.

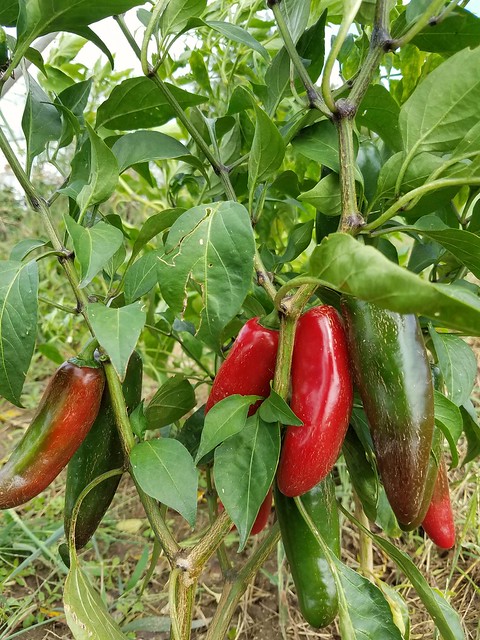
Peppers – Both our green peppers and our hot peppers really did well this year.

Silver medals

Radishes – The plants themselves did well. I just did a poor job of planning and planted too much at one time. So a lot was wasted.

Cauliflower – This was my first year for growing cauliflower. Again, the plant grew well, and I pinned the leaves closed like I was supposed to. Then I waited, and waited, and waited, and waited. Steve finally mentioned that he thought they should have been ready to pick by now. However, I had waited too long and they were all bitter. If I had been more vigilant they would have gotten a gold medal.

Tomatoes – The plants grew large and produced a lot of fruit. We made one harvest and took them to Steve’s mom to can. She made a few quarts of tomato juice from them. We had planned another harvest and then rain hit. In one weekend we got over 4 inches of rain and the garden was too soft for me to walk in. By the time the ground dried up a little and I remembered that we needed to pick tomatoes, most of them were rotten.

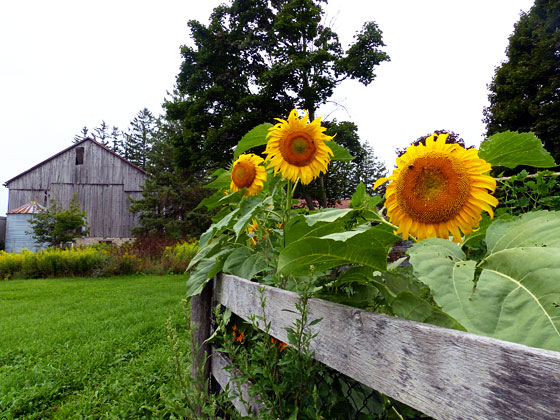
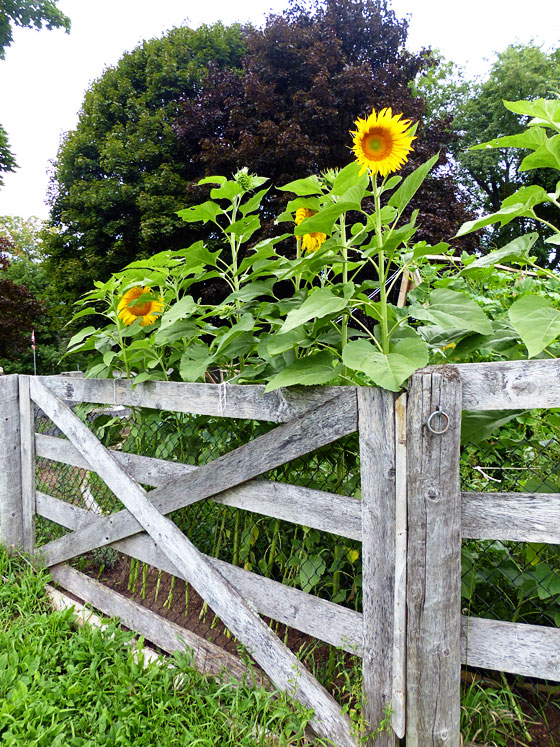
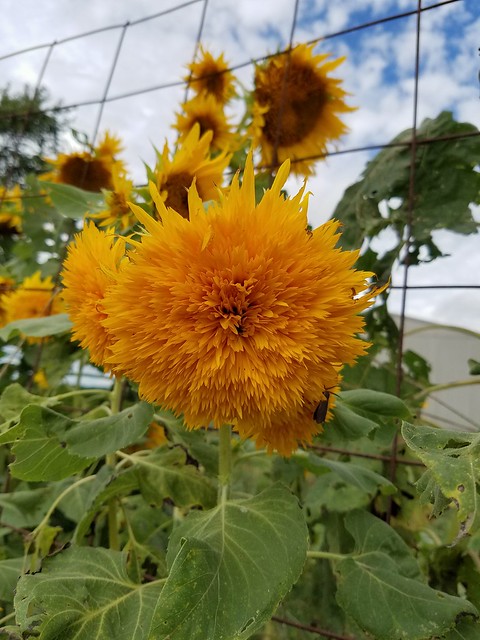
Sunflowers – The flowers are beautiful, but I did not pay attention to the amount I planted of each variety. I got several plants that are really pretty but only two are the type that you can harvest the seed from and the kids are disappointed that we will not have sunflower seeds to eat.

Bronze medals

Red Cabbage – I had planted 4 plants and they looked healthy, but I only was able to harvest one head.

Carrots – We planted the carrots too close together. The few that we harvested were good, but they did not have much room to grow very large.

Cabbage – I am thinking maybe cabbage moths or some type of pest took over the plants. All of the leaves were full of holes and we did not harvest any cabbage.

Asparagus – I didn’t know what to expect for my first year of asparagus. And I would normally think that maybe mine looked okay. Until I went to my brother’s and saw his first year of asparagus. His plants look so full and healthy and mine look so thin and spindly. I will have to add some new crowns next year.

There were a few vegetables that did not even show up to my “garden olympics” and so they did not get awarded anything:

Cucumbers – my plants this year were pitiful. Just pitiful. There is no other way to describe them. I think out of about 15 plants I harvested 2 cucumbers. TWO.

Brussels Sprouts – This was my first year of growing them and I knew that they didn’t seem to be doing anything. My thoughts were confirmed when I went out to the garden and saw Steve mowing the plants down. Apparently he had given up on them before I did.

Overall, I should be happy. We produced our own food. We grew food that was healthy and fueled our bodies with the best quality nutrients. There really is nothing I should be upset about. I should just look to improve next year.

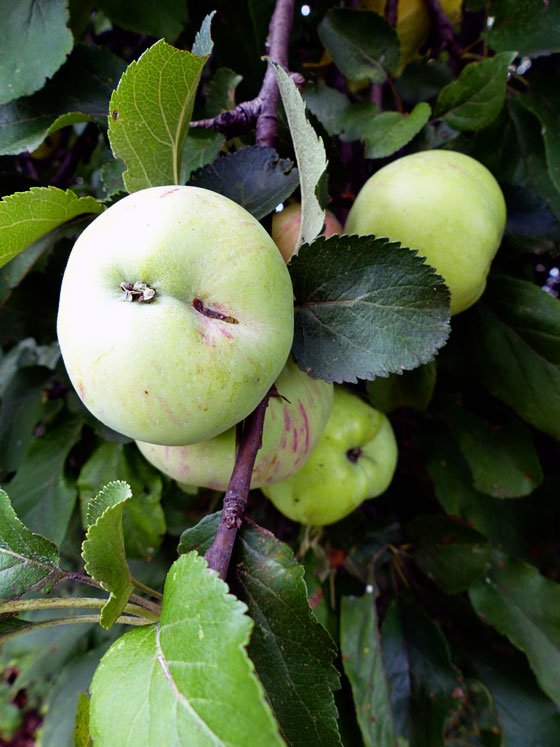
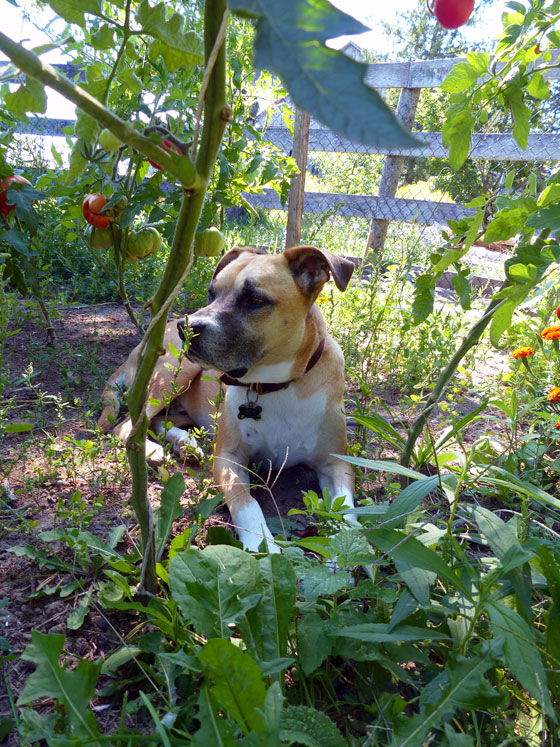
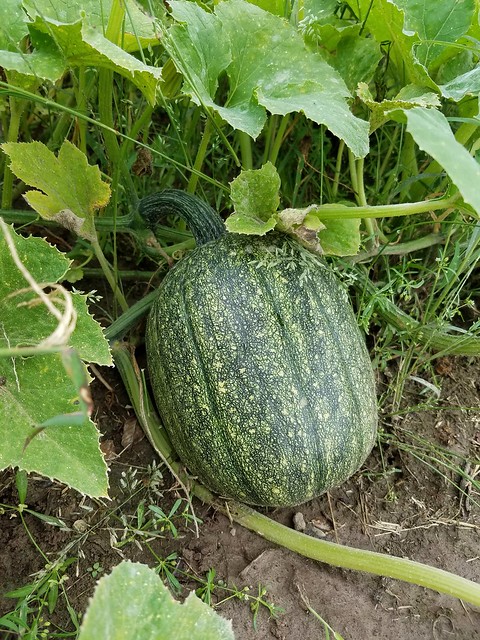
In the meantime, I will keep checking on these vines and hope that we have some pumpkins to carve this year!

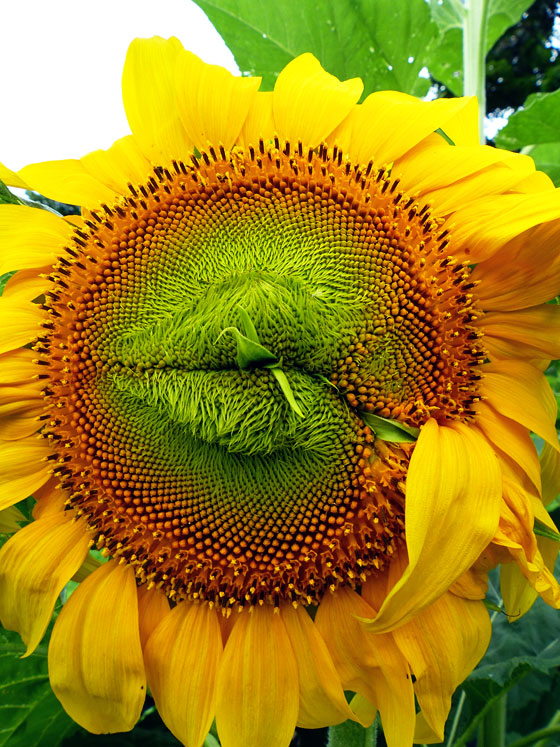
Great summary, Sarah. I think as gardeners we learn very quickly that we can’t expect everything to be a success. It even varies year to year. It’s really good to keep a record like this of what worked and didn’t, and use that to set goals and plan for next year. (BTW, I love the fuzzy fluffy sunflowers! I’m adding those to my garden plan for next year.)

Save

Making Monarchs and memories

Our days here at the farm start early. In the darkness on Wednesday morning, Matt noticed that the chrysalis for both of our Monarch caterpillars had turned black. In actual fact, they had turned clear. However, they look black because the black wings of the butterfly inside are showing through.

Monarch chrysalis about to hatch

We figured that later that day, we’d be proud parents.

I took Baxter for our morning walk and Matt left for work.

About 45 minutes later I was back in the kitchen making my breakfast. I turned around, and there was a butterfly in the bowl on the island.

Holy moly, EdWING actually had wings!

Newly hatched Monarch butterfly

I went a little bananas. I took lots of birth photos. I messaged Matt. I tweeted and instagrammed the official birth announcement.

I was officially late for work.

Eventually though, I had to leave. That mean EdWING had to go outside.  I’ve been referencing Karen’s “how to raise a Monarch butterfly” series a lot as we progressed with our caterpillars. A quick check of her site said that Ed would hang around and rest for about 2-3 hours and then he’d be ready to fly. Well, that would be when Matt and I were very much still at work. I couldn’t rely on Baxter to send his new brother out into the world, so Ed had to finish his resting outside on his own.

I found the most sheltered area I could and hid Ed under some leaves so that he hopefully didn’t turn into breakfast for a hungry bird.

Monarch butterfly

Last I saw of him he was gently opening and closing his wings. So, so beautiful.

Monarch butterfly

Kevin no-longer-a-CATERPillar hatched a little while later. Matt came home to a restless butterfly in a bowl.

Monarch butterfly in a glass bowl

He took him outside, and Kevin flew away.

Two Monarch butterflies. Out into the world. So, so amazing. We’ve made lots of memories since moving to the farm, and this is definitely another special one.

Save

Save

September garden update

Look! We grew a puppy again!

Baxter in the garden

We grew a lot of other things too. Yet again, this garden is crazy productive.

Sicilian Saucer tomatoes

Purple peppers

Butternut squash

First year grape vines

Watermelon

Watermelon

Asparagus

Acorn squash

Red potatoes

The puppy didn’t fit in the basket.

Not pictured are the zucchinis that just won’t stop and hundreds of cherry tomatoes (I roasted a bunch last night for all kinds of goodness).

What’s growing in your garden?

Save

Save

Save

The results of our basement waterproofing

Today is supposed to be the last post about our big summer project: waterproofing our basement.

Here are the previous posts if you need to get caught up:

However, I can’t wrap up this project because a week ago we had a torrential downpour and we had puddles in the basement. Wah-wah.

The first leak was in the laundry room and the second in the cold cellar–two places we’d waterproofed.

In the cold cellar, it appears to have come up through the shiny new floordrain.

Basement floor drain

In the laundry room, it somehow somewhere came through the wall. The rain was an extraordinary downpour, but nonetheless, my expectation from our waterproofing is that we would be waterproof.

The big selling point of working with our waterproofing company is that the work came with a lifetime guarantee, so we’re working with them now to make sure our leaks are truly fixed.

In the meantime, I can share some of our progress. Here’s the biggest illustration–and one area that doesn’t leak anymore:

Before (ish)

Spray foam insulation

After with framing, insulation, drywall, paint, carpet and baseboard all redone.

Wall repaired after waterproofing

I think the thing that frustrated me the most with this project–aside from the fact that the leaks are not actually fixed–is that we ended up basically back where we started. We shelled out a bunch of money, put in a bunch of work and it all looks the same.

But looks aren’t everything.

With home ownership, what’s behind the walls matters a lot. So that’s why it’s so important to us to fix our leaks, not just cover them up or ignore them.

Last week’s rain was a bit extreme. Up to then, we had a few other rainfalls without issue. In fact the night the crew left, we had our first big rainstorm of the summer. Matt and I were sitting in the living room, and I said, “I think I hear the sump pump.” Sure enough, rain was falling hard enough that the water was flowing through the weeping tile around the foundation and filling the sump pit. Talk about timing.

We love the assurance of our new sump pit and pumps. There are two pumps in our pit. One is a regular pump that is plugged into a regular electrical socket. The second is a back-up pump and it is plugged into a giant marine battery.

Back up sump pump powered by a marine battery

If for any reason the first pump gets overwhelmed or stop working (like the power goes out), the second one will kick in automatically. Considering that power outages are a real possibility during rainstorms, we feel very good about our back-up system.

The pumps have two alarms. The first will sound if the back-up pump comes on and second very, very loud alarm will go off if both pumps for some reason fail.

Sump pump alarm

I also appreciate the finish both inside and out. In the cold cellar, the dirt and footings around the perimeter are gone in favour of clean smooth concrete. And the crew did a great job of making the new concrete nice and even with the existing floor. Where the exterior waterproofing happened outside the laundry room, again the wall looks super clean, even though we appear to still have some problems here.

At the doorway to the cold cellar, where I always did a little hop across the dirt at the threshold, the floor drain is a nice addition. The floor drain ties into the weeping tile which in turn ties into the sump pit. Given the water we found in the cold cellar, I surmise that there was so much rain that it overwhelmed the weeping tile and spewed out of the drain.

So unfortunately, I can’t say we’re all done. We’re hoping we get there soon, and I’ll be sure to share when we do.Save

Save

Save

Freshening up an organizer

Sarah in Illinois joins us today with a great makeover that adds a bit of style to an area that sometimes doesn’t see a lot of decor–her garage. This is a lesson in the power of paint. Plus the power of soap and water!

It seems like all of my small projects get set aside during the summer months. We spend all of our time outside and don’t want to be cooped up in the woodshop/workshop.

I have a pile of projects out there waiting for the cooler months, but I did get one thing finished.

I found this old metal organizer that has been hanging in our garage for who knows how long.

I thought it looked handy, plus it looked like something that could be fixed up with a can of spray paint.

I took it off the wall and took the little jars off. They easily cleaned up in a sink of soapy water. I took off the bracket that attaches it to the wall. I thought that I could just run a little sandpaper over it and start painting. But the red paint that I chose didn’t show up well, it just looked like a rusty red color.

See how the red looks flat?

I decided that I should probably have done it the right way from the start. So I started over. I ran the sandpaper over it again and coated it with a light color primer. This helped the red really stand out when I painted it and that was the look I was going for.

I put several coats of paint on it trying to avoid getting much paint on the inside of the caps on the threads where the jars screw on. Too much paint built up would have made the jars hard to screw on.

Unfortunately, after all of the years hanging on the wall, there is a little jar missing. I am hoping I find it stashed somewhere in the garage, but I am guessing it may have fallen on concrete at some point and is long gone. So I will keep my eyes open for a replacement.

My mom and my brother’s girlfriend are yard sale pros so I am going to put them on the case. In the meantime, I am happy that I made an improvement that cost very little and is much more pleasing to look at.

Do you use spray paint very often on your projects? Do you ever try to take shortcuts then have to start over? What color would you have chosen to paint this organizer?

The red brings a great pop to the garage, Sarah. I think I probably would have kept the rust(ic) look just because I can’t be bothered painting it or decorating my garage (if I’m being honest), but it looks so good. Such a cheerful addition. I love the concept of this organizer. Do you think you could DIY something like this? Perhaps with some very strong glue for the jar lids?

Monarch caterpillar update

Monarch butterfly chrysalis

Our Monarch caterpillars are no more.

But do not despair.

Because we are a big step closer to having Monarch butterflies.

We have two chrysalis.

Monarch butterfly chrysalis

Over the past week, EdWING Encarnacion and Kevin CATERPillar grew a lot. They decimated their daily milkweed rations.

Monarch butterfly caterpillars

Towards the end of the week they started to wander, looking for a spot to hang their chrysalis.

Monarch butterfly caterpillar

Eventually, Ed settled in. But something went wrong. He fell off the screen that covered the bowl. We found him curled in his J lying on a leaf.

We could see the webbing that he’d used to anchor himself to the screen hanging off his tail end, so we wrapped that over a stick and taped it in place careful not to touch him with the tape. It seemed to work, because a few hours later he had transformed into a chrysalis, and Kevin had climbed up onto the stick too.

Monarch butterfly chrysalis

By the next day, we had two chrysalis hanging from the stick. The black speck at the top of Ed’s chrysalis is actually his outer caterpillar skin. The chrysalis is inside the caterpillar, and he sheds his outer skin as he transforms.

Monarch butterfly chrysalis

It has been so, so cool to go through this process with our caterpillars. I can’t wait to see what happens next.

Save

Getting in the mood

I had planned to share the final post in our waterproofing project today, but some of the finishing touches have been delayed. So instead, inspired by the project that took us away from the basement, I’m going to be sharing some thoughts on DIYing.

As I sat down to start writing this post, the announcers who are calling the baseball game on TV were talking about one of the players taking some time off for family problems.

Matt added his own commentary. “Family problems? What, did his wife make him dig a trench too? And complain all afternoon about not having a backhoe?”

Now, in my defense, I did not make Matt dig a trench. I came up with the brainwave to add a hose connection out at the garden this spring. I also advocated for renting a small backhoe or hiring out the trench (I even got a quote). Matt’s the one who came up with the brainwave to hand dig the trench for the new waterline and to do it on a humid 30+ degree afternoon in August.

As much as it might sound from my description that we’re sniping at each other, really we’re just teasing each other. This is part of our rhythm. When it comes to working around the farm, we are very much a team.

Trenching a waterline to the garden

But the thing about DIYing as a couple is sometimes we’re not both in the DIY mood at the same time. And that was definitely the case for me when we were digging the trench.

It was hot, between a cold (I hate a summer cold) and a lurking migraine (thank you, humidity) I wasn’t feeling great, our clay soil is super hard and full of roots and rocks, and the distance from the hose hook up at the driveshed (where we’re tying in) and the garden is loooooong.

But because of all of the things I listed above (except for how I was feeling), I didn’t want Matt to have to do the whole trench all by himself.

Plus, I really want a hose out at the garden, so if Matt’s in the mood to trench the waterline, I’m going to take advantage of that, no matter what mood I’m in.

So I grumbled about a backhoe, how hard our soil is and my bad mood. I took breaks to sit and lie down in the shade. I kept refilling our water bottles and planned how we’d reward ourselves with a post-trench refreshment. And I also kept swinging the pick while Matt wielded the shovel.

And Matt was understanding. He didn’t begrudge me slacking off. He got extra drinks for us, posed for pictures and encouraged snuggle breaks with the dog.

Farmboy lemonade reward for a hard day's work

He also recognized that even though he said at various points, “Why don’t you go in and watch the Olympics,” there was no way I was going to leave.

Relationships are about give and take. Add in a farm and a heap of DIY, and we need to be even more flexible. For Matt and me, recognizing where we each are at and supporting each other–no matter our moods–allows us to accomplish everything we do around the farm.

How do you get in the DIY mood? What’s your secret to DIY success? Are you part of a DIY duo? How do you make a partnership work?

Save

Save

Save

How to grow tomatoes vertically

This season in the garden, we’re all about growing vertically. I’ve shared how we’re keeping our raspberries upright. Today, I’m talking tomatoes.

How to train tomato plants to grow up a string

I love training my tomatoes to grow tall. They take up less space in the garden, and I think they’re also more productive due to increased air circulation, better sunlight and less contact with the dirt.

Since moving to the farm, I’ve used various methods to stake or cage our tomatoes, but this year for the first time we had space to build a proper trellis. This method is not new for me. I learned from how my Dad grew tomatoes in his garden.

How to train tomato plants to grow up a string

I used 2x2s to build a frame. Matt hammered three 2×2 posts into the ground leaving about 8 feet between each post. The posts were about 5 feet long, and he hammered them in about a foot, giving us a final height of roughly 4 feet. Then we screwed 8 foot pieces of 2×2 across the top of each post. This gave us rows that were 16 feet long.

Here’s a photo from back in the spring of the trellises in place.

How to build a simple tomato trellis from 2x2s

We then planted our tomato seedlings underneath the trellis. Once they grew about a foot tall, it was time to tie them up.

Using twine, I tied a very loose knot around the base of the tomato stem. It’s important that the knot is loose as your tomato plant has a lot of growing to do, and you don’t want the twine to end up too tight.

How to train tomato plants to grow up a string

I then wrapped the twine around the stem a few times, making my way up the plant. Leaving a bit of slack, I tied the other end of the twine to the 2×2 crosspiece directly above the plant.

From then on, it was about basic maintenance. Every few days, I’d walk the row and continue to wind the tomato plants around the string.

I’m also pretty vicious when it comes to suckering my plants. I remove the lower leaves plus any “suckers” that sprout in the crotch between branches and the main stem.

Tomato sucker

Suckering allows the plant to put its energy into producing fruit rather than more leaves and keeps the plants a manageable size. Suckering usually depends on whether you have determinate (bush) or indeterminate types of tomatoes. I always just assume I have indeterminate tomatoes and rip those suckers off.

However, we tried a new kind of tomato this year–Sicilian Saucers–and they did not take well to suckering. They kind of rebelled when I started pulling off their leaves, so I backed off and tried to let them do their thing a bit more.

I was still able to wind them up the strings fairly well, which is helpful because these plants and their fruit are super heavy. Our giant tomatoes would definitely be lying in the dirt if they weren’t supported by the trellis.

How to train tomato plants to grow up a string

Now that the plants and the fruit are very well established, I did go through and clipped off a lot of the lower leaves. I’m trying to get a bit more sunlight onto the Saucers to encourage them to ripen.

As the plants have grown, some of them have exceeded the height of the trellis. I’m tying them along the top 2×2 and just trying to support them so the stems don’t bend or break.

How to build a simple tomato trellis from 2x2s

So far this season, we’ve had a great tomato harvest. From the looks of our Sicilian Saucers we have much, much more goodness ahead.

Do you grow tomatoes? Are you into suckering or do you leave them alone? Have you ever tried to grow tomatoes vertically? What method do you use to trellis tomatoes?

Save

Save

Raising Monarch caterpillars

We added two new members to our family last week.

Meet Kevin CATERPillar and EdWING Encarnacion.

(I advocated for Troy TuloWINGSki, but it was deemed too hard to pronounce. For anyone who needs an explanation of their names, refer to the Toronto Blue Jays roster).

Monarch caterpillars eating milkweed leaves

These are little Monarch caterpillars that I found walking our fields. They started very small–just a few millimetres long. With fresh milkweed every day, they’ve been packing on the weight and the length.

Since I found them as caterpillars, I have no idea how old they are. According to Karen at the Art of Doing Stuff who did a series on raising monarch butterflies, Kev and Ed will spend 10-14 days at the caterpillar stage.

So far, I’m loving seeing how much they grow every day. I’m really excited about seeing the chrysalis stage.

I’m also excited to see their namesakes live this week. Matt and I are heading to the Jays game on Thursday. Kevin CATERPillar and EdWING Encarnacion will be staying home.

Have you ever raised a Monarch butterfly? Who else is a Jays fan? What Jay/Monarch names can you come up with?

Save

Save

Save