Top o’ the manure morning to ya

Our fields are in the process of being transitioned from hay to soybeans. Earlier this fall, our farmer killed off all of the hay, and at the end of last week, the manure men showed up.

I had an inkling that something might be in the works when on Baxter’s and my morning run on Friday–which takes place entirely before sunrise–a very, very large manure-smelling piece of equipment loomed out of the dark as we entered the big field. Baxter and I  were both a bit disconcerted, as it’s usually just the two of us alone. Once I ascertained that it wasn’t a) coyotes b) a UFO c) poachers, we were able to get on with our run, although Baxter continued to give it the stink eye (pun not intended, but I feel clever now, so I’m leaving it in) as we did our morning perimeter patrol.

Saturday morning, the rumble of machinery signaled that work was underway. Being the weirdo country newbie that I am, I rushed outside with the camera to document the process. I’m not sure that the manure contractors have ever been models before, but they were pretty tolerant of my presence and even took time to answer my questions.

Despite their explanations, I still know very little about manure spreading, so I’ll do my best to explain what I saw.

To start, this is a massive operation. The manure men were independent contractors hired by the farmer who rents our fields. They had traveled 3 hours by tractor that morning to come to our farm. Here’s just some of the equipment that was involved in manurefying our fields.
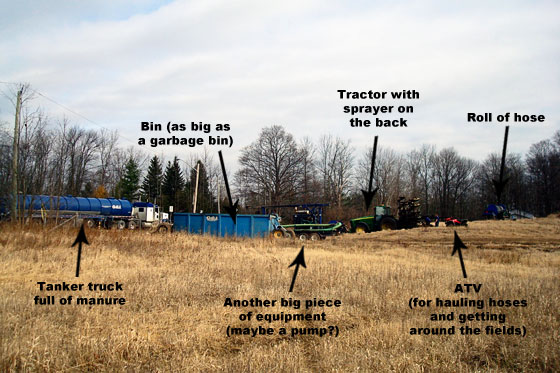
Equipment for manure spraying

Outside of the frame of this picture is a second tractor, a pick-up truck and another tanker. Each tanker holds 8,000-10,000 gallons of manure. Our front field, which is roughly 6 1/2 acres, took 7-8 truckloads of manure. Holy crap (okay, that pun was intentional).

The trucks were in a regular rotation, going to the veal farm down the road from our place to get filled with manure and then coming back to the farm to deposit their load.

The manure flows from the trucks, I’m assuming through some kind of pump, and then travels in long hoses across the fields to the tractor.
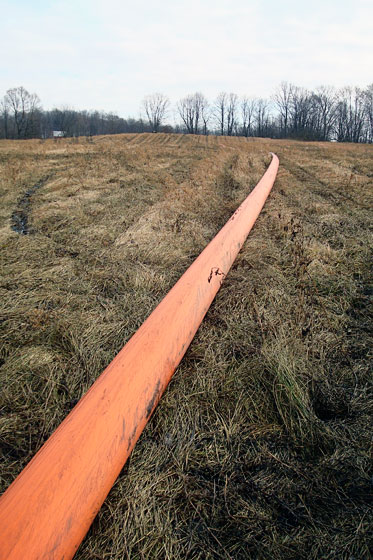
Hose for manure spraying

The big hose connects into smaller hoses on the tractor, which are each attached to a disc. It’s a bit hard to see here, but the rear window on the tractor cab has its own windshield wiper… a necessity for when one of the hoses has a “blow-out.” Ewwwww.

Tractor for manure spraying

Here is the spraying attachment folded up (for scale, the tractor’s tire is as tall as me).

Manure spraying attachment

The discs cut into the ground so that the manure goes right into the dirt, although some of it does pool on top.
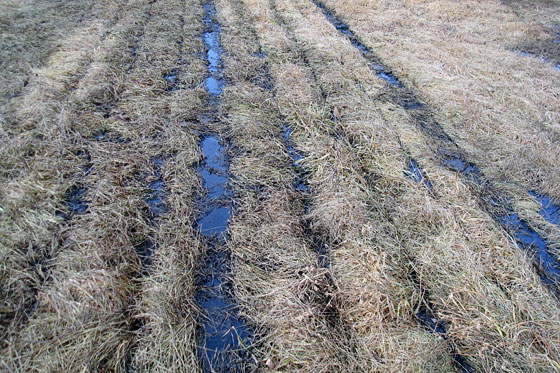
Field that's been sprayed with manure

When the field is done, the hose rolls up onto a spool on the front of the tractor.
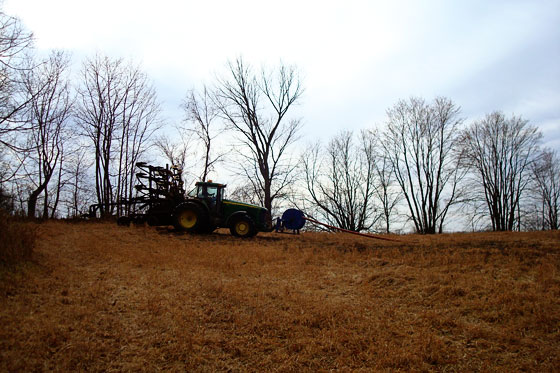
Manure spraying

Here’s an action shot of the spraying.
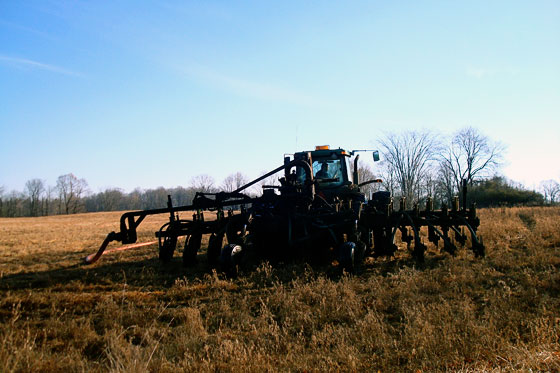
Tractor spraying manure

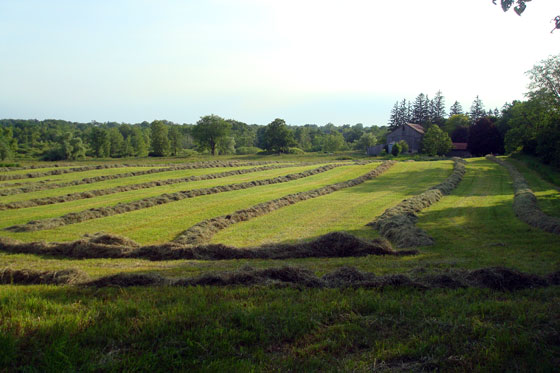
And here’s what our fields look like now. (For contrast here’s a picture from the same angle taken at the start of summer after this year’s first hay harvest.)
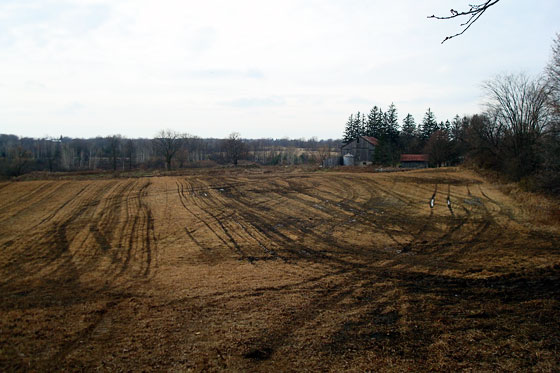
Field after spraying with manure

As for what our fields smell like now, well, I have to admit things are a bit stinky around here. It’s not as bad as I thought it would be (perhaps I’m building a bit of an immunity to “country air”). At the same time, I feel like I’m constantly smelling manure. Even when I’m in the house with the windows closed, the smell is still in my nose.

I’ll leave that part of the experience to your imagination.

Does anyone have any wisdom to share about manure spraying? How weird was it that I felt the need to document the whole process? Is anyone else dealing with a malodorous environment? Any idea how long it will take for the smell to fade?
Building a family tradition

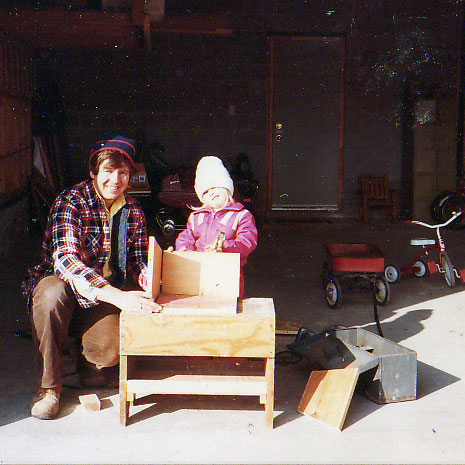
There’s a tradition in my family of working on projects together. Always. For as long as I can remember. Take this picture, for example, of my Dad and I building a bird feeder. I had probably just turned four that fall.

Child and father building a bird feeder

Here’s my Dad and I posing with the finished product (and my little sister) as we put seed in the feeder for the first time.

Putting seed in a simple wood birdfeeder

Fortunately I have a nephew who likes building things with me, so I’m able to carry on the tradition that my parents established. When he and his brother came to stay with us for a few days, building a bird feeder was top on my list of projects.

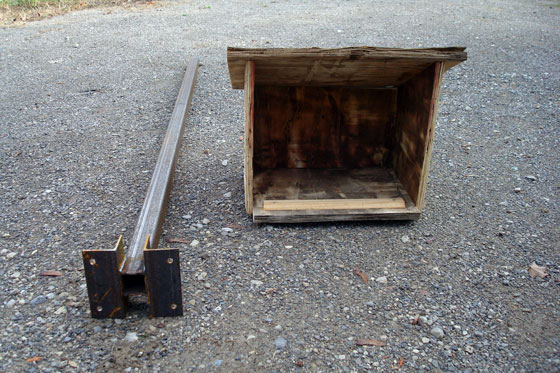
Using the measurements from my Dad’s feeder, we drew it out on a sheet of 5/8 plywood. He held the wood in place while I cut out the pieces with my skilsaw. Then, we switched jobs, and I held the pieces while he nailed them together. We used a bit of wood glue on each joint and some 1 1/4 inch finishing nails.

If I was to build another bird feeder, I might consider painting it before putting it together, but let’s face it, when working with an almost 14 year old, waiting for paint to dry is as exciting as… well… watching paint dry. So we put the feeder together and, after letting the glue set, I was on my own for painting (and yes, I used pretty much the rattiest piece of plywood I could possibly find for the roof).

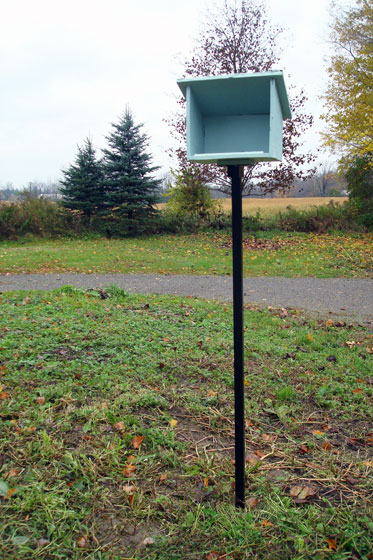
Bird feeder and pole

A few quick coats of paint on the feeder and one coat of Tremclad on the pole that my cousin welded for us–seriously, the most sturdy bird feeder post I’ve ever seen–the feeder was ready to go outside.

As my nephew hasn’t come back to visit yet, Matt stepped in as my helper. He hammered the post into the ground, and I screwed the feeder onto the post. Still nephew-less, I did the first ceremonial seed dump on my own.

Sunflower seeds in a bird feeder

Perhaps the birdies are waiting for his return before they partake of the seeds, because no one has come to test out the feeder as far as I’m able to tell.

I’m thinking it could be because they feel the feeder is a little exposed. I put it on the turnaround where I can easily see it from the dining room table. However, that means there’s no bushes or trees close by for cover.

Simple wood birdfeeder

Birds do hang out on the turnaround, so I’m hoping it’s just a matter of time before they discover the feeder. I know the design appeals because nearly 30 years later my parents still have the same feeder in their backyard, and they have a steady stream of customers.

If you’re interested in building a bird feeder of your very own, I drew out the plans and you can download them here. This is a perfect project to do with kids because it’s quick and there’s lots of parts they can help with. And if the birds ever show up, I’m sure they’ll like watching them snack too.

Do you have a bird feeder? What bird seed do you use? Any tips for enticing birds to a feeder? Do you like to build things with your children or nieces or nephews? Or did you build things with your parents when you were growing up?

Opinions on farming from Baxter

Hello everyone. Hope you enjoyed last week’s guest posts as Matt and I enjoyed a little vacation. We’re back to our regular routine, but apparently there’s one most guest post yet to go. It turns out that Baxter has something to share with you all (or, as he says, y’all), so I’m turning the blog over to him today.

Now, I know I’m new to Canada, but I do have some experience with farms (remember Kentucky and the chickens?), and there’s been something bugging me ever since I came to live with Julia and Matt.

There’s no other way to say it. Our fields were a sorry site.

Sure a couple of them had seen the mower this year, but three of them hadn’t. And two of them were at the very front of the property for everybody to see. The grass was so tall it had started to fall over. And after a rain, well golly, then we had these huge matted down areas in the fields.

Our farm was looking downright derelict.

The grass was so high that we would walk to the edge of the field, but we couldn’t go through it.

And never mind sniffing. Do you know how hard it is to sniff over grass, rather than follow a trail right along the root?

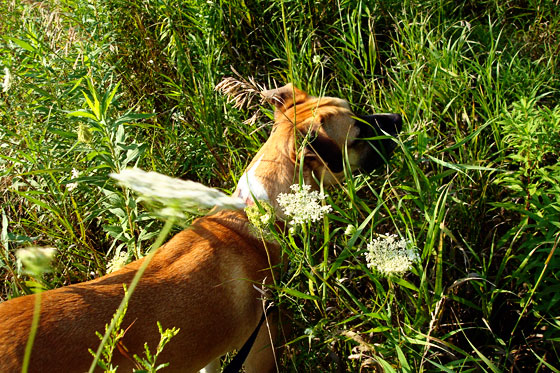
Baxter sniffing in the long grass

It wasn’t fit for man, woman or dog.

But, finally someone decided to do something about it, and I have to tell y’all it is marvelous.

Not only does the farm look better, but it smells better too. Whole new worlds have opened up.

Seriously.

I’ve walked on ground that I never walked on before. I’ve sniffed smells I never smelled before. I’ve watered grasses I never watered before.

So far, I’ve attended to the perimeter and inspected the hay on two new fields.

Baxter inspecting a big round hay bale

I saw some signs of the other doggies that I hear at night–the yippy howly ones named Coyote. As much as I’m curious to meet these doggies, they have to know that this is Baxterland, so I sprinkled some of their markings.

Sometimes, I’m near overcome by the twitching in my nose, and I have to just sit down and sniff. Don’t worry though, I always get up and finish my patrol.

After all, this is my farm now. It’s my job to look after it.

Fuzzy buzzy

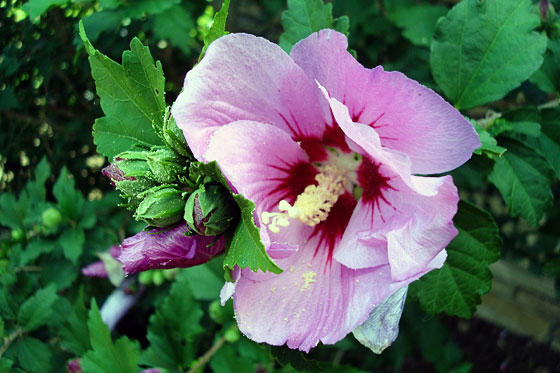
Our huge Rose of Sharon bush outside the dining room window is in bloom. Honestly, as beautiful as it is, I wasn’t going to do a post about it because, really, it’s just another picture of a pretty flower.

Rose of Sharon blossom

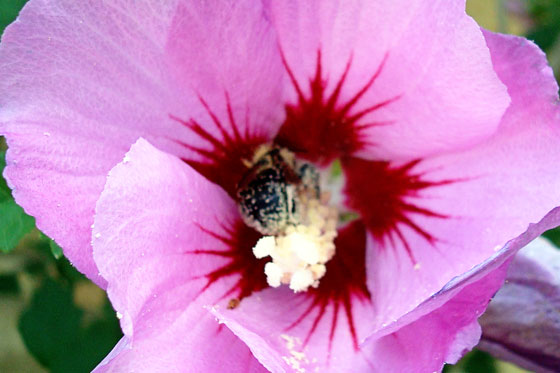
But then I saw a fuzzy bumble bee pollinating the blossoms. He was completely dusted in pollen, so I of course had to take his picture.

Bee pollinating Rose of Sharon flower

It may seem sappy, but seeing this industrious fellow–and the hummingbrids which also love the Rose of Sharon–reminds me that mother nature is pretty cool.

Ralph’s raspberry patches

The rainy spring and the hot summer have conspired to produce a bumper crop of raspberries this year at the farm.

Black and red raspberries

Black raspberries grow wild on the bank outside of the barn.

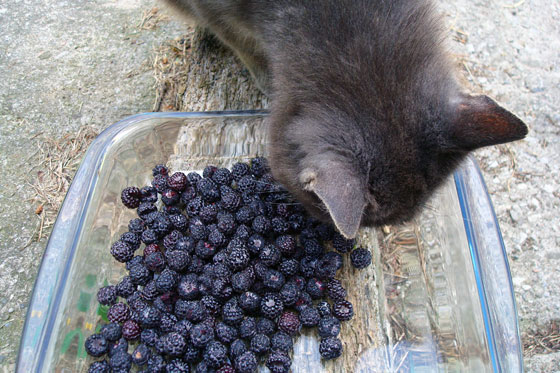
Black raspberries

Ralph keeps a careful eye on them and performs quality control inspections during picking.

Ralph the barn cat looking over the harvest of black raspberries

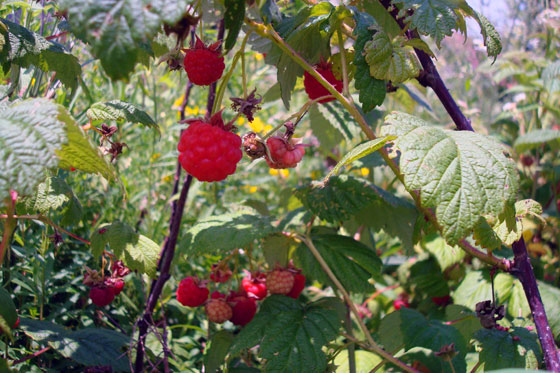
Just to the east of the barn–in the spot where I want to put the vegetable garden–is a patch of red raspberries.

Red raspberries

I’m going to try and preserve some of these canes when we dig out the garden, so we can continue with our raspberry bounty each summer.

I’d love to transplant the black ones into the garden as well. Does anyone have any idea if they would survive a move? Any tips for transplanting? The black ones are smaller, seedier and sourer than the red ones. Do you think if I watered them or fertilized them they’d plump up?

Landscaping: Phase 2

I said at the beginning of the week that I’m declaring the start of July as the end of phase 1 of landscaping. We all know that the end of one thing is the start of something else, so it is also the beginning of… you guessed it… phase 2.

Yes, I still have things to finish up from phase 1, but let’s not get technical here.

For phase 2, I’m going to use the same technique that I did in phase 1. Walk out the front door and start with the first thing I see. Except this time instead of turning right, I’m going to turn left. Earth-shattering strategy, I know.

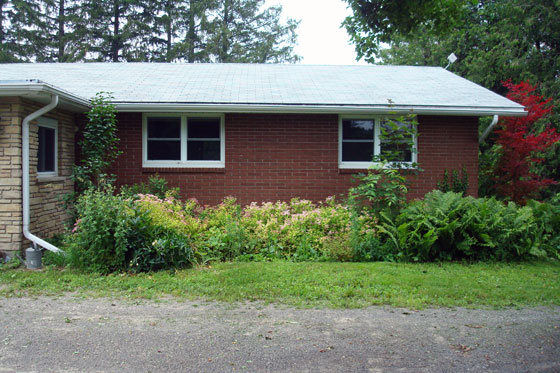
So what will I find when I turn left? Something that looks a little like this. (Our roof is not as green IRL as it appears in this photo).

Garden of spirea and ferns

From a distance it may not look that bad, but in reality it’s an overgrown jungle of spirea and ferns. I’m a variety is the spice of life kind of woman, so I need a little more diversity in my garden. I’ll be digging out a decent number of the plants. They will not go to waste though. (Remember the massive turnaround garden that needs plants?)

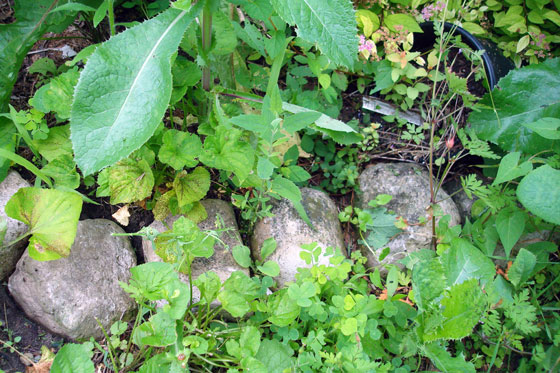
However, gardening here is never as simple as just weeding, pruning and transplanting. Take these rocks for example (and yet another plastic plant pot that escaped the earlier purge).

Rocks edging a weedy garden

Every single existing flower garden on the property is edged in rocks like this. I’m sure it looked lovely at one point. However, over the years, the rocks have sunk just far enough into the ground to become a complete hazard for the lawnmower. Plus, they’re not doing anything to keep the weeds or grass out of the garden. I would rather edge the garden every year with a spade and be able to get the lawnmower right up to the edge of the plants than deal with these rocks.

Rocks–specifically moving rocks–has been the major theme of landscaping this year. Wiley and I will spend some more quality time, moving loads and loads of rocks back to the pile behind the barn.

Let’s see. What else is there about this garden? Follow me down this garden path and let’s find out.

Broken patio slab path in a weedy garden

Note to self: Add weeding and remove broken patio slabs to the to-do list. Oh, and fill in the pit at the end of the path.

Square pit with wood retaining walls

Oh look. Another plastic plant pot.

This pit is the spot where the wood stove chimney came out of the basement. We’ve removed the wood stove, patched the hole in the wall and tarred the foundation. Now I need to deal with the pit. It’s about 3 feet deep and is usually home to frogs or, when I was taking the picture above, a camera shy garter snake. Perhaps this is a place to dispose of some of the rocks. Provided of course I rescue any creatures first.

If I follow this garden around the corner of the house to the north side, I’ll find more rocks (what else?) and more patio slabs from where the old oil tank used to be. If I follow it around to the back side, things get really wild.

The back gardens will likely be phase 3. No ETA for that yet, though.

Do you have any advice for plants that will add some diversity to my spirea and ferns? Or tips for transplanting? I tend to stick them in the ground and water the heck out of them. What’s edging your gardens? Anyone else have any “special” features in your gardens, like a pit?

Landscaping: Phase 1

Friday morning at work, a colleague who reads my blog regularly marveled at how much Matt and I have accomplished at the farm so far. I didn’t totally agree. Sometimes I see the difference that we’re making. Sometimes I just see the things left undone and the rest of the to-do list.

July does feel like a bit of a milestone to me, though. A turning point. Or a halfway mark. So I have decided to declare it the end of phase 1 of this year’s major project–landscaping–and I have decided to take a look at what we’ve done so far. If you’re interested in a refresher, here’s my previous progress report or the to-do list.

My focus has been the immediate area around the house. I used the very thoughtful technique of walk out the front door, turn right and start there. I slowly worked my way around to the side of the house. So the smaller of our two front gardens has been weeded and a new border of grass has been established.

Evolution of the front garden

Still to do: Put those poor plants that have been living in plastic pots for at least a year and a half in the ground. Transplant some other plants to fill in some of the gaps in this garden, and maybe give the yew and the Rose of Sharon a hair cut.

Around the corner from the front garden, we come to a creation I’m particularly proud of, the well garden. At the beginning of the spring, this area was a heap of hard-packed dirt strewn with rocks and overgrown with weeds. After digging everything out (including two window wells last year which were unnecessary after we bricked over the broken basement windows), leveling off the dirt, edging it with rocks (some really, really big rocks that required the help of Matt and his Dad to position), transplanting some plants, repositioning the downspout, installing a hose hanger and seeding the grass, it is starting to look like an actual garden.

Flower garden edged with rocks around a well head

Still to do: Convince the plants to grow. It’s a little hard to see, but I’ve actually planted quite a lot in this garden. I may do a bit more, but I’m trying to restrain myself, because I’m pretty sure once these plants take off, this garden is going to be pretty lush–just what I want.

Let’s go away from the house for a moment across the driveway to the fire pit. This really wasn’t a fire pit. It was more of an area where previous owners burned things. Matt and I have used it a lot as we’ve been cleaning up brush and lumber from the property. However, heaps of ash and brush wasn’t the nicest visual to see when I opened the front door or drove up the driveway. The brush I was able to relocate to a new burn area I’ve established behind the drive shed. The ash got spread around and leveled–and then I went back and forth over it with a big magnet to pick up all of the nails and screws (and hinges, door knobs and other metal) that were mixed in. The rock pile that I discovered buried in ash was picked up and dumped in the main rock pile behind the barn–talk about a dirty job.

Cleaning up an old firepit

Still to do: Make sure all of the metal has been picked out of the ash. Mix some manure and soil in with the ash so that grass might actually grow and seed it. Relocate the lawn chair and bench that were plopped beside the fire pit. Relocate the remaining large logs and lumber that were stacked waiting to be burned. Get rid of the dirt pile.

Between the fire pit and the house is the biggest undertaking of the year, the turnaround. This former mountain goat territory has been leveled, fertilized with loads and loads of manure and rototilled. I built a brick pathway across the middle of the garden and planted some bushes, hostas, trees, tomatoes and lettuce.

Evolution of the garden on the turnaround

Still to do: Finish the pathway–I need 60-80 more bricks and sand to fill the joints in between. Put a bench beside the path. Pull the weeds that have sprung up. Plant a whole lot of plants. Seriously. This thing is going to eat plants.

So it’s probably obvious from this post that I can’t just focus on what we’ve done so far. Although looking at the photos above, I am able to see the transformation happening. Slowly, ever so slowly, it’s starting to look a little more like the picture in my head (or on my Pinterest board).

How are you doing on your summer to-do list? Are you looking ahead at what’s yet to do? Anyone have any tips for living in the moment and appreciating what I’ve done so far?

That time again

The first day of summer meant the first harvest of the year on the farm.

The field behind the driveshed had been mowed earlier in the week, and by the time I came home on Friday, the hay was dry and had been mounded into long rows ready for baling.

Mowed hayfield waiting for baling

As soon as I got out of the car, I could hear the clanking of machinery in the big field. Matt and I walked out to see what the commotion was.

Two big tractors were baling the hay. Unlike last year’s first cut when we had big round bales, this year we had massive rectangle bales. Allow Matt–all six feet of him–to illustrate the scale.

Large rectangle hay bale

As best I could tell, each of these huge hay blocks is made up of about 21 smaller size rectangle bales. For those not familiar with hay, it’s not any one plant. Each hay bale is made up of a variety of grasses, clover, flowers and other plants. Last weekend, when I walked out to the back field, I snapped some shots of the most frequently occurring grasses.

Grasses that make up hay

I’m not knowledgeable enough about haying to tell you what any of these grasses are. According to the farmer who manages our fields, we have a good crop of hay for this first cut thanks to a good amount of rain this spring and some doses of fertilizer earlier in the season.

Just like people have to mow the grass on their lawn weekly, the hay will grow back, and we should be able to have a second cut–or maybe even a third–in one year. Something I learned last year that surprised me was that the second cut is usually better–as in more nutritious–than the first.

So this scene may repeat yet this year.

Tractors baling hay
How did you mark the first day of summer?