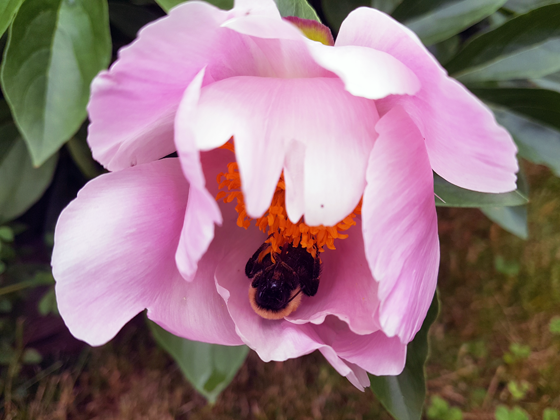
Why yes. This is a big fuzzy bumblebee basically taking a bath in peony pollen.
Why yes. This is a big fuzzy bumblebee basically taking a bath in peony pollen.
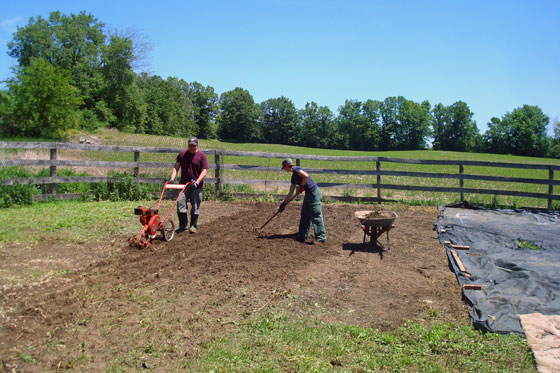
Spring is a mad dash around the farm. There’s winter clean up, like picking up branches, and there’s summer prep, like putting the mower on the tractor. And before we know it, we’re weeding gardens, cutting grass and deep in the routine of outside work. I have this feeling that if I don’t get the gardens, lawn, trees, flowers, patio, barn, tractor, equipment, what-have-you set up right now, I’ll be behind all year.
However, this year it’s been feeling a wee bit different. It’s almost calmer. Almost.
For the first time, I feel a bit like we’re maintaining, rather than building.
Our first five years at the farm have been about so much work–reclaiming the overgrown property, establishing flowerbeds, making the vegetable garden. There are still pieces of that, but I feel a bit like the main parts are in place, and the way we work on the property is a bit more normal.


I do have one big “building” project on my Home Goals list: clear the pond shore. When Matt broke his arm last month, we had to re-evaluate what we were going to be able to do this year. So the pond shore has been deferred. As the brush is already quite overgrown, I’m thinking it may be easiest to wait until next spring when it’s all died off again.
But good news, Matt gets his cast off today. And ready or not, summer has arrived.
It’s an ongoing battle to keep the farm somewhat civilized, but through a lot of work we’re in decent shape this year.
How’s spring going for you? How do you handle property maintenance at your house?

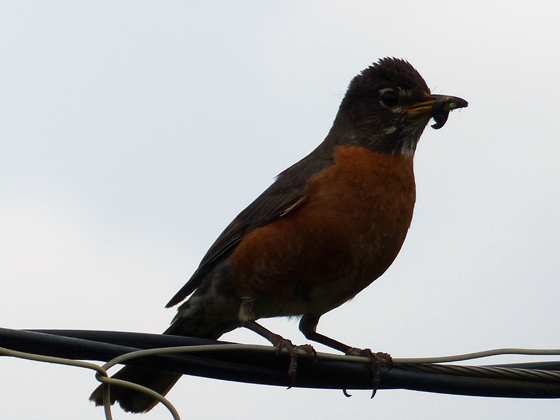
A few weeks ago, a mama robin moved into one of the old nests on the driveshed. Last week, I noticed a few tiny mouths stretching up over the edge of the nest.
On Sunday, Mama and Daddy were trying to convince the babies it was time to leave the nest. One tried to tempt them with some food.
But the babies did not agree it was time to fly on their own.

Every so often, the parents would discuss their problem children.
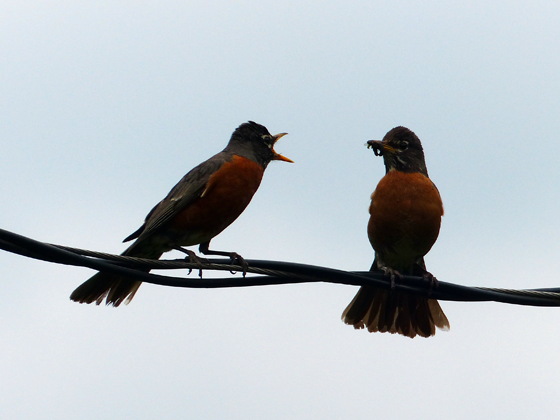
One flew down to the ground to try a different angle. Of course, Ralph noticed. That led to a discussion between Ralph and me.

The babies stayed high on the rail at the driveshed–even though I convinced Ralph to move on.

I didn’t see the babies finally take flight. I hope that they found their way safely. I enjoy all of the different animals who call the farm home. New babies are extra special.

In case it’s not clear, I’m pretty much winging it when it comes to our grapevines. So I was thrilled to have the opportunity to talk with Brian Schmidt of Vineland Estates. Brian and the Vineland team have 118 acres of vineyards in Niagara.
Way more than our dozen vines.
Brian was extremely generous in answering my questions and talking me through how to care for our vines. He gave me a great confidence boost.
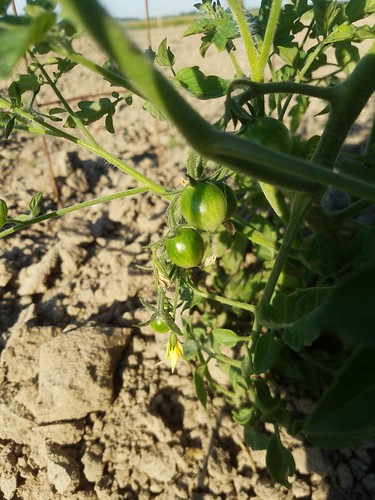
My main question was whether to pinch off any fruit this year so that the vines can focus on growing big and strong. Brian’s advice was that the key to long-term success is to not overburden the vines in their youth. So these baby grapes will be picked this weekend.

Brian also gave me advice on pruning, trellising and pest control.
Pests are the one issue that’s arisen with our vines this spring. Some little worms are eating the leaves on our second year vines (the ones we planted last spring). The Lakemonts, which are brand new as of a few weeks ago, have too few leaves to be a target yet.

Our leafiest vines have been very hard hit.
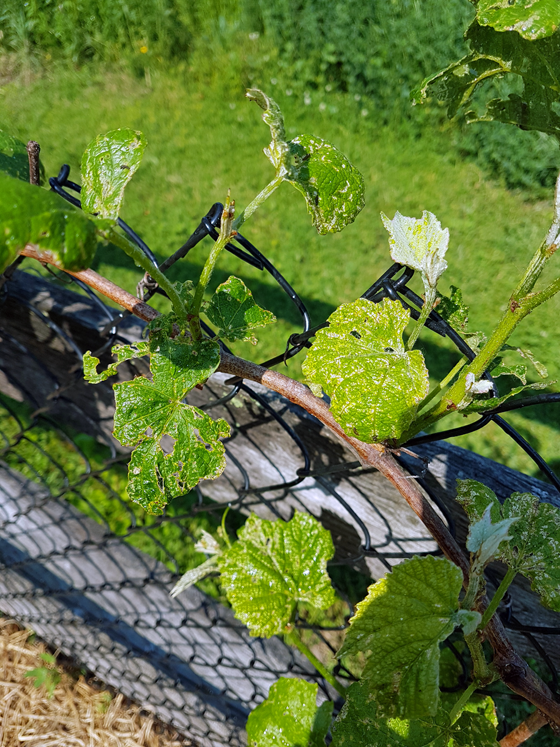
Brian’s advice was to give our vines a case of dandruff. Not really. He was much more professional than that. He suggested diatomaceous earth. I’ve heard of DE before, but didn’t know much about it. DE is a powder made from “the fossilized remains of marine phytoplankton.” Brian described it as “eating glass” for bugs. Lovely image, but sorry bugs.
The nice thing about DE is that it’s safe for humans to eat, unlike many chemical pesticides.
I sprinkled it all over the vines last weekend.

So far, the DE doesn’t seem to be doing the trick. In fact, there are more worms than ever. From the little bit of research I’ve done on DE, it sounds like it might be more for bugs with hard outer shells and more of a topical than an ingestible. The worms are pretty soft-shelled. They’re very easily crushed when I pinch them–which may be the solution I resort to.
I’ve given the vines a second dusting of DE, and I’m hoping that this might be enough to stop the infestation. I’d really appreciate any ideas you have. Anyone know what these pests are and how to get rid of them? Should I just be patient with the DE?
Since starting our own journey in country living, I’ve realized that there are lots of people following a similar path, but each of us are doing it in our own way. Gardening, animals, permaculture, homesteading–everybody tackles things slightly differently.
There is a lot of information online or in books to help you learn how to do things and what works for you. However, sometimes it’s really nice to talk to people in person and learn from their experience first hand. Sarah in Illinois has found a group of like-minded family and friends who are doing just that.
Last fall a few family members and friends decided to start a small group with the common interest in gardening and homesteading. We had a very informal “meeting” where a few people shared areas that they had interest and knowledge in.
We discussed that when selecting a seed you may see words like open-pollinated, heirloom, hybrid, organic or non-GMO and what those words mean. We learned that if you plan to save some seeds from the crop that you plant this year, you must select an heirloom variety. A couple people brought extra seed catalogs that they had, and we talked about the suppliers that we have had good luck from in the past.
We talked about composting and that it is important to get a good mix of “green” and “brown” ingredients. We also looked over a list of things that you should never add to a compost pile such as meat, bones, pet waste, fats and dairy.

Another cousin brought up the topic of what you should plant and how much. She suggested making a list of, on average, what your family actually eats in a year. Then you can use this list to decide what you will use and also not overplant so that you don’t waste food.
She also gave us a list of books that she has used that she thought may be of interest (not affiliate links):
We ended the evening with a short demonstration on how to make your own yogurt, and a friend brought some for us to sample.
We joke that we are kind of nerdy, but when it is a topic that you are truly interested in, I don’t think you can get too much information.
Then we created a private Facebook group where we could share tips, pictures, successes and failures.
This week someone took a video tour of their garden, and we were all so excited to see it that several of us made tours of our own gardens. We all live in about a 30 mile radius, but this allowed everyone to view the gardens when they had time and it was very convenient.
It was so interesting to see the different crops, different sizes of gardens, different methods for weed control and really just about every aspect of gardening and small farm animal production. (My cousin has 11 goats!)
My tour ended up being 21 minutes long. I toured the fruit trees, the garden, the grape vines, my chickens, my compost pile and my herb garden. And I also rambled quite a bit.
I am going to put a few short clips on my Instagram so that you can view them.
As much as I have learned from my parents and in-laws on gardening, I feel like I have so much more to learn. But each year I have a better understanding, better results and a deeper love of growing my own.
Do you belong to a formal or informal gardening group? What areas of gardening do you want to learn about? Have you ever made a garden tour video?
If you’re nerdy, Sarah, I’m right there with you. This sounds like a really inspiring group to be part of. Country living is a constant learning experience, in my opinion. It’s great that your family and friends have come together in this was to share their experiences.
Throw pillows are a great way to add personality to a space. You can easily change them out for the season or your mood. However, mixing fabrics is a skill. It takes practice and sometimes some trial and error.
Join me in a little demonstration.
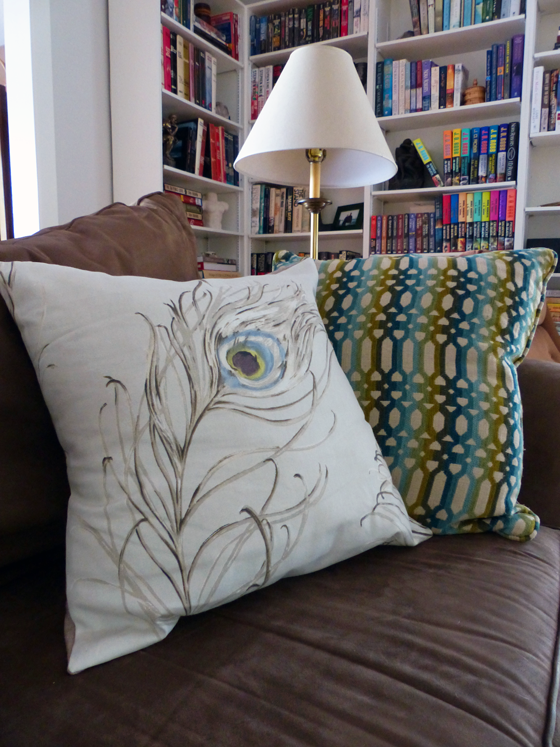
These are the pillows I chose when we first bought our beloved basement couch. It came with six pillows, and I selected three different fabrics. I wanted colour, pattern and something not too serious. However, it turned out they didn’t all play together as nicely as I wanted.
Observe.
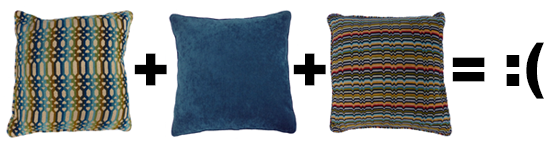
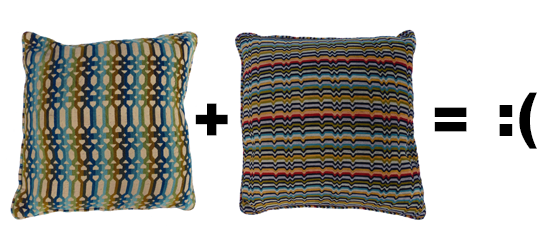
On their own, the patterned pillows each work with the turquoise velvet, but they do not work with each other, despite sharing several colours.
However, let’s look at another equation.
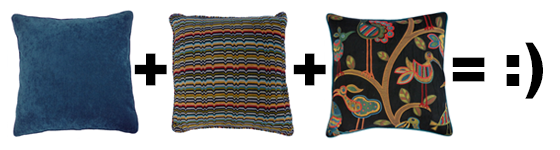
Remember back when I made our big round ottoman? How I searched for the perfect fabric, and the one that ended up working best with the striped pillows was the bird fabric that I already had in my stash? I still love this fabric, and since I ended up buying more to supplement my stash, I still had a good amount of yardage. More than enough to make two pillows.
These ended up being the most professional pillows I’ve ever made. They have zipper closures, piping and even extra liners to help contain the feathers, which always seem to work their way out through the covers. I love them so much.

But what about the poor rejected blue-green geometric? Here’s another equation for you.
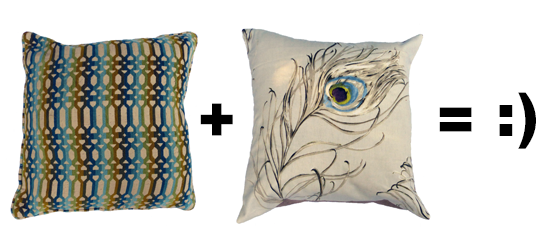
The feather is another fabric that I’ve had in my stash for years. I had always planned to use it to make cushions for the couch upstairs, and I finally got around to it. The blue and green bring a bit of summer into the living room.
I love the serendipity of two stash fabrics being perfect mix for pillows that we already had. Along the way, I’ve learned a few lessons about mixing fabrics.
Pillows are some of the easiest items to sew–and there are also plenty of options to buy. They can add a finishing touch to a room or completely change the feel of a space. I like being able to freshen up the living room for the summer season, and I’m also very glad to have found the right mix for the family room.
Do you enjoy mixing and matching pillows? Do you sew your own or purchase? Do you change your decor with the season? What are your tips for finding a mix that works?
When I was working on my office, I knew I wanted to find a way to display two collections. One was my Red Rose Tea figurines and the second was china thimbles my MIL has brought back from various trips she’s taken.
The thing about both of these collections is that they’re small. I had the shelves of the china cabinet where I could tuck in a few thimbles or figures, but they’d be lost amongst the bigger items on display. I also didn’t want them on a tabletop where they took up space that could be a work surface.
I decided to do two small shelves.
First was a small floating shelf for the thimbles. This shelf was so small and the thimbles are so light that I knew it wouldn’t need much support and I could screw it right to the wall.
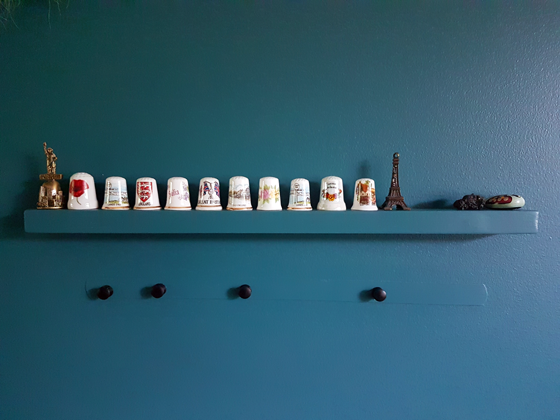
I cut a piece of 1×2 to the length I wanted and then drilled two holes through the face of it. The holes served two purposes. The first was to make sure the shelf didn’t split when I screwed it to the wall. The second was to recess the heads of the screws. I made the holes slightly bigger on the front so that the screws would go into the shelf by about a quarter of an inch.
I painted the shelf the same colour as the wall and then screwed it into place. Then I filled the holes with woodfiller and painted over them. The shelf blends into the wall very well, so that it (almost) looks like the thimbles are floating.
The second shelf is ingenious, but I can’t take credit for it. I found the idea on The DIY Mommy. This shelf started its life as a cutlery tray. I lopped off the one segment that ran perpendicular to the others on my Dad’s tablesaw. Then I painted it white, and simply screwed it to the wall. It is exactly the right size for my collection of nursery rhyme tea figurines.

I love having different things hanging on the wall, rather than the usual pictures and paintings. These two collections have a lot of meaning for me. Memories of the tea figurines that lived in my grandmother’s china cabinet, appreciation for my mother-in-law thinking of me and my love of sewing when she’s traveling.
Do you have any small collections? How do you display “smalls”? Have you built any tiny shelves?
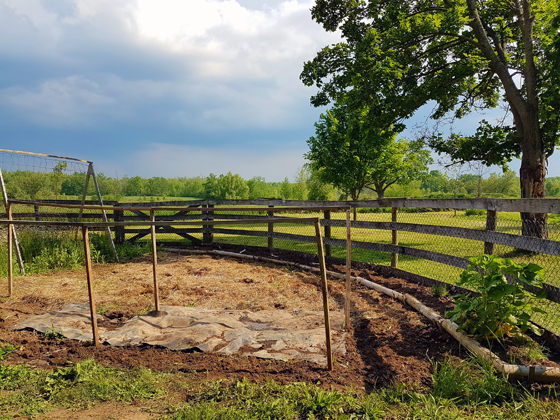
Living in Canada, our growing season starts a little later than some other places. However, I’m feeling really late on the vegetable garden. You’ll notice I haven’t shared an update on the garden since my last one when I said I was trying to stay away from the garden. Unfortunately, I’ve been fairly successful at staying away, and I’m quite behind on the vegetable garden.
Everything starts with weeding. I got the raised beds around the perimeter and one of the quadrants completely weeded last weekend. Another of the quadrants still has our winter rye cover crop, so I’ll just keep mowing it. That means there’s roughly half the garden to go.

As I’m weeding, I’m planting because if I wait until the garden is weed-free we won’t grow anything.
I put in our potatoes a few weeks ago. So long ago that I need to go back and weed them again and then hill up the plants. Between the rows I’ve laid down some black rubber to try and smother the weeds.

I planted four new grapevines.

All of the eight vines I planted last year are alive. I’m not sure I can take credit for this, but I’m still proud to see them growing. We now have four Somerset (red), four Sovereign Coronation (blue) and four Lakemonts (green). All seedless table grapes.

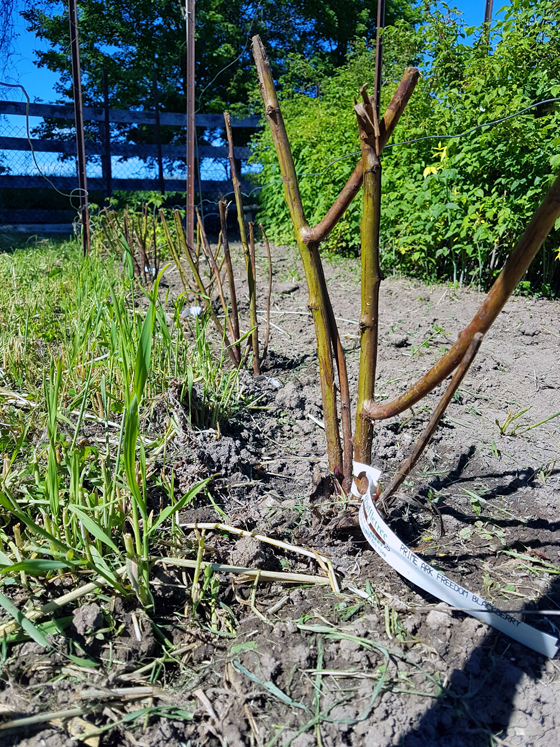
I also ordered five blackberry bushes to add this year. We have a thriving row of red raspberries that I got from my parents last year (they’re that bushy mass in the background of the photo below).
I could easily do two rows of raspberries–I’ve thrown out hundreds of canes as I’ve weeded the garden–but variety is the spice of life, so I’m trying these Prime Ark Freedom blackberries. The canes seem pretty healthy, even though they mostly look like sticks for now.
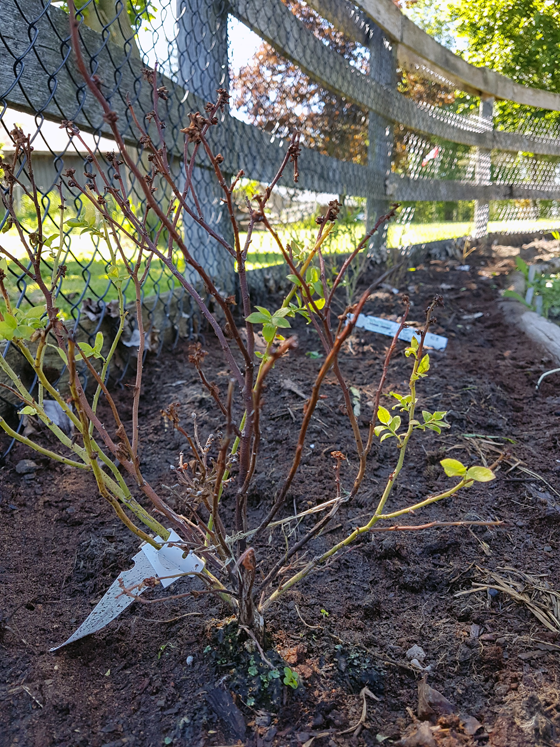
While I was picking up my grapes and blackberries I noticed blueberry bushes for $4 each. Regularly these cost $12-$16. I’m usually a fairly plannful gardener and don’t buy things on a whim, but $4 is too good of a deal, so four blueberry bushes came home with me. Two are Jersey and two are Brunswick.
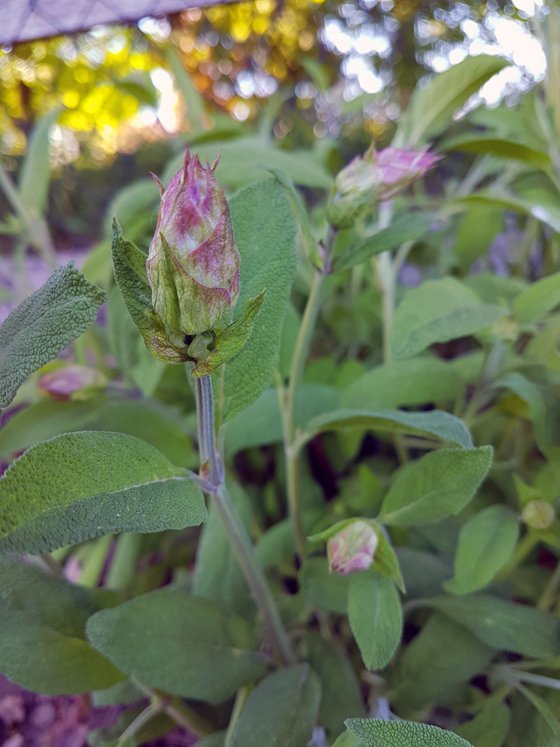
I love the way the outer raised beds are shaping up. They are going to be home to perennials (mostly fruits and a few herbs). There is our asparagus (still small, but thriving).

Then there’s our dozen grapes, followed by our rhubarb. I’ve left room for us to add more rhubarb plants when this one is ready to split.

Coming around the garden we go into the blueberries. There are also lavender, sage, thyme and chives. I may plop some basil, dill and rosemary in here, even though they’re not perennials.
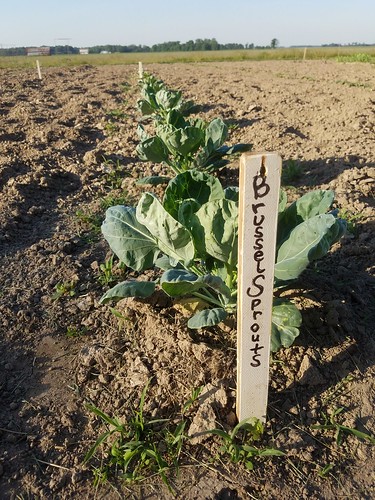
We have some sprouts in the house, but they’re still pretty small–our theme of starting everything late this gardening season applies to everything. I want them to hurry up and grow because they really could go outside. But the garden isn’t quite ready for them, so I don’t mind them taking their time.
I still have plans to get some old hay bales from our farmer so that we can put a deep mulch on the garden. Hopefully that will mean I don’t spend all of gardening season weeding.
For now, even though I’m behind, I am very pleased with how things are looking. This is our third year with our garden and our second with it officially laid out with raised beds and trellises. It’s really taking shape.
How is your garden growing? Are you ahead or behind or on schedule? Have you added any new plants this year? Do you have any tips for growing blueberries?

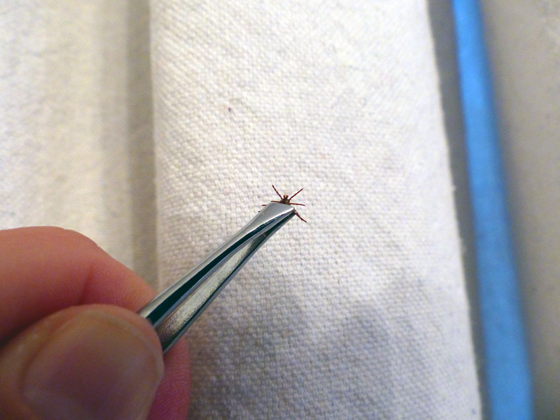
Ticks have been awful this spring.
We’ve removed more than 20 ticks from Baxter, ourselves and various surfaces in the house. Matt has expanded and extended pathways all around the farm so that we can avoid the long grass of the fields. We’ve made tick checks part of our regular routine every time we come into the house.

I try not to worry about them too much. I know some ticks can carry dangerous illnesses, but we’re diligent checking ourselves and the dog regularly and pulling off any we find. (I wrote an article for ThatMutt.com about techniques for protecting Baxter from ticks.) As much as the quantity of ticks we’ve faced this spring is an anomaly, I feel like ticks are part of living on the farm.
However poor Matt is losing his mind. He’s mowed so much grass this spring–determinedly riding Wiley around on tick killing missions.
The one upside of this plague is that adding birds to our family has moved up our list. Hens, particularly guinea hens, eat ticks. Birds have always been on our someday list, but Matt has put them on the “we need to kill these ticks now” list. When my husband makes a decision, things happen fairly quickly.
After that statement, you might expect to see a picture of a cute fluffball chick or a feathered hen here. We’re not that impetuous. First we will build the coop and then we will get our birds. But I think we may have found our summer project.
Any coop building tips to share? Or any tick fighting strategies? Do you have ticks at your house? What pests are you battling this spring?
I’m feeling a bit sentimental after five years on the farm. We have a special place, and I really treasure being here.
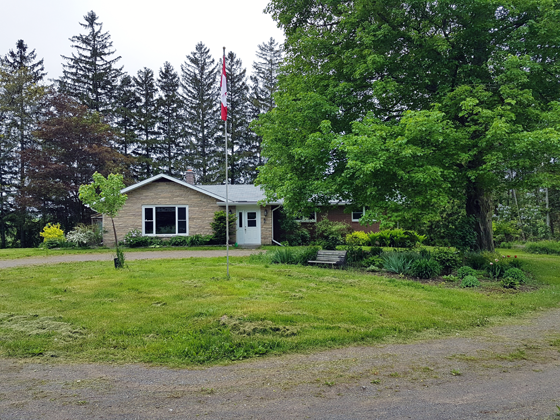
The house and the property have evolved since we arrived here five years ago. Looking back to April 2012, we’d added the flagpole to the turnaround, but the rest of the property–especially the turnaround–were still a disaster.

In our second year, I started taking a photo each June 1. Everything is green and growing. It’s a nice time of year to showcase the farm.
In June 2014, we were still establishing the gardens, but things were looking much tidier than when we first started.

This spring, we’re still making progress, and I’m so proud of what we’re building.
The exterior of the house itself has not changed as much as the interior or the rest of the property, but it will… someday. (And yes, I know our little maple tree is tilted.)
I think it will be fun to look back at these June 1 photos in another 5, 25 or even more years and think about all of the memories we’ve made here.

How do you mark progress at your house? What time of year does your home look its best?
