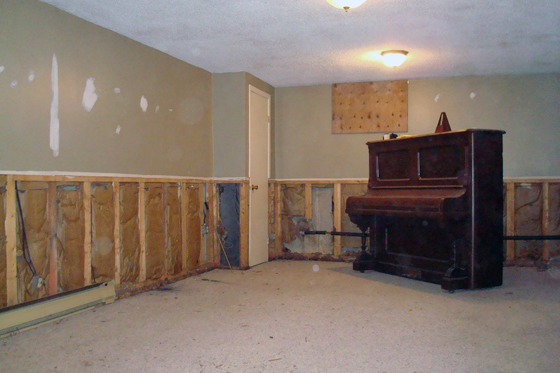
Warm and toasty… and teal?

What do you think of our new colour scheme in the basement?

Spray foam insulation

It’s a little bit smurf, a little bit cotton candy.

Matt was hoping for blue. I’d say he got his wish.

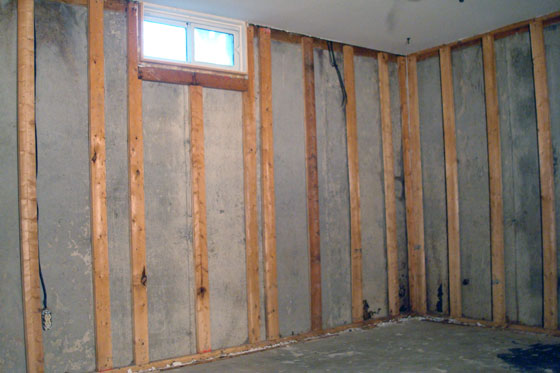
Last week, we had spray foam insulation applied to all of the exterior walls.

As you’ll recall, the original plans for the basement reno were mostly cosmetic (replace carpet, remove paneling, relocate cabinetry, leave all the drywall in place and just patch and paint). Simple, easy, quick!

However, we’ve had a few surprises in the form of inadequate insulation and improper wiring. Our solution was to remove the drywall and the existing R7 insulation from all of the exterior walls and start fresh.

R7 insulation

The old insulation was actually stamped R7. I don’t think I’d admit it if I was that inadequate.

However, we couldn’t just simply put the new insulation into the old walls because all of the studs were laid flat on the concrete. This meant we only had 1 1/2 inches for insulation. We had to fur out all of the existing studs with new 2x4s.

Furring out studs

We screwed new 2x4s onto the existing studs.

The count was close to 100 studs for the whole basement. Each one had to be plumbed (make sure it’s perfectly vertical) and then toenailed (screwed on an angle) with three inch screws to the old studs. It took two people to do each stud (one to hold and one to screw), so this stage has taken us a little while to complete. Matt and I found it took us about two hours to do a wall.

It would have been easier to put the new studs flat onto the old studs, but we wanted the higher R factor that additional depth allowed us. We ended up with 5 inches of space and we had the option of R20 or R27 for the insulation. R20 application meant we’d have 3 1/4 inches of foam and R27 would be 4 1/2 inches. We chose to go with R20 because there was nearly a $1,000 price difference for just 7 more R factors, which wasn’t worth it for us. R20 is still a really good rating.

I’ve never done spray foam before (and to be clear we couldn’t find a DIY option for spray foam, so we hired an insulation contractor to do the work for us), but we chose this option over the traditional batts for a couple of reasons:

  1. Traditional insulation requires tar paper (or some other membrane) between the concrete and the studs, and there was no way we could do this and still leave the existing studs in place. We then would have to run a plastic vapor barrier over the insulation before we put up the drywall.
  2. We found about 6 mice (all dead) and numerous rodent highways in the old insulation.

Spray foam is tar paper, insulation and vapor barrier all in one. Plus it’s more rodent resistant, which is comforting given our discoveries.

The spray foam covers the wall space between each stud as well as the joist headers at the top of the walls. In the main room and long room the ceilings are all open so the sprayers had easy access (click here if you need a refresher on the floor plan for the basement). In the office we left the ceiling in place, so Matt cut back about 12 inches of drywall off the ceiling on the two exterior walls so that the sprayers would be able to access the joist headers and we’d have a good seal all the way around.

Spray foam insulation in the joist headers

These joist headers (which were completely uninsulated before) can be the source of a lot of drafts

To prepare for the spray foam we made sure all of the electrical and plumbing work that we wanted to do was completed in advance. Spray foam fills all of the nooks and crannies and hardens very quickly. It’s great for efficiency, but you can’t really change your mind and say, “Oh I really wish that plug was over here” after it’s all done.
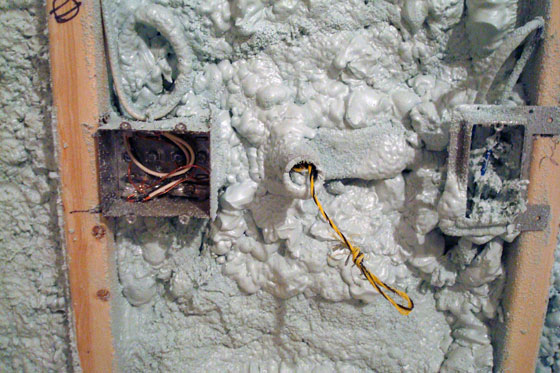
Electrical outlets encased in spray foam insulation

This is the corner in Matt’s office where the desk is going to go. From left to right we have a double box for electrical outlets, a plastic conduit that will eventually house the internet wire (we’ll use the string to pull the wire through the pipe) and a phone jack.

The spray foam crew took a full day to do the whole basement. While the spray is being applied, it is toxic, so the crew wore respirators and my Dad (who was on-site supervising) couldn’t stay in the house. When we got home from work that night there was a slight odor, but we opened the windows and it dissipated quickly.

Insulation is a major step in putting the basement back together. As much as we love the teal, we’re anxious to move on to drywall… Or maybe just anxious about drywall. This next stage is going to be a biggie. We’ll keep you posted on how we make out!

How to install a pot light

The original lighting in what will be the TV area of the basement consisted of four pot lights, two ceiling fixtures mounted on the walls and one ceiling fan recessed into the ceiling so that it didn’t decapitate anyone. These three different sets of lights were controlled by three different switches in two different locations.

The main room before

The original lighting in the basement.

We decided to keep just the pot lights, so Matt took apart the ceiling fan, and my Dad pulled out one of the wall-mounted ceiling fixtures while I dealt with the other one. We removed the boxes and wires running to each of the lights as well as the switches that controlled the ceiling fan and the pot lights. Then we reconnected the pot lights into the switch that originally controlled the ceiling fixtures.

Everything was working well, but we felt we needed a little more light, so we decided to add an extra pot light in the middle of the ceiling.

Apologies for the quality of the following photos. So many circuits are off in the basement due to the electrical work that we don’t have very many lights. We have construction lights set up, but they’re a little harsh. I played around with some new actions in Photoshop, but I can’t tell whether they made things better or worse.

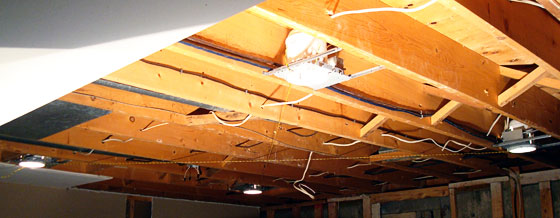
Potlights in the open ceiling

Our original four pot lights

Electrical work can be intimidating, but installing a pot light is a very straight forward job that can be completed in about a half an hour, even by those of us that are not licensed electricians. We did have a lot of other issues with the electrical in the basement, and for those we hired a professional electrician.

Here’s my pot light installation method, complete with lots of photos (of varying quality). Note that in the tutorial I’ve assumed that the wire that is going to be feeding your new pot light is already in place.

1) Turn off the electricity to your light. In this house, none of the circuits are labelled, so our usual method of finding the right one is to turn on the light (or plug something in) and have one of us watch it while the other person flips the breakers until we find the right one. Then we label it!

2) Determine where you want your new light. I used the oh so scientific method of tying a piece of twine to each of the existing pot lights. Where it crossed was the centre.

Using twine to find the centre

3) Now onto your light.

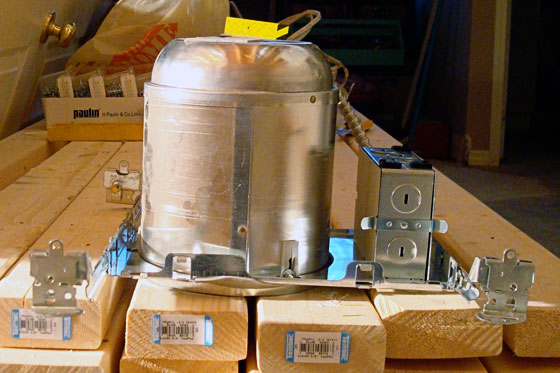
Pot light

Some pot lights can be installed in a finished (drywalled) ceiling. However, this type of pot light has to be installed where the ceiling is open.

4) Pop the cover off the wiring box to reveal the wires.

Preparing your pot light for installation.

Cover on (left). Cover off (right). I also cut off the push-in connectors because I’m used to twisting the wires together instead.

5) Now attach the pot light to the joist. For my light, this meant adjusting the brackets, or bar hangers, so that they were the right length to span between the joists and then nailing the bracket into the joist.

Installing a pot light bracket onto the joist.

For reference, holding the light in place while taking a picture is not the easiest. A third hand, or better yet a second pair, would be helpful.

6) Take a break because your husband has arrived home, and he brought dinner.

Pot light housing installed

Pot light housing installed. Time for dinner.

7) If necessary, trim your feed wire to the required length and strip back the casing to reveal the individual wires. The easiest way to do this is to use your side cutters to snip a little split in the casing, just enough so that you can access the ground wire (the copper one). Grab the ground wire with your pliers and pull to rip the casing. You want to remove the casing for about 6 inches so that you can access the black, white and copper wire. Once your casing is ripped back far enough, clip it off with your side cutters. Strip about a 1/2 inch or so of the plastic coating off of the tips of the black and the white wires. I usually do this with a knife, as though I’m peeling a vegetable.

Removing the casing from wiring

Remove the casing from the wires by pulling on the ground wire. For reference, the ground wire is pointing up to the right, the black and white wires are pointing down to the left and the empty casing is pointing down in the centre.

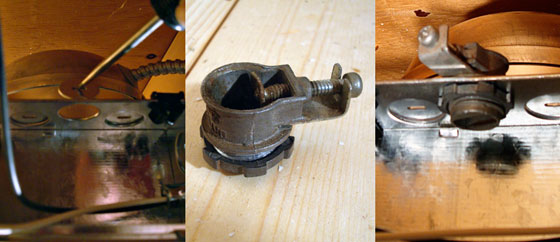
8) Knock out one of the round metal covers (coincidentally called knock-outs) on the pot light housing. I used my awl to bend it up and then wiggled it back and forth until it snapped out. The wire isn’t supposed to float loose in the hole, but the pot light didn’t come with any clamps or conduit, so I pulled one off of an old electrical box and put it in the hole.

From left to right, removing the knock-out, the clamp that will hold the wire in place and the clamp installed.

9) Insert your feed wire into the pot light and clamp it in place.

Feed wire inserted into the pot light

Sorry for the slightly blurry photo. The plastic casing should be just inside the pot light housing.

10) Connect your feed wire to the wire in the pot light: black to black, white to white, ground to ground. Twist them together with your pliers and cap them with marretts.

Connected wires in pot light housing

You don’t have to get fancy with different coloured marretts. These are simply the two I had on hand that fit the wires properly.

11) Once everything is securely connected, tuck your wires back into the housing, put in a light bulb and flip the circuit back on to test your light.

New pot light

It works!

12) Put the cover back over the wiring area. Make sure the light is positioned where you want it on the hanger bars. There’s a screw that you tighten into the bar to lock the light in place. Stand back and admire your handiwork.

Five potlights

Let there be light!

The five pot lights look great, and throw a sufficient amount of light. I initially thought we might need some wall sconces or extra lamps, but I think the pot lights will work well for us.

Oh and you might want to take down your measuring twine, unless you really like it as a decorative element.

ETA: The final, final step in installing pot lights is installing the trim, which I did after our ceiling was drywalled. I’ve posted my instructions of how to install pot light trim.

Reflections on a DIY lifestyle

Last week two of the blogs I read regularly did posts on the theme of DIYing vs. Living In Your Home & Enjoying It (that’s Young House Love’s title. DIY Diva had her own reflections). Reading their posts got me thinking about my philosophy and how we live in our house.

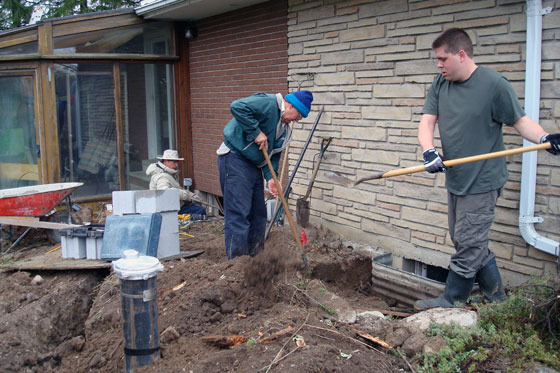
Removing a window well

Matt and Dad dig out an old window well while our mason works at bricking up another old window

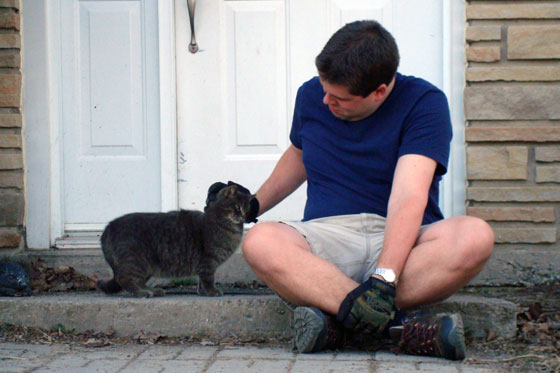
It’s been just about two months since we moved into the farm. Our major motivation for moving to the country is to enjoy a slower pace and really savour life, but I feel like we really haven’t taken much time to sit down and enjoy being here. We have moments–Saturday afternoons before dump runs tend to be a time you’ll catch us sitting outside for a few minutes… usually just on the ground or a rock, usually with the kitties around us.

Matt takes a kitty break

Matt on a kitty break. Notice the work gloves are still on.

As much as I love DIY, it can be a tough lifestyle at times.

Last week was a bit rough in spots. We had a couple of late nights working on the house, a couple of evenings out for other stuff (the rest of your life and work continue even when you’re mid-reno) and a couple of last minute shopping sprees/construction blitzes to prepare for trades who were coming the next day.

We tend to sacrifice sleep to get it all done and there are lots of mornings that we are dragging and some days where we feel a bit droopy.

Skinned knuckle

Cuts and scrapes, bumps and bruises are all part of DIY

I can’t imagine not working on our house myself and making it what I want with my own two hands. But there comes a point in every project where I just want it to be done. We’re not there yet. It usually hits sometime around the drywall stage.

A big project, like the basement reno we’re in the midst of now, causes a lot of chaos. Everything that would normally be in the basement is in the living room. The kitchen island is covered with tools and materials and manuals and notes for trades. There’s a fine skim of dust everywhere, both upstairs and down.

The yearning to have a clean and organized house and be able to sit down for an evening without feeling guilty is powerful motivation at this stage of a project.

The partially gutted basement

The partially gutted basement

We do try to keep a balance. We’ve learned we don’t always have to be working on the house. Yes, taking a night off makes me feel slightly guilty and pushes the finish line a little farther away. However, hanging out with friends, sitting on the couch watching TV or just taking a walk rejuvenate me so that I’m more motivated when we get back to work.

Also, we tend to only take on one big project a year, so we have lots of time off to recuperate and relax in between–and forget!

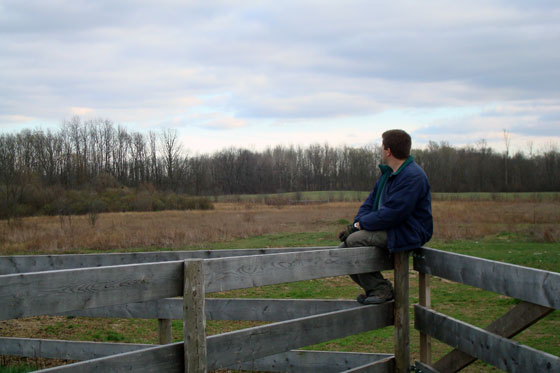
Matt sitting on a fence

Vistas like this just outside the front door can make us shift our focus pretty quickly from DIYing to relaxing.

This basement project is not our first DIY reno, but this is my first time blogging about it, and I’m finding the blog is very motivating as well. Keeping a record of our progress and posting pictures of what we’re working towards help to keep me moving. I know at the end it will be beautiful and completely worth it.

As well, knowing that we have all of you out there supporting us, reading updates and looking forward to seeing the finished product means a lot. People have been promised an invitation to play games and watch movies in our fun basement hangout. We have to deliver!

Now it’s your turn. Whether you’re a DIYer or not, how do you stay motivated?

Psycho shower

In previous posts I mentioned that our basement bathroom is deserving of its own feature. Well, here it is. The promised post on our basement bathroom.

Let’s take a look, shall we?

Basement bathroom before

Hey, that looks pretty good. Shower, toilet, vanity, sink, mirror, light. All of the parts seem to there.

Let’s look a bit closer, shall we?

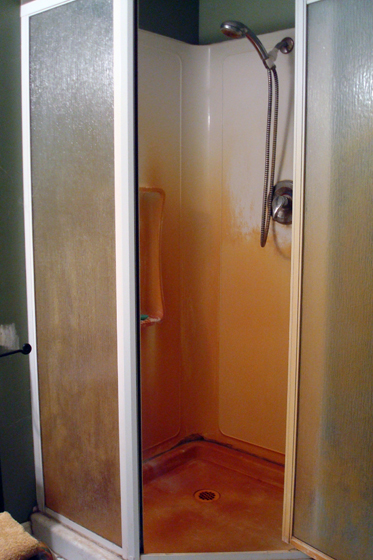
Shower in our basement bathroom

Psycho shower! No, this is not a crime scene. We have some issues with iron in our water.

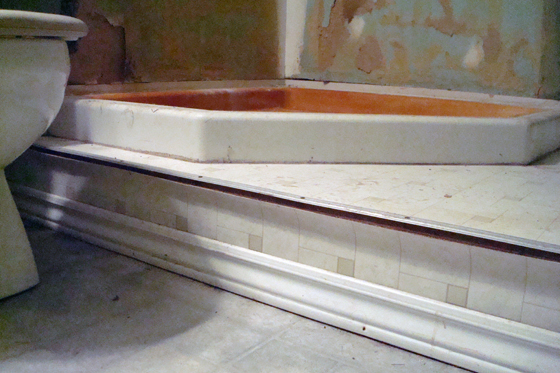
Psycho shower on a platform

Psycho shower on a grody platform (and yes, some demo has taken place between the first two photos and this photo)

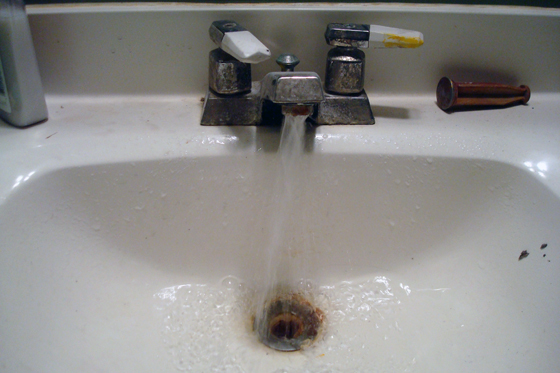
Decent sink, but ugly faucets and some spray issues

Decent sink, but ugly faucet and some spray issues

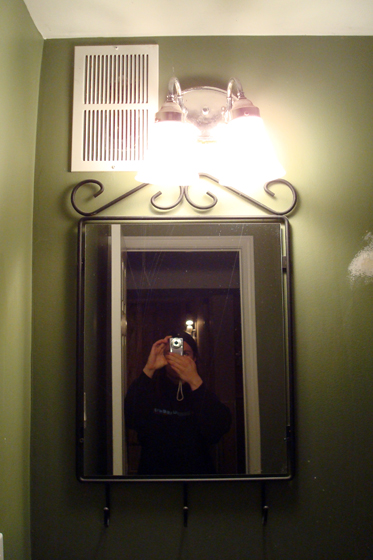
Off-centre light

Off-centre light (and random vent… don’t know what it’s covering yet)

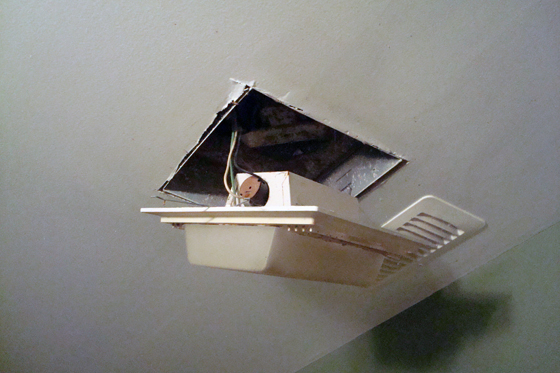
Exhause fan

Exhaust fan issues (we haven’t touched this yet. This is actually how it was when we bought it.)

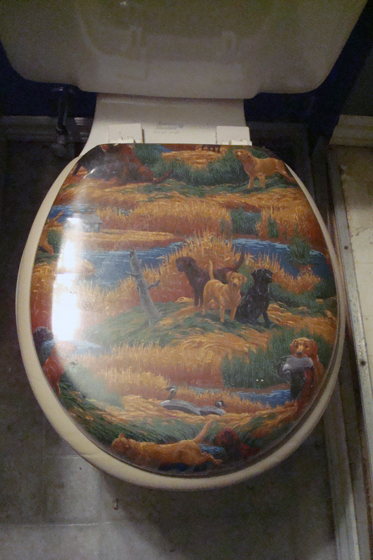
Cushy toilet seat

Cushy toilet seat with colourful hunting scene on the lid

Lovely, isn’t it?

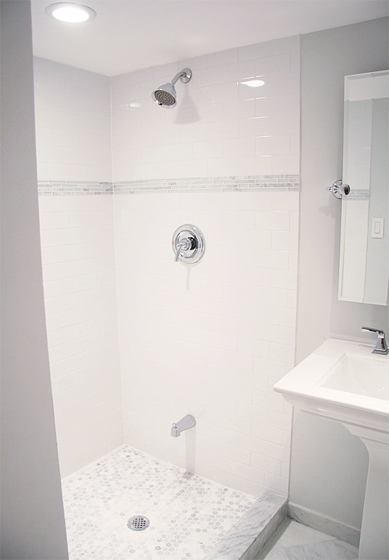
We knew from the first time we saw it that we would be tearing out the basement bathroom entirely. Here’s the vision for what it will be.

Not at all psycho shower

Decidedly not psycho shower. Source: Aubrey + Lindsay’s Blog

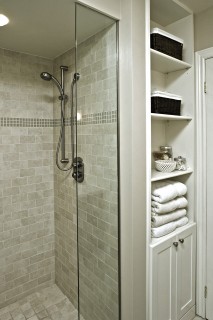
While most of the key features of the bathroom are in place, the one thing that we’re missing is storage, so the reno will have to include space for extra soap, toilet paper, towels and all of the other stuff that is part of a bathroom. Something like this will be perfect.

Built-in storage

Source: Houzz

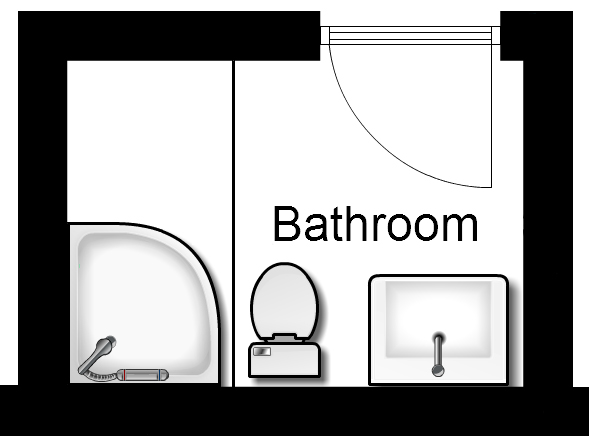
Here’s the floor plan before.

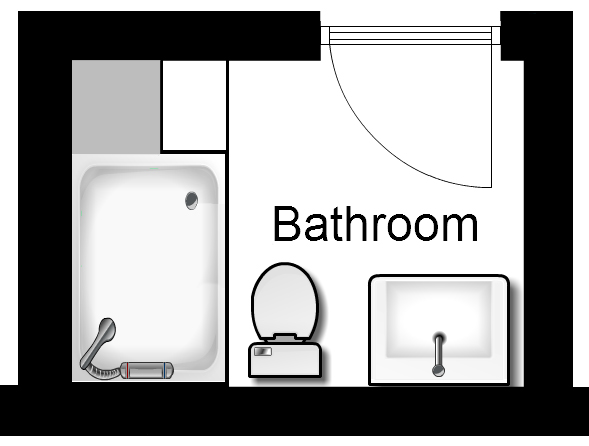
And after.

Basement bathroom floor plan after

Much larger shower (hopefully not on a platform), with a ledge at the one end for shampoo and soap. The other side of the ledge will be floor to ceiling storage. Source: floorplanner.com

Like in the rest of the basement, we’re not making major changes to the layout, but everything will be coming out and the walls will be opened up and the insulation will be upgraded. We’re probably going to reuse the vanity, albeit with a new faucet. There will be a new toilet, new floor, new lighting and lots of nice, clean, new tile.

After growing up in a house with only one bathroom, Matt now requires his own bathroom. So I will be the main user of the upstairs bath, and this one will be all his. Somehow it doesn’t seem entirely fair that he gets the nice new bathroom all to himself. Don’t you think?

For more inspiration images, including ideas for fixtures, see my basement bathroom board on Pinterest.

How to recover a chair seat

As part of preparing for the family dinner that we hosted on Good Friday, I had to put new cushions on our dining room chairs.

We had our dining room set refinished just before we moved into the farm, and since moving in the chairs have been naked.

Naked dining room chair

Yikes, naked chair!

I know it’s not a hard core renovation, but it is DIY, so I’m posting a brief how-to. I should be clear though that this was my first true upholstery project, and I am sure I made a few mistakes along the way. There are lots of great tutorials online by people much more skilled than me. However, here’s the method that I used for our dining room chairs.

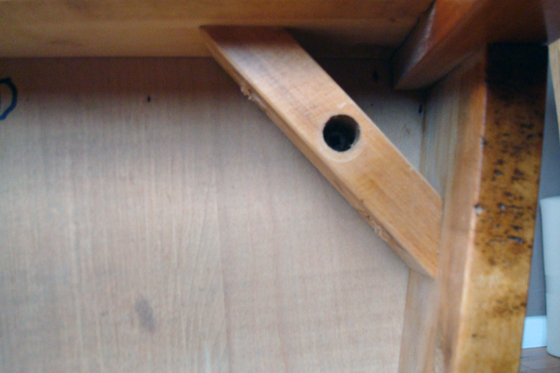
1) Remove the seat from the frame. In my case, this meant unscrewing the seat from four corner braces that were underneath.

Bracket

Brace under the seat that holds the seat to the chair frame.

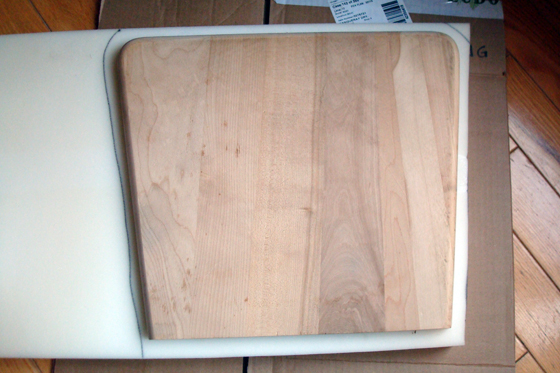
2) Cut your foam. My foam was 1 1/2 inches thick. I cut the foam about a 1/2 inch bigger all the way around than the seat (no measuring, I just eyeballed it). If you’re fancy or a professional, you’ll probably want to use a foam saw for this step, or even an electric knife. I didn’t have either of those things. I tried a utility knife but ended up having the best luck with my kitchen scissors. The edge wasn’t perfect, but it was smooth enough for me.

Cutting the foam

I allowed about a 1/2″ border all the way around.

3) Using the tips in this video, I tacked the foam to the top of the seat. I stapled about every 3 inches around the three outside edges. Again, if you’re fancy or a professional, you will likely use a pneumatic staple gun for this. I am neither of those things, so I used my manual staple gun that’s a hand-me-down from my father-in-law (pictured in the upper right below). It takes a bit more muscle, but you can do this project without fancy (or professional) tools.

Foam tacked in place

Foam tacked in place

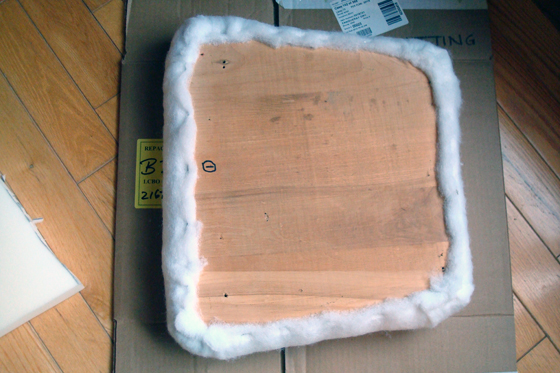
4) The next step is batting. Cut a square of batting that’s about 8 inches bigger all the way around than your seat. Lay the foam covered seat face down on the batting, fold the batting around your seat and staple it on the bottom. Make sure to pull the batting taunt. This is the moment to make a nice smooth surface for your fabric. Start on the straight edges in the middle and work your way out to the edges. Do the corners last. For the corners, I didn’t have a special technique. Usually, I just tried to smooth and squish the batting into position and then I stapled the heck out of it. Once you’ve stapled all the way around, trim off the excess batting.

Batting

Bottom of the chair with the batting stapled in place

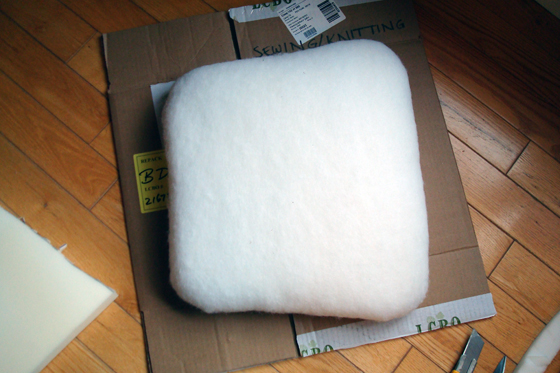
5) Flip over your seat and admire the lovely cloud that is now your cushion. At this point, you’re ready for fabric.

Chair seat ready for fabric

Chair seat ready for fabric

6) The process for installing your fabric is the same as the batting. Make sure to allow yourself lots of extra fabric all the way around your cushion, start in the centre of the front edge and staple in place. Pull your fabric taunt as you go and make sure it’s square on your cushion–especially important if you’re using a plaid or striped fabric. I probably stapled every inch or so. For the most part, I used 5/16″ staples, but I switched to longer staples for the corners where I had to staple through a lot of batting and pleats of fabric. The corners are the spots where you’ll have to spend a bit of time figuring out exactly how you want your cushion to look. For me, because I had rounded corners at the front, the best solution seemed to be a double pleat. It took some time to get my fabric to lay exactly the way I wanted it. And then it took some more time to make sure the other corners all looked roughly the same as my first pleat.

Pleats on the front corner

Pleats on the front corner

At the back I did a simple single pleat that’s pretty much hidden by the chair frame.

Back corner pleat

Pleat on the back corner (ignore the wrinkle)

7) Once your cushion is complete, the next step is to reattach the seat to the frame. In my case, this meant rescrewing the seat to the corner braces. I ended up having to get longer screws for this because, with the batting and fabric, the old screws were too short.

Finished chair

A finished chair

As I said at the beginning, this is my first upholstery project (beyond sewing toss cushions for the couch), and my verdict is that this is a very easy DIY. You don’t need any sewing expertise, and you need very minimal equipment. My chairs are not perfect by any means, but I still think they look great, and I’m really pleased with the fabric I chose.

I picked a linen blend that looks very natural. It has a slightly rough texture that I think is appropriate for a farm setting.

Close up of the new fabric

Close up of the new fabric

We’ve had this dining set for five years (I’ll save the story of how it came to be ours for another post), and during all that time the cushions have been torn, mis-matched and not at all cushy. It’s so nice to walk through the dining room and see the chairs finally finished.

Dining room set with finished chairs

Dining room set with finished chairs

For a more comprehensive (and professional) tutorial, I recommend you check out this video which I mentioned in step 3. I used this as a reference when I was beginning my project. Jenny on Little Green Notebook also tackles a lot of upholstery projects and posts great step-by-step tutorials, including this one for chairs that are much more complicated than mine.

Demo done

Our Friday night looked something like this.

Matt declares victory over a pile of drywall and insulation.

Matt declares victory over a pile of drywall and insulation.

The upside of schlepping 28 garbage bags of insulation up from the basement and out to the drive shed at 11:30 on a Friday night is that you don’t have to do it on Saturday. That means you have time to pull every nail, staple and screw out of the studs, rip up all of the carpet, load everything in to the truck and trailer and make it to the dump before it closes–with a half hour to spare.

Demo in the basement is pretty much done now. The next items on our to-do list include fixing up the electrical.

Does this look right to anyone? I think we may need professional help.

Does this look right to anyone? I think we may need professional help.

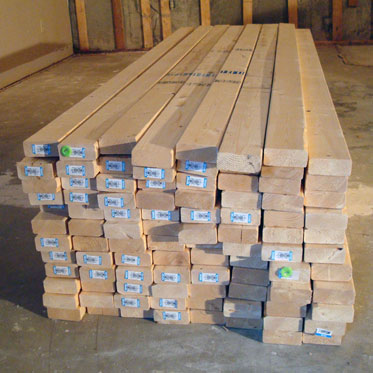
And beefing up the existing studs, which have been laid flat, leaving us only 1 1/2″ for insulation–not enough.

New lumber to fur out our existing studs.

New lumber to fur out our existing studs.

Our formerly finished basement is now very much unfinished, but I’m actually really happy to see the clean slate. And I feel like we’re approaching the point where we finally start to put it all back together.

Matt's office

Hello clean slate (also known as Matt's office)

What did you do on your weekend? Productivity is satisfying, but I do hope someone out there got to sit and relax a bit.

Basement plans

So I realized I talked a lot about what we have to do to the basement, but not a lot about what it will be.

The main words to describe this space are cozy, comfy and casual.

Sarah Richardson Sarah's House Season 1 basement

Not our basement. Inspiration picture from Sarah’s House Season 1

We’re starting with a pretty good space. We have great ceiling height, large rooms and really good bones. You’ve already seen a sneak peak of the room I’ve dubbed the long room and heard about some of our early demo work. Here are the other rooms that make up our basement.

The main room before

The main room. Picture a large, comfy sectional couch where the wood stove is and a big TV on the wall opposite the staircase.

The basement before

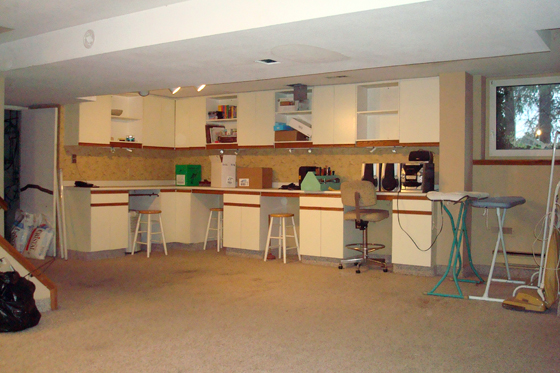
The other side of the main room in the basement. Not sure what the deal is with all of the cabinetry and the workstations. This has all been removed, but some of the cabinets will be reused in Matt’s office. Picture a ping pong table and games table in this space.

Basement bathroom before

The basement bathroom, soon to be known as Matt’s bathroom. This project will get its own post.

Basement before

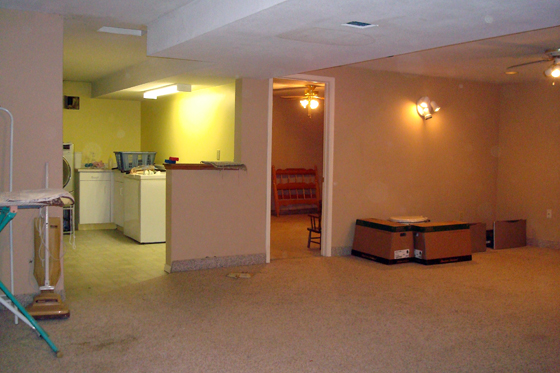
Another view of the basement before. The laundry room is to the left and Matt’s soon-to-be office is through the doorway in the centre. The half wall has already been demolished and a new doorway to the office has been cut behind it.

The basement also includes our cold cellar and utility room, but we’re focusing our renovation on the actual living space.

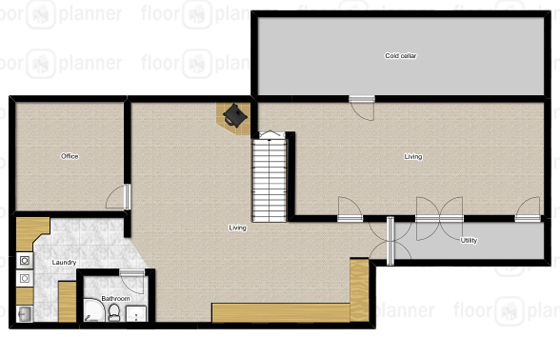
Here’s a floor plan showing how the spaces fit together.

Basement floor plan before

Basement floor plan before (Image courtesy of floorplanner.com)

And here’s the plan showing the changes I’d like to make.

Basement floor plan after

Basement floor plan after. Just subtle changes (except for the aforementioned bathroom). Just moving some things around and dialing up the cozy factor. (Image courtesy of floorplanner.com)

In the end, the main spaces in the basement will be used for TV watching, games and hanging out.

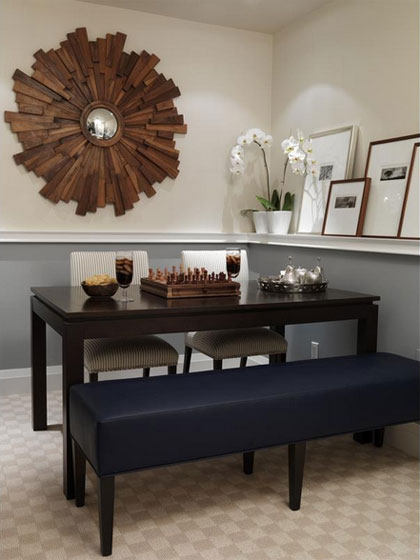
Sarah Richardson is known for putting a full size table in her family rooms as a spot for games, work, crafts or dining.

I think that’s a great idea and we’ve got the space for one, so that’s on the list too.

Sarah Richardson Sarah's House Season 1 basement

Inspiration photo from Sarah’s House Season 1.

I’ve already made some fun board game-inspired artwork to go on the walls.

We found a ping pong table top in the barn, so we’ll be making a base for it and bringing it into the basement. There’s a dartboard in the office that we’ll be hanging up somewhere. We’re also storing my brother’s pool table for him and I’ve told him not to be surprised if it ends up in the long room while it’s here.

The basement was Matt’s main priority when we were house-hunting, so I’m excited to make it a nice space that’s special for him.

For more of our inspiration images, visit my Basement board on Pinterest.

And feel free to add your input in the comments. What makes up your perfect basement? Are you a rec room fan or a home theatre enthusiast?

This

Sunday morning, this arrived at the farm.

Woodsplitter

And with it came these.

Chainsaws

Soon, there was lots of this.

Matt and his dad cutting wood

And a whole bunch of this.

Me splitting wood

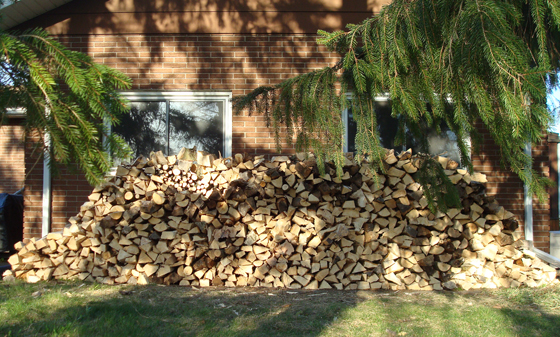
By Monday evening (yes, that means this exercise in lumberjacking went on for a full two days), we had this.

Our new wood pile

Hello, crackling fires on cold winter nights

A huge thanks to Matt’s Dad for all of his work, time, equipment and expertise. He took down the tree on our first weekend and then came back to help us finish the job–and do battle with two huge stumps. End result is three rows of wood, each about 16 feet long, 5 feet high, and all of it cut, split and stacked.

I love my father-in-law’s wood splitter. You might say we cheated and didn’t do it the way a real farmer would. I say it’s magic. The best invention ever.

Basement reno

When moving into a new house, the first reno project for many people might be the kitchen or the bathroom, something in the main living space. But not for us. Nope, we’re going underground and doing the basement.

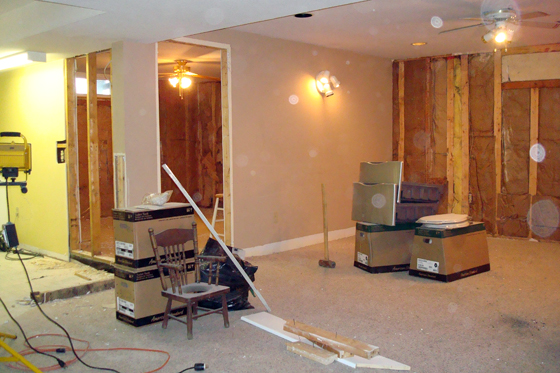
Basement demo in progress

Basement demo in progress

We knew from the first time we saw the basement that we were going to rip out the bathroom entirely right away. Very quickly on the first weekend we realized we were also going to rip out the carpet. Then, when Matt started taking down the paneling in the long room, we realized we needed to upgrade the insulation in all of the exterior walls.

This is when scope creep began to happen. Scope creep happens when you say to each other, “Since we’re doing A and B, we might as well do C, D, E, F and G.”

So, here is the to-do list for the basement reno:

  1. Redo the bathroom (this is a big project that will get its own post)
  2. Replace all the carpet
  3. Remove the wood stove
  4. Relocate the built-in cabinetry
  5. Brick up one window
  6. Redo all the insulation and drywall on the exterior walls
  7. Remove barn board paneling
  8. Relocate office doorway
  9. Deal with electrical (remove baseboard heaters, fix lighting issues)

So yeah, this isn’t just a slap some paint on the walls project. Oh well, we just came from a basement reno at our last house. We can do it all over again. It’ll just take a little more time and energy than we’d initially planned on.

Hopefully the scope of this project doesn’t creep any further!

We’ve already made pretty good progress. Most of the exterior walls are opened up, the wood stove is out, the new office doorway has been cut and the cabinetry is down.

Our weekend involved things like discovering peg board, floor to ceiling, wall to wall installed behind the drywall on every single wall of Matt’s new office. Just FYI, peg board is not easy to remove. Drywall, you can usually pop that right off. Peg board, not so much. I now officially hate peg board and will never ever be using it anywhere.

We also discovered that our wood stove is even heavier than our piano. Matt and I were able to get it off of its tile platform together, but we couldn’t move it very far just the two of us, so we decided to save it until my Dad was there to help us (you’re welcome, Dad!). Turns out, the three of us couldn’t move it very far either.

We managed to heave it onto a dolly, which allowed us to wheel it to the bottom of the basement stairs. Then we set up planks on the stairs and tried to wheel the dolly up our makeshift ramp. We made it about 6 inches.

Plan B involved a very long, very heavy rope that we discovered coiled up outside the drive shed. The rope went around the dolly and the wood stove about 6 times. Some creative knots were tied. Then the rope went up the stairs, out the front door and was tied to the trailer hitch on my Dad’s truck (can you guess where this is going?).

I have no photos of any of this, because, as I’m sure you can understand, our hands were a little full.

With me driving, Matt directing me from the top of the stairs and Dad guiding the dolly from the bottom, the extrication began. Eventually, even the truck gave up as the back wheels started spinning while the wood stove was still about 3 feet from the top of the stairs. The rope was creaking, the planks were sliding and we were still so close–yet so far!–from victory.

But by that point, we were not going to surrender to our iron adversary, so with Matt and me pulling and my Dad pushing we managed to heave the wood stove up the final few feet. Dad’s comment was that he had no choice but to get it up since he was on the bottom and the wood stove was going to go through him if gravity prevailed. When it was finally on level ground, the three of us just slumped against the floor, the wall, the stairs, wherever we were, chests heaving, hands still gripping the stove, a little bit stunned that we actually managed to get this beast out of the basement.

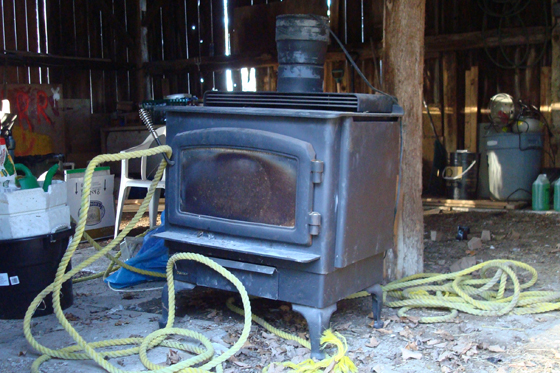
Wood stove

Wood stove, in its new temporary quarters in the drive shed.

So, I now have a wood stove for sale. You want it, you come and get it. I will not be helping you load it.

Basement reno begins

Here’s how we spent our Saturday afternoon.

The future pool table room

Basement before

Basement after

Basement after.

The space that I call the “long room” in the basement had barn board paneling on the lower half of the walls. Matt was not a fan.

It was chipped, water stained (notice the flood evidence in the first picture) and just a whole lot too rustic for our taste (and yes, that is plywood covering a broken window in the photo). The patches you can see on the upper half of the wall are not our handy work and in fact that drywall is now going to be coming down and completely redone, so just pretend it’s not even there.

After Matt finished with the frustration that was attaching the pedestals to our new washer and dryer, he was ready to hit something. That meant the paneling was doomed.

A few hours later we learned several things:

  1. Don’t mess with Matt when he has a wrecking bar.
  2. There is no drywall behind our barn board paneling… Huh, I guess this is going to be a little more work.
  3. The insulation behind the barn board is both inadequate and improperly done… Huh, I guess this is going to be a lot more work.
  4. Our piano (which came with the house) weighs about 3,000 pounds… and when Matt’s adrenaline is up, he can move it all by himself.
  5. You should always find the right breaker before you start to mess with an electrical outlet (my poor Phillips screwdriver will never be the same).
Basement after

Another angle of the room, including the lovely view we now have into the utility room.

This is going to be a long project, so don’t expect the final reveal next weekend, but I am pleased to say that work inside the house is finally underway.