A new tool for the farm

Last week Ellie and I put a new-to-us tool to work for the first time. Our own wood chipper.

You may recall that two falls ago (2022), I borrowed our farmer’s wood chipper (and one of his giant tractors to run it). A little while after that, I was at our tractor dealership, and our sales guy said, “Hey did you ever get that brush pile cleaned up? We have a used chipper here, and your tractor could probably run it.”

Well, the brush was cleared, but I knew there would be more to come. After thinking about it for a few days (and with some encouragement from my sister), I bought it.

But up until this spring, I still hadn’t used the chipper yet. Though I had been rebuilding the brush piles.

So finally I asked our sales guy to come out, and he helped me hook up the chipper and made sure everything worked properly. And then we blasted through the branches.

The chipper worked so, so well. It handled big stuff, small stuff, green stuff, dry stuff. The chips are nice and small (our farmer’s chipper let a lot of sticks through). And it gives us great mulch to use in the gardens–much better than burning the brush as we’ve done in the past.

For anyone interested in the details, the chipper is a Wallenstein BX42. It can handle branches that are up to 4 inches, though at our farm that’s firewood. I probably chipped a few 3 inch pieces, and they went through just fine. Our Kioti CS2410 (24hp) tractor runs it easily.

The chipper is a useful attachment, and I’m glad that we have it. It’s a good way to clean up branches, which we always have here at the farm.

Do you have any new tools at your house? Do you use mulch in your gardens? Who else buys something, but then takes a while to use it?

Four tips for tackling an intimidating task

Remember when we bought a rotary cutter? (For those that need a refresher, it was in 2017.) We put it to work mowing the septic bed, meadow and pond shore. And then it got tucked into the driveshed and has been used rarely since.

Last year I cleared the septic bed and part of the meadow (again). But I didn’t use the cutter. The brush was too big by then, so I used my new-to-me reciprocating saw. Then Matt’s Dad came and used his chainsaw.

It was always my plan to use the rotary cutter too, but I never got to it last year.

Last week, I decided to give it a try.

I took advantage of nice weather, a free afternoon, and Ellie at school to hook up the mower. Tasks like this are always a bit intimidating for me. The cutter is huge and heavy. It’s a bit tricky to get everything connected properly. The tractor doesn’t always have great traction, and the ground I wanted to mow was hilly and bumpy–lots of chances to get stuck. (Like Cigo in the photo below, who is actually tangled up in a wild raspberry bramble.)

But in about twenty minutes, I had the cutter connected. Alright. Let’s try mowing. Success.

An hour after I first came outside, I was done. A task that had been on my list since last year (longer if you look back to when we bought the cutter) was done.

I was so proud of myself. Conquering something that feels hard is a big accomplishment. Here are my tips for tackling an intimidating task.

Start small

Break your task down into smaller steps. Focusing on one thing at a time can be less intimidating than looking at the whole big project that you have to do. My initial plan was to see if I could get the mower hooked up to the tractor. Even if that was all I accomplished, I was going to call it a win.

Just start

Sometimes it’s hard to figure out where to begin. Or you feel you can’t start until everything is perfectly set up. With the mowing, at first I couldn’t figure out how to balance the mower. It was tilted way too far forward and the front edge dug into the ground if I lowered the hitch too far. Also, I couldn’t get the PTO to fully lock. But I started anyway. After my first pass, I figured out how to balance the mower. The PTO slipped off a few times, but I eventually got it to click. And in the meantime, I got some mowing done. Even if you don’t feel completely ready, start. You’ll already be accomplishing something.

Ask for help

There is no rule that says you have to do everything yourself. It can be hard to ask for help, but in my experience people are usually very willing to step up. With the mowing, I could have called our farmer, our tractor salesperson, or my cousin who helps mow our grass. They are all very kind, generous people who know exactly how to connect the cutter to the tractor and would be happy save me some anxiety–and muscle strains. Think about the task you’re tackling and who would be best to help.

Know when to quit

Intimidating tasks truly are hard. If things really aren’t working out, it’s okay to take a break and come back later. (Perhaps after exercising your phone a friend option, above.) Even if things are going well, it’s also okay to take a break. With the mowing, I’d cleared the areas I wanted to clear and I’d managed not to get stuck. (I’d also managed not to run out of fuel, but the gauge was very low.) There’s always more I can do, but sitting on the tractor eyeing additional overgrown areas, I said to myself, “You’re pushing your luck.” And I drove up the hill to the barn.

It feels really good to cross this task off my list–and to know that I can do it again if I need to.

I’m hoping to do at least a couple more mowings this year to keep the septic bed clear. Maintaining is much easier than starting from scratch (again).

It’s also easier knowing that I can do this–and it wasn’t that hard.

Do you have any accomplishments to share? Or any intimidating tasks that you need encouragement to tackle? What tips to do you have to tackle intimidating tasks? What outdoor work have you been doing at your place?

How to change a tractor tire on a Kioti CS2410

Baxter with the flat tractor tire

One of the issues we’ve run into with our little Kioti CS2410 tractor, Wiley, is his front tires not holding air.

The tires are just rubber tires on metal rims. No tubes. So if they’re underinflated or hit something, we’ve found that the seal between the tire and the rim can start to leak.

We added a tube to the front right tire back in our first winter here. The left front tire we left mostly alone, just checking it and reinflating it regularly.

But after Wiley got stuck at the start of the month, the front left tire wouldn’t hold air at all.

Flat tire on a Kioti CS2410

So we popped it off the tractor, took it to the tractor dealership and asked them to put in a tube.

Removing a tire from a Kioti CS2410 is relatively straightforward.

First, with the tire and the tractor still on the ground, we loosened the nuts. Keeping the tractor on the ground ensures that your tire won’t spin while you’re trying to undo the (often very tight) nuts.

How to change a tire on a Kioti CS2410

We found a normal tire iron was too big for the nuts. Instead, we used our socket wrench with a 5/8 socket.

5/8 socket

Once all five nuts were loose, we raised the tractor up with a jack under the front axle. (If you’re on uneven ground like we are, it’s smart to stabilize your jack by putting it on a board).

How to change a tire on a Kioti CS2410

Then we unscrewed the nuts the rest of the way and lifted off the tire. Super easy.

How to change a tire on a Kioti CS2410

Wiley did a balancing act for a few days (we stuck some wood under the axle so we weren’t relying solely on the jack) while the tire was at the repair shop.

How to change a tire on a Kioti CS2410

Once we got our newly tubed tire back, attaching it to the tractor was pretty straightforward.

How to change a tire on a Kioti CS2410

The hardest part was getting the holes perfectly lined up so that the nuts would screw in straight. It was helpful to have two people, one to hold the tire and the other to handle the nuts.

Once we had the nuts finger tight, we lowered the tractor back down onto all four wheels and removed the jack. Then Matt tightened the nuts with the socket again. Like with any tire, follow a star pattern when you’re moving from nut to nut, rather than going around in a circle.

How to change a tire on a Kioti CS2410

And that was it. Then Wiley got to go for a little run on his new wheels.

How to change a tire on a Kioti CS2410

I’ve learned that a tractor–even a small one like Wiley–is indispensable on a farm–even when we’re not farming. We’re very happy to have him back in working order and to not have to worry about flat tires any more.

Labour Day labours

Happy Labour Day everyone.

Like Studio McGee said on Instagram the other day, I’m “really feeling the whole rest from your labours thing this weekend.”

Of course, we tend to mix in a bit of labour around here even when we’re having a mostly relaxing weekend–a three day weekend too. But sometimes the labour doesn’t go as planned.

Tipped tractor

Tipped tractor

Spinning tractor wheel

Towing the tractor with the car

Tractor behind the car

Note the dog, who is very unconcerned with his chances of getting smushed by either a car or a tractor or whipped by a snapping chain. I’m glad he trusts us to keep him safe, but dude could have a bit better sense of self-preservation.

Note as well the husband hiding behind the front end loader.

And a final note that this is all my fault. I hadn’t mowed the gully with the push mower as well as I usually do. There was an actual thought of, “I wonder whether Matt can get down here with Wiley.”

Turns out he can, but he can’t get out, at least not when the ground is soft and a little wet.

What are you doing this Labour Day?

Finding our waterfront

Remember how clearing the pond shore was my one and only outdoor home goal for this year? And how at the mid-year report I said it wasn’t going to happen?

It’s happening, people.

Our keen 17-year-old nephew who loves being at the farm had a day off from his summer job, and he wanted to learn how to drive the tractor. If you’re driving the tractor, you might as well learn how to use the front end loader, the new rotary cutter and tow the trailer.

So I went through the basics of a hydrostatic transmission and what levers did what. We hooked on the rotary cutter and I pointed him at the pond.

Here’s how things were looking after last weekend’s mowing of the meadow. I swear there’s water on the other side of all of that grass and brush.

Overgrown brush on the shore of the pond

I was super impressed with our nephew. He was calm and confident and careful.

Mowing the overgrown grass around the pond

Mowing the overgrown grass around the pond

Loading firewood with the front end loader

A morning of work cleared about half the shore on the east side. The remaining thickets are hiding all kinds of logs and stumps. So we have more work to do, and I need to set Matt loose with his chainsaw, but the progress is awesome.

This vantage point still doesn’t show you much of the water, but I swear it’s there.

Clearing overgrown brush on the shore of the pond

Clearing overgrown brush on the shore of the pond

This deep in the summer, the pond is a little mucky, but it’s still my favourite part on the property.

Pond in the summer

Pond in the summer

Our nephew totally made my summer.

Making room to run

Back in the spring, I stopped in at our tractor dealership. I love our tractor, Wiley. I particularly love his attachments–mower deck, front-end loader, snowblower–and covet more–backhoe, auger, rotary cutter.

On this particular day, I was particularly coveting the rotary cutter.

A rotary cutter is a heavy-duty mower, sometimes called a bush hog. It can go through thick brush. It can hit rocks and stumps without breaking. It can even take down small trees.

In our constant campaign to beautify/tame/maintain the farm, clearing brush is an ongoing undertaking.

The thing about anything to do with the tractor is it isn’t cheap. So when I came home and told Matt I’d gotten a quote on a rotary cutter, I wasn’t sure what his reaction would be.

His exact words were, “You’ve been talking about this since we moved here, woman. Just buy it.”

Alrighty then. One rotary cutter coming our way.

Woods rotary cutter

It took us a while to get the rotary cutter running. Eventually, our tractor guy came out for a farm call to walk us through it (five years in and we’re still country newbies). But last weekend we got cutting.

And Matt loved it as much as I did.

Matt did the septic bed. He wanted to cut the little trees so that their roots don’t get into the drainage area. It’s hard to see, but at the top of this slope behind all of those weeds is the house.

Clearing brush with the rotary cutter

It took Matt very little time to get his confidence. While I avoided trees that were more than a couple of inches in diameter, Matt had no hesitation about mowing them down.

Clearing brush with the rotary cutter

Clearing brush with the rotary cutter

Clearing brush with the rotary cutter

The puppy liked all of the new smells that we uncovered.

Clearing brush with the rotary cutter

We also uncovered a few rocks and stumps, but the cutter powered through.

Rock scraped by a mower

Matt soon had the septic bed nice and clear. (The house is behind me in this shot.)

Cleared septic bed

After Matt had his turn, I took mine in the meadow. This is what happens when I ask my husband to take my picture. I end up with puppy butt.

Baxter watching the tractor

He did manage to resist Baxter’s charms long enough to get a few action shots.

Clearing brush with the rotary cutter

At the end of the day, there was plenty of space for the puppy to run.

Baxter running through the meadow

And a nice clear view from the pond up to the house. Well, clear except for the pines, but there’s no way we’re taking those down.

The mowed meadow

How we installed a waterline for the vegetable garden

A big to-do on the garden task list is now done. We finally have a hose at the garden… and I’m so happy to cross this one off the list.

Hose in the vegetable garden

With the lack of rain we had this summer, we watered the garden a lot. However, the closest hose was at the driveshed. That was three hose-lengths away. I had screwed the hoses together back in the spring, and most of the time we kept them laid out across the yard. But any time I had to wind them up (like every time we cut the grass) it was a heavy haul.

Adding a tap at the garden was one of my Home Goals 2016. I already shared a bit of the misery that was digging the trench from the driveshed to the garden (ground so hard, summer so hot, rocks and roots so many, garden so, so, so far away).

Trenching a waterline to the garden

When I measured the trench, it came out a bit more than 100 feet. I spent a week visiting various home improvement stores and then specialty plumbing suppliers trying to find someone who would sell me 110 feet of irrigation pipe. All I could find was 100-foot or 400-foot coils. Ugh.

I bought 100 feet and crossed my fingers that we could splice on a small extra piece we had at the farm already and still make it to the garden.

But it turned out I was worried for nothing. When Matt and I unrolled the pipe and laid it in the trench, it easily reached the garden. Thank goodness for small wins.

The other thing I was worried about was our plumbing abilities. I had a plan, but I wasn’t sure if it was actually going to work.

We dug down to the waterline that ran to the hose at the driveshed. After turning off the water, I took a deep breath and cut through the waterline with the hacksaw. So much for my brand new work gloves.

Cutting a waterline with a hacksaw

Then we inserted a T. A note about these connections. They fit super, super tightly. We boiled the kettle and then Matt poured the hot water over the pipe and that softened the plastic enough that I was able to wedge the fitting into place. The clamps on either side provide extra insurance to hold everything together and prevent leaks

Adding a T connection on a waterline

From there, it was easy to connect our new 100 feet of pipe.

Running a waterline for a garden hose

At the garden, the pipe sneaks under the brick threshold at the gate and up the post. Look how much pipe we had. Exactly the perfect length. And look at the water flowing. We did it! And there are no leaks! Big wins all around!

Adding a hose at the vegetable garden

Backfilling the trench was much easier than digging it out. Wiley helped which was huge.

Backfilling the trench with the tractor

Baxter did not help. In fact he staged a sit-in (lie-in) to protest when Matt started to put the sod back down. “Dirt is good, dude.”

Baxter lying in the dirt

The finishing touches were clamping the waterline to the fence post and then installing a hose hanger.

Rather than a typical hanger, I wanted to try a metal bucket. I’ve seen a few other people do this, and I figured it would give us a place to stash nozzles or maybe even some garden tools.

Again, I spent some time running around to various stores trying to find the perfect bucket. Then I remembered a rusty old canning pot–one of our many gifts from previous owners. I knew there was a reason I didn’t throw that out.

I drilled a couple of holes in the bottom and then bolted it to the fence.

Using a pot as a hose hanger

Then I dragged the hose out to the garden one final time (except for seasonal shutdown, but don’t burst my bubble, okay?) and coiled it up.

Hose in the vegetable garden

Such a great addition to the garden. And this is actually our final to-do on our garden to-do list. This year has been all about adding the structure (raised beds, trellises, perennials) and functionality (gate, trellises, hose) to the garden. I think all of this is going to make a huuuuge difference next year.

The other thing that is going to make a huge difference–and that we have yet to do–is clean up. We have a whooooole bunch of weeds that I want out of there before winter sets in. That’s still a few weeks away though, as harvest is still going strong.


How is your garden growing? Does plumbing make anyone else anxious? How do you handle irrigation in your garden?

Save

Save

Save

Save

Save

Save

Getting my act together

A month ago, I said it was time to get my act together, and I posted my fall to-do list.

I’m most productive when I post regular updates to hold myself accountable, so today is about sharing where I’m at in getting ready for winter.

And I am pleased to report that I’m getting my act together.

The vegetable garden

  • Hang the gate
  • Edge the garden
  • Put in raised beds
  • Spread manure

Okay. Perhaps this isn’t the best way to start. Beyond the harvest and clearing out the dead plants, I haven’t spent much time in the garden. My plan is to make the garden my focus for November.

Harvest 2015

The bird feeder

  • Reattach feeder bracket – My cousin who made the birdfeeder post for us originally very kindly bolted the top bracket back into place.
  • Install a sleeve for the post – I put a section of pipe in the ground so that the post can just slide into place, no hammering required.

I restocked our seed supply last week, and we have a steady stream of blue jays, chickadees, juncos and a whole bunch of other birds I can’t identify visiting the feeder every day.

Chickadee in the birdfeeder

Firewood

  • Tidy up the trees – Matt and his Dad went to town.
  • Put up another row of firewood – As Matt and his Dad cut, I split and stacked, and we are set.

More details about our latest lumberjacking episode will be coming in a future post, but for now gaze upon our woodpiles.

Firewood piles

Get Wiley ready for winter

  • Change the oil – My handy cousin (he of the birdfeeder) changed the oil for us.
  • Check the battery contacts – My handy cousin also made us a little sleeve to tighten up the battery clasp, and Wiley’s starting so smoothly now.
  • Remove the mower deck – Done. There will be no more grass cutting this year.

How to detach a Kioti SM2410 mower

The house

  • Take off the screens
  • Clean the heat pump filter — Done
  • Clean out the gutters — Matt’s done this twice in October, and he’ll probably have to do it at least once more.
  • Turn off the outdoor water
  • Annual service and filter replacement on indoor water system — A new to-do

The house is another area where we’ve not done a whole lot. What does that say about me that I’m putting less time into the roof over my head as opposed to the property around my house? Thankfully, Matt’s on it.

Matt cleaning the gutters

Anyways, three categories out of five are completely done. That’s pretty good. Now to keep the productivity coming before winter comes.

How are you doing on your pre-winter to-do list so far?

How to remove a belly mower from a Kioti CS2410

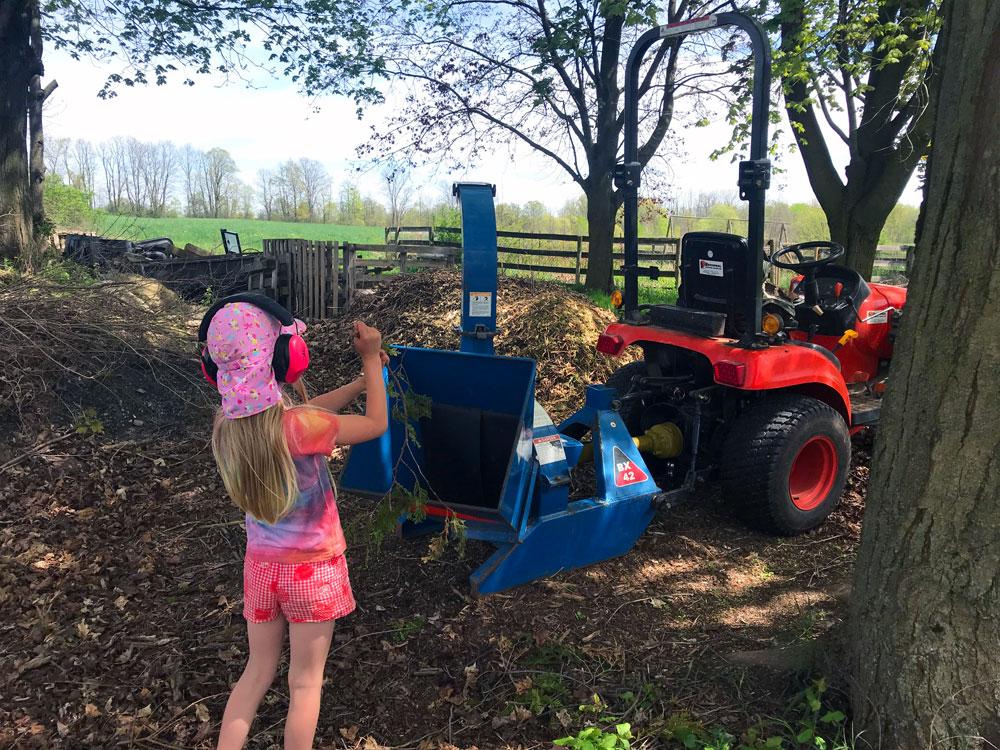
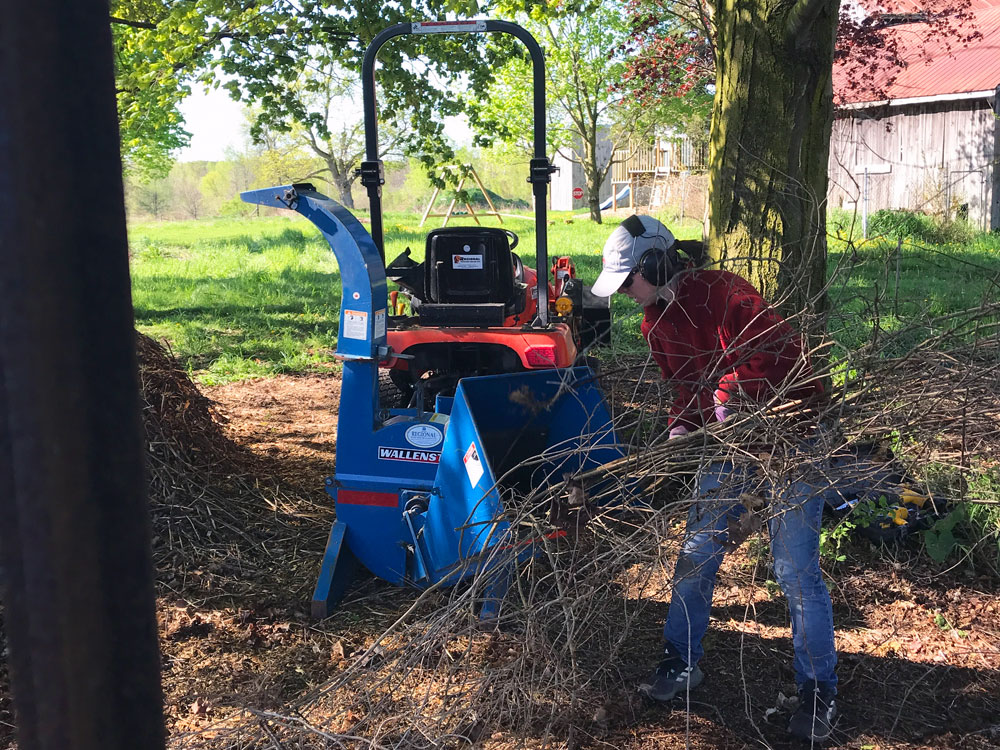
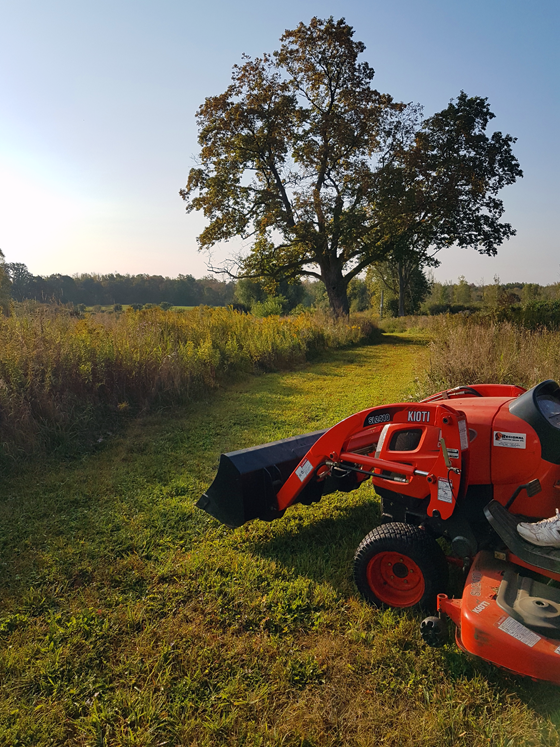
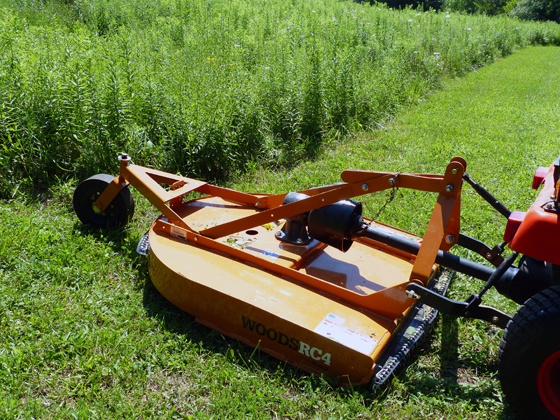
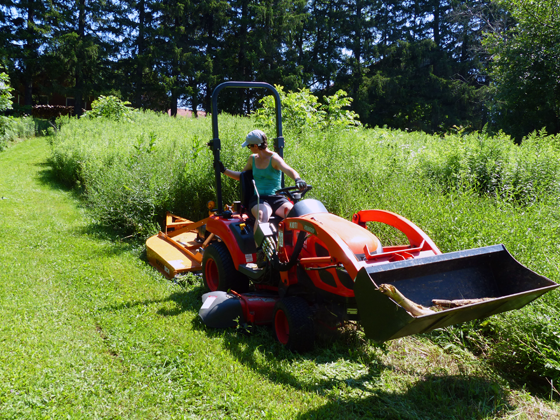
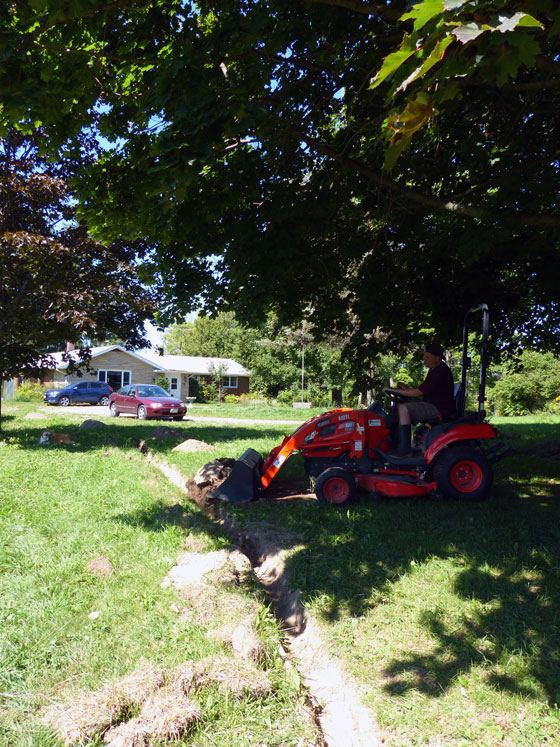
Every year, twice a year, Matt and I get up close and personal with our little tractor, Wiley. Attaching the mower deck in the spring and detaching it in the fall are pretty intimate operations.

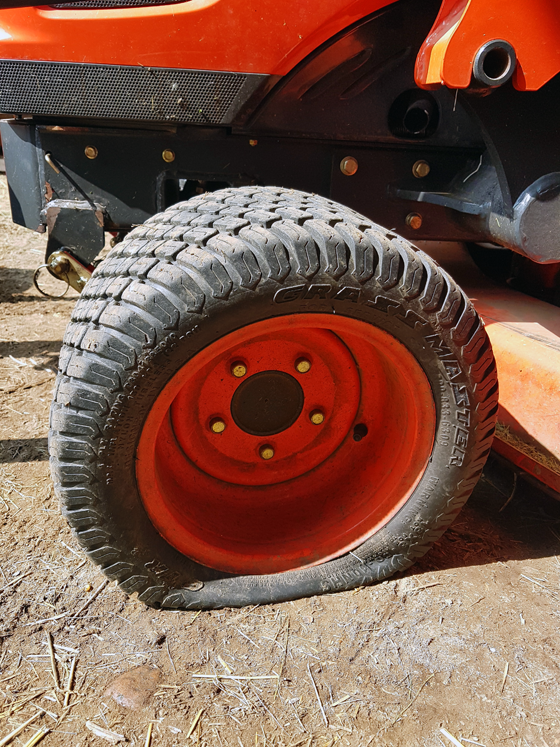
Just a refresher, Wiley is a Kioti CS2410. His mower deck is a Kioti SM2410. It’s a belly mower, meaning it rides under Wiley’s middle (as opposed to the mowers that are towed behind a tractor).

How to detach a Kioti SM2410 mower

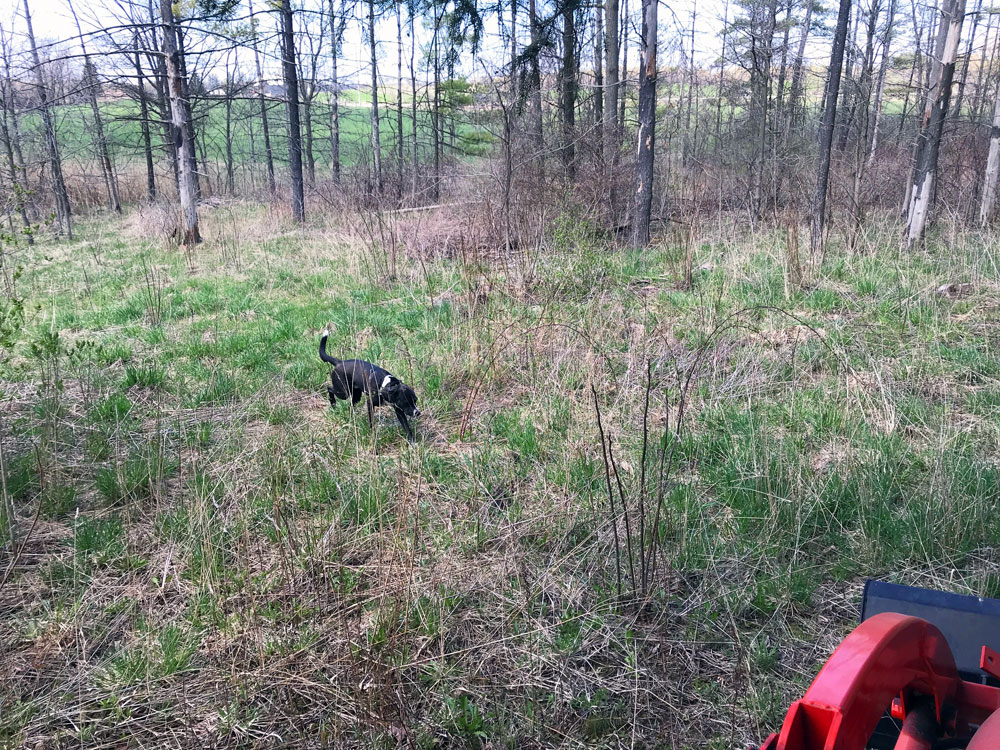
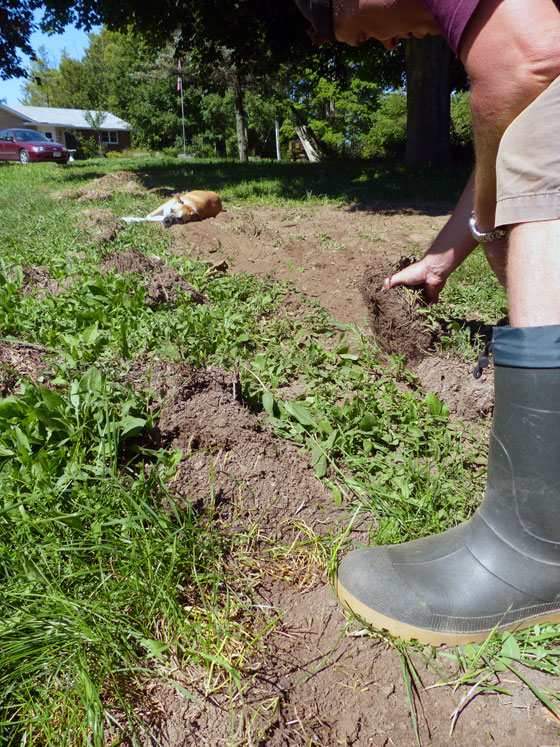
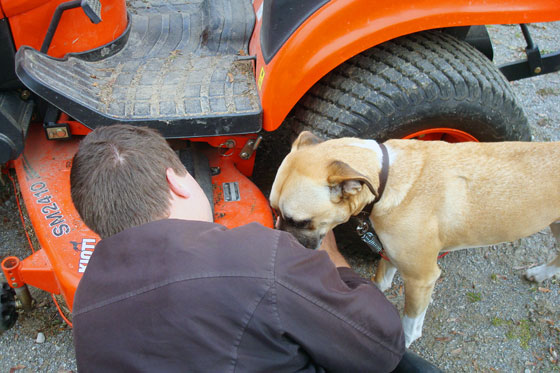
I thought this year that I’d finally properly document the process. I’ve tried to do this for the past few years, but attaching and detaching is always a bit stressful. See how concerned Baxter is when we did this two years ago?

Baxter helping to remove the mower deck

I usually feel like it’s better for my marriage if I don’t try to prep a blog post at the same time as we’re installing or removing the deck.

That’s not to say this is an overly complicated undertaking. It’s just an undertaking that is a bit tricky in spots.

Here are the steps to remove the mower deck from the tractor:

1. This whole operation will be dramatically aided by level ground (which does not exist at the farm). So, step 1: park the tractor on level ground… or at least the levelest ground you can find.

2. Start with the mower raised but set at the shortest cutting setting.

Cutting settings on a Kioti CS2410

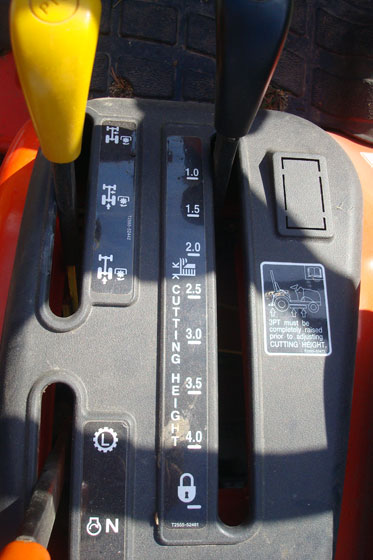
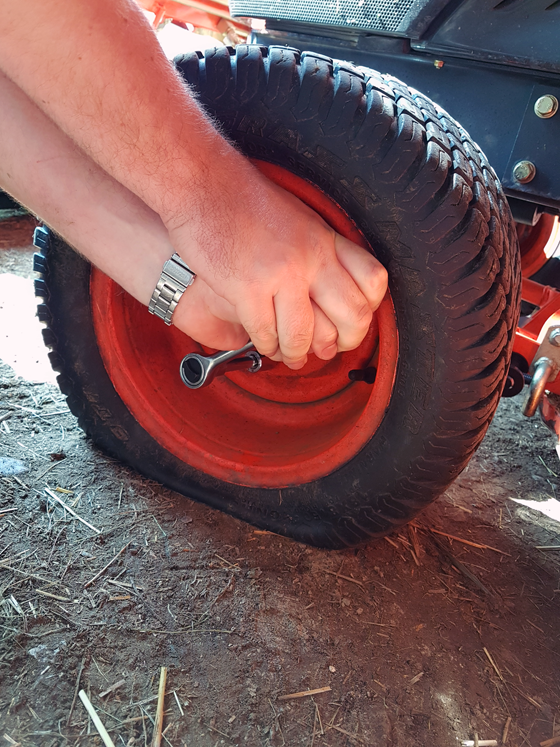
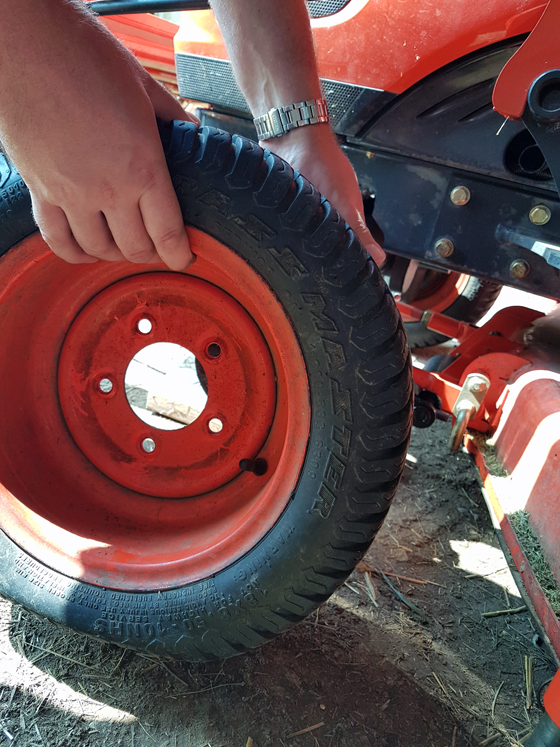
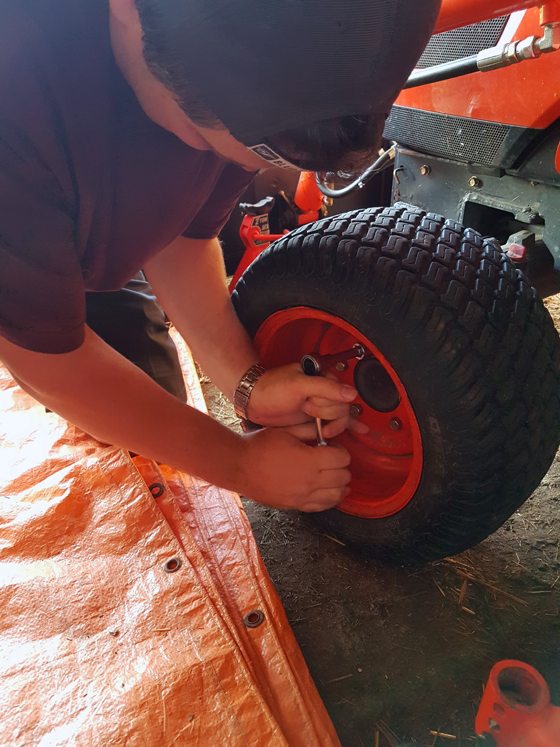
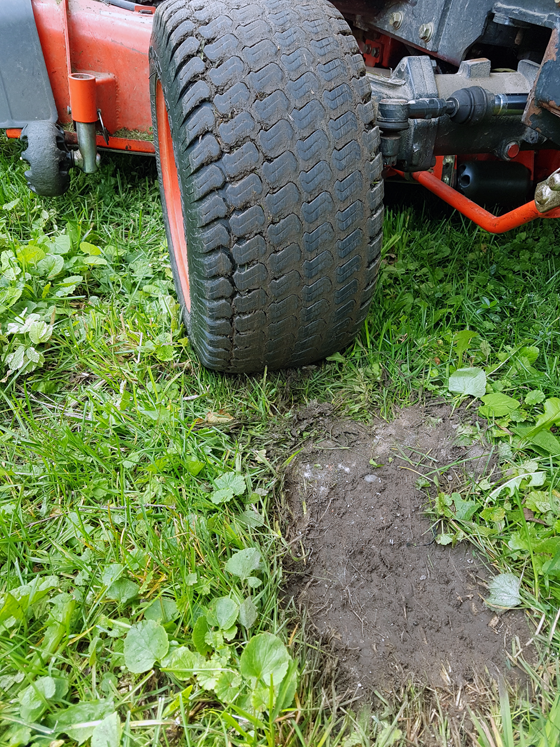
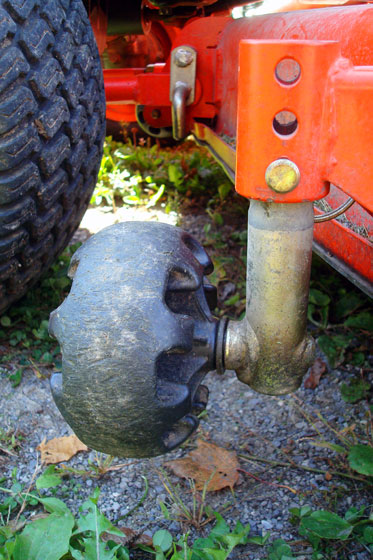
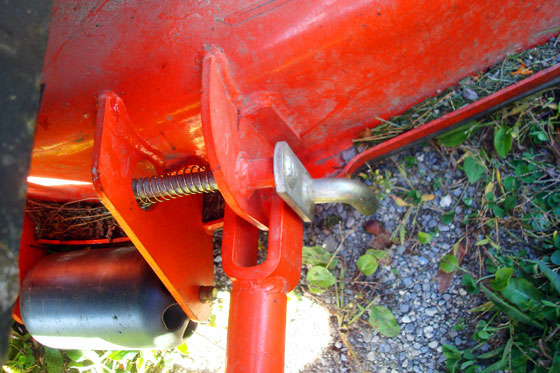
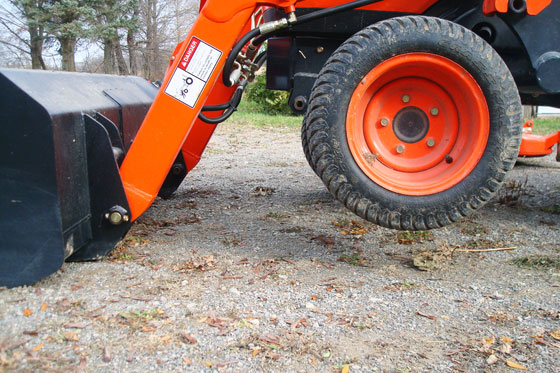
3. Turn the wheels that support the deck so that they’re perpendicular (90 degrees) to the tractor’s wheels. Pop out the pins and rotate the wheels.

How to detach a Kioti SM2410 mower

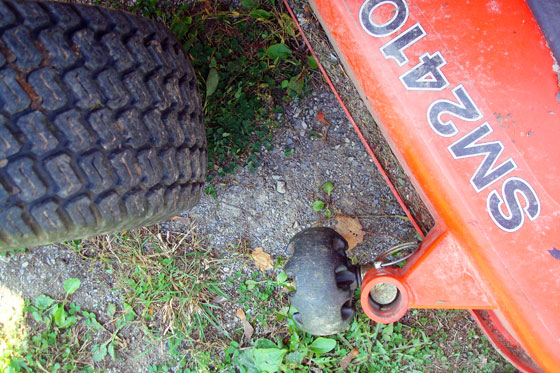
Repin them in the highest position–meaning the mower is as high off the ground as you can get it, i.e. the pins are in the bottom hole on the sleeve.

Pin in the bottom hole

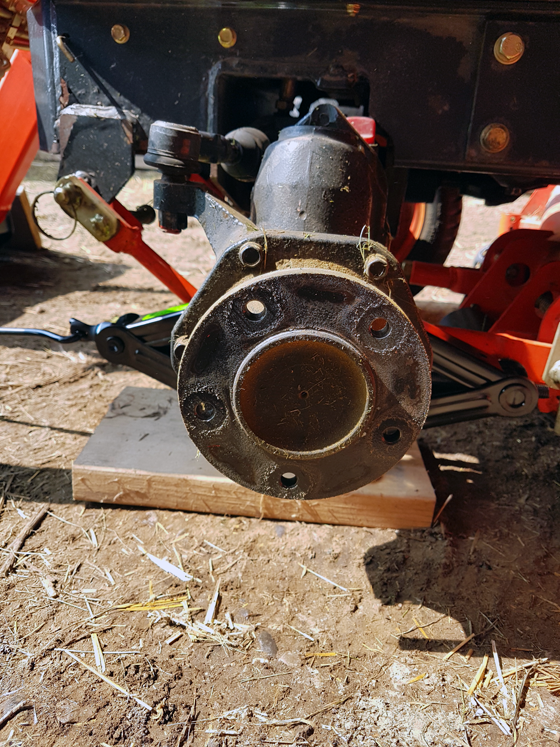
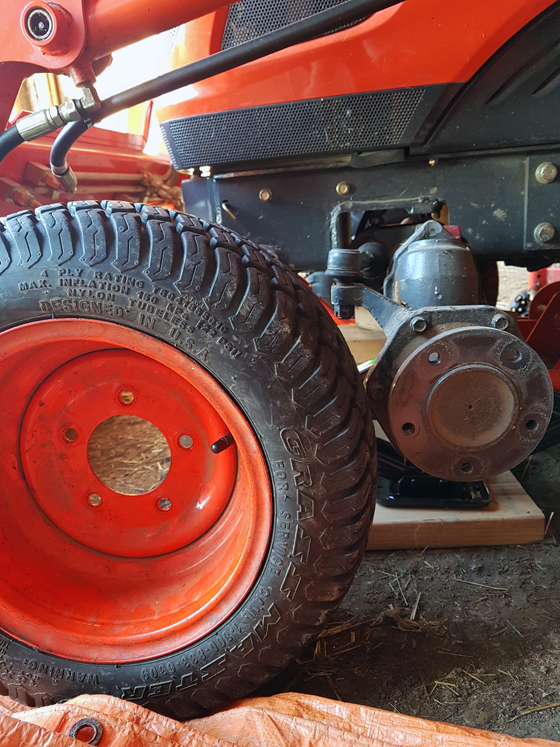
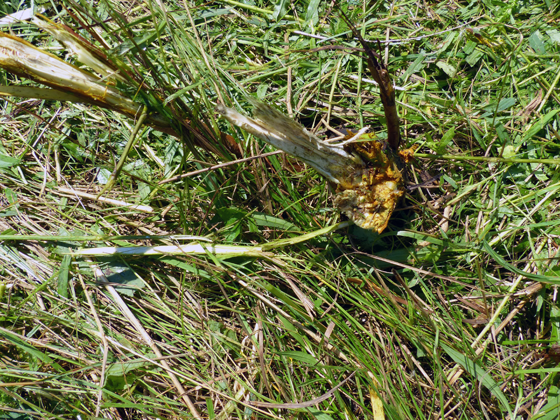
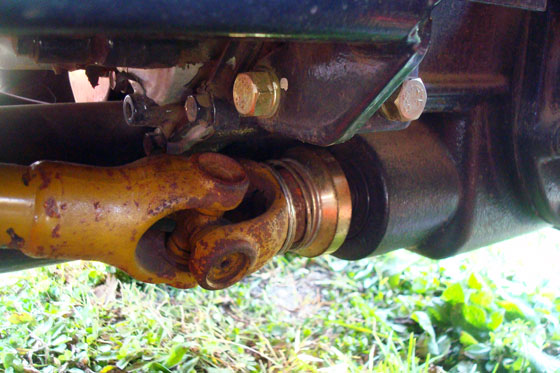
4. Disconnect the PTO. Push the shiny gold collar towards the mower deck (forwards), and pull it off the shaft. The person with the longest arms should do this (i.e. Matt), as the PTO is right in the middle under the tractor, and you have to reach over the deck and around the back wheel to reach it.

PTO on a Kioti CS2410

5. Lower the deck–use the three-point lever, not the cutting height lever. Give the deck a good shake to make sure it’s all the way down. You do not want this thing falling on you. It will crush you. (Not quite the same, but I have this line in my head now and I can’t resist. Plus, it’s one of Matt’s favourite movies.)

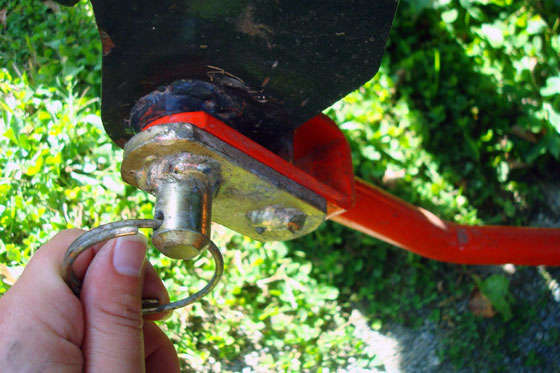
6. Pull the pins that attach the deck to the tractor. There are three on each side. The quick connect pins at the front and back are on springs. Just pull them out and turn them out of the way. The other pins at the very front have split rings that you have to remove first.

Quick connect spring pins on a Kioti CS2410

Cotter pins on a Kioti CS2410

The pins are when things get stressful for us. The deck is super heavy. And if you’re not on level ground, there’s invariably some weight still resting on the pins. So sometimes they just don’t want to come out, no matter how hard we yank on them.

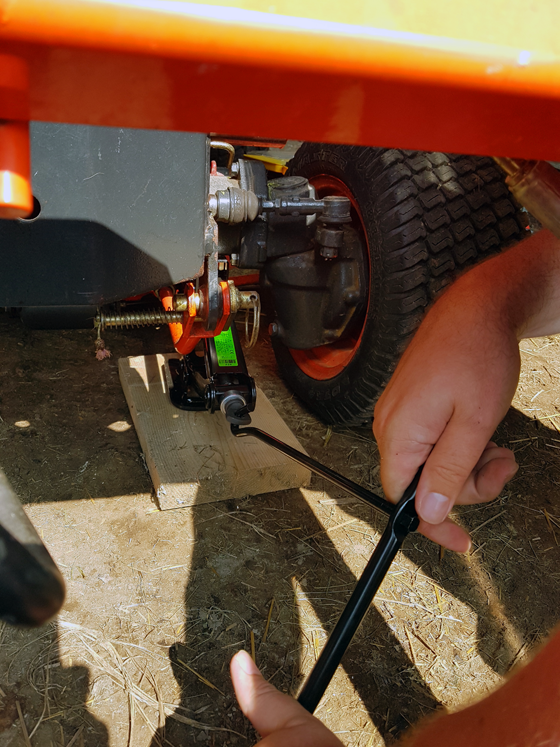
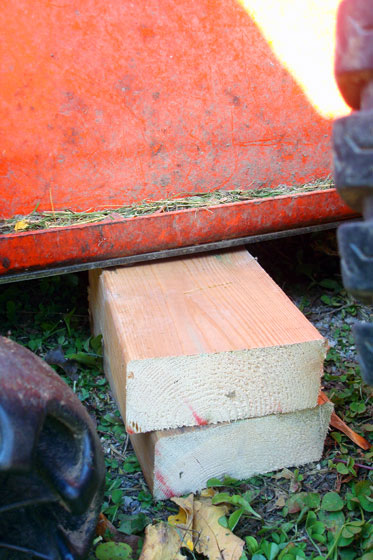
There are two techniques we’ve found to help: one, slide some blocks under the deck to help support the weight. Use trial and error to find out where you need them–front or back, starboard or port.

Tips to remove a Kioti CS2410 mower deck

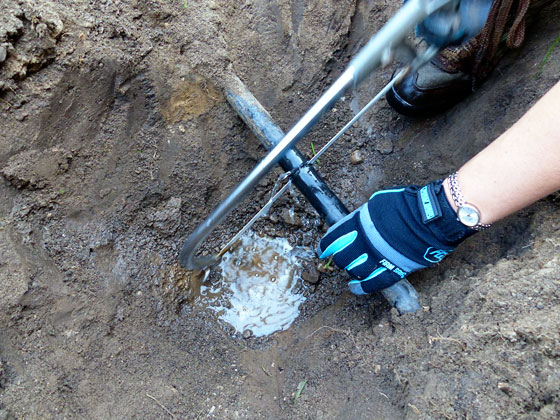
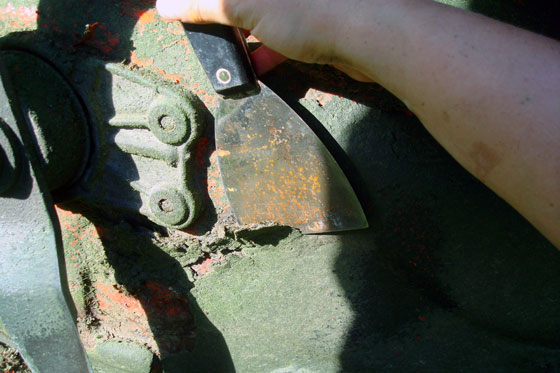
The second solution is tried and true: the hammer. Tap (as gently as you can given your current frustration levels and your limited maneuverability under the tractor).

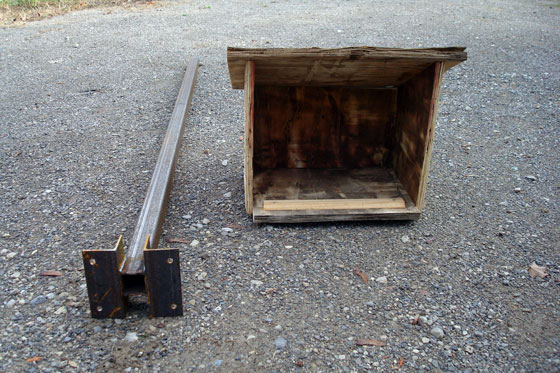
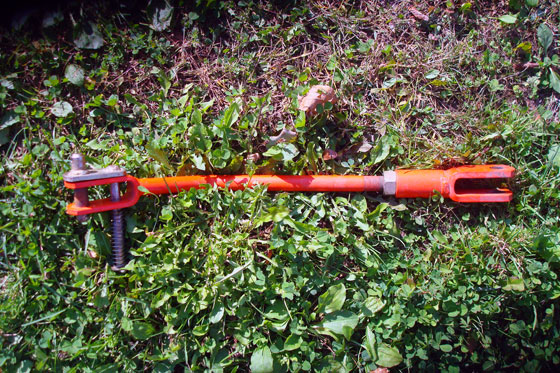
It’s a wonderful feeling when the pins pop free. You will end up with two metal arms that hold the deck to the front of the tractor. Those arms should stay with the deck. Don’t lose them. You’ll need them if you ever want to cut grass again. (And just a note for when it comes time to reattach them, the springs point in).

Kioti SM2410 mower deck arms

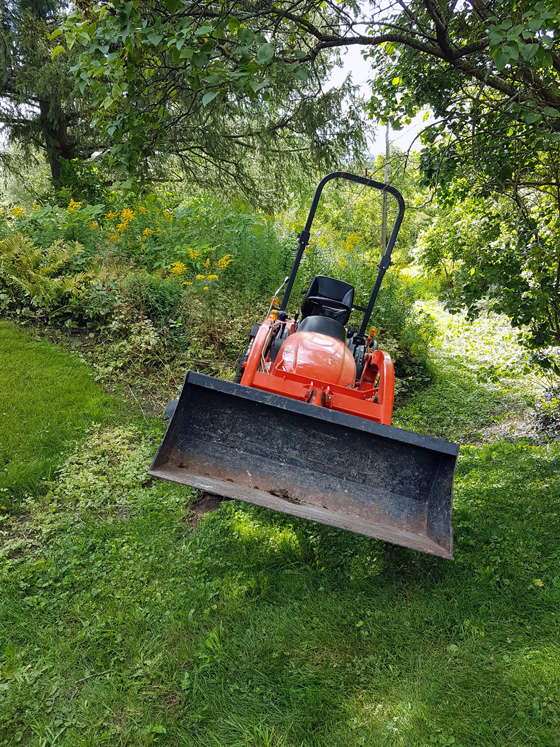
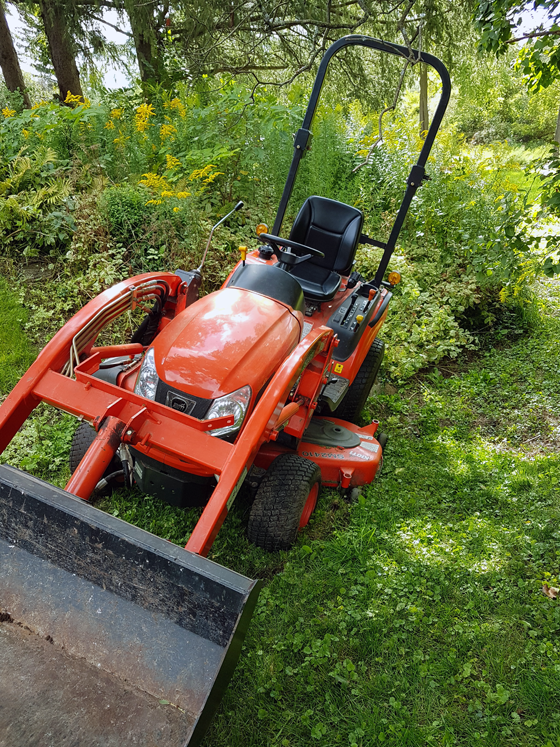
7. Raise the mower using the three-point lever to fully detach the deck. At this point the deck should not be connected to the tractor, but still sitting under the tractor. Use the front end loader to lift the tractor up a little bit–just enough to give you clearance to slide out the deck. (Put the parking brake on–safety first!)

Use the front end loader to lift the front wheels off the ground

8. Push, push, push and pull, pull, pull the deck out from under the tractor, and you’re good!

How to detach a Kioti SM2410 mower

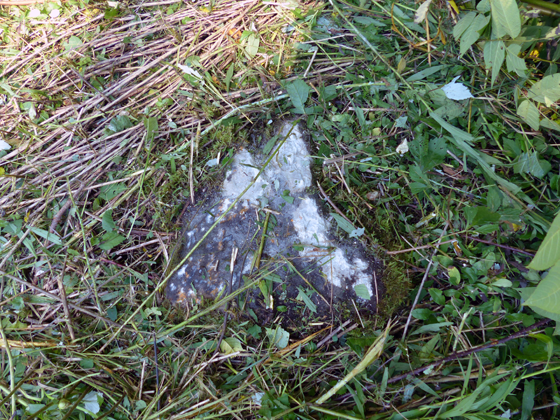
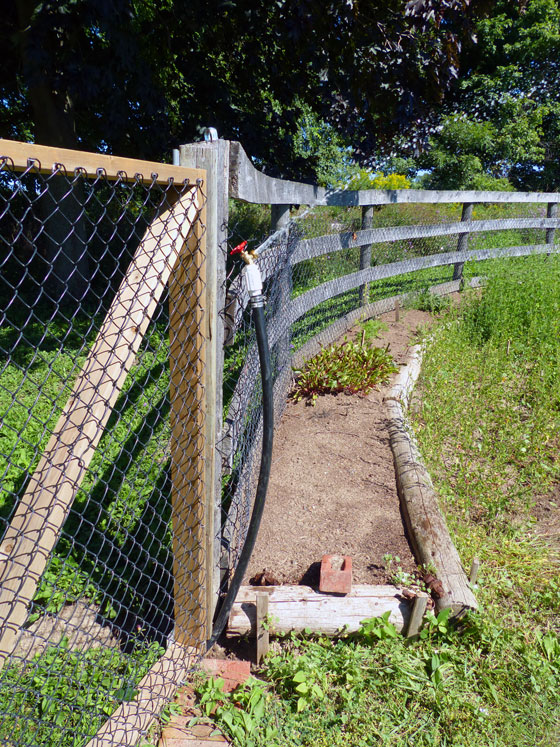
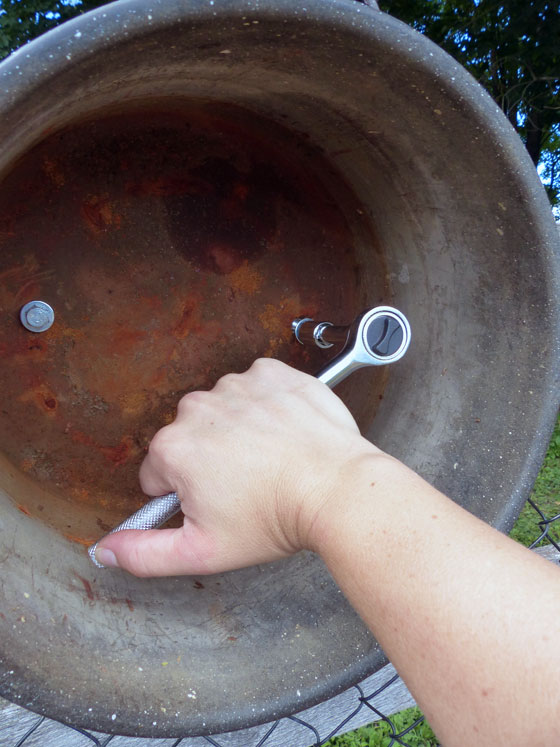
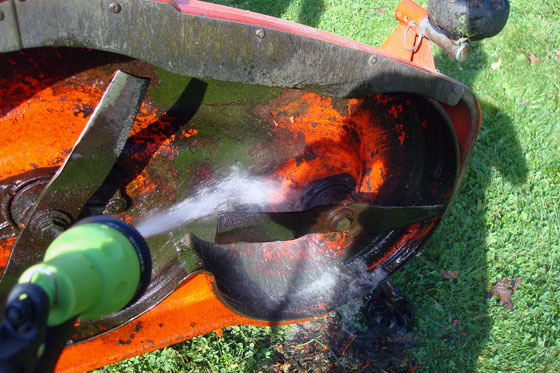
Well, you’ll probably want to tip up the deck, scrape the dried up crusty grass from the underside, hit it with the hose, inspect the blades and grease all of the fittings.

Scraping grass out of a mower

Cleaning the mower deck

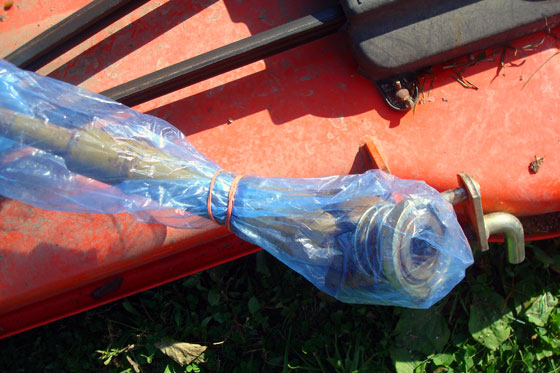
Just to be safe, we also tuck the PTO into a plastic bag to keep dirt out of it.

Protect the PTO with a plastic bag

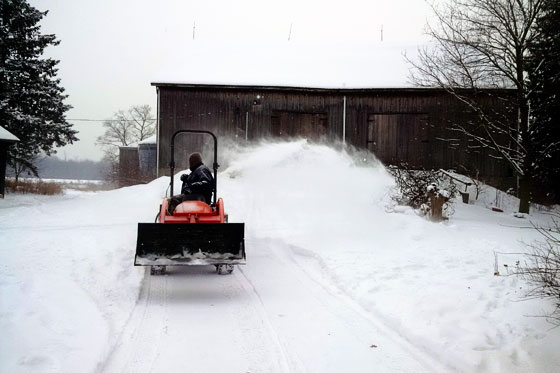
But do all that, and you’re done. And you don’t have to cut grass for another few months. (Don’t mention attaching the snowblower).

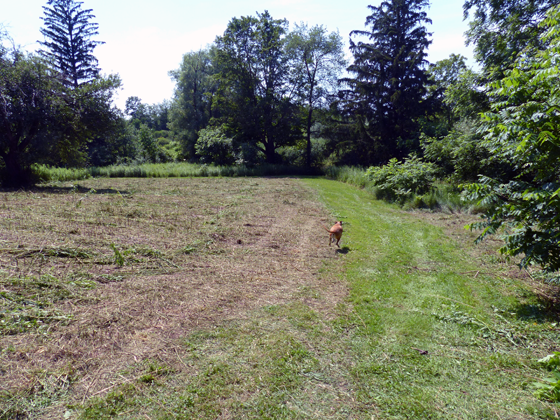
Time for a victory dance! (Wow, Bax was skinny that first year).

Victory dance

What type of mower do you use at your house? Have you tucked your mower away for the season yet? Do you have any jobs that put your relationship to the test? Do you have a sidekick who helps (and celebrates) the tough jobs?

Time to get my act together

I can no longer deny it. Fall is here. I’ve been hanging onto summer as long as I can, but last week the temperatures DROPPED. As in, we had a windchill, and I wore my winter jacket, hat and mitts for Baxter’s and my morning walk.

So, it’s time.

Every year as fall rolls in, a list starts in my head. It’s not completely a do or die list, but it’s definitely a “winter is coming and you’d better get your act together” list.

So here we go: the fall to-do list.

The vegetable garden

Unhung garden gate

This was my biggest home goal for 2015, and before the year ends, there are a few more things I’d like to do.

  • Hang the gate – The gate has been hanging around unhung for long enough. We need to take a bit of time, sort out the hinges and just get this done.
  • Edge the garden – We have a huge pile of old fence posts, and my plan is to use them as kind of “curbs” to help keep the weeds out of the garden.
  • Put in raised beds – I’m going to use the rest of the fence posts to make a ring of shallow raised beds around the outside edge of the garden.
  • Spread manure – This is our chance to knock two tasks off our to-do list at one time: clean out the 17 stalls in the barn and fertilize the garden. The manure is well-aged since it’s been here since before we bought the farm.

The bird feeder

Bird feeder and pole

I love watching the birds from the dining room window, and feeder is the best way to attract them.

  • Reattach feeder bracket – Last year when we were hammering the bird feeder post into the ground, one of the brackets broke off. My cousin made the post for us originally, so I’m going to tap him to reweld the top bracket.
  • Install a sleeve for the post – To make sure we don’t have to hammer the post anymore, I’m going to put a length of pipe in the ground so that the post can just slide in every fall.

Firewood

Downed tree at the edge of the field

This is our first fall with a fireplace, and we’re so looking forward to firing it up.

  • Put up another row of firewood – We have two rows of wood dried, split and stacked. I think we’ll need one more row to get us through fireplace season.
  • Tidy up the trees – Tree maintenance that’s an ongoing task at the farm–as demonstrated by the big tree above that came down over the weekend. Fortunately, we have a steady supply of firewood as a result.

Get Wiley ready for winter

Clearing snow with the tractor

Our handy-dandy tractor needs his annual tune-up.

  • Change the oil – More accurately, have my handy cousin change the oil for us.
  • Check the battery contacts – Wiley’s a bit reluctant to start sometimes. In the spring, we had a loose connection on the battery terminal, and my cousin made us a little sleeve to tighten up the clasp. Cold weather starts are even harder for Wiley, so we want to make sure we do everything to help him out.
  • Remove the mower deck – It’s that time of year again.

The house

Cleaning gutters with a leaf blower

There are a few things to do for the place where we actually live.

  • Take off the screens – The screens get so dusty during the summer, I’ve found it’s necessary to take them off and give them a good cleaning before it’s open window season again.
  • Clean the heat pump filter – I broke out the shop vac on Friday, figuring that we’d need to fire up the geothermal before the end of the weekend. Sure enough, as of last night the heat is on.
  • Clean out the gutters – Matt did round one last week, but we’ll need at least one more cleaning before the snow falls.
  • Turn off the water

I feel like I’ve been taking it easy for a little while when it comes to work around the farm. So step one to completing is to find my motivation. Any tips?

Obviously, some of these tasks are unique to the farm. But some of them are universal no matter where you live.

What’s on your fall to-do list? Are you feeling the pressure of impending winter?

Previous fall to-do lists: