Sunset visitors

After just over five years of farm living, the novelty of the wildlife lives on and passes through our property has not worn off.

At sunset on the weekend, we had three deer munching in the back field, and much, much closer we had one very chill deer relaxing in the centre field.

Eventually she stood up and trotted away, white tail waving.

The whitetails were waving again on Monday morning when Baxter and I were out for our pre-dawn walk. The white was all we could see as four deer headed away from us through the dark field.

They keep coming back, though, and have been in the back field each evening so far this week. And it’s still exciting every time.

Makeover motivation from a mini One Room Challenge

It’s that time again. The One Room Challenge is taking over the blogosphere. It started last week and runs until May 10. More than 200 bloggers, 200 rooms and 200 inspiring makeovers.

I’m looking forward to all of the beautiful content arriving in my feedly over the next four weeks.

Once again this year, I’m not participating in the One Room Challenge. I’ve loved participating in the past and especially loved the results of our laundry room and master bedroom. But this time around, I don’t have a room ready for the six week timeline.

However, I do have a room mid-makeover. My office.

I’m thinking I can use the One Room Challenge and all of the activity of my fellow bloggers to motivate me to Finally. Finish. This. Room.

Office mid-makeover

So this is it. I’m setting a deadline, people. May 10. The office will be done.

Here’s my original to-do list, and where we’re at:

  • Scrape ceiling – Finished over the Christmas break–oh so long ago.
  • Paint ceiling, trim and walls – Finished over the Christmas break.
  • Add new shelf to closet – Finished and already filled.
  • Redo china cabinet and desk – Finished and partially filled.
  • Reupholster slipper chair – Finished and it’s oh so pretty.
  • Reupholster ironing board – Finished thanks to a lucky thrifting score.
  • Unpack all of my boxes and decorate – Started.

That last item is where I’ve been a bit stuck. I had so many boxes, which had been packed for at least five years–some of them longer. Also, decorating is kind of a big thing.

I know myself, and I know I’ll do better if I can break it down into smaller pieces.

So here’s the new to-do list of the remaining items:

  • Buy and install light fixture – I somehow forgot that I need a new light for this room since I removed and trashed the boob light that was here originally.
  • Unpack remaining boxes and organize china cabinet
  • Style china cabinet shelves
  • Sort and file paperwork
  • Install gallery wall #1
  • Install gallery wall #2
  • Reupholster seat of wooden chair

Totally doable, right? It’s mini compared to the full room makeovers other people are tackling through the ORC.

As slow as work has been on the office, it has been ongoing, even though I haven’t shared many updates. This weekend I made some progress on a few little shelves that will be part of the gallery walls.

Painting little shelves

I’m going to start sharing regular updates here to help myself stay on track. I’m not going to be sharing my makeover through the official ORC linkups on Calling It Home, though, because mine is so mini. I do encourage you to visit Calling It Home and checking out all of the projects for yourself.

And stay tuned here. Soon enough–with a little motivation from the ORC–I’ll be able to reveal the finished office. Four weeks to go.

Are you following any ORC makeovers? Official ones? Are you doing any makeovers yourself? How do you find motivation to finish off a makeover?

Grey days

Two grey days, exactly three weeks apart.

Snowy field in mid March

I swear as of this week I’m seeing the fields turn green. I can handle grey skies when I feel spring is coming.

Field at the beginning of April

This bird’s eye view is courtesy of a deer stand at the edge of the back field.

Looking down from the deer stand at Baxter on the ground

A great way to see the farm. But too tall for puppy.

Deer stand

As excited as I am for the green, last night we had a few snow flurries. C’mon spring!

What’s the weather like where you are? Are you seeing signs of spring?

Projects, painting and progress in Illinois

Sarah in Illinois is here today with an update on how she’s done on her monthly projects.

If you have been keeping track, it’s been three months since I announced that I was setting a goal of one project a month. So how have I done?

Let’s start with Blitz’s house.

It’s painted, and that was my goal. I really thought that I would have the roof shingled too, but that didn’t get done. For the paint, I used some concrete floor latex epoxy that we had sitting around. It would not have been my first choice if I went to the store and picked it out, but I think it will work very well. And the epoxy will help protect it from the weather.

My second project is by far my favorite and the one I am most proud of. I told you that we had sneakily taken my grandma’s St. Francis statue from her yard.

It was starting to crack and the paint was faded and flaking. When I last posted about it I showed a little progress.

And now:

Yes, that really is the same statue.

I want to maybe touch up his facial features a little, but I can say that I am very happy with the outcome, and I can’t wait to give it back to my grandma.

And since I love a good before and after:

For my final project from my list I was supposed to prime and paint our hallway. I will call it about 75% complete.

It is primed, and I did start painting, but I really thought I had more paint left. If I have more, I sure as heck can’t find it. So I will take what little info I remember about it (it is semigloss and the color is called Toll Booth), and I will go back to where I got it and hope they can mix me up some more. I am frustrated because the color runs throughout our house and if for some reason I can’t find a match I am going to have quite a problem.

So there you have it, not completely done, but I have made some headway. I love having this goal out here in the public because it made me focus on my three projects and not get distracted like I so often do.

To keep motivated I will set my next three months goals in my next post. You can be assured that they will be garden related.

Good job, Sarah. That statue looks amazing. Your grandmother will be so surprised. That’s really special. I’ve done the paint colour match thing before, and it’s worked out fairly well. Just to be safe, I suggest trying to make the “break” at a corner or other dividing point. 

Digging in the dirt

Tulips in the garden

Dirt under the nails, dirt on my jeans, digging in dirt. It has started.

It felt so good to get out in the sunshine on the weekend and start to weed the flower gardens.

Considering that last year it didn’t start at all, I had a bit of work to do.

A full year without weeding meant the garden was overgrown 6 months ago. After everything died off over the winter, it looked terrible.

Overgrown flower garden

Two heaping wheelbarrows later, it looks better, but a little bare.

Cleared garden

There’s plenty of room to grow. And it seems like the bushes, irises, sedums, tulips and other plants are all alive. So it should fill in quickly.

How are your gardens looking? Have you done any weeding yet?

Pick up sticks, farm style

Baxter behind a fallen tree

One of the common springtime jobs is picking up the branches and twigs that have fallen into the yard. When your yard is 129 acres, this job goes to another level.

I’ve written before about our trails and how we haven’t done a great job of maintaining them. Early in the winter, a decent size tree came down right across the entry of the west trail.

Cleaning this up will be much more than just picking up sticks.

Fallen tree across the trail

But for now, we’re letting fallen trees lie.

Last week, Baxter and I clambered over it to check out the rest of the trails.

This is actually a magic time to walk the trails. We’re not slogging through snow, wading through (much) water, battling masses of mosquitoes or dealing with overgrown grass and brush.

The trails are wet though. Matt and his Dad had laid a catwalk through the first marshy section, but it floated away a little while ago. We can sneak around on the right edge of the trail, but, of course, a tree has fallen to block the way. It’s a choice of hurdle or limbo and don’t fall in the water.

Hiking through the marsh

Farther along, we have an actual creek crossing. This section never ever dries up and will be deep and fast flowing in a few more weeks. As you can see, the catwalk in this area has also washed out.

Crossing the creek

The willow on the other side of the creek has lost a large limb.

Fallen tree branch

Deeper into the woods, we climb to higher ground and the forest changes to evergreens–including new trees that have sprouted in the middle of the trail.

Hiking through an evergreen forest

At the end of the trail, we reach the east boundary of our property. Looking to the north, somewhere on the other side of this marsh, is the other half of our trail network.

Overlooking the marsh

Baxter and I backtracked so that we could check it out too.

The east trail is not nearly as wet. There’s a creek at the entrance, but an old corduroy road topped with a plank makes crossing easy.

Corduroy road

The east trail has the same tree issues as the west, though. We’ve had a super windy winter, so some fairly large trees have fallen.

Baxter under a fallen tree

Baxter under a fallen tree

I’m on the lookout for a brigade of forest rangers with chainsaws who want to give me a few weeks of free labour.

If they are wearing hip waders that would be great.

Wading in the water

Bax and I did discover a few things that could help with our water issues.

At the edge of the back field are a couple of large piles of tires. Aren’t these ugly? I still think we could upgrade our catwalks using these as “piers” and laying skids across them to make a boardwalk.

Tires thrown away in the woods

Alternatively, we could channel the water with these culverts. I continue to be amazed at what’s been abandoned and dumped on the property.

Culverts

For now, barring the arrival of any forest rangers, I’m happy to just enjoy the farm and our trails. And that’s my plan for the weekend.

What are your plans for the weekend? Do you do pick up sticks at your house in the spring?


A heck of a hive

Giant wasp nest on the ground

Snow melts. Grass dies. And all of a sudden things appear.

Things like a giant wasp nest.

Giant wasp nest on the ground

I’ve never seen a nest this large. Let alone one built on the ground.

Never mind knee high to a grasshopper. This is knee high to a grown (albeit not super tall) woman.

Giant wasp nest on the ground

Have you ever seen a nest this large? Is spring uncovering anything at your house?

New upholstery for a vintage slipper chair

Slipper chair upholstered in Brissac Jewel by P Kaufmann Fabric

When my Mom was cleaning out my grandmother’s house, I asked if I could have the slipper chair. When my Mom showed up with a pink skirted chair, I was surprised. I actually didn’t remember ever having seen this chair before. The “slipper” chair I had in mind was a parson’s chair that had sat in my grandmother’s front hall. I ended up with that chair too–in fact it turned out to be one of a pair and I got them both in addition to the little pink slipper chair.

Yes, I have a thing for chairs.

I stripped off the pink cover and the old padding way back when we were still living at our first house. And the poor chair has sat naked in the pool room since we moved here to the farm. (I still had the pink cover balled up in a plastic bag. I slipped it back on the chair for a photo op. However, with no stuffing and an extreme number of wrinkles, the chair, which was already pretty sad, looks really, really sad.)

Reupholstering a slipper chair

I’ve always envisioned the slipper chair being part of my office, so now that that makeover is underway, it was finally time to give the slipper chair a new life.

This was a totally start from scratch scenario. I had the wood frame of the chair and that was it.

Wood frame of a slipper chair

This was also a totally make it up as I go scenario. I am not experienced in upholstery and am–like many people–a bit intimidated by it.

So I just dove in. I stained the legs to a dark brown. I covered the seat with some foam, and then put more foam on the back. I covered it all with batting, mashing it around the corners. I stapled, stapled and stapled.

Reupholstering a slipper chair

Then I covered it all with an old sheet, stapling the heck out of every fold.

Reupholstering a slipper chair

Then things got serious. I pulled out my bolt of Brissac Jewel fabric that I’ve had for longer than I’ve had the chair. There was lots of laying things out, turning them around, laying them out again, putting them back to the exact way they were before. And then doing it all over again. Once I finally figured out how to place the fabric, I then spent a lot of time stuffing material around the legs and trying to get the folds just right–or right enough.

Reupholstering a slipper chair

Reupholstering a slipper chair

I made my own piping and used flexible metal tack strip (plygrip) for the first time (this video was very helpful).

Reupholstering a slipper chair

I built my grip strength using my vintage manual staple gun–seriously, I’m almost ready for American Ninja Warrior. My fingertips are still tender. If I take on more upholstery, I would invest in an air powered staple gun. However, a project like this can be done with very basic tools–and very basic skills.

I covered up the messy underside with another piece of the sheet (although the packing crate that was used for the seat is pretty cool–I wonder what went to Montreal via Halifax).

Stamped wood on the underside of the vintage slipper chair

Underside of the slipper chair

My grandmother grew up in her family’s furniture store and reupholstered furniture regularly. She made the pink slip cover that was on the slipper chair originally. All I could think as I was working on this chair was that she would definitely have something to say about my technique if she was around. And I wish she was around to tell me how to do it right.

Right or wrong, though, it turned out pretty well. I can see the few flaws, but overall, I’m really proud.

Slipper chair upholstered in Brissac Jewel by P Kaufmann Fabric

Slipper chair upholstered in Brissac Jewel by P Kaufmann Fabric

Slipper chair upholstered in Brissac Jewel by P Kaufmann Fabric

Slipper chair upholstered in Brissac Jewel by P Kaufmann Fabric

I think my grandmother would be too.

Sweet and sour saga of syrup making

Homemade maple syrup

Maple syrup. Sap, sugar, sweetness–so much goodness. Our maple syrup making this spring has been great–except for one incident that can only be described as terrible.

I try to be a positive person, so we’ll start with the good.

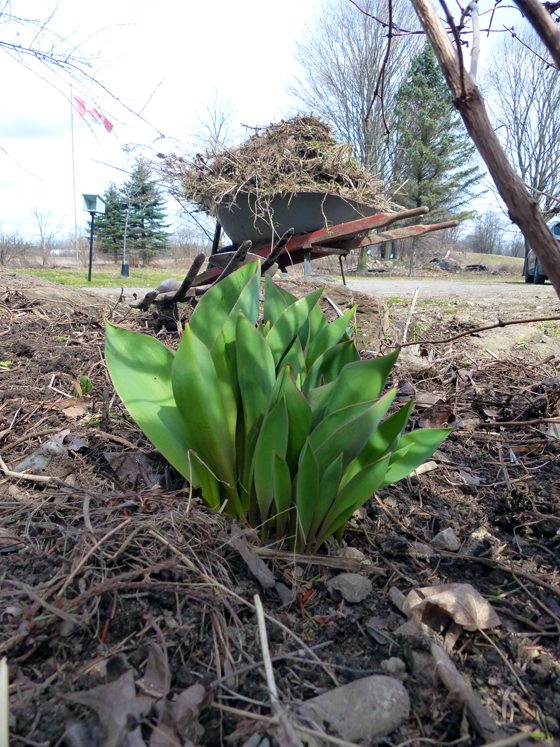
We tapped five maple trees at the start of this month (about two weeks earlier than last year), and we are having such a good run of sap. Warm weather the first week of March brought 30 litres on a good day–way more than last year.

We were a bit overwhelmed. We have only so many large containers to store sap and the fridge was full of food with no space for sap–thank goodness for the cold cellar. We’re low tech syrup makers, so we boil all of our sap on our stove, which takes a long time. Getting 30 litres of sap down to syrup on an average weeknight has made for some very late nights.

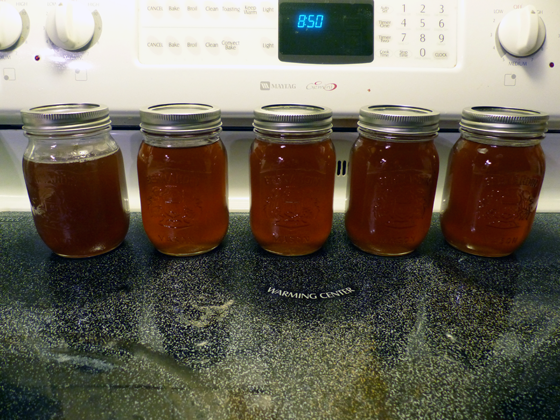
But right from the start the syrup was great. Our first run gave us a bit more than 3 litres of very light syrup. (Syrup gets darker as the season progresses. I only photographed our first 1.5 litres).

Homemade maple syrup

A cold spell put the run on hold for a couple of days, then we started again and got about 80 litres of sap over last weekend. When we finished our full weekend of boiling on Sunday night, we had 2.5 litres of incredibly sweet syrup–magic. (See how it’s darker than the first run?)

Homemade maple syrup

The run continued into the start of this week, and by Tuesday evening we had about another 80 litres of sap on its way to syrup.

And then things took a turn.

Early Wednesday morning–very early, 1 am early–something woke me up. A couple of seconds later, the smoke alarm went off. Matt–and a whole lot of smoke–were in the kitchen when I opened the bedroom door. In fact, the smoke was absolutely everywhere. Syrup was pretty much everywhere too.

It had boiled over the pot, flowed across the stove top, overflowed the stove top, ran down onto the floor, behind the cabinet, under the stove, across the kitchen floor. It was a mess like I’ve never seen.

Matt sent the smoking pot outside, and we started sopping up the burned syrup. I’m not quite sure how to describe the next hour. Sticky. Smokey. Smelly. Not how you want to spend the time between 1 and 2 am. Those all apply.

We pulled the stove out of its spot so that we could mop behind and underneath. I mopped again the next morning before I went to work to deal with the residual stickiness. We scraped the stovetop as much as we could but there’s still a black ring of burnt syrup. I’m sure syrup is behind and under the cabinet, but I’m not moving that. The house still smells like burnt sugar three days later. The charred pot is still sitting on the lawn.

Burnt maple syrup

Burnt maple syrup

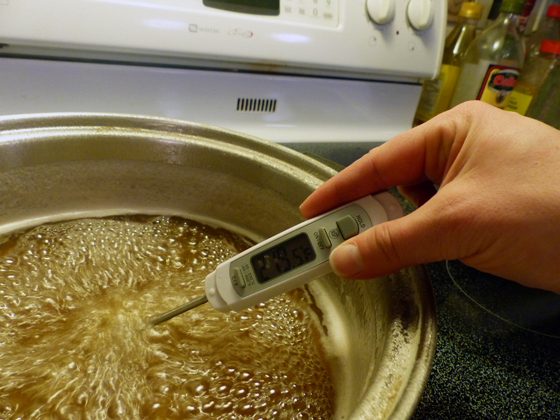
At the final minute when sap turns into syrup–around 219 degrees Fahrenheit–it gets foamy and bubbles up in the pan. We had both accidentally fallen asleep and missed this magic syrup moment. So the bubbling and foaming accelerated until it took over the whole stove and a portion of the kitchen.

Checking the temperature on maple syrup

Our frustration at losing so much syrup and so many hours of work is significant. However, we completely recognize that we only lost syrup. The red coals of charred sugar that I saw on our stove when I first entered the kitchen on Wednesday morning remind me that our loss could have been much, much worse.

We’re going to try again, though. Matt insists that we not end our syrup season this way. After sub zero temperatures for the past few days, the sap started running again yesterdays\ afternoon. We have a container of sap that will go on the stove this weekend.

And we have a new plan that all boiling stops at midnight, whether we have syrup or not.

Maple syrup. Sap, sugar, sweetness–so much goodness. Sap, sugar, smoke, spills–so terrible.

But more sweetness ahead.

Garden plans in Illinois

Like me, Sarah in Illinois is also planning and dreaming of her garden. She’s making her list and checking it twice–and then checking it a third time thanks to some help from the family. 

Like Julia, I am planning my garden this year. I wrote this post, and then when Julia mentioned taking a week off I thought that I might have a few things to add.

Well, it turns out I have lots to add.

I have received several plant and seed catalogs. I usually buy many of my plants at a local farm store, but I want to place an order for some of the things that are not found around here.

I made a small list and asked Steve if there was anything he wanted to add to it. My list included a few seeds that we always plant, and I added a few new things to try. Namely, blueberries, tomatillos, pepperoncini peppers and Black Krim tomatoes.

Steve couldn’t think of anything he wanted to add, so I set it aside and went out to clean the chicken coop. I came back in and Steve and his daughter had all of my catalogs out and were making a list. And I mean, they were making a LIST. Many items were new varieties of vegetables that we have grown before but there are new plans for the garden and surrounding yard this year.

We will be adding 2 cherry trees, 3 blueberry bushes and 4 grape vines. We also threw in 50 new strawberry plants and 2 holly trees for the yard. This wasn’t completely a shock to me since Steve and I have wanted to add a fruit arbor to our yard for a while. I just did not know that it was going to be this year.

At our house I am the planner, thinker and researcher. Steve is more likely to throw things together and see how it works out. It is a good combination for us. But that means I am frantically researching how, when and where to plant these trees and vines and bushes before they arrive and Steve is likely to just start digging when they show up. Hopefully, I will have a rough sketch of where we will put them soon.

Another way that Steve is helping to prepare for the garden is that he tuned up our tiller. He also fixed a couple things that have never worked for us on it. It is a hand-me-down piece of equipment and it has worked as-is, but it is nice that he has fixed a couple of the features on it. All we are waiting for is for the temperatures to rise a little and the garden to dry up a little.

Last weekend I planted some lettuce inside. I just felt I needed to start something growing around here. And in a short time I should have some lettuce to add to our salads!

My next post I will be updating how I did on my “one project a month” goal. I have made some progress as I mentioned. But I have also had setbacks.

I came home to this mess.

Blitz had knocked the little pot of brown paint (for my Grandma’s statue) off the workbench and all over him and the floor. Thankfully it was paint and not stain like I had originally thought. That would have been a nightmare to clean off of him and the floor.

Are you planning to plant anything new this year? Do you have any advice for growing any of the new items we ordered? Have you had any help from your pet on a project?

Way to go, Sarah. Your plans (and Steve’s) sound great. Perhaps we can share grape tips. I’m also curious to hear how your holly does. I love the idea of holly, but have been pretty much unsuccessful with two different plans at two different houses (including this one where I killed an established bush).