Vintage bar cart end table

Vintage bar cart used as an end table in the living room

I made a change in the living room the other weekend.

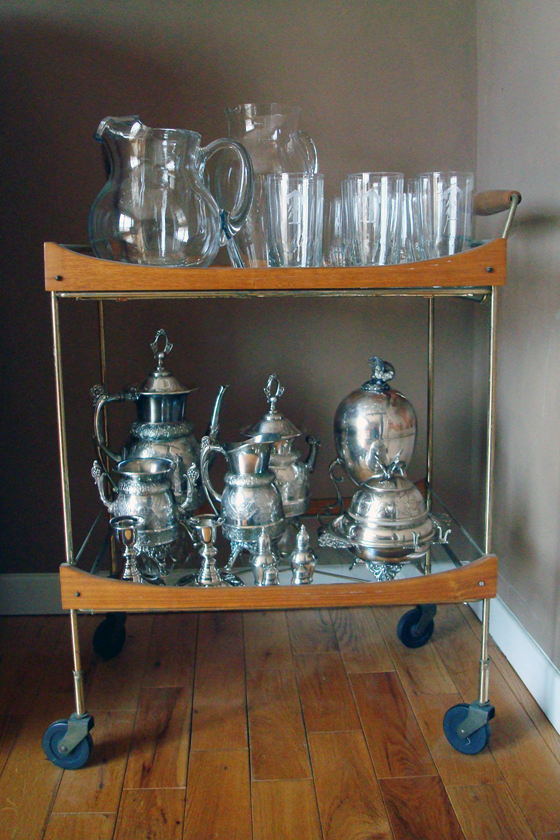
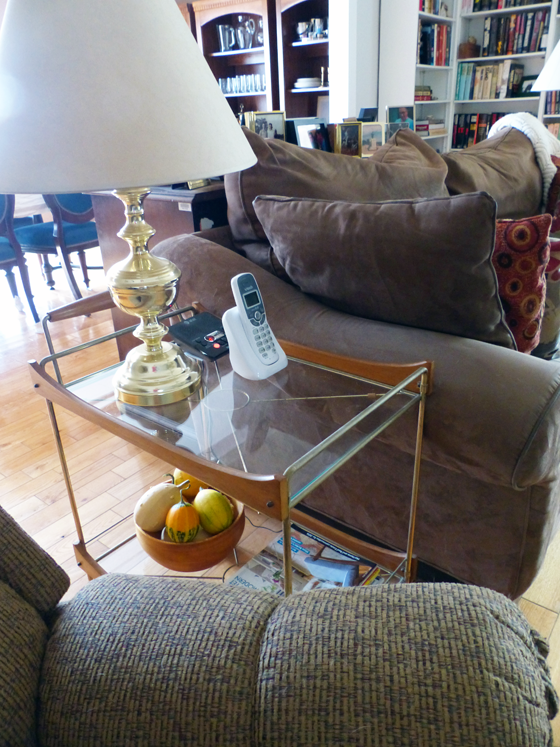
I switched out a small end table for my grandmother’s vintage bar cart. I’ve envisioned using this cart as an end table for as long as I’ve had it, and I love how it looks in the living room.

The top tray is the perfect height for a lamp, and the shelves give us more space for the phone, answering machine (we’re still old-school here in the country), some storage and display, and even some room left over for a drink and a snack.

Plus the brass, glass and wood is pretty.

Vintage bar cart used as an end table in the living room

Bar carts have become so popular. I think the reason is in part because they are such versatile furniture.

In my grandmother’s house, this cart lived in a corner of the dining room and held her silver tea set. As much as my grandmother enjoyed an adult beverage now and then, this cart was known as a tea cart.

When it came to our (first) house, it served the same purpose, sitting in our dining room and holding my silver tea set.

It did that for awhile here at the farm too. But I knew it could do more.

Vintage wood and brass tea cart

When we added the third part of our new-to-us china cabinet to the dining room, the tea cart got a chance to try something new and moved in to the living room.

It will be here for at least awhile. But I’m also envisioning it in a bedroom as a night table. So much potential…

Do you have a bar cart at your house? How do you use it? Are you a fan of bar carts? Have you ever heard of a tea cart?

How I organize recipes

Open shelving in the kitchen for cookbooks

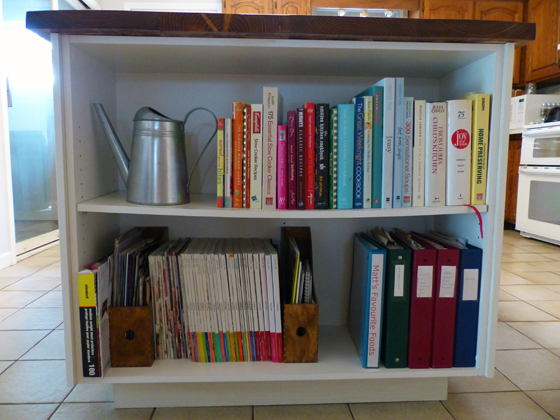
One of my favourite features of the island we added to the kitchen is the open shelving on the end that holds our cookbooks.

The books add a splash of colour to the wood and white of the kitchen. The shelves keep them organized and easily accessible. Plus I love cookbooks. I will sit and read them like a magazine or novel. (And, yes, you’re not imagining. The upper shelf is sagging a bit under the weight of all of our cookbooks).

However, not all of my recipes reside in cookbooks. I have a bunch of printouts from recipes I’ve found online (I haven’t progressed to a tablet yet), clippings from the newspaper or magazines, even a few hand-written recipes from family and friends.

To keep these recipes organized, I returned to the lessons learned in school–binders, dividers and page protectors.

A couple of weeks ago, I added a bunch of new recipes to my collection, so I thought I’d share my organization method with you.

How to organize recipes

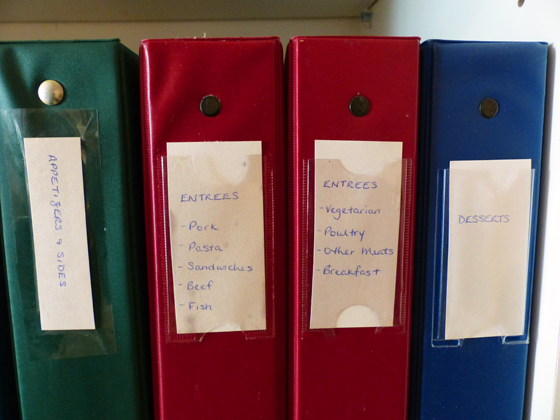
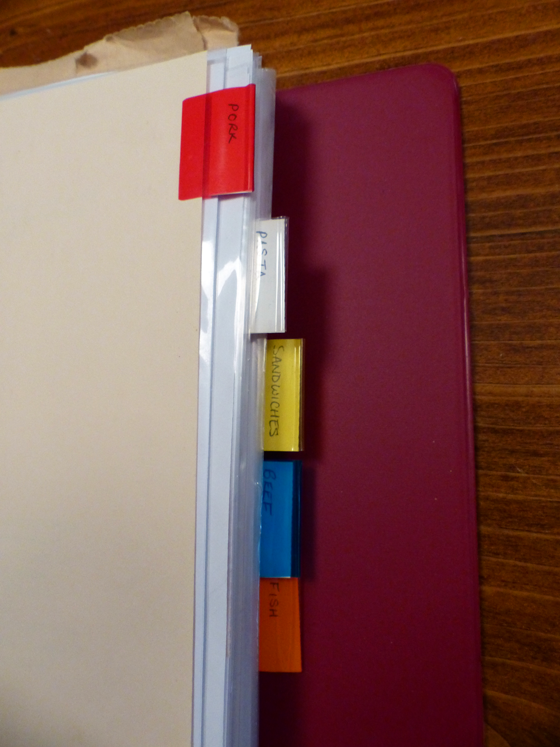
First are the binders. I have three major categories which each get their own binder: Appetizers and Sides, Entrees, Desserts and Sweets. Entrees outgrew its single binder and is now split into two books. I use different colours for each grouping.

How to organize recipes

Within each binder, I’ve divided the recipes into subcategories.

In appetizers, the sections are appetizers, soups, salads, sides, snacks, breads and drinks. For entrees, I divided them into pork, pasta, sandwiches, beef, fish, vegetarian, poultry, other meats (venison, lamb), breakfast. Desserts starts with the most important, chocolate, and then goes to cookies, “buns” and bars (including muffins), cakes, pies, fruit, custards and Christmas.

How to organize recipes

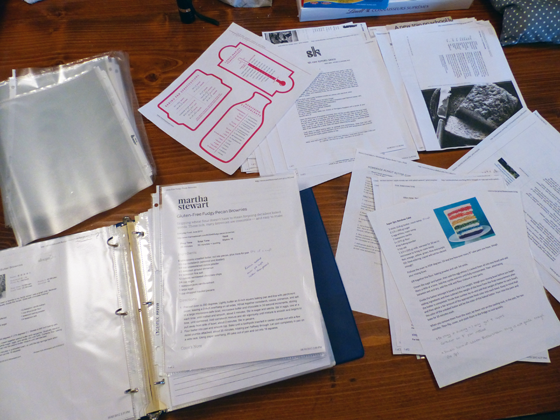
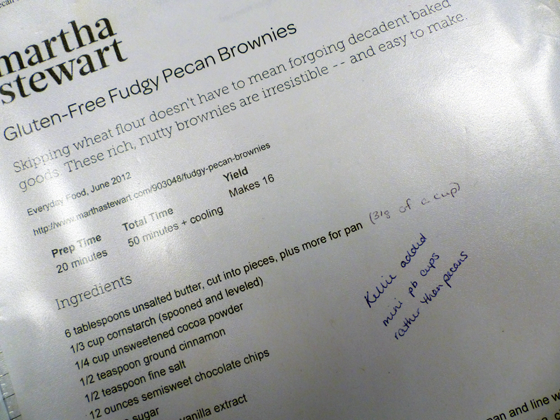
The recipes themselves are stored in plastic page protectors. I’m not the tidiest cook, so the plastic sleeves protect the paper from spills and splashes.

However, it’s easy to slide the recipe out of the plastic and add notes about what worked, what didn’t or what adjustments I made.

How to organize recipes

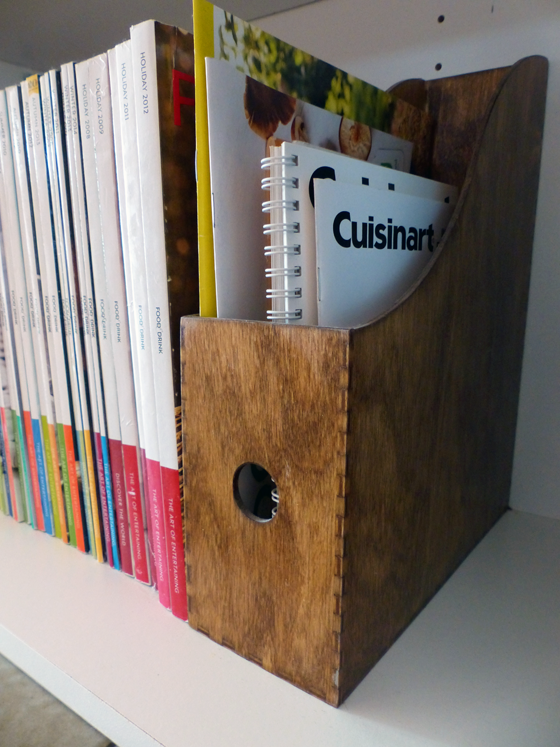
Beyond the binders, I also use magazine holders to organize the smaller pamphlets and cookbooks I’ve collected over the years. I got two wooden holders from Ikea and stained them to match the countertop and cabinets.

Wood magazine holder

I love having my recipes organized.

In fact, I was so inspired that I flipped through the dessert binder and whipped up one of my favourite fall recipes, spiced apple muffins, using the apples my friend gave me from her own tree.

Apple spice muffins

With my recipes all organized, I feel ready to move on from fall baking on to Christmas baking.

Are you doing any baking, either fall or Christmas? How do you organize your recipes?

Basement bathroom details

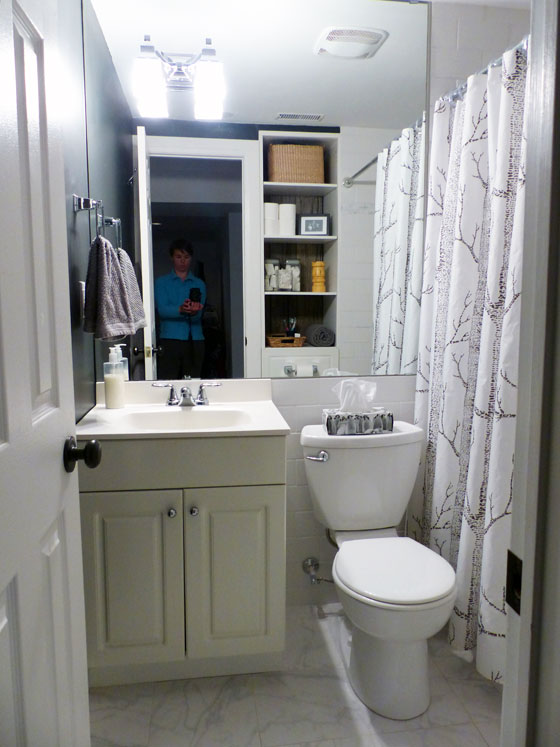
Small black and white bathroom

Today is about diving in to all of the details on our basement bathroom that you saw on Friday.

This is a small space–5 feet by 7 1/2 feet. But it makes a big statement, if I do say so myself.

As you saw, what we started with was not great. We ripped everything out right back to the concrete. We reframed the walls, our plumber ran all new waterlines, our electrician fixed the unsafe wiring we uncovered, we had sprayfoam insulation added, and then we put up drywall and cement board.

Along the way, Matt broke up the concrete floor so that we could reposition the shower drain and toilet (a lack of insulation in the original walls made them very thin. Once we reframed and reinsulated, we had to bump the toilet out from the wall by a few inches).

We also flipped the plumbing in the shower so that the shower head was on an interior wall rather than the exterior one.

And the other change was a small bump out into the hallway outside the bathroom. We have a very wide hallway leading to the laundry room–7 feet wide. So we borrowed about 2 square feet of it to make a little storage nook in the bathroom.

Here’s the floorplan.
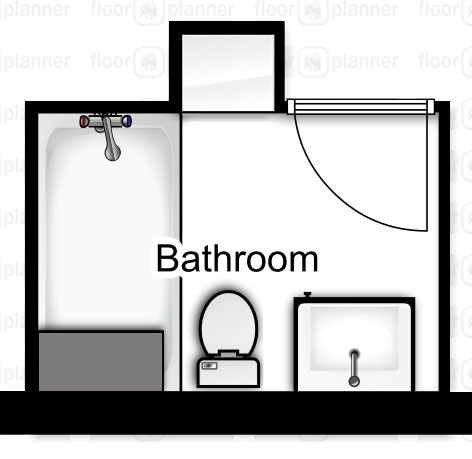
Bathroom floorplan

And here’s how the bumpout looks from outside the bathroom. It’s not obtrusive and gives us a nook perfectly sized for a storage cabinet just outside the laundry room.
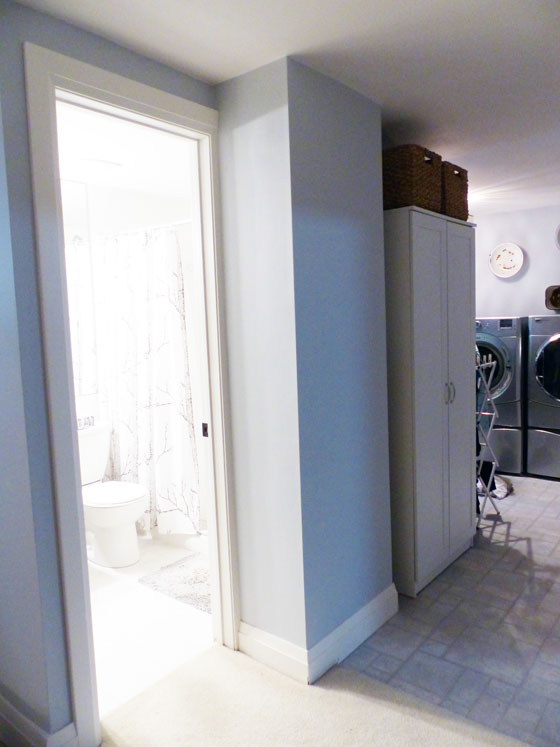
Storage bumpout for the basement bathroom

Let’s step inside and take a look at some of the details of our new basement bathroom.

The shower is big (3 feet by 5 feet), beautiful (marble! white! clean!) and has a few special features that I’ve always wanted (the soap niche and bench).

The main tile that we used is a 4 inch by 2 inch white subway tile–a bit bigger than the standard. It runs up half the wall behind the toilet and then floor to ceiling in the shower. Inspired by Lindsay Stephenson and her beautiful DIY shower, I added an accent band of grey marble mosaic tile. The shower floor is also a grey marble mosaic of little hexagon tiles.

The niche and the bench are two things I knew I wanted from the start. The niche is 12 inches wide by 15 inches tall and the bench is 32 inches wide by 16 inches deep by 18 inches high. On every horizontal surface, I used a solid piece of marble to protect against leaks. For the curb and the niche, we were able to find marble at Home Depot. For the bench, it took awhile, but we eventually found a remnant that was big enough for the top.
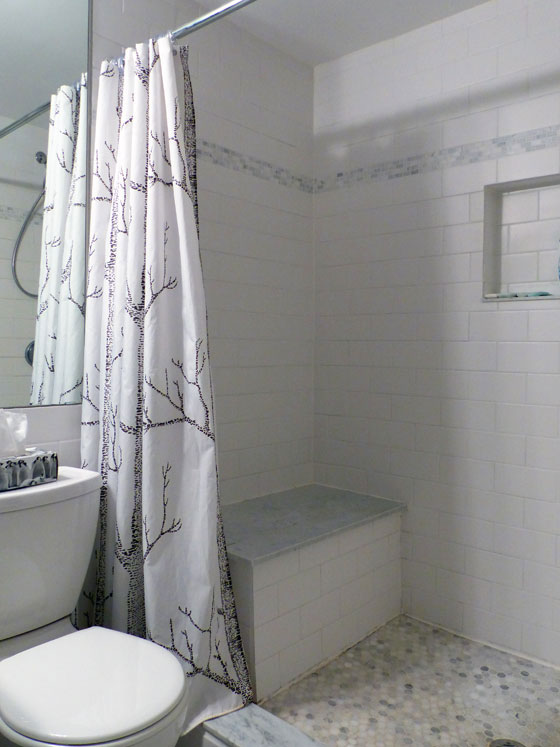
White subway tile shower with a marble seat

It may sound funny, but the shower curtain is what pulls it all together for me. Early in the bathroom project, I fell in love with Cole & Son Woods wallpaper. It was an organic pattern that would be a bit of a rustic element in the bathroom. Since moving to the farm, I’ve come to want to incorporate something rustic in all of my interiors. However the fabric version–like the paper–is way more $pendy than my budget.

I considered all kinds of alternatives, but nothing panned out. Then this summer Jen at Rambling Renovators posted about a Woods knock-off. And it was from a Canadian company and already made into a shower curtain. Before I finished reading her post, I had already placed my order. It’s perfect.

Someday we might add a glass enclosure (there’s extra blocking in the wall to support glass), but that’s more money than we want to spend, and Matt’s satisfied with the curtain.

As I mentioned in Friday’s post, we reused the original vanity and sink that were in the bathroom. We didn’t have a lot of space, and they fit perfectly, so there was no reason to reinvent the wheel. Looking at these photos, I see the finish of the vanity looks very creamy next to the white toilet and tile. However, in real life, it doesn’t bug me.

Matt selected the faucet, and his choice was driven purely by budget. If it had been up to me, I would have chosen something square, like the towel holder and light fixture, which I picked. However, in hindsight that might have ended up being a bit too many squares. The faucet matches the hooks that we chose and the variety of shapes work well.
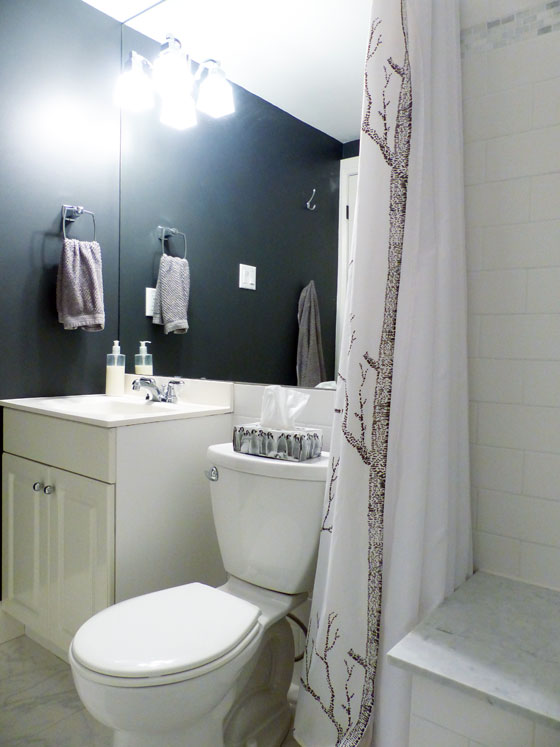
Small black and white bathroom

There were two things I wasn’t sure about in this bathroom: the black paint and the huge mirror.

In a small room, I was worried the black would be too much. But it’s only one wall, so the black doesn’t overwhelm the small space (it’s Wrought Iron by Benjamin Moore). The contrast with the white tile and fixtures is dramatic.

In a small room, a big mirror is a no-brainer. But sheet mirrors like this aren’t exactly in style anymore. Running it from the corner right over to the shower and from the vanity up to the ceiling modernizes it a bit. Installing the light fixture on top of the mirror also modernizes it–although the process of measuring and hanging this mirror was nerve-wracking. But the mirror does its job of doubling the light and appearing to double the size of the room.

Small black and white bathroom

With limited wall space, we didn’t have a lot of room for towel bars. Two hooks behind the door–each with three individual hooks–give Matt space for his bath towel and clothes–although pants still end up on the chair in the family room outside the door. Argh.
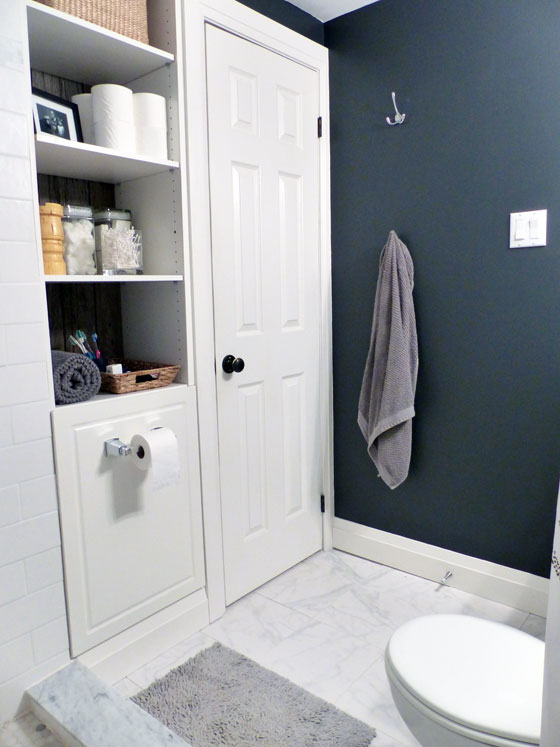
Built in shelving in a small bathroom

Even if the hooks don’t work quite like I intended for storage, the built-in works very well.

The closed cabinet on the lower part hides the less decorative things in the bathroom. Plus the cabinet door that I found at the Habitat Restore is a perfect match for the doors on the vanity. Originally, I’d planned to build a drawer inside the cabinet, but some dollar store baskets are much simpler and work just as well to organize Matt’s toiletries. The guy’s deodorant collection is ridiculous.
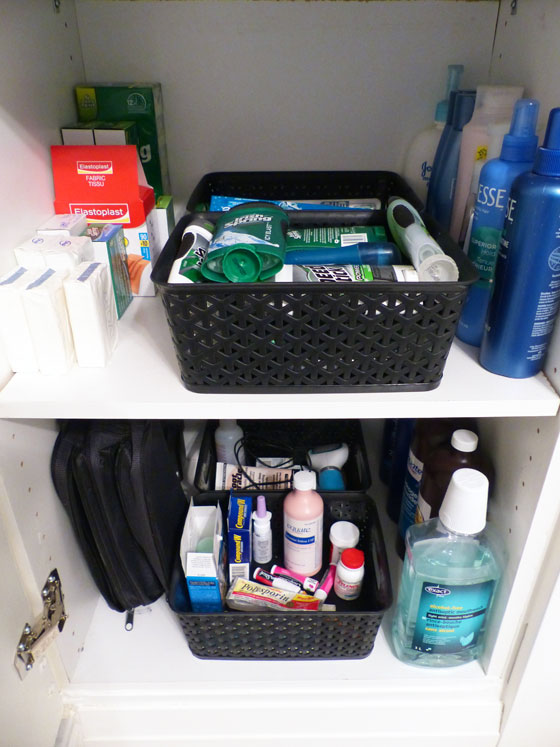
Built in shelving in a small bathroom

The upper part of the shelves gives more storage and a spot to decorate, which makes me happy. The back of the open shelves is lined with barnboard–that I actually went out and cut off the side of the driveshed. It’s another rustic touch that I love so much.
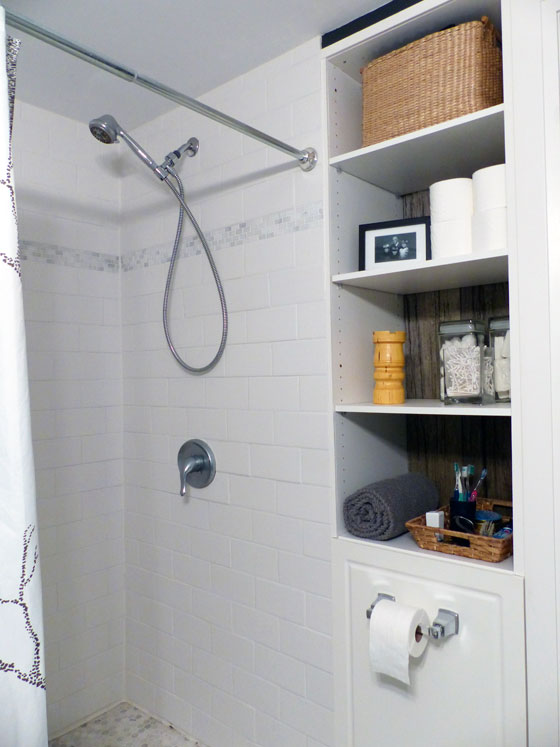
Built in shelving in a small bathroom

This might be a stretch for anyone except me, but I had a loose chess theme in mind when I conceptualized this bathroom. We have kind of a fun and games thing happening in the rest of the basement. Matt’s game–although I’m not sure you can really call it a game the way he plays–is chess.

When I thought about going black and white for the bathroom, I thought of a chess board.

That also led me to incorporate a photo of Matt’s grandpa, who was an avid chess player. And to ask my Dad to make a large rook–Matt’s favourite chess piece–on his wood lathe. (Beware, any time you play with Matt, he will always castle his rook and king).
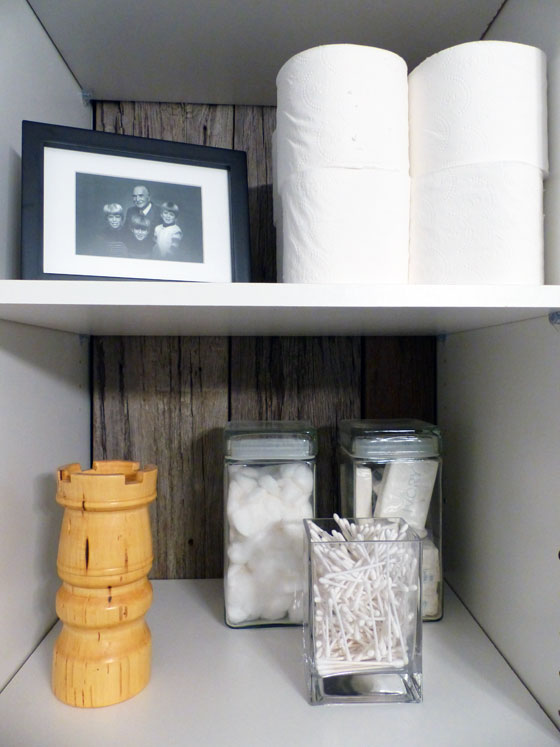
Built in shelving in a small bathroom

For all of the time that Matt and I have shared a house, we have not shared a bathroom (aside from the short time span when this bath was under construction). So this room is all about him.

Happily, the finished product is something that works for both of us.
3/3 of a china cabinet

Want to see the thrifting score of the year?

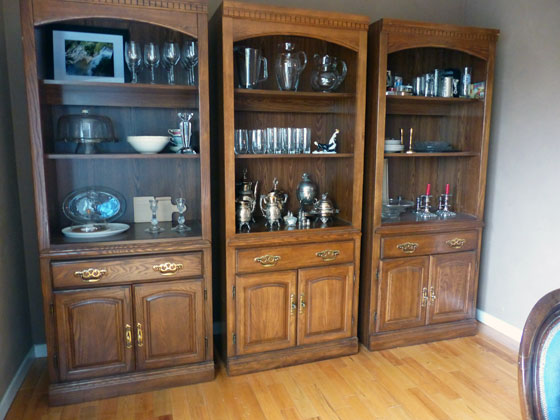
Last December I wrote about a pair of large bookcases I found at Value  Village and my intention to turn them into a china cabinet in the dining room. I also wrote that I had really hoped to find three bookcases, but the store only had two (hence the 2/3 title of that post).

90s bookcases as china cabinet

More than six months later, in a different Value Village, in a different town, I came face to face with a bookcase.

It looked like it might be the same as the bookcases we already had at home. I actually called up my original blog post on my phone and tried to compare the pictures of the cabinets with the bookcase standing in front of me.

I was pretty sure they were a match.

In another sign that the universe was on my side that day, we were driving my Dad’s truck, so we had a way to transport the bookcase. And Matt had a 30% off coupon.

The bookcase became ours.
When we placed it in the dining room, sure enough, it was a match.

Unbelievable.

90s bookcases as china cabinet

I still have plans to make over this trio, but when that day comes I will no longer have to build the middle section from scratch. For now I’m quite happy to have 3/3 of a china cabinet sitting in the dining room.

Hallowe’en look back

Gourds in a wooden bowlThis is our fifth Hallowe’en at the farm. Over the years, we’ve learned not to expect trick or treaters to trek up our long driveway–but Matt bought some candy just in case.

This year, the extent of my fall decorating (I can’t even call it Hallowe’en) is a bowl of gourds on the dining room table in one of my Dad’s hand-turned wood bowls.

Here’s a look back at Hallowe’en through the years.

Our first Hallowe’en, we carved a pumpkin based on Christopher Lee’s performance as Dracula–one of Matt’s favourite movies. The pumpkin even sat on the front stoop for a little while before we realized we were the only ones that were going to enjoy it and we brought it in to the fireplace hearth.

Dracula pumpkin carving

Our second Hallowe’en at the farm was our first Hallowe’en with Baxter. He showed off his tricks to earn a few treats. I’m writing more about trick training over at ThatMutt.com today.

An eclipse coincided with our third Hallowe’en, creating a spooky blood moon.

bloodmoon1b

Last year, our fourth Hallowe’en, I created a creepy haunted forest complete with real animal skulls on the mantel. I still love this display.

Hallowe'en mantel

How are you celebrating Hallowe’en at your house? Do you decorate for Hallowe’en? Are you going trick or treating?

Five standout houses from homify

I’ve been writing for homify.ca for a few months now. As a home reno and decor junkie, I love going behind the scenes on amazing houses from all over the world.

Here are a few homes that I’ve written about that stood out so much that I had to share them with you.

I love the idea of being involved in a barn conversion–especially when the result is as beautiful as this barn in the Netherlands.

country Corridor, hallway & stairs by reitsema & partners architecten bna


The tiny house movement is not something I can see myself participating in, but it was neat to see how every “room” of a house could fit into a single shipping container.

rustic Houses by Cristina Menezes Arquitetura


Container homes are very much not my style, but this one from Northern Ireland came with sheep and a cow, so it appealed to the country girl in me. Plus it has an amazing suspended bathtub that looks like a hammock (!).

modern Houses by Patrick Bradley Architects


I love a good before and after, and this Portuguese home was full of them.

translation missing: ca.style.schools.eclectic Schools by SHI Studio, Sheila Moura Azevedo Interior Design


And my most recent post, a restored rustic farmhouse in Northern England, complete with a beautiful country kitchen.

by Linda Joseph Interiors


Check out all of my homify.ca posts.

Country or modern, rustic or sleek, what home styles appeal to you?

Fun oversize Scrabble art for the basement

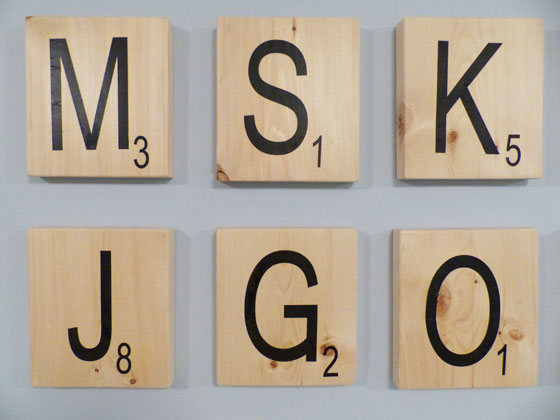
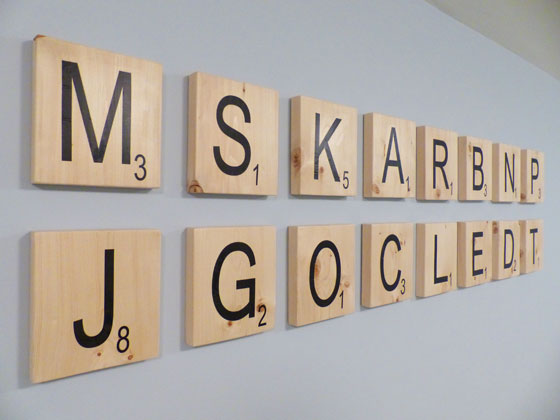
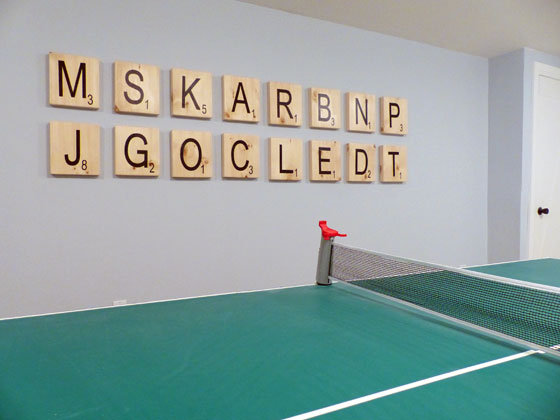
Oversize scrabble tiles as art in the game room

Anyone want to play Scrabble? I’ll bring some letters if you bring the very, very large board.

When it comes to art in this house, I follow two principles: keep it personal and keep it inexpensive. For the basement, I have one more factor: keep it fun.

A wall full of really big Scrabble tiles ticks all the boxes.

Oversize scrabble tiles as art in the game room

Personal: The letters are the initials for us and everyone in our immediate family. Moms, Dads, brothers, sisters, in-laws, nephews, niece, pets.

A message from Auntie JuJu to the two babies joining our family in the next few months: your names must start with one of these 16 letters. More than half the alphabet is in play. That’s lots of options for you.

Inexpensive: Sanding all of these tiles took a bit of time, but since I’m not paying myself an hourly rate, my only costs were a few 2x10s, some sandpaper, printer paper, Mod Podge and a paint pen.

Fun: We have giant Scrabble tiles hanging on our wall. That’s not typical artwork.

Oversize scrabble tiles as art in the game room

When I was making these, I wanted the letters to hang perfectly flush to the wall. Even the thinnest hanger didn’t appeal to me.

Oversize scrabble tiles as art in the game room

I came up with a simple solution that was also–you guessed it–cheap.

I routed a channel in the back of each tile, which slips over a nail that I hammered into the wall.

Oversize scrabble tiles as art in the game room

Adding art to the basement was one of my Home Goals for 2016. We call this room the long room, so I wanted some substantial art that could fill the wall. Sixteen large wood slabs work very well.

Oversize scrabble tiles as art in the game room

Do you play Scrabble? Would you ever hang boardgame art on your walls? How do you handle art when you have a big wall?

Save

Save

Save

Save

Freshening up an organizer

Sarah in Illinois joins us today with a great makeover that adds a bit of style to an area that sometimes doesn’t see a lot of decor–her garage. This is a lesson in the power of paint. Plus the power of soap and water!

It seems like all of my small projects get set aside during the summer months. We spend all of our time outside and don’t want to be cooped up in the woodshop/workshop.

I have a pile of projects out there waiting for the cooler months, but I did get one thing finished.

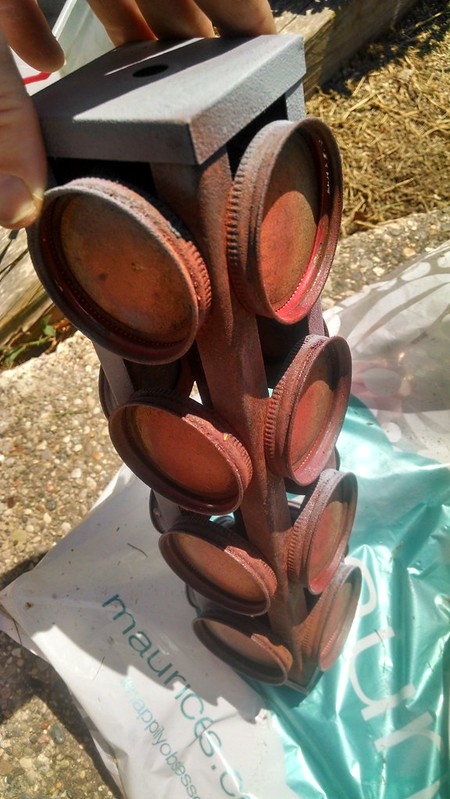
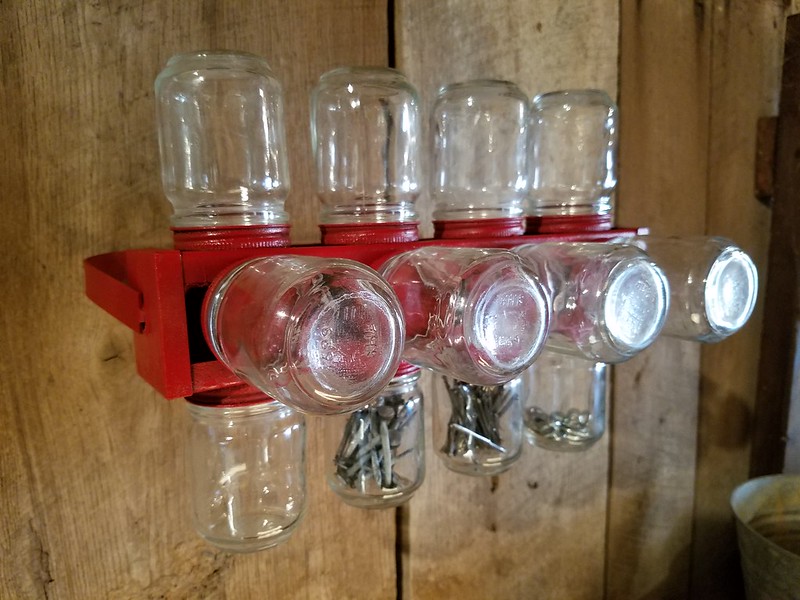
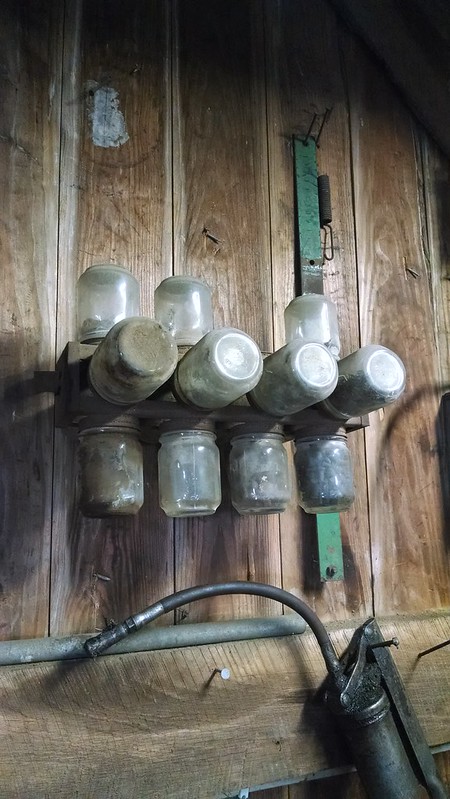
I found this old metal organizer that has been hanging in our garage for who knows how long.

I thought it looked handy, plus it looked like something that could be fixed up with a can of spray paint.

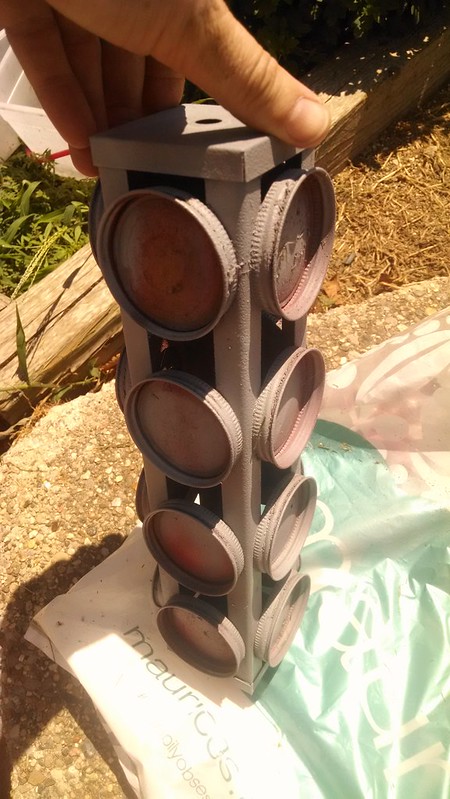
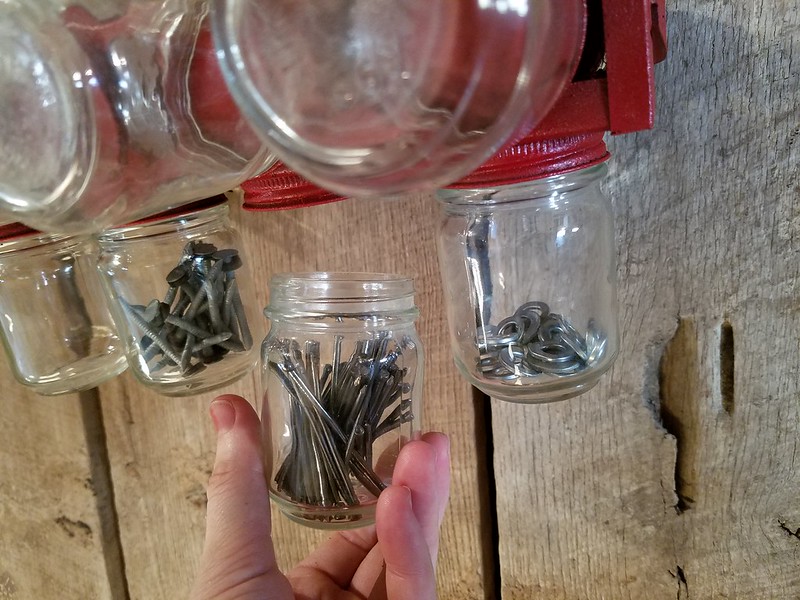
I took it off the wall and took the little jars off. They easily cleaned up in a sink of soapy water. I took off the bracket that attaches it to the wall. I thought that I could just run a little sandpaper over it and start painting. But the red paint that I chose didn’t show up well, it just looked like a rusty red color.

See how the red looks flat?

I decided that I should probably have done it the right way from the start. So I started over. I ran the sandpaper over it again and coated it with a light color primer. This helped the red really stand out when I painted it and that was the look I was going for.

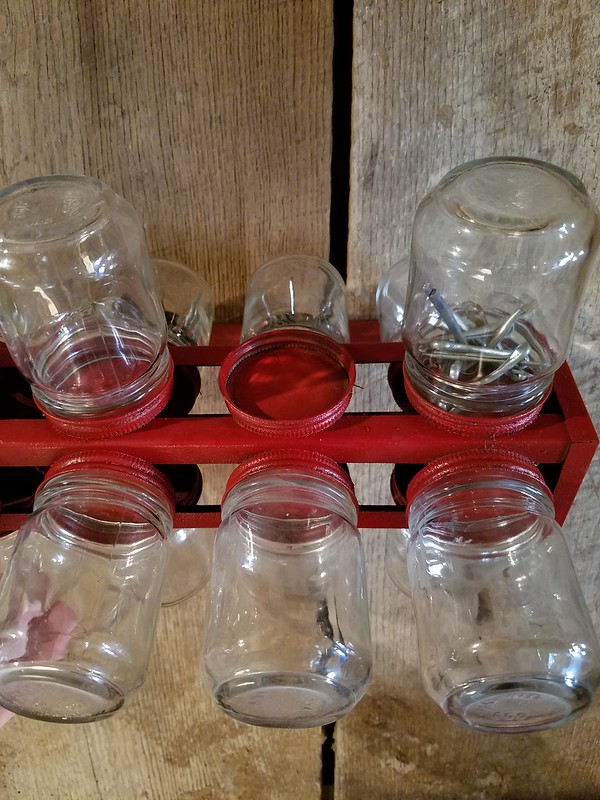
I put several coats of paint on it trying to avoid getting much paint on the inside of the caps on the threads where the jars screw on. Too much paint built up would have made the jars hard to screw on.

Unfortunately, after all of the years hanging on the wall, there is a little jar missing. I am hoping I find it stashed somewhere in the garage, but I am guessing it may have fallen on concrete at some point and is long gone. So I will keep my eyes open for a replacement.

My mom and my brother’s girlfriend are yard sale pros so I am going to put them on the case. In the meantime, I am happy that I made an improvement that cost very little and is much more pleasing to look at.

Do you use spray paint very often on your projects? Do you ever try to take shortcuts then have to start over? What color would you have chosen to paint this organizer?

The red brings a great pop to the garage, Sarah. I think I probably would have kept the rust(ic) look just because I can’t be bothered painting it or decorating my garage (if I’m being honest), but it looks so good. Such a cheerful addition. I love the concept of this organizer. Do you think you could DIY something like this? Perhaps with some very strong glue for the jar lids?

I’m not here

A mid-summer holiday Monday. Ahhh. Such a treat. In honour of my day off, I’m taking the day offline too. Paintbrushes and other tools, my two favourite guys, the garden and great outdoors–there’s lots of things I love out there IRL.

Paintbrush

Save

Home Goals 2016 mid-year report

Six months ago, I shared my Home Goals for 2016. We just crossed the halfway point of the year, so it’s time for my mid-term report.

Beyond sharing my Home Goals, I also started the year by sharing some of my ideas for the major renovation that we want to do… someday. And the first goal on the list was to get an idea of how much the reno is going to cost to help us figure out when that someday might be.

We consulted with a contractor, got some feedback on our plans and got some numbers. They’re big numbers… as in not any time soon numbers… but it was helpful to give us an idea of where we’re at.

In terms of specific projects, here are the rest of our goals.

Guest room

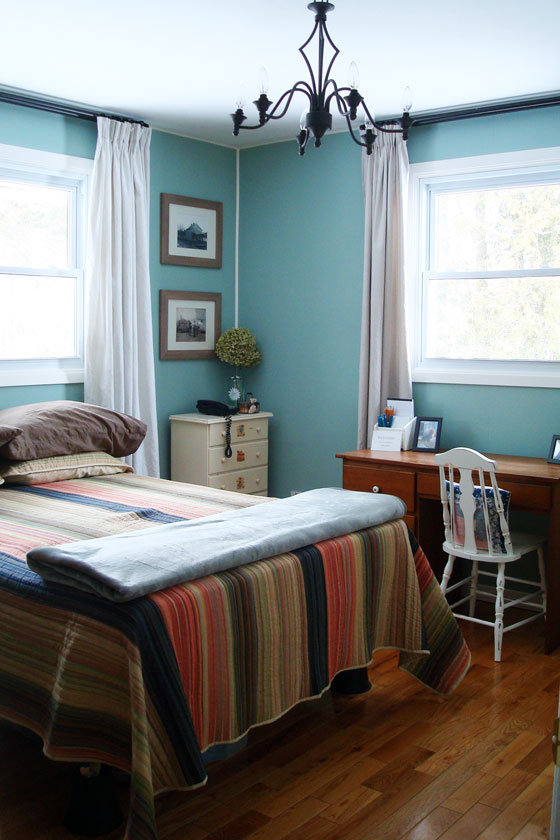
Robin's egg blue country guest room

The guest room was our first project of the year, and I’ve already done the official “reveal,” so I’m feeling pretty good about crossing this project off. However, there’s one task left on my original to-do list, which has also made it onto my summer to-do list.

  • Paint the walls and trim
  • Replace the light fixture
  • Make window treatments
  • Refinish the desk chair
  • Strip the paint off the metal bedframe (and maybe repaint)
  • Decorate and personalize

Finish the basement

Building shelves in the closet under the stairs

The basement was essentially finished a looong time ago. However, those niggly finishing details are still hanging around. Plus, we have two new summer projects, one that you know about and one that you don’t yet. (I’ll be talking more next week about things that are going to affect our basement progress).

  • Trim around the cold cellar doorway
  • Finish the built-in storage area in Matt’s bathroom
  • Make/buy art to finish off the space
  • Build shelving in the closet under the stairs
  • NEW Build a new closet in the basement
  • NEW Mystery project (more to come next week)

Furniture

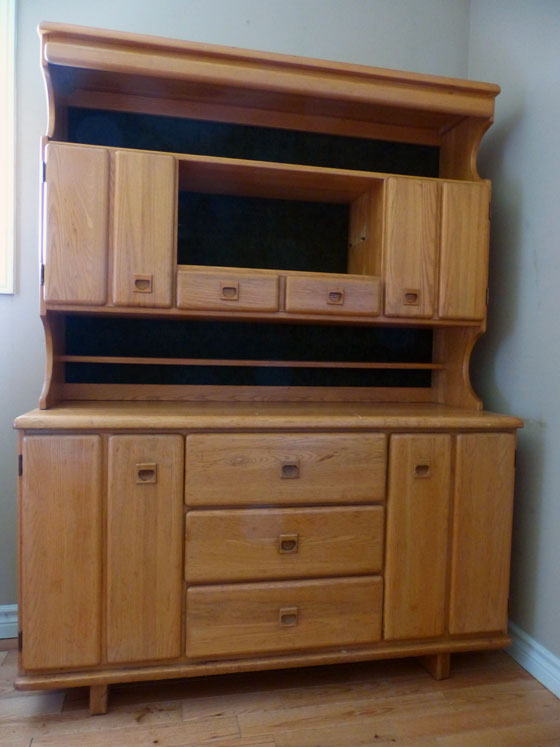
Vintage china cabinet

I’m always on the hunt for a few key pieces of furniture. So far this year, I’ve found one piece–the china cabinet for my office–but it’s still awaiting its makeover.

Vegetable garden

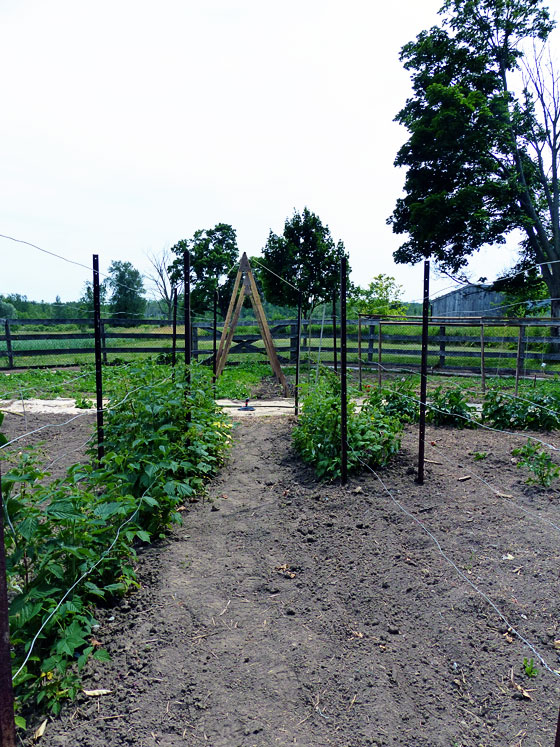
Centre axis of a round vegetable garden

My all-consuming summer project every year has become the vegetable garden. Thanks to Dueling DIY this spring, the garden is in really good shape.

  • Hang the gate
  • Edge the garden
  • Build raised beds around the perimeter
  • Build trellises for the raspberries, tomatoes and squashes
  • Plant perennials: grapes, asparagus, rhubarb, more raspberries
  • Run a waterline out to the garden
  • NEW Spread hay mulch over the garden

Outdoor clean-up

I ambitiously added another outdoor goal to the list, although I realized I’d have to pick my battles in terms of which area I chose to clean up.

Thanks to a bit of distraction at the start of the garden Dueling DIY, I’ve cleaned up the large lumber pile on the north side of the centre field and burned the long grass and weeds on the south side of the garden. Matt’s been mowing the burn, and it almost looks like a real lawn already.

Burned lawn

I’m feeling pretty good about what we’ve accomplished so far. Work on a farm never ends, but I love seeing the progress we’ve made.

How are things going at your house? Do you feel like you’re making progress on your goals?

Save

Save

Save