More than a year ago I mentioned I was thinking about buying a ceiling fan for our front hall. I was hoping a fan might help regulate the temperature between upstairs and down, particularly in the summer, particularly when we’re using the air conditioner.
The feedback I collected and the brief amount of research I did suggested that the ceiling fan might be more helpful in the winter. The fan would push the warmer air downstairs, more than it would pull the cooler air up.
Shortly after those musings, I was in a local store that was going out of business and I spied a basic ceiling fan on sale. I decided I was done thinking. I bought the fan.
But that’s as far as I got. The prospect of installing the fan over our stairwell was not something I was enthused about. So the fan sat in its box on the mudroom landing. For more than a year.
Then summer returned. Temperatures rose higher than ever. The basement was frigid. I really wanted to give the fan a try.
Finally, I had a brainwave. Our electricians were here for the bathroom. I could ask them to install the fan. Problem solved.
The electricians were happy to take care of the fan for me. And I’m very glad I asked them to do it, as install included switching the electrical box with a fan-rated box, something I wouldn’t have known was needed. (Also, there was the whole hovering over the stairwell while holding a large heavy fan over your head thing.)
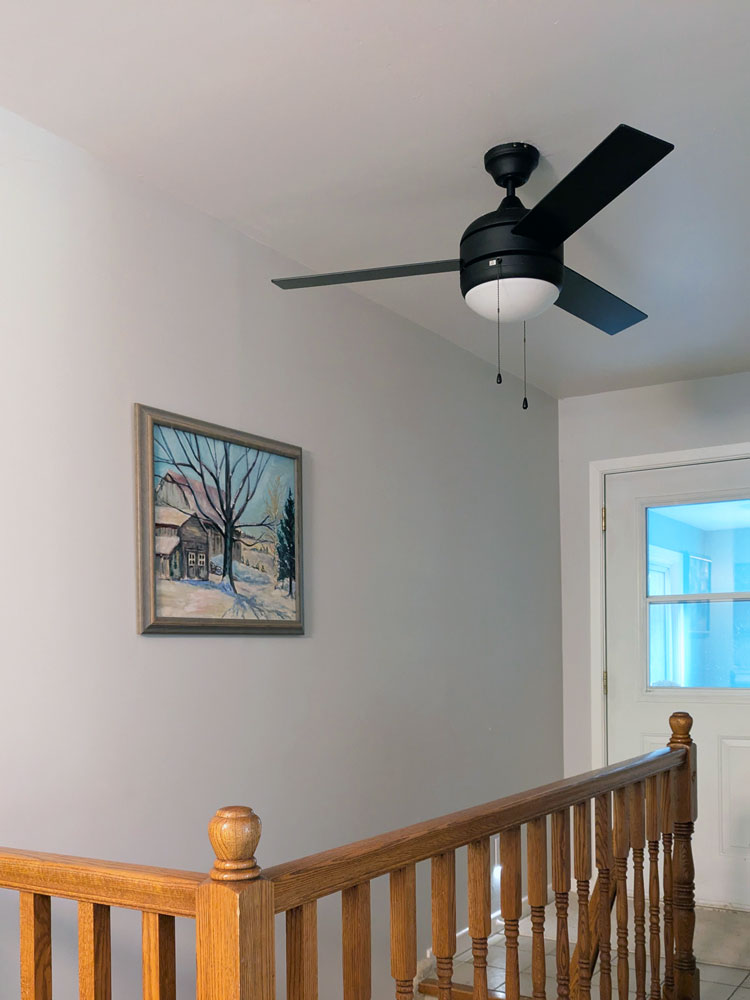
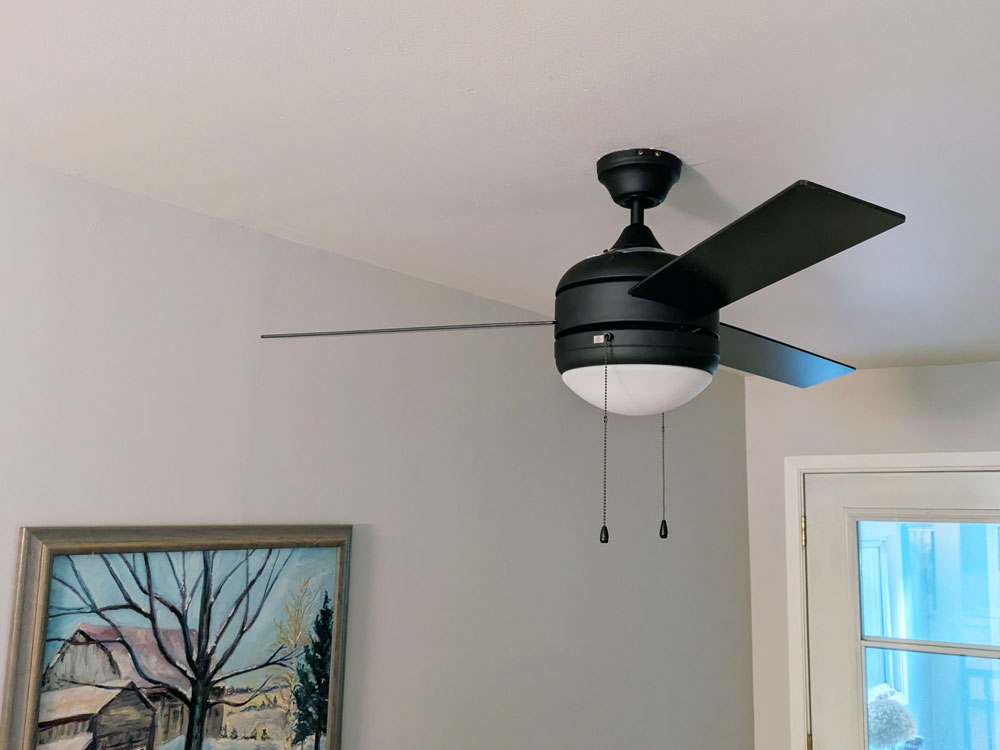
So we now have a fan in the front hall. I’ve been running it most days. It does move the air around, though I’m not sure I’ve noticed a huge change in the upstairs and downstairs temperatures. The air currents extend into the kitchen, so I feel a nice breeze sometimes when I’m in there.
I’m curious to see if I notice any difference in the winter.
For now, I’m happy the fan is no longer on the mudroom floor and instead on the foyer ceiling as intended.
Are you a ceiling fan fan? Any tips for this fan newbie? Who else has bought something and then gotten stuck on the install?
Anyone want to go to the bathroom? (I realize that may be an odd question, but I really hope you say yes, because I have things to show you.)
Our main bathroom is looking so good. We are still under renovation, but I’m making progress (one of the realities of DIY is that things usually take a while).
My last update took you through demo, plumbing and electrical rough-in, tile and the start of the wall panelling.
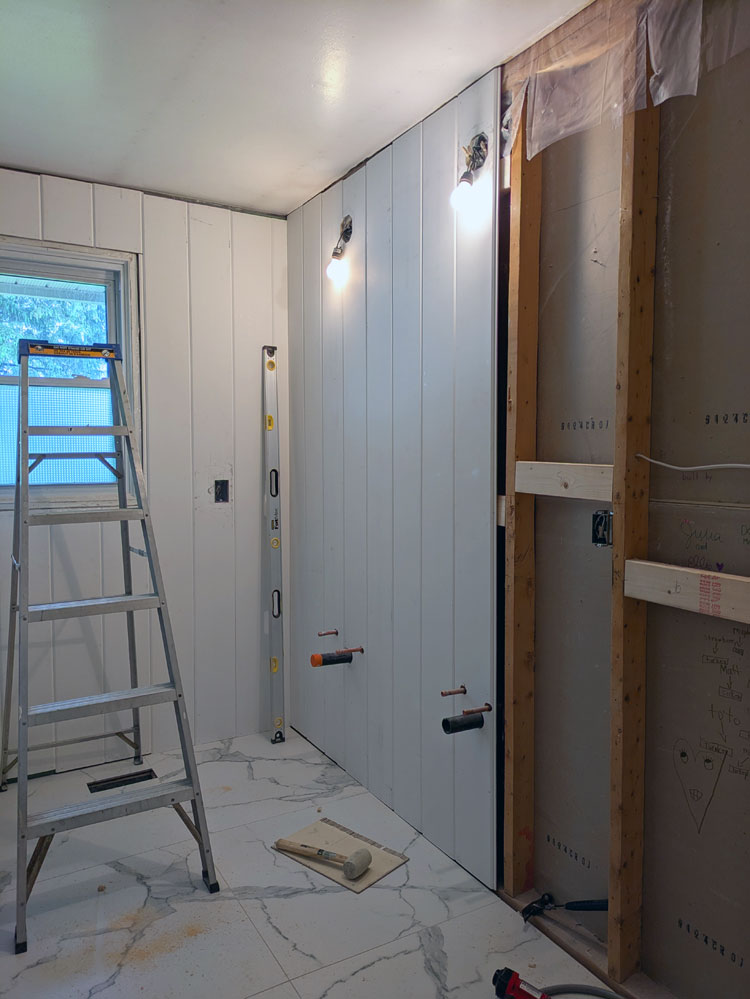
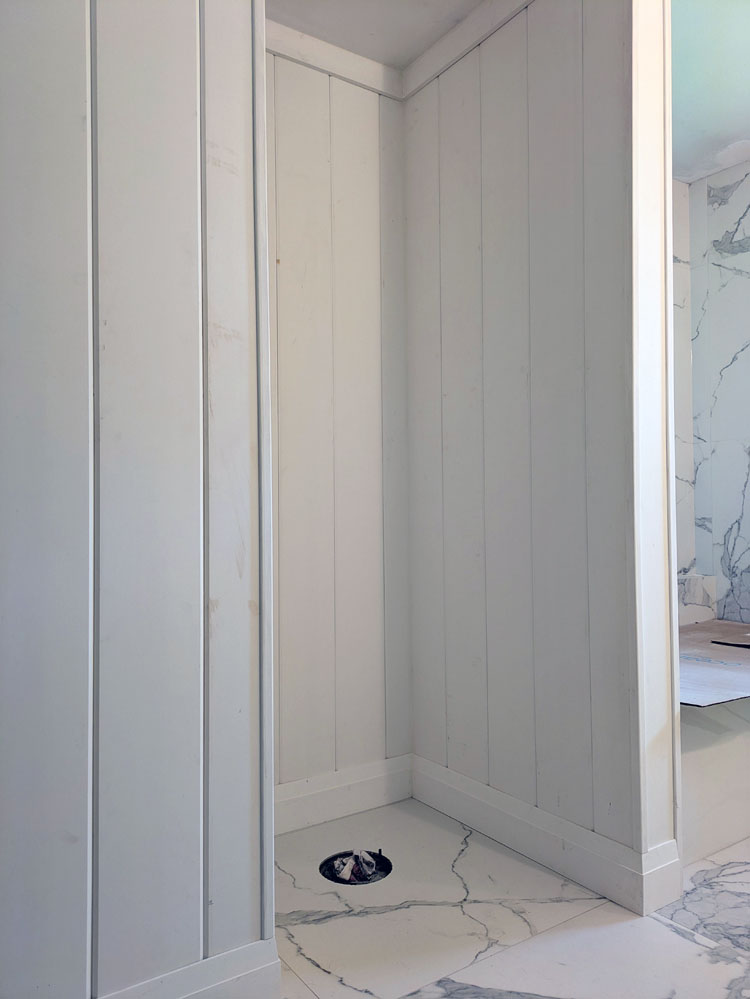
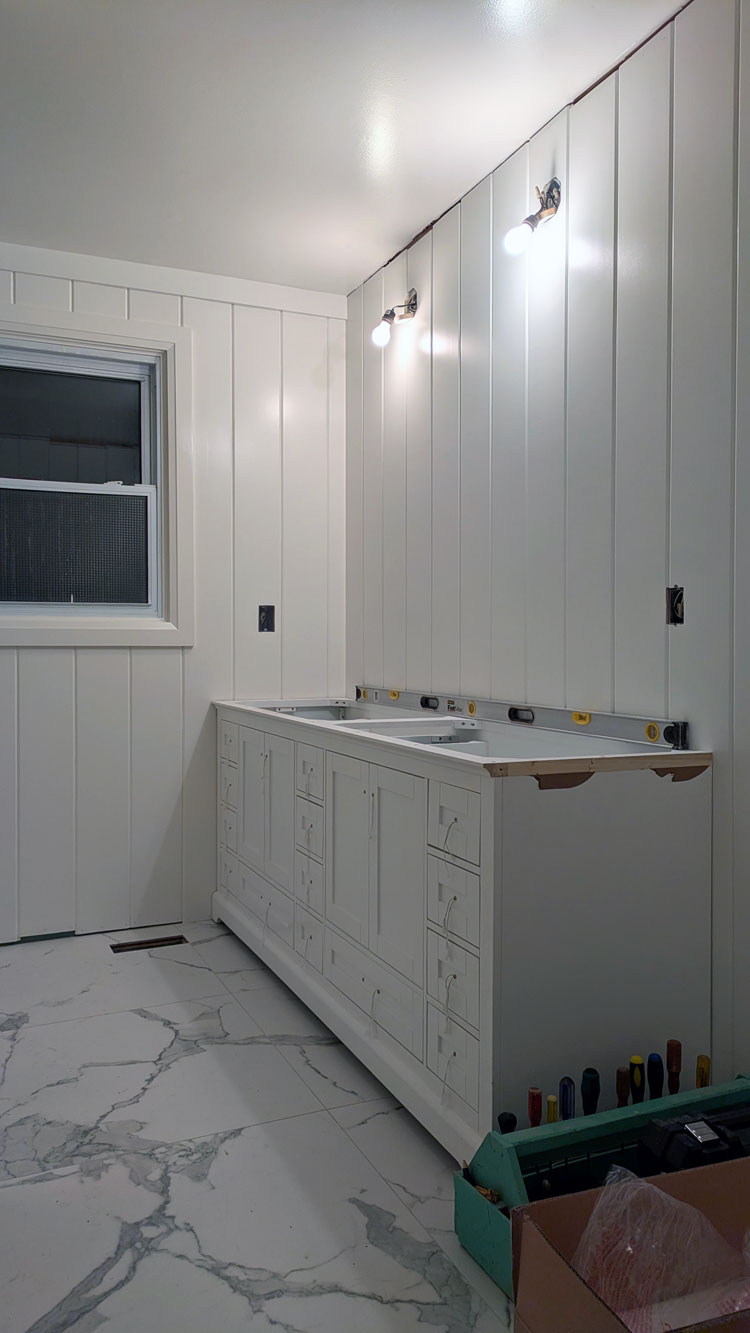
Now, the panelling is up and painted. The vanity is in place. And the electrical is complete. Today I’m going to share the details of how it all went.
This bathroom has been a stretch for me in terms of my skills, and panelling was something I’ve not done before. I chose a pre-primed, tongue and groove, pine V-groove for all the walls. I started installing it behind the door so I could hide any mistakes, but everything worked out fine.
I prepped for the panelling by installing blocking between all the studs about halfway between the ceiling and the floor. This gave me an extra spot to nail the boards and ensure they were fastened securely. I used my Dad’s long level to make sure each board was straight and a rubber mallet to make sure the joints were tight. Then I face nailed each board top and bottom and one nail through the tongue into the blocking.
Once the panelling was up, I moved onto the trim. Trim was essential because it covered all of the gaps with the V-groove. I did window and door casing, baseboard, flatstock along the ceiling, and corner pieces over every outside corner. There are a few spots that still need trim, but I’m waiting until the vanity and hutch are complete before I install these finishing touches.
Trim is slow and challenging because I had to be super precise with every measurement, every cut and every install. But it turned out really well and finished off the panelling beautifully.
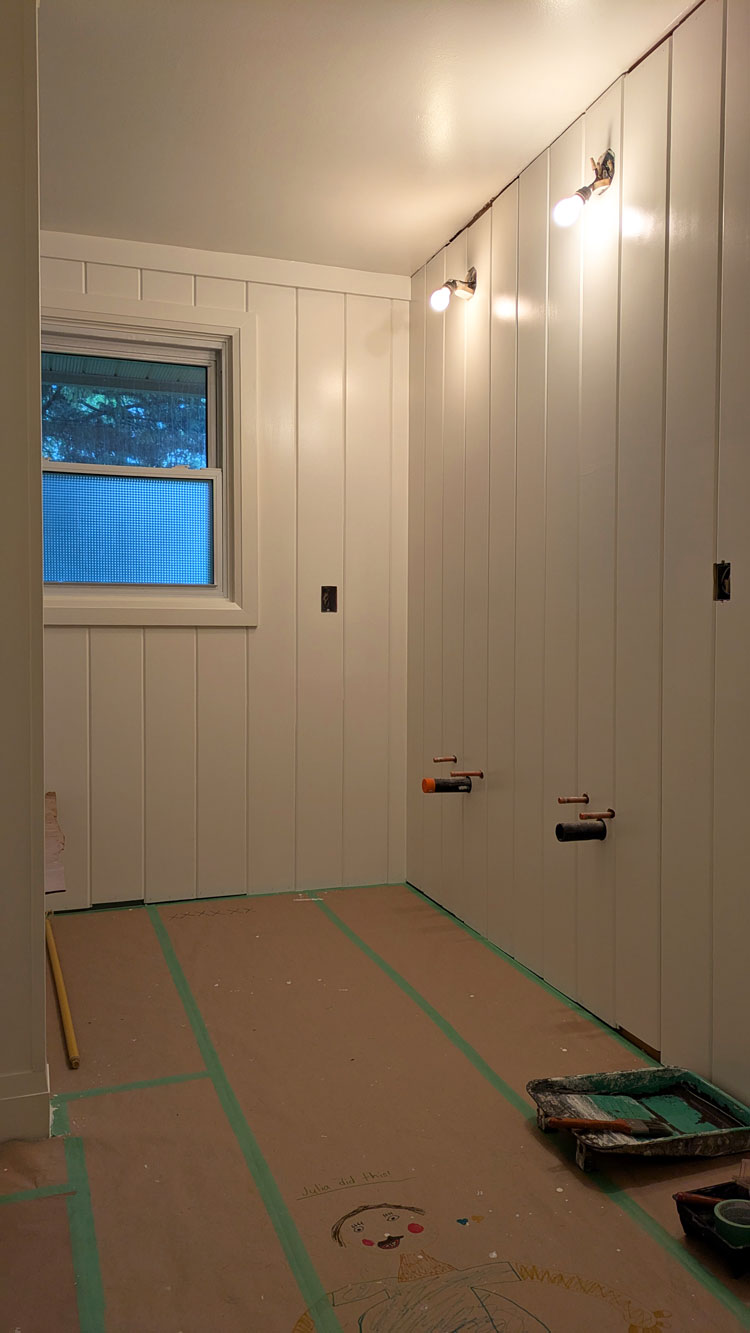
Then came paint. While I hadn’t installed panelling before, I had painted it in the mudroom. There, I rented a sprayer to ensure I got into every groove. I didn’t love the sprayer. The rental process was not straight forward, and my spraying technique wasn’t great. For the bathroom, I decided to try a roller and brush and hope I could get into the grooves and achieve a good finish.
It ended up working out really well. I cut in around the ceiling, floor, corners, door and window with my brush. It was tedious, but I covered everything well. Then, as I hoped, I was able to squish my roller into the V-grooves between each panel, so they were completely painted. Then I carefully went over the whole board with the roller to smooth out any excess paint.
I chose to paint the bathroom white. I’m not a white room person usually, but I really like the warm white we have on trim and furniture throughout the house (Benjamin Moore Cloud White). I thought it would look good for the bathroom. The V-groove adds a lot of texture to the walls, so there is good visual interest. Plus the white lets the other elements of the bathroom–the tile, counter and wood hutch–stand out.
I used Benjamin Moore’s Advance line. This is my go-to cabinetry paint, so I figured it would be extra durable for the bathroom.
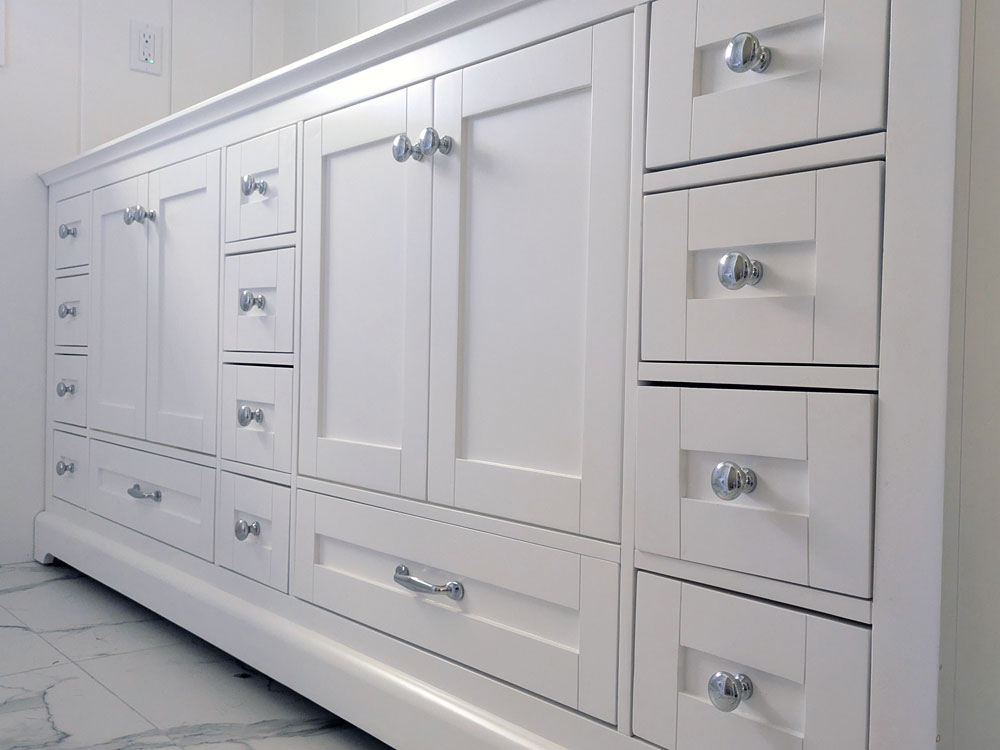
Next up was the vanity. I picked the vanity design a very long time ago (before Ellie was born). I had stumbled across an image of a vanity with cabinets under the sinks, but they were shorter than usual. Under the cabinets were drawers. I loved the idea of drawers for extra storage, rather than wasting space with a big cupboard.
I knew I wanted simple shaker doors and it was going to be white.
When I ordered all of the bathroom fixtures, the consultant I worked with looked at my plans and said, “You’ll need custom for the vanity.” So I called numerous cabinetry companies and tried to find someone to make my dream vanity. When I finally found one to give me a quote, the estimate came in at $9,000 and they couldn’t build it until the fall. Umm. No.
I hopped online and was amazed to discover a vanity very close to what I wanted at Home Depot. It was the size, colour, profile and even more important drawers I wanted. It was half the price of the custom vanity. And it could be here in a week. Sold.
The vanity did need some adjustments. It’s meant to be free-standing, but I wanted it tight to the wall and the hutch I’m having built. To make that happen I had to cut off a bit of trim at the top and bottom on either end.
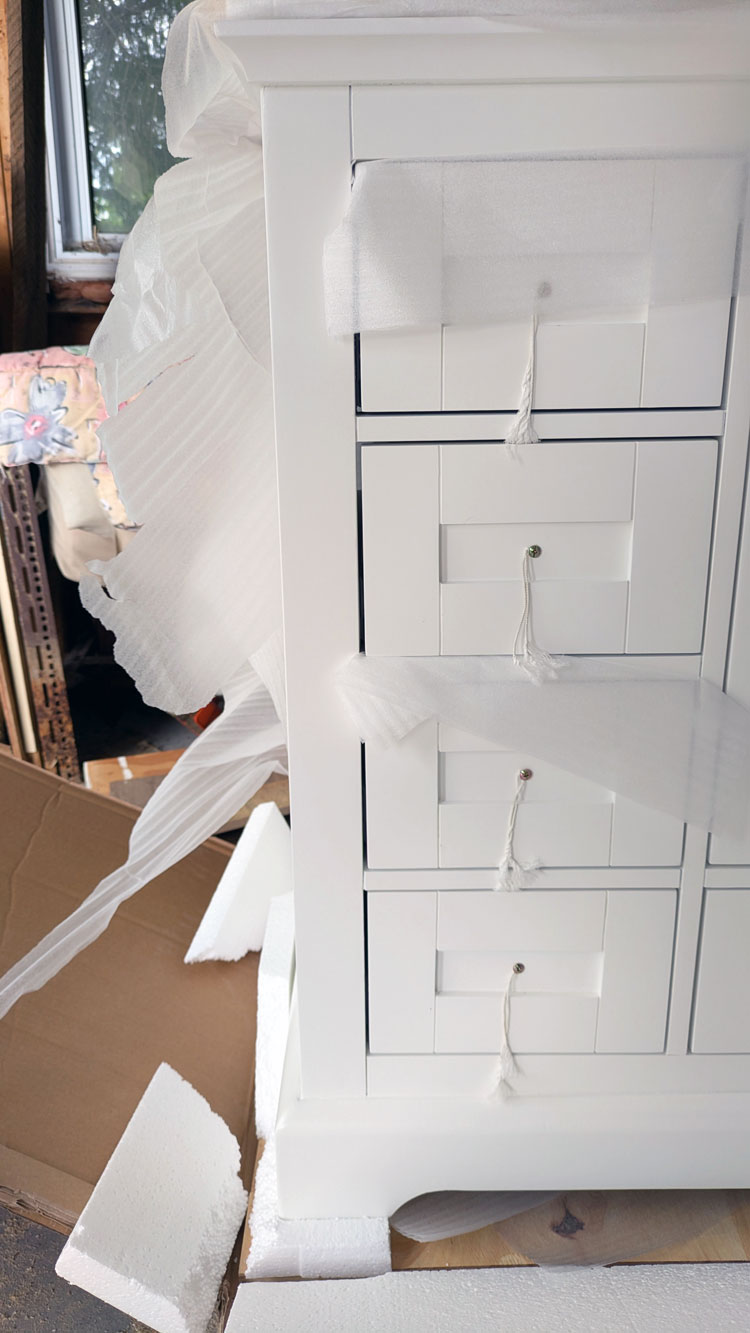
Cutting into a brand new vanity is a bit nerve wracking. The amputation also required turning the vanity upside down, which was too heavy for me to do on my own.
So I exercised my phone-a-friend option and that friend, her very precise engineer husband, and weight-lifting son came over to help. They removed the necessary pieces and then carried the vanity inside. It was a tight fit, but they made it into the bathroom, and I was so pleased once I saw it in place.
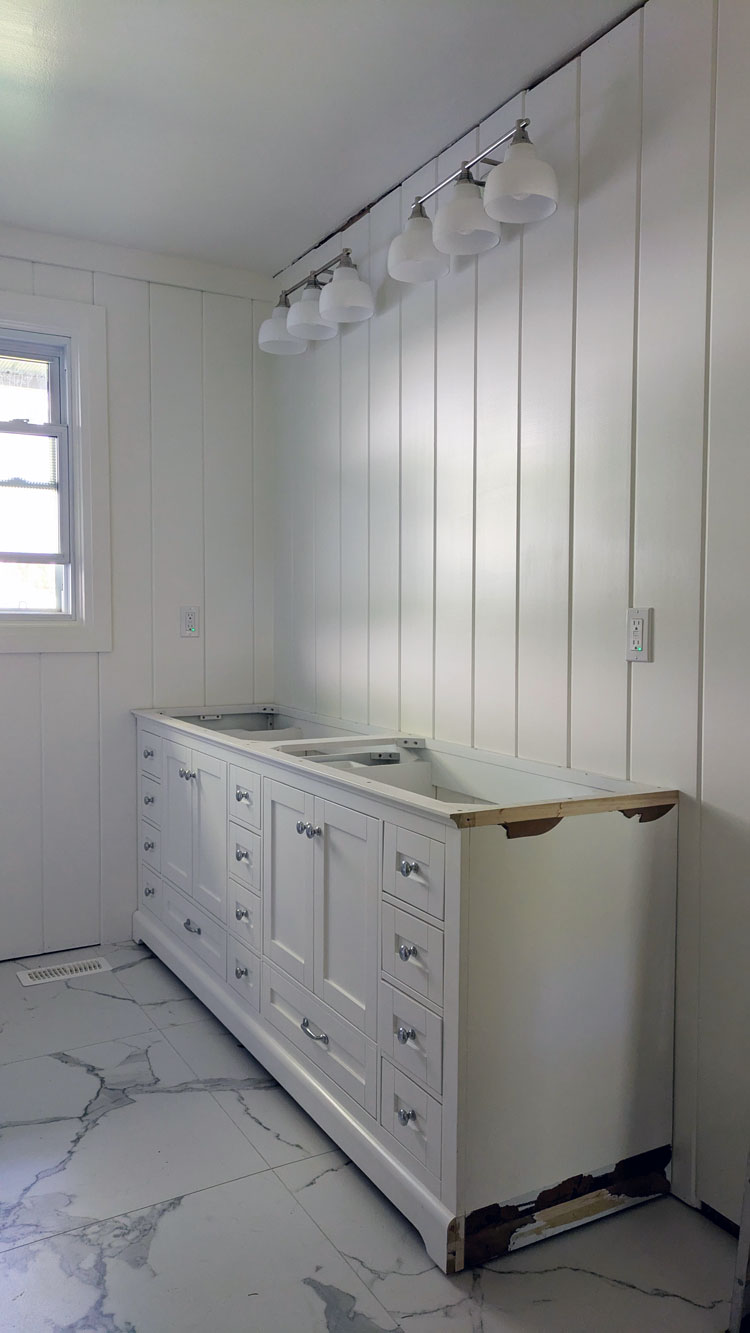
One of my concerns with the vanity was the colour. Would the white be too cool against my creamy walls? Would I have to paint the vanity? The white looks great. It’s not an exact match to the walls, but it is definitely on the warmer side. The surgery worked and the vanity fits tight to the wall. All of the nicks and cut marks will be hidden.
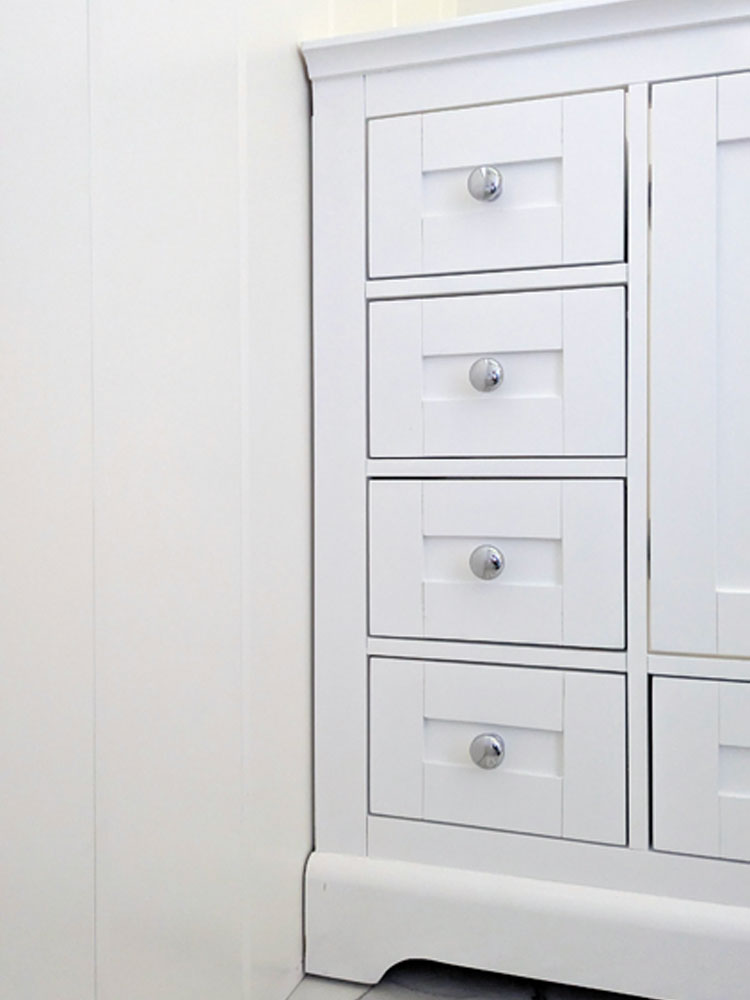
One of my other concerns with the vanity was the hardware. The online listing said it came with brushed nickel hardware, which was not the look I was going for. I planned to source hardware that fit the pre-drilled holes. But as I unscrewed the hardware (it was installed backwards for shipping), I discovered it was polished, so I decided to install it.
The decision to go with the polished hardware solved another dilemma–the lighting. In my original mood board for the bathroom, I had thrown in a light, but I really had no idea what kind of light I wanted.
I planned to mix metals. Chrome on the taps and maybe towel bars? Black on the hutch hardware and hooks? Brass on the lights and vanity hardware?
I searched through so many lights online and couldn’t find ones that seemed exactly right. I wandered lighting boutiques and big box stores. I added to my Pinterest board. I polled my family with various options.
I finally ordered a gold light that I liked. But when it arrived, it turned out I didn’t like it that much. The gold was very brown. Almost copper. It blended with the frame of the mirrors, when I wanted it to stand out. It was not the look I was going for.
The polished vanity hardware helped me decide to skip bringing brass or gold into the bathroom. I would still have the touches of black I was planning, but the lights were going to be shiny silver.
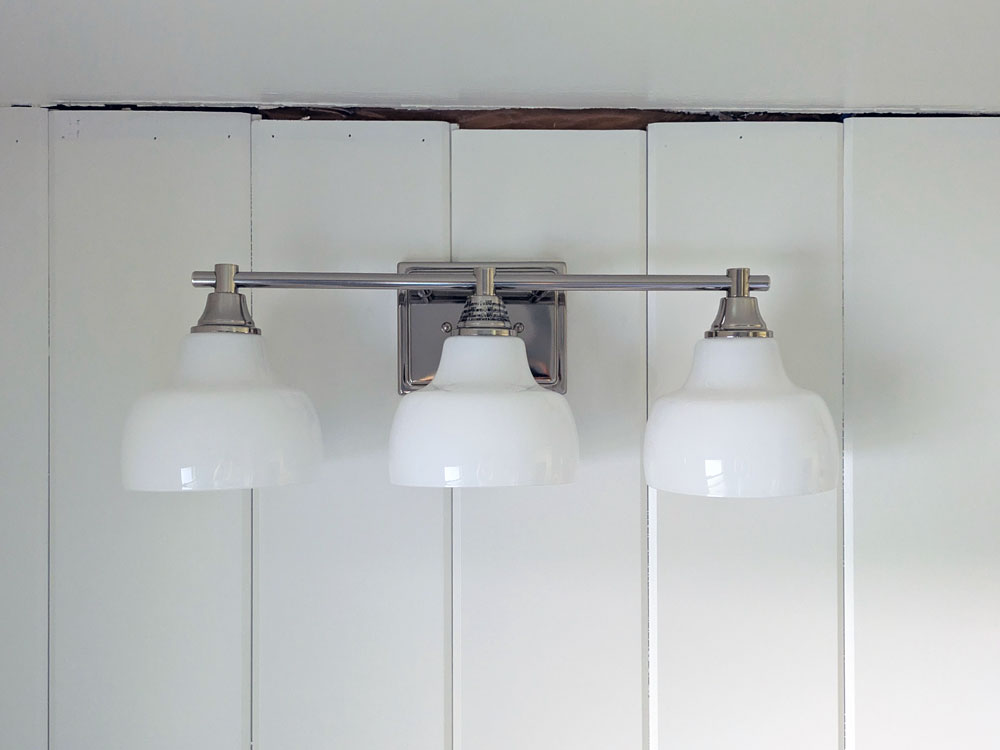
I went back to a light I’d seen at Home Depot. It had white milk glass-esque shades like the schoolhouse lights we have in the hall and kitchen. It had bright shiny polished metal. Even better, it was in stock at my local store–critical since the electricians were coming in 5 days.
So I bought the lights. When I unpacked them at home, I decided I still liked them.
The electricians came and installed the lights, plugs, floor thermostat, timer for the fan and dimmer switch for the lights. So electrical is done.
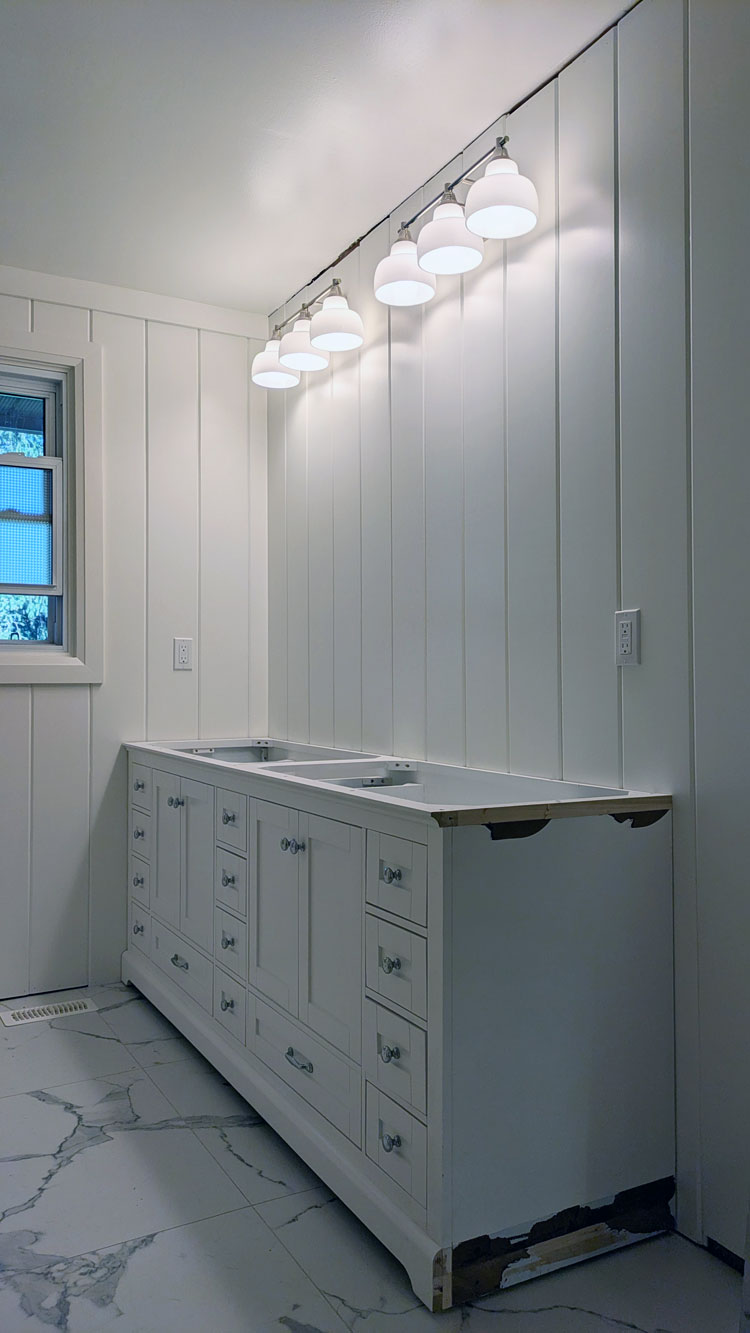
The bathroom feels extremely bright with our new lights and white walls. We went from two bulbs to six, which is a big glow up. Fortunately, we have the dimmer switch. We also went from one plug to two. And of course there’s the heated floor. So many upgrades.
I’m really glad to have one trade completely finished. The biggest tasks that I had to tackle are also done. I managed to finish the painting before Ellie finished school for the summer. All of my jobs now are very manageable.
As more and more pieces come together, I’m thrilled with how everything looks together. I had a very clear idea of what I wanted in the bathroom and how I wanted it all to look. But when designing a bathroom, you pick these big, really hard to change things like a tub, tile, vanity, countertop mostly in isolation. Then you cross your fingers and hope they all look good in the room together. So far, they do, which makes me very happy.
I’m documenting the bathroom reno and sharing it in a series of videos on Instagram. Follow me at juliaon129acres, and catch up on all the construction in the bathroom highlights Part 1 and Part 2.
Have you ever modified a brand new piece of furniture? How do you feel about the metal mixing trend? Are you a polished or brushed person? Are you a white room person?
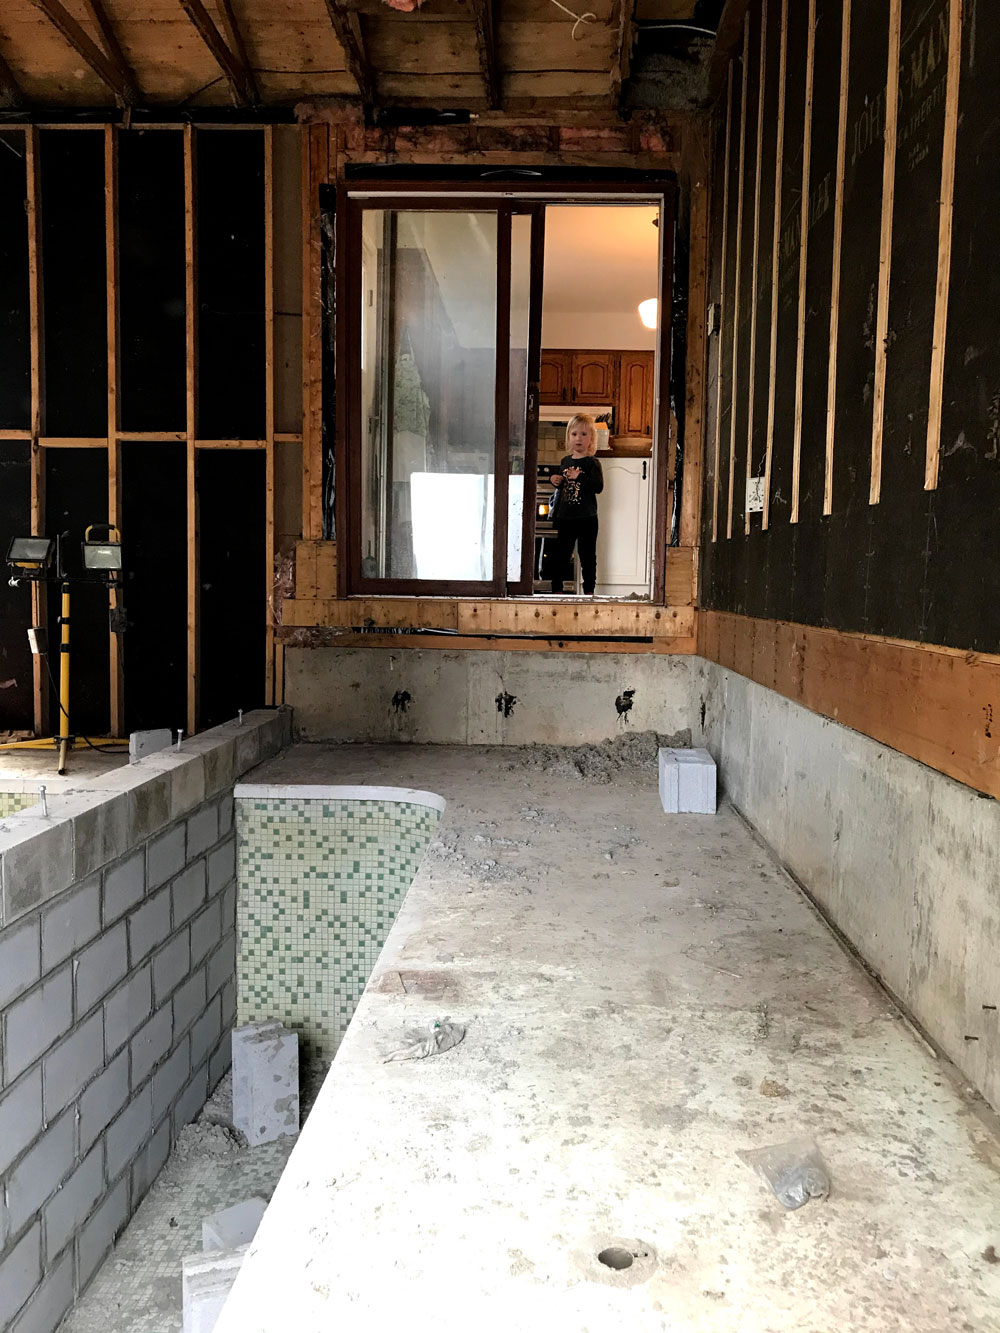
We’ve talked about tile for the mudroom. We’ve talked about paneling for the walls and ceiling. Do you want to see it in real life?
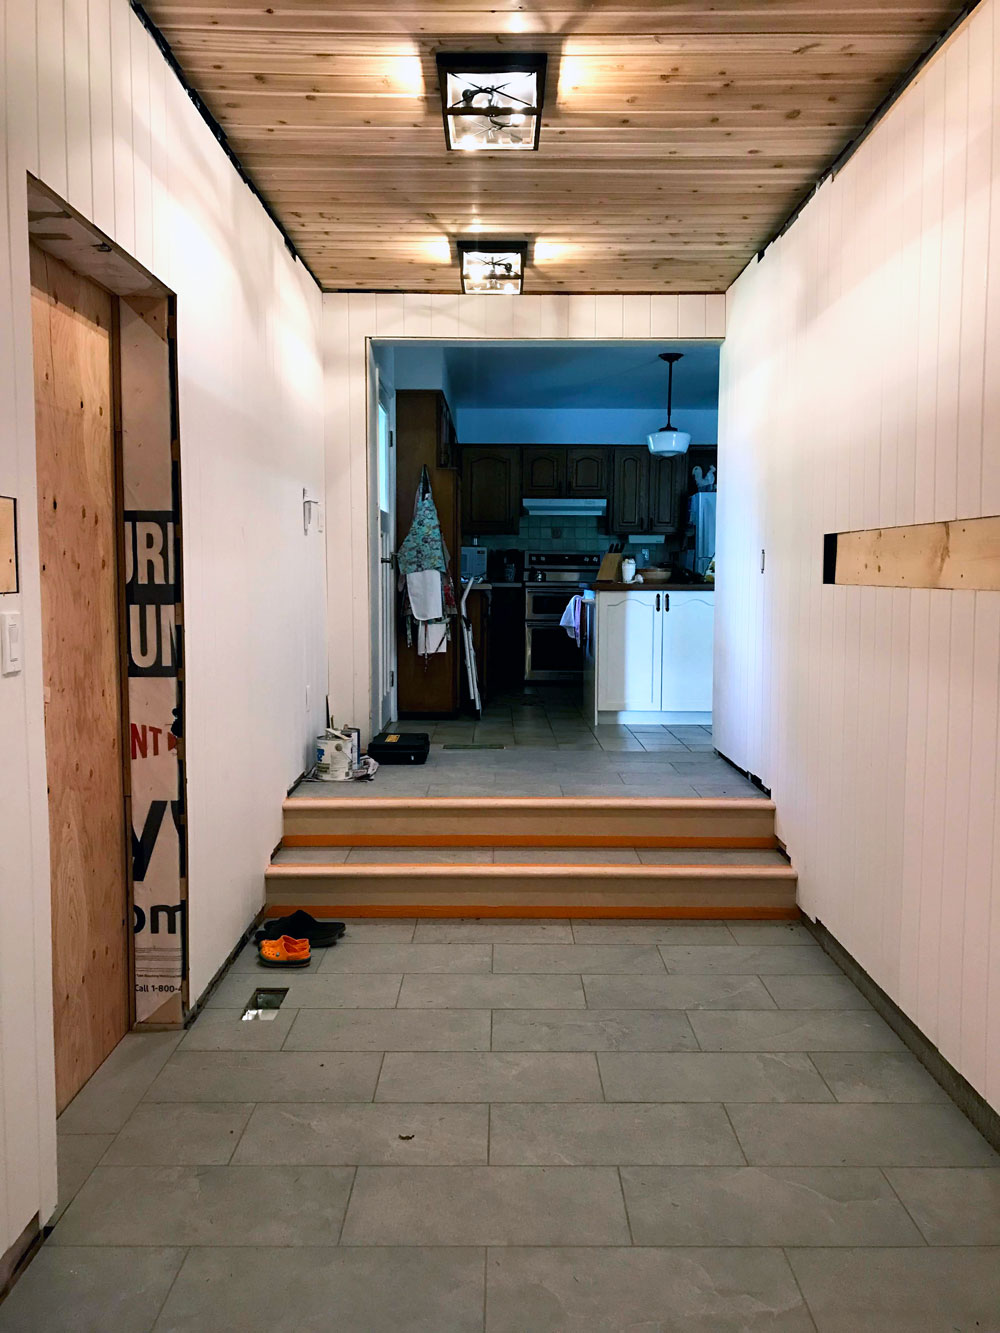
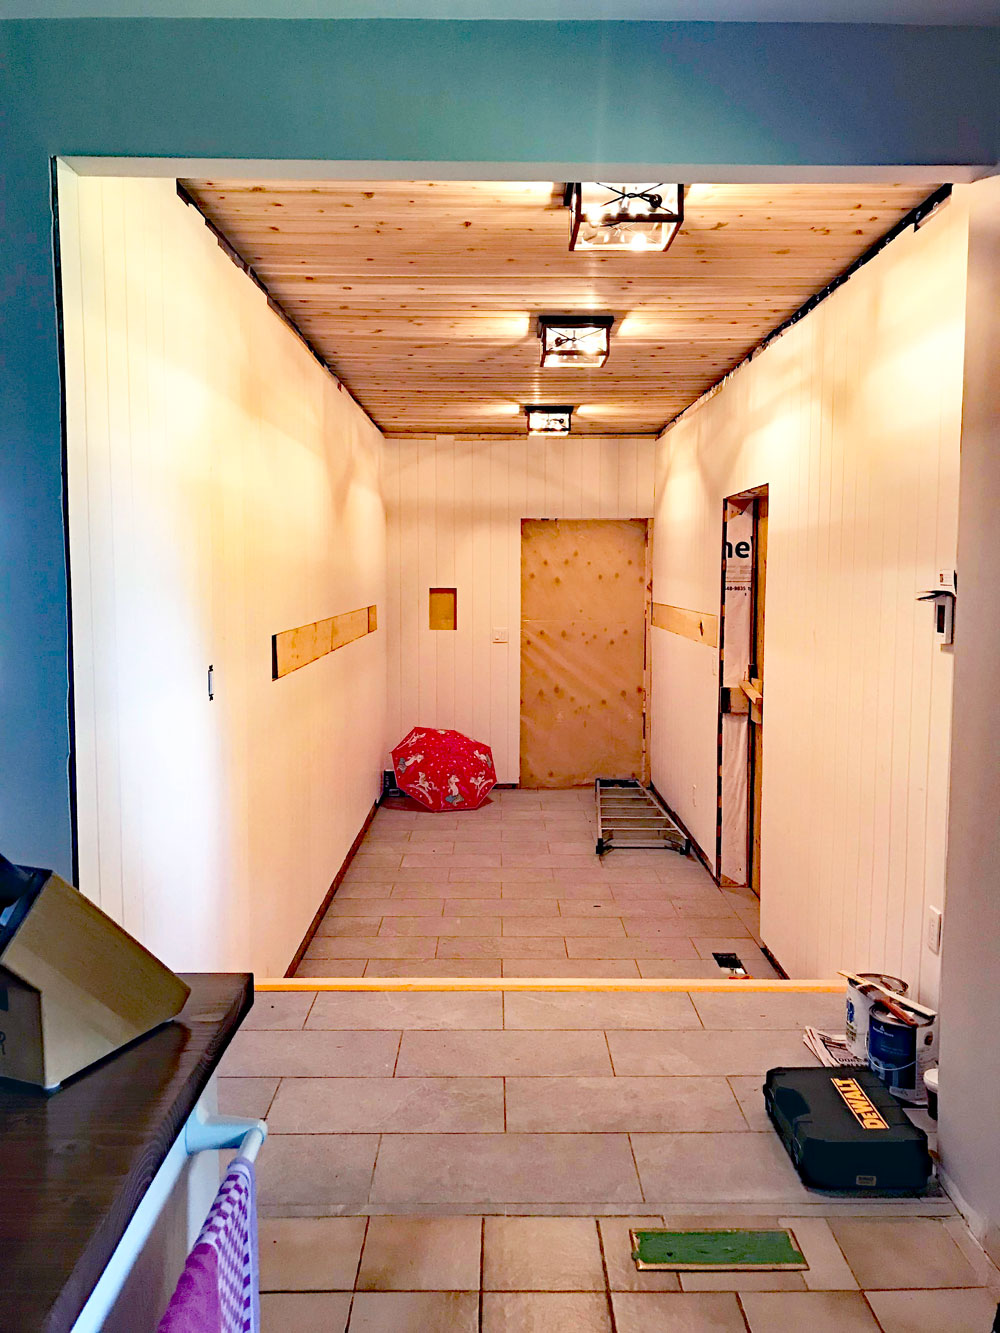
Here is the new mudroom in its current state.
We are two doors, some trim and paint away from being done with the mudroom and garage. Sooooclose.
(I feel like I’ve been saying that for a while).
But I can see it coming together, and it’s all looking so good.
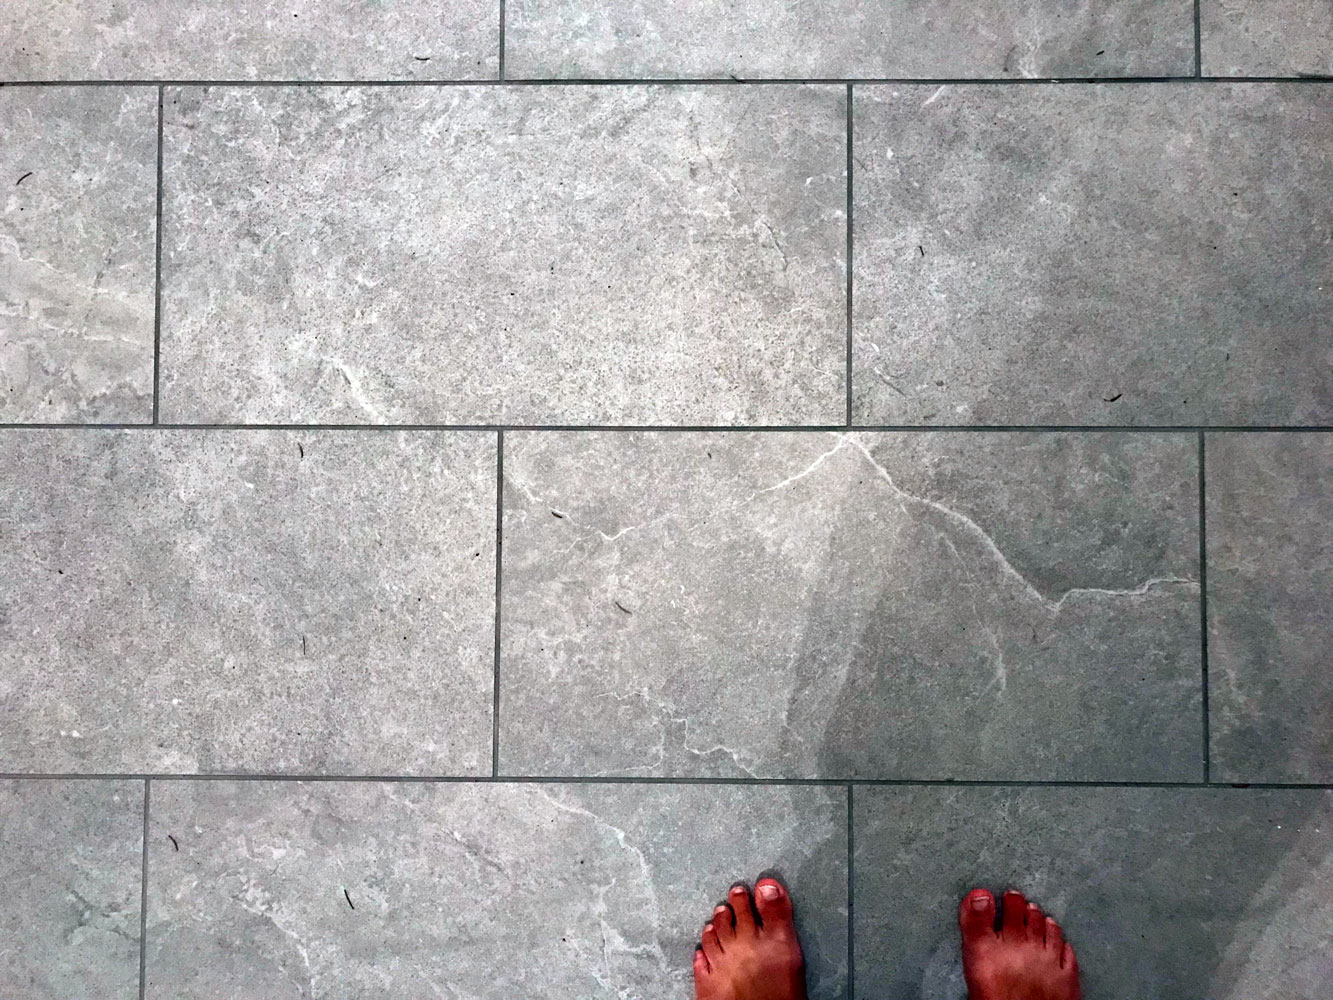
I went with a mid-grey porcelain tile. You may recall my biggest criteria with the tile was maintenance. I will not be cleaning this floor every day, and the tile need to hide all of the dirt that comes with a farm. We also chose a dark grey grout for the same reason.
The tiles are 12×24 and installed in a brick, running-bond, offset pattern. This is my second choice tile. My first choice had more variation in tones and the veining, but it was back-ordered, and I didn’t want to wait. When I picked up my order, I was pleasantly surprised to find tiles were more varied than I expected, based on the single sample tile I selected from.
The floor in the main area of the mudroom (the lower level) is heated, so yay to warm boots.
The risers and nosings on the stairs are faced with beautiful maple. I didn’t want a metal or rubber or tile edge on the stairs, so our contractor worked with me to come up with a solution and then he had his stair supplier fabricate the pieces. They are absolutely lovely. I will be protecting them with a stain and varathane.
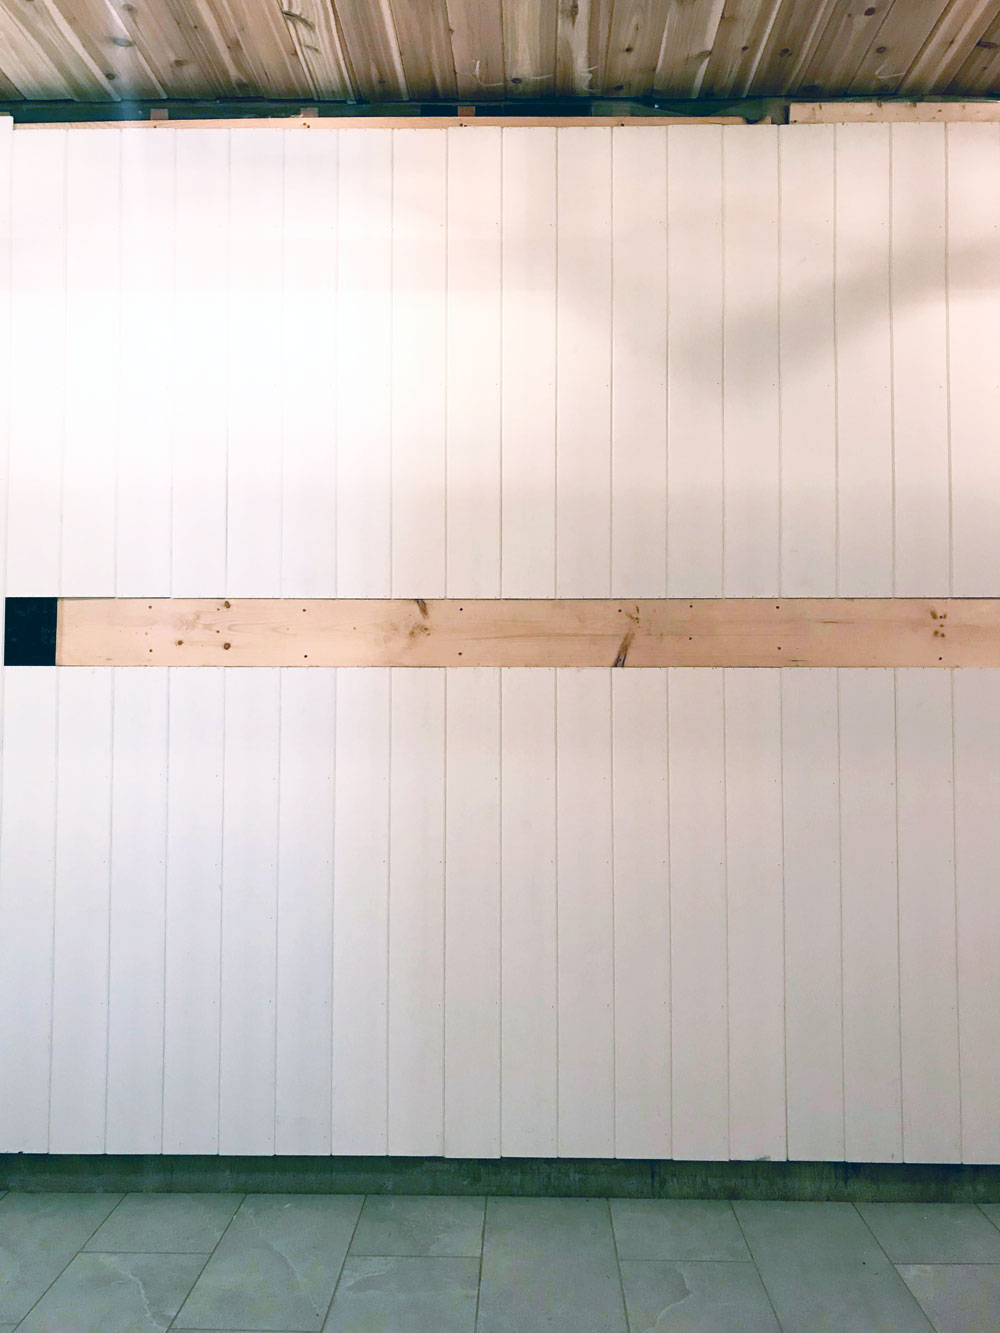
The walls are the V-groove panelling, which I also love. It adds so much character to this room. My contractors did not love the panelling so much. Strapping the walls so that they were perfectly level took a lot of shims and a lot of time. (The new walls that they built were fine. The original wall backing onto the living room was c-r-o-o-k-e-d.)
One surprise with this V-groove is it’s not a true tongue and groove. Each board has a very small overlap, so my contractors ended up having to face nail each piece in a few spots. Lots of tiny holes for me to patch.
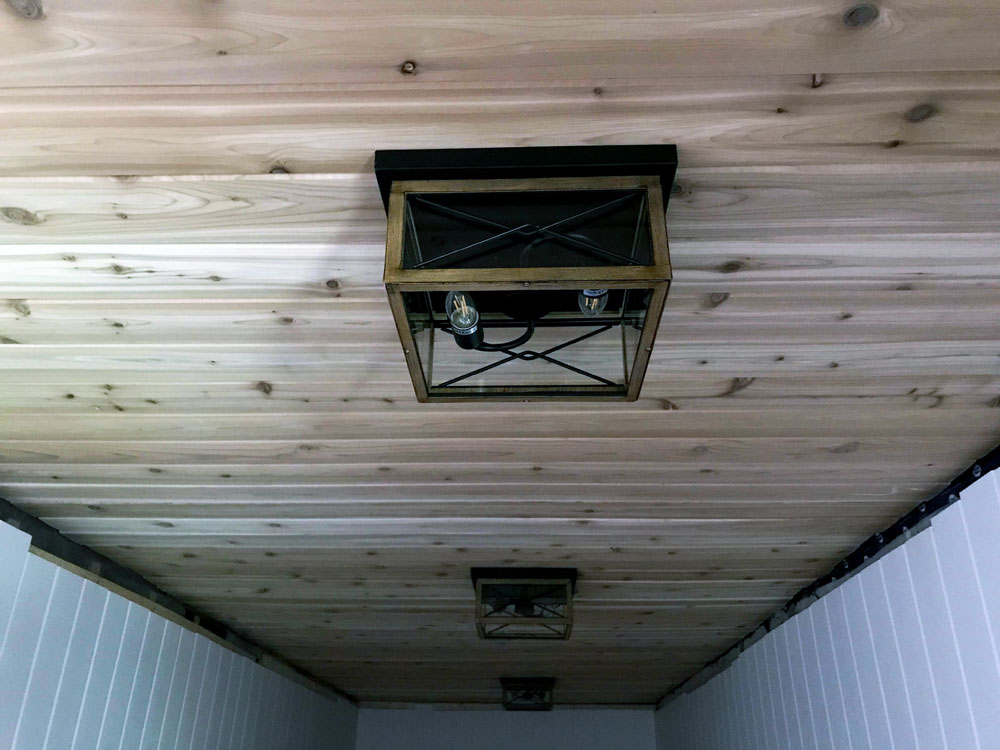
The ceiling is a really, really special feature. This is cedar V-groove that I found at a local supplier. I will be leaving this natural, as I love the tone so much.
For the lights, I ended up going with three flush mounts. My original plan was for two barn style pendants in the main mudroom area and a flush mount on the landing, but my Mom convinced me to go with one type of light for the whole room.
I chose the exterior lights first, and then picked the matching flush mounts. They look a bit rustic, a bit industrial, fairly casual, and I’m really happy with them.
I feel like I could change the title of this post to the mudroom is lovely. I truly love everything so much.
Hopefully doors arrive this week. Once they’re in, trim can be installed. Then the contractors will be done, and I’ll paint and we can start to use this lovely room.
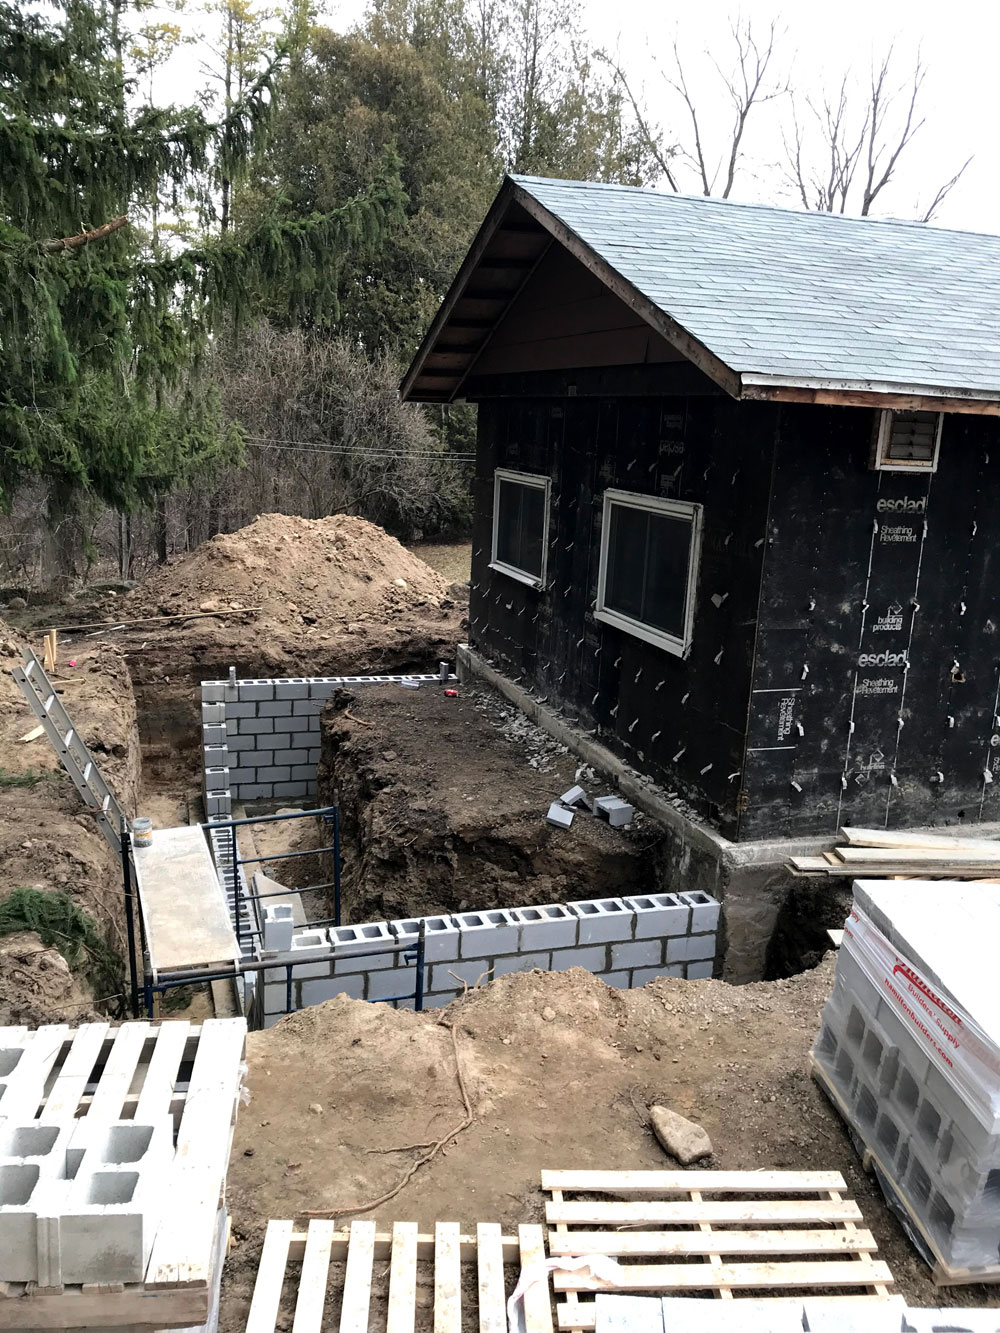
Foundations are in for the garage and mudroom. I’m hoping everything will be backfilled this week–and maybe the pool finally filled as well.
I’m trying to do my part of keeping the renovation moving by making decisions about what I want.
After thinking about and planning for this renovation for so long, I thought I knew exactly what I’d choose. But now that it’s real, I’m finding out that sometimes my mental picture isn’t as clear as I thought it was.
I’d appreciate your input on a couple of things.
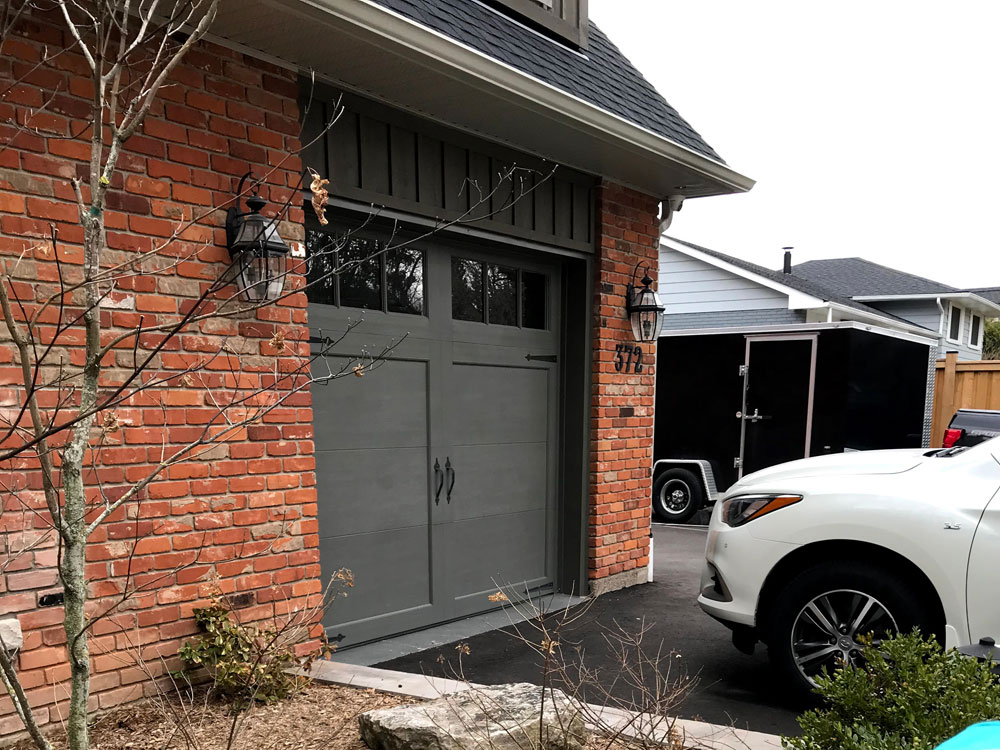
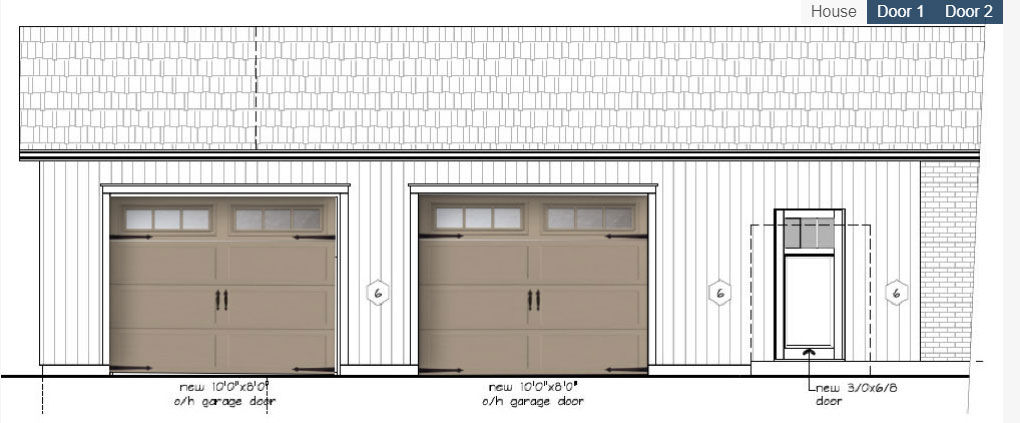
Garage doors
A carriage door style feels appropriate for a farm. These doors have fake handles and hinges that make them look like old-fashioned swinging doors.
However, the carriage doors I like the most are all overlay doors. In an overlay, the panels or strips are applied by hand. This translates to more expensive. As well, there are sometimes issues with getting the overlays to line up between each section of the garage door.
I can get the carriage door look (hinges and handles) in a pressed door. In this profile, the design is pressed into the steel and there are no applied pieces. However, the profiles that I like the best (the two-panel or Zed above) are not available. I’d go with a simple shaker style panel to get as close as possible.
I’ve spent a lot of time gawking at garage doors, trying to figure out if I dislike the pressed profiles enough to go for an overlay door.
What would you do?
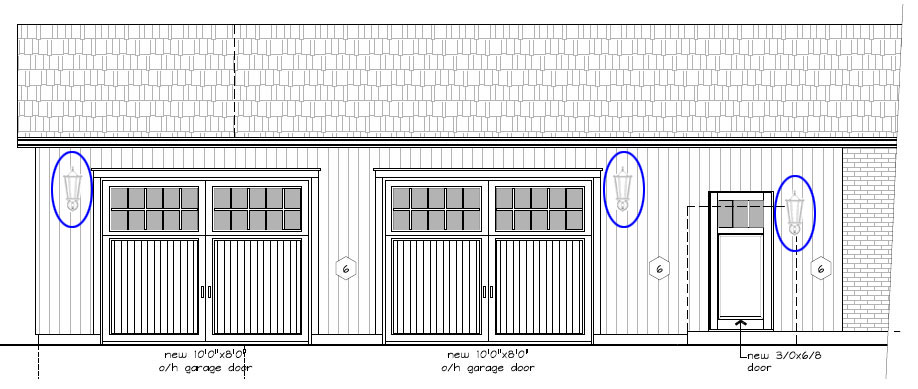
Lighting
Lighting is still a while away, but wiring will happen soon. So I’m thinking about how many lights we need and what they should look like. We could have as many as six lights (if we stretch all the way over to the living room patio door) or we could go with three, or somewhere in between.
They could all be the same, or we could switch up the style.
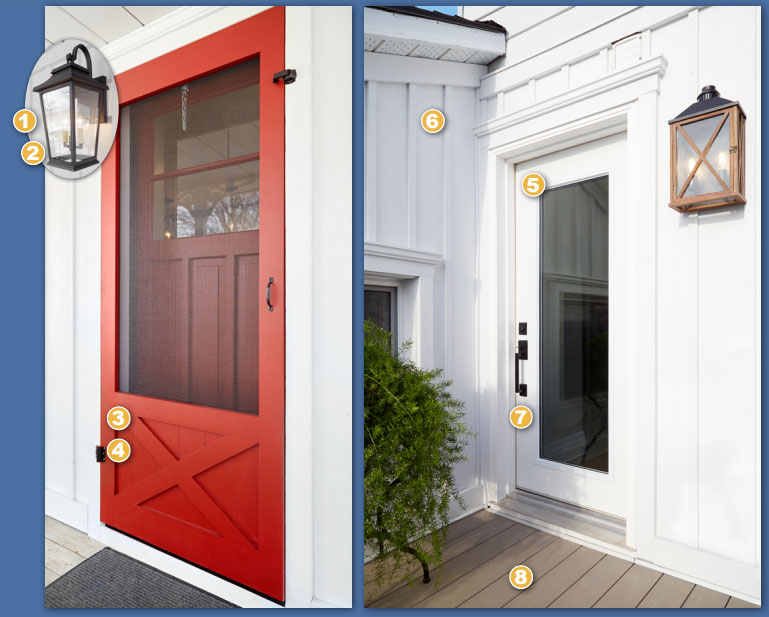
I’m leaning toward a lantern style light on either side of the garage. This graphic from Farmhouse Facelift shows two options that appeal to me: a traditional lantern and rustic wood design that I haven’t seen before.
I’m also considering goose neck barn style lights (though their trendiness makes me want to avoid them). We drive past a house that has used them beside the garage doors, rather than above (which we won’t have room for).
Hand up if you’ve ever found yourself standing at a window, trying to hold two pieces of paper steady while you traced a pattern. My hand’s definitely up. It’s awkward, right? For crafters, tracing is an important part of a lot of projects.
A light box is a handy tool that makes tracing much, much easier. Sarah in Illinois is sharing how she made a light box for her quilting mother.
I hinted a few posts back that I was not making good progress on my “one project a month.” If you remember, my three projects for the second quarter of the year were
Light box for my mom
Grill lighting
The garden
Starting from the bottom, the garden is doing well. Very well. Plants are growing, we’ve picked some veggies, had some setbacks, but overall it’s doing very well. I decided to write a separate post on the garden, so I will just say I am very happy with the progress so far.
The grill lighting is on hold. When we hung the decorative string lights on our awning this year we decided that they give off enough light to make sure our hamburgers aren’t burnt. And since we are not sure what we want in permanent lighting we decided to do more research before we make the money and time commitment. So not done, but on hold.
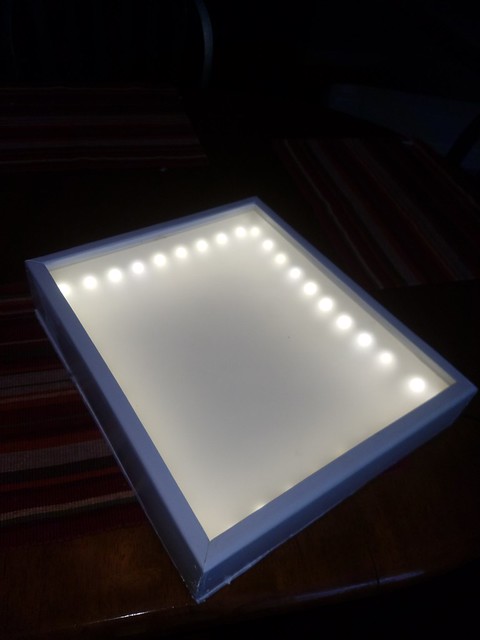
As for the light box, I can say it is done.
So what is a light box? Basically, it is box with a transparent top and a light source inside.
When you put a print and a blank piece of paper on top of the box, the light shines through and makes it easy to trace the original print. This is great for crafters wanting to copy patterns. In this case, my mom wanted one for making quilts.
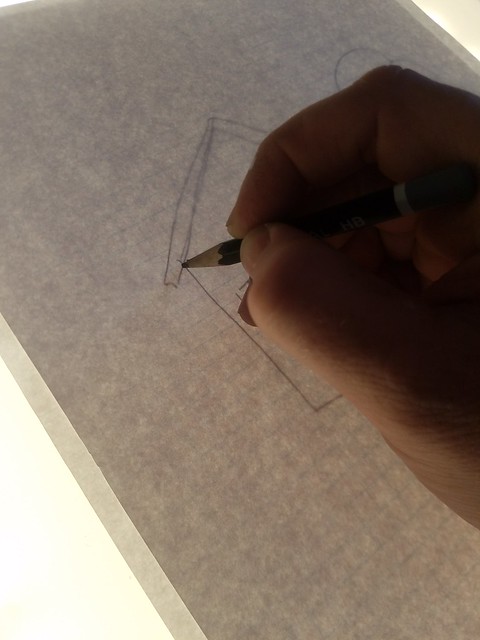
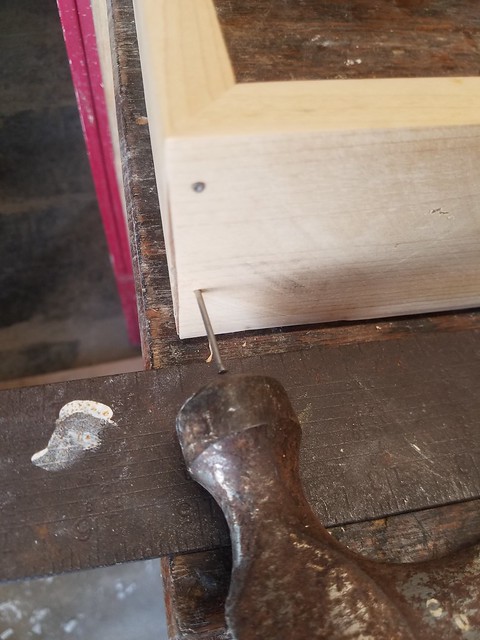
I started by cutting 45 degree angles for the 4 sides of the box.
Then I got to play around with the router. Honestly, I had not used our router before. It is kind of Steve’s toy, but using some practice boards it was fairly easy to get the hang of. The reason for the router was to cut a groove in the sides of the box for the transparent top to sit in.
I also used the router to curve the edges of the boards to give it a nicer look.
So this was the point where I would have started assembling the pieces. Except I came home and found that Blitz had put his mark on two of the pieces, quite literally.
It aggravated me of course, but who could I blame but the person who left them where a 10 month old pup could reach them? In case that wasn’t clear, that person is me.
So after redoing half of my work I began putting the sides together. Simply put, it is like building a frame for a picture.
The finished dimensions are 13 inches by 15.25 inches with the “window” area being 12.5 inches by almost 14.75 inches. Obviously I didn’t work by any plans, I just wanted to make sure it was large enough to use a standard 8.5 by 11 piece of paper for tracing.
I pre-drilled my nail holes and put three sides together.
It was at this point that I put the first coat of white paint on all of the pieces. It has been extremely humid here which is not the best weather for paint to dry. I got several scratches and finger prints on the pieces that had to be touched up once I was done handling everything.
I slid the “window” into the channels that I routed and attached the fourth side.
For the window I used a piece of plexiglass that I cut with a razor blade and snapped to break. To hide the inside of the box and to dull the brightness of the intense lights that I chose, I sprayed the plexiglass with a frosted paint.
It was at this point that I turned the box over and installed the light source. I chose this LED tape at our local home improvement store. I wanted LED so that heat did not build up inside the box.
This tape is 6.5 feet long but came with instructions on how to cut it to the correct fit. I used both the adhesive back and the small mounting brackets that came with the tape. I cut a small hole near the bottom to run the cord out of.
I was pleasantly surprised that the light tape came with a switch so that it will be easy for Mom to turn on and off as needed.
And finally I screwed the back to the box. I chose to use screws so that I can remove the back if I ever need to make any adjustments or repairs.
I am happy with the results and can’t wait to give it to Mom for her to try out.
That light box looks great, Sarah. It’s super professional with the routed channel for the plexiglass and the LED strip. I’m sure your Mom will appreciate it. Maybe you’ll get a new quilt out of it. 🙂
Way back when we started looking for our perfect farm, one of the things we wanted was a useable basement. Many farms come with old farmhouses which don’t typically come with great basements. Usually, there are rubble and stone foundations, shallow ceiling height, dirt floors and moisture.
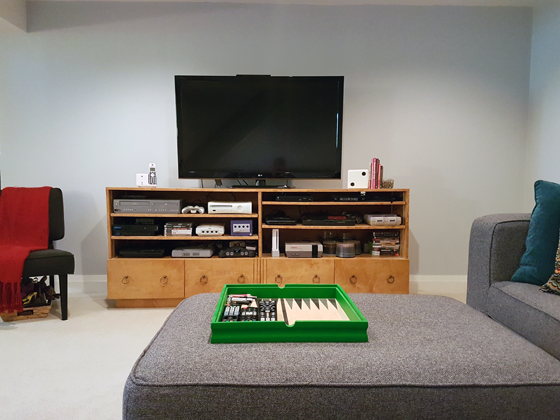
One of the things that made this farm a winner was that it had a very, very useable basement. You saw the transformation on Friday of how we renovated the TV area. Today I’m delving into the details of how we decorated it.
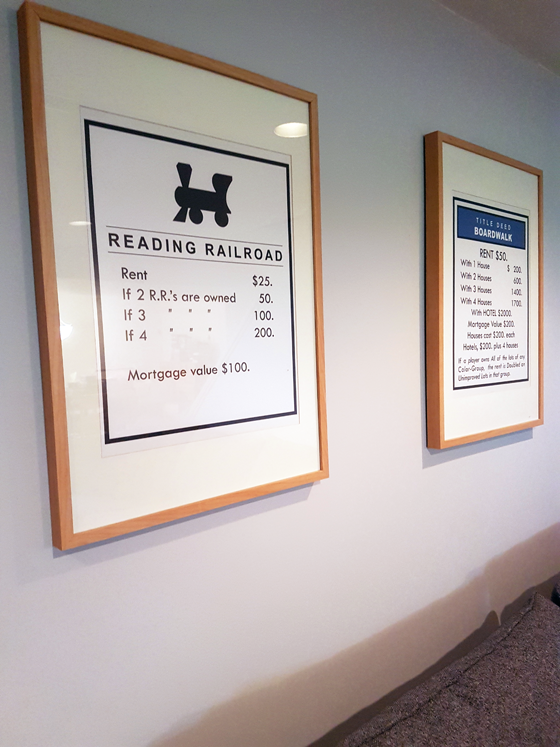
It all started with these posters. These are Matt’s two favourite Monopoly properties. When I saw them on Lindsay’s blog, I knew I had to make them for him.
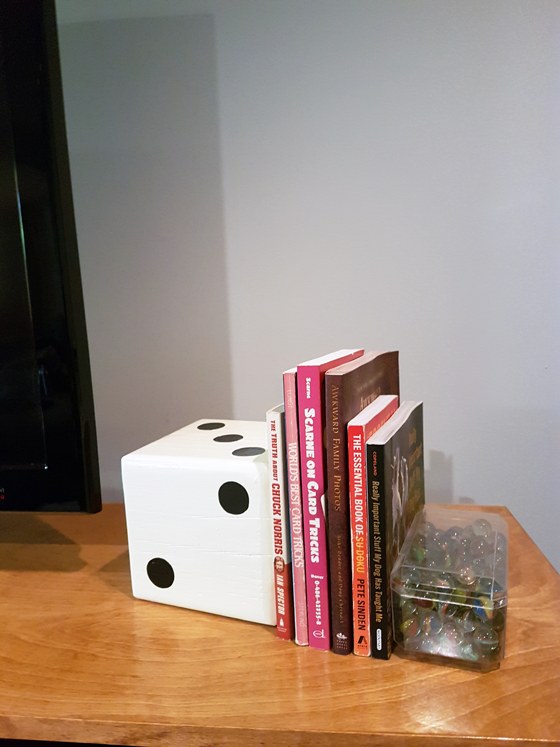
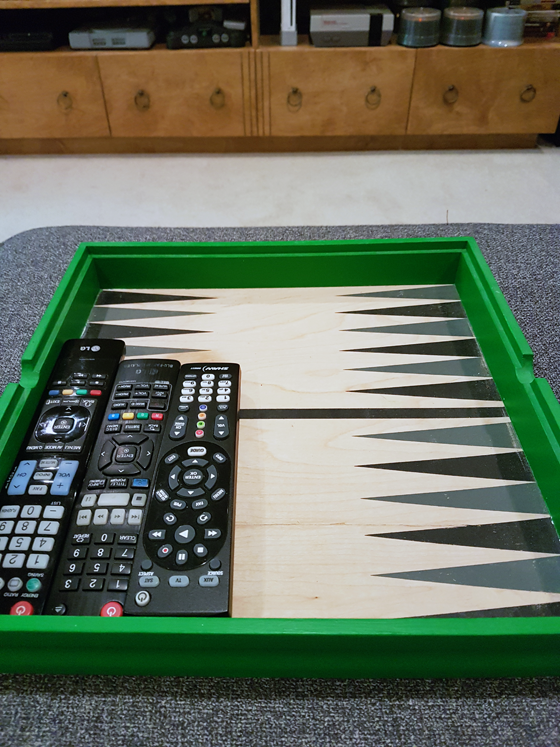
Theme is a bad word when it comes to decor, but we have a loose fun and games theme happening here in the basement. On the TV stand I made a die to serve as a bookend and on the ottoman we have a backgammon board tray.
I like these little pops of fun.
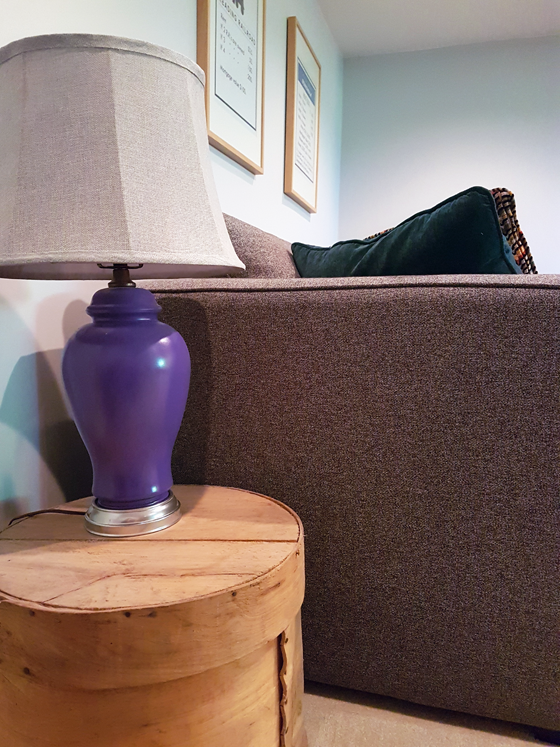
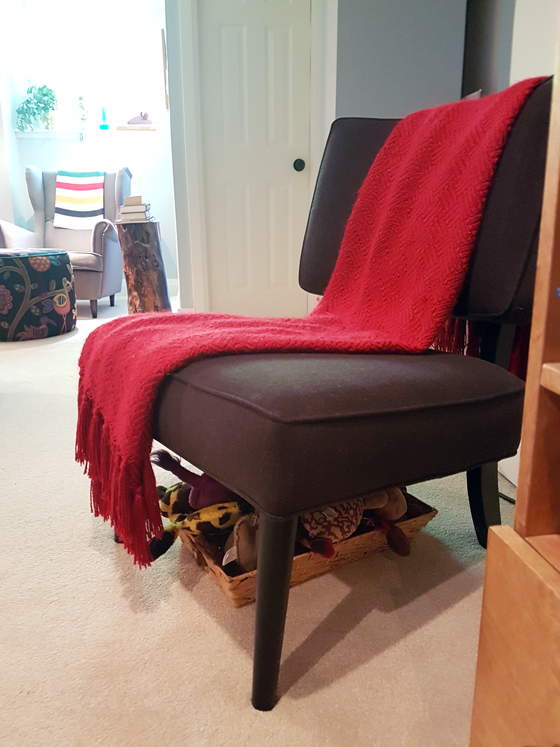
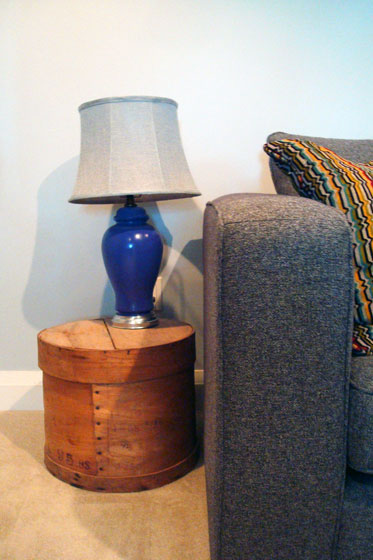
The other pop we have in the basement is colour. The base is neutral–the walls, carpet, couch, chair. The red throw, the green tray, the purple lamp and, of course, our pretty pillows all add personality.
The lamp sits on top of a wood cheese drum that came from Matt’s grandpa’s house. It’s too low to be used as a proper end table, but it’s the perfect height to give a bit of a glow when we’re sitting downstairs. And it’s the little touch of rustic that I’ve decided every room at the farm needs.
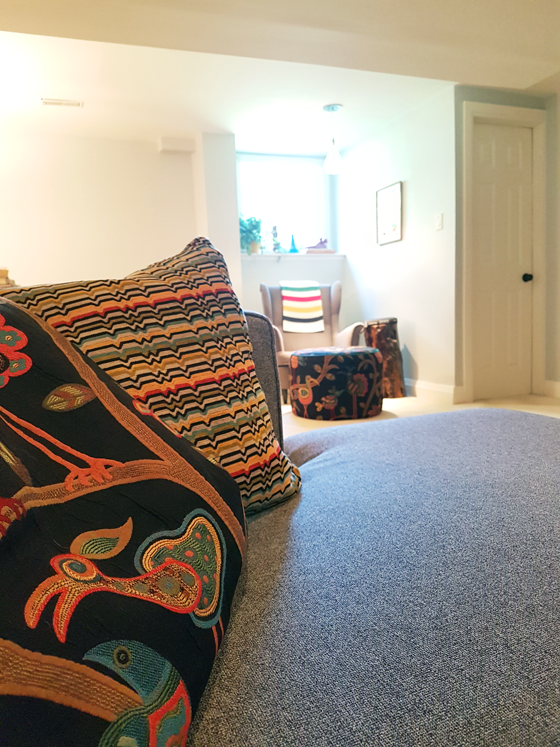
I love these pillows. The stripe is bossy, a little bit retro and a perfect match to the bird fabric that I used on our DIY ottoman (Crazy Ol Bird Midnight by Swavelle/Mill Creek). I love this bird fabric so much that I bought a lot of it, and I had plenty to make two pillows for the couch. (The stripe and the turquoise velvet pillows came with the couch).
The sectional is so comfortable. I love the chaise, I love that we have room for a huge number of people, I love that everyone can sit with their feet up. The ottoman also serves another purpose. The top hinges open to give us lots of storage.
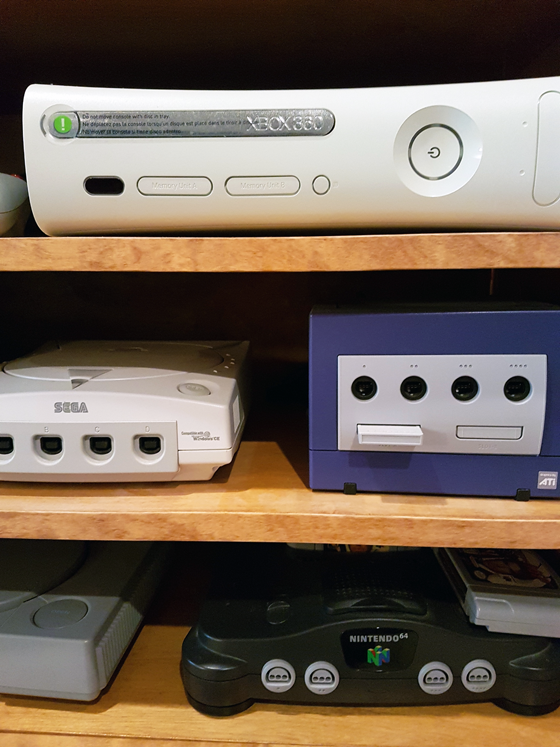
The other half of the TV area holds–what else–the TV. My Dad and I made the TV cabinet five years ago when we were first putting the basement together. And it’s awesome.
The goal with the TV cabinet was to hold all of Matt’s video game systems. He’s never been able to have them all hooked up at once, but here he finally does. There’s everything from old Nintendo and Sega to new Playstation and XBOX. The drawers hold games, controllers, cables and other accessories.
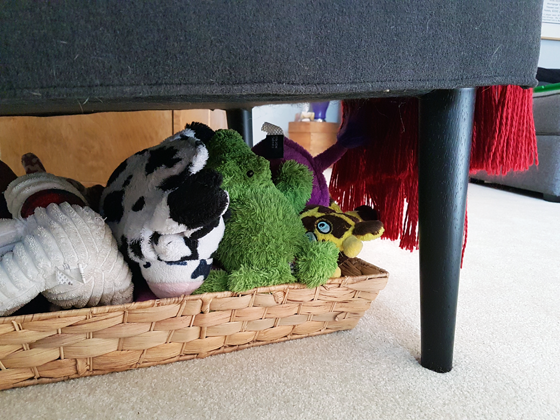
Baxter’s toys live in a basket under Austin–the basement is fun for everyone.
Our big renovation gave us a space. All of the little decorative details make the space. It’s personal and fun and perfect for us.
What’s your must-have for a fun family room? How do you feel about decorating themes? How do you mix neutrals and colour? Do you have a video gamer at your house? What are your favourite Monopoly properties?
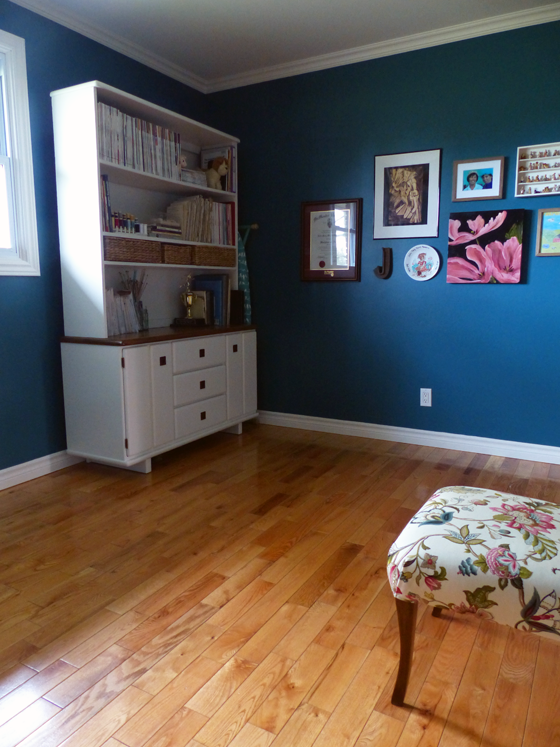
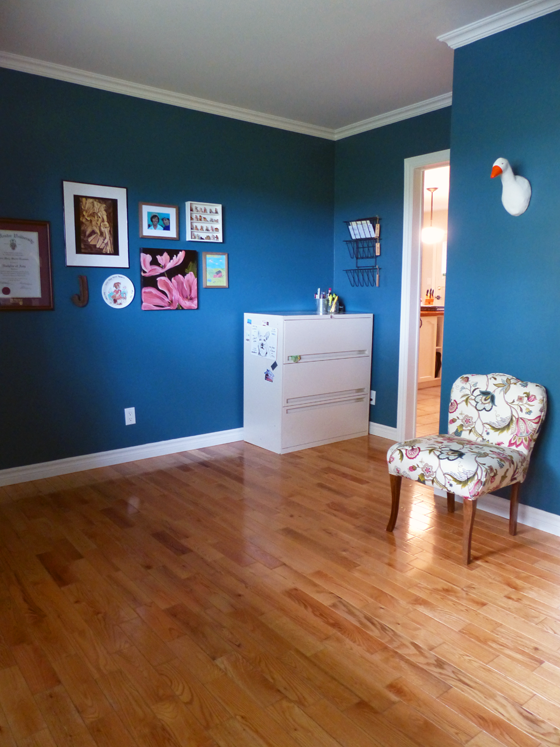
My office. A space that’s completely my own. The last bedroom in our house. It’s done. And I’m so happy with how it turned out.
While I’ve used the word “office” to describe this room, it’s really a sewing, crafting, creative space.
It’s filled with the things that I like to do. The things I like the most and that mean the most to me (Bill!). I love that I now have an organized room that I enjoy being in.
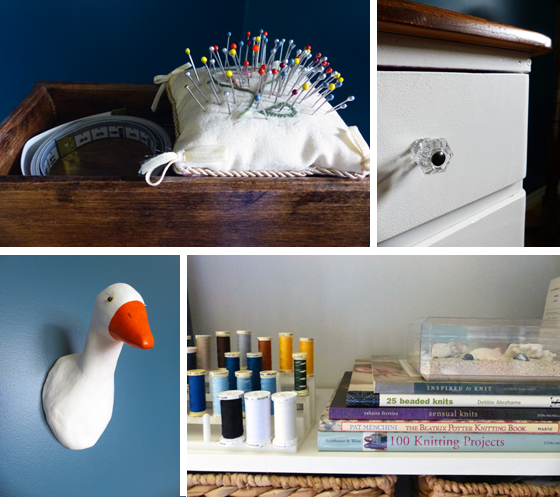
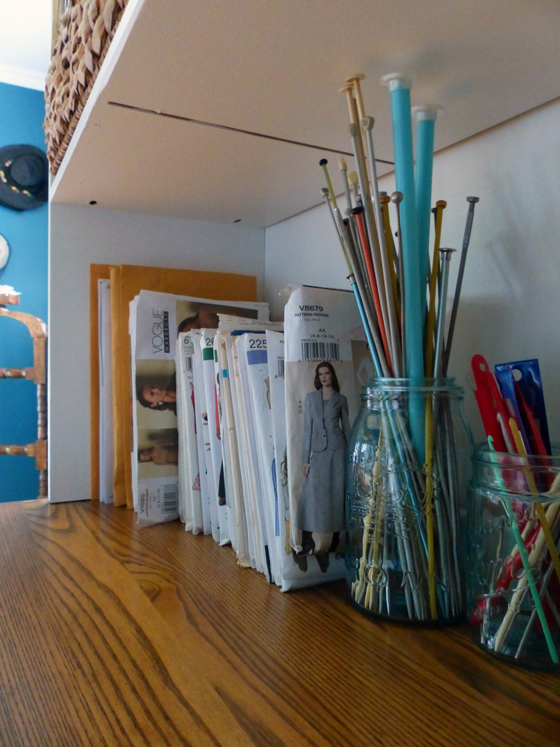
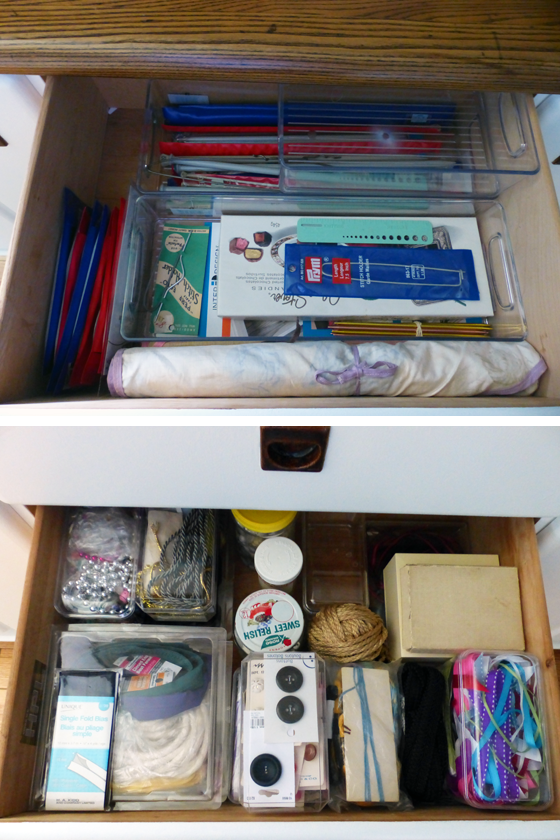
This wall used to be filled with boxes that had been packed since we moved in five years ago. Now, the thrifted china cabinet holds sewing and knitting supplies, magazines and memorabilia–and keeps them all organized.
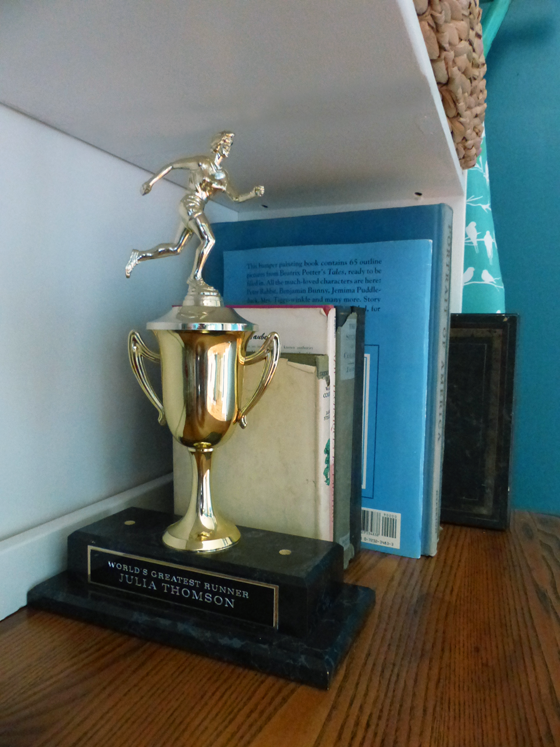
Growing up, I never won a trophy. When we were dating, I mentioned this to Matt. One fall, after I ran my first 10K, Matt presented me with a huge trophy. It meant so much to me that he did that. However, the trophy was truly huge. I took it apart and then put it back together in a slightly smaller configuration, and it fits easily on the shelves.
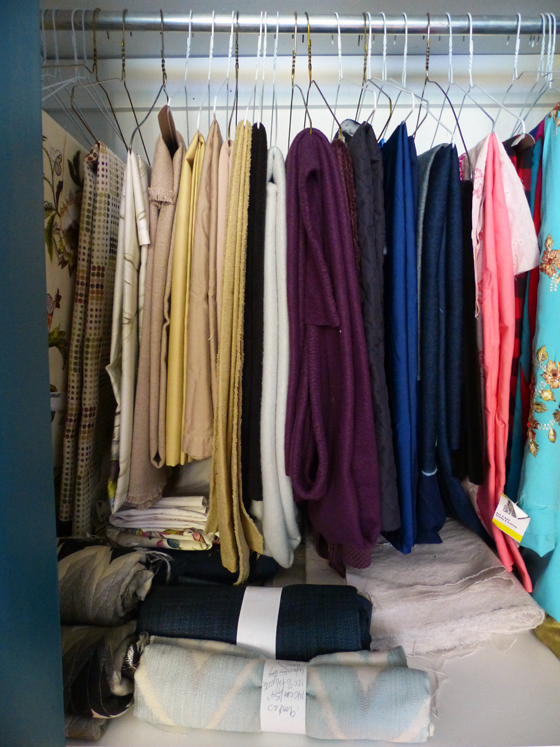
Reconfiguring the closet was also hugely helpful to keep everything organized. Hanging up my big pieces of fabric makes it easy to see what I have and ensures that I’m more likely to use them.
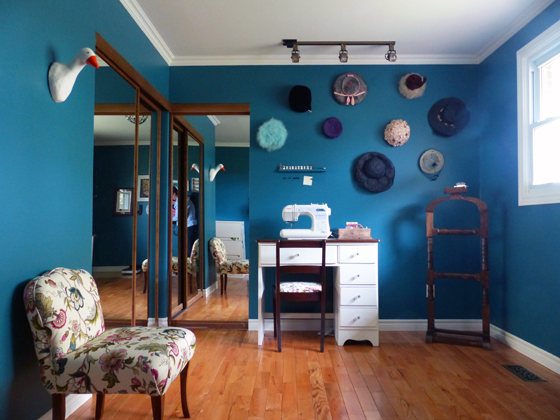
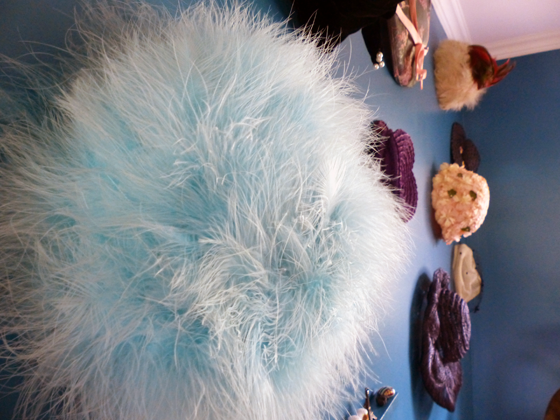
When it came to art, I wanted to display some of my favourite things–like this collection of vintage hats. My Mom taught me how to sew. She learned from her mother–the original owner of most of these hats. In fact, my great-grandmother made one of the hats that is hanging on the wall.
I love the idea of a time where people regularly dressed up to go out, and hats were part of the outfits. I don’t live in that world, but I can still enjoy these hats by having them on display.
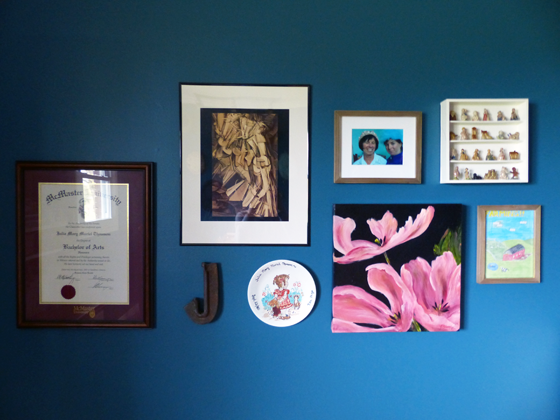
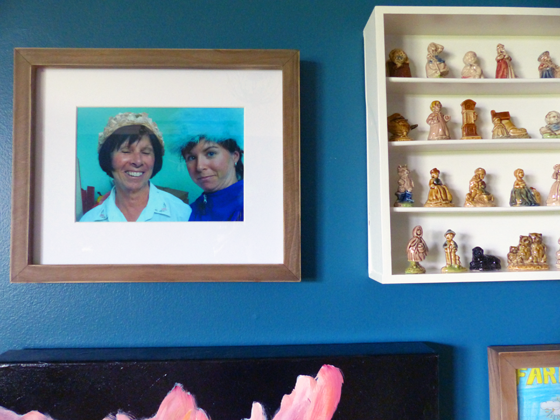
The gallery wall is another showcase of my favourite things.
The same grandma that taught my Mom to sew also had a collection of Red Rose Tea figurines. Often when we were leaving her home after visiting, she would give us a figurine to take home. A few years ago, I decided to collect a full set of the nursery rhyme statues. Between gifts and flea markets, I got every one. However, I’ve never had a place to display them. Now I do–along with a fun photo of my Mom and I modeling some of the hats.
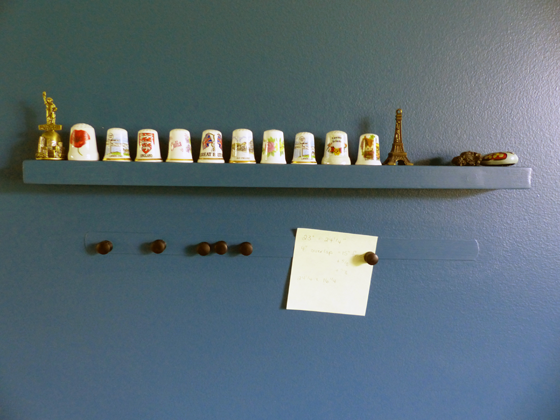
Another small collection that is finally on display is my thimble collection. Matt’s parents travel a fair amount, and my MIL buys a china thimble for me pretty much everywhere they go. I made a really small shelf to go above my sewing machine, and it holds all of the thimbles perfectly.
A magnetic strip from Lee Valley, painted the same colour as the wall, holds sewing instructions where I can easily see them as I’m working.
While I’m not an official participant in the One Room Challenge, which concludes this week, it definitely helped motivate me to finish off this room. I love that every item on my to-do list is crossed off.
You can check out all of the official ORC participants at Calling it Home.
There are so many little details that make this room work really well for me. And I love the beauty and the sentimentality that I was able to incorporate as well. While the ORC motivated me to finish the office, the room itself is now motivating me to keep crafting. I’ve returned to some projects that have been hanging around for a little while and had a super productive sewing month where I’ve churned out a dress, jacket and several pillows. I’m excited by what else this room is going to inspire.
Thanks for following along on the makeover. Do you have a crafty creative space at your house? What helps motivate you to finish projects–whether big like a room makeover or smaller crafts? Do you have a favourite collection on display?
There are three weeks left in the official One Room Challenge. And three weeks left in my personal mini-ORC, also known as mission finish the office.
Already the motivation of the ORC is working. I had a very productive weekend, and I’m excited to see the finishing touches for the office coming together.
Here’s the to-do list update:
Buy and install light fixture
Unpack remaining boxes and organize china cabinet
Style china cabinet shelves
Sort and file paperwork
Install gallery wall #1
Install gallery wall #2
Reupholster seat of wooden chair
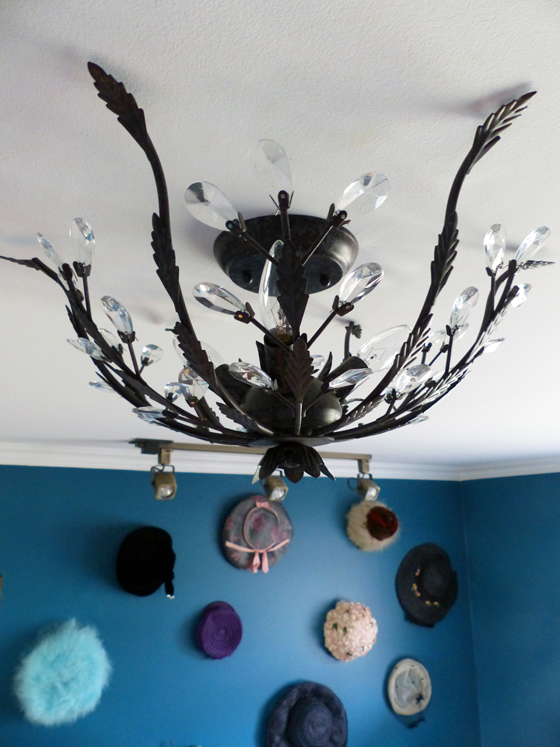
As you can see from the photo above, I have a proper light fixture now. I’ve envisioned this light fixture in the office for a long time. I second guessed myself for a moment when I finally bought it, but now that it’s installed it’s perfect. I love the dark metal and the vines and the crystals.
It’s kind of fun and a bit of a different experience to decorate a room completely for myself.
Something that’s also entirely for me is the gallery wall you see behind the light fixture. I’ll share more about that in a couple of weeks when I post the final the reveal.
Another personal favourite is the Brissac Jewel fabric by P Kaufmann that I used on my bulletin board and slipper chair. It’s making another appearance, this time on a wooden chair that past owners left at the farm.
Upholstering this chair hadn’t been part of the original plan for the office, but I couldn’t let this chair go (I have a thing for chairs). Covering a slip seat is a whole lot easier than upholstering the slipper chair. Pulling all of the staples out of the old upholstery probably took longer than adding the new fabric.
The dark wood and the bright fresh fabric look so nice against the white desk and turquoise walls.
A major perk of the ORC is it ensures I complete all of the little details of a makeover. Details like paint touch-ups (which were also part of my weekend) and upholstering this chair.
It’s those little details that make a room come together. I’m thankful to finally be at that point with the office. Just a little more to go. We’re getting there.
So are all of the other bloggers that are participating officially in the ORC. Even though I’m not linking up, I encourage you to check out the other makeovers at Calling It Home. There will be new updates every Wednesday and Thursday until May 10.
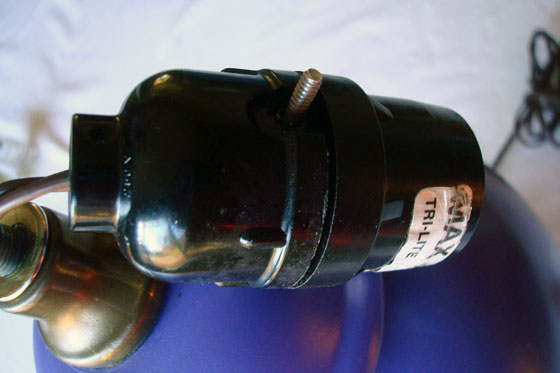
My thrift store lamp that you met on Friday had a lot of things going for it, especially after its spray paint makeover. However, there was one thing missing that I didn’t notice until the very end: the harp.
The harp is the little bracket that goes around the light bulb and holds the lampshade.
I admit, I was a little intimidated by the prospect of installing a harp. I hear about a lot of people rewiring lamps, but I’ve never attempted that myself. It turns out it’s not hard. In fact, I just started trying to take the lamp apart and was able to figure it out pretty much on my own.
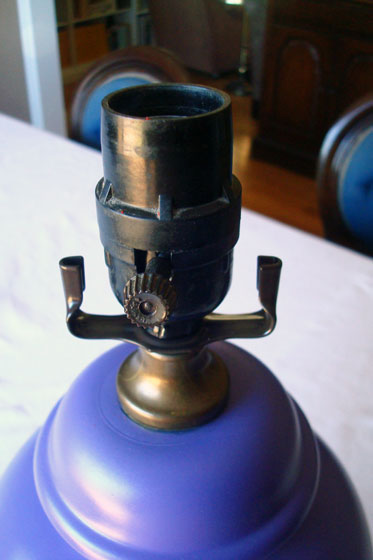
Step one was to remove the socket from the lamp base. It just unscrewed, and the cord was loose enough that I was able to pull it out a little bit.
The wire was still buried deep in the socket, so I started trying to figure out how to access it. A close examination revealed a seam in the middle of the socket. You can see it partially opened here.
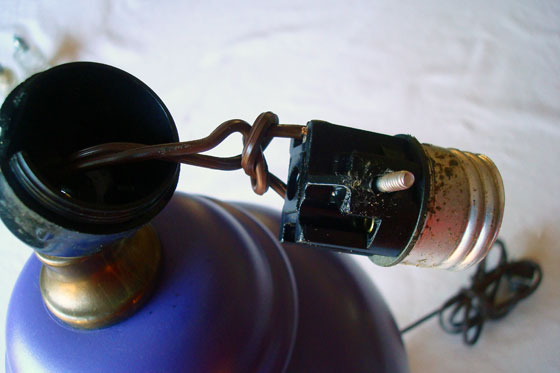
The socket easily unscrewed, and I could see where the wires attached to two screws. I could also see a really intimidating knot. Gulp.
A couple of turns loosened the screws enough to unhook the wires. Quick tip: I marked which wire went to which screw (one’s gold and one’s silver) by straightening the gold one and leaving the silver one hooked.
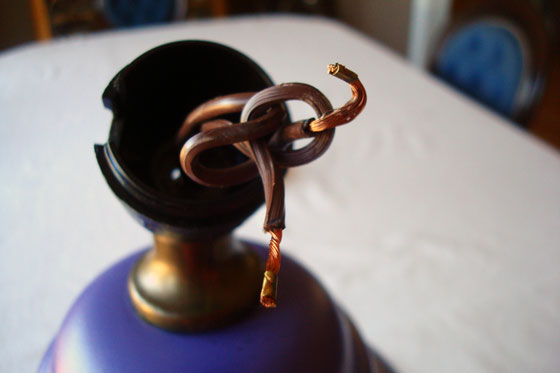
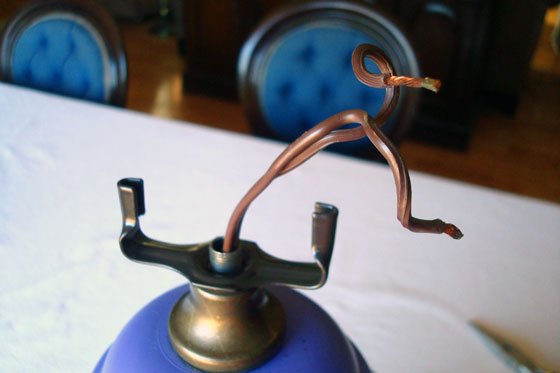
I was really, really hoping to not untie that knot, but in order to remove the bottom part of the socket–never mind putting on the harp–I had to. With the knot untied, the socket easily slid off and the harp bracket easily slid on.
After that, it was a (relatively) easy process of reassembling the socket. I slid the bottom part of the socket back into place. I retied the knot. (Okay, this was a bit complicated.) It turns out the knot is called an underwriters knot. I watched this animation a few times as I was tying my own knot. I hooked the wires back over their screws, and then screwed everything back together. I had a reassembled lamp that now included the bottom part of the harp.
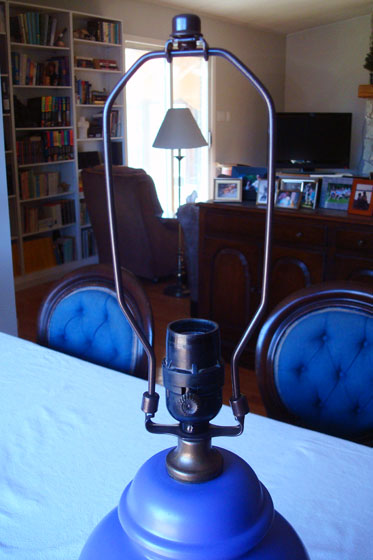
The upper part of the harp slid onto the bottom bracket and I gave myself a congratulatory pat on the back.
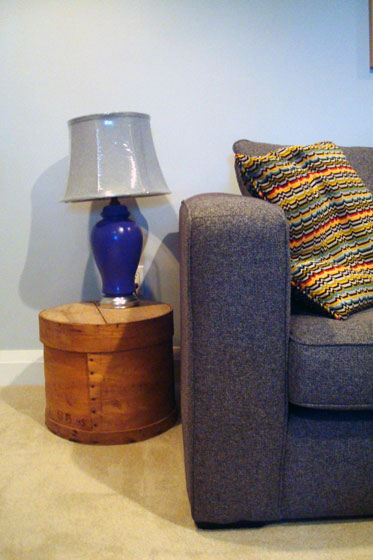
And then I had to choose a lampshade. Last week I asked for your input, white or grey. So what did I end up choosing?
I went with the grey. It was pretty much the universal favourite last week, and I decided that I liked its flared shape best.
And another detail on the basement comes together. Slowly but surely I will finish this space.
Have you ever rewired a lamp? What DIY projects do you find intimidating?
If you think back to February, you might recall that I posted about struggling to find a lamp that I liked for the end of the couch in the basement. Well, things move like lightning over here–lightning I tell you–because just 9 months later I’m ready to show you my solution.
Ummm… not quite.
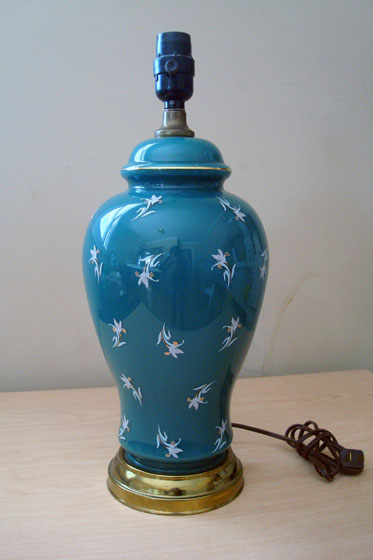
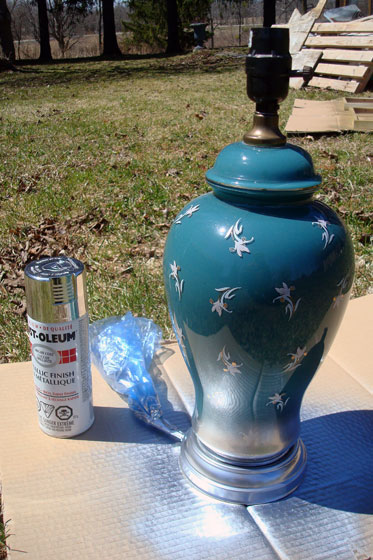
A thrifted lamp was my starting point. It was the right height. I liked the shape. The base wouldn’t take up a whole lot of space on our tiny end table.
I took care of the brass with the same shiny silver spray paint that I used on the original dining room chandelier.
As much as I liked the turquoise colour, I was not a fan of the flowers. So everything got a coat of deep purple spray paint.
Purple?
Yep.
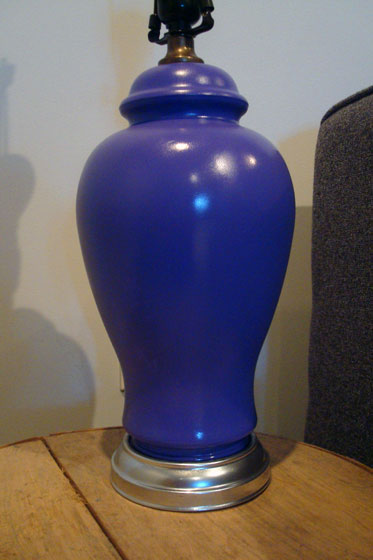
I like having pops of colour in the basement, and purple is a colour I’ve not used yet.
Turns out the purple works. I really like how it looks in the basement.
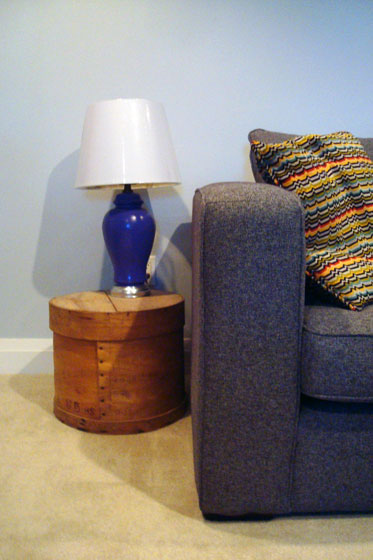
But I have a dilemma.
What lampshade looks best? (Ignore the shiny cellophane wrapping.)