Two gender neutral nursery designs

There are just a few finishing touches left before the baby’s room is finished and ready to share with all of you. Before the official reveal, I thought I’d share two alternate nursery plans that I considered–one colourful and one neutral.

There were a couple of things that both plans had in common.

We knew we weren’t finding out if we were having a boy or a girl, so no matter what the room looked like it needed to be gender neutral. (Sorry, no gender reveal post coming until baby arrives.)

The second thing was that I wanted an Ikea Strandmon wing chair and Animal Print Shop photos in the room. The Strandmon is a super comfortable chair. I knew the high back, wings, arms and generous seat would be good support for a tired nursing Mama. The Animal Print Shop images are super fun and would be a friendly addition to a baby’s space.

I’ve really enjoyed pulling the baby’s room together and thinking about what feel I wanted and what made the most sense for us and our baby.

Here are the two ideas that I started with.

Neutral

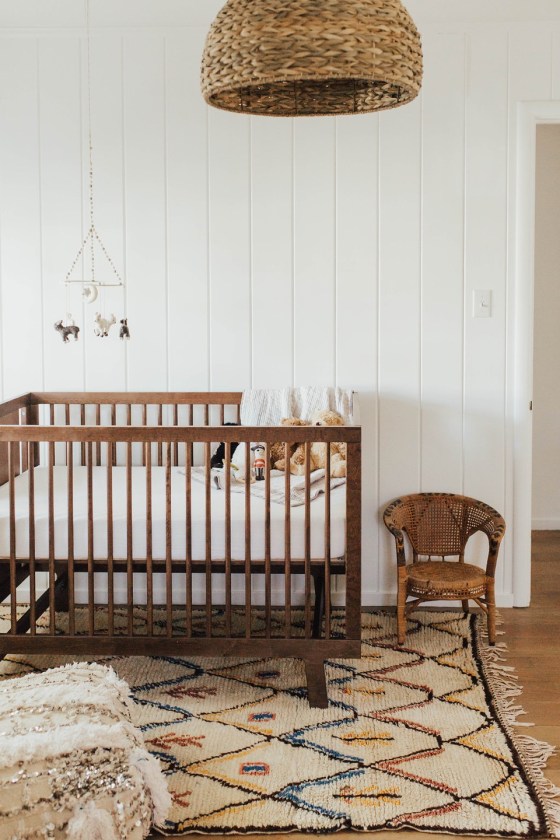
The neutral design came when I considered using the guest room as the nursery. This room has faux wood paneling on the walls, which I thought would look great in white. The dropcloth curtains that I made for the guest room were a soft non-colour that would contrast just enough with the walls. The rest would be wood, leather and natural tones like brown, white and grey. Something like this room from Cheetah is the New Black or this one from design dump.

I’ve learned that light colours are very calming for me, so I felt like this would be a zen space, even if I’m not always feeling zen.

I also felt like this scheme would work really well with our farm–all of the natural materials and neutral colours would be a fit for the country setting.

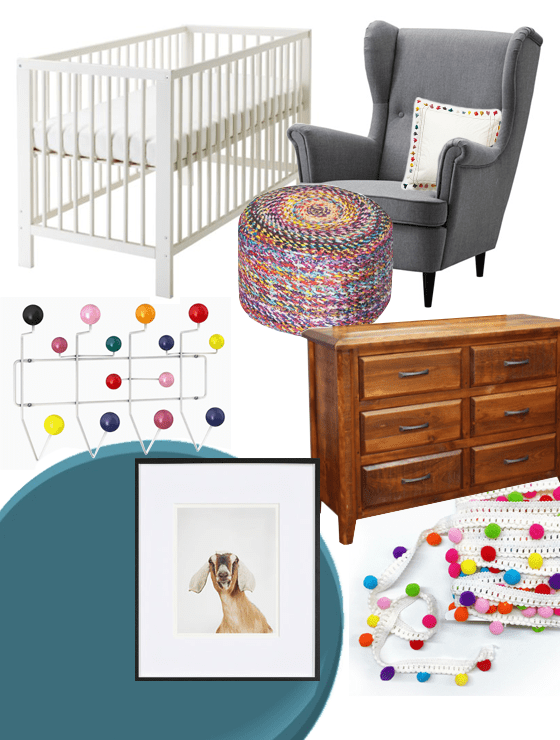
Here’s a moodboard with some of the items I was considering.

Colourful

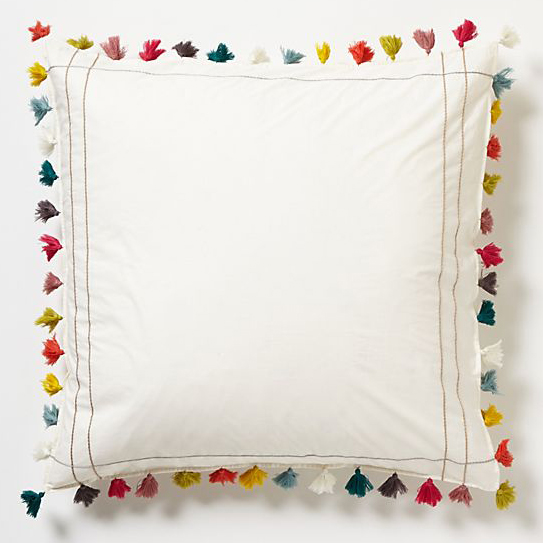
The colourful scheme was the one that had been in my head the longest. I had originally planned on using my office for a baby’s room. The walls were turquoise, and I liked the idea of that inspiring, high energy colour for a baby. This pillow from Anthropologie (which is no longer available) inspired the rest of the decor.

Lindi Fringe Euro Sham from Anthropologie

I felt like white would be important to temper the turquoise. At the same time, I liked the colourful tassels, and they inspired me to think about other colours that would mix with the turquoise.

Here’s the moodboard for the colourful nursery.

The final space ended up being a bit of a combination of the two plans, and I’m excited to show it to you.

What design appeals to you most?

Looking back at Home Goals 2017

Thanks everyone for your good wishes on our new addition. We’re excited–and I will admit I’m still a bit nervous about this whole baby thing too. We had our pre-natal class this weekend, which was informative and encouraging, and I have (yet another) ultrasound this morning (this baby is going to have supersonic hearing after all of our scans). Overall, we’re feeling pretty good about where we’re at.

As you can see, 2017 was quite a year for us. Today I’m taking a minute to look back at the year that was from a personal, professional and farm point of view.

After thinking and planning for quite awhile, I took a leave of absence from my communications job at the end of August to spend some extra time with family and see if I could build my own communications consulting company. I love working from home and love working for myself. I’m still working on building my client base, but I’m so grateful to have this opportunity.

The timing for my leave turned out to be very fortunate, as at the start of July we found out we were going to have a baby and at the end of September Matt was diagnosed with an ocular melanoma. It’s been so helpful to have a more flexible schedule for appointments and most importantly to have the mental space to process and reflect on all of the changes in our lives.

Along with all of that, we’ve replaced both our cars–my 14-year-old girl finally died and Matt’s year-old car was written off after he was hit by a driver who ran a red light. Matt ended up with a broken arm courtesy of the airbag, which derailed some of my plans for projects around the farm, but was a small hardship when he could have been much more seriously hurt.

Amongst all of these changes and challenges, the farm has been our constant and our refuge. 2017 marked five years at the farm, and I can’t imagine being anywhere else. It gives both of us peace to be here, and also gives us an outlet when we need to distract ourselves with tractor therapy, digging in the dirt, painting something or just walking the property.

I have a feeling we’re going to be saying, “What a year!” for the next while (perhaps the rest of our lives?) as we watch this baby grow, adjust to our new family reality and continue with life on the farm.

As many of us do at the start of the year, I like to take a moment to look back and reflect on the year past. Beyond all of the personal changes in our lives, I also started 2017 with my usual list of Home Goals I wanted to accomplish at the farm over the year.

Looking back, we didn’t do too bad.

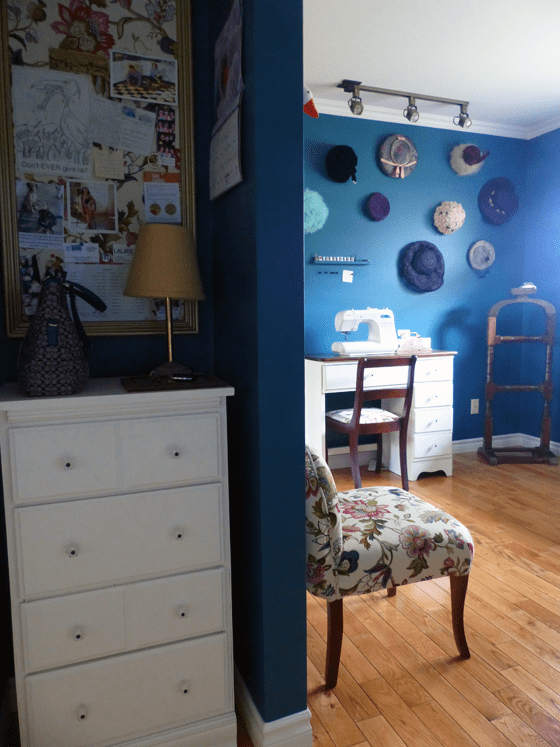
My office
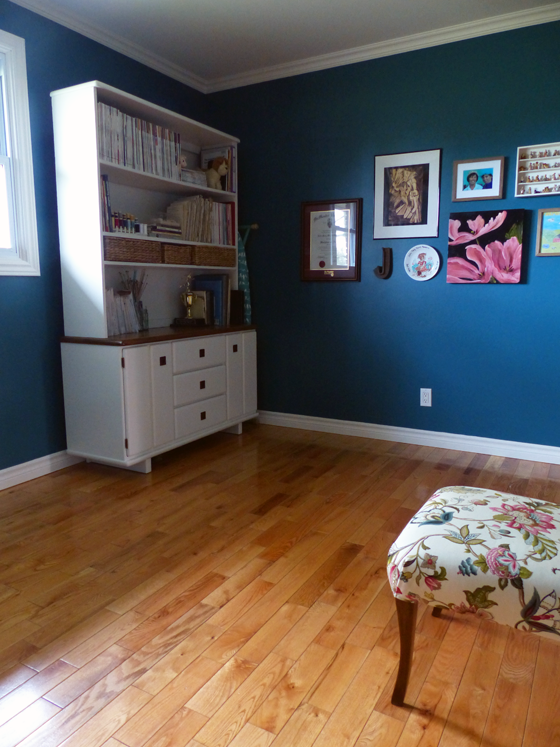
Turquoise craft room

I was very happy to finish the final bedroom at the farm and finally unpack all of our moving boxes–only five years after moving in. Reupholstering my grandmother’s vintage slipper chair is a project I’m still very proud of. What I called my office ended up being more of a craft room and it was such a great space for creativity.

I say “was” because my office ended up seeing another makeover just a few months later when I decided to turn it into the baby’s room. I’m finding other spaces to be creative around the house, and I love how the baby’s room is coming together. I’ll be sharing all of those details soon.

Clean up the pond shore

Red sky over the pond at sunset

The pond shore was my one and only outdoor land clearing goal for the year (and we have plenty of spaces that I want to clear). Mid-year, I gave up on it happening, but then an enthusiastic nephew and a generous husband went to work over a few weekends, and we made more progress than I ever expected.

There’s still more to go, which might be difficult as I don’t think the baby will be as helpful as our teenage nephew, but Matt and I may be able to divide and conquer on this one. And regardless, every time I look out the kitchen window or walk past the pond with Baxter (which happens at least once a day), I’m grateful for the improved view and access to the water.

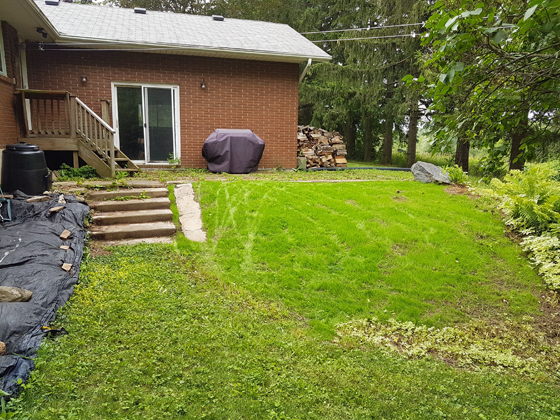
While I had planned to focus just on the pond shore, I did give the area right behind the house a bit of attention, and cleaned up (most of) the jungle that’s been there since we moved in.
New lawn

Vegetable garden

Green tomatoes growing in the garden

At the start of last year, I said I was going to add rhubarb (check), a second row of berries (check–ended up being blackberries) and maybe some more grapes (check). I also put in four blueberry plants to try. As usual, I’m crossing my fingers that everyone survives the winter and bears fruit this year.

My biggest goal was keeping the weeds under control. I can’t say I was successful in that. I tried to find some old hay bales for a deep mulch but didn’t have any success. And in terms of weeding by hand, most of the season, I didn’t feel like weeding, and I gave into that feeling… a lot.

We capped off the year by covering two of the quadrants with tarps, and my tentative plan for the coming year is to leave the tarps in place. This will decrease the garden size by not quite half, which might just be manageable in our new reality.

Flower gardens
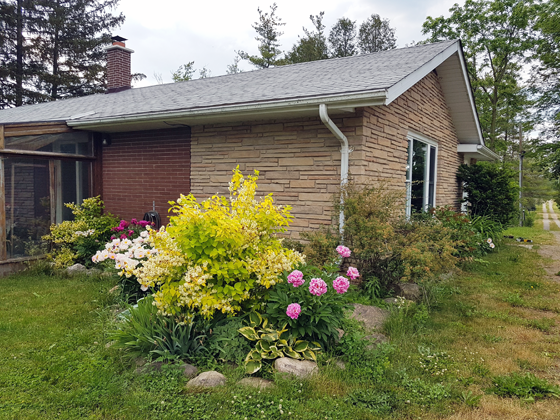
Garden in bloom in June

The flower gardens got some half-hearted attention this year. I can’t say I met my goal of keeping them weeded and filled with beautiful flowers, but I did get in them a few times and they didn’t look too scraggly most of the time (I don’t think).

Basement

Uh, yeah. I still have empty picture frames leaning against the basement walls waiting for art. I didn’t get to this in the first half of the year, and, since I left my job, I’ve been careful about spending money on extras, even inexpensive posters. So we go yet another year with some unfinished areas in the basement.

However, I did finally share the transformation of the basement TV area and all of the details on how we decorated it. I love this space so much and am so proud of us for doing it ourselves.

Basement TV area

New barn cat

Our barncat Ralph

After talking to a few people, we decided not to add a new barn cat to our family. Ralph has things under control and she’s content. She doesn’t need company, and I’m not confident that expecting her to train a young cat would work. So Ralphie gets to be mistress of the barn. She can live out her years in peace, and we will take our chances with adopting a new cat when we need it and hope that the newbie lives up to Ralph’s high standard.

Extras

As always, a few extra projects sneak into every year. I can call another room completely finished–the guest room–after refinishing a vintage metal bedframe. Spoiler alert, the guest room has since seen a few more changes as it’s become guest room/sewing room as I’ve given my office over to baby.
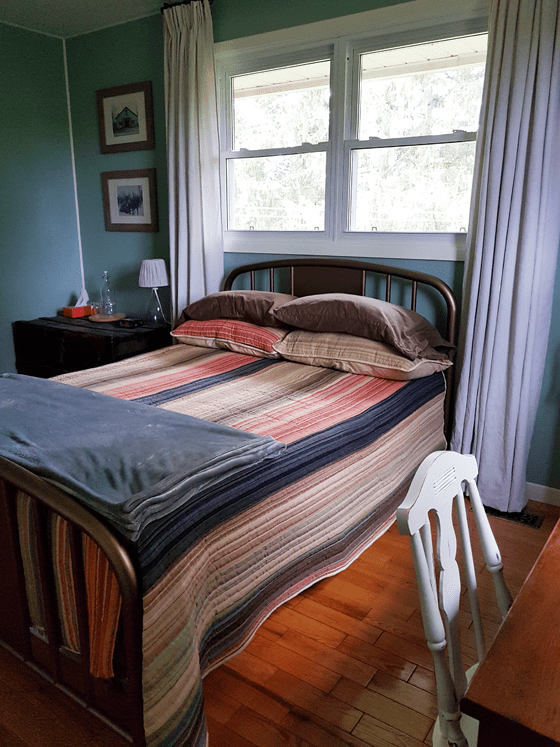
Antique brass metal bed frame

The living room also saw a few tweaks with a new mirror on the mantel and new pillows on the couch. I’ll be sharing our new coffee table soon too.
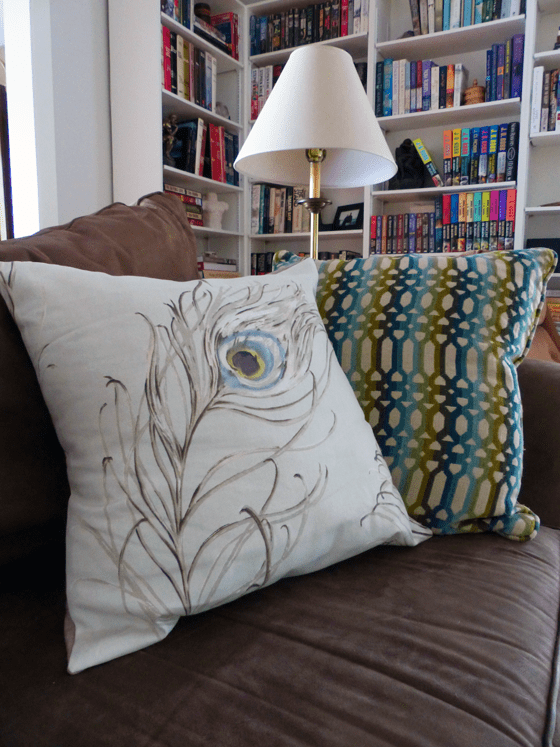
How to mix and match throw pillows

So around the house, 2017 was a mix. Which is okay and pretty normal for us.

We had enough abnormal in the year that I’m grateful that projects and the farm are such a refuge for us.

How was 2017 for you? What was your big accomplishment for the year?
Four tips for simple Christmas decorating

Sarah is here to share a touch of Christmas from Illinois. Her front entrance is looking very festive, and decorating didn’t take her a lot of money or time. She’s sharing her tips for easy, affordable and attractive Christmas decorations below.

I love just about everything about the holiday season. One of my favorite activities is decorating our house both inside and out.

We had never done this before, but Steve asked if this year we wanted to decorate with a theme, so we chose “red and gold.” I think this will become a new tradition. It has made decorating much simpler and everything feels less cluttered and classier.

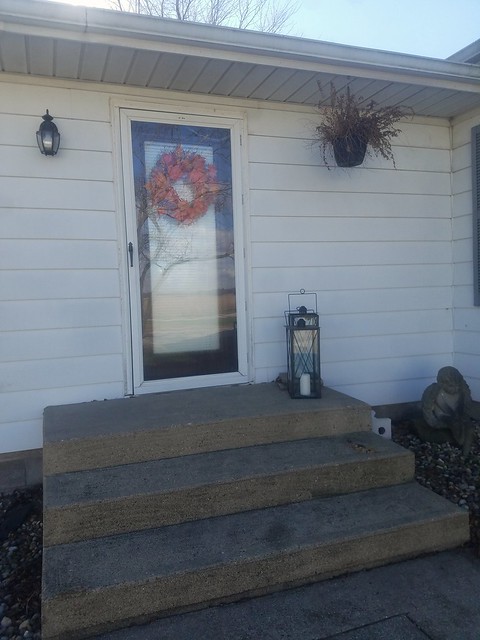
I used this line of thinking when decorating our front step and chose to go with the gold part of our theme. I thought I would share some tips I have when decorating.

This is the sad view that I started with. What you can’t see is the rotten pumpkins that I had just removed from the steps.

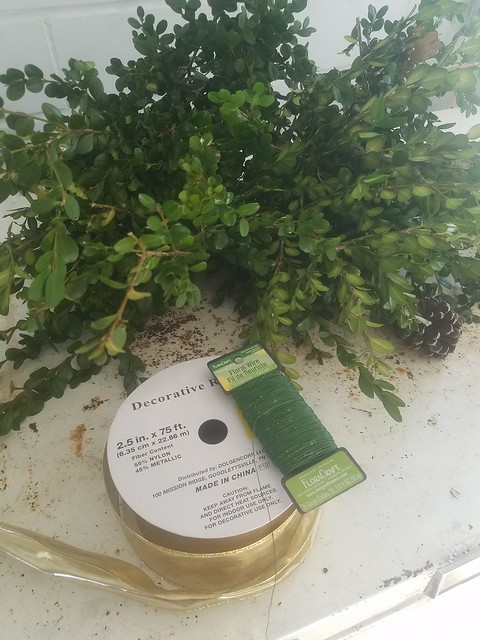
I began by going to my parents’ and helped my mom gather clippings from her boxwood bushes.

Tip #1: You don’t have to buy expensive decorations. Branches from pine, cedar, boxwood and other evergreens make beautiful natural decorations.

I gathered my supplies and laid my branches out in the general shape and size that I wanted to hang from my front door. I used floral wire to tie small bunches of branches together.

Tip #2: When wiring together live branches make sure to tie them really tight. The branches will shrink as they dry out.

I used ribbon for decoration and also to hide the wire that I used. I like to use wired ribbon to help it hold its shape.

Tip #3: I always scour after Christmas sales for ribbon. I can often save 50-75% by doing this.

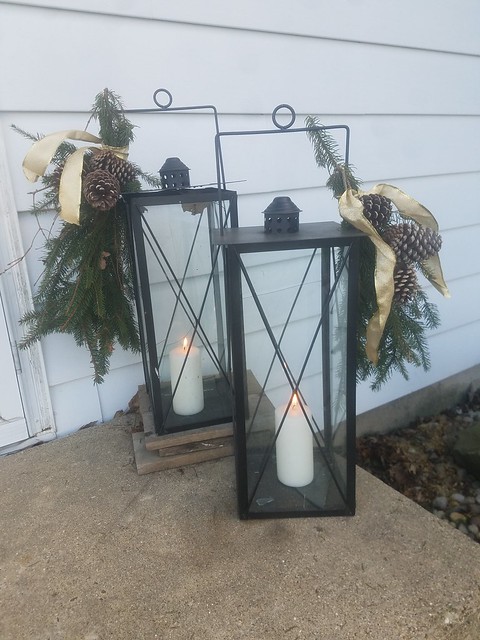
For my lanterns I wired a few branches from my trees to the handles.

Tip #4: When trimming branches from a tree, look at how the branch is hanging before it is cut. If you want the branch to hang down, but it is curved up on the tree, it will be very difficult to force it into the position you want.

I also added some pinecones that my mom’s cousin had given us. Again I used floral wire to tie them together and tied them to the handle. I took some more wired ribbon and tied a knot to finish it off.

To complete the look, I added a really cute dog.

Merry Christmas from Illinois! I will be back after the New Year.

That is indeed a cute dog. Does the craft store sell Blitzes?

Thanks for all of your posts over the last year, Sarah. It’s been great to see what you and Steve are up to in Illinois. I hope that you and your family have a wonderful holiday season!

Coffee table – Input needed

Car loaded with lumber

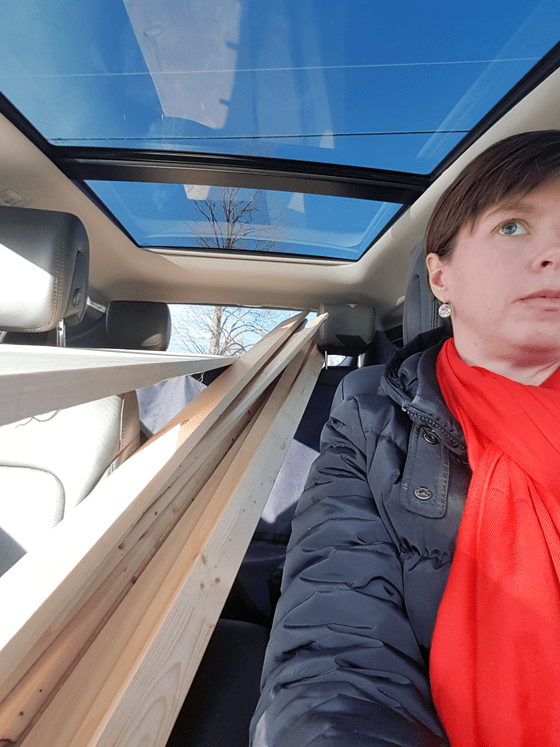
I bought materials for the most exciting project on my fall to-do list, our new coffee table. However, before I start construction, I need your input.

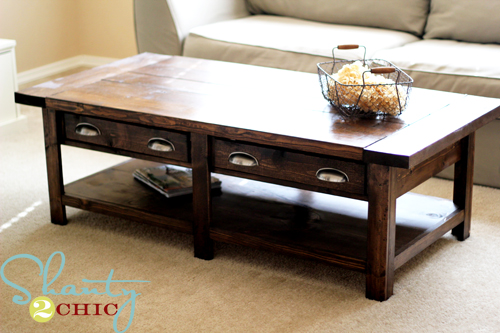
I’m going (roughly) with this plan from Ana White.

I love the idea of the drawers. So much in fact that I’m going to be doing four drawers, two on each side.

This addition may end up changing the dimensions of the table a wee bit, so I’m going to take it slow and buy more material as I need them.

The one area where I’ve bought absolutely no material is the top.

In Ana’s plan, the top is made out of 2x6s. A 2-by top seems very heavy to me. Unnecessarily heavy. Plus I’m not sure it’s proportionate with the rest of the table, which is 1-by. Our current coffee table (which is nothing special, but has served us very well for 10 years) has a top that’s half an inch thick.

In fact, our current coffee table isn’t all that different from the Benchwright table, minus the drawers.

So what do you think readers, a 2-by or a 1-by top? What would you do?

Trials and errors in Illinois

Sometimes, we cross our fingers and give something a try. We’re hopeful that it will work, but not quite sure how it might turn out. That’s the case in many aspects of life, but especially DIY. Sarah in Illinois is back today to report on the results of two experiments.

There have been a few projects in the past that I have posted about and said that I would report back how they turned out. I thought I’d report back on two of them today.

The most recent was the storage tomatoes. You can see the process I used here. But unfortunately, it didn’t work at all. Two weeks after I put them away, they looked like this:

My best guess is that the garage that I stored them in was too warm. Next year I plan to try again but find a cooler storage spot. I may also try another variety like Longkeeper.

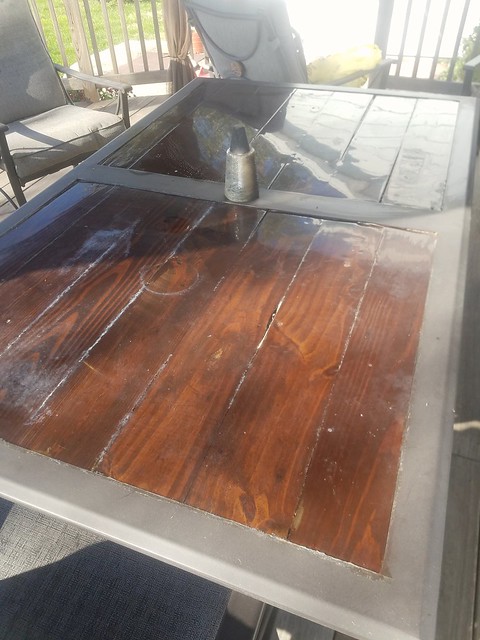
My second follow-up is for the table that we refinished for the deck.

I said in my original post that the epoxy we used stated that it wasn’t for outdoor use, but we chose to use it anyway.

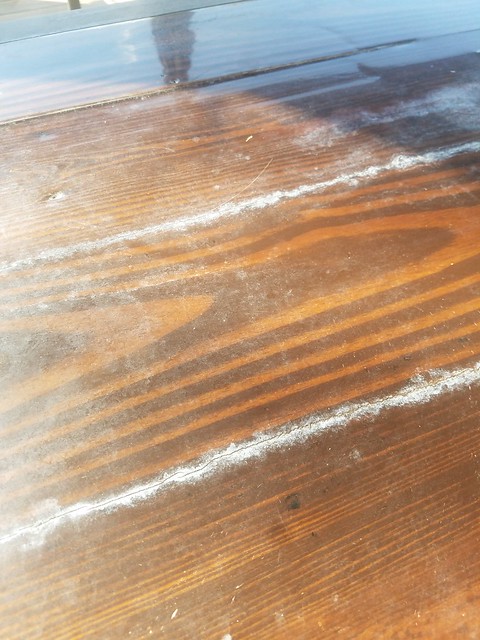
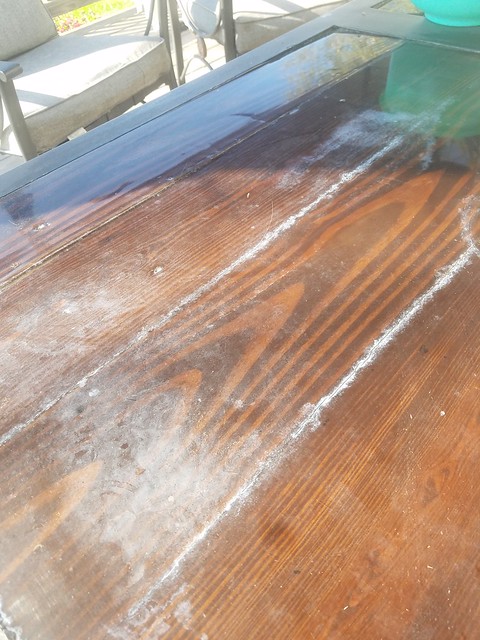
They are a few small issues that popped up after a summer of outdoor use.

There are small cracks appeared in the epoxy which allowed moisture to sleep down underneath.

Also something that sat on the table, possibly a pot of plants, held moisture against the epoxy and made a cloudy ring where it should be clear.

I wouldn’t consider this a complete failure for the project, but it tells me that the finish won’t hold out as long as I hoped. My plan is to see how it looks after using it again next summer then possibly trying a different method to coat the wood.

So unfortunately, both trials didn’t go perfectly, but that is why they were truly experiments for me. Most things in life are trial and error. The best thing to do is learn from it and move on.

That’s about the only choice, Sarah! I’m sure these results are a bit disappointing, but they are absolutely learning experiences.

I have to say I’m bummed about the tomatoes and the table for you. We lost a bunch of our favourite potatoes this year just a couple of weeks after we put them in storage. There wasn’t anything to do but move on, but it was frustrating that we’d had such a good harvest and then so many didn’t keep–and especially that it was our favourite variety that was hit. Also, the last time you shared that table, it was so shiny! 😦

Refinishing a vintage metal bed frame

Thanks everyone for your good wishes on my last post. Matt seems to be recovering well from his surgeries. We’re hopeful that our follow-up appointments over the next few months give us more positive news.

The guest room has become Matt’s treatment room where we can lay out all his drops and ointments, and the patient can receive them. You may recall that back when I shared the finished guest room nearly, oh, a year and a half ago, the room was missing a key component–a bed frame.

Well, we’ve finally managed to remedy that.

Metal bed frame in the guest room

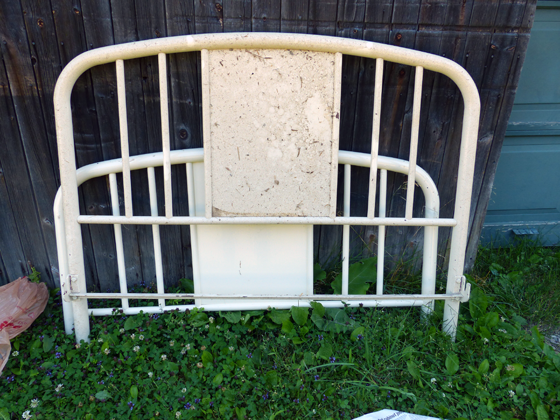
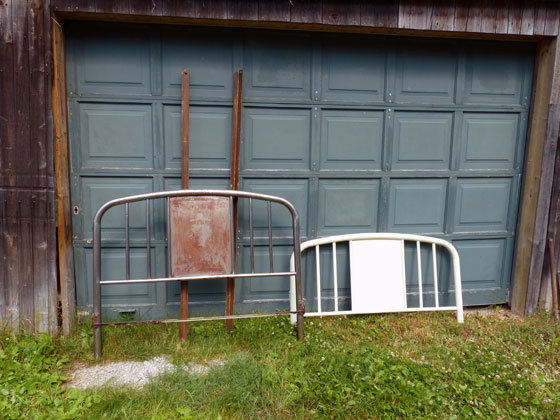
We had an old metal bed frame that was in my cottage bedroom growing up and then Matt and I used it in our first house. This style of frame has become pretty trendy, and I’m seeing various versions all over the web, so I wanted to keep it. Plus it was free.

However, the finish was in rough shape. During the cottage days, it was a greyish, pinkish flesh tone. Matt and I repainted it cream, but it was our first foray into spray paint and the finish was drippy and chipped (and dusty after living in the barn for several years).

Vintage metal bedframe painted cream

One of my home goals from 2016 was to strip the frame. I had hoped that the metal was in good enough shape that it wouldn’t need to be painted and it could just go right into the guest room.

Stripping paint off metal is very similar to stripping paint off wood. I used my usual chemical stripper, scrapers and wire brushes. It was a fiddly process because of all of the spindles and layers of paint (and as usual my sidekick was no help).

Baxter helping to strip the paint off the metal bed frame

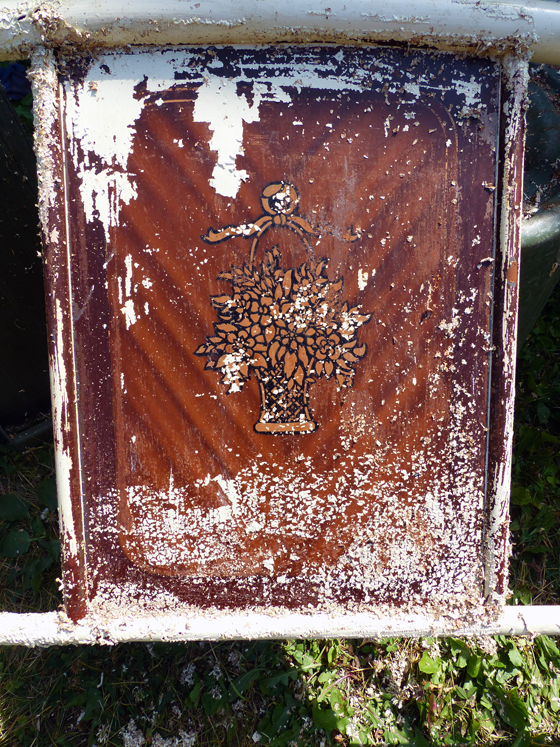
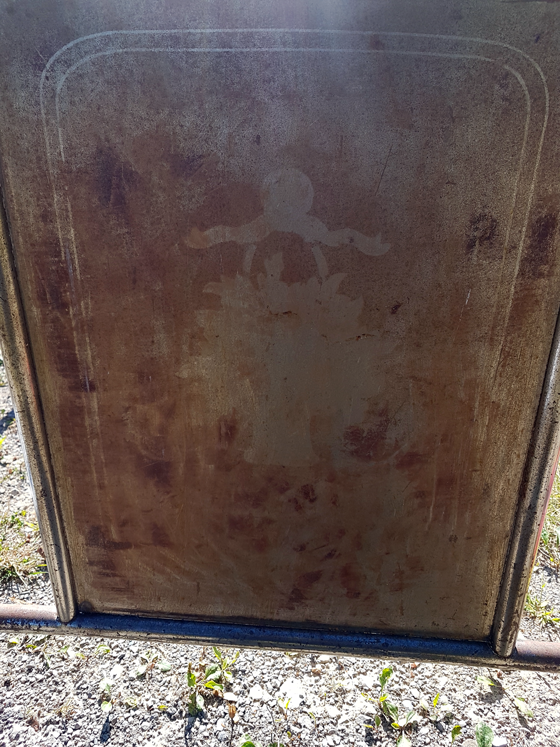
The original finish on the bed was a faux wood treatment. It was not what I expected to find at all. I had seen glimpses of this stenciled basket through the subsequent layers of paint and thought it might be embossed into the metal. That was not the case, and it was a feature of the original finish.

Faux wood grain paint on a metal bedframe

Stripped metal bed frame

Unfortunately, the metal was not in great shape once I got the paint off. There were scratches and pits and rust and the welds were obviously different colours. I knew I would have to repaint the whole bed. Faced with that reality, I stopped stripping. I had removed the paint from the headboard and two siderails, but I had visions of simply adding another layer of paint to the footboard.

Stripping paint off a vintage metal bedframe

But I knew that wasn’t what I really wanted. If I’m going to do the job, I might was well do it right and take the footboard back to the original metal. Plus the footboard is the most visible part of the bed, and I was worried that the chips and goopy layers of paint would show through my new finish.

So this summer I returned to the bed frame and finally stripped the footboard. Then I waited for the weather to cool off enough to paint–and to figure out what colour I wanted to paint.

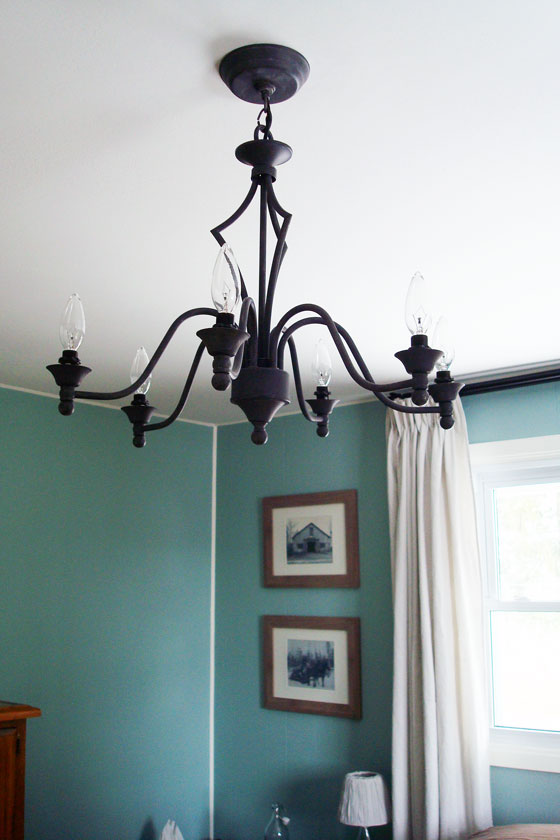
So many of the metal bed frames I see are black. I love the look. But between the trunk that’s already in the room, the chandelier and the curtain rods, I already have my pops of black. I didn’t feel like I needed more.

Rustic black chandelier

The second place colour seems to be white, but there’s also a few white pieces in the room, we’d kind of already done this with the cream paint and honestly I wanted something more interesting than white.

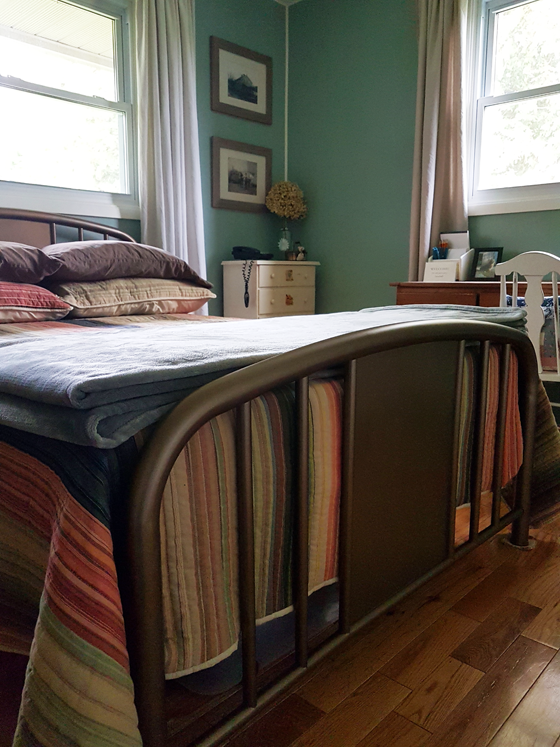
I sampled a bunch of colours, but that didn’t help. Finally, I went to the store and just picked a colour. I chose Antique Brass by Rustoleum. I liked the idea of echoing traditional brass beds. Plus some of the hardware in the room on the desk and the chest of drawers is brassy.

Rustoleum Antique Brass spraypaint

I figured, if I didn’t like it, I could always repaint. At least I now have a smooth surface to do so, and I wouldn’t need to strip again.

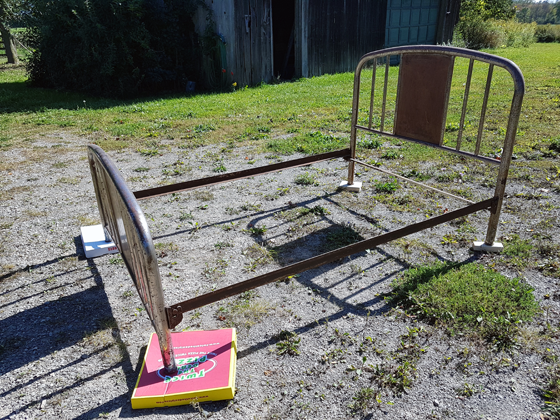
We set up the bed on the driveway, and I went to town. Given the state of the metal, I think I could have used a primer, but after a brief sanding I went straight to paint–and ended up having to run to the store to get more cans. In the end, all of the scratches were covered and the finish looks good–much better than any of the previous finishes.

Metal bed frame set up on the driveway for painting

After a week of airing out in the driveshed, we brought the bed in and set it up.

Antique brass metal bed frame

And now, I can finally say the guest room is done. Ready for our next patient guest.

Building a round wood framed mirror

Large round wood frame mirror

It’s been two years since I watched a bunch of bloggers participate in the One Board Challenge. Two years since I haven’t been able to get this round mirror by Jenn at Build Basic out of my mind. The fact that it was built with a single 1×8 made it even cooler.

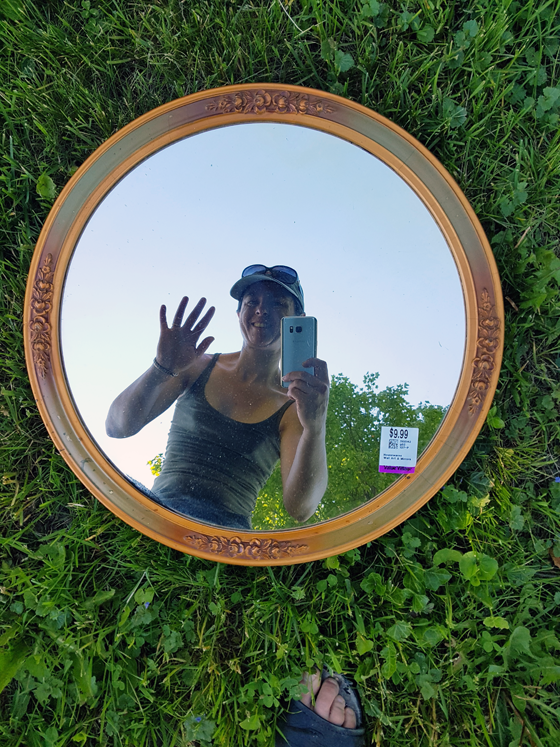
Every time I went to a thrift store, I casually looked for a large round mirror. This spring I finally found one at Value Village (for $9.99), and it was time for my own One Board Challenge.

Round mirror makeover before

I’m not going to post a how-to here because, hello, not my project and also Jenn’s instructions are very good.

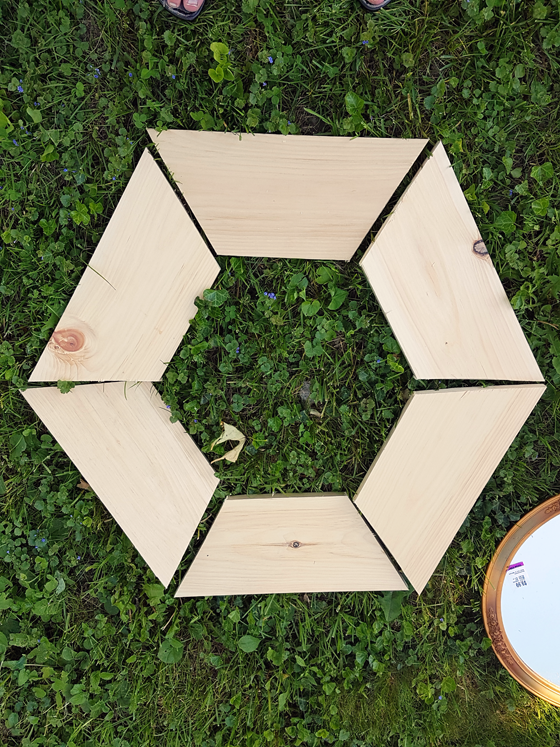
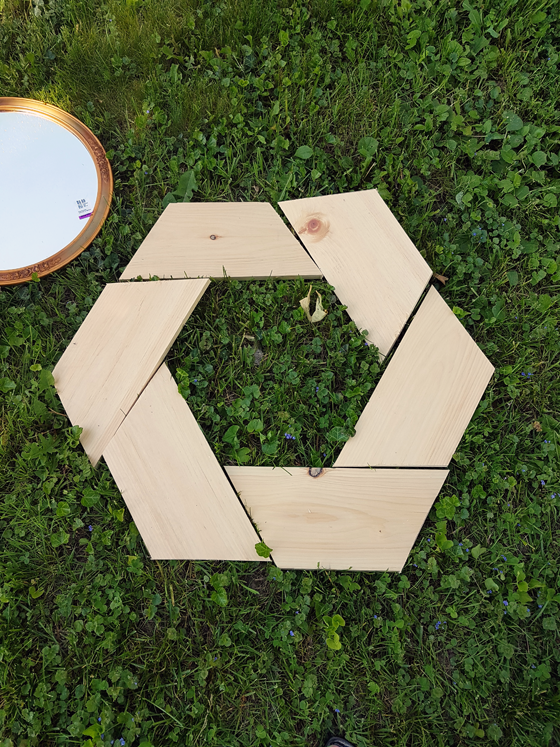
I love the creativity of the One Board Challenge. My brain does not work like this. I would not think to make a round frame out of a straight board. In fact, even with the tutorial, it took me a couple of tries to figure out how to arrange the wood. My first try was fine, but not as interesting as Jenn’s configuration.

Building a round wood frame

Jenn notes that there are multiple ways to arrange the wood. I feel like her arrangement had more interesting angles, so that was what I went with.

Building a round wood frame

If you’re thinking of trying this mirror yourself, I do have a few notes to share.

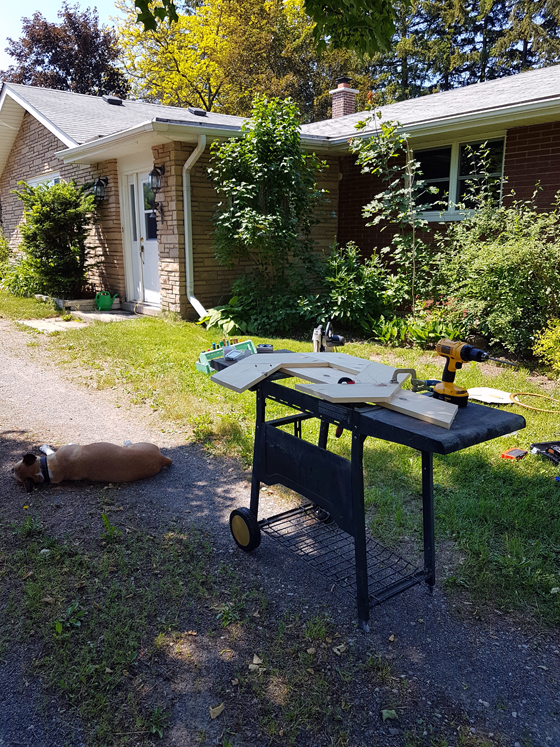
This project is rated moderate. It’s very doable, and none of the skills are particularly difficult. What might make this challenging for a novice DIYer is that building the frame takes a lot of tools. I had my tool box, mitre saw, jig saw, drill, Kreg Jig, sander and clamps all spread out over the front lawn (plus the dog). Then I went to my parents’ house and used my Dad’s nailer and air compressor.

Outdoor workshop

Cutting the curves with the jigsaw–especially the narrow border pieces–takes a certain level of confidence. I think it would be much easier to do the little pieces on a table mounted jigsaw versus freehanding it.

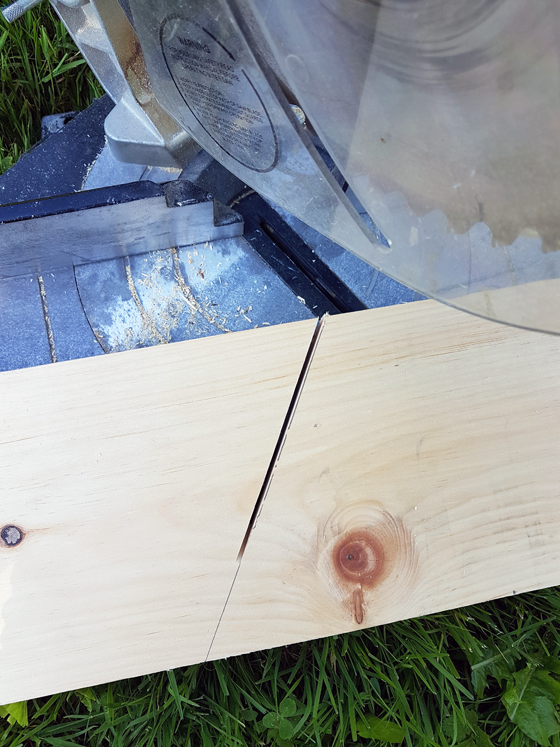
Speaking of tools, my mitre saw wasn’t big enough to handle the major angle cuts in one shot. A 1×8 is not a narrow board. I had to cut partway through, then flip over the board, readjust the angle of the saw, and cut the other half. It wasn’t difficult. Just slow.

Building a round wood frame

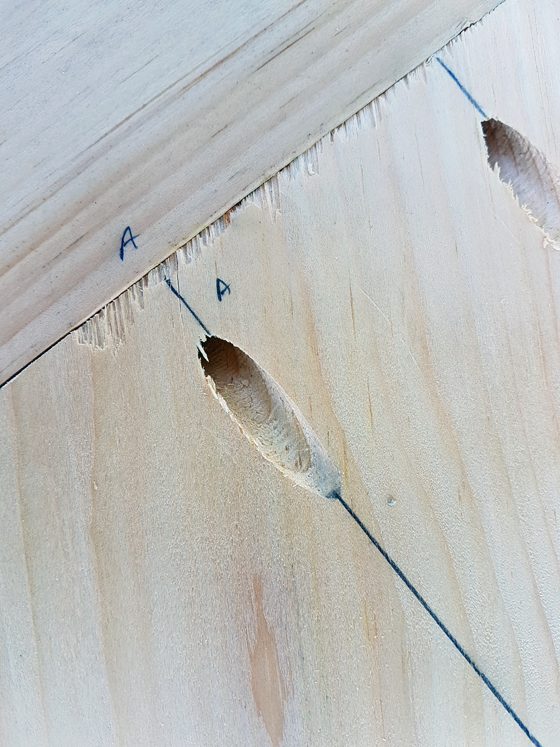
In Step 4, Jenn says “On each joint, mark a unique registration line so that it’s easy to quickly reassemble the pieces later on.” A simple registration mark is letters–you want each to be unique, so a line or slash isn’t distinctive enough. With letters, you can make one joint the A joint, another B and so on. You draw an A on each of the pieces to be joined together, so that you know which piece connects to which, even after dryfitting, sanding and the rest of the steps.

Registration marks

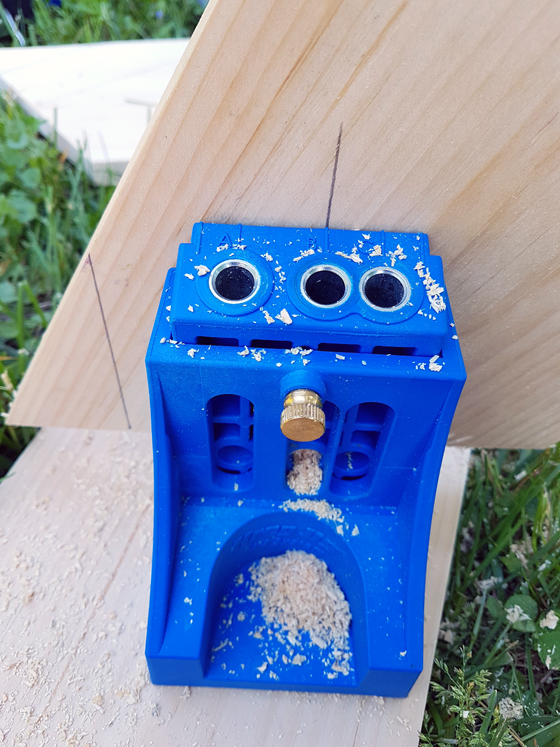
When marking your holes for the Kreg Jig, draw your lines extra long so that the jig doesn’t cover them up.

Kreg Jig

Once the frame was assembled, I stained it my favourite Provincial. Then the final step was attaching the mirror to the frame.

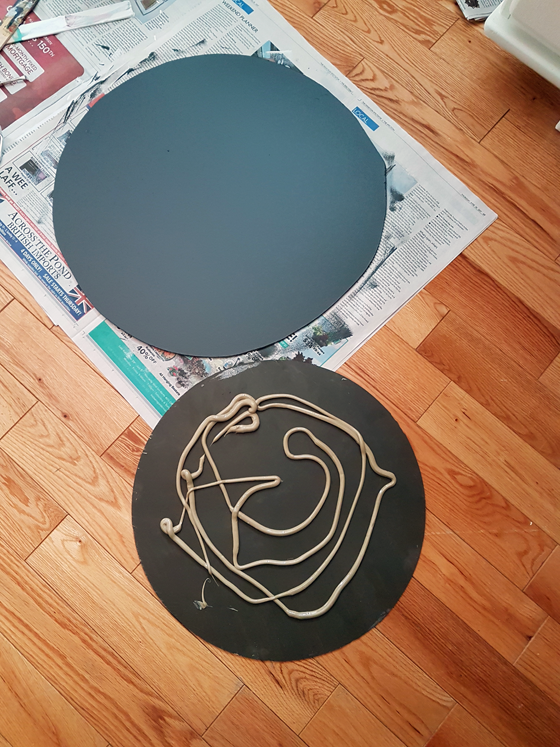
I broke from Jenn’s suggestion to attach the mirror using clips because my mirror ended up being just a wee bit smaller than the finished opening. Instead, I cut a disc from hardboard. I painted it black to camouflage any gaps that might show between the edge of the mirror and the frame, then I used construction adhesive to glue the mirror to the disc.

Gluing a mirror with construction adhesive

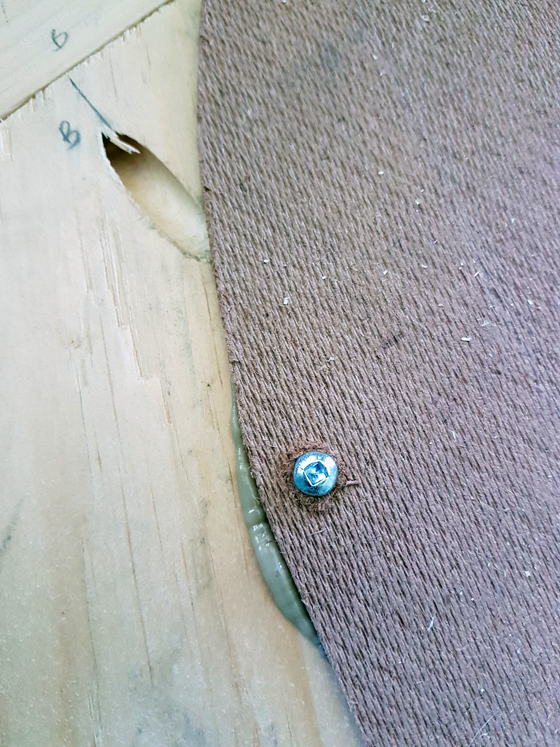
Once the adhesive was set, I then glued the disc to the back of the wood frame. I added a couple of tiny screws for extra insurance.

Attaching the mirror to the wood frame

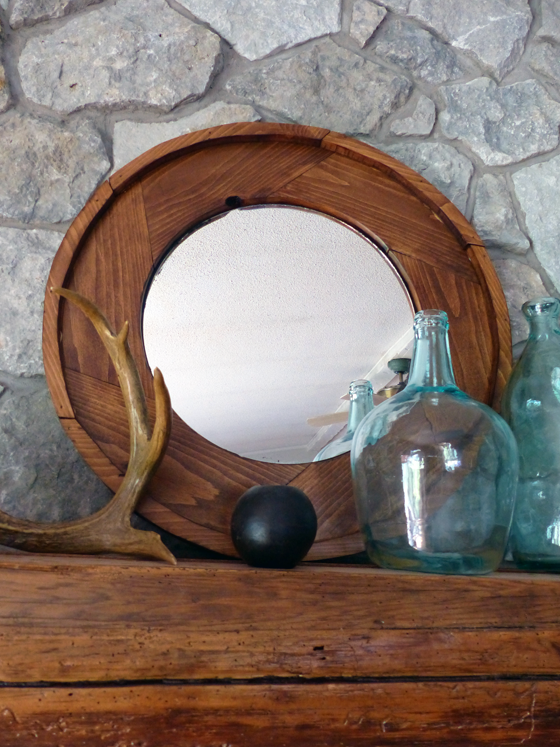
As soon as I flipped it over, I was ecstatic. I love how this turned out.

Large round wood frame mirror

Fieldstone fireplace in the summer

It’s large and bright and a little bit rustic–and a great addition to the summer mantel in the living room. Thanks to Jenn at Build Basic for sharing such a great project.

Do you decorate with mirrors? What would you build in a One Board Challenge?

Summer farmhouse mantel

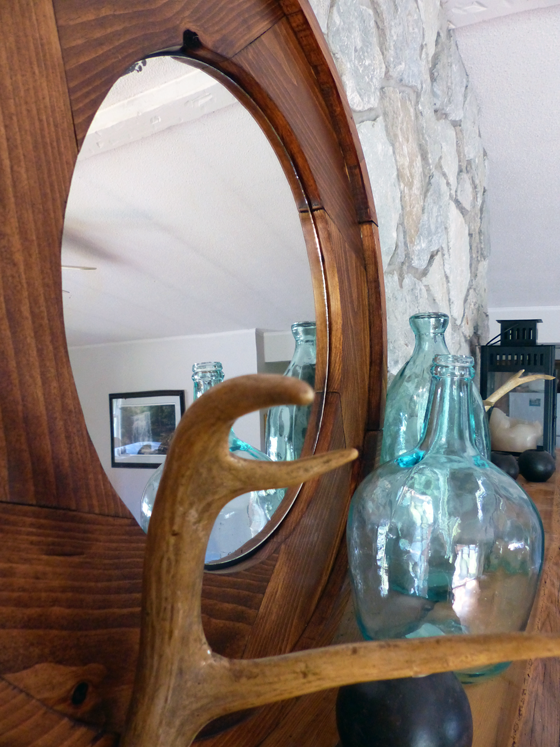
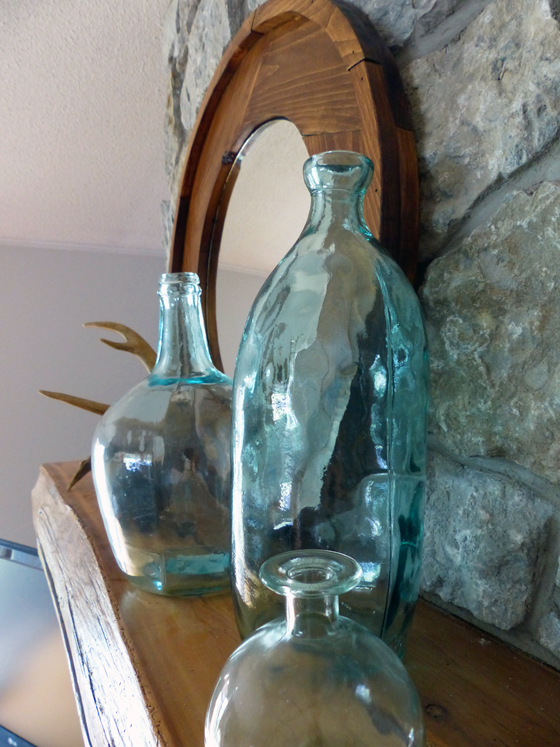
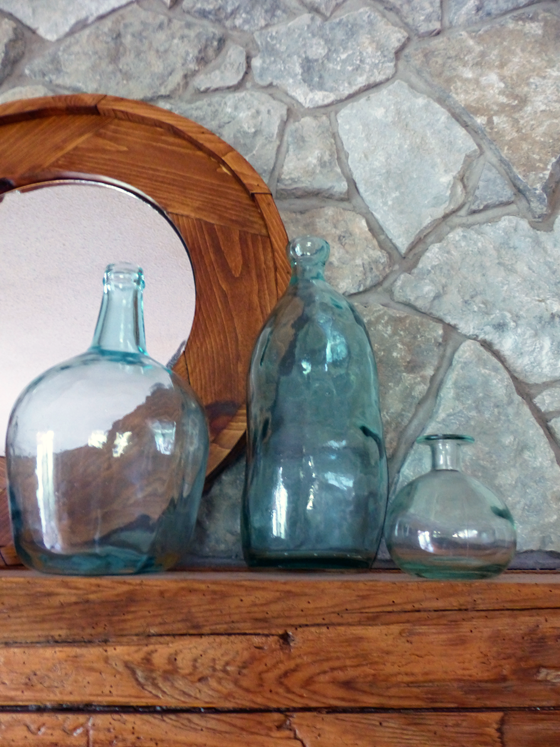
Blue-green glass jugs on the mantel

I typically don’t do a lot of seasonal decorating. But given that the mantel still had snowshoes on it at Easter, I thought it was time for a little refresh in the living room.

These blue-green glass jars are definitely more summery than snowshoes. They go perfectly with the new throw pillows I added to the couch.

Blue-green glass jugs on the mantel

How to mix and match throw pillows

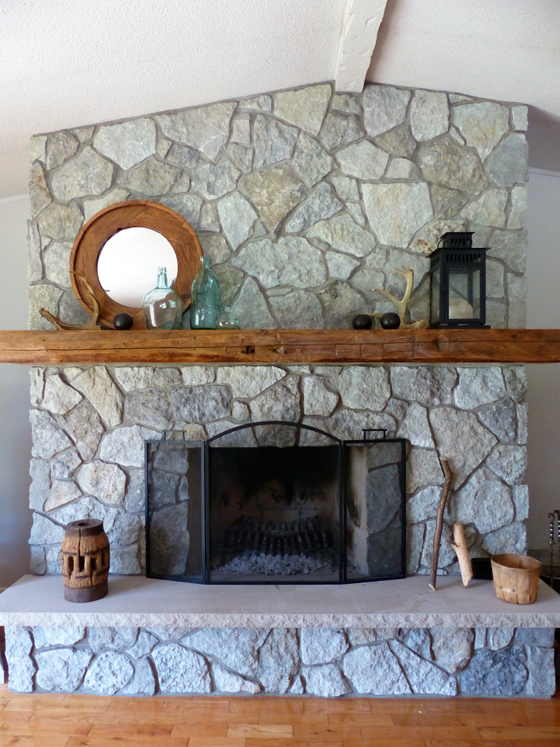
I bought the two bigger bottles last year and even though they looked large in the store, when I put them on the mantel I felt like they were a wee bit small. The fireplace is huge and with the vaulted ceiling in the living room, there’s a lot of space above the mantel to fill.

I made this wood framed mirror to add some height and give the illusion of doubling the bottles. (More on this mirror coming up later this week).

Fieldstone fireplace in the summer

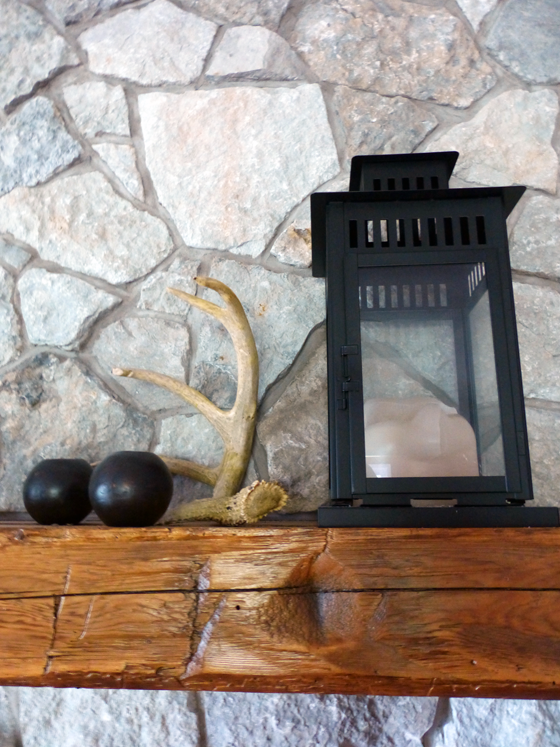
On the rest of the mantel, I used our usual decor that stays no matter the season. The pair of antlers that my FIL found are a beautiful organic accent that complements the wood and the stone. The large lantern and the trio of sphere tealight holders are very welcome hits of black.

Decorating our mantel with a lantern and antler

We are not using the fireplace these days–Easter was the cut off for that as well as the snowshoes. However, the beauty of the fieldstone and barn beam has not diminished. I love how it is the centrepiece of our home.

How do you decorate for summer? What colours do you associate with summer?

Home Goals 2017 mid-year report

Hello July. Holy moly we’re already halfway through the year.

Halfway through the year means it’s time to take a look at how we’re doing on Home Goals 2017.

July also means summer vacation. I’m going to be taking a brief blogging break this week in favour of spending some time working on more of these Home Goals.

Office

The first room makeover of the year and the last bedroom to be redone. In case it’s not clear from all of the posts I’ve done about this room–including last week’s video tour–I’m loving this room.

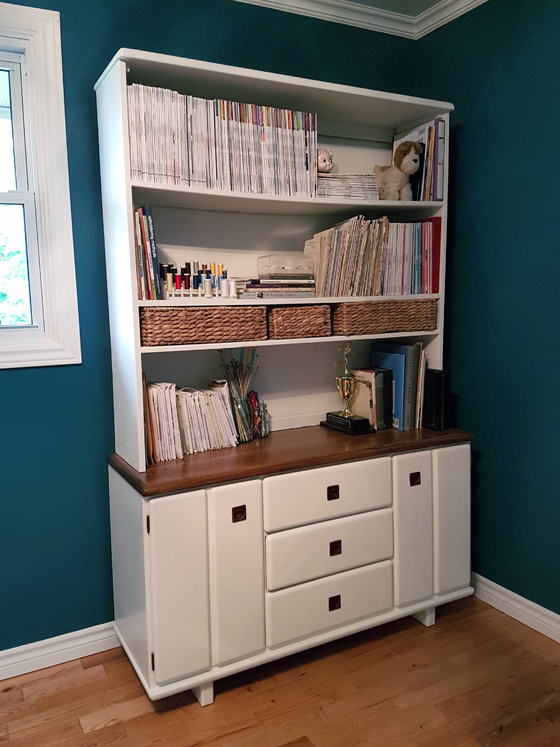
China cabinet storage in the office

Pond shore

The pond shore was my one and only property clean-up goal this spring. However, between time, weather and then a broken arm, it didn’t happen. Argh. Expect to see this on the 2018 home goals list.

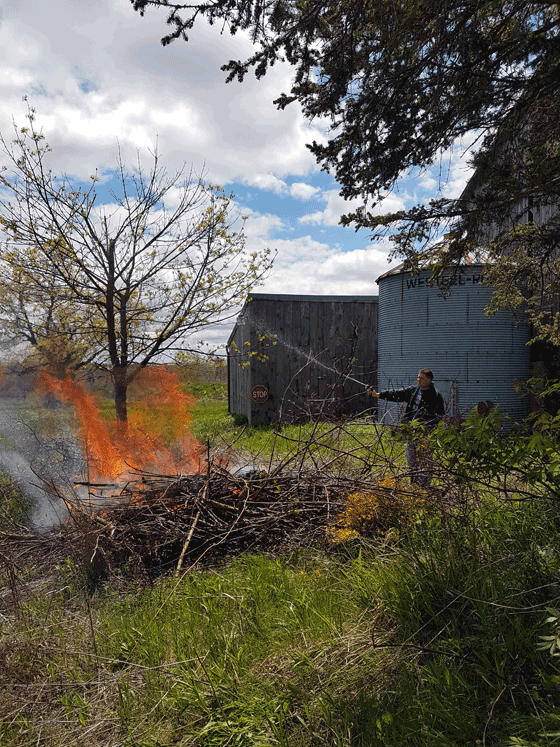
Instead of the pond shore, we tackled some other property clean-up. Matt and I burned an overgrown area behind the driveshed–but then I never cleared the rocks that we uncovered, so we haven’t been able to mow it, and it’s almost as overgrown as usual now. I’ve ever so slowly been tackling the jungle behind the house. So property clean-up hasn’t been a total skip this year. It just hasn’t been focused in the area I had hoped.

Cleaning up brush with fire

Vegetable Garden

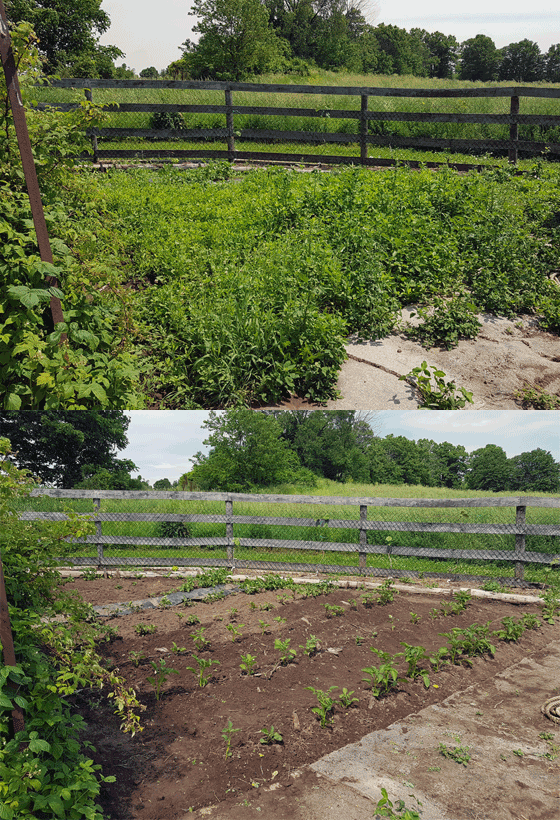
The vegetable garden is off to a slow start, but a good one. The new blueberries, blackberries and grapes that I added are all doing well. The year-old grapes even seem to have recovered from their infestation.

I’m later than I would like on planting, so everything is pretty small still. Plus, so far I haven’t had any luck finding straw for our deep mulch experiment, so the battle against the weeds is being waged by hand. But between me and weeds, we’re even. I can’t say they’re winning yet, so I’m counting that as a win for me.

Weedy potatoes

Flower gardens

The flower gardens have been getting a bit more attention this year than they did last year. As a result, they’re–surprise, surprise–looking better than they did last year. The peonies were stunning, and we’re moving on to lily season.

I’ve added a couple of new plants–an astilbe and a white lilac–which will bring more blooms to our very green beds. Everything needs a good haircut–deadheading the spent blossoms and shaping up some of the very bushy bushes–so that’s the next to-do on the list.

Pink peony

Basement

I was really excited to share the basement TV area a little while ago. There are two more spaces in the basement that I’m hoping to show to you before the year’s out. They just need some art, some styling and a major tidy. Organizing the basement is tops on Matt’s list for the summer, so between the two of us, we may finish the rest of this space yet.

Basement TV area

New barn cat

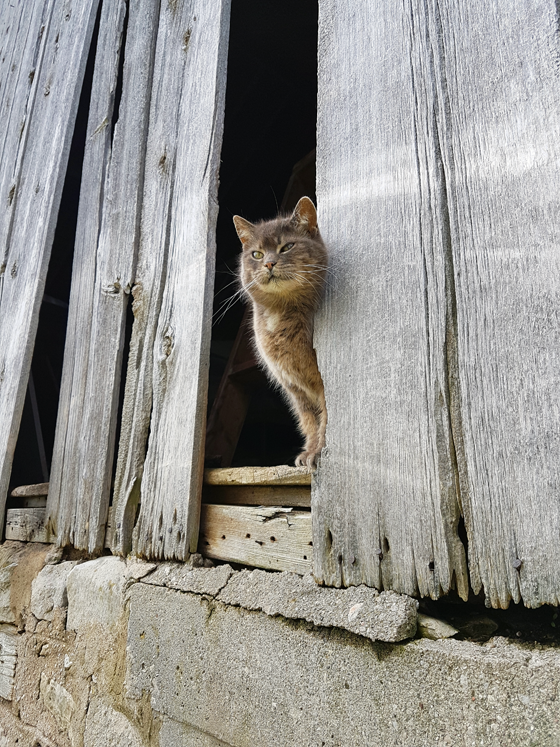
We’ve decided that the best thing for Ralph for now is for her to continue to enjoy her days in peace and relative solitude. Our best girl is queen of the farm and doesn’t need a sidekick. So we will continue to be a one barncat farm for the foreseeable future.

Our barncat Ralph

Coop

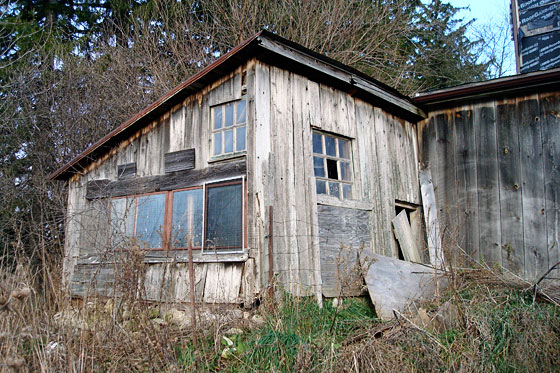
This final task is a new addition for this year’s Home Goals courtesy of Matt. He is determined to have some hens to eat ticks next year, so that means we’re taking down the old coop and building a new one. I have lots of ideas about how to build the coop, but I haven’t entirely worked out all of the details of this project. I expect this one will take a little while. I guess I know what we’re doing this summer.

Old chicken coop

In fact, we’re getting a little start on the coop this week. With my few days off work, and Matt now on summer holidays, there will be gardening, weeding, organizing, cooping and cat scratching. Somewhere in there, there may be some relaxing too.

As part of my holiday, I’m taking the rest of the week off the blog too. I’ll be back next week with more news from the farm.

How are you doing on your projects so far this year?
Office befores and afters, plus a video tour

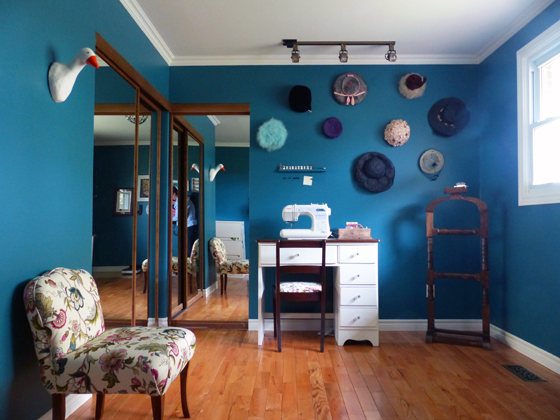
I’m loving my newly decorated office so much. There has been sewing, crafting and working–it’s such a fun inspiring space. Even better, everything is still tidy and organized. I’ve been wanting to do a video tour for a little while, so I thought the office would be a good place to start.

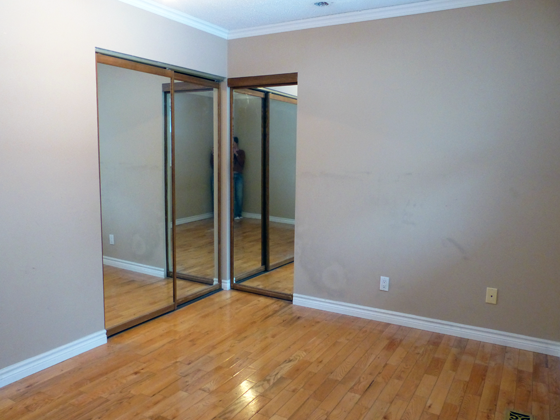
Usually in my room makeovers I post a before and after. However, the office was such a blank slate that the before is pretty basic and blah. As well, I didn’t make any major changes so the layout–the window, the doors, the closet–are all the same. Comparing a before and after doesn’t seem very dramatic in my opinion.

Office before

Office after

However, there were befores and afters for some of the elements in the room, so I thought today I’d share some of those as well as the video.

The nook

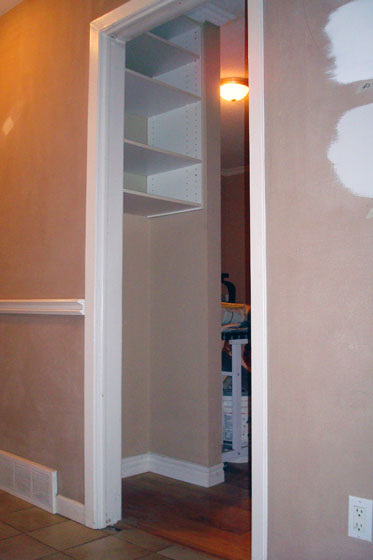
The video tour gives you a good look at the weird little nook just inside the office doorway. This spot’s makeover started a few years ago when I removed the weirdly high shelving, built a little dresser and hung a bulletin board. What could have been a really awkward part of the office has become a really functional command centre.

Nook before

Office command centre

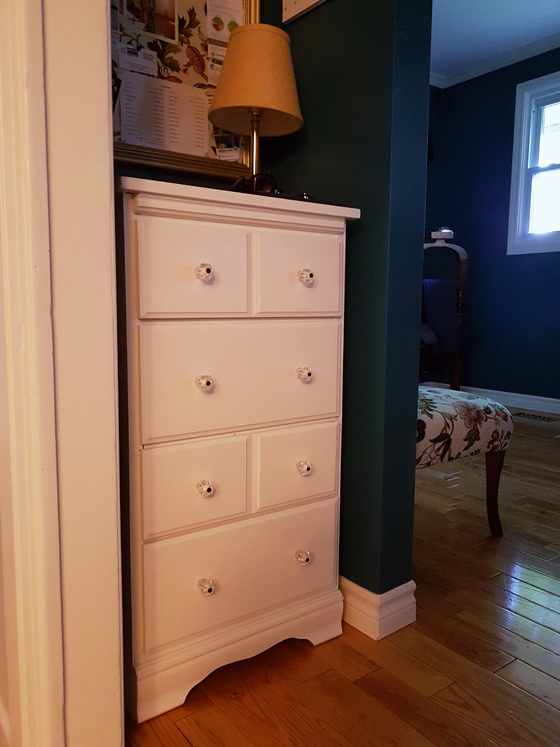
Little dresser

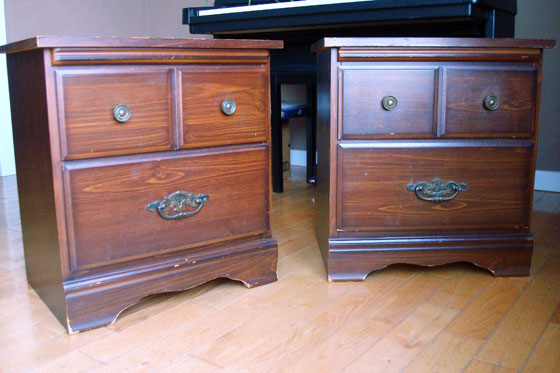
The search for furniture that fit the little nook was long and challenging. I wanted something tall, but it had to be narrow and not too deep. Plus, as usual, it had to be cheap. I ended up finding a pair of nightstands that fit the space perfectly. And when stacked on top of each other, they made a tall narrow dresser that holds everything from tools to notepads.

Two vintage night stands

Tall narrow dresser

Desk

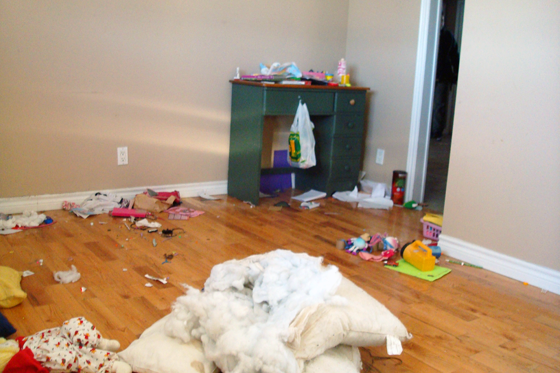
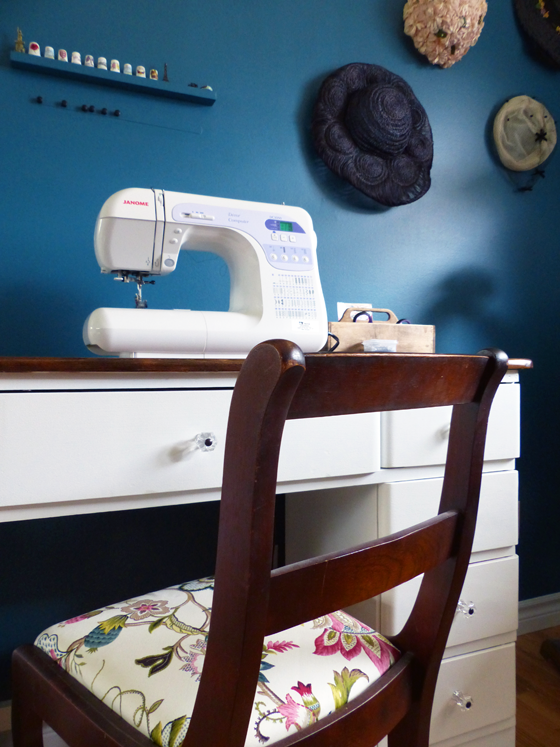
I’m going waaaaay back in the archives for this before picture. This was what the office looked like when we first bought the farm. The green desk (along with a lot of trash) was left by the previous owners, and I drafted it into serving as my sewing desk. When it came time to makeover the office, it was more than time to makeover the desk too. With fresh white paint, rich dark stain on the top and sparkly hardware on the drawers, it’s become a bright, feminine piece of furniture.

Messy office with green desk

Sewing desk

China cabinet

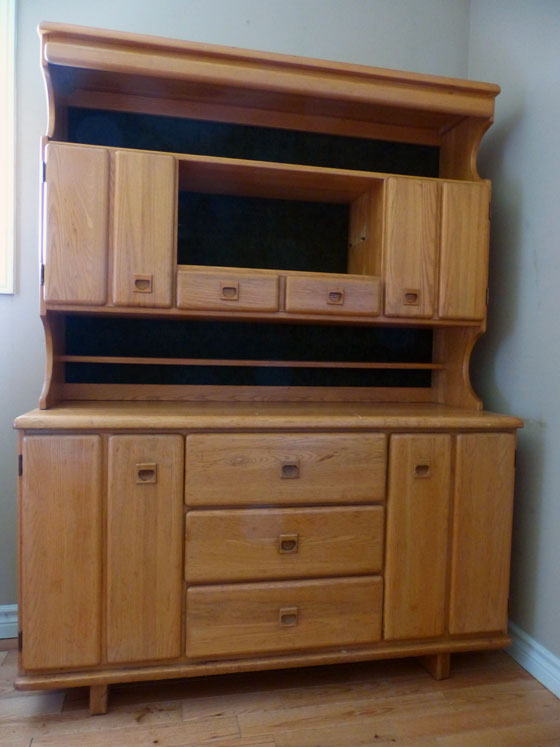
The hardest working piece of furniture in the office is the china cabinet. It holds so much stuff while keeping it all nicely organized and allowing space for display.

Vintage china cabinet

China cabinet makeover

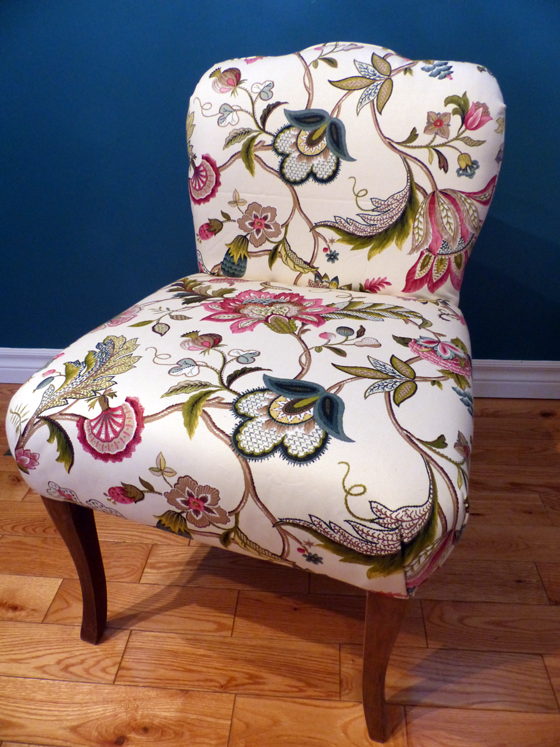
Slipper chair

The slipper chair was the most complex reupholstery project I’ve tackled. I love that I’ve been able to give this family heirloom a new life in our home.

Reupholstering a slipper chair

Slipper chair upholstered in Brissac Jewel by P Kaufmann Fabric

The office ended up taking awhile–five years since we moved to the farm. I tackled little projects here and there before finally diving into the big makeover at the start of this year. I’m so happy that everything has finally come together in one finished, functional and pretty space.