Looking back at Home Goals 2021

I returned to annual home goals last year after a four-year break. It felt good to be focused and have some projects to work on through the year. And I feel like I did pretty well at accomplishing my goals.

Here’s a look back at what happened around the farm in 2021.

Garage addition

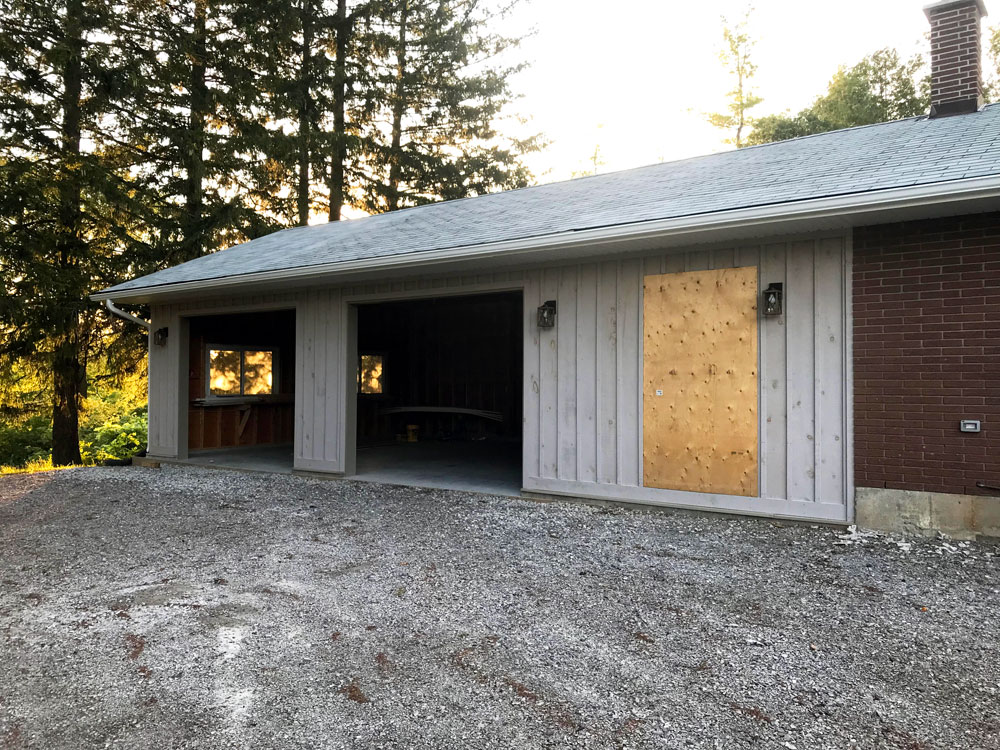
Our biggest project last year (biggest home project so far) was the garage and mudroom. These spaces have made such a difference for our home and how we use it. There are a few things to work on still (Home Goals 2022 coming soon!), but I am so happy we did this renovation.

Playground expansion

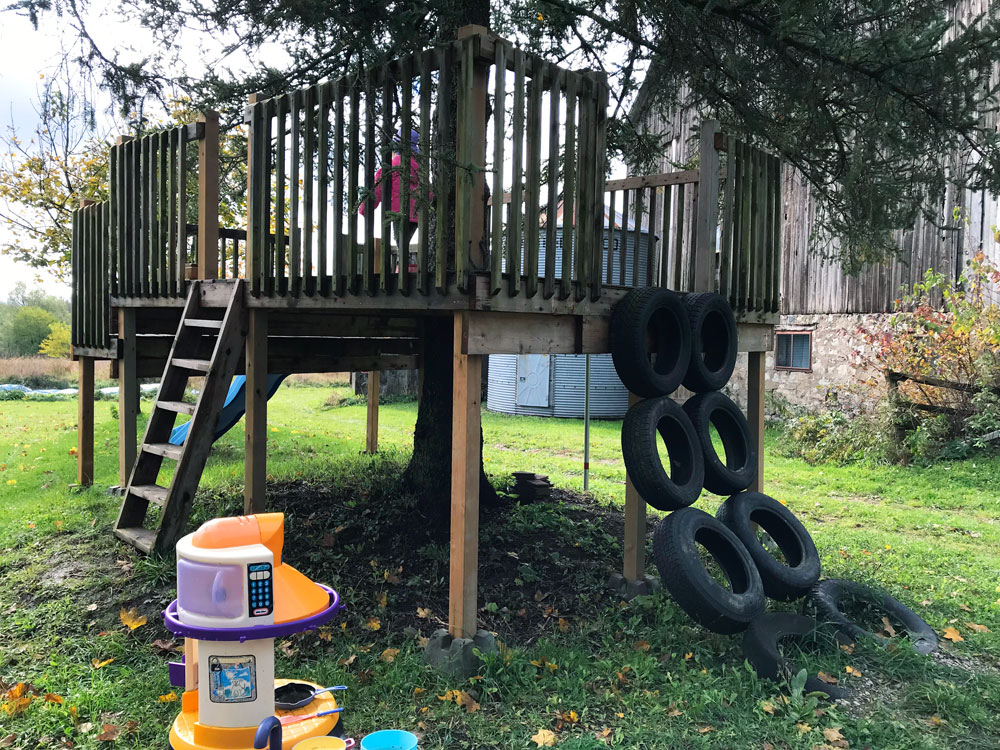
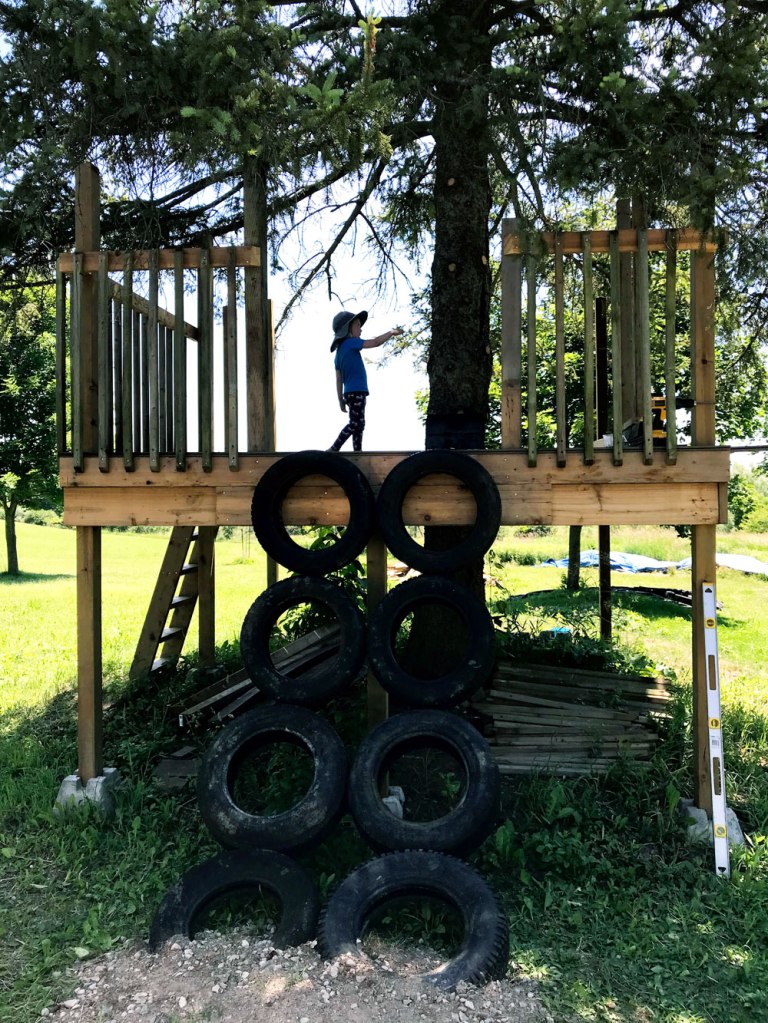
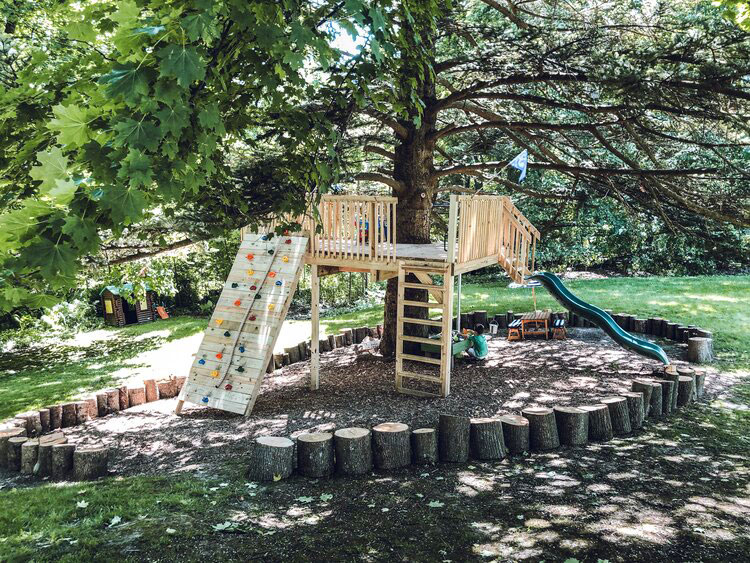
The treehouse playground was a highlight of last year. Both for the actual building and for the fun Ellie has playing on it.

Pond shore

The pond shore is my perennial home goal. Last year, we cleared a little more of the shore, though I didn’t do as much as I hoped and I didn’t build a little bridge across the creek. What is clear, we enjoyed, though. I had bonfires almost every week with my friends over the summer, and Ellie and I make regular visits to the little waterfall.

Vegetable garden

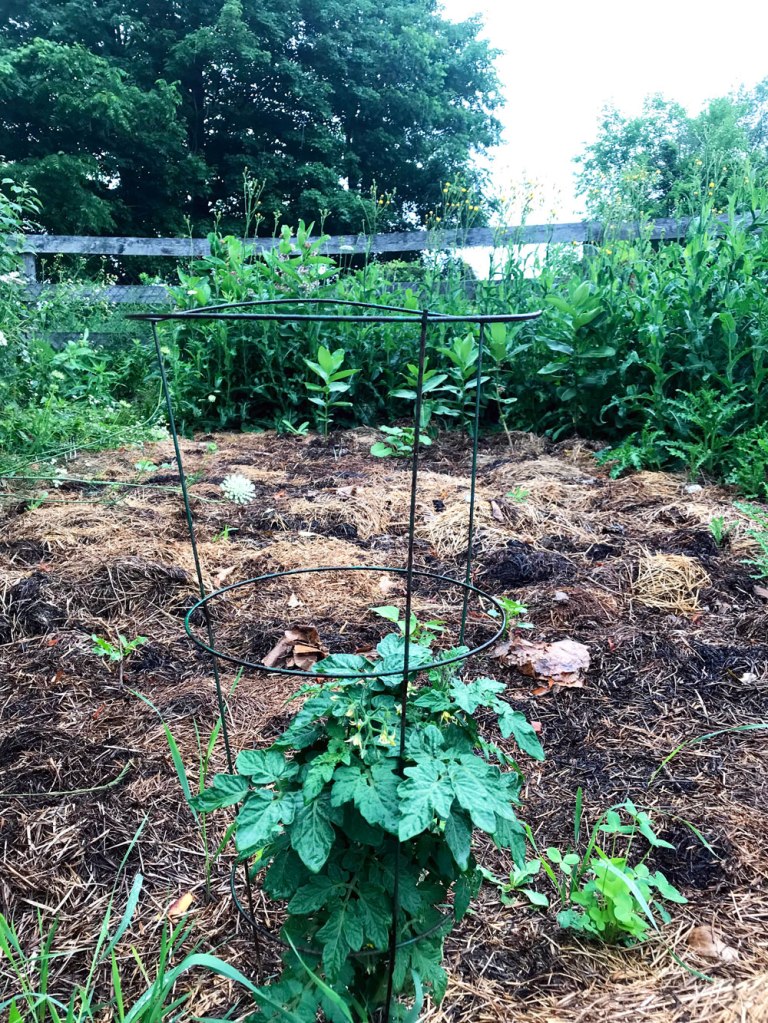
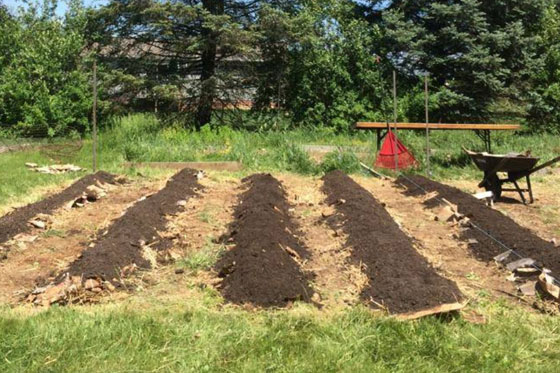
I would classify the garden as a fail last year. I tried mulch, but didn’t build proper raised rows. And I didn’t spend enough time in the garden to maintain it. We did grow a few things, and I feel like I keep learning every year.

The last big junk pile

The last big junk pile is pretty much gone and our new compost area is built. I have a bit more to tidy this spring, but the view out the dining room window is vastly improved.

Bedroom refresh

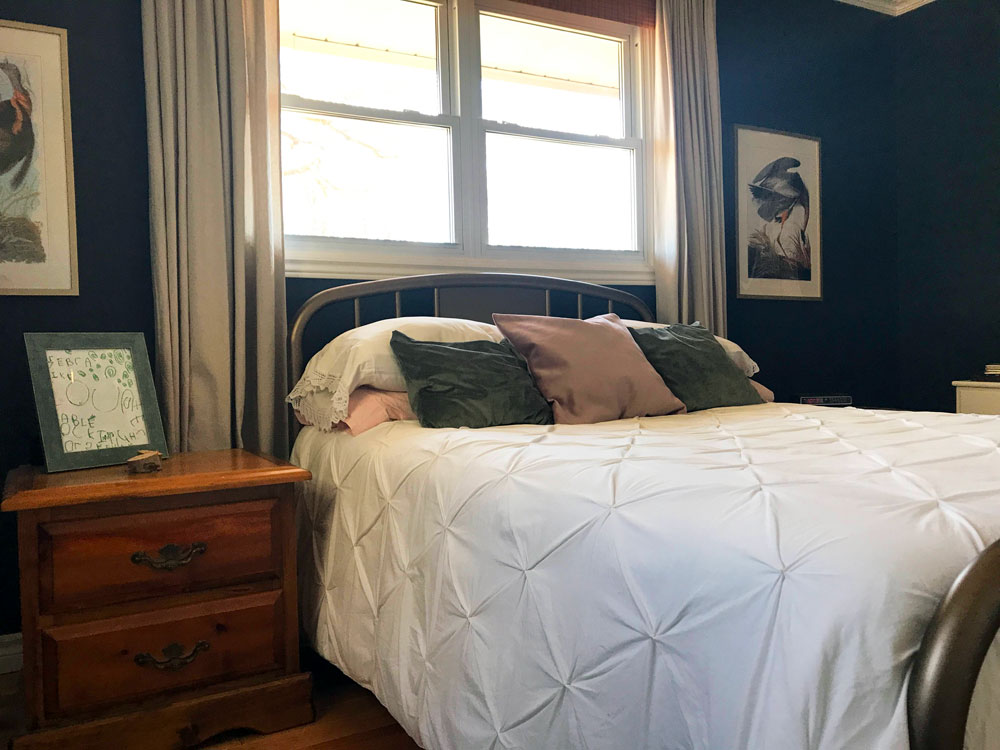
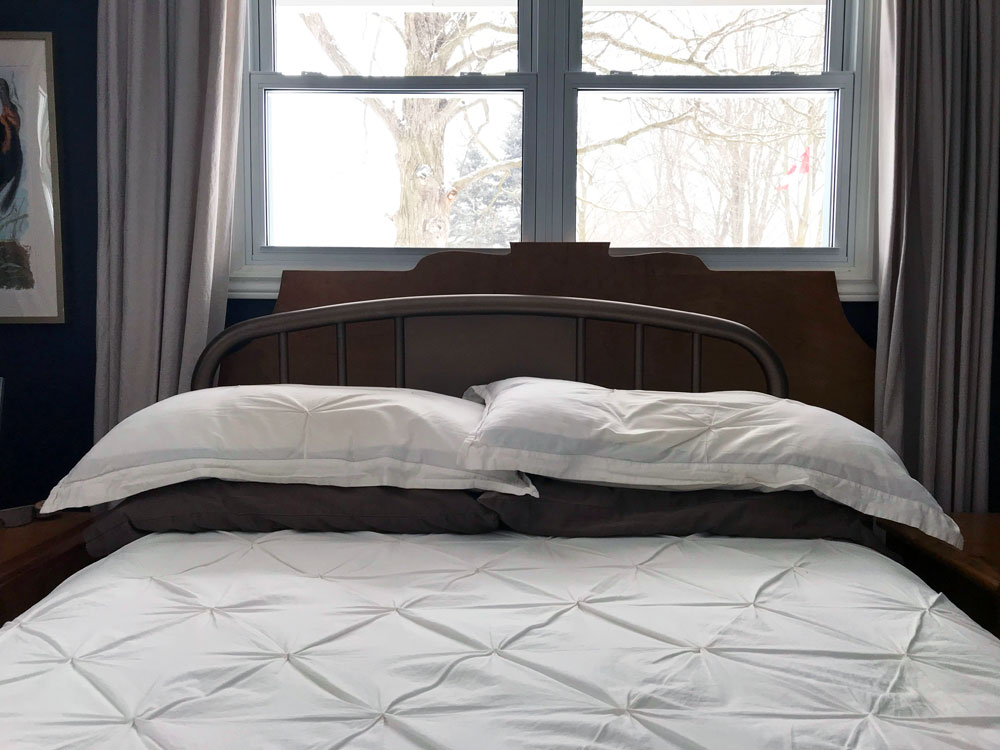
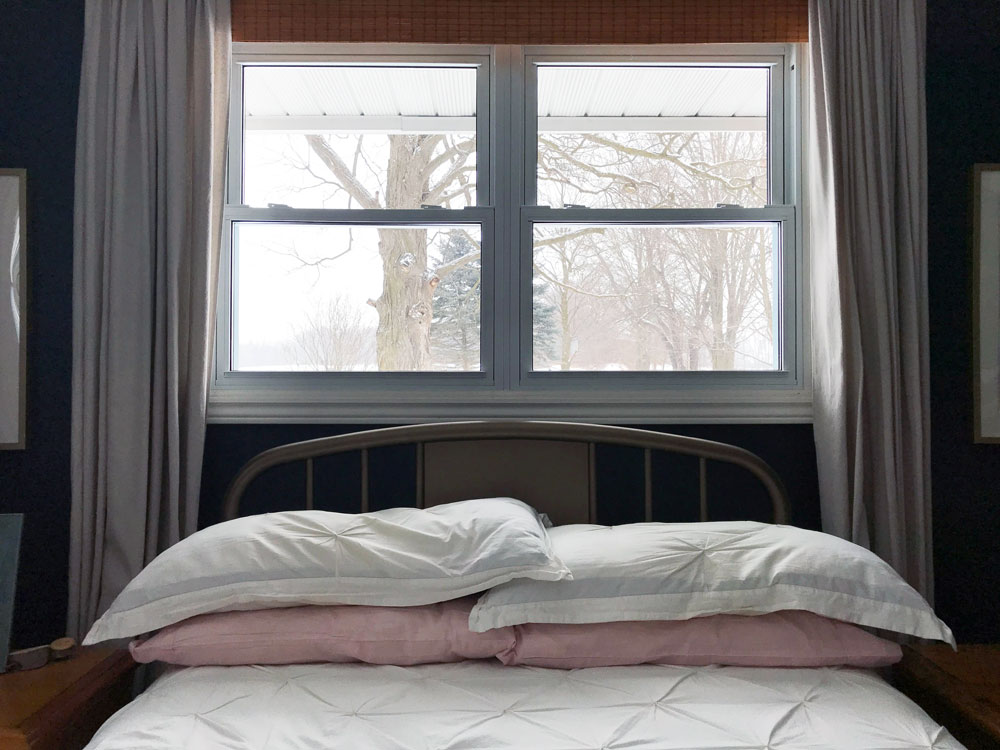
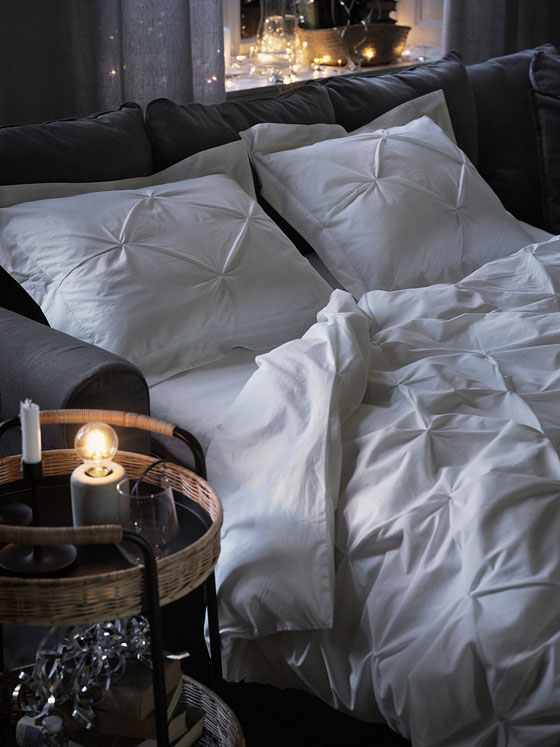
I thought my new duvet cover might inspire other changes in our bedroom. That didn’t happen. (My Mom did gift me with new pillows for Christmas.) The space is working well enough. Though I still think a closet reorganization would be lovely.

History

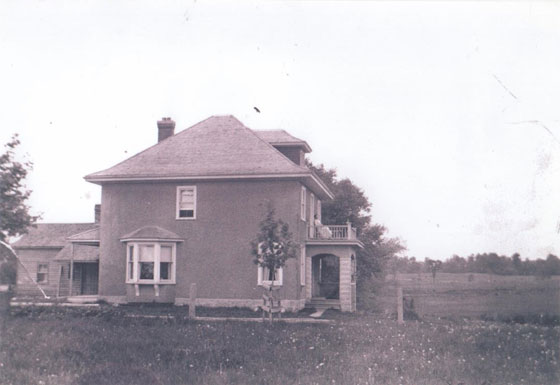
I was able to keep in touch with the woman who’s family first owned this farm over the last year. In fact, I have a story of a special tree planting to share soon.

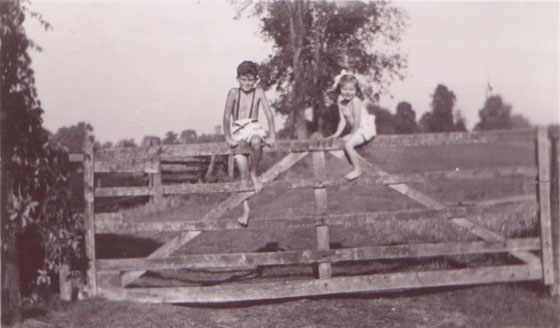
Black and white photo of two children sitting on top of a wood gate

The garage, mudroom and treehouse are the big wins of last year. The garden is the big fail. But overall I am really happy with what we accomplished. I work best when I have specific projects to focus on, and I’m looking forward to setting new goals for 2022.

What was your biggest accomplishment at your house last year? Did you have any fails? Did you set any home goals?

Halfway through Home Goals 2021

I really like setting goals for the farm every year. With a large property, it’s easy to get overwhelmed by everything that needs to be done. Or pulled in a million different directions working on a million different projects.

This year has been feeling really good. I love being productive and making progress, and that’s what’s been happening so far.

At the start of the year, I identified seven projects or goals that I wanted to work on. (The original post has six because I wasn’t ready to talk about the garage yet, but it was definitely on my mind when I wrote the list.)

The goals were garage addition, playground expansion, pond shore clean-up, vegetable garden, the last big junk pile, bedroom refresh, and farm history.

Some of these goals are interconnected. The garage addition led to the playground expansion, as we used the wood from the old pool deck for the treehouse. The junk pile started to get organized (and downsized) because I needed a spot to stash the brick that were removed from the pool exterior. Part of organizing the junk pile involved tossing two old bales of hay into the garden for mulch.

With any home project, dominoes can happen really easily and it’s nice to be able to line them up intentionally. Here are some more details on how we’ve been doing with each goal.

Garage addition

The garage and mudroom are turning out so, so well. After thinking about this renovation for so long, I’m really pleased with the result. We are also so close to being done. (I owe you a look at the panelled and tiled mudroom.) We are waiting on doors. Person doors. Garage doors. We need doors. Once doors go in, trim can be finished and we can move in.

Playground expansion

I am almost as excited for Ellie’s treehouse/playground as I am for the garage. It’s big. It’s fun. And it’s something that I’ve done mostly by myself. It’s been a long time since I’ve built like this. I’d like things to be going a little faster, but bit by bit I keep making progress.

Pond shore

The barometer for the pond shore is can I mow it? Well, I’ve been mowing a little bit more shore this year. I clipped back brush and tiny trees. Matt’s Dad cut some more trees that had sprouted out of an old stump. Ellie and I carried everything to the firepit and had an epic blaze. We’re not ready to build our new bridge yet, but we have the beginning of a little path between two pines as I’ve always envisioned and we can access the waterfall more easily.

Vegetable garden

Ellie and I finally unrolled two old bales of hay and spread them over one quadrant of the garden. The hay (along with the cardboard I put underneath it) is doing a good job of keeping the weeds down for us. (Though everywhere else they’re as prolific as ever.) I haven’t managed to build any raised rows, but we have planted some tomatoes and a few other seeds. We were late and the seeds were old, but we have a few things growing in the garden for the first time in several years.

The last big junk pile

We’ve done dump runs, dragged brush to the burn pile, dug things out of the ground, picked glass out of the dirt and finally started mowing a little bit of the area beside the garden. In addition to being the dumping ground for who knows what, this spot is also my compost pile for weeds and other cuttings from the gardens. I’ve dealt with most of the who knows what. What’s left is piles of brush and leaves and weeds. Then the plan is to build a new compost bin that will contain the mess.

Bedroom refresh

The inspiration to refresh our bedroom was the new TRUBBTÅG duvet cover from Ikea. Which appeared to be out of stock for the first half of this year. It’s finally here, and now I’m wondering what else I want to do for this room?

History

Connecting with the woman whose family first owned this farm was a very meaningful experience last year for me. Due to lockdowns, we’ve not seen each other very much, and she’s not been out to the farm yet this year. We have kept in touch and I am looking forward to learning more about this special place.

Black and white photo of two children sitting on top of a wood gate

Progress is the theme for our Home Goals so far. Nothing is done yet. I’m not sure we’ll be completely finished any of them by the end of the year. But we’re making progress, and that makes me very happy.

It felt good to set goals at the beginning of the year. It felt like I was coming back into this part of myself that has been pushed to the background since I got pregnant, since Ellie was born, since Matt was sick.

It’s also felt good to work on these goals this year. Every day is a juggle of Ellie, work, farm, life. But the juggle has felt like a balance–of sorts–so far. I feel like I’ve made more progress this year than we have in a long time, and I’m excited to see what we accomplish over the rest of the year.

What have you been up to this year? How to you prioritize projects at your house? Are you feeling in balance? Productive? Motivated?

Home Goals 2021

It’s been a while since I’ve posted home goals. Looking back, 2017 is the last time I looked a year ahead and thought about what I wanted to change around the house and property. I was surprised it’s been that long.

But I am ready to think about home goals again.

It’s nice to feel this part of me coming back.

Here are some of the projects I’d like to tackle this year.

Playground expansion

The playground that we got for Ellie last year has been awesome. As soon as it arrived, I started thinking about how I could expand it. When I saw this set-up from heart of this home, everything came together in my mind (and in a hastily scribbled sketch).

Pond shore

Having déjà vu yet? Yes, the pond shore makes the list every year. And yes, with a lot of help we cleared the shore last year—or at least part of it. I’d love to clear a little bit more and build a little bridge so that we can cross the creek more easily.

Vegetable garden

Another item that always makes the list. Matt’s Dad and I cleared a lot of the weeds out of the garden last fall, and that gives me hope that I can maybe possibly hopefully manage one quadrant this year. I’d love to try raised rows, deep mulch and no dig. The promises of a low maintenance garden make me feel like the set-up would be worth it.

The last big junk pile

Between the garden and the tree line of the front field is one of our last remaining junky areas. It’s full of brush, skids, bricks, lumber, barrels, a basketball net and who knows what else. It’s in direct view out the dining room window, and I’m tired of looking at it every day. I’d like to finally tidy it up and mow the grass.

Bedroom refresh

I guess I should put at least one house project on my home goals list, eh? I saw before Christmas that Ikea has a new duvet cover in a pattern I’ve coveted for years. As soon as the king size comes back in stock, I’m planning to order it. I’m thinking a bedding refresh might inspire a couple of other changes. Paint? A different dresser? A better closet organizer? I have some ideas.

Source: Ikea

History

Connecting with the woman who’s family first owned this farm was a very meaningful experience of the last year for me. I am looking forward to continuing to stay in touch with her and learning more about this special place.

Black and white picture of a two story farmhouse surrounded by open fields

Even without goals the last few years, we’ve accomplished things around the house: demolishing the sunroom, redoing the dining room, setting up Ellie’s nursery (I have an update to share) and a new play area for her, clearing the pond shore, finally putting the finishing touches on the basement.

I’m proud of what we’ve done. But I’m also happy to be back in a more plannful frame of mind. It helps me focus–there’s that word of the year.

Stick with me. Let’s see what happens.

What are you aiming to do at your house this year? Are you focused inside or out? What would your dream playground have? Any tips for low maintenance gardening? Is there such a thing?

Three simple ways to refresh your home

The One Room Challenge continues this month, and I’ve been inspired to revisit some of my previous ORC rooms.

I still love all of the spaces that I did through the ORC. But with any space, time can take a toll. Maybe your needs change, things get worn, or you can add something to make the room new again.

Here are my tips on easy ways to freshen up a room.

Clean

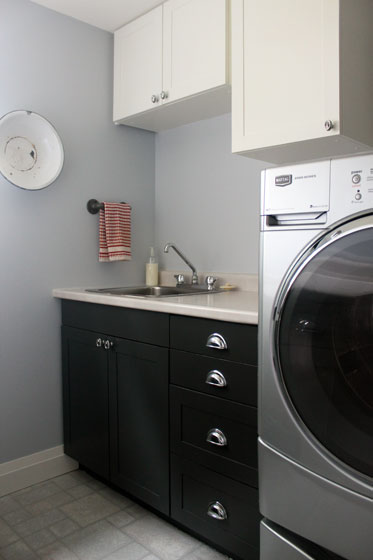
The laundry room was my very first One Room Challenge. The black and white colour scheme and shaker cabinets still feel pretty current. The pipe drying rack and towel bar work really well. I love the style and the function of the whole space.

Black and white shaker cabinets with chrome hardware in the laundry room

But there’s some lint gathering on the floor, cobwebs in the corners and detergent drops on the counter. A good cleaning will make the room feel fresh and make me like it even more.

I’ll also be spending some time in the guest room (aka my sewing room 2.0). My original office/craft room was the ORC project, not the guest room where my sewing machine has lived since Ellie arrived. But I need an excuse to motivate me to sort the paperwork that’s been piled on top of the filing cabinet.

Repair

The master bedroom was my second One Room Challenge. The DIY headboard, wallpapered closet doors and repainted dresser have all held up really well. But a few fixes are needed.

Audubon print of a heron in my bedroom

The guide fell off of my nightstand drawer, so now every time I pull out the drawer, it drops and will crash to the floor if I don’t catch it. Hammering the guide back onto the drawer should be a very simple repair.

The second repair comes from not doing things properly the first time. When I hung the Audubon prints on either side of our beds, I skipped adding a picture wire across the back of the frame, and instead simply hung the frame itself from nails tapped into the wall. The picture frames have bent from the weight–it’s not a good look. I’ll be adding wires and rehanging the pictures, and hopefully the frames will return to their rectangular shape.

Also on the list? Rebalancing the washing machine and a paint touch-up in the laundry room,

Tweak

Sometimes after living with a space–even one you love–for awhile you realize there’s something missing. Our dining room is our most recent ORC, completed just this spring. I hoped to build doors for the upper section of our china cabinet during the makeover, but ran out of time.

White china cabinet in the dining room

The ORC goes so fast that there are often parts of a makeover that don’t get done. Even though I’m not participating in the ORC, watching everyone’s projects motivates me to return to the dining room and maybe finally build the doors.

I also have some other ideas for simple updates. In our bedroom, I’m going to freshen up our bedding with some new pillow cases. And in the laundry room, I’d like to sew a faux roman shade for the window.

One of the best parts of the One Room Challenge and other room makeovers is that you end up with a new beautiful space. These simple updates can ensure that you continue to enjoy your space for years to come.

Are you revisiting any room makeovers that you’ve done in the past? What tweaks do you want to make in your home?


Looking back at Home Goals 2015

There are all kinds of retrospectives and reflections happening in the blogosphere right now. My look back will not be nearly as emotional or deep as some of the ones going around.

I feel like 2015 was a pretty good year for this blog and our projects at the farm. Last January, I said I wanted to be flexible and not knock myself out renovating all the time. I definitely feel like I managed that. I also had a few more personal posts mixed in over the course of the year, and I’ve made some progress on that front too.

For now, it’s time for the annual report on how we did on Home Goals 2015.

1. Master bedroom Check!

Thanks to the One Room Challenge, we have a beautiful master bedroom. I love having another room completely done.

Dropcloth curtains in a navy master bedroom

2. Basement art No check.

The smallest task on the list–and the one I was most enthused about at the start of last year–was the one where I made no progress. This one will carry over to 2016.

3. Furniture Partial check.

Looking back over the year, I was a bit surprised at how much furniture we bought, made or made-over. We did better than I thought. However, there’s always more on the list, hence the partial check.

  • Found 2 bookcases that I’m going to make into a china cabinet for the dining room. They still need their makeover, but they’re working okay for now.
  • Found a set of 8 dining room chairs that match our table nearly perfectly. They’ll need to be reupholstered and refinished someday, but once again, they’ll do for now.
  • Found a ladder/step-stool/chair that reminded me of my grandmother–and a lot of you of yours.
  • Made a headboard and painted a dresser as part of the master bedroom makeover.

Dining chairs and table

4. Vegetable garden Big fat check.

My one and only outdoor goal for the year was a huge success. It started when I decided to build the garden in Matt’s “goat ring.” To get rid of the weeds, our nephew and I lit it on fire, I spread out the world’s biggest tarp, and then Matt rototilled the whole thing. We planted and watered and then we harvested… and harvested… and harvested. Along the way, I built a gate, and Matt and I put up chainlink all the way around. And then at the end of the season, I spread manure over the whole thing.

Tomatoes ripening in the garden

There’s still more work to be done. It’s a garden, which I’ve learned is synonymous with work. However, it’s established. It produced food. We’re still eating our harvest. And I’m so enthused about this year’s plans.

But that’s the stuff of home goals 2016. Those will be coming up next week.

How did you do on your goals in 2015? What was your big accomplishment?

Simple belt storage solution

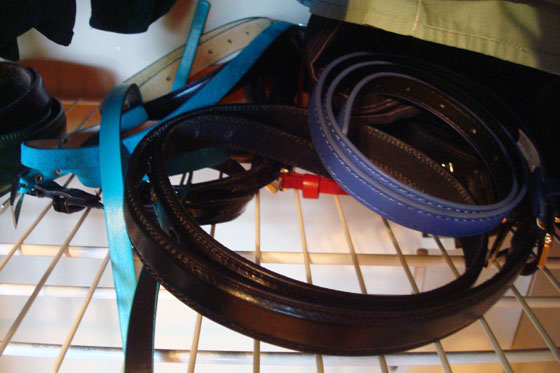
When we switched bedrooms, we switched closets too. I knew one thing I wanted to improve in the new closet was my belt storage. They’ve been tangled and tossed onto a shelf since we moved in.

belts2

When I still lived with my parents, I came up with a solution that worked very well for belts: cup hooks.

belts23

In the past, I’ve screwed the cup hooks directly into the drywall or plaster of the wall. However, this time I decided to go for something more portable so that I can move it if I ever relocate closets again. Screwing the cup hooks into a length of wood worked. Then I simply screwed the wood into the wall of the closet.

Simple belt storage solution

Super simple DIY. Super simple storage. My happiness is not commensurate with the simplicity of this project.

How do you organize your belts? Who else is a fan of cup hooks? Does organization make you happy?

How to apply preglued veneer on curved edges

More than two years ago, I wrote a tutorial on how to apply preglued veneer edging. Veneer edging covers up the raw edges of plywood and makes your piece of furniture or whatever it is you’ve made look like one solid piece of wood.

When I made the headboard for the master bedroom, I had a scenario that I’ve never dealt with before: applying the veneer to a curved edge. So today I’m posting an addition to my previous tutorial.

The same tools, techniques and principles still apply (mostly):

  1. Cut a piece of veneer slightly longer than the section of plywood that you’re covering.
  2. Line it up along one edge and apply heat and steady pressure to melt the glue.
  3. Firmly press the veneer down with a wood block (it will be too hot to touch with your hands) until the glue sets.
  4. Trim the overhang with a file.

For a convex edge (think the outside of a U), I didn’t have to do anything special. For a concave edge (think the inside of the U), I had to make a few more adjustments. On the more gentle curve, I found the very tip of my iron worked to soften the glue. I just had to work slowly, about an inch at a time.

Applying preglued veneer edging to a curve

Pressing the veneer into place as the glue dries is really, really important. On a curve, it’s particularly easy for the veneer to pull away from the plywood. A narrow pressing block or your fingers (protected with a glove or a rag)–along with patience–are essential.

For the tighter curves, I discovered why I still have a curling iron in my bathroom cupboard. The barrel was just the right size to fit into the curve at the top of the headboard. Once the adhesive was soft, I firmly pressed the veneer onto the plywood and held it in place until the glue set.

Using a curling iron to apply veneer edging

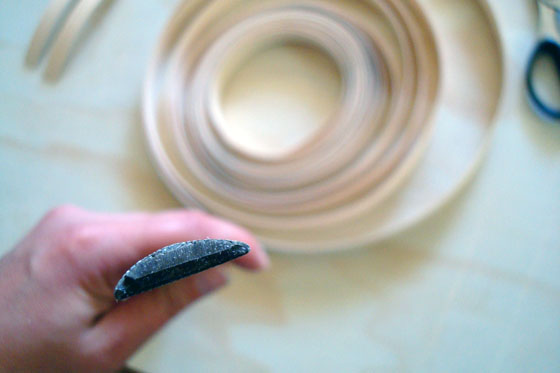
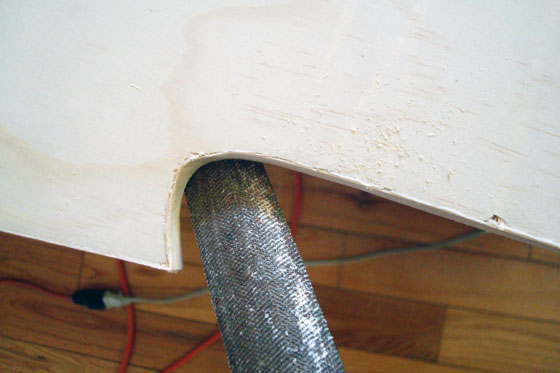
To trim the veneer, I always rely on a file. For the curved edges, I used the curved side of the file.

Curved profile on a file

Triming veneer on a curve with a file

A couple of swipes over the edge with fine sandpaper further smoothed veneer, and then it was ready for staining along with the rest of the headboard.

(And yes, the veneer takes stain and urethane and paint just like real wood).

Here’s the final product–in its impossible to photograph location in front of the window.

Applying preglued veneer edging to a curve

Anyone else have any tips for working with veneer edging? Who else has an old curling iron kicking around? Have you ever used beauty tools for DIY?


Making DIY dropcloth curtains – 8 lessons learned

In the last post, you saw the easy layered window treatments in the master bedroom. I promised more details on the dropcloth curtains I made.

Blackout blind, bamboo blind and drop cloth curtain window treatments

There are lots of tutorials out there on how to make dropcloth curtains. So I’m not going to write one here. Plus, I totally made these up as I went along, so a tutorial doesn’t really exist. I did want to share some of the things I learned from making my DIY curtains, though.
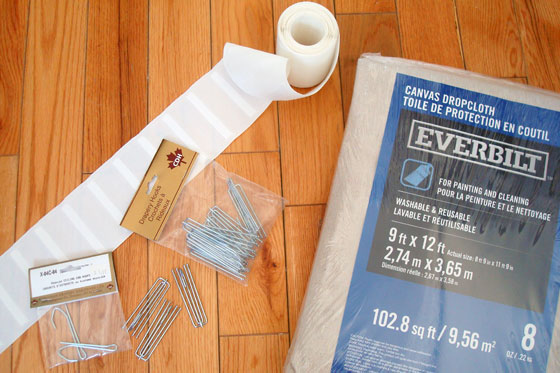
How to make dropcloth curtains

1. Dropcloths come with seams. I assumed that my 9 by 12 foot dropcloth would be one single piece of fabric. It wasn’t. All of my dropcloths had a seam down the middle. One had a centre seam plus an additional patch along one end.

For my two widest curtain panels, I just left the seam alone. It’s a bit thicker than I would like and a wee bit puckered, but I decided I could live with it if it was hidden in the folds of the curtains.

For the other curtains, my seam ripper and I spent some quality time pulling out the stitching.

Ripping out the seam on a dropcloth

2. Dropcloths come with holes. The canvas fabric of the dropcloths is not perfect. The rustic quality of the weave and the few strands of blue and red that were here and there are some of the elements I like best about using this fabric.

However, in a couple of spots my dropcloths went beyond rustic and veered into unraveled. So if you want to make anything out of dropcloths, check them over carefully. You don’t want to end up with a hole in the middle of your project.

3. Wash and iron before you start. Pre-washing your fabric is a basic tenant of sewing. I didn’t want my curtains shrinking (not that they’re going to be washed often) after I put the effort into making them, so I washed my fabric before I started sewing.

Dropcloth fabric is heavy duty. As a result, it wrinkles easily and the creases are really difficult to remove. I found that ironing the dropcloths when they were still damp from the washer helped to remove the worst of the wrinkles.

4. Use curtain tape. (Britt, this tip’s for you). From what I hear, making pinch pleat curtains is pretty tedious. Lots of measuring and calculating. A much easier solution is to use curtain tape. This is a kind of mesh fabric strip with channels on the back. You pair it with some special multi-pronged hooks, and it basically forms the pleats for you. I bought mine at a local fabric store.

The pleats are softer than they would be if you sewed them without the tape, but that was okay for my rustic fabric and my farm setting.

I sewed the tape along the edge of one of my dropcloths, put in the hooks and voilà, pinch pleat curtains.

Using curtain tape to make pinch pleat curtains

Using curtain tape to make pinch pleat curtains

Using curtain tape to make pinch pleat curtains

Pinch pleat dropcloth curtains

You can space your pleats as far apart or as close together as you want. I left one empty “pocket” for a space of about 6 inches between each pleat.
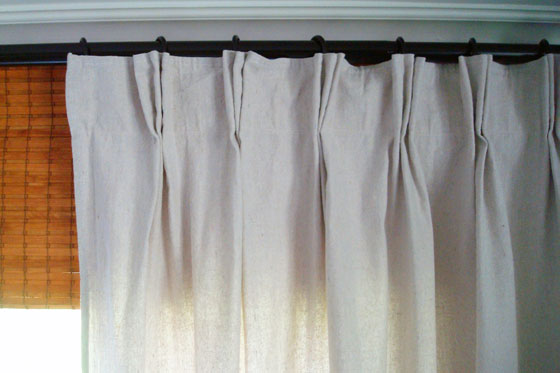
Pinch pleat dropcloth curtains

5. Use curtain tape to measure your curtains. Before I sewed the curtain tape onto my fabric, I formed all of my pleats until I had a strip that was as wide as I wanted my curtains to be. Then I cut the curtain tape at that length, removed the pleats and used the tape to measure the dropcloth fabric.

6. There are different types of hooks. The magic pleat-making hooks are very handy. They come in two different forms (there may be more, but I tried two). Whatever form you choose, the hooks hook onto the rings that go on your curtain rod. Option 1 has the hooks at the end, so the curtains hang a bit below the rings. Option 2 has the hooks in the middle, so the top of the curtain hangs up against the rings. This is the type of hook I ended up using.

There are also special non-pleating hooks (just plain single hooks) to hold up the ends of the curtains where there are no pleats.

7. Take your time hemming. I wanted my curtains to just brush the floor. For my first set, I hung the curtains, found the spot where they met the floor, and then I used a ruler to measure the rest of my hem from that point. The result was curtains that were the right length at one or two spots, but for the most part they scuffed, not brushed the floor.
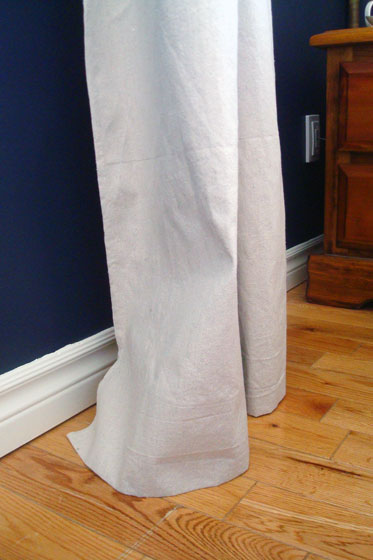
Curtains hitting the floor

For my second set of panels and for the bed skirt that I also made out of dropcloths, I skipped the measuring tape. Instead, I used pins to mark the fabric at about 1/4 to 1/2 inch off the floor. I pinned my way across the bottom of the curtains, marking about every six inches. Then I pressed the hem using the pins as a guide. It wasn’t scientific, but it resulted in curtains that just brushed the floor.

8. You can totally do this too. Dropcloth curtains are pretty easy to make. Honestly, I found them a bit tedious. The only sewing is in straight lines. Loooooong straight lines. However, boring they may be, sewing straight lines is not difficult.

Dropcloth curtains in a navy master bedroom

Let me know if you try them yourself.

Have you ever made your own curtains? Any tips to share from your experience?

Linking up with: Happy Housie DIY Challenge Party
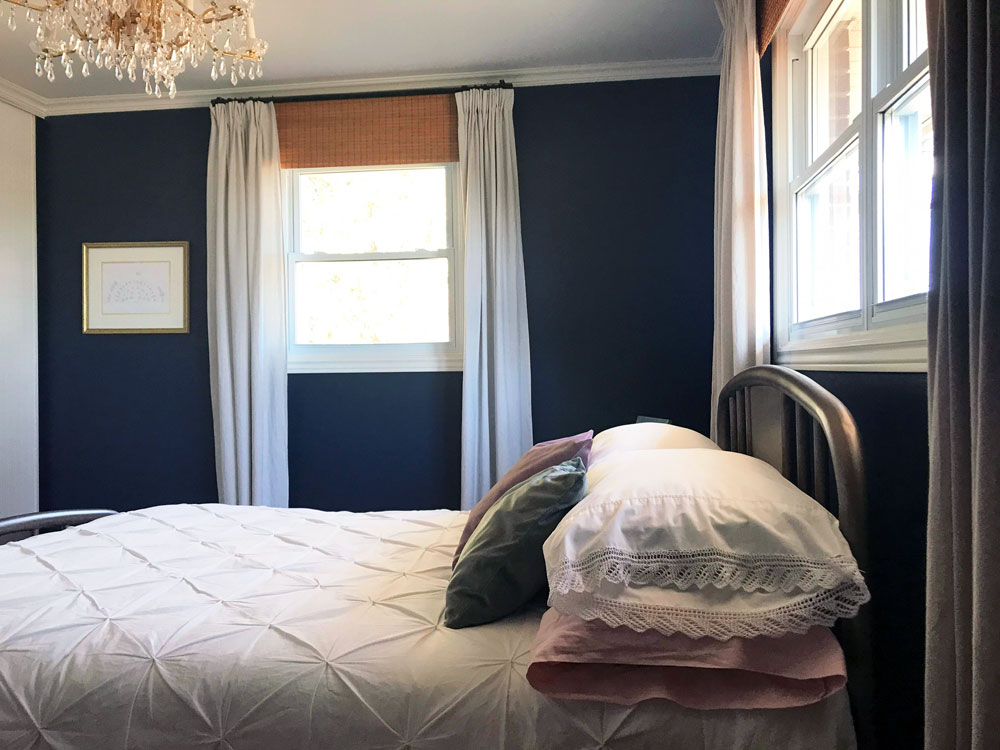
How to make simple layered window treatments

When I had the brainwave to move our bedroom across the hall, Matt didn’t understand why we couldn’t just stay in our current room. He went along with my plans, but he had one requirement: he wasn’t moving in until we had curtains.

Blackout blind, bamboo blind and drop cloth curtain window treatments

We haven’t had curtains on any windows in any room since we moved to the farm. With no neighbours, privacy is not a concern.

However, our new bedroom is on the east side of the house. There are fewer trees on that side, so more light comes in the windows. At night, the lights on the barn and the driveshed and even headlights from the cars on the far-away road shine into the room.

Plus, east equals sunrise. If we wanted to sleep past dawn on any summer morning, we needed curtains.

But I wanted more than just curtains. I stumbled over Kristine’s window treatments on the Painted Hive and thought her solution was ingenious. (So I really can’t take credit for this idea).

Kristine’s solution is a great mix of form and function.

Function starts with a basic blackout vinyl roller blind, which I mounted above the window casing.

Vinyl blackout blind hidden behind bamboo blinds and dropcloth curtains

Form comes next.

The blackout blind is hidden behind a bamboo blind. Or what looks like a bamboo blind.

In reality, it’s basically just a valance. I took one bamboo blind and chopped it to pieces. For the main window over the bed, I was able to use the full six foot wide blind, but I only wanted it to be about 16 inches long. To shorten it, I clipped the strings that hold the slats together and knotted the ends so that the blind didn’t fall apart. I’m not going to lie, tying hundreds of tiny strings into tight double knots was pretty tedious.

For the smaller side window, I needed a narrower blind. A set of strong pruning sheers and Matt’s strong hands clipped off the excess width. Then, I again cut the strings to give me a 16 inch length and tied another whole bunch of tiny knots.

Cutting a bamboo blind

To put bamboo blind in place, I installed a double curtain rod just below the crown molding. I chose the Räcka and Hugad from Ikea.

The bamboo panels just drape over the rear rod (I tied them in place) and hang over the top of the window. They hide the blackout blind and, because I hung them so high right under the crown molding, they make the windows look much taller.

Double curtain rod

The front rod supports the dropcloth curtains that I made. The curtains are completely functional, but we don’t need to use them, thanks to the blackout blind, so they’re mostly just for form. They do hide the edges of the two blinds and help to block light from sneaking around the sides of the window though.

I’ll be sharing more about some of the lessons I learned from making dropcloth curtains in my next post.

I used the trick of hanging the curtains so that they fall just outside the window casing. This really does make the window look bigger in my opinion.

Altogether, the blackout blind, bamboo valance, double curtain rod and full length dropcloth curtains make for stylish and functional layered window treatments.

Blackout blind, bamboo blind and drop cloth curtain window treatments

Plus there’s the added benefit of keeping Matt happy.

Happy husband. Stylish master bedroom. I’m all set.

What are your master bedroom must-haves? Are you a blackout blind-er or a up with the sunshine-er? What’s your window treatment style?

One Room Challenge Week 6 – Master bedroom reveal

Cross the master bedroom makeover off my Home Goals 2015 list. Thanks to the One Room Challenge, this room is D-O-N-E.

Want to catch up on how we got here? Here are all of the previous posts:

It was hard for me to stay motivated in this makeover. The ORC was the push I needed to finally finish it off. I have to admit that I’m glad the room is done. Even better, I’m glad that it’s pretty… if I do say so myself.

Navy blue and white master bedroom

I think you’ll agree it’s definitely more stylish than where we started.

Master bedroom before and after

The best descriptors for this makeover are three words: simple, DIY and personal.

Simple

We kept things simple by working with what we already had.

First up was fresh paint for everything: ceiling, walls, trim, the door and even the old garage sale dresser we bought when we moved into our first house. After going round and round on paint colour, I love the deep navy blue I chose for the walls (Hale Navy by Benjamin Moore).

White dresser with aged brass hardware

Paint took care of most of the transformation, but it only went so far.

For those that have been following along, you know the finish on the sliding closet doors was in pretty rough shape. I didn’t want to replace the doors though (remember, we were working with what we had), so I tried wallpaper for the first time. With a bit of help from my parents and two rolls of beadboard wallpaper, we added a nice country touch to the bedroom.

Navy and white master bedroom

Where we didn’t go country was the lighting. Matt’s reaction when he first saw the chandelier was one word: “Liberace.”

Hello, sparkles.

Brass and crystal chandelier

Even with this light, we were still able to work with what we had (although not that awful ceiling fan, thank goodness) thanks to one of my co-workers. She invited me over to see her new (to her) house, and as we were eating dinner in the dining room she mentioned that they were going to replace the lighting. I said, “I’ll take it!” (Yes, I’m that dinner guest).

I wasn’t sure where I was going to use such a sparkly, brassy, glassy, shiny chandelier–we do live on a farm, after all–but it’s a perfect fit for this bedroom. Navy, brass, sparkle, white, wood… yes, please.

I love this view when I’m lying in bed. Also lovely is the smooth unstippled ceiling above it.

Brass and crystal chandelier

Which brings us to the DIY stage of this makeover (not that painting and lighting aren’t DIY).

DIY

Scraping the stipple ceiling was definitely the most involved DIY in this room. The other DIYs were much easier, but, given my lack of motivation throughout this makeover, tedious.

Well, not completely tedious. I knocked out a couple of hookboards really quickly. Having lots of hooks behind the door helps to corral the piles of clothes that appear so regularly in our bedroom. And if I’m being honest, these hooks are usually smothered in pyjamas and dog-walking clothes, not a pretty scarf and handbag–although Matt’s baseball cap is genuine.

Brass and white hookboards

The headboard was a difficult DIY just because I couldn’t decide what to do. Should it be upholstered? Painted? Curved? Square? It couldn’t stick up too high because it was going in front of the window. I didn’t want to spend too much money because some day post-whole house reno I hope to have a new master bedroom where I can build the wing chair style headboard of my dreams.

I finally decided on a simple wood headboard in an interesting shape. A leftover sheet of plywood and some careful cutting with my jigsaw fulfilled my vision.

After mixing a few cans of stain together, I was able to get a finish that’s a pretty close match to the nightstands from Matt’s childhood bedroom–although I had a really hard time photographing the headboard in front of the window, so I realize it’s kind of hard to tell.

I love the accents of the warm wood against the deep blue and bright white.

Navy, wood and white master bedroom

The other DIYs in this room involved a less typical power tool–my sewing machine. Although the fabric I sewed is a DIY staple–canvas drop cloths. I love the weight and the colour of these drop cloths. I used them for both the curtains and the bedskirt, and I will definitely be using them in future projects.

The window treatments will get their own post soon. They’re super simple, yet we have everything we could ever want: blackout blinds, bamboo blinds for style and full length pinch-pleated curtains–style and function

Navy and white master bedroom

Personal

The final guiding principle of this makeover–of my overall decorating philosophy–is to make it personal.

First up is the quilt on the bed. The quilt is from Walmart, but its patchwork pattern is special to me.

My grandmother was a quilter, so I’ve been exposed to this intricate handcraft my whole life. The double wedding ring pattern has been my favourite for years. I love the symbolism of having this pattern on Matt’s and my bed.

I admit, I wasn’t sure about the patterned quilt as this makeover progressed. So many rooms I see online are all about white or neutral bedding. I think that the quilt works in the room though, and it’s a lesson for me to use what I love, not what’s trendy or stylish.

Blue and white master bedroom

The other really personal element is the art that I chose.

The two pictures on either side of the bed are beautiful Audubon posters. On my side is a Great Blue Heron, an elusive bird that visits the pond occasionally. It’s always really special when I catch a glimpse of one. On Matt’s side is his favourite bird to see at the farm, the wild turkey.

Audubon prints

The final art can’t get much more personal, a family tree. I made each of my sisters a family tree like this when they got married with their wedding date in the middle circle. Now Matt and I have one of our own. (If you want one of your own, Martha–who else?–has a free template).

Fan family tree

So simple + DIY + personal. Plus six weeks (okay, a little bit more). Plus a whole lot of motivation from all of you reading along and all of the other participants in the One Room Challenge. Equals one beautiful master bedroom. Thanks so much for following along.

Visit Calling it Home to check out all of the other amazing reveals.