I tackled the biggest projects we’ve done in a while here at the farm–maybe ever when I think of the birds who are now a fixture of the farm.
When I laid out my home goals a year ago, I was very excited by what was ahead. As I look back, I’m very excited and proud of what I accomplished.
Here’s my look back at Home Goals 2025.
Coop
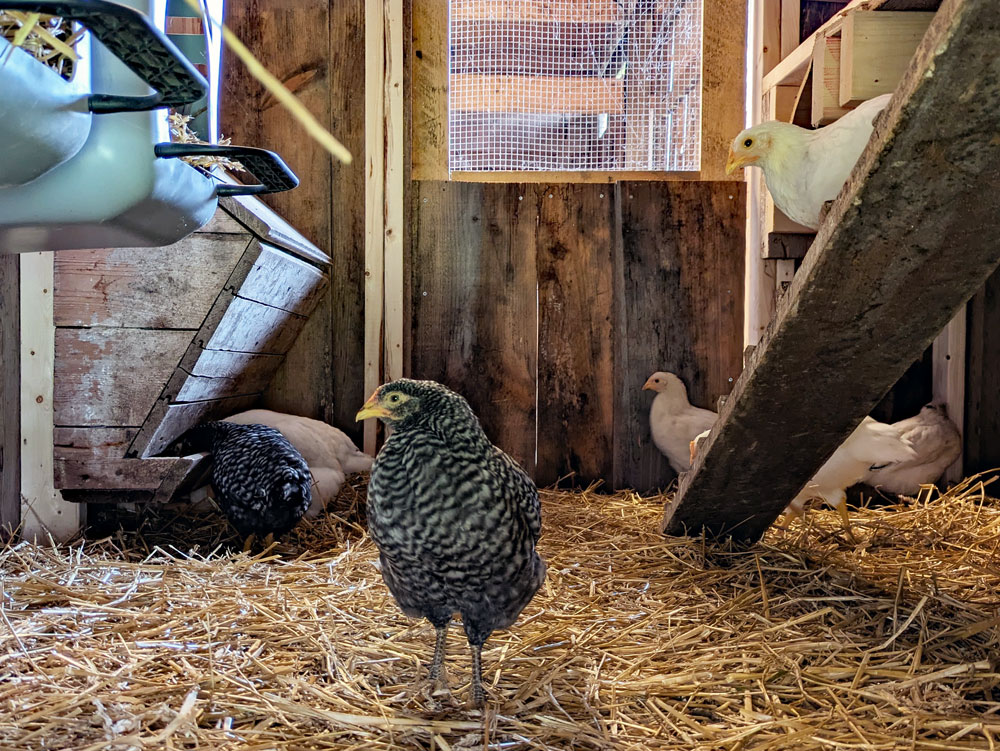
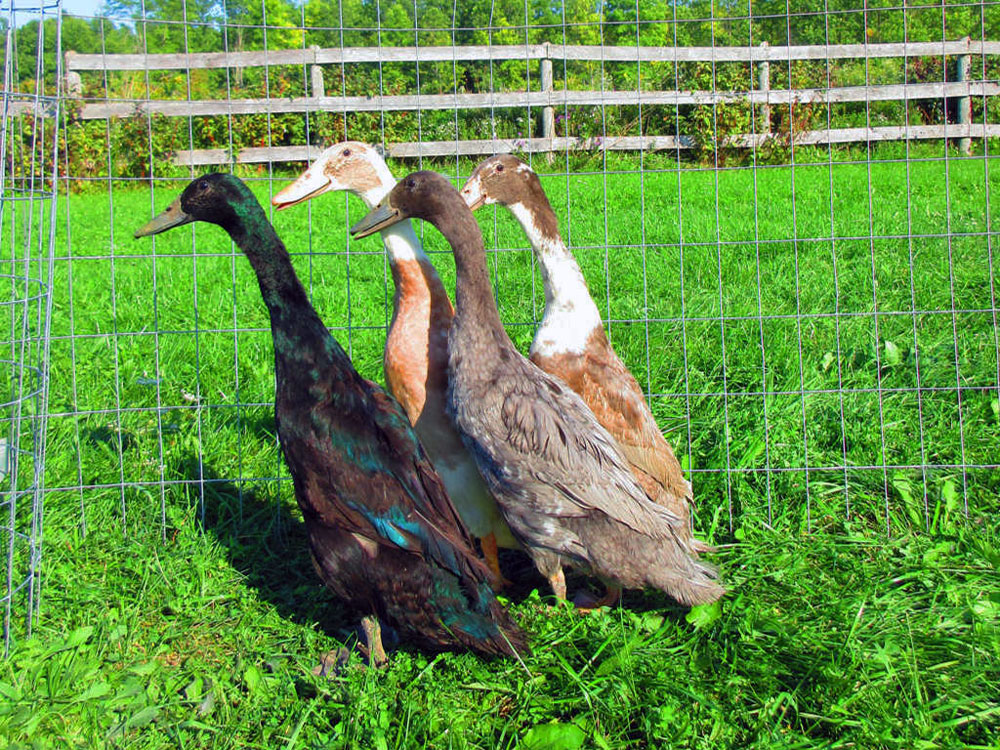
The coop was a big construction project and it turned out so well. The barn, pens, storage, and runs all work very well and have kept our birds comfortable and safe. Adding birds to our family has been a very special, fun experience–even the turkeys.
While it’s not directly for the coop, there was another big barn task I completed last year: eavestrough. I’ll be sharing more details about this project in an upcoming post.
My office
My office was the first project of the year. It is a comfortable, personal room. Having this space for working, writing, crafting, sewing, whatevering has been so nice.
It’s also helped me to be more focused with my worktime. I still bring my computer to the couch occasionally, but having the desk, a place for my laptop and a dedicated spot for work has helped me leave work on my desk a bit more.
Ellie’s playroom
Ellie’s playroom makeover did not happen. As fall arrived, I really wanted to tackle it, but the reality of everything I was already doing and the number of hours in a day meant that another project would have been too much. I’m glad I decided to postpone the makeover, and I’m eager to start this room this year.
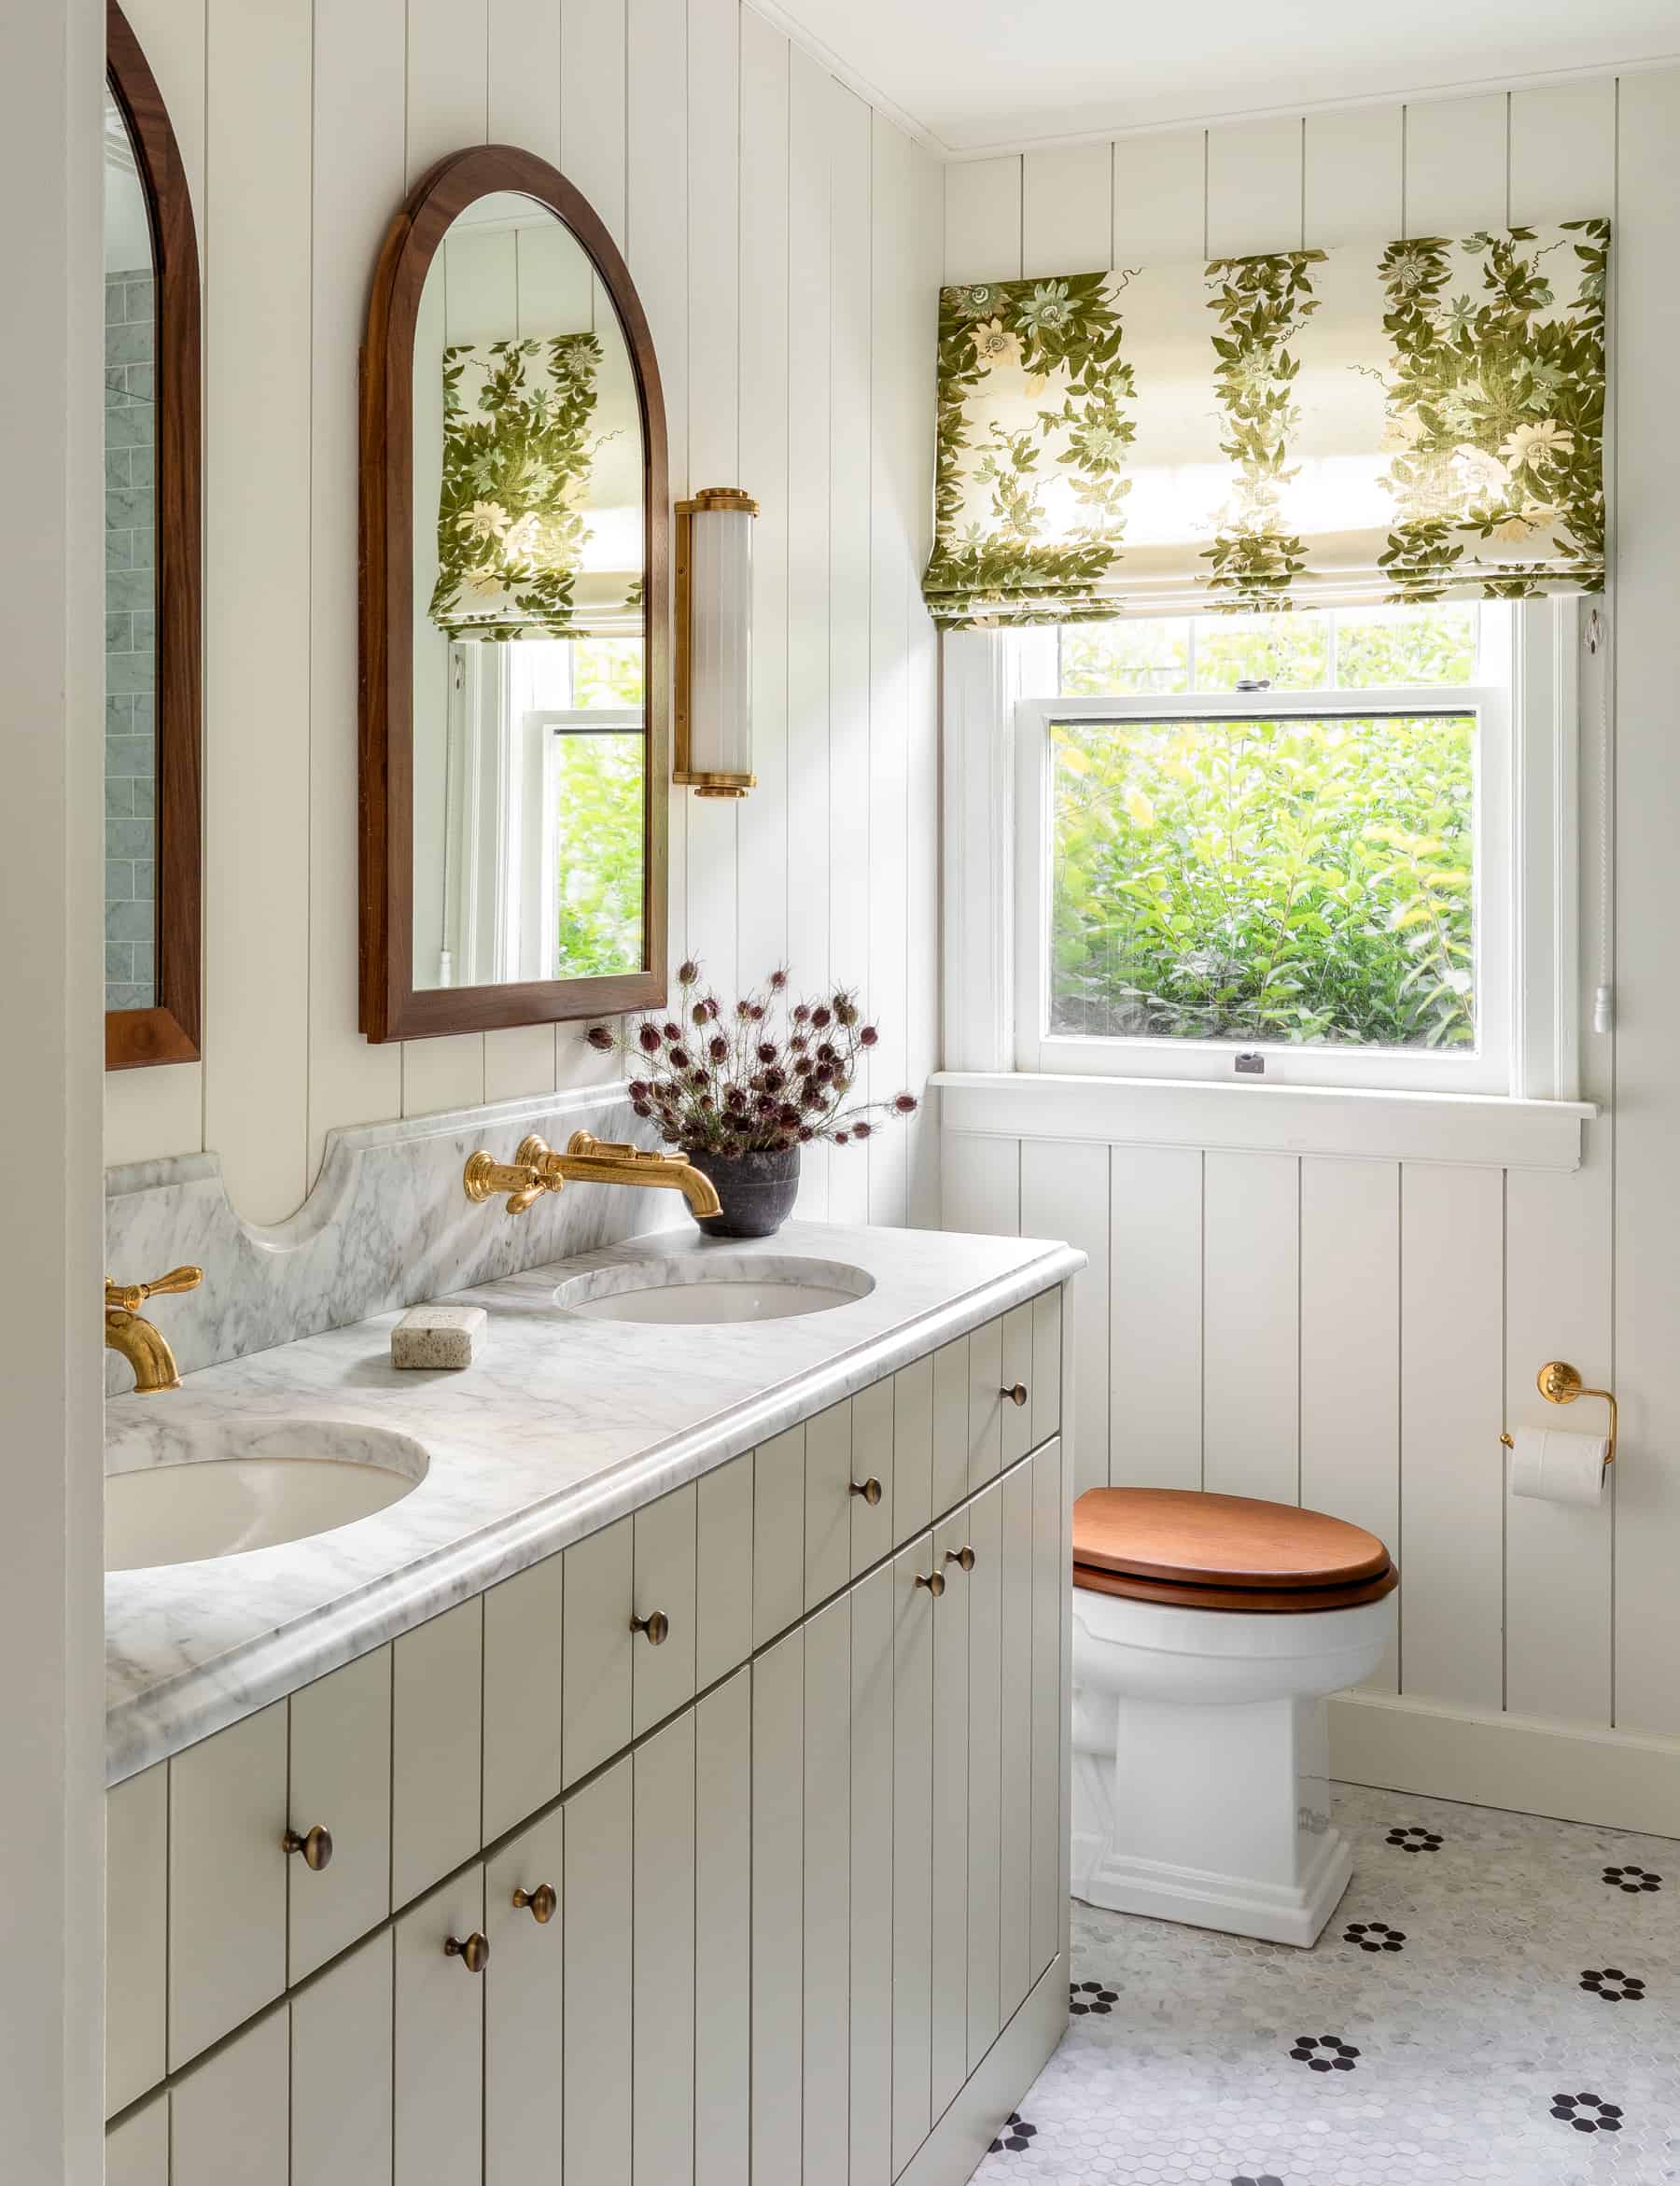
Main bathroom
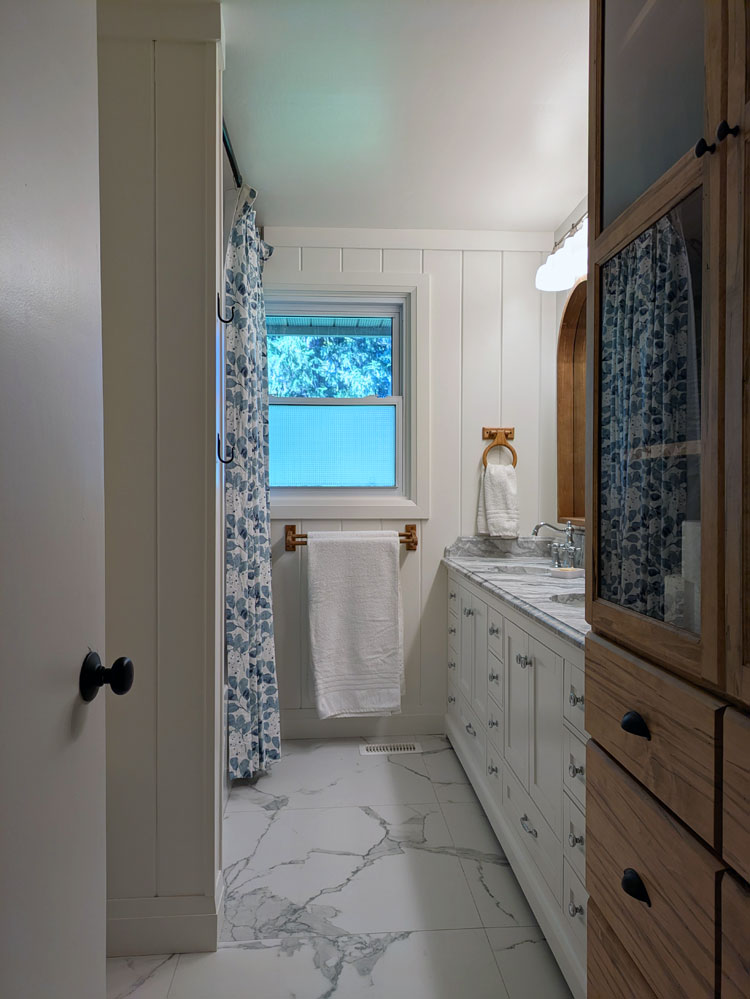
The novelty of our renovated bathroom has not worn off. Every day I am grateful for how beautiful it is, how well it works, that I did so much of the work myself and that after living here for 13 years it is finally done.
Checking off three out of four home goals feels pretty good, especially since these were big projects for us. And, I need to say it one more time, they all turned out so well. I love the changes we’ve made to the house and the farm, and I’m really proud of what we accomplished.
Did you have any big home accomplishments in 2025?
Take one old desk, two file cabinets, a bookshelf, a countertop and a dream and what do you get? The desk in my new office.
My vision for the desk was pretty clear right from the start. I knew I wanted two work stations. I knew I wanted file storage. And I knew I was cheap.
Fortunately, I also knew I was handy.
I came up with the idea of a long counter that wrapped around the corner. Underneath there would be regular desk drawers and file drawers. In the corner on top there would be open shelves for storage and display.
I knew what I wanted. Now I had to make it happen.
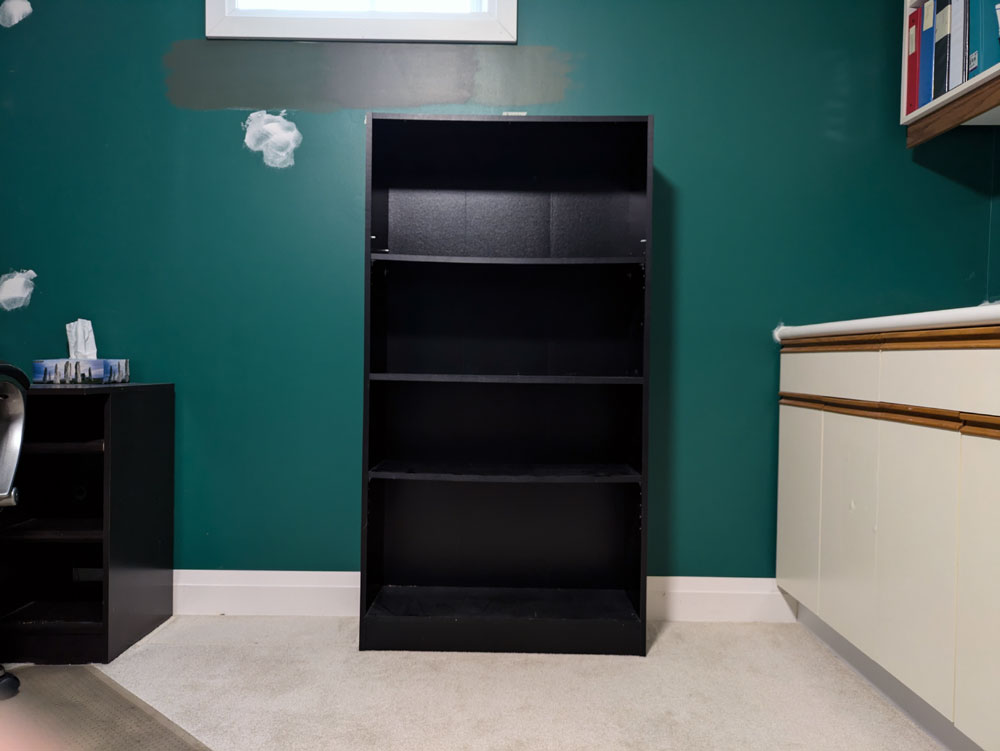
When we cleaned out Matt’s office, I left one bookshelf behind with the plan to use it for the hutch on top of the desk. One component, check.
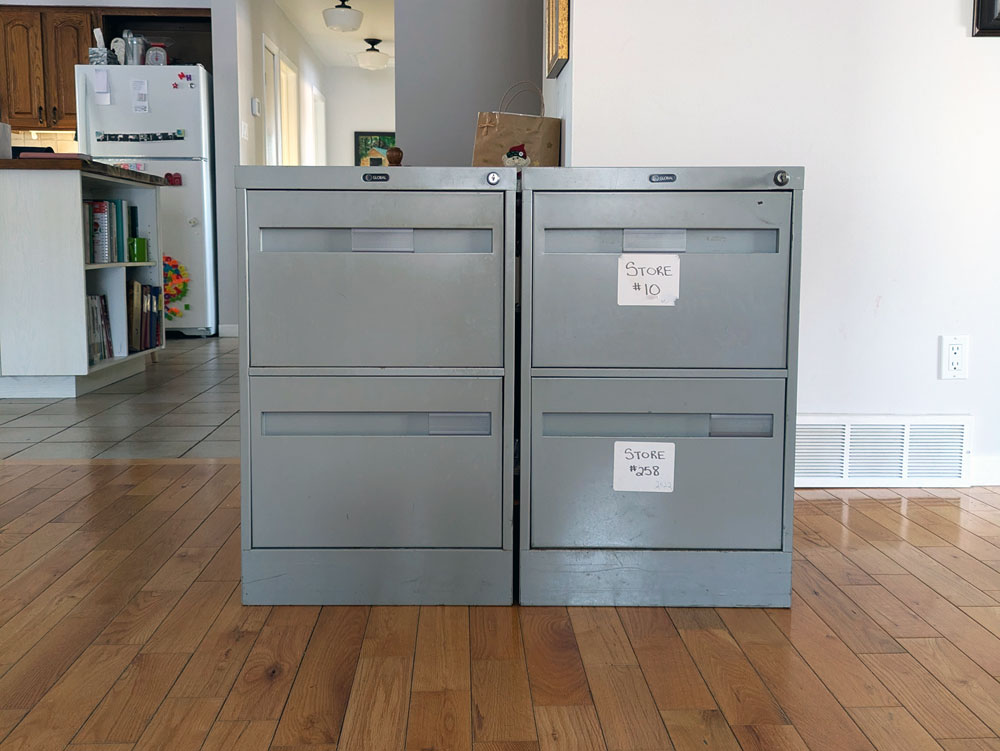
Then I moved on to the file cabinets. I wanted cabinets with a decent amount of storage that were the right height to support a counter. I found a matching pair at a used office supply surplus store.
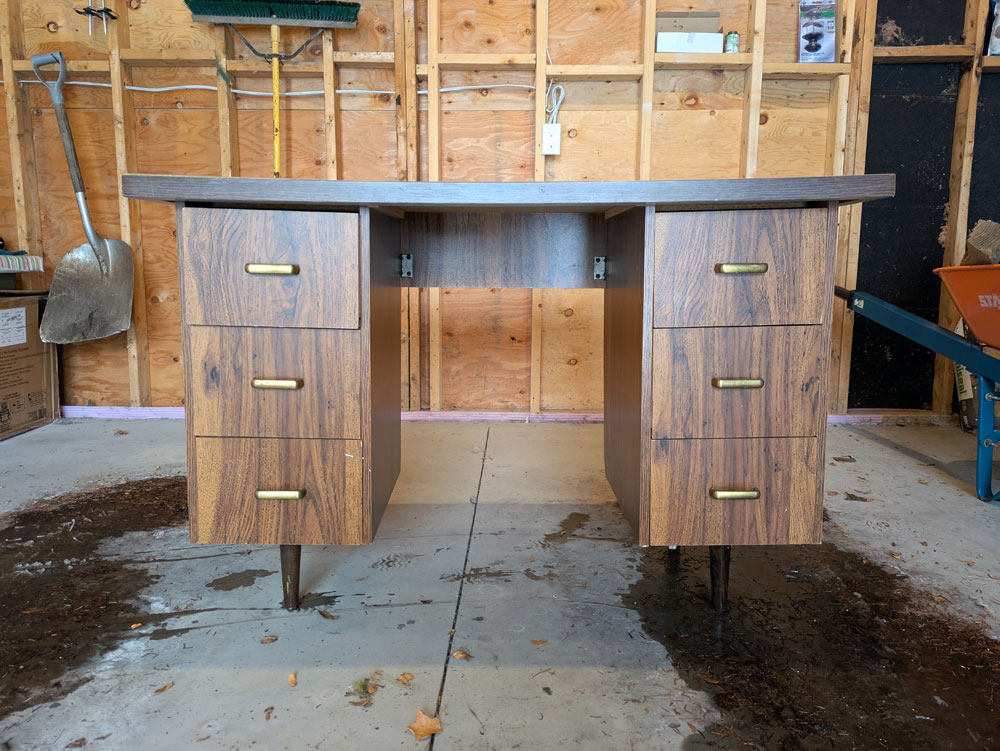
Next came the drawers. I considered building them and really didn’t like that idea. A search on kijiji netted me an old desk with two towers of simple drawers.
When we picked up the desk, the seller asked Ellie, “Is this going to be your desk?”
She said, “No it’s my Mom’s.”
The seller was a bit horrified. (The desk was pretty rough.) He said, “I have a nicer one in the house.”
I said, “No. This is exactly what I’m looking for.” And in my head, “You’ll never recognize it when it’s done.”
Elements procured, it was time to put them together. Or take them apart and then put them together.
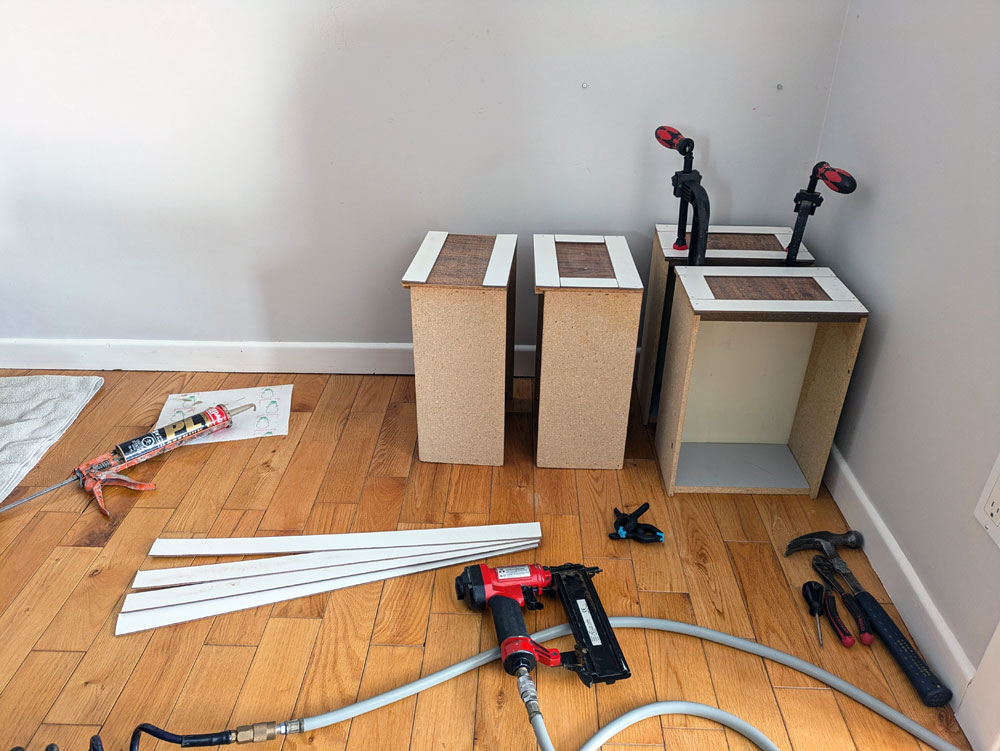
I removed the legs from the desk then cut the top so that I had just the two towers of drawers. Then I revisited the fake shaker technique I used in our laundry room and added strips around the edges of the drawers to give them the recessed panel profile. This is always the stage where I’m questioning my life choices and wondering how this is ever going to look good.
Wood filler, sanding and paint make everything better. I also painted the file cabinets my go-to furniture colour, Benjamin Moore Cloud White.
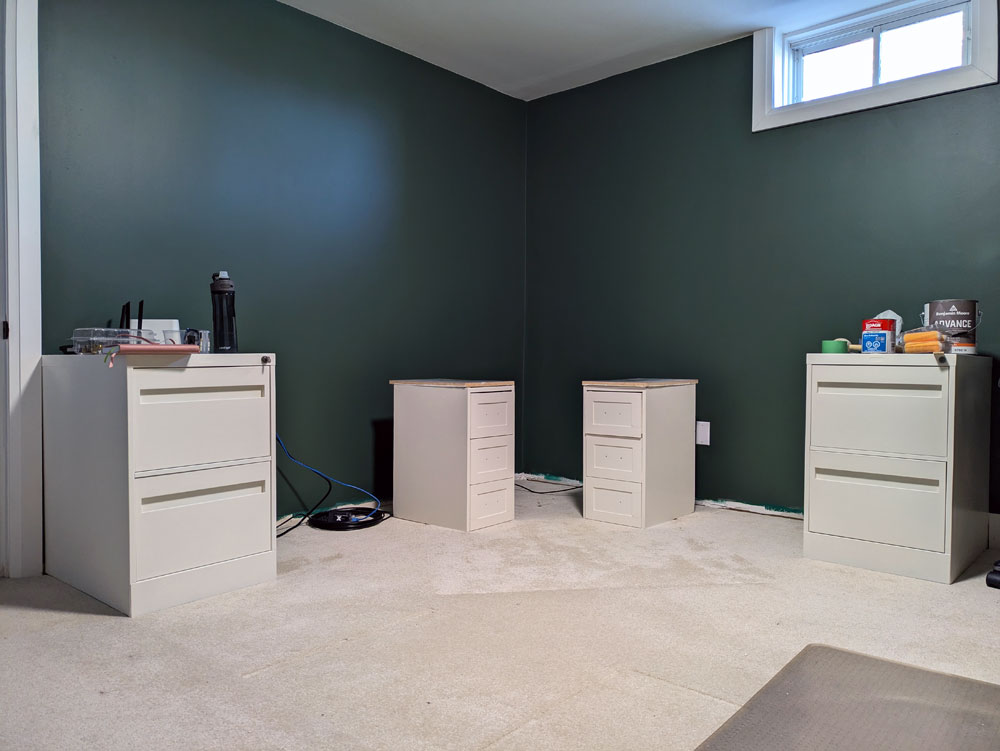
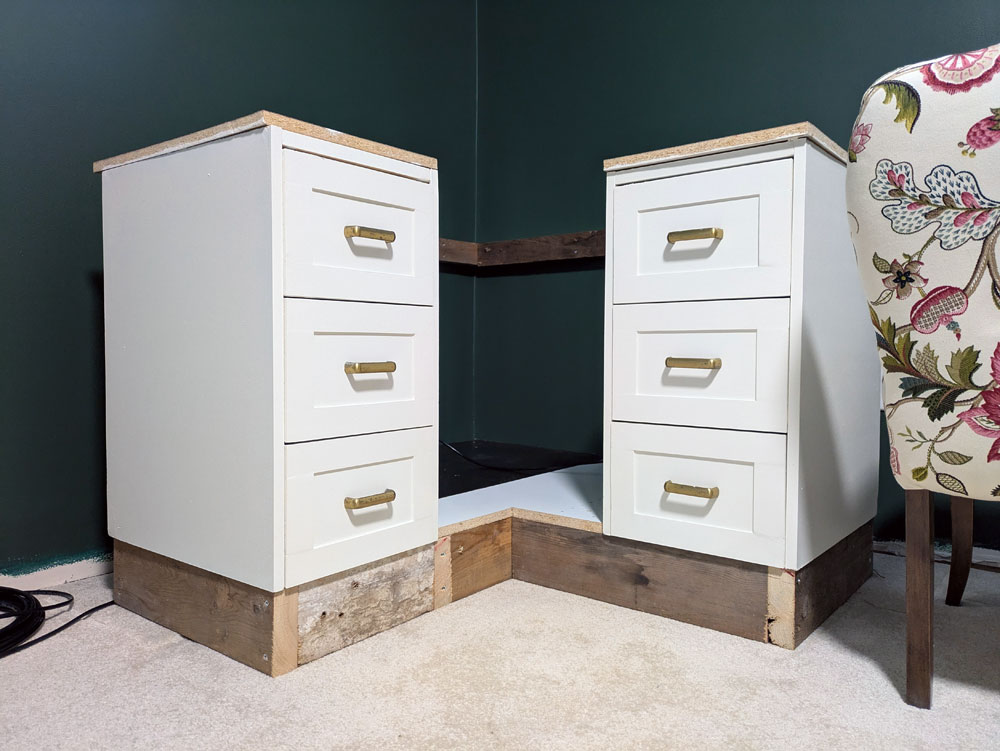
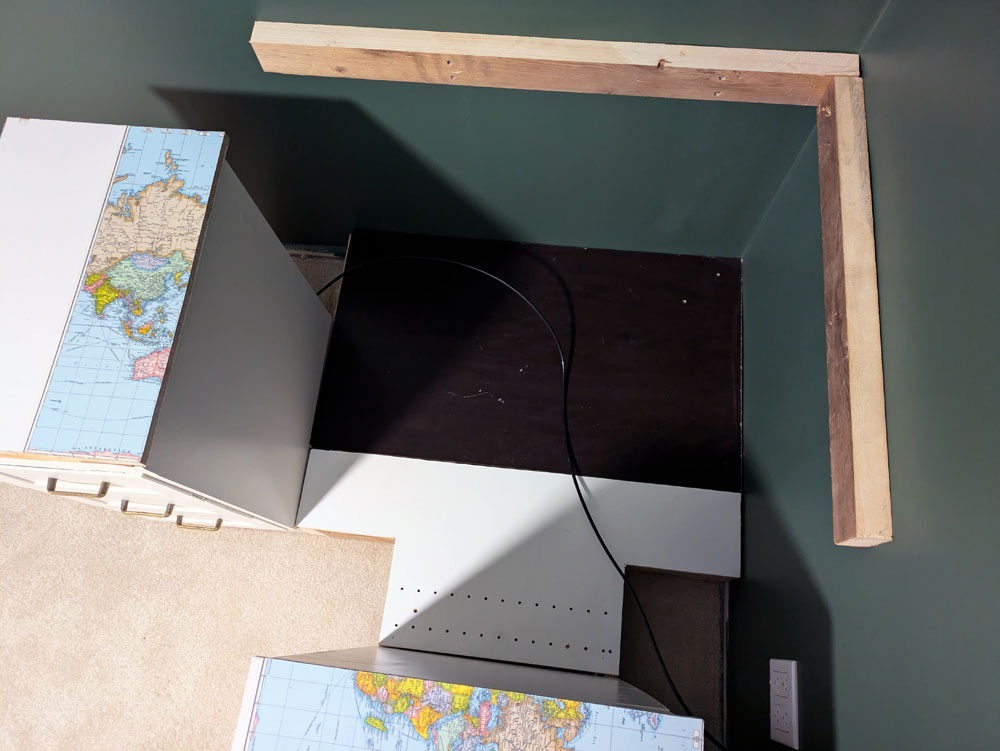
I was finally at the reconstruction stage. I set the file cabinets at either end of my L-desk. The drawers were going to go in the corner of the L, but they were a bit short.
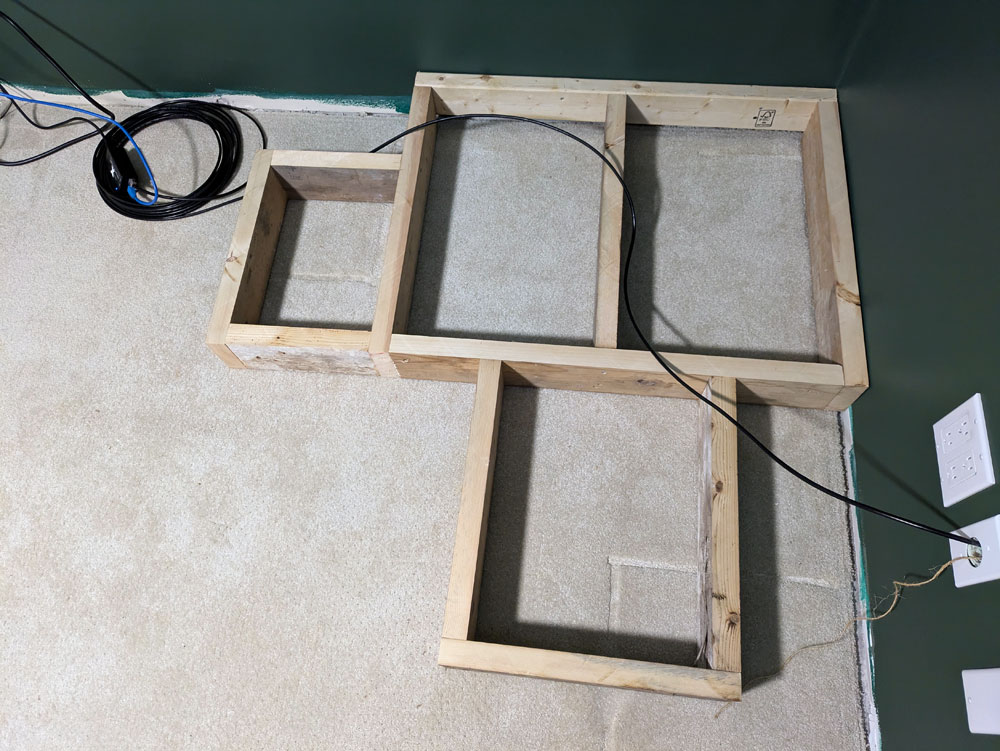
I built a little platform in the corner that raised the drawers up to be even with the file cabinets. The drawers are shallower than the file cabinets and I had to make sure I had access to some electrical outlets, so the platform appears to be oddly shaped.
After debating spacing and dimensions a bit, I decided to make the corner into a functional cupboard, albeit with a very small doorway and a patchwork floor. This is the spot for memorabilia and rarely used things.
With the drawers in place, I threw a piece of plywood on top and took the desk for a test drive.
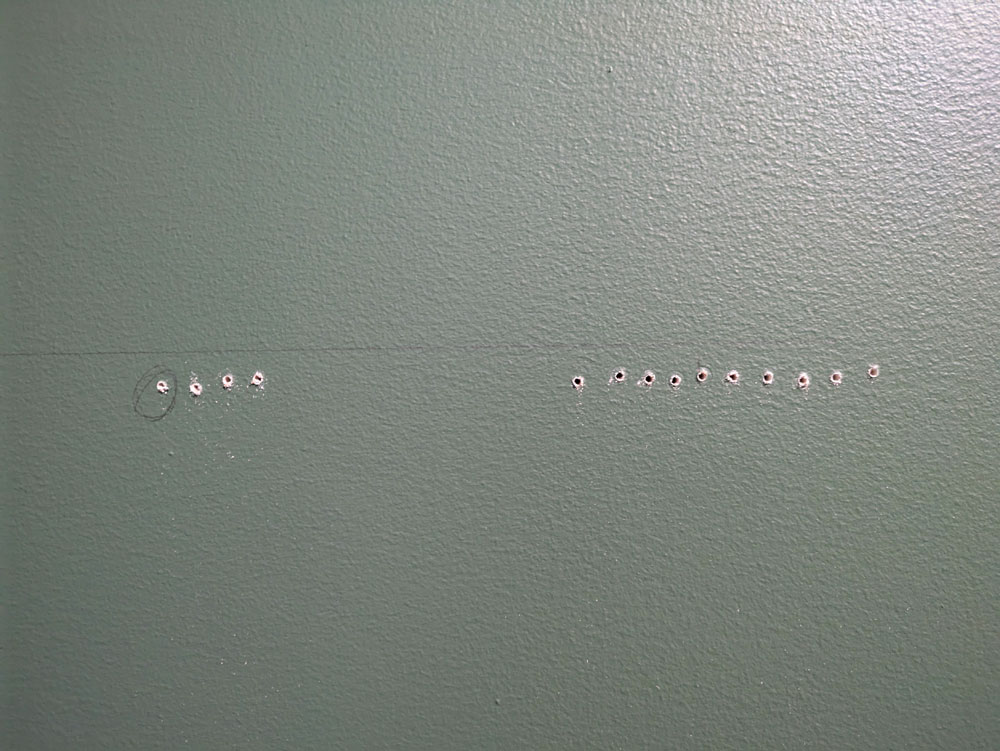
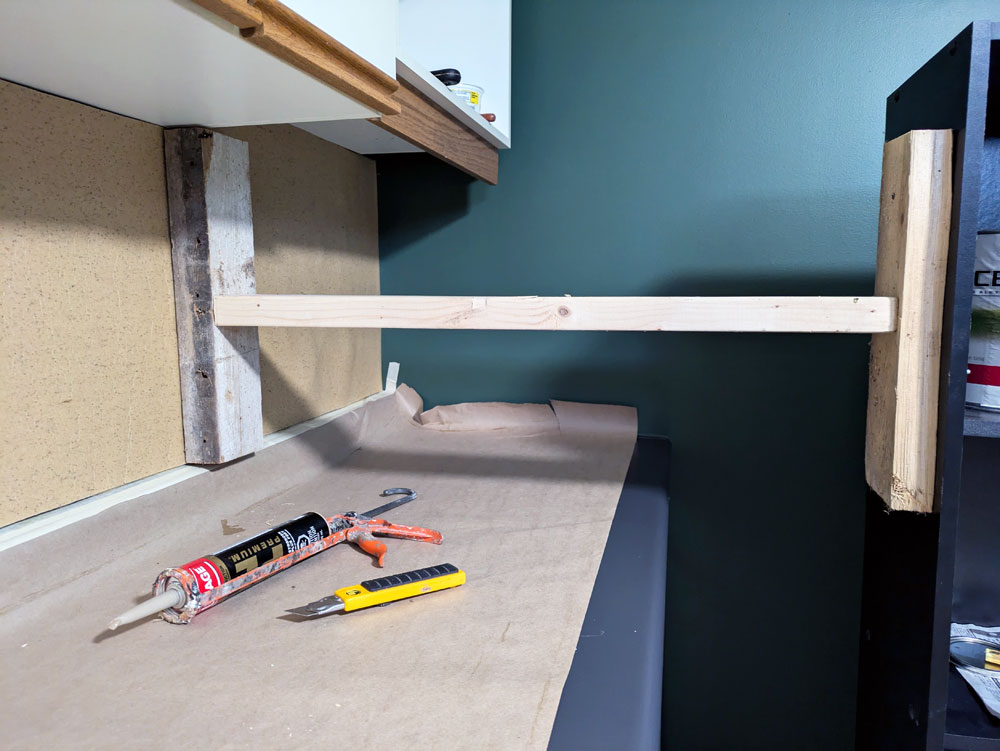
Everything was level and felt good, so I placed my order for a countertop. I went with a simple laminate counter. I added some ledger boards on the walls for additional support (after drilling just a few holes to find a stud).
The counter also rests on all the drawers. Thanks to the size of my file cabinets, the desktop is extremely deep. Lots of space to spread out.
Bottom half done. Onto the hutch.
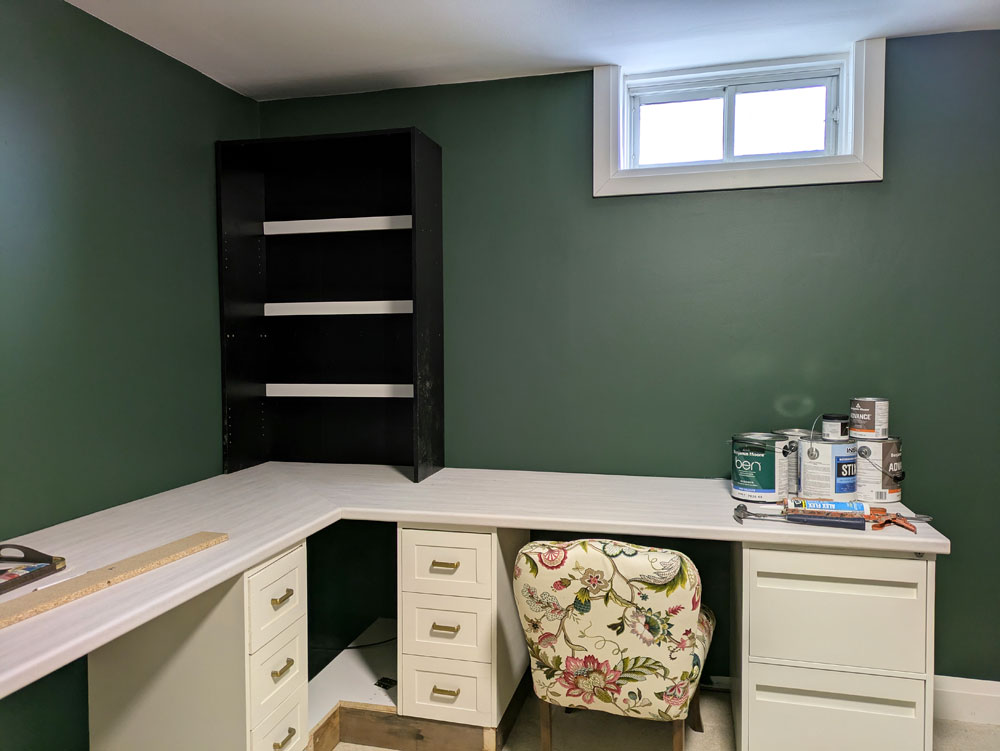
I cut Matt’s bookcase so it was the height I wanted and then I positioned all of the shelves and fastened them in place. I added extra bracing along the back as well.
I debated what colour to paint the shelves and ended up deciding on the same green as the walls, rather than white. After few coats of paint, I lifted it onto the desk, set it in place and screwed it to the wall. Some wood filler and paint touch-ups finished it off.
The final step was a door for the corner cupboard–and we just happened to have a corner cabinet in the barn. I removed the door, cut it down to the size I needed (carefully preserving the hinges), gave it a coat of paint and… couldn’t figure out how to fit it in place. Fortunately, I live with a small person who is keen to help, so she climbed into the cupboard with a flashlight and pencil and marked the hinges for me. (Throughout the construction process, she liked the idea that the corner was a hidden fort just for her, so she had no problem climbing in when asked.)
I was then able to drill the holes and screw in the hinges. A wooden knob, some painted hardboard for the toe kick and reinstalling the baseboard were the final touches. The desk was done.
I am not a cabinet builder and fine carpentry is not my strength. I am really proud of how the desk turned out. I was able to take an idea, a bunch of furniture pieces, put them together and create an awesome, functional, attractive result.
Anyone else have any Frankenstein furniture? Have you every remade a piece of furniture? How do you prefer to work? Do you have a dedicated desk? Or do you move around?
I introduced this year’s home goals by saying, “I am really, really excited by the projects I have planned.” Mid-way through the year, I am still excited about these projects. I’m also really, really excited by how much progress I’ve made.
What a year it’s been so far!
Coop
The coop is finished. The birds are in residence. It is awesome. I love having birds again. Seeing them walking around makes me happy. I am so proud of the coop and how well everything has worked out. I will likely continue to make tweaks depending on what the birds need (like repairing the turkeys’ door after they take it apart–again), but I am comfortable saying that for now, this project is done.
My office
Another project that’s done? My office. Transforming, decorating and organizing this space was fun, and I love having my own working, writing, crafting, sewing, creating, whatevering space.
Ellie’s playroom
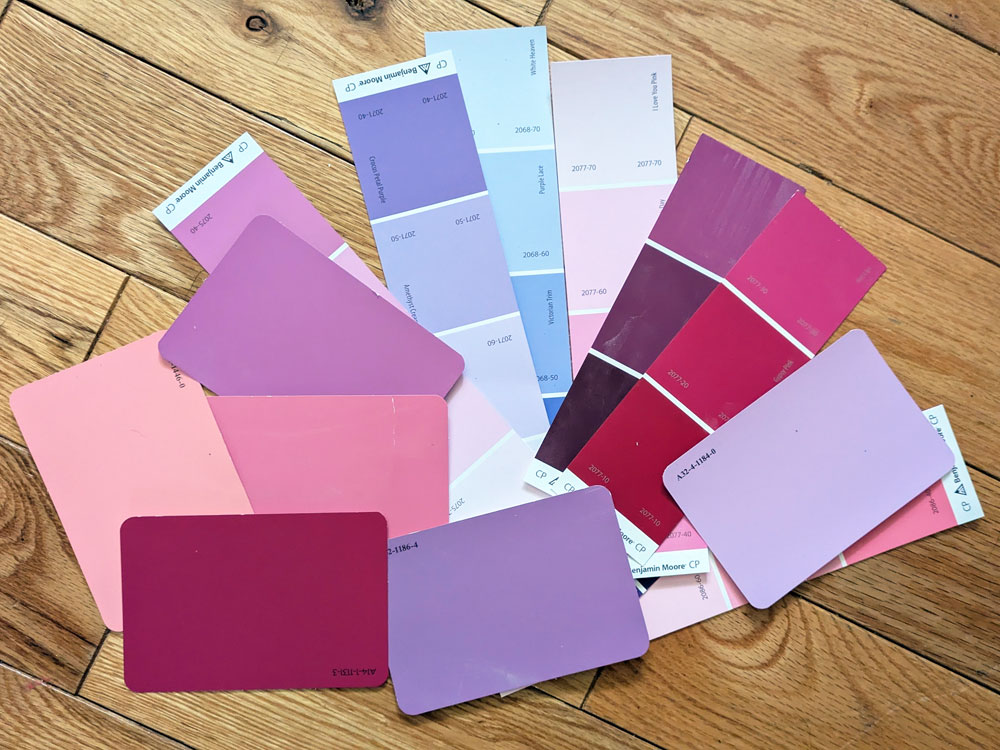
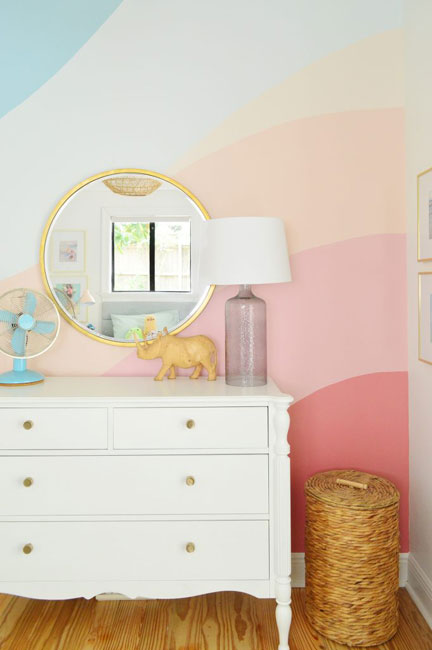
A dedicated play, crafting, creating space for Ellie is still on the list for this year. She’s been collecting paint chips in anticipation. Can you guess what her current favourite colours are? This room will likely be our fall project.
Main bathroom
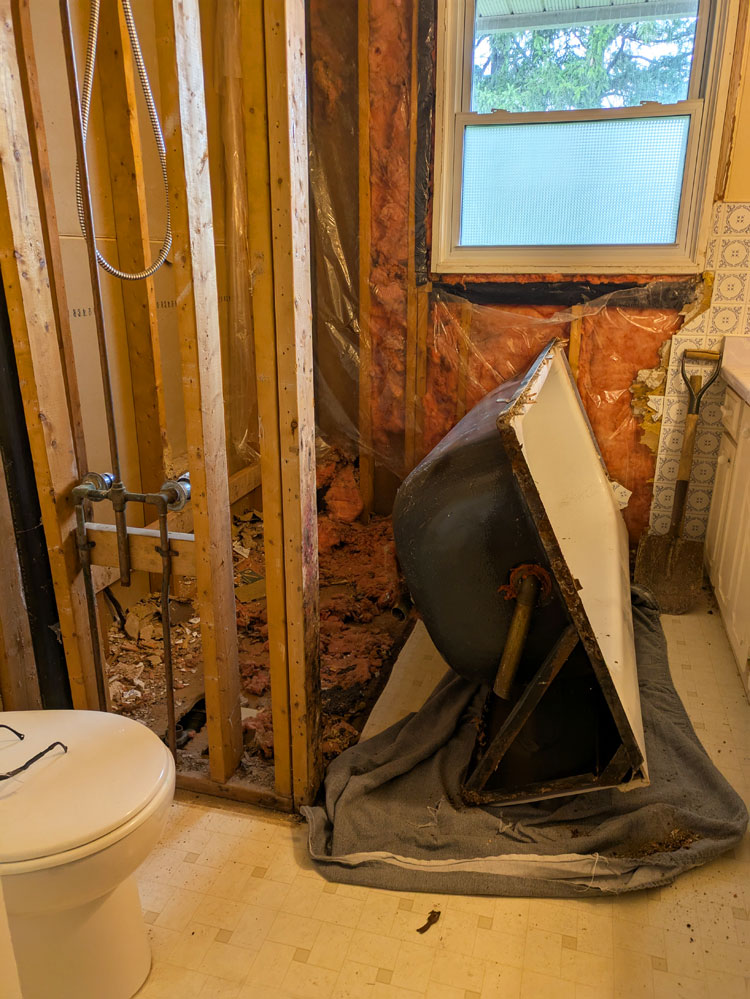
The bathroom renovation is well underway, and what a transformation. I’ve been able to do a lot of the work myself, which feels really good. My vision for the design and function of this space is turning out beautifully. I am really happy. More updates to come.
2025 is a big year. I don’t think I’ve had this many projects on the go since early days (perhaps years) or moving to the farm. It’s been tiring, fulfilling, challenging. But mostly it’s been fun. I love working on the house and the property, making it ours and making it beautiful.
I hope I can keep up the momentum for the rest of the year.
Have you tackled any project around your house so far this year? What’s on your list for the rest of 2025?Anyone else having a big house year? What’s exciting you about your house right now?
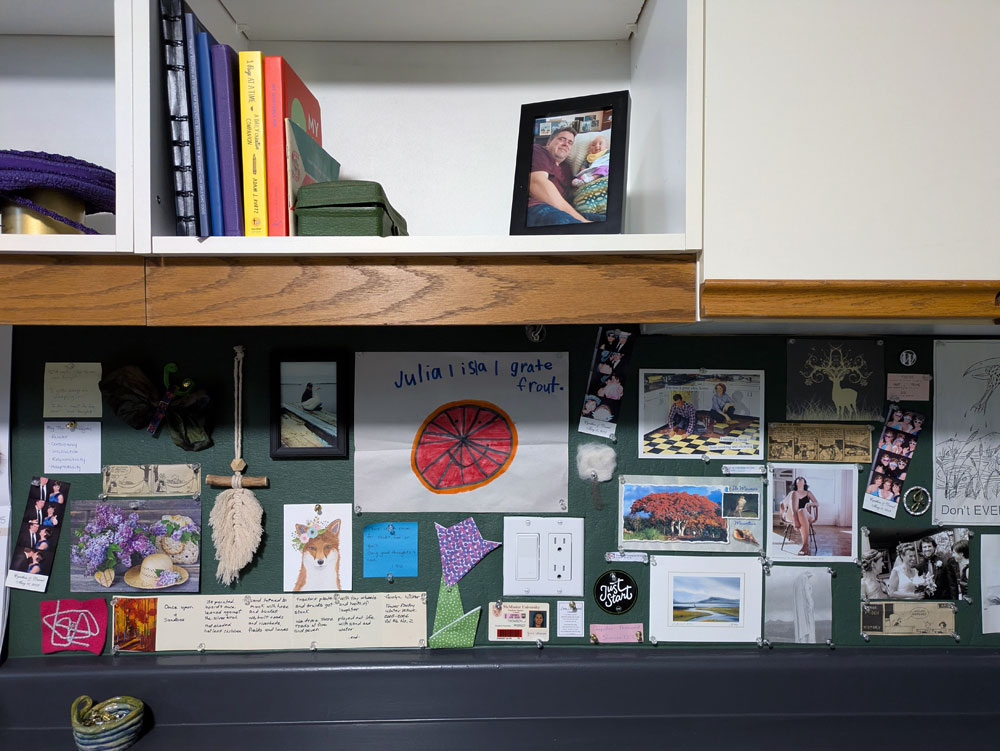
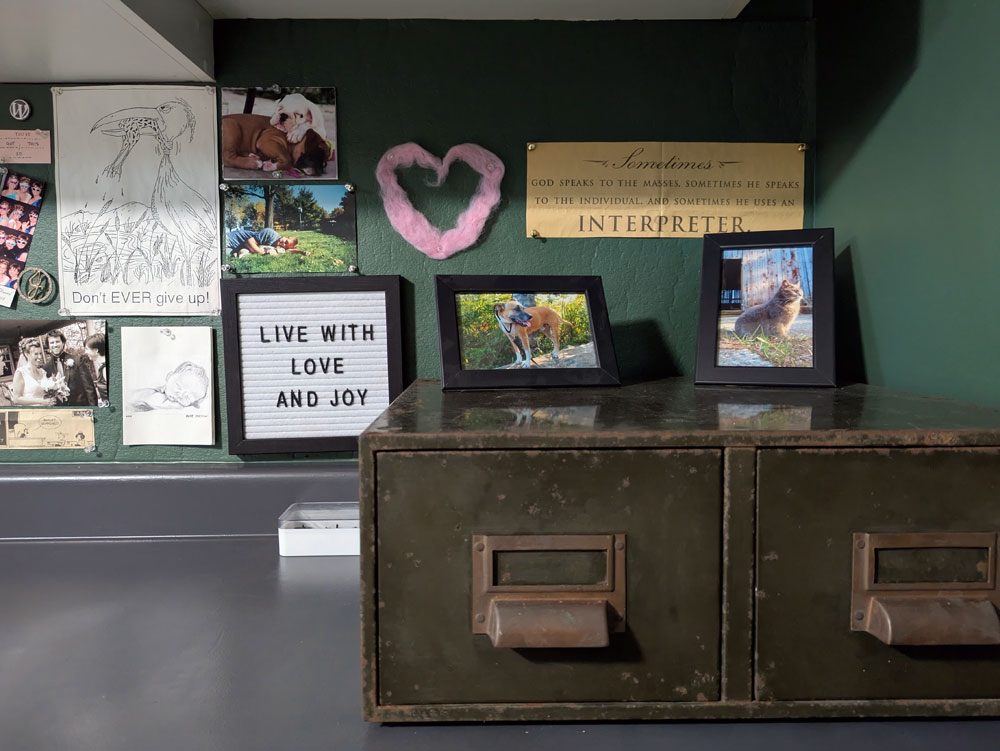
I love a bulletin board. I collect pictures, sayings, mementos–things that inspire me. There are also reminders that I jot down and Ellie’s many art creations. They all need a place to live, and my preferred home is a bulletin board.
In my new office, I debated where that bulletin board should go. Matt had one on the wall above his computer. I could do the same and even reuse the same board. But I really liked the idea of hanging some nice art above my computer instead.
Then I thought of the cabinets on the other side of the room. What if I made the “backsplash” a giant, long bulletin board?
I had used cork shelf liner at our first house to make a bulletin board over my desk and it worked pretty well (a couple of layers were needed as this cork is very, very thin).
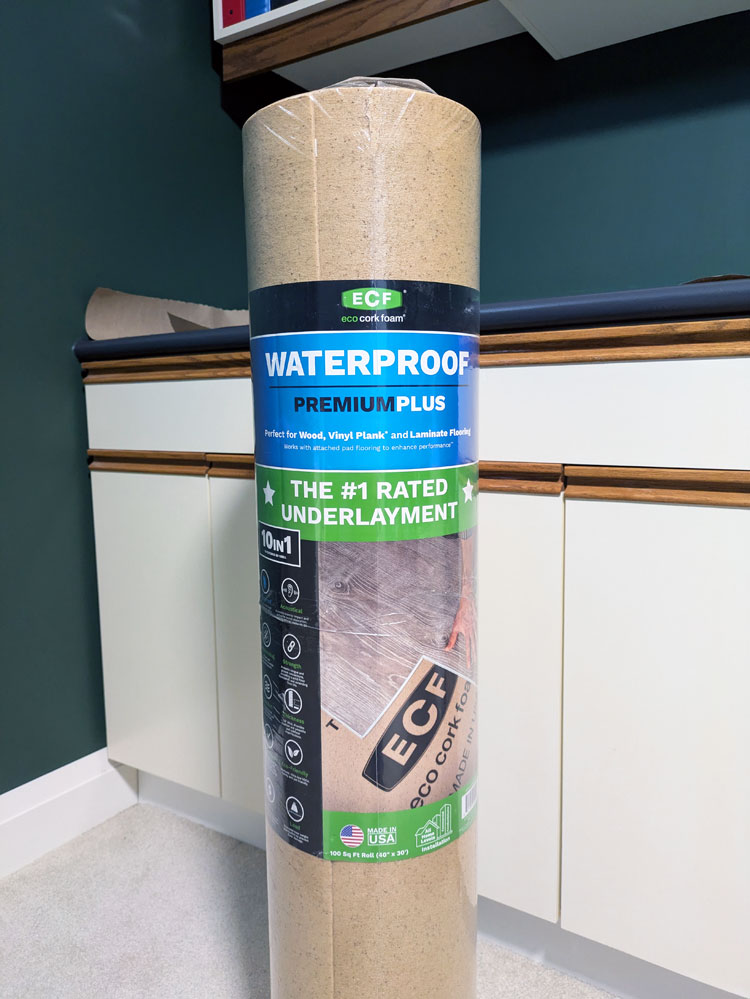
A quick tour of Home Depot showed me that I would need many, many packages of cork and it wasn’t the dimensions I needed. Then I thought about cork flooring underlayment. I had put a strip on the cold cellar door where we have our dart board. Maybe it would work for the office?
I decided to give it a try.
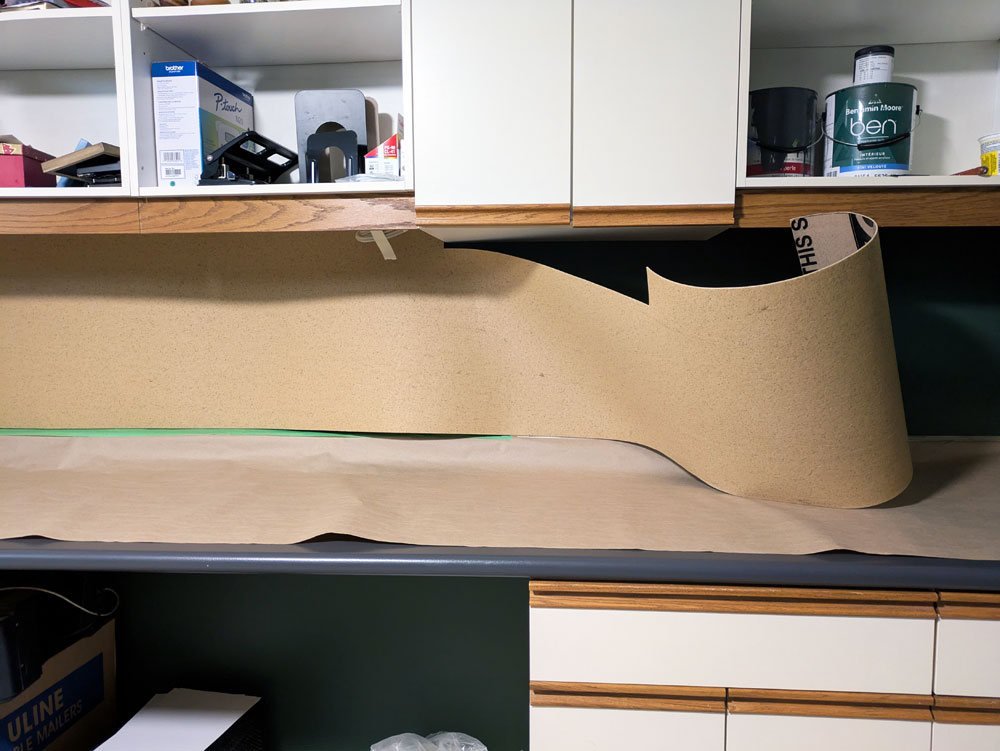
The underlayment comes in a roll 40 inches wide by 30 feet long. Plenty for what I needed.
I did a quick test. I put a couple of layers together and stuck a pin in it. It was nice and squishy and seemed to hold well.
I decided to go for it.
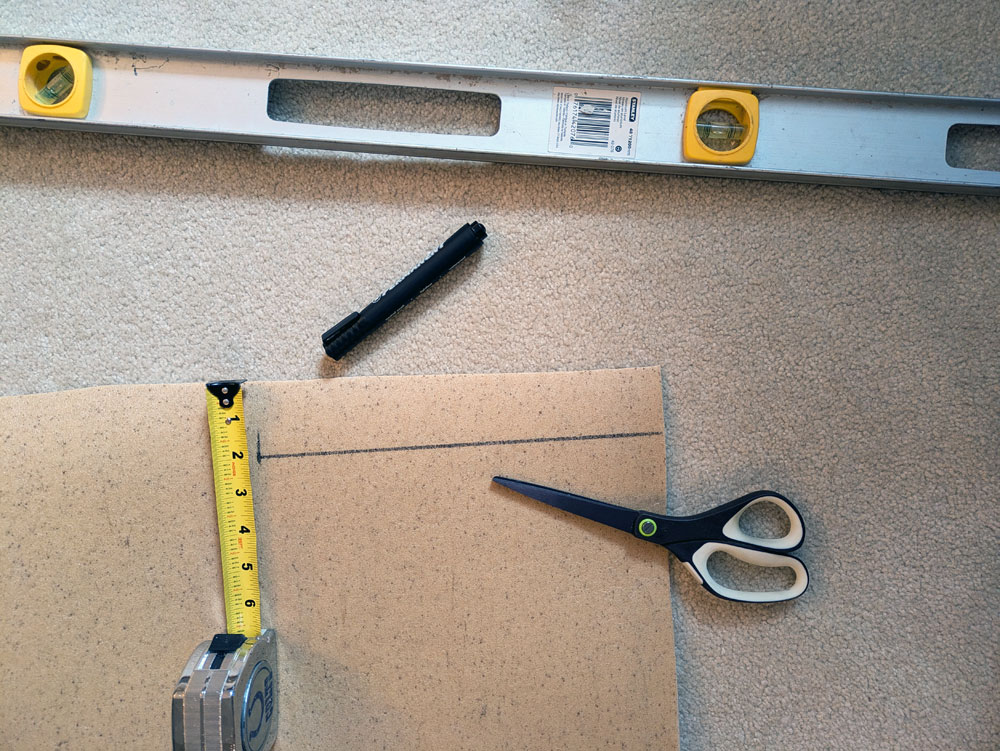
I rolled out the cork. My first step was to cut off the plastic “fringe” that’s along the one edge. Then I measured the space between my cabinets. There were a few ups and downs as a couple of the cupboards are fitted for under cabinet lights. I very carefully plotted everything out with a marker and cut along the lines with my scissors. The cork cut super cleanly and easily.
Then I took my first layer for a test fit. I had a few gaps that were bigger than I wanted, but overall it was a pretty good fit. I was ready to put it on the wall.
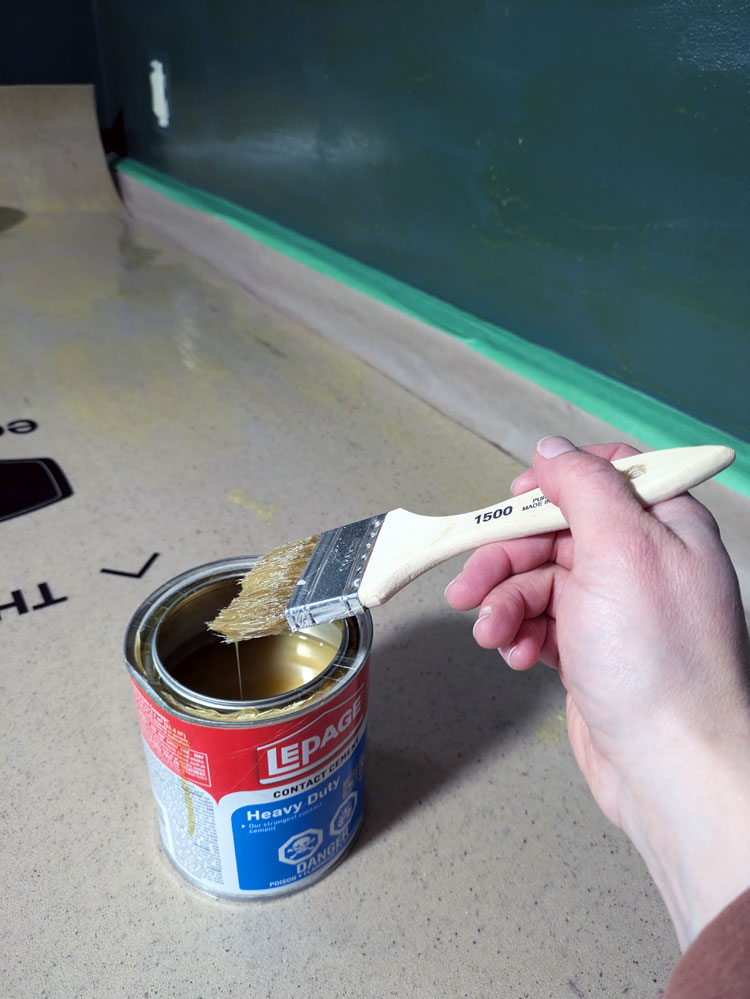
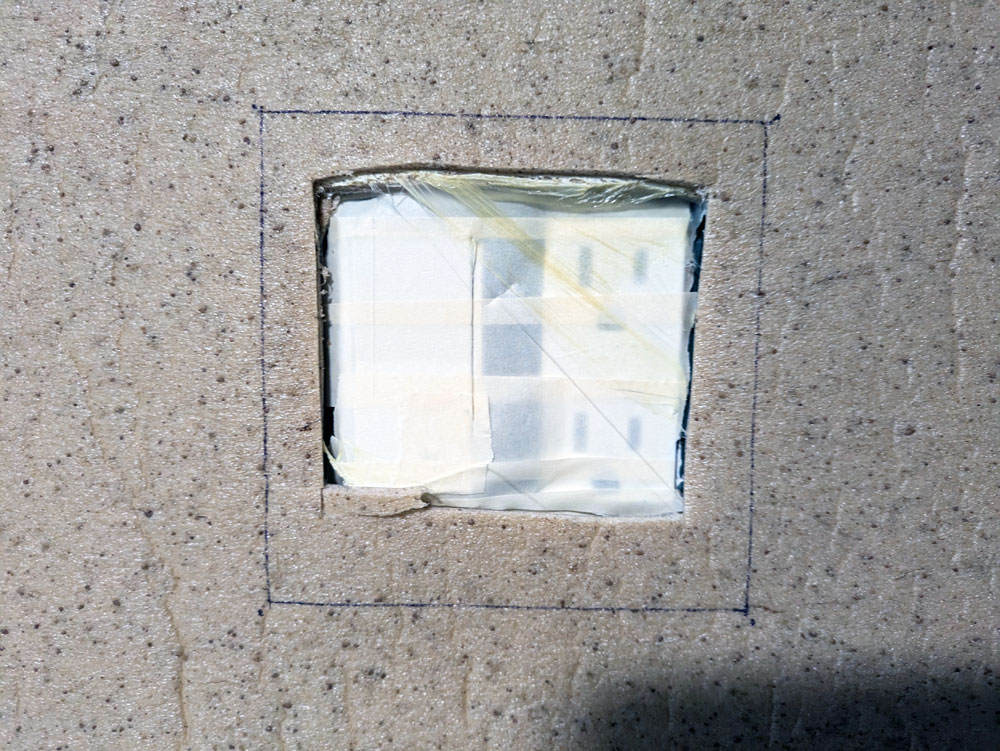
I removed cover plates from the outlets and covered the plugs with tape. I taped off the edge of my counter and covered the whole surface with paper to protect it from the adhesive. Then I laid the cork facedown on the counter and coated the back of it with Contact Cement. I also put a layer of CC on the wall. (Cheap chip brushes are good for this, as you will be throwing them out after gluing.)
Warning about Contact Cement. The fumes are super strong. I had the window wide open (in January) and the door closed.
I recommend following the application directions for CC exactly. Put on a generous, even layer. Let it dry for 30 minutes. Have an extra can of CC to make sure you can fully cover your wall and cork.
The issue I ran into in this project (more on that in a moment) was all because of the Contact Cement. I went through CC much faster than I expected, so some areas didn’t get that “generous” coating. (A 946mL can covers 25-33 square feet. My backsplash was about 20 square feet, so ideally I would have had two cans for each layer of cork.) I also was impatient (and it felt wrong to let glue dry), so I only let it set for about 20 minutes before putting the cork on the wall (still within the guidelines, but on the low side).
So after that foreshadowing, let’s proceed with the install.
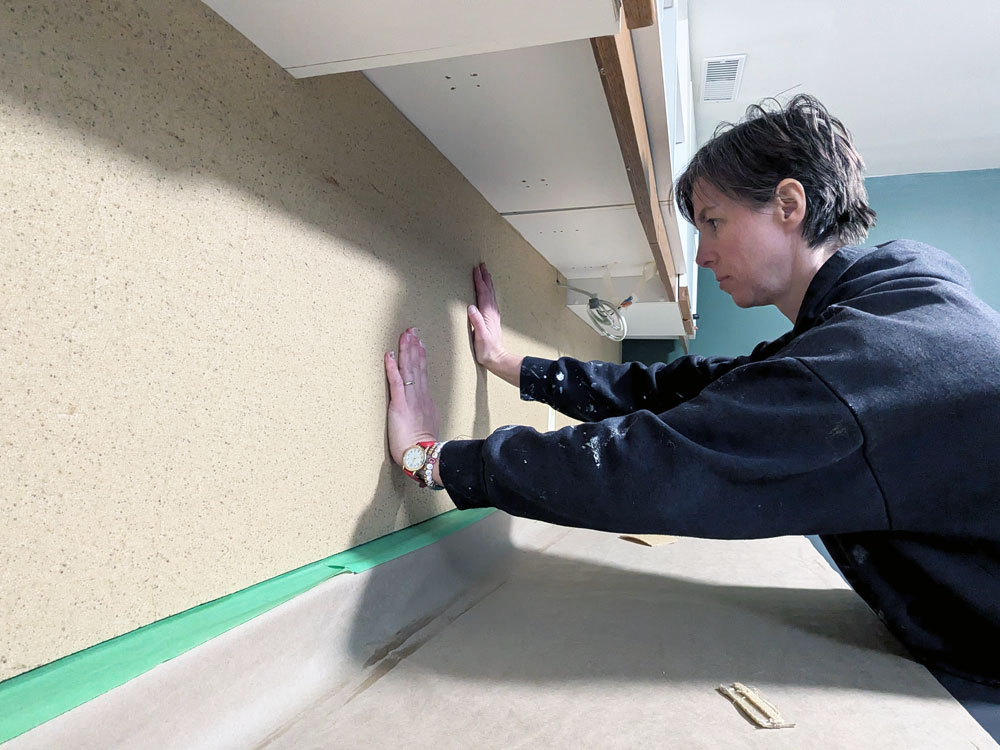
Once the Contact Cement had dried (kind of), it was time to put up the underlayment. I started at one end, got everything lined up as best I could and worked my way down to the other end. Depending on the size of your bulletin board, having an extra person would be helpful for this step. The Contact Cement on the cork sticks as soon as it touches the CC on the wall. You don’t have any wiggle room. With a long, floppy piece of cork, getting it smooth and aligned on my own was a bit awkward.
Once the underlayment was in place, I went over the whole length of cork and pushed it firmly into the wall. I went back and forth, up and down several times.
Then, I did it all again for a second layer. I was able to make some adjustments to my measurements to compensate for the little gaps I had in the first layer. I also cut out the plugs between each layer, just a rough cut around the outlets for now.
Two layers likely would have been enough, but I could still feel the wall when I pushed in a pin, so I decided to add a third layer of cork. However, I was out of Contact Cement, so the third layer had to wait until a trip to the hardware store.
When I came back the next day, I was dismayed to discover a huge bubble at the end of the bulletin board where I’d done a thinner coat of CC. This was also the spot that had cured for the shortest amount of time. The other end was smooth, flat and securely adhered.
I decided to slit the cork with my utility knife, peel it back and repaste it on the wall with my fresh Contact Cement. Then I proceeded with my third layer of cork, which I knew would cover the repair.
The next day, though, was deja vu. There was another bubble at the same end, and this one seemed even larger. My initial reaction was, “Well, I guess I know where I’m hanging the calendar.” But as I looked at the bubble, it seemed too large to leave. It was a significant bulge and would have been noticeable even behind a calendar.
So I came up with a plan. I would cut a small slit in the cork. Then I would fill the bubble with construction adhesive. I would brace a 2×4 against the cork to push it into the wall while the adhesive set.
So I went to work. My small slit became quite large, as I cut open the whole bubble. But I was able to squirt construction adhesive into the whole area. Then I put my brace in place and not so patiently waited the prescribed 24 hours.
When I took the brace out, the bubble was gone. The cork was perfectly flat and securely stuck to the wall. The cut wasn’t super noticeable, and I hoped it would disappear even more with a coat of paint. Worst case, it was still a spot to hang my calendar. (Spoiler alert: the calendar ended up elsewhere.)
I decided to paint the bulletin board because I didn’t love the colour of the underlayment. It’s a bit yellow and not a true brown cork. Plus I liked the idea of the bulletin board blending in with the rest of the walls a bit more.
Before painting, I did my final cut around the two outlets. I traced the coverplates and very carefully cut the cork back. The outlets are recessed now into bulletin board.
I primed the cork with my go-to Stix primer and then did two coats of green paint. The cork took the paint really well, and I really like how it matches the walls.
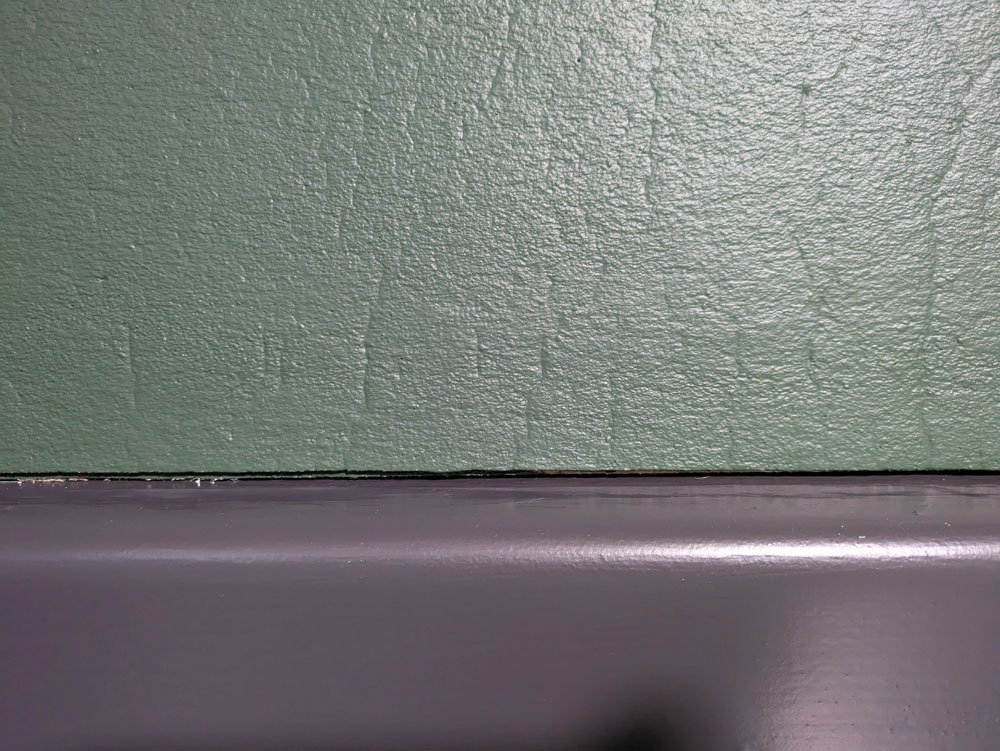
After painting, I took all the masking off the outlets and countertop. That’s when I found the gap between the bulletin board and the counter was more noticeable than I liked. I decided to caulk the edge of the cork where it meets the counter. Then I went over the caulk with another coat of paint. This made a really clean edge.
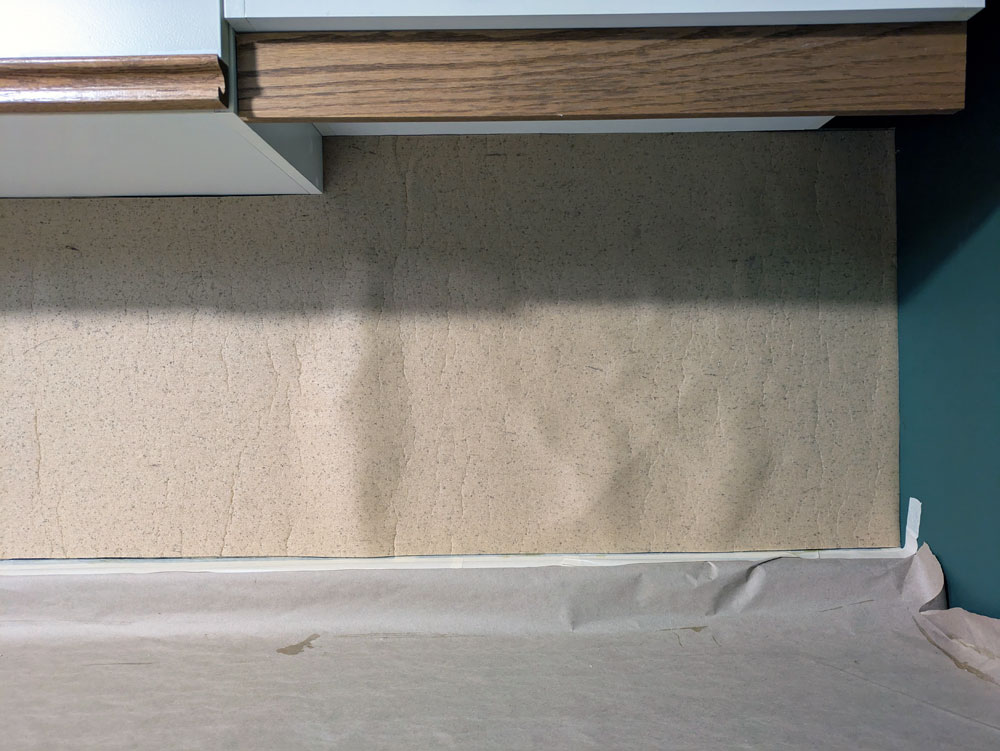
My third layer of cork was a bit more “wrinkly” than the earlier layers. This layer was closer to the centre of the roll of underlayment, so it was wrapped more tightly and had some creases in it. The creases were a bit visible on the wall, but they mostly smoothed out as the cork relaxed.
Once I started to load up the bulletin board, all of the flaws disappeared. I love how this project turned out. The wall is full of things that make me feel inspired, happy and loved. And I have plenty of room to grow.
I also love the trial and error–and ultimate success–with this project. I felt like I was returning to some of my old DIY days. I’m still that scrappy, creative, hard-working, cheap, make-it-happen person, and I like tapping into that.
Who else likes a bulletin board? Do you have a place to display creations and inspiration? Has anyone else had to adjust mid-project when things aren’t working out as you planned?
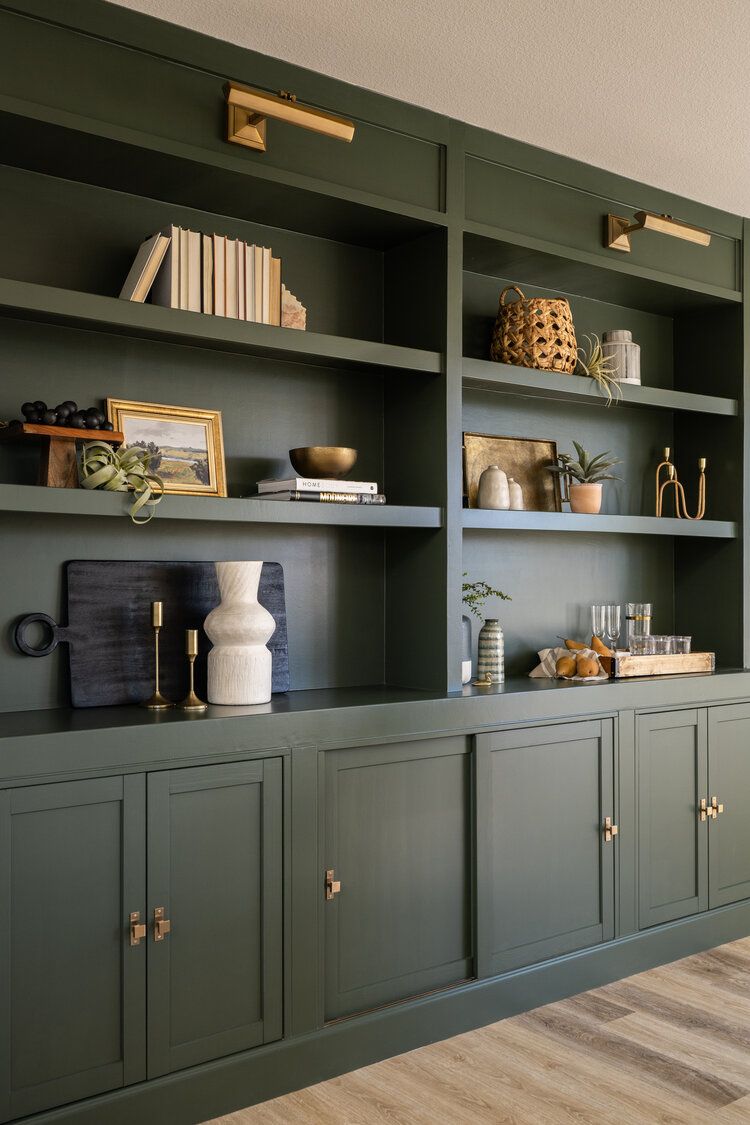
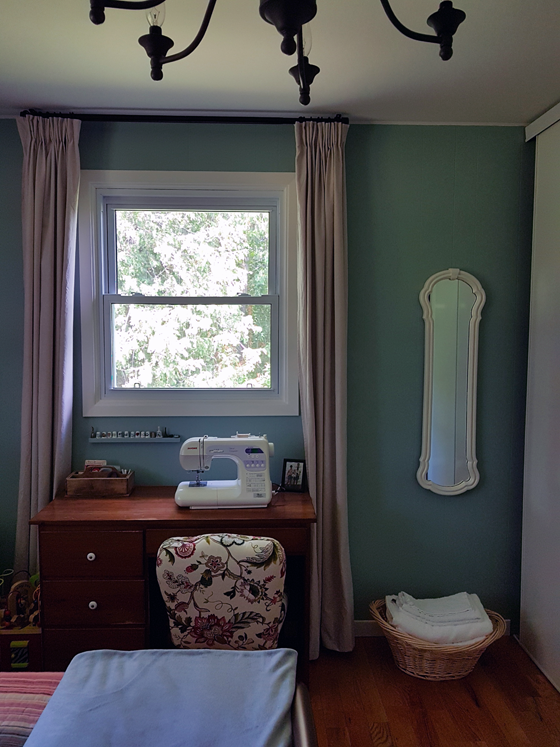
I was unsure what colour I wanted to paint the office for a long time. Back when we first set up the room, Matt picked a forest green (Benjamin Moore Manor Green). It was not my favourite colour, but it was his room, so I didn’t say anything.
Once I decided the office was going to be mine, I was more than ready to repaint.
I liked the idea of sticking with some shade of green. I like green and it would be another memory of Matt. I knew I wanted dark olive green a few places in the room (namely the vintage metal drawers I found years ago at an auction). Did I want it on the walls too?
I finally decided to go for it. But then I had to figure out what green. I sampled several: High Park, Rosepine, Cushing Green, Peale Green. They were too light, too grey or too brown.
Ellie’s comment was, “So you’re painting the office garbage can green.”
Thanks, girl.
I returned to the paint store in search of my goldilocks–not garbage can–green.
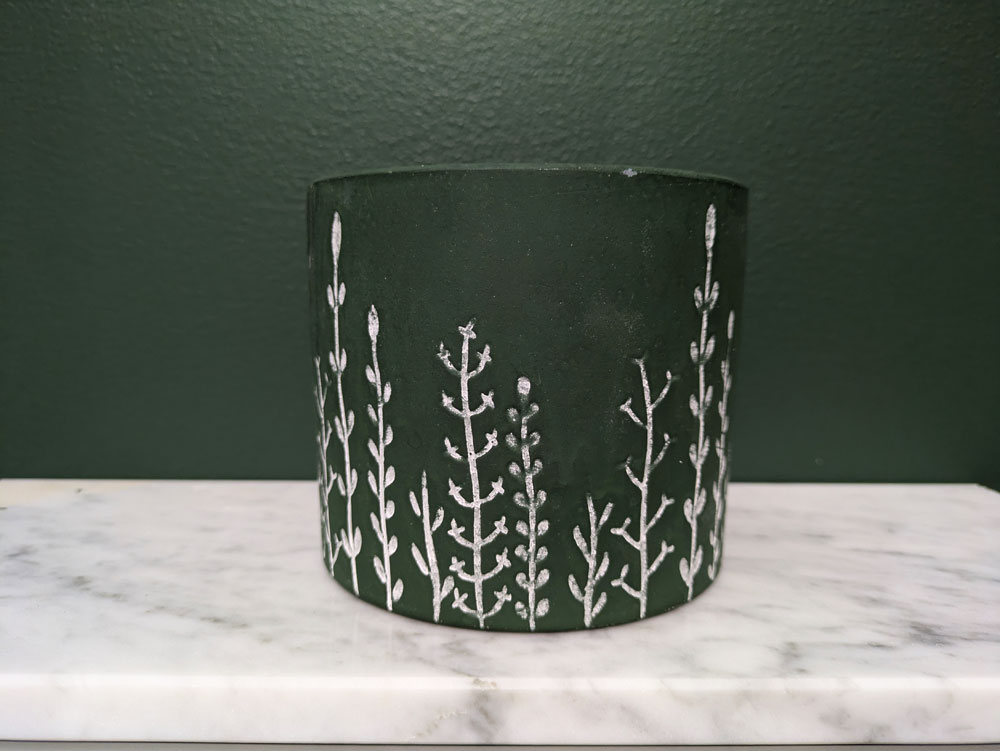
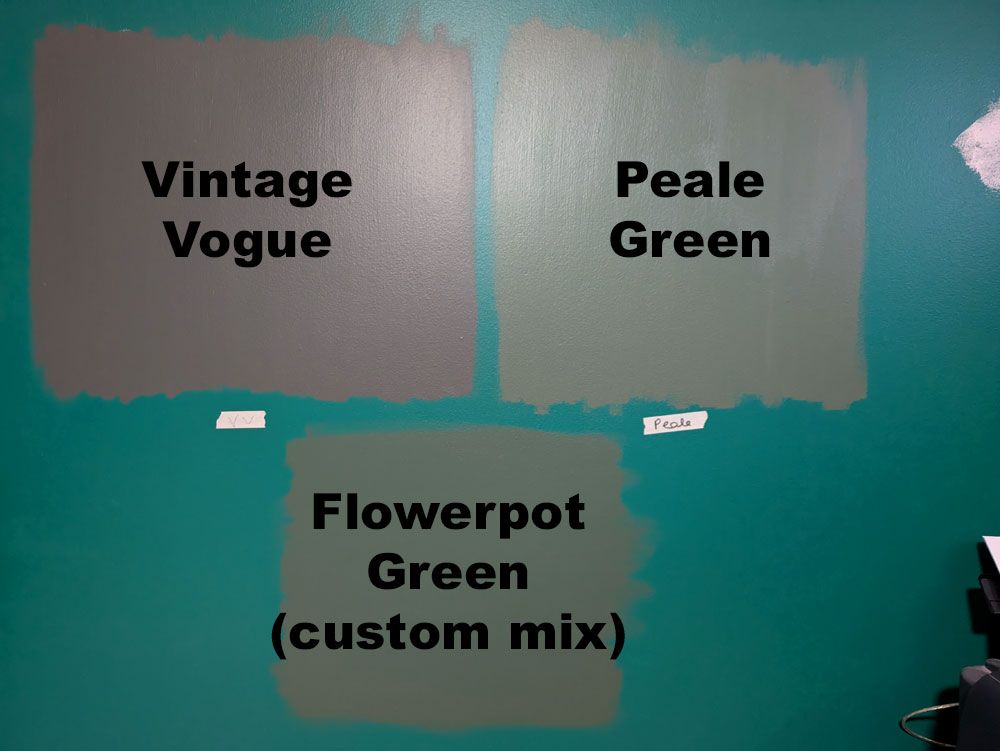
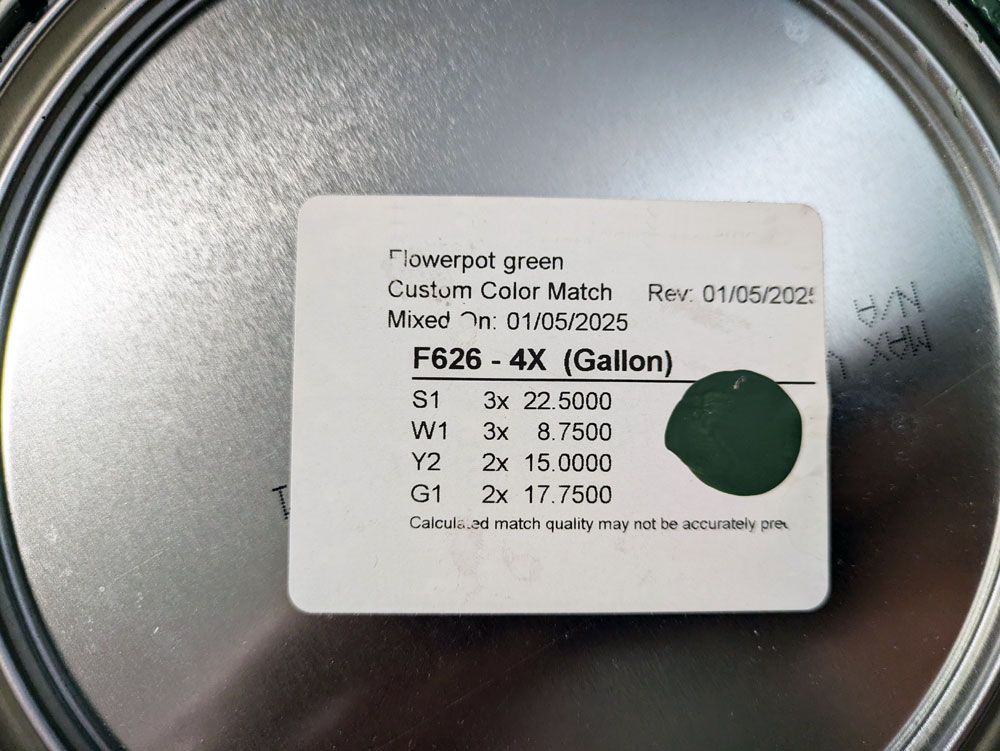
I bought two more samples: the oh so popular Vintage Vogue and a custom shade matched to a flowerpot my sister gave me for Mother’s Day.
Back at home, I put them on the walls… and Flowerpot Green was the winner. It’s dark, but not black, not brown, not grey. It is definitely green, and it picks up the tones of so many of the things I used in this room.
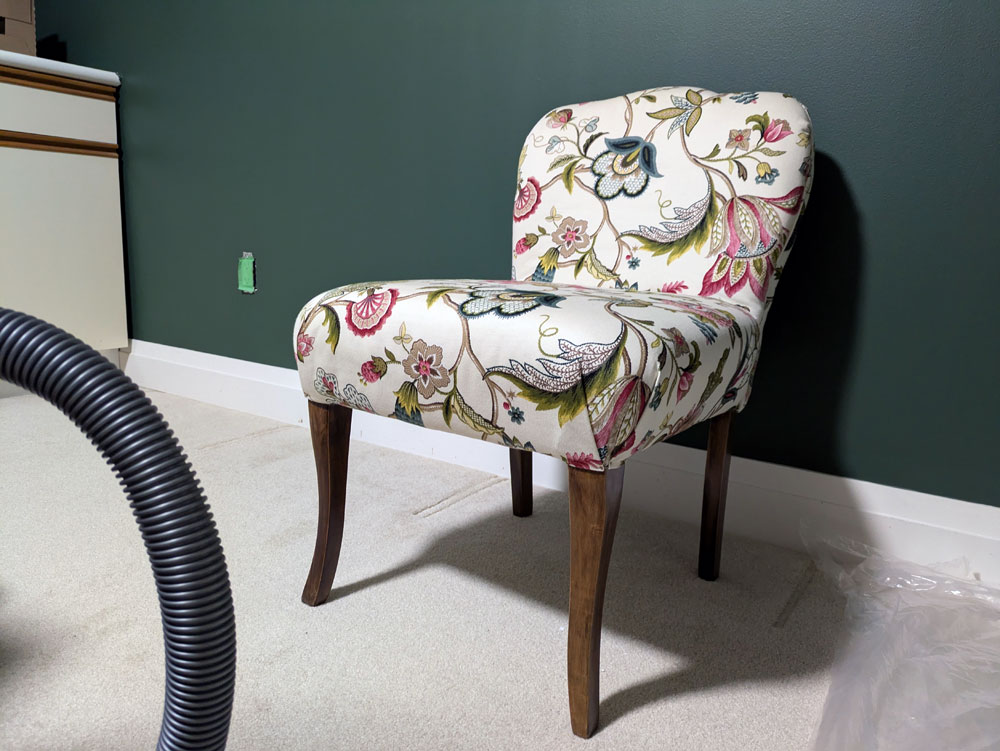
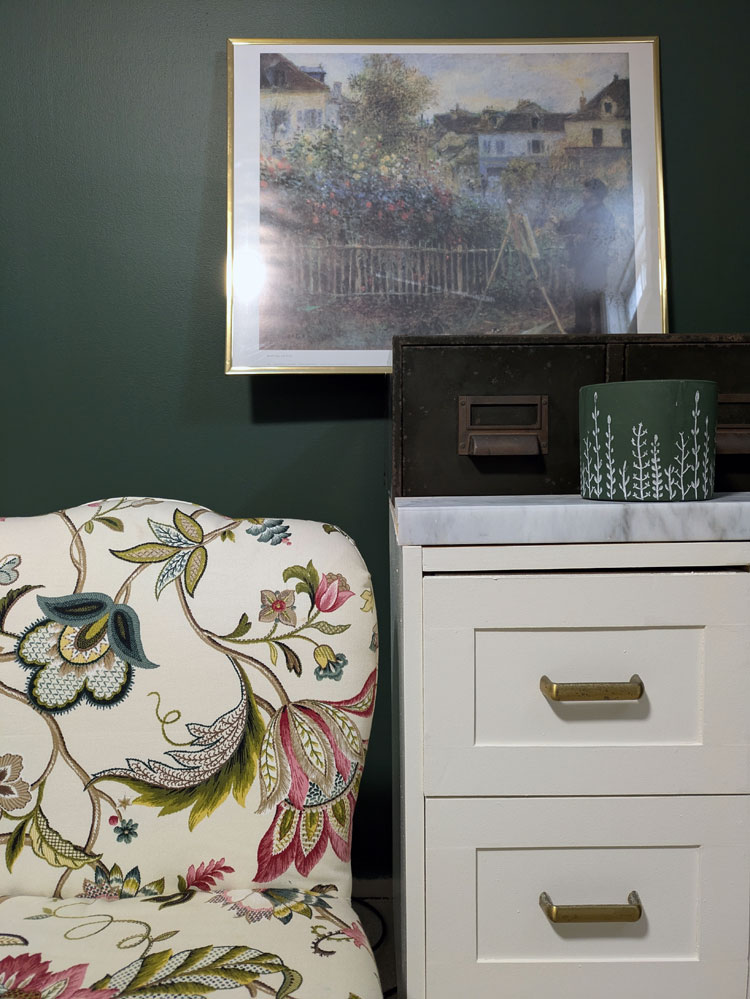
I had a few moments of hesitation as I was painting the first coat, but then I decided I liked it. When I moved my vintage slipper chair in just to see, I loved it.
My Mom’s reaction gave me another reason to love it. Her comment the first time she saw the room was, “Oh, this is the colour we had in the living room and dining room at home!” She was remembering a time that my grandmother (a frequent redecorator) got new furniture, painted the living room dark green, and then sewed curtains to match.
So from my grandmother to Matt to my sister taking care of me on Mother’s Day, my new office paint is full of history and meaning and family. That feels like a good choice to me.
Do you have a favourite colour? Have you ever had a custom paint colour mixed for you (this was my first time)? Are you a fan of neutrals? Or do you go for colour? Who prefers light shades over dark?
My Mom taught me to sew when I was young, as her Mom had taught her. As my great-grandmother taught my grandmother. Now I have a new space for sewing, crafting, writing, working, creating. A space filled with heritage and history from these women and so many other special people in my life.
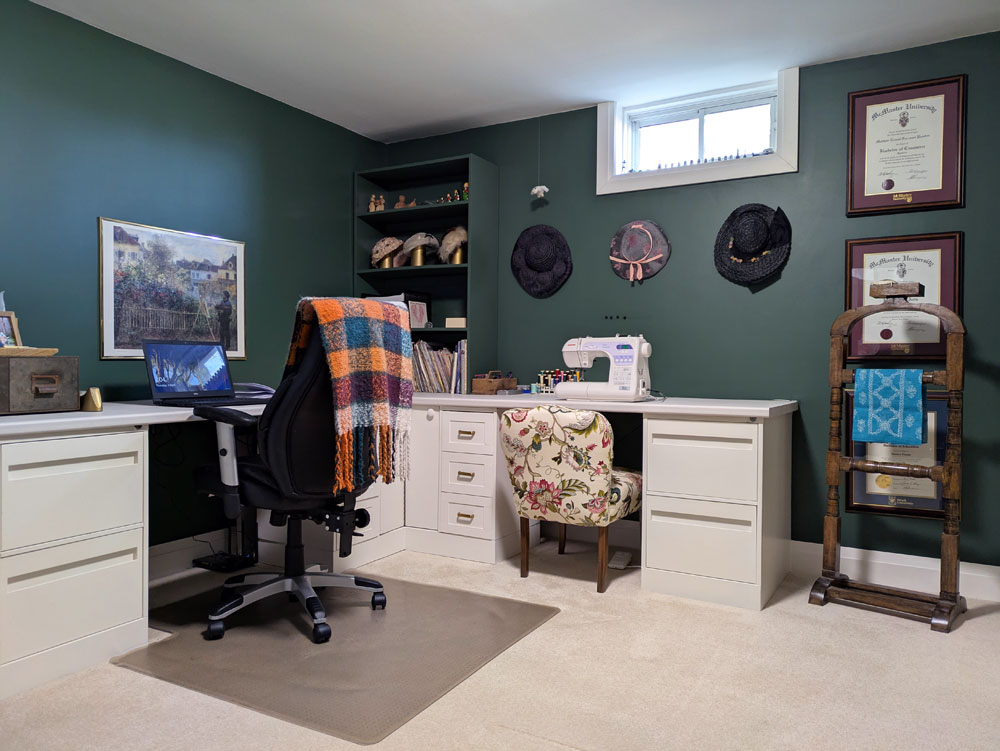
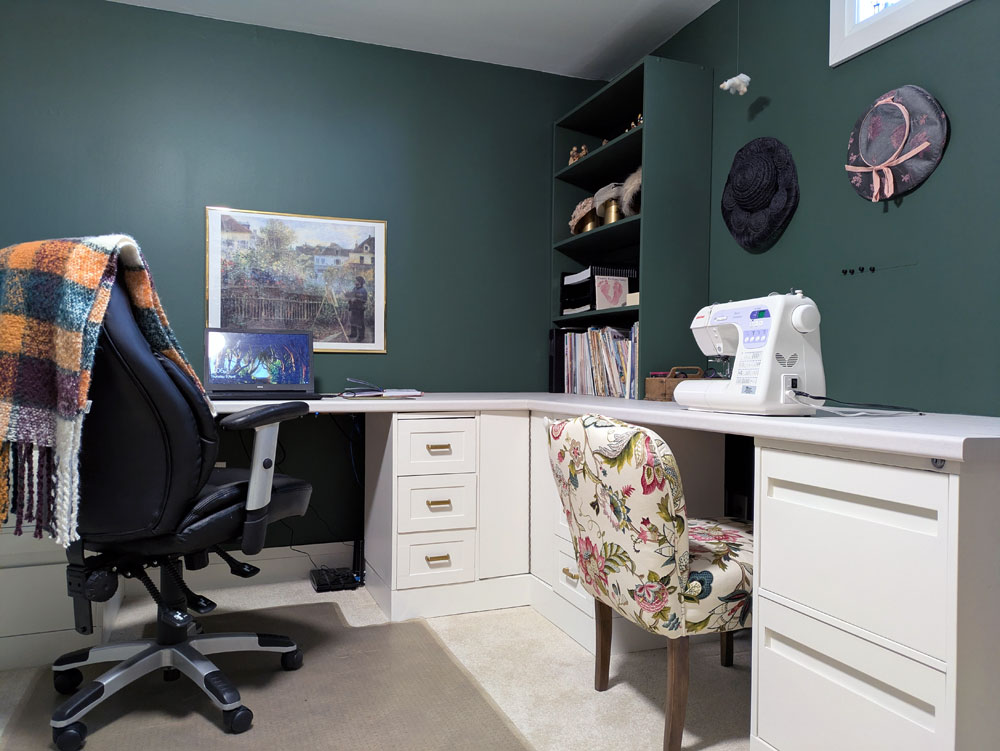
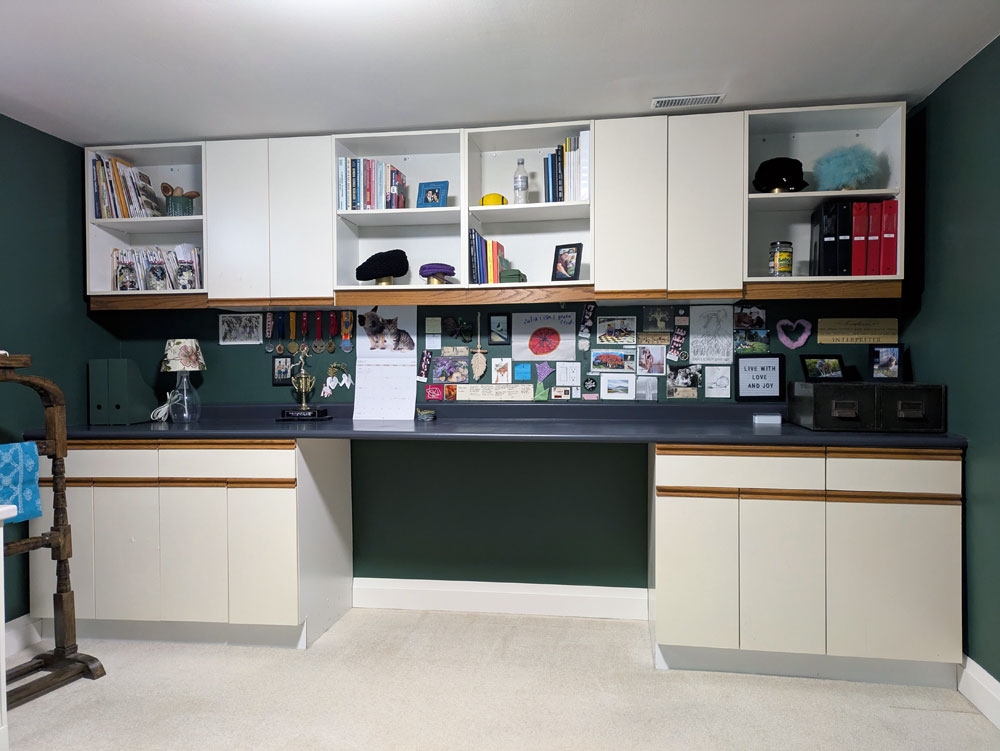
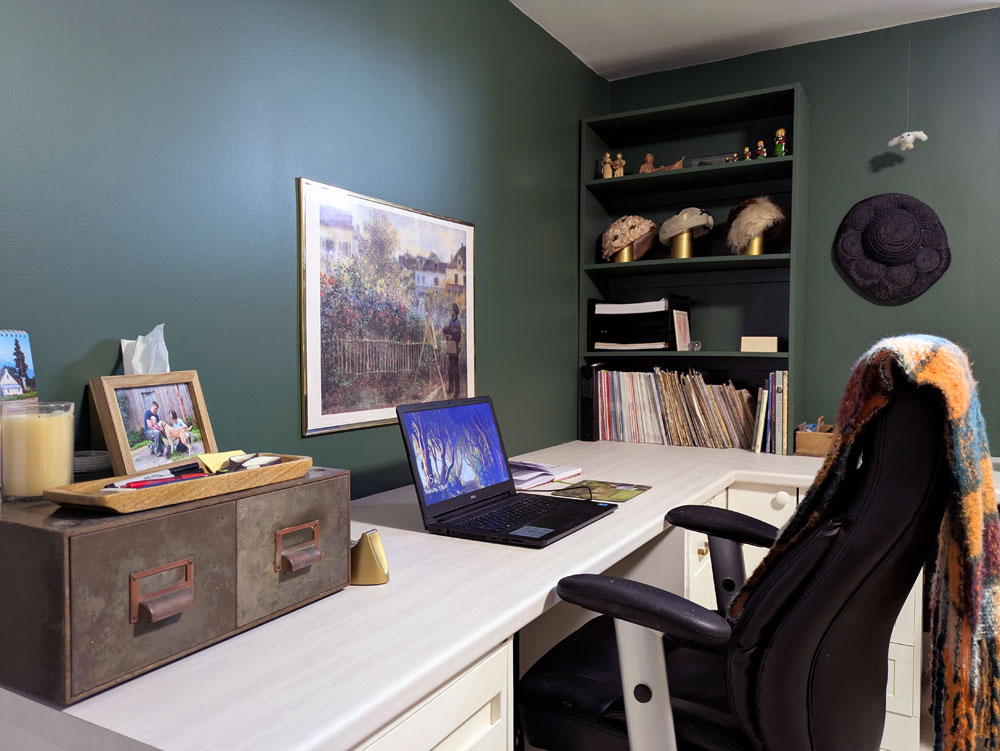
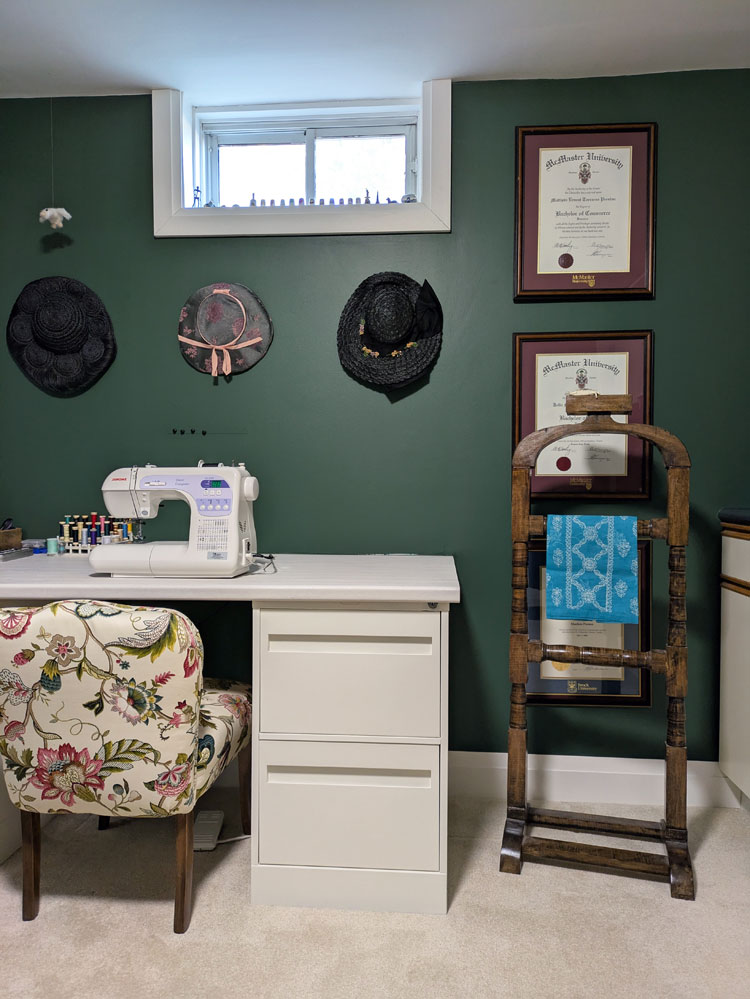
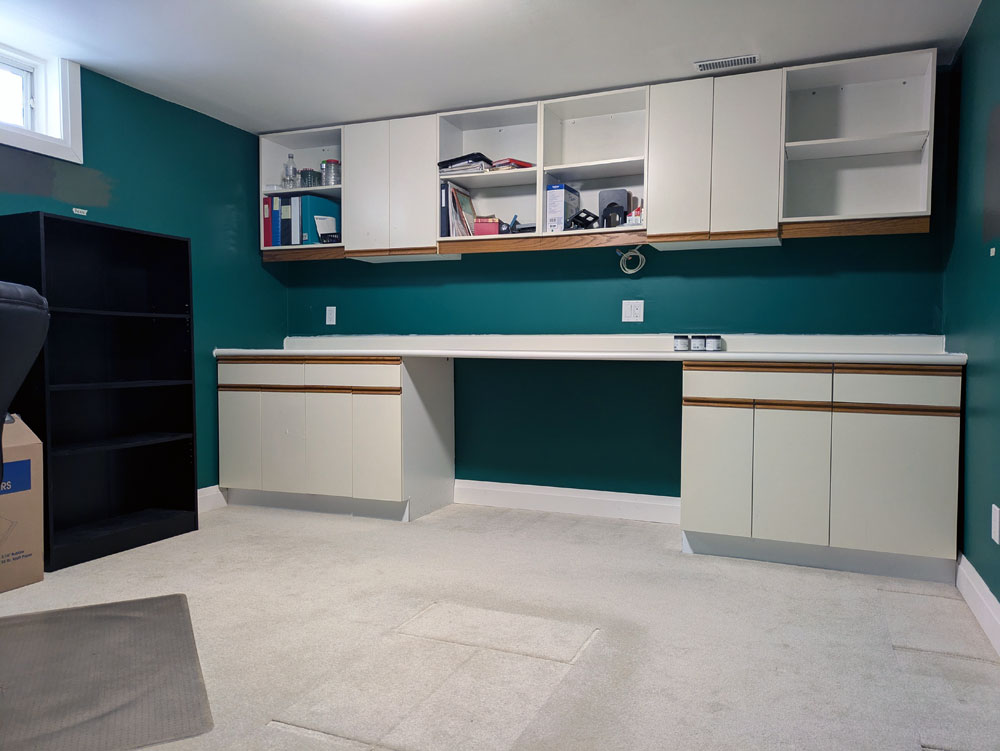
Welcome to my new office.
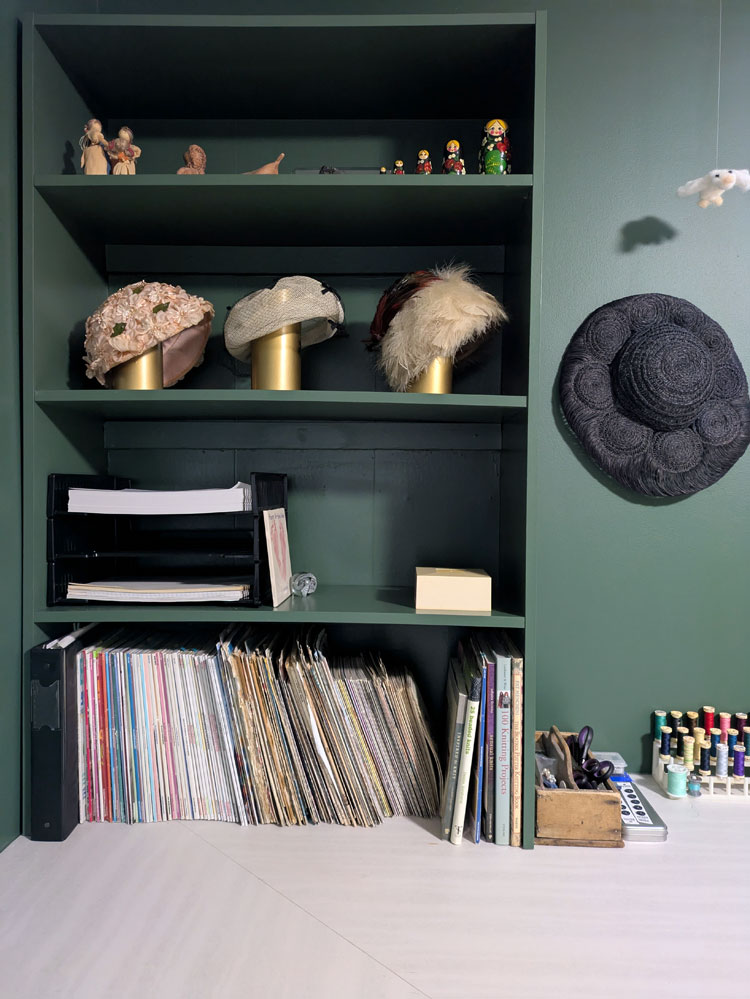
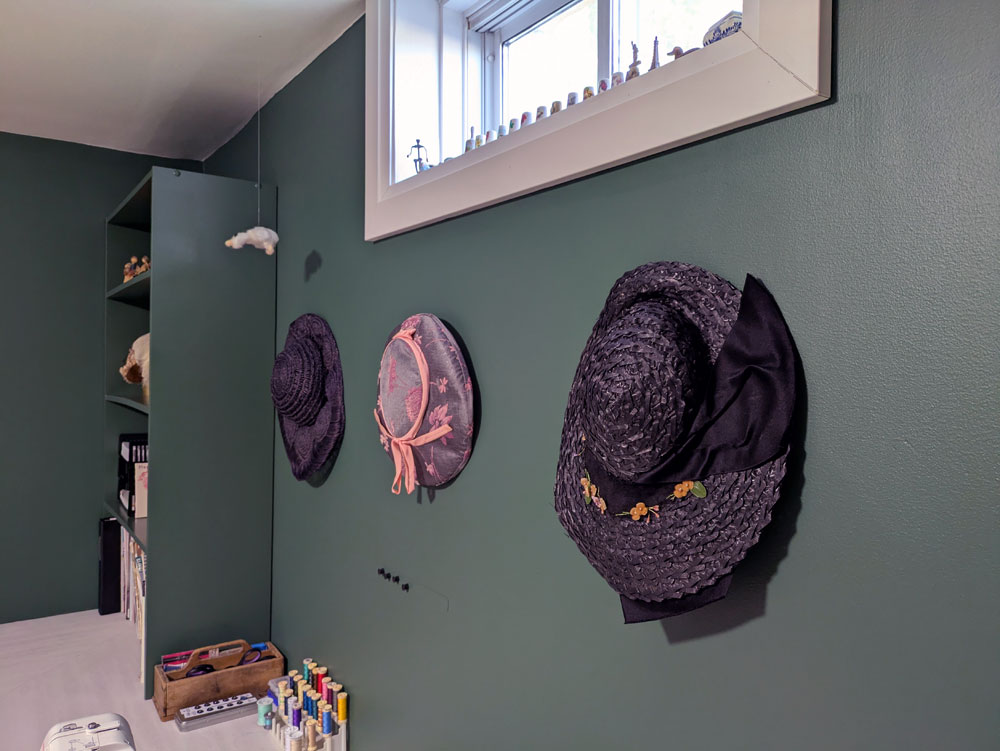
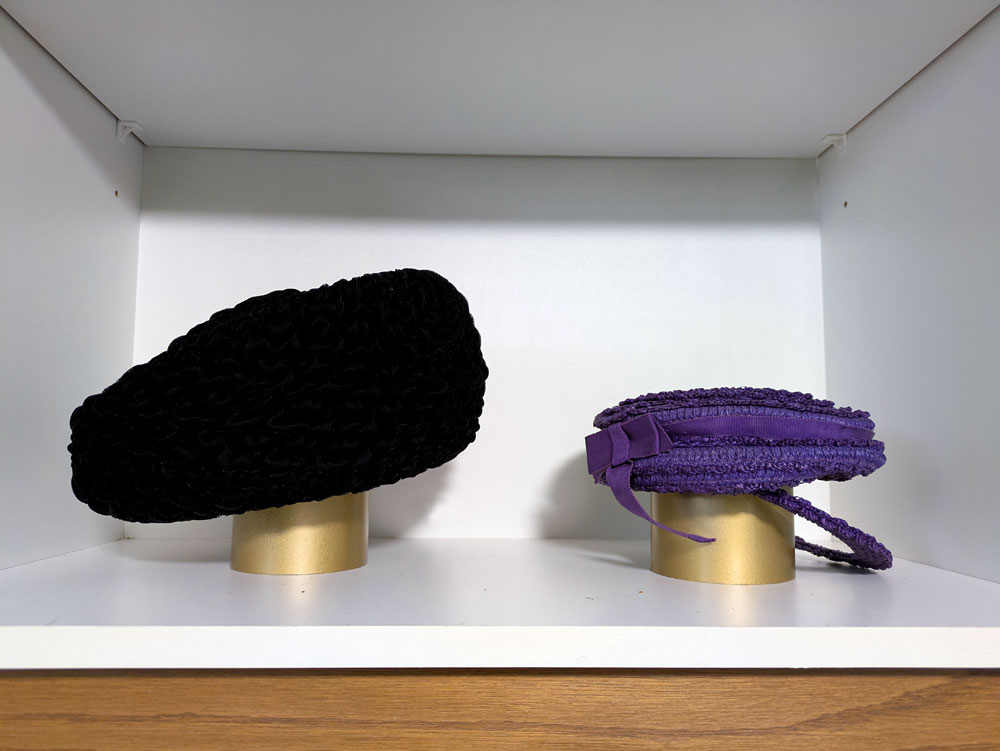
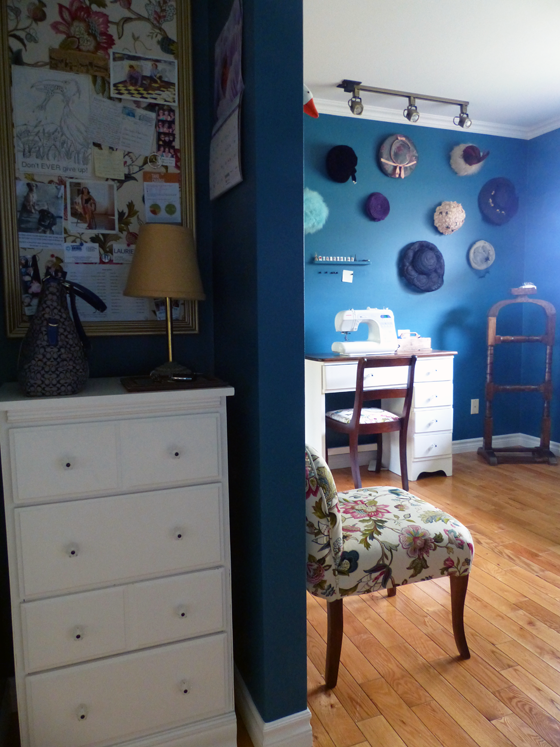
Spread around the room, you will see my collection of vintage hats. Most of these are my grandmother’s. One was made by my great-grandmother. I remember finding a scrap of material in my Grandma’s stash and recognizing it from the hat. I was blown away that someone could simply make a hat. This legacy of creativity and ability is something that I’m very proud of and try to live up to.
As I was decorating the room and styling the shelves, I realized that the hats needed some support. They didn’t look right just sitting on the shelves and I couldn’t see their details clearly. Of course, my initial thought was, “I need some heads.” But I quickly came up with another solution. I chopped up a broken pipe we had left over from redoing our sump pump outflow. I sprayed the pipes gold and voila. Cheap, simple, fancy hat stands. Creativity and ability, check.
The rest of the shelves are filled with books, photos, sewing patterns, mementos. There’s a pickle bottle Matt’s Dad found that is made by Matt and Steve–their names. There’s a football my Dad bought me when I was a baby. There’s a collection of buttons in a powder box that smells just like my Grandma when I open it. So many precious, special things that I can see and enjoy now that they have a home.
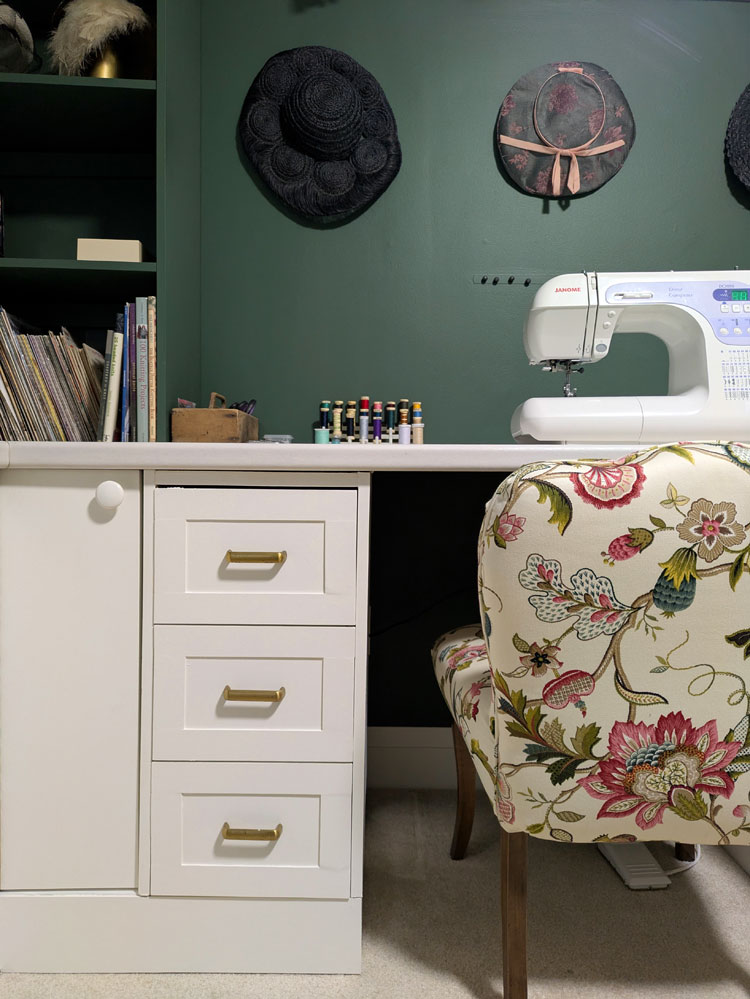
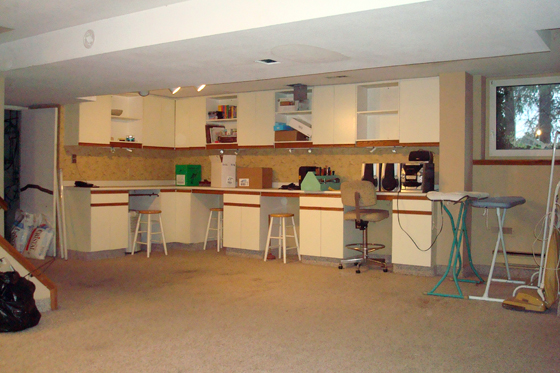
Matt and I installed the cabinets when we set up this room as his office. They provide such great storage for all of my sewing, knitting, wrapping and other supplies. I would like to update the doors and give everything a coat of paint some day, but for now I am enjoying their storage and ignoring their style. This is the first time I have ever had all of my sewing and knitting materials in one spot, and it’s so helpful for projects.
The backsplash is a very long bulletin board. This corkboard is full of things that I find inspiring, beautiful, fun. Cards from friends, crafts from Ellie, even a few notes from Matt. I will be sharing more details about this project in a future post.
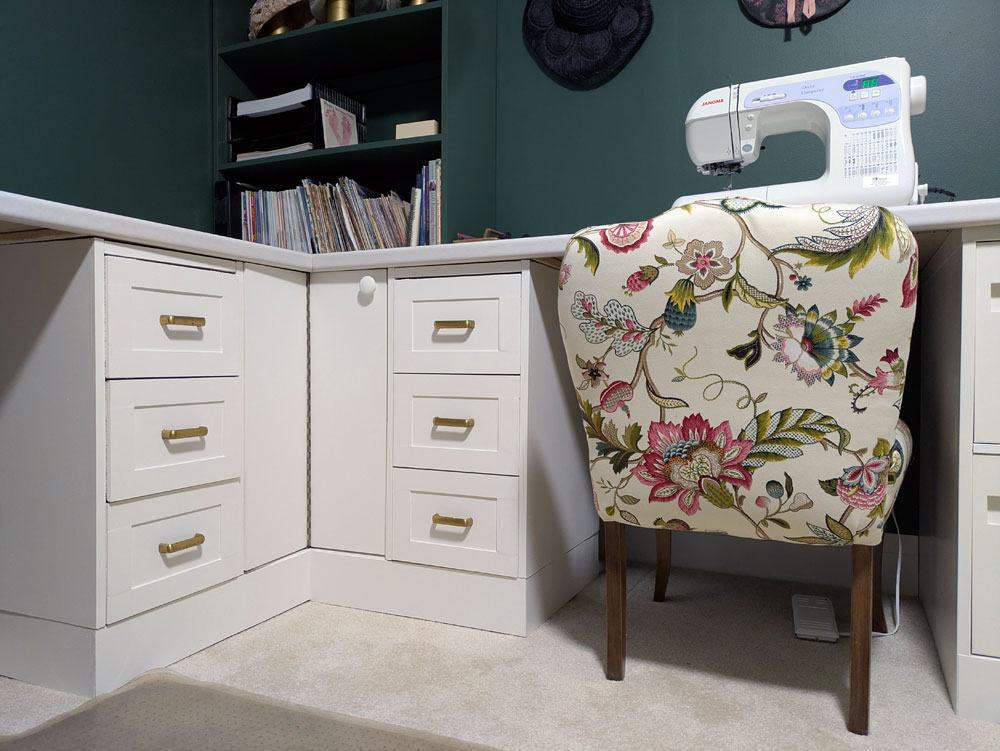
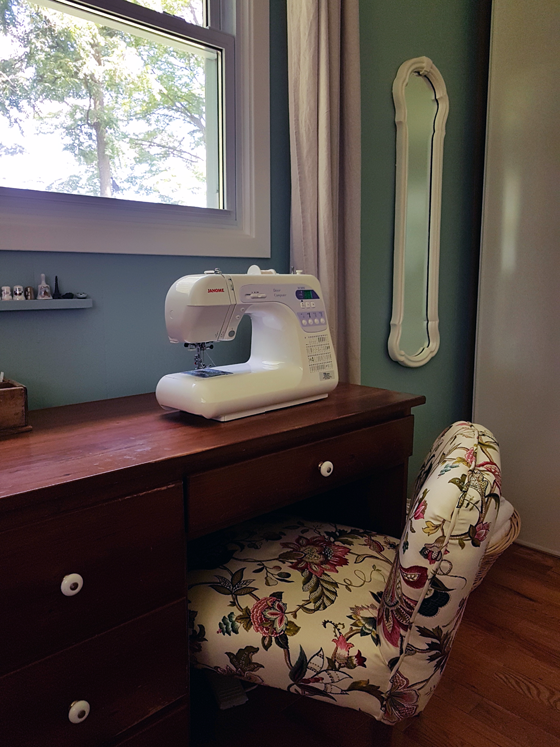
The biggest function is the huge corner desk. I have two workstations here, one for my computer and one for my sewing machine. Each zone comes with its own drawers for office supplies or sewing materials. There are also four large file drawers that hold all of our paperwork and even some extra crafting supplies. Above the desk, I have some open shelves for more storage and display. I’ll be going into more details of how I built this desk in an upcoming post because I am very proud of how it turned out (more creativity and ability).
As part of the sewing zone, I have a valet stand that my Dad built for me. When he took up woodturning, he had some signature things he liked to make. One was valets like this. It is perfect for holding in progress sewing projects. Behind the valet I hung Matt’s and my diplomas. They fit perfectly in this space, and I like that Matt and my Dad are both part of this room. So many legacies in this one corner.
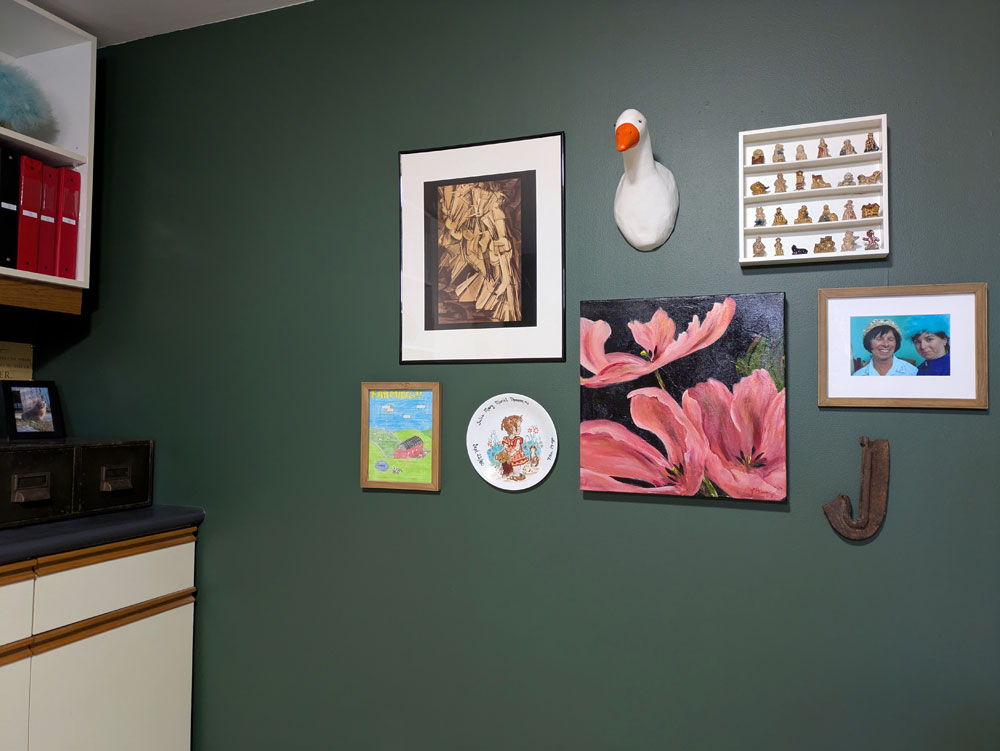
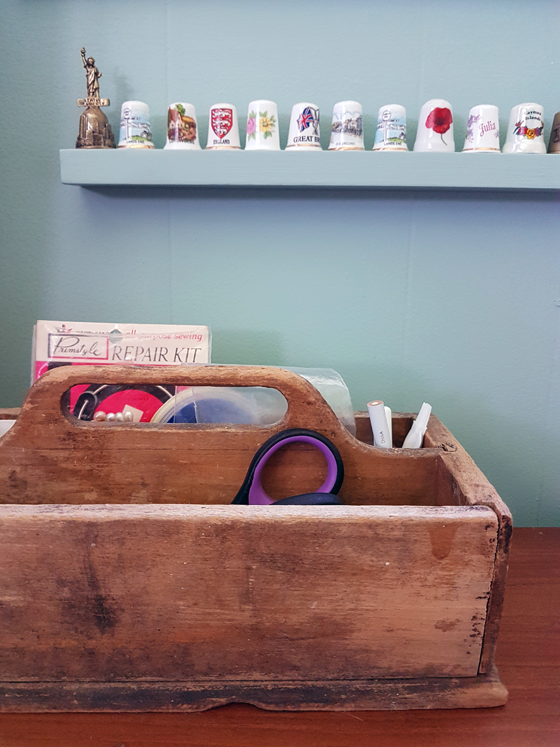
A gallery wall on the other side of the room holds more pictures and things that are special to me. The window sill holds a collection of thimbles from Matt’s Mom and other small trinkets. Ellie needle felted a goose to look like my long ago pet Bill and I hung it from the ceiling so it flies over my sewing machine.
The two sets of green metal drawers came from an auction we went to years ago. They’ve been in the driveshed ever since waiting for the right spot. Now, one sits on the counter and the other on my desk. They give great extra storage, and I love their rustic green patina.
There are so many details in this room, I feel like I could keep going forever. There are a few things I’m still hoping to add (Matt chose the cheapest light fixture possible, and it’s terrible), but I love how this room turned out right now. It is functional. It is pretty. And, like all my spaces, it is personal.
The office makeover is a project I’ve been dreaming about for more than a year. I’ve been working for myself from home since before Ellie was born, yet I don’t have a dedicated workspace.
If I feel like sunshine and a view, I sit at the dining room table. If I’m feeling cozy and the fire is on, I sit on the living room couch. Most nights, I’m on the downstairs couch. I like the flexibility, but having an actual office would also be nice.
It took me a while to realize that I could turn Matt’s office into my office. As soon as I did, I got very excited thinking about everything this room could be.
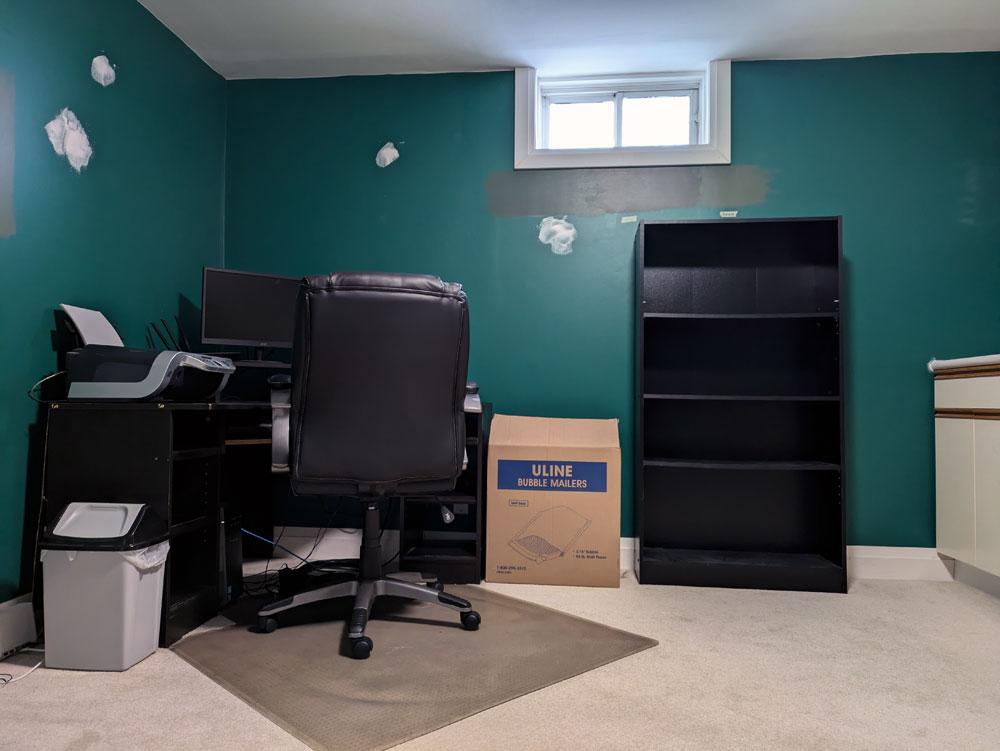
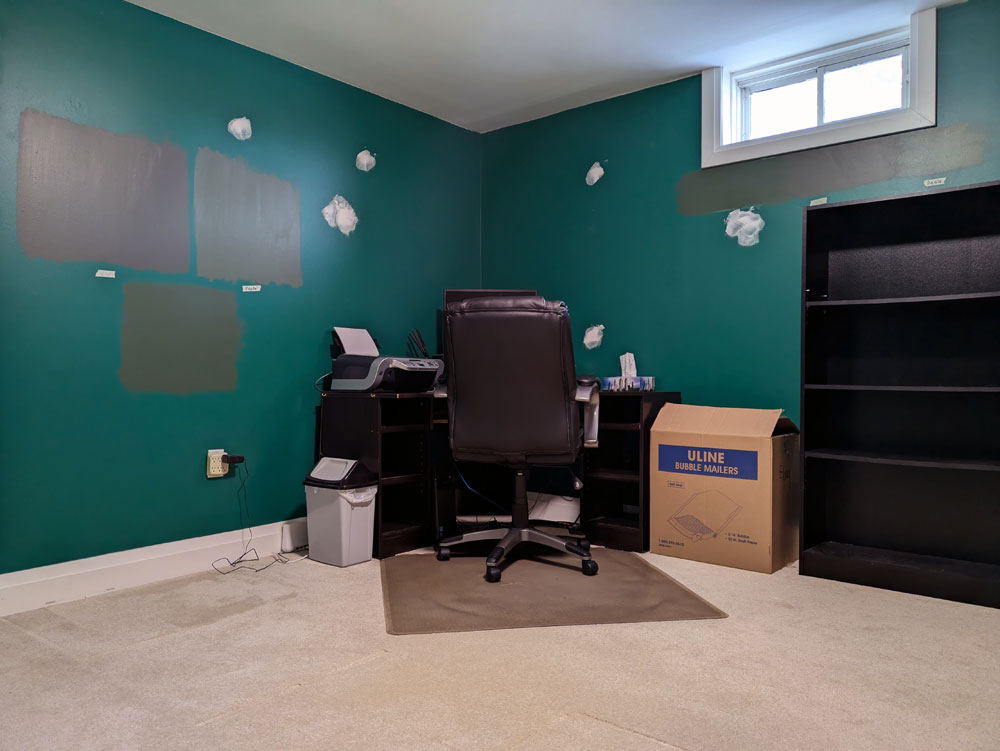
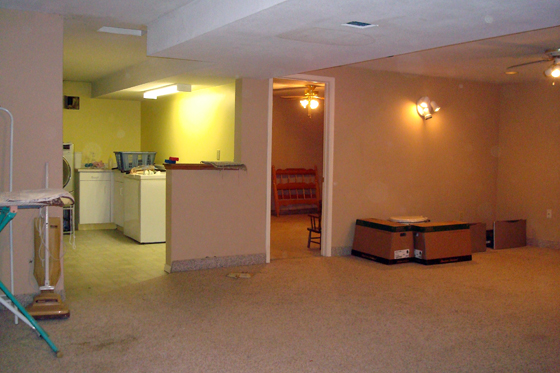
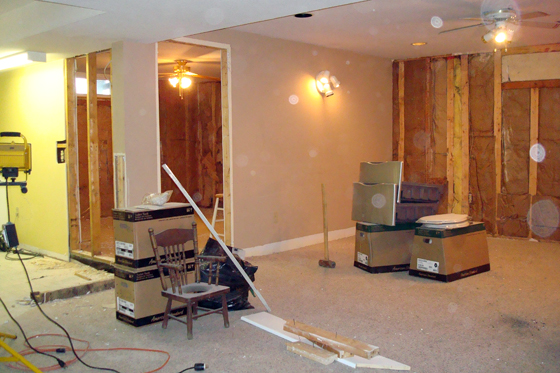
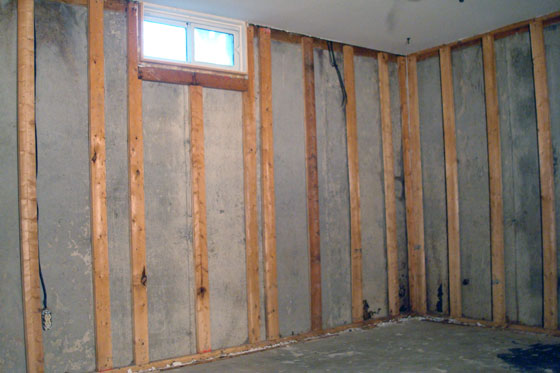
Matt’s office is a room that only appeared on the blog waaaaaay back when we first moved in and were renovating the basement. After Matt set up his space, he wasn’t keen on sharing it and it wasn’t very photogenic, so I never featured it here.
That is all about to change.
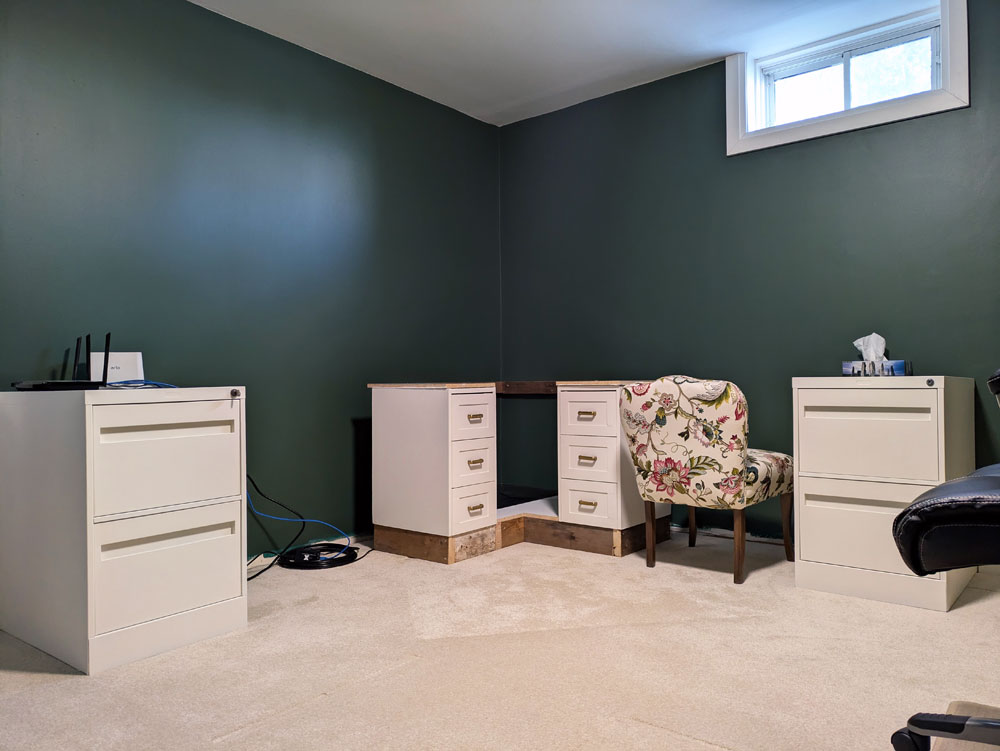
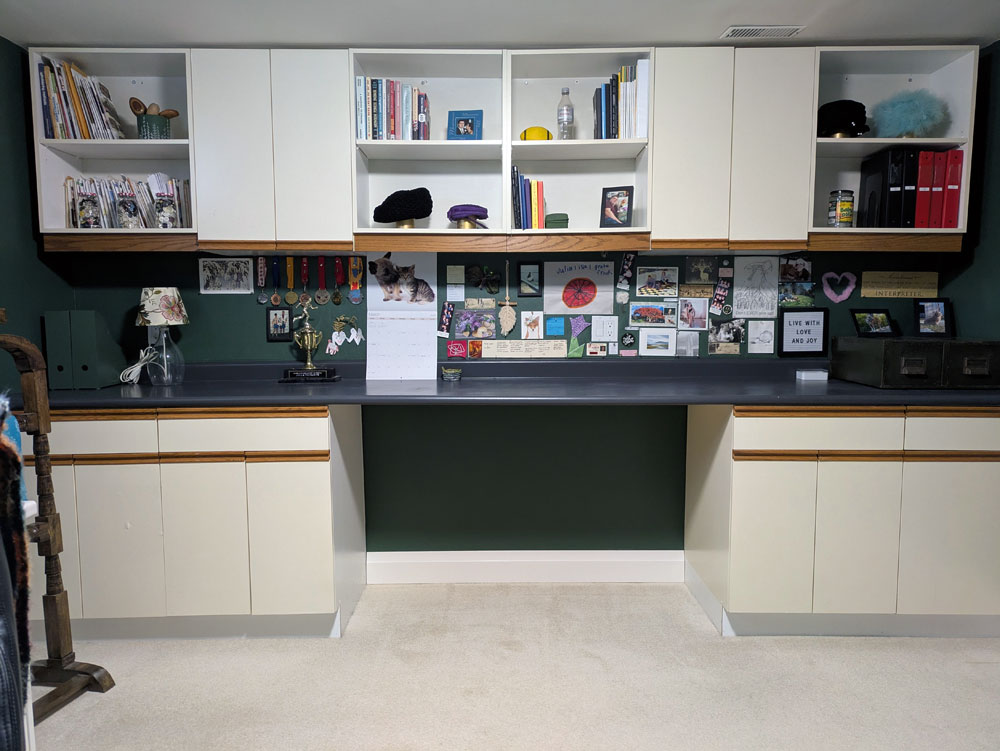
This is the before, a mostly clean slate. (In my excitement to start this project, I couldn’t resist patching nail holes and putting some paint samples on the wall.)
When we did the basement renovation, we reinsulated all of the exterior walls, moved the office door around the corner, put up new drywall, had new carpet laid, and installed the cabinets (which used to live in the main room of the basement).
The foundation of the room was good. But I wanted to make it work for me.
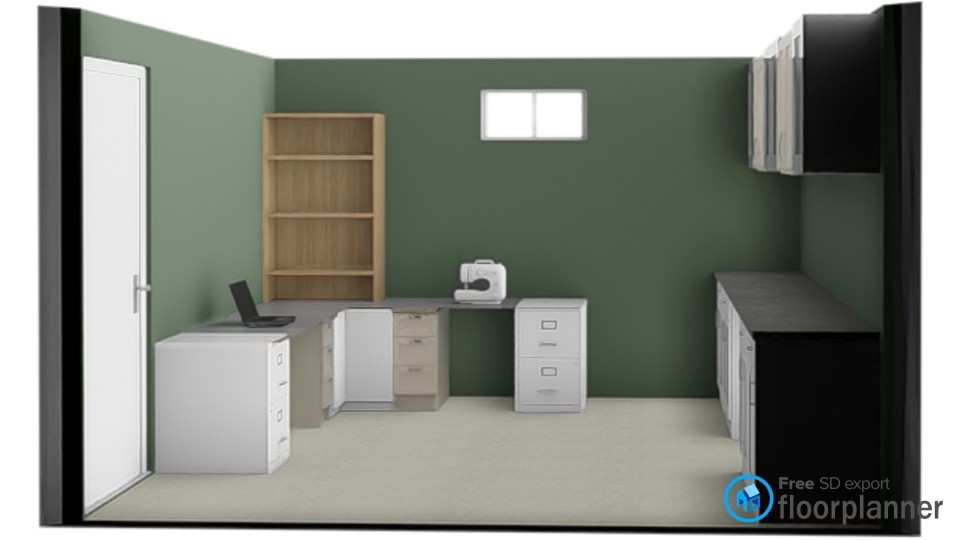
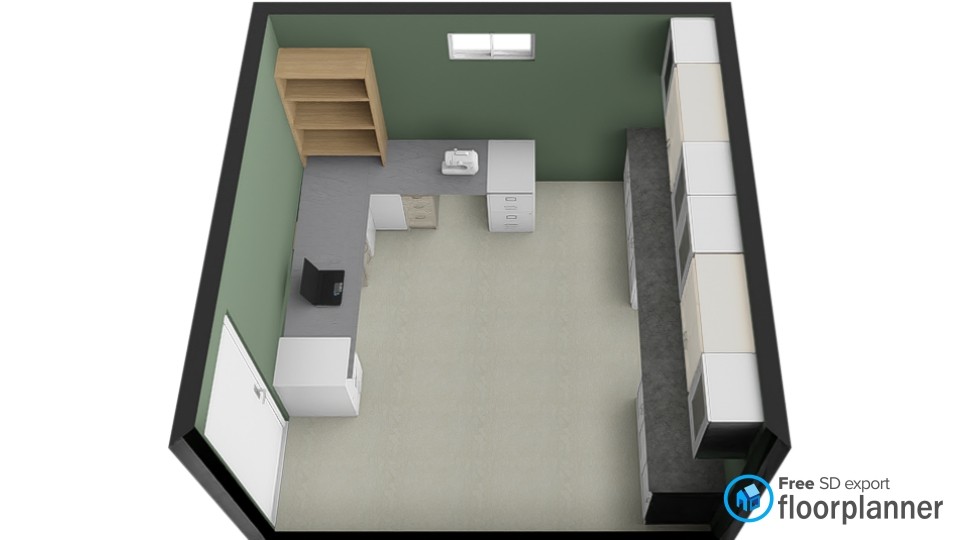
Here’s a collage of some of the things that are in my plans.
First up is the colour. I’m going to be sticking with green for the walls, but a slightly different tone.
My plan is to have a large desk with two work stations that wraps around the corner. On one side, I’ll have my computer. On the other, I’ll have the sewing machine.
The base of the desk will be two filing cabinets and two banks of drawers, all painted white. Above the desk in the corner I’ll have some open shelving (likely painted green) for storage and display.
The cabinets are staying where they are, as they are (for now). I’d love to transform these into shaker doors like I did in the laundry room and give them a coat of paint, but that’s a later plan. For now, I’m grateful to have the cabinets as they provide a lot of really useful storage for fabric, yarn, office supplies, wrapping paper and more. I am planning to add a corkboard “backsplash,” as I love a bulletin board.
Then the rest of the room is decorating. I have art and objects that are special to me, and I want to finally have a nice spot to display them.
I am very excited for this project, and work is already underway. Stay tuned for more updates.
Do you have an office at your home? What’s your must-have (or wishlist) for an office?
I am really, really excited by the projects I have planned for this year. This year will bring a lot of new and big things for us and the farm. They’re all centred around how we live, how we use the house and what we want for our lives here.
Having birds has been a goal since Matt and I were thinking of buying a farm. I made really good progress on the coop last year (updates are coming), and I’m aiming to finish it soon so we’re ready to welcome some new feathered friends this spring.
Following our big cleanout last year, Matt’s office is ready to become my office. I am excited to have my own space for working, writing, crafting, sewing, whatevering. This will be the first project of the year. (In fact, it might already be underway.)
A dedicated play, crafting, creating space for Ellie is the second step in the game of dominoes that is our whole home reorganization. After I move into my new office (and remove all of my things from Ellie’s old bedroom), setting up this room just for Ellie is next on the list.
I’m very glad that we kept the guest room. You may recall it was one of the options when I was thinking about which room was going to become Ellie’s nursery.
Matt and I have each been having some trouble sleeping recently, and we’ve both taken a turn in the guest room. My Mom has stayed with us a few nights too, and I’m grateful that we have a comfortable space ready for her.
It occurred to me during one of my shifts in the guest room that I haven’t shared some of the changes I made prior to Ellie’s arrival. As I dismantled my office to turn it into Ellie’s nursery, the guest room had to do multi-duty as a work space, craft space and guest space.
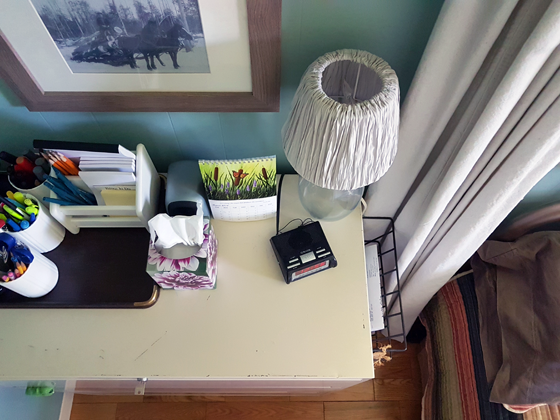
I replaced my vintage trunk with our filing cabinet. Not as attractive, for sure, but it still works as a night stand, and it also gives a spot for some office supplies.
I still procrastinate about filing, and our mail sorter helps me corral paper until I’m ready to deal with it. I drilled a couple of holes in the cabinet and mounted the sorter with wire.
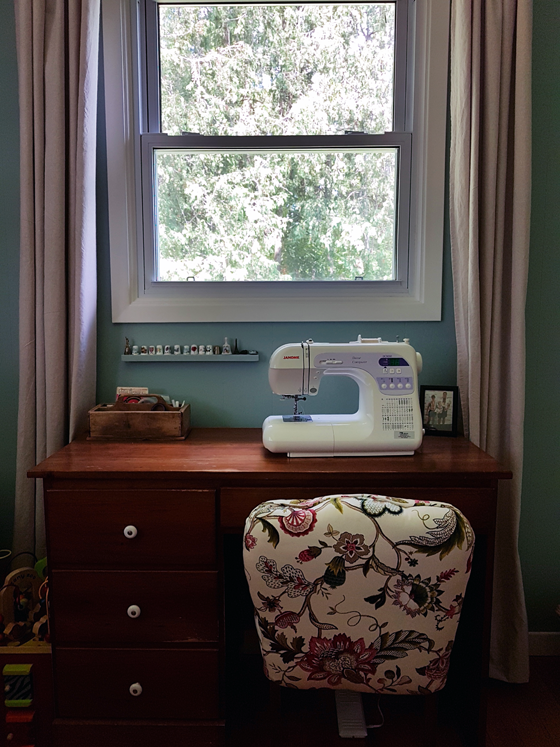
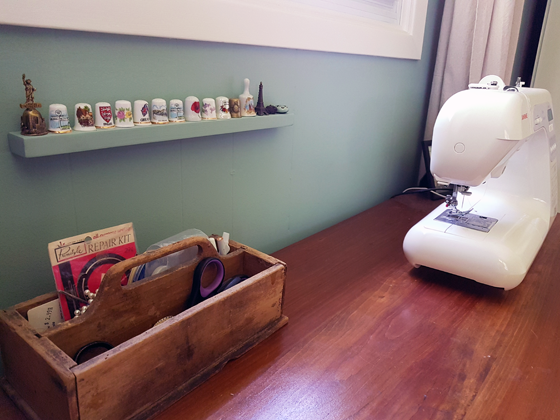
I sold the wooden chair that I painted and distressed along with the white desk that I refinished. My sewing machine has a new home on Matt’s desk. I figured our guests wouldn’t mind seeing it.
I also transferred the tiny shelf that holds my thimble collection, and affixed it under the window.
We’ve maxed out the closet filling it with fabric, wool, and other items from both Matt and me. The idea of emptying this closet and finding new places for everything was so intimidating that it was a major factor in my decision not to use the guest room as Ellie’s nursery.
I’ve been happy about how we’ve been able to fit everything into the guest room and make it a multi-functional space. Ellie (and Baxter) both enjoy laying and kicking on the bed while I sew or do paperwork. So it’s a good way for us to spend time together too.
Another perk: I made $100 selling the trunk and the desk. And the trunk was pulled out of the garbage and the desk was left behind at the farm by the past owners. Yay for free money.
Do you have a multi-functional space at your house? How do you balance form and function? Has anyone else gotten something for free and then sold it for a profit?
Thanks everyone for your good wishes on our new addition. We’re excited–and I will admit I’m still a bit nervous about this whole baby thing too. We had our pre-natal class this weekend, which was informative and encouraging, and I have (yet another) ultrasound this morning (this baby is going to have supersonic hearing after all of our scans). Overall, we’re feeling pretty good about where we’re at.
As you can see, 2017 was quite a year for us. Today I’m taking a minute to look back at the year that was from a personal, professional and farm point of view.
After thinking and planning for quite awhile, I took a leave of absence from my communications job at the end of August to spend some extra time with family and see if I could build my own communications consulting company. I love working from home and love working for myself. I’m still working on building my client base, but I’m so grateful to have this opportunity.
The timing for my leave turned out to be very fortunate, as at the start of July we found out we were going to have a baby and at the end of September Matt was diagnosed with an ocular melanoma. It’s been so helpful to have a more flexible schedule for appointments and most importantly to have the mental space to process and reflect on all of the changes in our lives.
Along with all of that, we’ve replaced both our cars–my 14-year-old girl finally died and Matt’s year-old car was written off after he was hit by a driver who ran a red light. Matt ended up with a broken arm courtesy of the airbag, which derailed some of my plans for projects around the farm, but was a small hardship when he could have been much more seriously hurt.
Amongst all of these changes and challenges, the farm has been our constant and our refuge. 2017 marked five years at the farm, and I can’t imagine being anywhere else. It gives both of us peace to be here, and also gives us an outlet when we need to distract ourselves with tractor therapy, digging in the dirt, painting something or just walking the property.
I have a feeling we’re going to be saying, “What a year!” for the next while (perhaps the rest of our lives?) as we watch this baby grow, adjust to our new family reality and continue with life on the farm.
As many of us do at the start of the year, I like to take a moment to look back and reflect on the year past. Beyond all of the personal changes in our lives, I also started 2017 with my usual list of Home Goals I wanted to accomplish at the farm over the year.
Looking back, we didn’t do too bad.
My office
I was very happy to finish the final bedroom at the farm and finally unpack all of our moving boxes–only five years after moving in. Reupholstering my grandmother’s vintage slipper chair is a project I’m still very proud of. What I called my office ended up being more of a craft room and it was such a great space for creativity.
I say “was” because my office ended up seeing another makeover just a few months later when I decided to turn it into the baby’s room. I’m finding other spaces to be creative around the house, and I love how the baby’s room is coming together. I’ll be sharing all of those details soon.
Clean up the pond shore
The pond shore was my one and only outdoor land clearing goal for the year (and we have plenty of spaces that I want to clear). Mid-year, I gave up on it happening, but then an enthusiastic nephew and a generous husband went to work over a few weekends, and we made more progress than I ever expected.
There’s still more to go, which might be difficult as I don’t think the baby will be as helpful as our teenage nephew, but Matt and I may be able to divide and conquer on this one. And regardless, every time I look out the kitchen window or walk past the pond with Baxter (which happens at least once a day), I’m grateful for the improved view and access to the water.
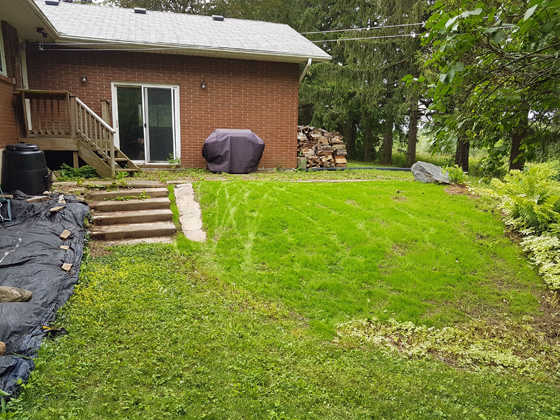
While I had planned to focus just on the pond shore, I did give the area right behind the house a bit of attention, and cleaned up (most of) the jungle that’s been there since we moved in.
Vegetable garden
At the start of last year, I said I was going to add rhubarb (check), a second row of berries (check–ended up being blackberries) and maybe some more grapes (check). I also put in four blueberry plants to try. As usual, I’m crossing my fingers that everyone survives the winter and bears fruit this year.
My biggest goal was keeping the weeds under control. I can’t say I was successful in that. I tried to find some old hay bales for a deep mulch but didn’t have any success. And in terms of weeding by hand, most of the season, I didn’t feel like weeding, and I gave into that feeling… a lot.
We capped off the year by covering two of the quadrants with tarps, and my tentative plan for the coming year is to leave the tarps in place. This will decrease the garden size by not quite half, which might just be manageable in our new reality.
Flower gardens
The flower gardens got some half-hearted attention this year. I can’t say I met my goal of keeping them weeded and filled with beautiful flowers, but I did get in them a few times and they didn’t look too scraggly most of the time (I don’t think).
Basement
Uh, yeah. I still have empty picture frames leaning against the basement walls waiting for art. I didn’t get to this in the first half of the year, and, since I left my job, I’ve been careful about spending money on extras, even inexpensive posters. So we go yet another year with some unfinished areas in the basement.
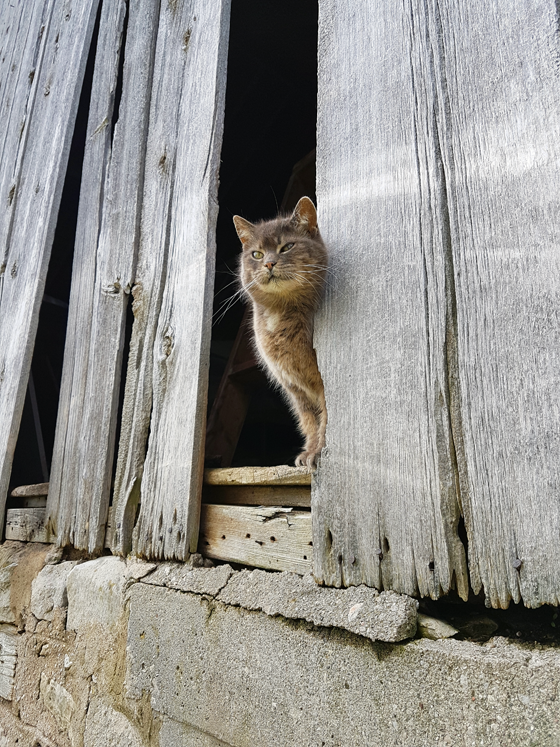
After talking to a few people, we decided not to add a new barn cat to our family. Ralph has things under control and she’s content. She doesn’t need company, and I’m not confident that expecting her to train a young cat would work. So Ralphie gets to be mistress of the barn. She can live out her years in peace, and we will take our chances with adopting a new cat when we need it and hope that the newbie lives up to Ralph’s high standard.
Extras
As always, a few extra projects sneak into every year. I can call another room completely finished–the guest room–after refinishing a vintage metal bedframe. Spoiler alert, the guest room has since seen a few more changes as it’s become guest room/sewing room as I’ve given my office over to baby.
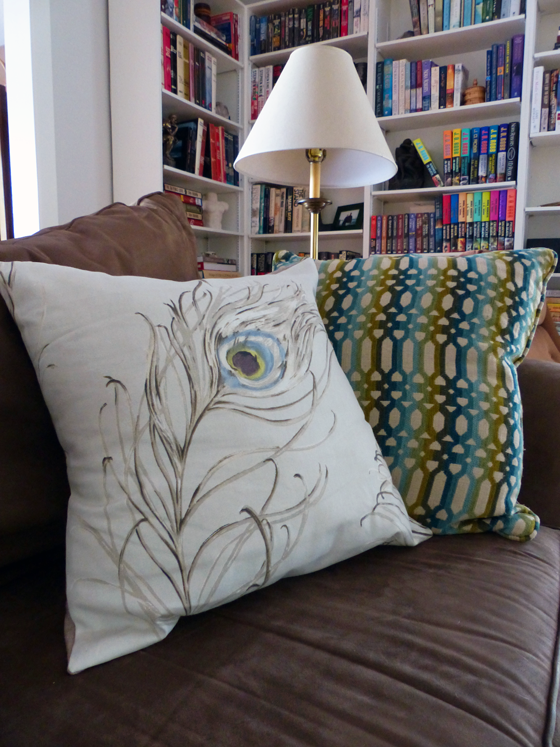
The living room also saw a few tweaks with a new mirror on the mantel and new pillows on the couch. I’ll be sharing our new coffee table soon too.
So around the house, 2017 was a mix. Which is okay and pretty normal for us.
We had enough abnormal in the year that I’m grateful that projects and the farm are such a refuge for us.
How was 2017 for you? What was your big accomplishment for the year?